
[项目基于十月的寒流]使用CommunityToolkit.Mvvm的Messager的同时使用依赖注入
[项目基于十月的寒流]使用CommunityToolkit.Mvvm的Messager的同时使用依赖注入
前言:在看了B站大佬十月的寒流对于CommunityToolkit.Mvvm的介绍后,迫不及待的按照视频敲了一遍代码。由于该UP主该系列的文字教程IoC部分还在更新中(PLZ快一点更新啊啊啊啊)于是去官网看,发现可以使用Microsoft.Extensions实现,恰好大佬也在B站有这个库的介绍,于是我就把两个示例项目源码敲在了一起。Demo项目源视频地址:1:IMessager2:DependencyInjection
项目1:IMessagerDemo
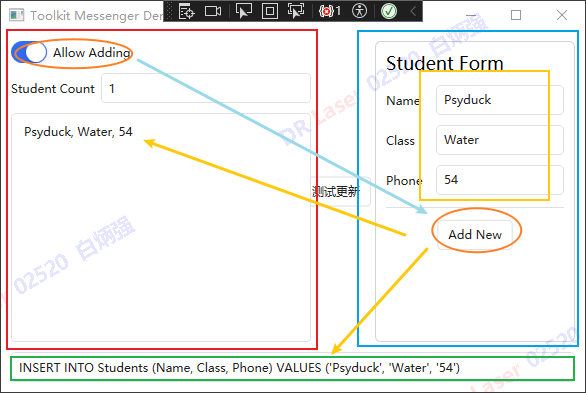
如图所示,项目由StudentList(左)与StudentForm(右)组成和下方显示框组成。通过信使实现了MainWindow、StudentForm与StudentList三个ViewModel之间的通信。
实现功能如下:
1、左边橙色圆圈的按钮控制右边橙色按钮的使能。
2、黄色Form部分的文本更改会同步至下方绿色显示框。
3、Add New按钮会把当前黄色Form中的信息添加进左边List。
项目2:IoCDemo
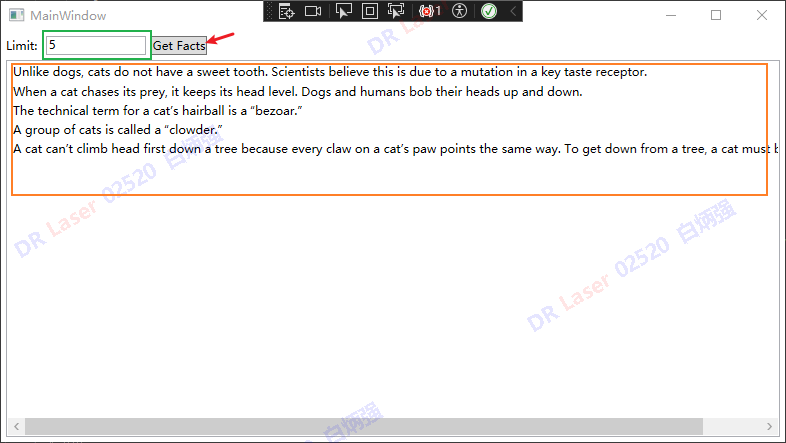
通过依赖注入CatFactsService与IWebClient实现:
点击Get Facts按钮后会生成Limit对应数量的CatFacts生成到下方的listBox中。
(第一句的翻译是:与狗不同,猫没有甜味偏好。科学家认为这是由于关键味觉受体的突变所致。)
开始
🆗我们现在做这样一件事情,把IoCDemo中的GetFacts功能拿出来放到IMessagerDemo中,同时在ListView中分出一个空间用来显示获取到的"猫事实"。(为了方便,这里用Phone一栏中的数字来代替Limit的功能).
这里博主的思路是,在StudentFormViewModel中实现GetFacts功能,并在获取完成后,把储存"猫事实"的ObservableCollection转为List并通过信使Send出去;与此同时让StudentListViewModel继承自IRecipient接口,ValueChangedMessage类型为List
步骤1:创建容器并注册用到的实例
在App.xaml.cs中添加:
public partial class App : Application
{
    public App()
    {
        Services = ConfigureServices();

        this.InitializeComponent();
    }

    public new static App Current => (App)Application.Current;
    public IServiceProvider Services { get; }

    private static IServiceProvider ConfigureServices()
    {
        var services = new ServiceCollection();

        //这里的Sevices与IoCDemo中的Services内容相同
        services.AddSingleton<IWebClient, WebClient>();
        services.AddSingleton<ICatFactsService, CatFactsService>();
        services.AddSingleton<IMessageBoxService, MessageBoxService>();

        //这里注册把viewModel注册为Transient也可以
        services.AddSingleton<MainWindowViewModel>();
        services.AddSingleton<StudentFormViewModel>();
        services.AddSingleton<StudentListViewModel>();
        services.AddSingleton<MainWindow>(sp => new MainWindow { DataContext = sp.GetService<MainWindowViewModel>() });

        return services.BuildServiceProvider();

    }

    private void Application_Startup(object sender, StartupEventArgs e)
    {
        var mainWindow = Services.GetService<MainWindow>();
        MainWindow!.Show();


    }
}
步骤2:创建有参构造函数
删除MainWindow.xaml中的:
 <Window.DataContext>
     <vm:MainWindowViewModel IsActive="True"/>
 </Window.DataContext>
原因是上面这种方式会默认使用无参构造,而为了实现依赖注入我们需要有参构造函数。
其他两个View也删除相关代码,我们可以在构造函数中手动写入IsActive = True来激活ViewModel。
MainWindowViewModel
在MainWindowViewModel中增加:
public StudentFormViewModel StudentFormVM { get; }
public StudentListViewModel StudentListVM { get; }

public MainWindowViewModel(StudentFormViewModel studentFormVM, StudentListViewModel studentListVM)
{
    IsActive = true;
    StudentFormVM = studentFormVM;
    StudentListVM =studentListVM;
}
其中,StudentFormVM与StudentListVM两个属性用来在MainWindowView绑定两个UserControl的DataContext:
 <!-- Left -->
 <local:StudentList Width="300" HorizontalAlignment="Left" DataContext="{Binding StudentListVM}" />
 <!-- Right -->
 <local:StudentForm Width="200" HorizontalAlignment="Right" DataContext="{Binding StudentFormVM}"/>
StudentFormViewModel
在StudentFormViewModel中增加:
private ILogger _logger;
private readonly IMessageBoxService _messageBoxService;
private readonly ICatFactsService _catFactsService;
public StudentFormViewModel(ILogger logger, ICatFactsService catFactsService, IMessageBoxService messageBoxService)
{
    _logger = logger;
    _catFactsService = catFactsService;
    _messageBoxService = messageBoxService;
    IsActive = true;
}
这里与IoCDemo中类似,不多赘述。
StudentListViewModel
这里我们可以仍然使用无参构造函数,在函数体中增加 IsActive = true即可。
 public StudentListViewModel()
 {
     Students.CollectionChanged += (_, _) => OnPropertyChanged(nameof(StudentCount));
     IsActive = true;//增加
 }
步骤3:StudentFormViewModel中添加GetFacts方法
[RelayCommand(CanExecute = nameof(CanADDNew))]
async Task GetFacts(string text)
{
    if (int.TryParse(text, out var num))
    {
        if (num <= 0)
        {
            _messageBoxService.ShowMessage("输入的Num值小于0");
        }
        var facts = await _catFactsService.GetCatFactsAsync(num);
        foreach (var fact in facts)
        {
            CatFacts.Add(fact);
        }
    }
    else
    {
        _messageBoxService.ShowMessage("输入的Num值不对。");
    }
    //在添加完成后,通过WeakReferenceMessenger把CatFacts送出去。
    WeakReferenceMessenger.Default.Send(new ValueChangedMessage<List<string>>(CatFacts.ToList()));

}
步骤4:StudentListViewModel中继承IRecipient并实现Receive方法
public partial class StudentListViewModel
    : ObservableRecipient,
      IRecipient<ValueChangedMessage<Student>>, IRecipient<ValueChangedMessage<List<string>>>
{
    public ObservableCollection<String> CatFactsDisplay { get; } = new ObservableCollection<String>();

 	//...

    public void Receive(ValueChangedMessage<List<string>> message)
    {
        var catFacts = message.Value;
        //注意这里刷新UI线程要使用这个做法
        Application.Current.Dispatcher.Invoke(() =>
        {
            CatFactsDisplay.Clear();
            foreach (var fact in catFacts)
            {
                CatFactsDisplay.Add(fact);
            }
        });
    }
}
步骤5:在View中实现按钮和界面
这一趴略过好了。
总结
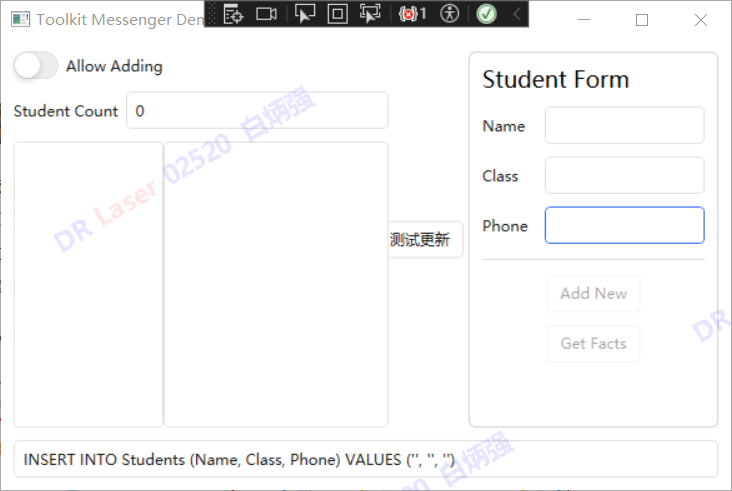
效果如图所示:

重点在于创建有参构造函数后相关View的DataContext不要绑定错误,否则会出现Enable控制失效,属性无法传递等。
以下是一些补充:
1.StudentListView可以不用修改绑定方法,但是MainView中要删除DataContext="{Binding StudentFormVM}" 即不要重复绑定。
2.可以把GetFacts方法直接写在StudentListViewModel中,按钮变量直接添加[NotifyPropertyChangedRecipients]属性,通过在实现的Receive方法中判断该变量的值来触发GetFacts。
当然这里博主也有一些疑惑的地方:
1.关于两个UserControl的DataContext是否有更优雅的方式实现绑定?
2.UI线程和主线程的关系?

 浙公网安备 33010602011771号