spring boot 整合 rabbitMq
一。安装
使用rabbitMQ时需要下载安装erlang环境,因为rabbitMQ是用erlang语言编写的,此时注意 erlang版本是否与 rabbitMQ 版本兼容
erlang官方地址: https://www.erlang.org/downloads
rabbitMQ官方地址:https://www.rabbitmq.com/news.html
查看是否兼容地址:https://www.rabbitmq.com/which-erlang.html
管理界面 localhost:15672
默认账户:guest
默认密码:guest
二。rabbitMQ 简介
- Server:接收客户端的连接,实现AMQP实体服务。
- Connection(连接):应用程序与Server的网络连接,TCP连接。
- Channel(信道):消息读写等操作在信道中进行。客户端可以建立多个信道,每个信道代表一个会话任务。
- Message(消息):应用程序和服务器之间传送的数据,消息可以非常简单,也可以很复杂。有Properties和Body组成。Properties为外包装,可以对消息进行修饰,比如消息的优先级、延迟等高级特性;Body就是消息体内容。
- Virtual Host(虚拟主机):用于逻辑隔离。一个虚拟主机里面可以有若干个Exchange和Queue,同一个虚拟主机里面不能有相同名称的Exchange或Queue。
- Exchange(交换器):接收消息,按照路由规则将消息路由到一个或者多个队列。如果路由不到,或者返回给生产者,或者直接丢弃。RabbitMQ常用的交换器常用类型有direct、topic、fanout、headers四种
- Binding(绑定):交换器和消息队列之间的虚拟连接,绑定中可以包含一个或者多个RoutingKey。
- RoutingKey(路由键):生产者将消息发送给交换器的时候,会发送一个RoutingKey,用来指定路由规则,这样交换器就知道把消息发送到哪个队列。路由键通常为一个“.”分割的字符串,例如“com.rabbitmq”。
- BindingKey(绑定键):用于把交换器的消息绑定到队列上,并且消费者通过此值绑定到队列;
- Queue(消息队列):用来保存消息,供消费者消费。

三。pom.xml
<!--rabbitmq-->
<dependency>
    <groupId>org.springframework.boot</groupId>
    <artifactId>spring-boot-starter-amqp</artifactId>
    <version>1.5.2.RELEASE</version>
</dependency>

四。properties配置
#对于rabbitMQ的支持
spring.rabbitmq.host=127.0.0.1
spring.rabbitmq.port=5672
spring.rabbitmq.username=guest
spring.rabbitmq.password=guest
#并发消费者的初始化值
spring.rabbitmq.listener.concurrency=10
#并发消费者的最大值
spring.rabbitmq.listener.max-concurrency=20
#每个消费者每次监听时可拉取处理的消息数量
spring.rabbitmq.listener.prefetch=5

五。RabbitConfig类
@Configuration
public class RabbitConfig {

    @Value("${spring.rabbitmq.host}")
    private String host;

    @Value("${spring.rabbitmq.port}")
    private int port;

    @Value("${spring.rabbitmq.username}")
    private String username;

    @Value("${spring.rabbitmq.password}")
    private String password;

    //连接
    @Bean
    public ConnectionFactory connectionFactory() {
        CachingConnectionFactory connectionFactory = new CachingConnectionFactory(host, port);
        connectionFactory.setUsername(username);
        connectionFactory.setPassword(password);
        connectionFactory.setVirtualHost("/");
        connectionFactory.setPublisherConfirms(true);
        return connectionFactory;
    }

    //必须是prototype类型
    @Bean
    @Scope(ConfigurableBeanFactory.SCOPE_PROTOTYPE)
    public RabbitTemplate rabbitTemplate() {
        RabbitTemplate template = new RabbitTemplate(connectionFactory());
        return template;
    }
}

六。Direct 模式(默认)
1。在 RabbitConfig 类里添加
//bindingkey
public static final String AQueue = "direct.A";

//创建队列
/**
* 参数说明
* name: 队列的名称
* actualName: 队列的真实名称,默认用name参数,如果name为空,则根据规则生成一个
* durable: 是否持久化
* exclusive: 是否独享、排外的
* autoDelete: 是否自动删除
* arguments:队列的其他属性参数
@Bean
public Queue AMessage(){
  //第二个参数为:true的话,表示队列持久
  return new Queue(AQueue);
}

//创建 Direct 交换器
/**
* 参数说明
* exchange:名称
* type:类型
* durable:是否持久化,RabbitMQ关闭后,没有持久化的Exchange将被清除
* autoDelete:是否自动删除,如果没有与之绑定的Queue,直接删除
* internal:是否内置的,如果为true,只能通过Exchange到Exchange
* arguments:结构化参数
**/
@Bean
public DirectExchange directExchange(){
  return new DirectExchange("directExchange");
}
//绑定队列到交换器
@Bean
public Binding bindingExchangeA(Queue AMessage, DirectExchange directExchange) {
  return BindingBuilder.bind(AMessage).to(directExchange).with(AQueue);
}

2。生产者
@Component
public class RabbitMqController implements RabbitTemplate.ConfirmCallback {

    private final Logger logger = LoggerFactory.getLogger(this.getClass());

    //由于rabbitTemplate的scope属性设置为ConfigurableBeanFactory.SCOPE_PROTOTYPE,所以不能自动注入
    private RabbitTemplate rabbitTemplate;

    @Autowired
    public RabbitMqController(RabbitTemplate rabbitTemplate) {
        this.rabbitTemplate = rabbitTemplate;
        //rabbitTemplate如果为单例的话,那回调就是最后设置的内容
        rabbitTemplate.setConfirmCallback(this);
    }

    //回调
    @Override
    public void confirm(CorrelationData correlationData, boolean ack, String cause) {
        logger.info("回调id:" + correlationData);
        if (ack) {
            logger.info("消息成功消费");
        } else {
            logger.info("消息消费失败" + cause);
        }
    }
  public void send1() {
      CorrelationData correlationId = new CorrelationData(UUID.randomUUID().toString());
      String content = "hi, i am message 1";
      rabbitTemplate.convertAndSend("directExchange", RabbitConfig.AQueue, content,correlationId);
  }
}

3。消费者
@Component
public class MsgReceiver {
    private final Logger logger = LoggerFactory.getLogger(this.getClass());

    @RabbitHandler
    @RabbitListener(queues = RabbitConfig.AQueue)
    public void process(String content) {
        logger.info("我是" + RabbitConfig.AQueue + "的消费者接收到的消息为:" + content);
    }
}

4。测试
@RunWith(SpringRunner.class)
@SpringBootTest
public class GuanchengApplicationTests {

    @Autowired
    public RabbitTemplate rabbitTemplate;

    @Test
    public void contextLoads() {
        RabbitMqController rabbitMqController = new RabbitMqController(rabbitTemplate);
        rabbitMqController.send1();
    }
}
七。Topic 匹配订阅模式
1。topic路由器的关键在于定义路由键,定义routingKey名称不能超过255字节,使用“.”作为分隔符,例如:com.mq.rabbit.error。
消费消息的时候routingKey可以使用下面字符匹配消息:
- "*"匹配一个分段(用“.”分割)的内容;
- "#"匹配0和多个字符;
例如发布了一个“com.mq.rabbit.error”的消息:
能匹配上的路由键:
- com.mq.rabbit.*
- com.mq.rabbit.#
- #.error
- com.mq.#
- #
2。在 RabbitConfig 类里修改为
public static final String AQueue = "topic.A";
public static final String BQueue = "topic.B";

// 创建队列
@Bean
public Queue AMessage() {
    return new Queue(AQueue);
}

@Bean
public Queue BMessage() {
    return new Queue(BQueue);
}
@Bean
public TopicExchange topicExchange(){
    return new TopicExchange("topicExchange");
}
@Bean
public Binding bindingExchangeA(Queue AMessage, TopicExchange topicExchange) {
    return BindingBuilder.bind(AMessage).to(topicExchange).with("topic.*");
}

@Bean
public Binding bindingExchangeB(Queue BMessage, TopicExchange topicExchange) {
    return BindingBuilder.bind(BMessage).to(topicExchange).with("topic.#");
}

3。在生产者里修改为:
public void send1() {
    CorrelationData correlationId = new CorrelationData(UUID.randomUUID().toString());
    String content = "hi, i am message 1";
    String content2 = "hi, i am message 2";
    rabbitTemplate.convertAndSend("topicExchange", "topic.A.C", content,correlationId);
    rabbitTemplate.convertAndSend("topicExchange", "topic.A", content2,correlationId);
}

4.消费者
@RabbitHandler
@RabbitListener(queues = RabbitConfig.AQueue)
public void process(String content) {
    logger.info("我是" + RabbitConfig.AQueue + "的消费者接收到的消息为:" + content);
}
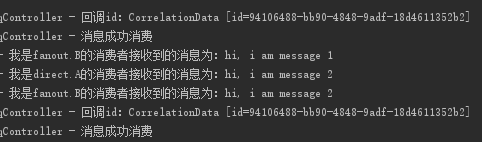
4.执行测试,结果:
八。Fanout 发布订阅模式
对于fanout交换器来说routingKey(路由键)是无效的,这个参数是被忽略的
1.在RabbitConfig里修改
public static final String AQueue = "fanout.A";
public static final String BQueue = "fanout.B";
public static final String CQueue = "fanout.C";

// 创建队列
@Bean
public Queue AMessage() {
    return new Queue(AQueue);
}

@Bean
public Queue BMessage() {
    return new Queue(BQueue);
}

@Bean
public Queue CMessage() {
    return new Queue(CQueue);
}

//创建交换器
@Bean
public FanoutExchange fanoutExchange() {
    return new FanoutExchange("fanoutExchange");
}
//此时只要绑定一个队列,其它队列也能接受到消息
@Bean
public Binding bindingExchangeA(Queue AMessage, FanoutExchange fanoutExchange) {
    return BindingBuilder.bind(AMessage).to(fanoutExchange);
}

2.生产者修改为
public void send1() {
    CorrelationData correlationId = new CorrelationData(UUID.randomUUID().toString());
    String content = "hi, i am message 1";
    rabbitTemplate.convertAndSend("fanoutExchange", "", content,correlationId);
}
3.消费者修改为
@RabbitHandler
@RabbitListener(queues = RabbitConfig.AQueue)
public void process(String content) {
    logger.info("我是" + RabbitConfig.AQueue + "的消费者接收到的消息为:" + content);
}

@RabbitListener(queues = RabbitConfig.BQueue)
@RabbitHandler
public void process2(String content) {
    logger.info("我是" + RabbitConfig.BQueue + "的消费者接收到的消息为:" + content);
}

@RabbitListener(queues = RabbitConfig.CQueue)
@RabbitHandler
public void process3(String content) {
    logger.info("我是" + RabbitConfig.CQueue + "的消费者接收到的消息为:" + content);
}
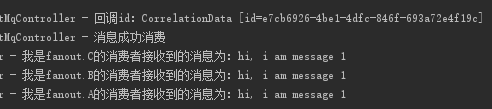
4.测试,结果为:
 参考文档
https://www.cnblogs.com/vipstone/p/9295625.html
https://blog.csdn.net/qq_38455201/article/details/80308771
https://blog.csdn.net/qq_35387940/article/details/100514134
九。死信队列

1.出现死信队列原因:
1.消息被拒绝(basic.reject/ basic.nack)并且不再重新投递 requeue=false
2.消息超期 (rabbitmq Time-To-Live -> messageProperties.setExpiration())
3.队列超载

x-dead-letter-routing-key:死信路由键
x-dead-letter-exchange:死信交换机
注:如果生产者成功发送消息到MQ交换机,消费者那边报错,可以使用MQ中的confirm机制(ConfirmCallback接口)
2.配置文件添加
# 允许消息消费失败的重试
spring.rabbitmq.listener.simple.retry.enabled=true
# 消息最多消费次数3次
spring.rabbitmq.listener.simple.retry.max-attempts=3
# 消息多次消费的间隔1秒
spring.rabbitmq.listener.simple.retry.initial-interval=1000
#  设置为false,会丢弃消息或者重新发布到死信队列
spring.rabbitmq.listener.simple.default-requeue-rejected=false
3.RabbitConfig 修改为:
    @Bean
    @Scope("prototype")
    public RabbitTemplate rabbitTemplate() {
        RabbitTemplate template = new RabbitTemplate(connectionFactory());
        template.setMandatory(true);
        template.setMessageConverter(new SerializerMessageConverter());
        return template;
    }

    /**
     * 创建队列
     * name: 队列的名称
     * actualName: 队列的真实名称,默认用name参数,如果name为空,则根据规则生成一个
     * durable: 是否持久化
     * exclusive: 是否独享、排外的
     * autoDelete: 是否自动删除
     * arguments:队列的其他属性参数
     **/
    @Bean
    public Queue LoginQueue() {
        //将登录队列绑定到死信交换机上
        //注意:如果已创建队列,没有绑定到死信交换机,则不能更改绑定
        Map<String, Object> args = new HashMap<>(3);
        args.put("x-dead-letter-exchange", MqKeyConstant.DEAD_LETTER_EXCHANGE);
        args.put("x-dead-letter-routing-key", MqKeyConstant.DEAD_LETTER_REDIRECT_ROUTING_KEY);
        return new Queue(MqKeyConstant.LOGIN_QUEUE,true,false,false,args);
    }

    /**
     * 创建交换器
     * exchange:名称
     * type:类型
     * durable:是否持久化,RabbitMQ关闭后,没有持久化的Exchange将被清除
     * autoDelete:是否自动删除,如果没有与之绑定的Queue,直接删除
     * internal:是否内置的,如果为true,只能通过Exchange到Exchange
     * arguments:结构化参数
     **/
    @Bean
    public DirectExchange directExchange() {
        return new DirectExchange(MqKeyConstant.LOGIN_DIRECT_EXCHANGE);
    }

    /**
     * 将交换器和队列绑定
     **/
    @Bean
    public Binding bindingExchange(Queue LoginQueue, DirectExchange directExchange) {
        return BindingBuilder.bind(LoginQueue).to(directExchange).with(MqKeyConstant.LOGIN_QUEUE);
    }

    //创建一个死信队列
    @Bean
    public Queue deadLetterQueue() {
        return new Queue(MqKeyConstant.DEAD_LETTER_QUEUE);
    }

    //创建死信交换机,死信队列跟交换机类型没有关系 不一定为directExchange  不影响该类型交换机的特性.
    @Bean
    public DirectExchange deadLetterExchange() {
        return new DirectExchange(MqKeyConstant.DEAD_LETTER_EXCHANGE);
    }

    //将死信队列和死信交换机绑定
    @Bean
    public Binding bindingDeadExchange(Queue deadLetterQueue,DirectExchange deadLetterExchange) {
        return BindingBuilder.bind(deadLetterQueue).to(deadLetterExchange).with(MqKeyConstant.DEAD_LETTER_QUEUE);
    }
4.消息生产者
@Autowired
    public RabbitMqController(RabbitTemplate rabbitTemplate) {
        this.rabbitTemplate = rabbitTemplate;
        //rabbitTemplate如果为单例的话,那回调就是最后设置的内容
//        rabbitTemplate.setConfirmCallback(this);
    }

    /**
     * 消息确认机制
     **/
    RabbitTemplate.ConfirmCallback confirmCallback = new RabbitTemplate.ConfirmCallback() {
        @Override
        public void confirm(CorrelationData correlationData, boolean b, String s) {
            if (b == false) {
                //如果消费者没有消费信息,这里可以设置再次发送信息到交换机,不过要在properties文件设置最大重复连接次数,避免死循环
                System.out.println("消息拒绝接收的原因是:" + s);
            } else {
                System.out.println("消息发送成功");
            }
        }
    };

    /**
     * 有关消息被退回来的具体描述消息
     **/
    RabbitTemplate.ReturnCallback returnCallback = new RabbitTemplate.ReturnCallback() {
        @Override
        public void returnedMessage(Message message, int i, String s, String s1, String s2) {
            System.out.println("err code :" + i);
            System.out.println("错误消息的描述 :" + s);
            System.out.println("错误的交换机是 :" + s1);
            System.out.println("错误的路右键是 :" + s2);
        }
    };

    /**
     * 发送消息
     *
     * @param sendMsg 发送内容
     * @return void
     * @Author GGDong
     * @Date 2020/7/15 14:47
     **/
    public void send(String sendMsg) {
        CorrelationData correlationId = new CorrelationData(UUID.randomUUID().toString());
        //配置确认和退回机制
        rabbitTemplate.setMandatory(true);
        rabbitTemplate.setConfirmCallback(confirmCallback);
        rabbitTemplate.setReturnCallback(returnCallback);
        rabbitTemplate.convertAndSend(MqKeyConstant.LOGIN_DIRECT_EXCHANGE, MqKeyConstant.LOGIN_QUEUE, sendMsg, correlationId);
    }
5.消息消费者
    @RabbitHandler
    @RabbitListener(queues = MqKeyConstant.LOGIN_QUEUE)
    public void process(String content, Message message, Channel channel) throws IOException {
        MessageProperties messageProperties = message.getMessageProperties();
        long deliveryTag = messageProperties.getDeliveryTag();
        channel.basicNack(deliveryTag, false, false);
       if (StringUtils.isNotBlank(content)) {
        //手动确定
        channel.basicAck(deliveryTag, false);
      } else {
        System.out.println("失败----------");
        //进入死信队列,批量拒绝全部
        channel.basicNack(deliveryTag, false, false);
      }
   }
6.死信消费者
@Component
public class DeadReceiver {
    @RabbitHandler
    @RabbitListener(queues = MqKeyConstant.DEAD_LETTER_QUEUE)
    public void process(String content, Message message, Channel channel) throws IOException {
        System.out.println("死信消费者开始消费--------" + content);
        MessageProperties messageProperties = message.getMessageProperties();
        long deliveryTag = messageProperties.getDeliveryTag();
        channel.basicAck(deliveryTag, false);
    }
}
参考文档:

 浙公网安备 33010602011771号