
Java秒杀系统方案优化 高性能高并发实战(1)
首先先把 springboot +thymeleaf 搞起来 ,参考 springboot 官方文档
本次学习 使用 springboot + thymeleaf+mybatis+redis+RabbitMQ 等实现,未完待继续补充

开发环境: IDEA
接口测试: PostMan
鸭梨测试:JMeter
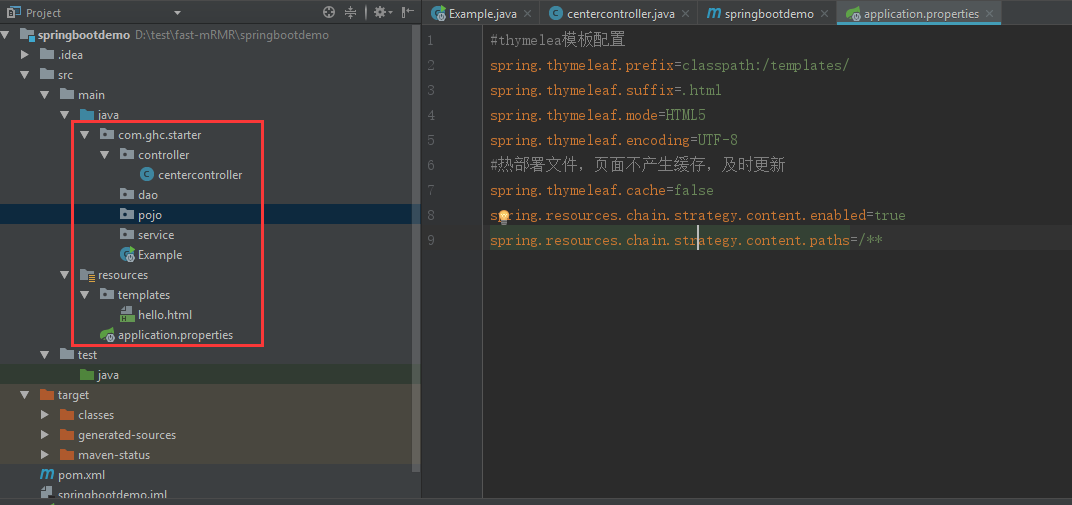
整体结构
那么使用 idea ——>file -->new project --> maven project
修改 pom.xml 添加依赖
<?xml version="1.0" encoding="UTF-8"?>
<project xmlns="http://maven.apache.org/POM/4.0.0"
         xmlns:xsi="http://www.w3.org/2001/XMLSchema-instance"
         xsi:schemaLocation="http://maven.apache.org/POM/4.0.0 http://maven.apache.org/xsd/maven-4.0.0.xsd">
    <modelVersion>4.0.0</modelVersion>

    <groupId>springbootdemo</groupId>
    <artifactId>springbootdemo</artifactId>
    <version>1.0-SNAPSHOT</version>

    <parent>
        <groupId>org.springframework.boot</groupId>
        <artifactId>spring-boot-starter-parent</artifactId>
        <version>1.5.2.RELEASE</version>
    </parent>

    <dependencies>
        <dependency>
            <groupId>org.springframework.boot</groupId>
            <artifactId>spring-boot-starter-web</artifactId>
        </dependency>

        <dependency>
            <groupId>org.springframework.boot</groupId>
            <artifactId>spring-boot-starter-thymeleaf</artifactId>
        </dependency>

    </dependencies>

    <properties>
        <project.build.sourceEncoding>UTF-8</project.build.sourceEncoding>
        <!-- set thymeleaf version -->
        <thymeleaf.version>3.0.0.RELEASE</thymeleaf.version>
        <thymeleaf-layout-dialect.version>2.0.0</thymeleaf-layout-dialect.version>
    </properties>

</project>
为 项目 书写一个 启动类
package com.ghc.starter;  //  千万注意,这里将启动类放置在 starter 这个 root 目录下,后面 controller, service,dao 等就不用写注解去 @ComponentScan 了

import org.springframework.boot.*;
import org.springframework.boot.autoconfigure.*;
import org.springframework.web.bind.annotation.*;

@RestController
@SpringBootApplication
public class Example {

    @RequestMapping("/")
    String home() {
        return "Hello World!";
    }

    public static void main(String[] args) throws Exception {
        SpringApplication.run(Example.class, args);
    }

}
这里 ,一个官方 简单的 快速搭建就已经实现了
手动输入 http://localhost:8080 即可访问 返回 页面 Hello World!
接下来,正常开发 是 分离 starter 与 controller 的
springboot 默认会有一个 application.properties 文件,我们可以在 resources 下 手动创建一个,为其添加 thymeleaf 的配置,实际上,数据源(spring.datasource.name)等都可以在此配置
#thymelea模板配置
spring.thymeleaf.prefix=classpath:/templates/
spring.thymeleaf.suffix=.html
spring.thymeleaf.mode=HTML5
spring.thymeleaf.encoding=UTF-8
#热部署文件,页面不产生缓存,及时更新
spring.thymeleaf.cache=false
spring.resources.chain.strategy.content.enabled=true
spring.resources.chain.strategy.content.paths=/**
扩展 数据源的配置
server.port=8888

spring.datasource.driver-class-name=com.amazon.redshift.jdbc41.Driver

spring.datasource.url=jdbc:xxx
spring.datasource.username= xxx
spring.datasource.password= xxx

#自动提交
spring.datasource.default-auto-commit=true
spring.datasource.initialSize=5
spring.datasource.minIdle=5
spring.datasource.maxActive=100
# 配置获取连接等待超时的时间
spring.datasource.maxWait=60000
# 配置间隔多久才进行一次检测,检测需要关闭的空闲连接,单位是毫秒
spring.datasource.timeBetweenEvictionRunsMillis=60000
# 配置一个连接在池中最小生存的时间,单位是毫秒
spring.datasource.minEvictableIdleTimeMillis=300000
spring.datasource.validationQuery=SELECT 1
spring.datasource.testWhileIdle=true
spring.datasource.testOnBorrow=false
spring.datasource.testOnReturn=false

# 配置监控统计拦截的filters,去掉后监控界面sql无法统计,'wall'用于防火墙
spring.datasource.filters=stat,wall,log4j
spring.datasource.logSlowSql=true


mybatis.config-locations=classpath:mybatis/mybatis-config.xml
mybatis.mapper-locations=classpath:mapper/*.xml
mybatis.type-aliases-package=com.middleplugin.pojo
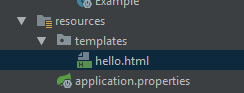
在 resources 下 创建一个 templates 用来做 视图渲染的 view 层,这里可以是 html,不是 jsp 哦,不要太爽。。
特别注意这里 <html lang="en" xmlns:th="http://www.thymeleaf.org"> 需要写上 namespace
<!DOCTYPE html>
<html lang="en" xmlns:th="http://www.thymeleaf.org">
<head>
    <meta charset="UTF-8">
    <title>hello</title>
    <meata http-equiv="Content-Type" content="text/html;charset=UTF-8"/>

</head>
<body>
 <p th:text="'hello:'+${name}"></p>
</body>
</html>
创建一个 controller 类,用来验证 thymeleaf 模板引擎起作用了。
import org.springframework.ui.Model;
import org.springframework.web.bind.annotation.RequestMapping;
import org.springframework.web.bind.annotation.RestController;

@Controller
@RequestMapping("/center")
public class centercontroller {
    @RequestMapping("/sayhello")
    public String hello(Model model){
        model.addAttribute("name","frank");
        return "hello";
    }
}
至此,我们可以验证一下,启动 Example 类,在 浏览器端输入 http://localhost:8080/center/sayhello 如果你有自定义 server.port 那么 就用自定义那个端口访问

整合 mybatis ,参考mybatis 官方文档其实 也没啥整合的 ,比 springmvc 容易整合。。。
准备我们的 sql 脚本
create database miaosha;

use miaosha;
create table user(id int not null auto_increment primary key,name varchar(10));

insert into user(name) values('frank');

select * from user;
修改 pom.xml 添加依赖 springboot-mybatis 整合依赖包, druid 连接池, mysql jdbc 连接驱动
 <!-- https://mvnrepository.com/artifact/com.alibaba/druid -->
        <dependency>
            <groupId>com.alibaba</groupId>
            <artifactId>druid</artifactId>
            <version>1.1.12</version>
        </dependency>

        <dependency>
            <groupId>org.mybatis.spring.boot</groupId>
            <artifactId>mybatis-spring-boot-starter</artifactId>
            <version>1.3.2</version>
        </dependency>

        <!-- https://mvnrepository.com/artifact/mysql/mysql-connector-java -->
        <dependency>
            <groupId>mysql</groupId>
            <artifactId>mysql-connector-java</artifactId>
            <version>8.0.12</version>
        </dependency>
修改 application.properties ,添加 mybatis, druid 等配置 注意 mybatis.mapper-locations=classpath:dao/*.xml 这个 mapper 文件指定很重要,当然后面会用注解来一次
# mybatis
# application.properties
#mybatis.type-aliases-package=com.ghc.starter.domain.model
#mybatis.type-handlers-package=com.example.typehandler
mybatis.configuration.map-underscore-to-camel-case=true
mybatis.configuration.default-fetch-size=100
mybatis.configuration.default-statement-timeout=3000
mybatis.mapper-locations=classpath:dao/*.xml

# druid
spring.datasource.url=jdbc:mysql://localhost/miaosha?useUnicode=true&characterEncoding=utf-8
spring.datasource.username=root
spring.datasource.password=xxx
spring.datasource.driver-class-name=com.mysql.jdbc.Driver
spring.datasource.type=com.alibaba.druid.pool.DruidDataSource
spring.datasource.filters=stat
spring.datasource.maxActive=2
spring.datasource.initialSize=1
spring.datasource.maxWait=60000
spring.datasource.minldle=1
spring.datasource.timeBetweenEvictionRunsMillis=60000
spring.datasource.minEvictableldleTimeMillis=300000
spring.datasource.validationQuery=select 'x'
spring.datasource.testWhileldle=true
spring.datasouce.testOnBorrow=false
spring.datasource.poolPreparedStatements=true
spring.datasource.maxOpenPreparedStatements=20
接下来做个 简单测试
pojo
package com.ghc.starter.domain.model;

import org.springframework.stereotype.Component;

@Component
public class User {
    private int id;
    private String name;

    public int getId() {
        return id;
    }

    public void setId(int id) {
        this.id = id;
    }

    public String getName() {
        return name;
    }

    public void setName(String name) {
        this.name = name;
    }
}
dao
package com.ghc.starter.dao;

import com.ghc.starter.domain.model.User;
import org.apache.ibatis.annotations.Mapper;
import org.apache.ibatis.annotations.Select;

import java.util.List;

@Mapper
public interface UserDao {
    @Select("select * from user")
    List<User> getAllUsers();
}
service 接口
package com.ghc.starter.service;

import com.ghc.starter.domain.model.User;

import java.util.List;

public interface UserService {
    List<User> getAllUsers();
}
service 实现类
package com.ghc.starter.service.Impl;

import com.ghc.starter.dao.UserDao;
import com.ghc.starter.domain.model.User;
import com.ghc.starter.service.UserService;
import org.apache.log4j.Logger;
import org.springframework.beans.factory.annotation.Autowired;
import org.springframework.dao.DataAccessException;
import org.springframework.stereotype.Service;

import java.util.List;

@Service
public class UserServiceImpl implements UserService{
    @Autowired
    private UserDao userDao;
    private final Logger logger = Logger.getLogger(UserServiceImpl.class);

    @Override
    public List<User> getAllUsers() {
        List userList = null;
        try{userList = userDao.getAllUsers();
        }catch(DataAccessException de){
            logger.error(de);
            throw new RuntimeException("数据库访问不到");
        }
        return userList;
    }
}
优雅地 使用 枚举+泛型 封装 返回值类型 Result
code msg 基接口
package com.ghc.starter.result;

public interface BaseCodeMsg {
    String msg=null;
    int code=500;
}
code msg 实现类
package com.ghc.starter.result;

public enum CodeMsg implements  BaseCodeMsg{
    SUCCESS("SUCCESS",200),ERROR("ERROR",500);
    private final String msg;
    private final int code;
    CodeMsg(String msg,int code){
        this.msg = msg;
        this.code = code;
    }

    public String getMsg() {
        return msg;
    }

    public int getCode() {
        return code;
    }
}
最后 Result 类
package com.ghc.starter.result;

public class Result<T> {
    private String msg;
    private int code;
    private T data;
    public static <T> Result<T> success(T data){
        return new Result<T>(data);
    }
    public static <T> Result<T> error(){
        Result result = new Result<T>(null);
        result.code = CodeMsg.ERROR.getCode();
        result.msg = CodeMsg.ERROR.getMsg();
        return result;
    }
    private  Result(T data){
        this.data = data;
        this.msg = CodeMsg.SUCCESS.getMsg();
        this.code = CodeMsg.SUCCESS.getCode();
    }

    public String getMsg() {
        return msg;
    }

    public int getCode() {
        return code;
    }

    public T getData() {
        return data;
    }
}
controller 层
package com.ghc.starter.controller;

import com.ghc.starter.domain.model.User;
import com.ghc.starter.result.Result;
import com.ghc.starter.service.UserService;
import org.mybatis.spring.annotation.MapperScan;
import org.springframework.beans.factory.annotation.Autowired;
import org.springframework.stereotype.Controller;
import org.springframework.ui.Model;
import org.springframework.web.bind.annotation.RequestMapping;
import org.springframework.web.bind.annotation.RestController;

import java.util.List;

@RestController
@RequestMapping("/center")
public class centercontroller {
    @Autowired
    private UserService userService;
    @RequestMapping("/sayhello")
    public String hello(Model model){
        model.addAttribute("name","frank");
        return "hello";
    }

    @RequestMapping("/getAllUsers")
    public Result<List<User>> getAllUsers(){
        List<User> userList = null;
        Result<List<User>> listResult=null;
        try{userList = userService.getAllUsers();
//            int a = 1/0; //测试下异常
            listResult = Result.success(userList);
        }catch(Exception e){
            listResult = Result.error();
        }
        return listResult;
    }
}
Postman测试访问

引入 redis 缓存
基于 redis api 封装自己的 redis 操作类
修改 application.properties 文件 添加 redis 相关配置
#redis
redis.host=192.168.32.129
redis.port=6379
redis.timeout=3
redis.password=frank
redis.poolMaxTotal=10
redis.poolMaxldle=10
# 秒 = ms * 1000
redis.poolMaxWait=3
读取 application.properties 文件 redis 部分 配置。
package com.ghc.starter.redis;

import org.springframework.boot.context.properties.ConfigurationProperties;
import org.springframework.stereotype.Component;

@Component
@ConfigurationProperties(prefix = "redis")
public class RedisConfig {
    private String host;
    private int port;
    private int timeout;
    private String password;
    private int poolMaxTotal;
    private int poolMaxldle;
    private int poolMaxWait;

    public String getHost() {
        return host;
    }

    public void setHost(String host) {
        this.host = host;
    }

    public int getPort() {
        return port;
    }

    public void setPort(int port) {
        this.port = port;
    }

    public int getTimeout() {
        return timeout;
    }

    public void setTimeout(int timeout) {
        this.timeout = timeout;
    }

    public String getPassword() {
        return password;
    }

    public void setPassword(String password) {
        this.password = password;
    }

    public int getPoolMaxTotal() {
        return poolMaxTotal;
    }

    public void setPoolMaxTotal(int poolMaxTotal) {
        this.poolMaxTotal = poolMaxTotal;
    }

    public int getPoolMaxldle() {
        return poolMaxldle;
    }

    public void setPoolMaxldle(int poolMaxldle) {
        this.poolMaxldle = poolMaxldle;
    }

    public int getPoolMaxWait() {
        return poolMaxWait;
    }

    public void setPoolMaxWait(int poolMaxWait) {
        this.poolMaxWait = poolMaxWait;
    }
}
redis 连接池 工厂类
package com.ghc.starter.redis;

import org.springframework.beans.factory.annotation.Autowired;
import org.springframework.context.annotation.Bean;
import org.springframework.stereotype.Service;
import redis.clients.jedis.JedisPool;
import redis.clients.jedis.JedisPoolConfig;

@Service
public class RedisPoolFactory {
    @Autowired
    private RedisConfig redisConfig;
    @Bean
    public JedisPool jedisPoolFactory(){
        JedisPoolConfig jedisPoolConfig = new JedisPoolConfig();
        jedisPoolConfig.setMaxWaitMillis(redisConfig.getPoolMaxWait()*1000); // 配置文件里是秒
        jedisPoolConfig.setMaxTotal(redisConfig.getPoolMaxTotal());
        jedisPoolConfig.setMaxIdle(redisConfig.getPoolMaxldle());
        JedisPool jedisPool = new JedisPool(jedisPoolConfig,redisConfig
                .getHost(),redisConfig.getPort(),
                redisConfig.getTimeout(),redisConfig.getPassword(),0);
        return jedisPool;
    }
}
自定义封装的 redis 操作类,主要实现 set / get 方法
package com.ghc.starter.redis;

import com.alibaba.fastjson.JSON;
import org.springframework.beans.factory.annotation.Autowired;
import redis.clients.jedis.Jedis;
import redis.clients.jedis.JedisPool;

public class RedisService <T> {
    @Autowired
    private JedisPool jedisPool;

    public T get(String key,Class<T> clazz){
        Jedis jedis = null;
        T t;
        try{jedis = jedisPool.getResource();
            String value = jedis.get(key);
            t = str2Bean(value,clazz);
        }finally{
            return2Pool(jedis);
        }
        return t;
    }
    public boolean set(String key,T value){
        Jedis jedis = null;
        try{jedis = jedisPool.getResource();
            String str = bean2Str(value);
            if(str==null||str.length()<=0){
                return false;
            }else{ jedis.set(key,str);
                    return true;
                }
        }finally{
            return2Pool(jedis);
        }
    }
    @SuppressWarnings("unchecked")
    private String bean2Str(T value){
        Class<?> clazz = value.getClass();
        if(value == null){
            return null;
        }
        else if(clazz == int.class||clazz == Integer.class){
           return ""+value;
        }else if(clazz == String.class){
            return (String)value;
        }else if(clazz == long.class||clazz == Long.class){
            return ""+value;
        }else{
            return JSON.toJSONString(value);
        }
    }
    @SuppressWarnings("unchecked")
    private T str2Bean(String value, Class<T> clazz) {
        if(value==null||value.length()<=0||clazz==null){
            return null;
        }else if(clazz==int.class||clazz == Integer.class){
            return (T)Integer.valueOf(value);
        }else if(clazz==long.class||clazz == Long.class){
            return (T)Long.valueOf(value);
        }else if(clazz==String.class){
            return (T)value;
        }else{ return JSON.toJavaObject(JSON.parseObject(value),clazz);}
    }

    private void return2Pool(Jedis jedis) {
        if(jedis!=null){
            jedis.close();
        }
    }
}
junit Test 测试一下
package com.ghc.starter;


import com.ghc.starter.redis.RedisService;
import org.junit.runner.RunWith;
import org.springframework.beans.factory.annotation.Autowired;
import org.springframework.boot.test.context.SpringBootTest;
import org.springframework.context.annotation.Configuration;
import org.springframework.test.context.junit4.SpringRunner;

@Configuration
@RunWith(SpringRunner.class)
@SpringBootTest
public class Test {
    @Autowired
    private RedisService redisService;

    @org.junit.Test
    public void testRedisService(){
        redisService.set("key1","value1");
        String value = (String)redisService.get("key1",String.class);
        System.out.println("value: "+value);
    }

}
发现报 异常如下:
Exception in thread "main" redis.clients.jedis.exceptions.JedisConnectionException: java.net.SocketTimeoutException: Read timed out
那么经过查询得知需要关闭防火墙
1、关闭firewall:
systemctl stop firewalld.service #停止firewall
systemctl disable firewalld.service #禁止firewall开机启动
firewall-cmd --state #查看默认防火墙状态(关闭后显示notrunning,开启后显示running)
firewall-cmd --zone=public --add-port=6379/tcp --permanent  #开放 6379 端口
为了防止 key 混淆 比如 User 的 key 与 Order 的 key ,最好绑定类名以及 id 或 name 的方式 存储一起做key ,也就是 把类名 做成 前缀
前缀 接口
package com.ghc.starter.prefix;

public interface KeyPrefix {
    int expireSeconds();
    String getPrefix();
}
前缀接口实现的 抽象类
package com.ghc.starter.prefix;

public abstract class BaseKeyPrefix implements KeyPrefix {

    BaseKeyPrefix(String prefix){
        this(0,prefix);
    }
    private BaseKeyPrefix(int expireSeconds,String prefix){
        this.expireSeconds = expireSeconds;
        this.prefix = prefix;
    }
    private String prefix;
    private int expireSeconds;
    @Override
    public int expireSeconds() {  // 默认 0 代表永不过期
        return expireSeconds;
    }

    @Override
    public String getPrefix() {
        return getClass().getSimpleName()+":"+prefix;
    }
}
前缀抽象类的 具体子类之一, 还可以有 OrderKey
package com.ghc.starter.prefix;

public class UserKey extends BaseKeyPrefix {
    private UserKey(String prefix) {
        super(prefix);
    }

    public static UserKey getById = new UserKey("id");
    public static UserKey getByName = new UserKey("name");

}
此时,我们需要对 RedisService 里面的 set , get 方法增加 输入参数 Prefix
 public T get(KeyPrefix keyPrefix,String key, Class<T> clazz){
        Jedis jedis = null;
        T t;
        try{jedis = jedisPool.getResource();
            String realKey = keyPrefix.getPrefix() + key;
            String value = jedis.get(realKey);
            t = str2Bean(value,clazz);
        }finally{
            return2Pool(jedis);
        }
        return t;
    }
    public boolean set(KeyPrefix keyPrefix,String key,T value){
        Jedis jedis = null;
        try{jedis = jedisPool.getResource();
            String str = bean2Str(value);
            if(str==null||str.length()<=0){
                return false;
                }else{
                         String realKey = keyPrefix.getPrefix() + key;
                         int expireSeconds = keyPrefix.expireSeconds();
                         if(expireSeconds>0){
                             jedis.setex(realKey,expireSeconds,str);
                         }
                         else{
                                jedis.set(realKey,str);
                         }
                 return true;
                }
        }finally{
            return2Pool(jedis);
        }
    }
接下来,再做一次 JUnit 测试
package com.ghc.starter;


import com.ghc.starter.domain.model.User;
import com.ghc.starter.prefix.UserKey;
import com.ghc.starter.redis.RedisService;
import org.junit.runner.RunWith;
import org.springframework.beans.factory.annotation.Autowired;
import org.springframework.boot.test.context.SpringBootTest;
import org.springframework.context.annotation.Configuration;
import org.springframework.test.context.junit4.SpringRunner;

@Configuration
@RunWith(SpringRunner.class)
@SpringBootTest
public class Test {
    @Autowired
    private RedisService redisService;

    @org.junit.Test
    public void testRedisService(){
        User user = new User();
        user.setId(2);
        user.setName("frank2");

        redisService.set(UserKey.getById,"1",user);
        User getUser = (User)redisService.get(UserKey.getById,"1",User.class);

        System.out.println(getUser.getName());
    }

}
如果有来生,一个人去远行,看不同的风景,感受生命的活力。。。

 浙公网安备 33010602011771号