(七)Spring Cloud 配置中心config
spring cloud config是一个基于http协议的远程配置实现方式。
通过统一的配置管理服务器进行配置管理,客户端通过http协议主动的拉取服务的的配置信息,完成配置获取。
下面我们对spring cloud config配置中心进行搭建
主要有以下模块
eureka-server 服务注册中心
eureka-config config配置中心
eureka-config-resp1 git远程仓库,用于存储客户端的配置文件
eureka-client1 客户端1,它的配置从config配置中心读取
eureka-client2 客户端2,它的配置从config配置中心读取
1. eureka-server注册中心
1.1 eureka-server pom 文件
<?xml version="1.0" encoding="UTF-8"?>
<project xmlns="http://maven.apache.org/POM/4.0.0" xmlns:xsi="http://www.w3.org/2001/XMLSchema-instance"
         xsi:schemaLocation="http://maven.apache.org/POM/4.0.0 https://maven.apache.org/xsd/maven-4.0.0.xsd">
    <modelVersion>4.0.0</modelVersion>
    <parent>
        <groupId>org.springframework.boot</groupId>
        <artifactId>spring-boot-starter-parent</artifactId>
        <version>2.2.5.RELEASE</version>
        <relativePath/> <!-- lookup parent from repository -->
    </parent>
    <groupId>com.devin</groupId>
    <artifactId>eureka-server</artifactId>
    <version>0.0.1-SNAPSHOT</version>
    <name>eureka-server</name>
    <description>Demo project for Spring Boot</description>

    <properties>
        <java.version>1.8</java.version>
        <spring-cloud.version>Hoxton.SR3</spring-cloud.version>
    </properties>

    <dependencies>
        <dependency>
            <groupId>org.springframework.cloud</groupId>
            <artifactId>spring-cloud-starter-netflix-eureka-server</artifactId>
        </dependency>

        <dependency>
            <groupId>org.springframework.boot</groupId>
            <artifactId>spring-boot-starter-security</artifactId>
            <scope>compile</scope>
        </dependency>

        <dependency>
            <groupId>org.springframework.boot</groupId>
            <artifactId>spring-boot-starter-actuator</artifactId>
        </dependency>

        <dependency>
            <groupId>org.springframework.cloud</groupId>
            <artifactId>spring-cloud-starter-sleuth</artifactId>
        </dependency>

        <dependency>
            <groupId>org.springframework.boot</groupId>
            <artifactId>spring-boot-starter-test</artifactId>
            <scope>test</scope>
            <exclusions>
                <exclusion>
                    <groupId>org.junit.vintage</groupId>
                    <artifactId>junit-vintage-engine</artifactId>
                </exclusion>
            </exclusions>
        </dependency>
    </dependencies>

    <dependencyManagement>
        <dependencies>
            <dependency>
                <groupId>org.springframework.cloud</groupId>
                <artifactId>spring-cloud-dependencies</artifactId>
                <version>${spring-cloud.version}</version>
                <type>pom</type>
                <scope>import</scope>
            </dependency>
        </dependencies>
    </dependencyManagement>

    <build>
        <plugins>
            <plugin>
                <groupId>org.springframework.boot</groupId>
                <artifactId>spring-boot-maven-plugin</artifactId>
            </plugin>
        </plugins>
    </build>

</project>
1.2 安全配置
package com.devin.eurekaserver.config;

import org.springframework.security.config.annotation.web.builders.HttpSecurity;
import org.springframework.security.config.annotation.web.configuration.EnableWebSecurity;
import org.springframework.security.config.annotation.web.configuration.WebSecurityConfigurerAdapter;

@EnableWebSecurity
public class WebSecurityConfig extends WebSecurityConfigurerAdapter {

    @Override
    protected void configure(HttpSecurity http) throws Exception {
        //关闭csrf
        super.configure(http);
        //开启认证
        http.csrf().disable();
    }
}
1.3 启动类
package com.devin.eurekaserver;

import org.springframework.boot.SpringApplication;
import org.springframework.boot.autoconfigure.SpringBootApplication;
import org.springframework.cloud.netflix.eureka.server.EnableEurekaServer;

@EnableEurekaServer
@SpringBootApplication
public class EurekaServerApplication {

    public static void main(String[] args) {
        SpringApplication.run(EurekaServerApplication.class, args);
    }

}
1.4 eureka-server application.yml 配置
启动端口为 7001
server:
  port: 7001 #启动端口
spring:
  #应用名称
  application:
    name: eureka-server
  #安全配置
  security:
    basic:
      enabled: true
    user:
      name: dev
      password: 123456

#eureka配置
eureka:
  server:
    #设置扫描失效服务的间隔时间
    eviction-interval-timer-in-ms: 20000
    enable-self-preservation: true
  instance:
    hostname: localhost
    leaseRenewalIntervalInSeconds: 10
    health-check-url-path: /actuator/health
  client:
    register-with-eureka: false  #false:不作为一个客户端注册到注册中心
    fetch-registry: false        #为true时,可以启动,但报异常:Cannot execute request on any known server
    service-url:
      defaultZone: http://${eureka.instance.hostname}:${server.port}/eureka/

# health endpoint是否必须显示全部细节。默认情况下, /actuator/health 是公开的,并且不显示细节。
# 设置actuator开关
management:
  security:
    enabled: false
  endpoints:
    web:
      exposure:
        include: "*"
  endpoint:
    health:
      show-details: ALWAYS
2. 配置中心config
2.1 pom.xml 完整配置
主要添加了 config-server(配置中心) ,mq ,actuator(spring bus配置中心刷新), eureka-client 的依赖
ps: 搭建时在使用idea自带的版本时,在用到配置刷新时会报mq的异常,所以这里更改了spirngboot和spirng cloud的版本,具体看配置文件
<?xml version="1.0" encoding="UTF-8"?>
<project xmlns="http://maven.apache.org/POM/4.0.0" xmlns:xsi="http://www.w3.org/2001/XMLSchema-instance"
         xsi:schemaLocation="http://maven.apache.org/POM/4.0.0 https://maven.apache.org/xsd/maven-4.0.0.xsd">
    <modelVersion>4.0.0</modelVersion>
    <parent>
        <groupId>org.springframework.boot</groupId>
        <artifactId>spring-boot-starter-parent</artifactId>
        <version>2.1.2.RELEASE</version>
        <relativePath/> <!-- lookup parent from repository -->
    </parent>
    <groupId>com.devin</groupId>
    <artifactId>eureka-config</artifactId>
    <version>0.0.1-SNAPSHOT</version>
    <name>eureka-config</name>
    <description>Demo project for Spring Boot</description>

    <properties>
        <java.version>1.8</java.version>
        <spring-cloud.version>Greenwich.RELEASE</spring-cloud.version>
    </properties>

    <dependencies>

        <dependency>
            <groupId>org.springframework.cloud</groupId>
            <artifactId>spring-cloud-config-server</artifactId>
        </dependency>

        <dependency>
            <groupId>org.springframework.cloud</groupId>
            <artifactId>spring-cloud-starter-netflix-eureka-client</artifactId>
        </dependency>

        <dependency>
            <groupId>org.springframework.boot</groupId>
            <artifactId>spring-boot-starter-actuator</artifactId>
        </dependency>

        <dependency>
            <groupId>org.springframework.cloud</groupId>
            <artifactId>spring-cloud-starter-sleuth</artifactId>
        </dependency>

        <!-- springcloud-bus依赖实现配置自动更新,rabbitmq -->
        <dependency>
            <groupId>org.springframework.cloud</groupId>
            <artifactId>spring-cloud-starter-bus-amqp</artifactId>
        </dependency>


        <dependency>
            <groupId>org.springframework.boot</groupId>
            <artifactId>spring-boot-starter-test</artifactId>
            <scope>test</scope>
            <exclusions>
                <exclusion>
                    <groupId>org.junit.vintage</groupId>
                    <artifactId>junit-vintage-engine</artifactId>
                </exclusion>
            </exclusions>
        </dependency>
    </dependencies>

    <dependencyManagement>
        <dependencies>
            <dependency>
                <groupId>org.springframework.cloud</groupId>
                <artifactId>spring-cloud-dependencies</artifactId>
                <version>${spring-cloud.version}</version>
                <type>pom</type>
                <scope>import</scope>
            </dependency>
        </dependencies>
    </dependencyManagement>

    <build>
        <plugins>
            <plugin>
                <groupId>org.springframework.boot</groupId>
                <artifactId>spring-boot-maven-plugin</artifactId>
            </plugin>
        </plugins>
    </build>

</project>
2.2 启动类
@EnableConfigServer 对config配置中心的支持
@EnableEurekaClient 将配置中心也作为一个eureka-client在注册中心进行注册
package com.devin.eurekaconfig;

import org.springframework.boot.SpringApplication;
import org.springframework.boot.autoconfigure.SpringBootApplication;
import org.springframework.cloud.config.server.EnableConfigServer;
import org.springframework.cloud.netflix.eureka.EnableEurekaClient;


@EnableConfigServer
@EnableEurekaClient
@SpringBootApplication
public class EurekaConfigApplication {

    public static void main(String[] args) {
        SpringApplication.run(EurekaConfigApplication.class, args);
    }

}
2.3 config配置中心的配置文件
我们这里采用了多profile的配置,分别对应dev和test环境
2.3.1 bootstrap.yml
主要配置了连接git仓库的地址,这里我们查找的路径按项目进行划分,使用了{application}占位,当客户端的服务名为eureka-client时,将在git地址的eureka-client文件夹下进行配置查找并使用
server:
  port: 7009

spring:
  profiles:
    active: dev
  #应用名称
  application:
    name: eureka-config
  cloud:
    config:
      server:
        git:
          uri: https://github.com/devinzhang0209/eureka-config-resp1.git
#          username: devinzhang0209
#          password: yourgithubpassword
          search-paths: /{application}
      label: master

# health endpoint是否必须显示全部细节。默认情况下, /actuator/health 是公开的,并且不显示细节。
management:
  endpoints:
    web:
      exposure:
        include: "*"
  endpoint:
    health:
      show-details: ALWAYS
2.3.2 测试环境功能 bootstrap-dev.yml
主要配置了向eureka-server 进行注册,以及mq的配置用于配置的刷新
#配置config服务的账号密码
spring:
  security:
    user:
      name: dev-config
      password: 123456
  rabbitmq:
    host: localhost
    port: 5672
    username: guest
    password: guest

#注册中心配置
eureka:
  auth:
    user: dev
    password: 123456
  client:
    service-url:
      defaultZone: http://${eureka.auth.user}:${eureka.auth.password}@localhost:7001/eureka/
  instance:
    #使用IP进行注册
    prefer-ip-address: true
    #配置实例的注册ID
    instance-id: ${spring.cloud.client.ip-address}:${server.port}
    #心跳时间,即服务续约间隔时间(缺省为30s)
    lease-renewal-interval-in-seconds: 5
    #发呆时间,即服务续约到期时间(缺省为90s)
    lease-expiration-duration-in-seconds: 10
    health-check-url-path: /actuator/health
2.3.3 测试环境功能 bootstrap-test.yml
这里的配置和dev环境一样,主要是为了测试test环境去读取git仓库中test对应的配置信息
#配置config服务的账号密码
spring:
  security:
    user:
      name: dev-config-test
      password: test123456

#注册中心配置
eureka:
  auth:
    user: dev-test
    password: test123456
  client:
    service-url:
      defaultZone: http://${eureka.auth.user}:${eureka.auth.password}@192.168.0.12:7001/eureka/
  instance:
    #使用IP进行注册
    prefer-ip-address: true
    #配置实例的注册ID
    instance-id: ${spring.cloud.client.ip-address}:${server.port}
    #心跳时间,即服务续约间隔时间(缺省为30s)
    lease-renewal-interval-in-seconds: 5
    #发呆时间,即服务续约到期时间(缺省为90s)
    lease-expiration-duration-in-seconds: 10
    health-check-url-path: /actuator/health
3. git仓库 eureka-config-resp1
git仓库中主要存储了不同eureka-client客户端的不同环境对应的配置文件, 结构如下:

git的地址是 https://github.com/devinzhang0209/eureka-config-resp1.git 这里我设置的是一个公共的仓库
下面我们展示eureka-clien的配置
3.1 application.yml
spring:
  application:
    name: eureka-client
3.2 application-dev.yml
server:
  port: 7003
msg: this msg is response by port 7003
3.3 application-test.yml
server:
  port: 7004
msg: this msg is response by port 7004
4. eureka-client
4.1 pom.xml
<?xml version="1.0" encoding="UTF-8"?>
<project xmlns="http://maven.apache.org/POM/4.0.0" xmlns:xsi="http://www.w3.org/2001/XMLSchema-instance"
         xsi:schemaLocation="http://maven.apache.org/POM/4.0.0 https://maven.apache.org/xsd/maven-4.0.0.xsd">
    <modelVersion>4.0.0</modelVersion>
    <parent>
        <groupId>org.springframework.boot</groupId>
        <artifactId>spring-boot-starter-parent</artifactId>
        <version>2.1.2.RELEASE</version>
        <relativePath/> <!-- lookup parent from repository -->
    </parent>
    <groupId>com.devin</groupId>
    <artifactId>eureka-client</artifactId>
    <version>0.0.1-SNAPSHOT</version>
    <name>eureka-client</name>
    <description>Demo project for Spring Boot</description>

    <properties>
        <java.version>1.8</java.version>
        <!--<spring-cloud.version>Hoxton.SR3</spring-cloud.version>-->
        <spring-cloud.version>Greenwich.RELEASE</spring-cloud.version>
    </properties>

    <dependencies>

        <dependency>
            <groupId>org.springframework.cloud</groupId>
            <artifactId>spring-cloud-starter-netflix-eureka-client</artifactId>
        </dependency>

        <dependency>
            <groupId>org.springframework.cloud</groupId>
            <artifactId>spring-cloud-starter-config</artifactId>
            <version>1.4.1.RELEASE</version>
        </dependency>

        <dependency>
            <groupId>org.springframework.cloud</groupId>
            <artifactId>spring-cloud-starter-bus-amqp</artifactId>
        </dependency>


        <dependency>
            <groupId>org.springframework.boot</groupId>
            <artifactId>spring-boot-starter-web</artifactId>
            <version>2.1.8.RELEASE</version>
        </dependency>


        <dependency>
            <groupId>org.springframework.boot</groupId>
            <artifactId>spring-boot-starter-actuator</artifactId>
        </dependency>


        <dependency>
            <groupId>org.springframework.boot</groupId>
            <artifactId>spring-boot-starter-test</artifactId>
            <scope>test</scope>
            <exclusions>
                <exclusion>
                    <groupId>org.junit.vintage</groupId>
                    <artifactId>junit-vintage-engine</artifactId>
                </exclusion>
            </exclusions>
        </dependency>
    </dependencies>

    <dependencyManagement>
        <dependencies>
            <dependency>
                <groupId>org.springframework.cloud</groupId>
                <artifactId>spring-cloud-dependencies</artifactId>
                <version>${spring-cloud.version}</version>
                <type>pom</type>
                <scope>import</scope>
            </dependency>
        </dependencies>
    </dependencyManagement>

    <build>
        <plugins>
            <plugin>
                <groupId>org.springframework.boot</groupId>
                <artifactId>spring-boot-maven-plugin</artifactId>
            </plugin>
        </plugins>
    </build>

</project>
4.2 启动类
package com.devin.eurekaclient;

import org.springframework.boot.SpringApplication;
import org.springframework.boot.autoconfigure.SpringBootApplication;
import org.springframework.cloud.netflix.eureka.EnableEurekaClient;

@EnableEurekaClient
@SpringBootApplication
public class EurekaClientApplication {

    public static void main(String[] args) {
        SpringApplication.run(EurekaClientApplication.class, args);
    }

}
4.3 controller 测试类
其中 @RefreshScope,用于后续spring config bus刷新配置文件
package com.devin.eurekaclient.controller;

import org.springframework.beans.factory.annotation.Value;
import org.springframework.cloud.context.config.annotation.RefreshScope;
import org.springframework.web.bind.annotation.GetMapping;
import org.springframework.web.bind.annotation.RestController;

/**
 * @author Devin Zhang
 * @className HelloController
 * @description TODO
 * @date 2020/4/2 9:50
 */
@RefreshScope
@RestController
public class HelloController {
    @Value("${server.port}")
    private Integer port;

    @Value("${msg}")
    private String msg;

    @GetMapping("/getMSG")
    public String getMsg() {
        return msg + " ,response by port:" + port;
    }
}
4.4 eureka-client的本地配置文件
4.4.1 bootstrap.yml
spring:
  profiles:
    active: dev
  #应用名称
  application:
    name: eureka-client
# health endpoint是否必须显示全部细节。默认情况下, /actuator/health 是公开的,并且不显示细节。
management:
  endpoints:
    web:
      exposure:
        include: "*"
  endpoint:
    health:
      show-details: ALWAYS
4.4.2 bootstrap-dev.yml
#注册中心配置
eureka:
  auth:
    user: dev
    password: 123456
  client:
    service-url:
      defaultZone: http://${eureka.auth.user}:${eureka.auth.password}@localhost:7001/eureka/
  instance:
    #使用IP进行注册
    prefer-ip-address: true
    #配置实例的注册ID
    instance-id: ${spring.cloud.client.ip-address}:${server.port}
    #心跳时间,即服务续约间隔时间(缺省为30s)
    lease-renewal-interval-in-seconds: 5
    #发呆时间,即服务续约到期时间(缺省为90s)
    lease-expiration-duration-in-seconds: 10
    health-check-url-path: /actuator/health

spring:
  cloud:
    #config服务配置
    config:
      username: dev-config
      password: 123456
      fail-fast: false
      #重试间隔时间
      retry:
        initial-interval: 3000
      #从注册中心获取配置服务,以及配置服务名称
      discovery:
        enabled: true
        service-id: eureka-config
  rabbitmq:
    host: localhost
    port: 5672
    username: guest
    password: guest
4.4.3 bootstrap-test.yml
#注册中心配置
eureka:
  auth:
    user: dev
    password: 123456
  client:
    service-url:
      defaultZone: http://${eureka.auth.user}:${eureka.auth.password}@localhost:7001/eureka/
  instance:
    #使用IP进行注册
    prefer-ip-address: true
    #配置实例的注册ID
    instance-id: ${spring.cloud.client.ip-address}:${server.port}
    #心跳时间,即服务续约间隔时间(缺省为30s)
    lease-renewal-interval-in-seconds: 5
    #发呆时间,即服务续约到期时间(缺省为90s)
    lease-expiration-duration-in-seconds: 10
    health-check-url-path: /actuator/health

spring:
  cloud:
    #config服务配置
    config:
      username: dev-config
      password: 123456
      fail-fast: false
      #重试间隔时间
      retry:
        initial-interval: 3000
      #从注册中心获取配置服务,以及配置服务名称
      discovery:
        enabled: true
        service-id: eureka-config
  rabbitmq:
    host: localhost
    port: 5672
    username: guest
    password: guest
5. eureka-client2
eureka-client2 和 eureka-client 完全一样只是实例的名称不一样,方便我们验证多个client在配置中心注册 ,此处代码就不在展示
7. 消息队列RabbitMQ
配置中心刷新时需要用到消息队列
7.1 安装RabbitMQ
本文直接在windows上验证,需要安装如下软件:
Erlang otp_win64_22.3.exe
RabbitMQ rabbitmq-server-3.8.3.exe
7.2 配置环境变量
安装完成后需要如下环境变量
ERLANG_HOME=D:\Program Files\erl10.7
RABBITQM_SERVER=D:\Program Files\RabbitMQ Server\rabbitmq_server-3.8.3
path=%Path%;%ERLANG_HOME%\bin;%RABBITQM_SERVER%\sbin;
7.3 启动mq的服务
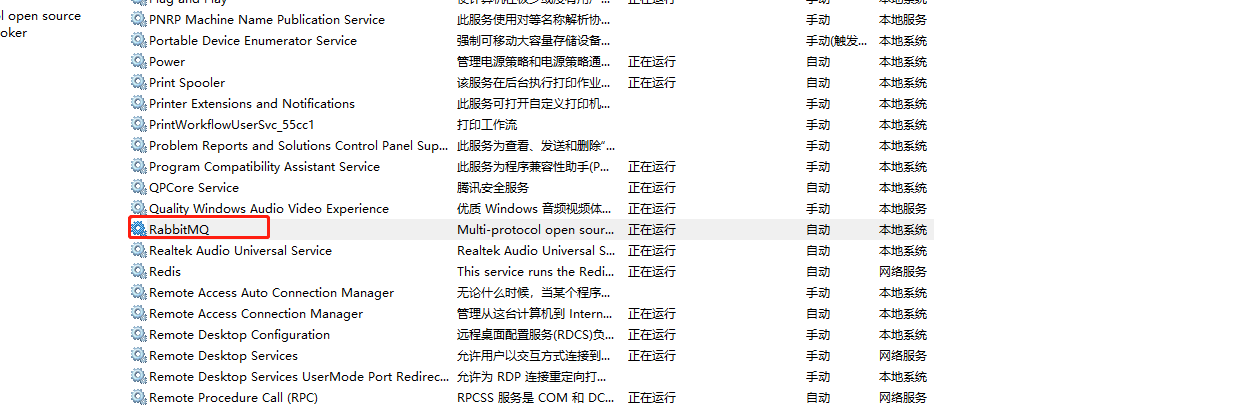
7.4 开启RabbitMQ管理服务端
rabbitmq-plugins enable rabbitmq_management
开启后访问的默认地址: http://localhost:15672/ 默认账号密码 guest/guest
8 验证配置中心
分别启动
eureka-server
eureka-config
eureka-client
eureka-client2
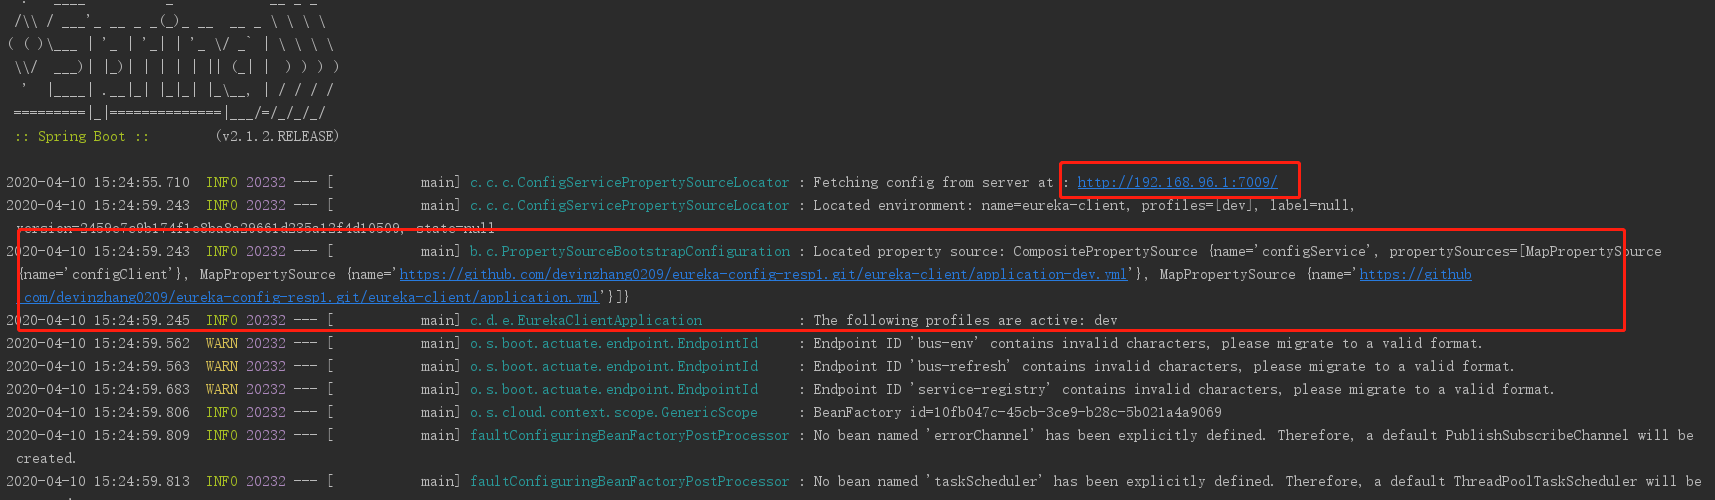
启动 eureka-client 和eureka-clent2 从启动日志中可以看到程序已经去配置中心7009读取配置并从github上读取了配置文件并使用
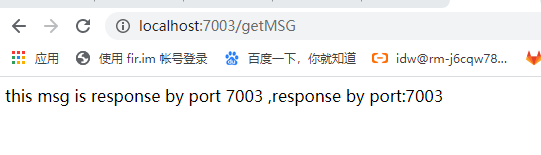
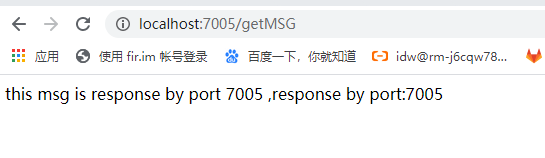
分别访问
可以看到euerka-client 和 eureka-client2 已经读取了启动端口,Controller也通过@Value读取了git中的配置信息
9. Spring Cloud Bus 刷新配置
刷新配置我们需要注意如下几点
1. 在使用刷新配置时,需要去掉eureka-config 和eueka-client 中的安全验证 ,直接在pom文件中去掉如下依赖即可
    <dependency>
            <groupId>org.springframework.boot</groupId>
            <artifactId>spring-boot-starter-security</artifactId>
            <scope>compile</scope>
        </dependency>
2. 在eureka-config 和eueka-client 的yml配置文件中添加RabbitMQ的配置
#配置config服务的账号密码
spring:
  security:
    user:
      name: dev-config
      password: 123456
  rabbitmq:
    host: localhost
    port: 5672
    username: guest
    password: guest
3. 在客户端所有用到读取配置文件的类上加上 @RefreshScope
4. 刷新配置
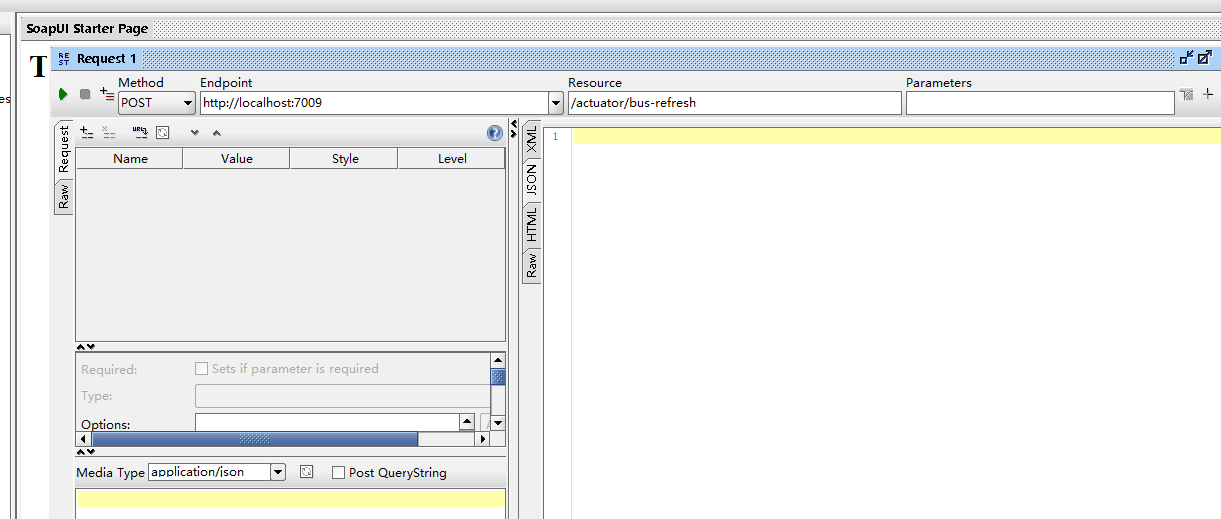
刷新配置可以访问eureka-config也可以访问任何一个eureka-client的服务进行刷新,如下刷新请求只能通过post请求去调用
通过eureka-config 去刷新 http://localhost:7009/actuator/bus-refresh
通过eureka-client 去刷新 http://localhost:7003/actuator/bus-refresh
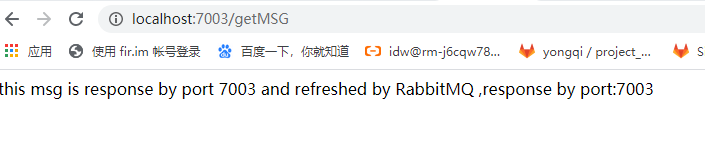
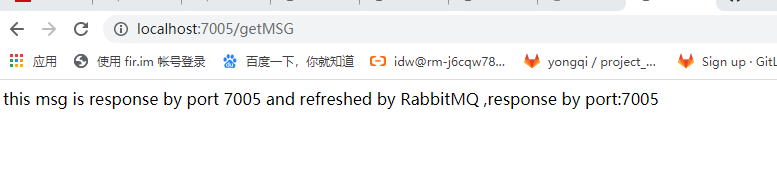
刷新后我们再后台log中可以看到,客户端已经去github上重新读取了最新的配置

再次访问客户端,可以看到客户端已经读取到了最新的配置
至此,spring cloud config配置中心搭建完毕

 浙公网安备 33010602011771号