WPF整理-XAML构建后台类对象
1.XAML
接触WPF的第一眼就是XAML---XAML是用来描绘界面的。其实不然!
"Actually, XAML has nothing to do with UI. It's merely a declarative way of constructing objects and setting their properties.”
XAML和UI一点关系也没有,它仅仅是一种以声明方式来构建对象,设置对象属性的一种方式而已,和code behind file作用差不多。XAML这种声明方式构建对象的好处是,程序员只管声明自己要什么,至于如何构建则不需要考虑。
XAML对WPF来讲,也不是必须的。我们可以轻松实现一个WPF工程,没有任何XAML。
XML也不是WPF才有,举个反例如在WF中XAML被用来构建工作流。
2.XAML和编译
"A XAML file is compiled by a XAML compiler that produces a binary version of the XAML, known as BAML. This BAML is stored as a resource inside the assembly and is parsed at runtime in the InitializeComponent call to create the actual objects. The result is bundled with the code behind file (the typical Window class is declared as partial, meaning there may be more source files describing the same class) to produce the final code for that class."
XAML文件首先由XAML编译器编译成二进制的BAML,并以资源的形式存储在程序集中,在运行时由InitializeComponent方法结合后台代码来构建最终的对象。
3.通过XAML来构建后台类对象-Single Object
譬如我们定义一个后台类。如下:
    class Book
    {
        public string Name { get; set; }
        public string Author { get; set; }
        public decimal Price { get; set; }
        public int YearPublished { get; set; }

    }
我们如何在XAML中访问这个类呢?
1.添加一个XAML映射,code snip如下:
<Window x:Class="CreatingCustomTypeInXaml.MainWindow"
        xmlns="http://schemas.microsoft.com/winfx/2006/xaml/presentation"
        xmlns:x="http://schemas.microsoft.com/winfx/2006/xaml"
     xmlns:local="clr-namespace:CreatingCustomTypeInXaml"
如果不在同一个程序集需要加上";assembly=程序集名称"。
2.这样使用
    <Grid>
        <Button  HorizontalAlignment="Left" Margin="129,82,0,0" VerticalAlignment="Top" Width="258" Height="107">
            <local:Book Name="WPF tutorial" Author="DebugLZQ" YearPublished="2013" Price="29.99"/>
        </Button>
    </Grid>
当然,为了使上面的代码正常工作,我们需要为Book类重写一个合适的ToString。
    class Book
    {
        public string Name { get; set; }
        public string Author { get; set; }
        public decimal Price { get; set; }
        public int YearPublished { get; set; }

        public override string ToString()
     {
      return string.Format("{0} by {1}\npublished {2}",Name,Author,YearPublished);
        }
    }
程序运行如下:
----
又如,可以在MVVM中可以在View中为Window的DataContent赋值ViewModel(虽不是最好的办法):
<Window x:Class="AsynchronousBindingDemo.MainWindow"
        xmlns="http://schemas.microsoft.com/winfx/2006/xaml/presentation"
        xmlns:x="http://schemas.microsoft.com/winfx/2006/xaml"
        xmlns:local="clr-namespace:AsynchronousBindingDemo"
        Title="MainWindow" Height="350" Width="525">
    <Window.DataContext>
        <local:MainWindowViewModel/>
    </Window.DataContext>
    <Grid>
        <TextBlock Text="{Binding Text1, IsAsync=True}" FontSize="60" HorizontalAlignment="Center" VerticalAlignment="Center"/>
    </Grid>
</Window>
参考DebugLZQ后续博文:
MVVM: Improve MVVM Application Performance Using Framework Features
View and ViewModel Mapping using MEFedMVVM
4.通过XAML来构建后台类对象-Collection Object
上面我们是在XAML中构建简单的Single Object,如果我们需要构建一个数组,该如何做呢?
如,我们有如下一个类:
    public class Person
    {
        public string Name { get; set; }
        public int Age { get; set; }
    }
现在我们需要用xaml构建这个类的数组。
我们在C#中新增一个类:
    public class PersonList : List<Person>
    {

    }
上面这个类的目的是用来包装泛型List<Person>,因为泛型对象是无法再xaml中构建的。
其实,我们一般不用List,而是用ObservableCollection。请参考DebugLZQ后续博文:WPF整理-Binding to a Collection
如下使用:
xmlns:local="clr-namespace:CreatingCustomTypeInXaml"
        <ListBox  DisplayMemberPath="Age">
            <ListBox.ItemsSource>
                <local:PersonList>
                    <local:Person Name="DebugLZQ1" Age="26"/>
                    <local:Person Name="DebugLZQ2" Age="26"/>
                </local:PersonList>
            </ListBox.ItemsSource>
        </ListBox>
通常,我们会把XAML构建的对象放到Resource中。如下:
    <Window.Resources>
        <local:PersonList x:Key="personList">
            <local:Person Name="DebugLZQ1" Age="26"/>
            <local:Person Name="DebugLZQ2" Age="26"/>
        </local:PersonList>
    </Window.Resources>
<ListBox ItemsSource="{StaticResource personList}" DisplayMemberPath="Name"/>
当然,List<int>、List<string>。。。。相同。
运行如下:
附:MainWindow.xaml,MainWindow.xaml.cs


<Window x:Class="CreatingCustomTypeInXaml.MainWindow"
        xmlns="http://schemas.microsoft.com/winfx/2006/xaml/presentation"
        xmlns:x="http://schemas.microsoft.com/winfx/2006/xaml"
        xmlns:local="clr-namespace:CreatingCustomTypeInXaml"
        Title="MainWindow" Height="350" Width="525">
    <Window.Resources>
        <local:PersonList x:Key="personList">
            <local:Person Name="DebugLZQ1" Age="26"/>
            <local:Person Name="DebugLZQ2" Age="26"/>
        </local:PersonList>
    </Window.Resources>
    <StackPanel>
        <Grid>
            <Button  HorizontalAlignment="Left" Margin="129,82,0,0" VerticalAlignment="Top" Width="258" Height="107">
                <local:Book Name="WPF tutorial" Author="DebugLZQ" YearPublished="2013" Price="29.99"/>
            </Button>
        </Grid>
        <ListBox ItemsSource="{StaticResource personList}" DisplayMemberPath="Name"/>
        <ListBox  DisplayMemberPath="Age">
            <ListBox.ItemsSource>
                <local:PersonList>
                    <local:Person Name="DebugLZQ1" Age="26"/>
                    <local:Person Name="DebugLZQ2" Age="26"/>
                </local:PersonList>
            </ListBox.ItemsSource>
        </ListBox>
    </StackPanel>
</Window>
using System;
using System.Collections.Generic;
using System.Linq;
using System.Text;
using System.Threading.Tasks;
using System.Windows;
using System.Windows.Controls;
using System.Windows.Data;
using System.Windows.Documents;
using System.Windows.Input;
using System.Windows.Media;
using System.Windows.Media.Imaging;
using System.Windows.Navigation;
using System.Windows.Shapes;

namespace CreatingCustomTypeInXaml
{
    /// <summary>
    /// Interaction logic for MainWindow.xaml
    /// </summary>
    public partial class MainWindow : Window
    {
        public MainWindow()
        {
            InitializeComponent();
        }
    }

    public class Person
    {
        public string Name { get; set; }
        public int Age { get; set; }
    }

    public class PersonList : List<Person>
    {

    }

}
5.通过XAML构建---Static对象
MainWindowTextSettings.cs如下:
using System.Windows.Media;

namespace StaticCliassInXamlDemo
{
    public class MainWindowTextSettings
    {
        public static double FontSize = 64;

        public static string StringValue = "Customer customized value";

        public static Brush ForeGround = new SolidColorBrush(Colors.Red);
    }
}
MainWindow.xaml如下:
<Window x:Class="StaticCliassInXamlDemo.MainWindow"
        xmlns="http://schemas.microsoft.com/winfx/2006/xaml/presentation"
        xmlns:x="http://schemas.microsoft.com/winfx/2006/xaml"
        xmlns:oem="clr-namespace:StaticCliassInXamlDemo"
        Title="MainWindow" Height="350" Width="525">
    <Grid>
        <TextBlock Text="{x:Static oem:MainWindowTextSettings.StringValue}"
                    FontSize="{x:Static oem:MainWindowTextSettings.FontSize}"
                    Foreground="{x:Static oem:MainWindowTextSettings.ForeGround}"
                   TextTrimming="CharacterEllipsis"/>
    </Grid>
</Window>
效果如下: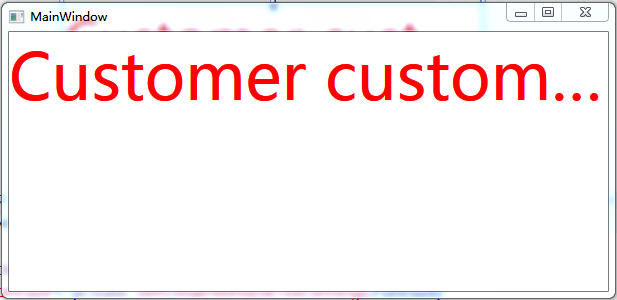
希望对你有帮助~

 浙公网安备 33010602011771号