黑客松
Claude Code

张小白都试过了,而VSCode的插件Cline张小白在以前也尝试过:

所以这次就用 VSCode + Cline + GLM Coding Plan这个组合吧!
二、环境安装与配置
参考资料:
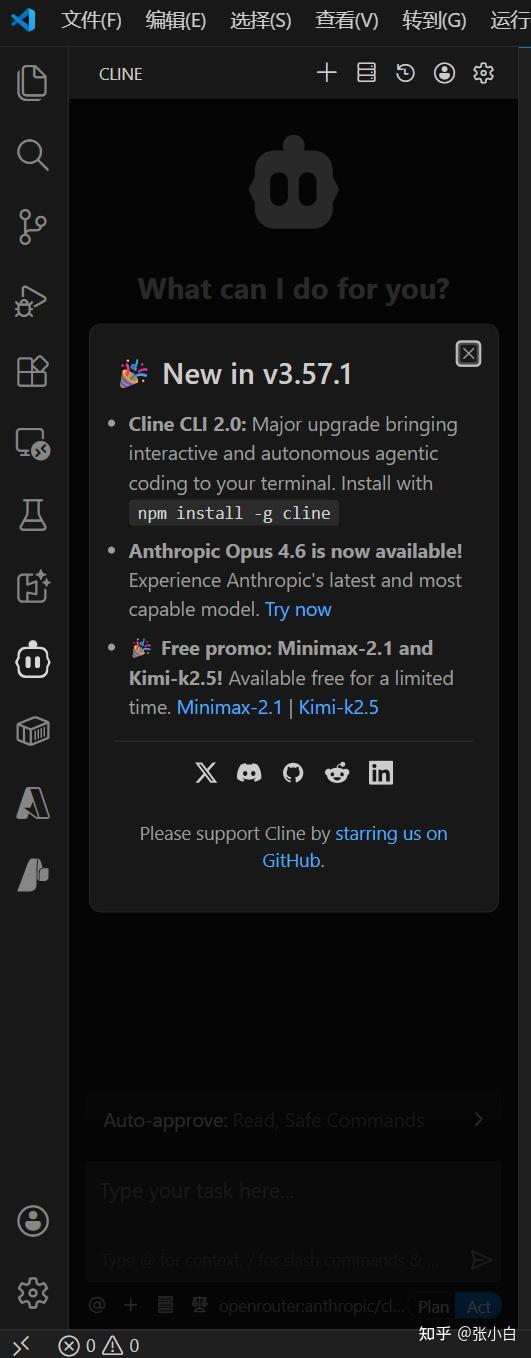
1、检查Cline插件安装情况
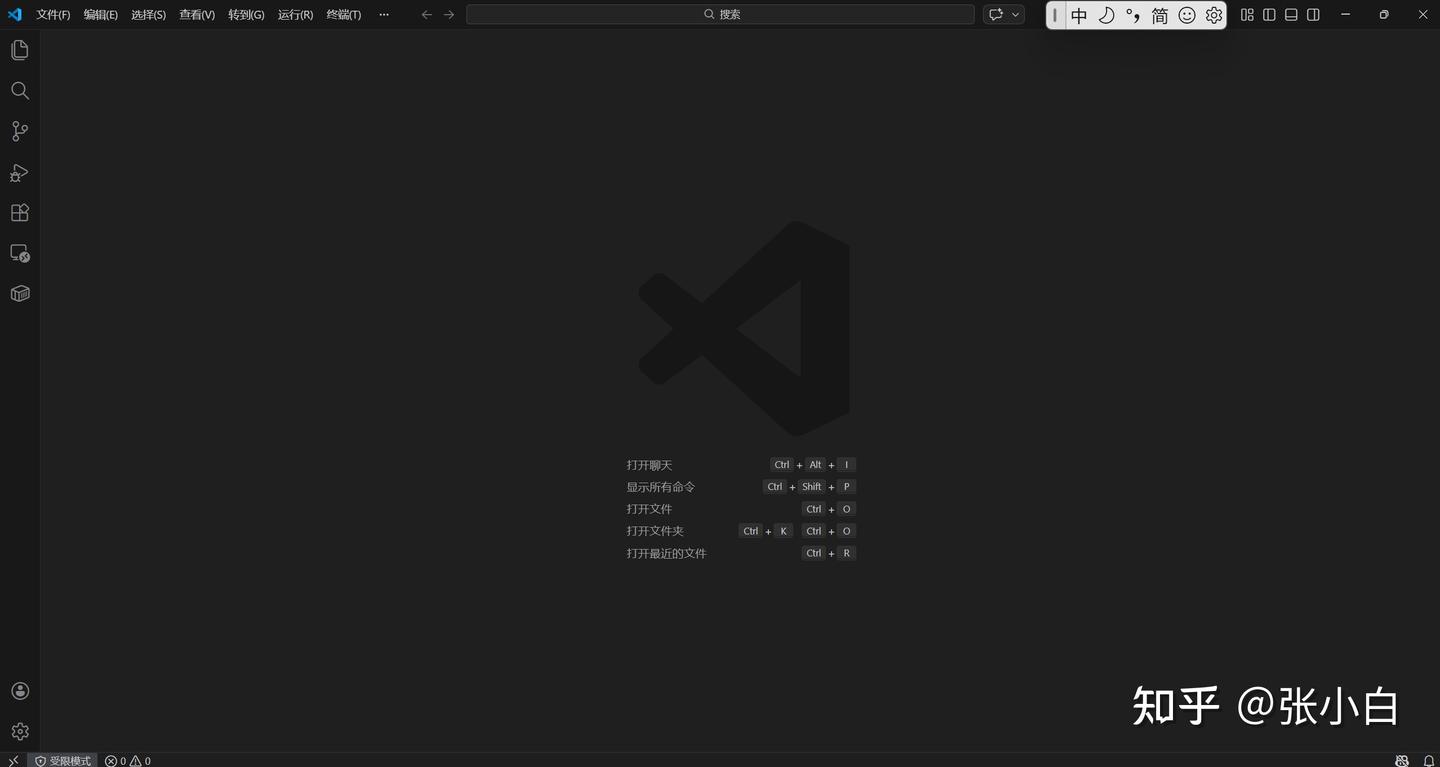
打开VSCode:
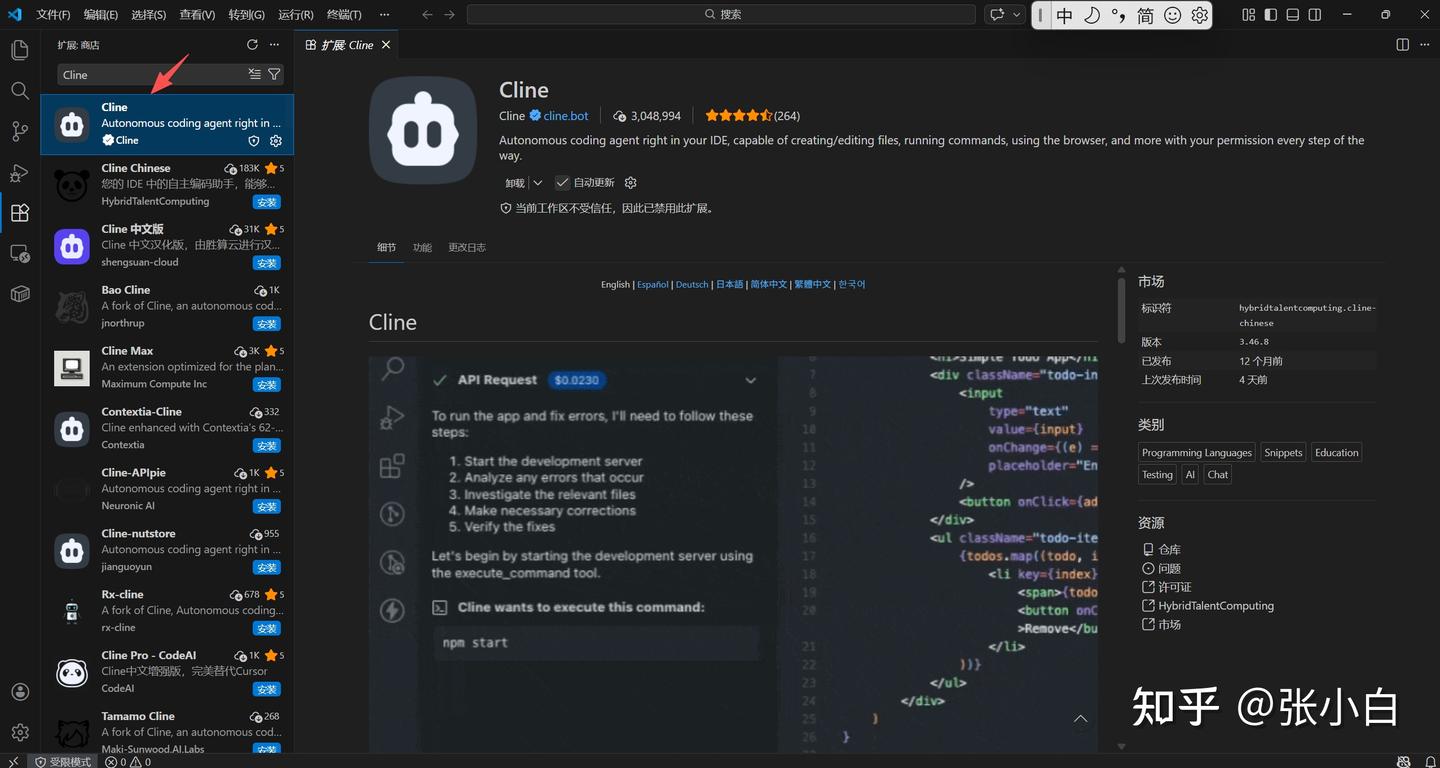
点击左边的扩展按钮,搜索Cline:
从左下角可以看到,现在是【受限模式】,点击:
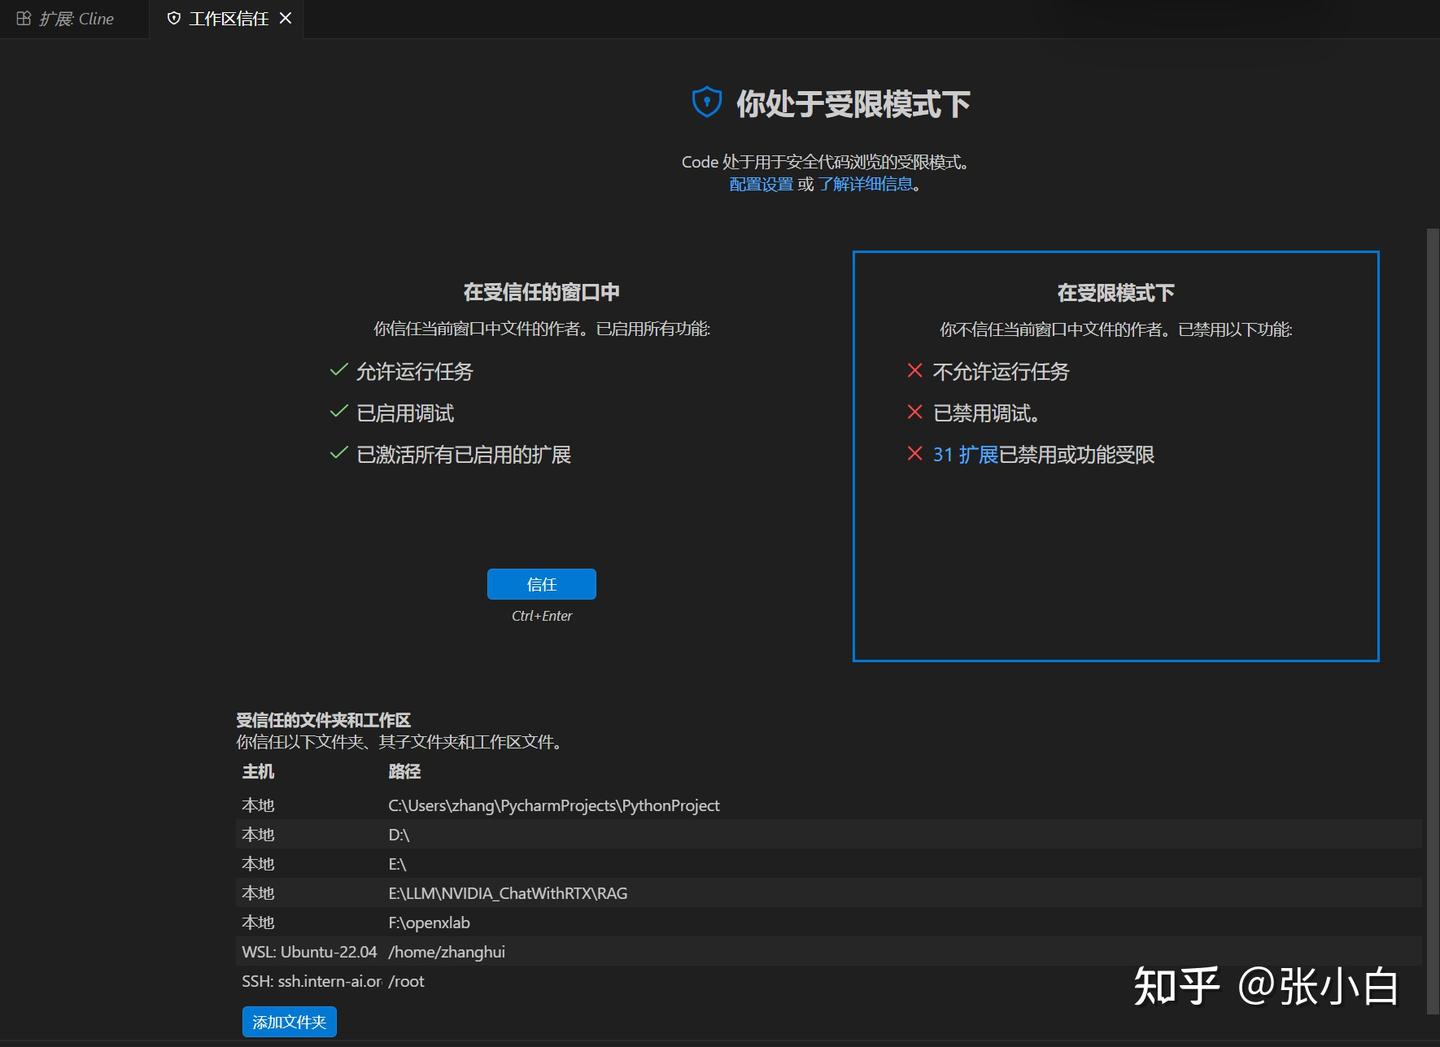
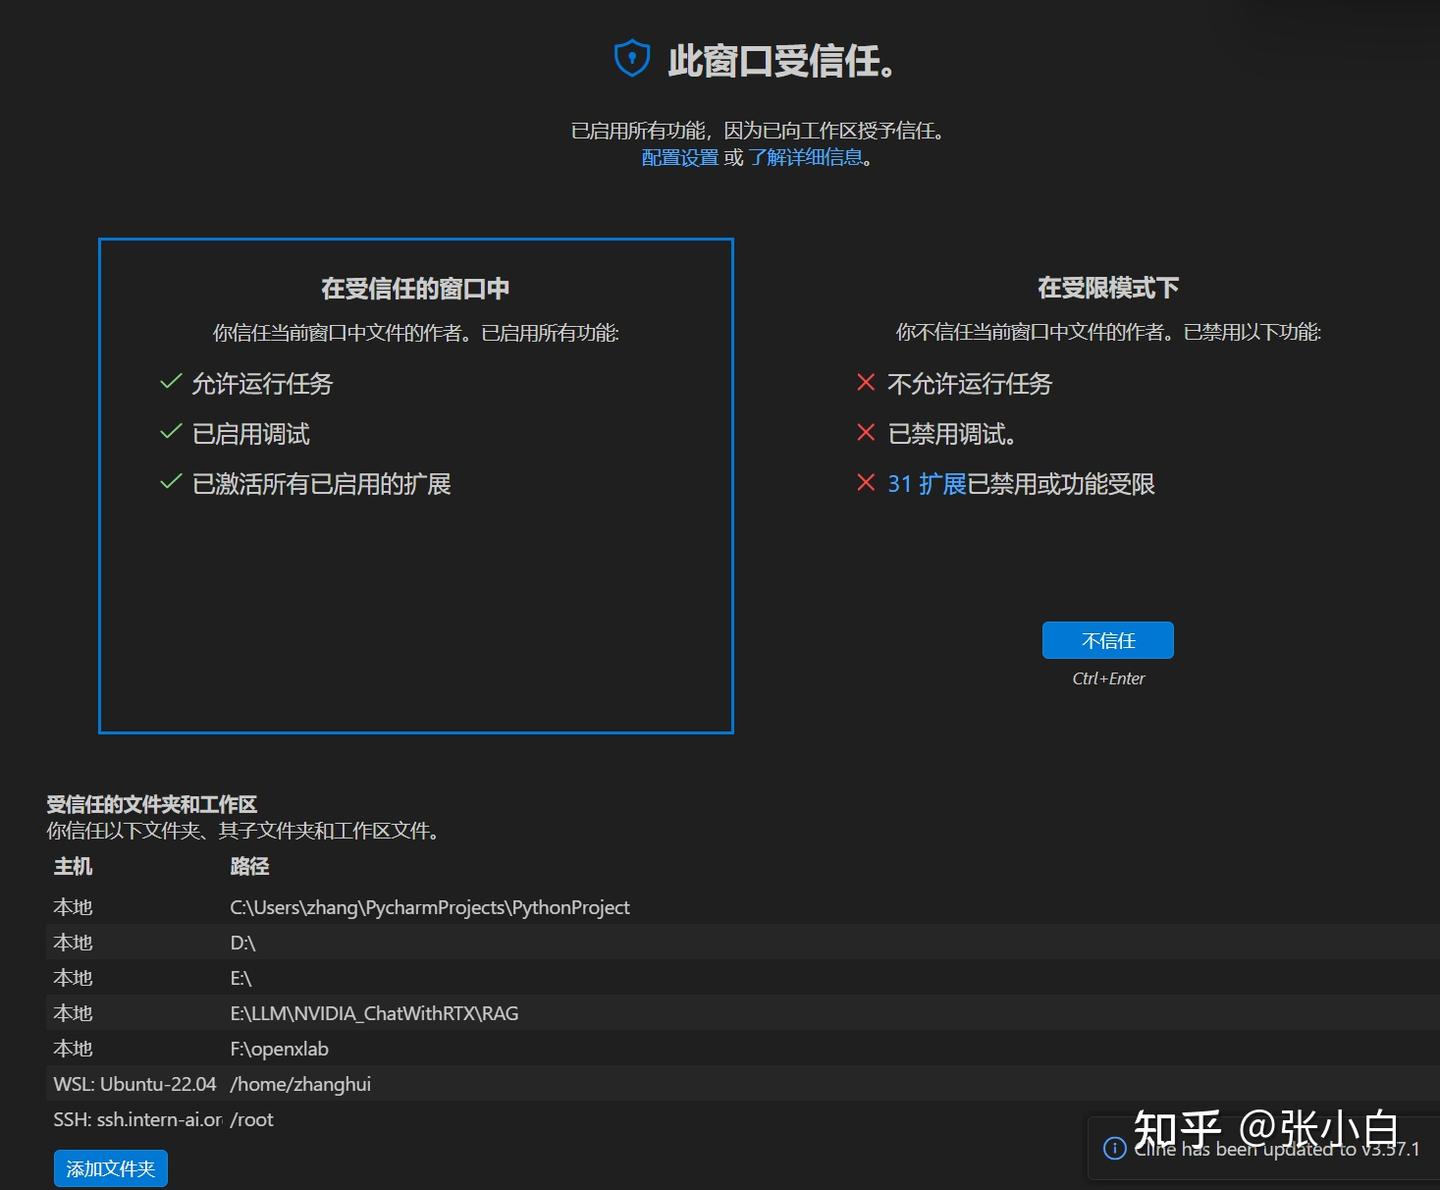
点击“信任”吧!
2、生成智谱API-KEY
打开
生成智谱API Key:
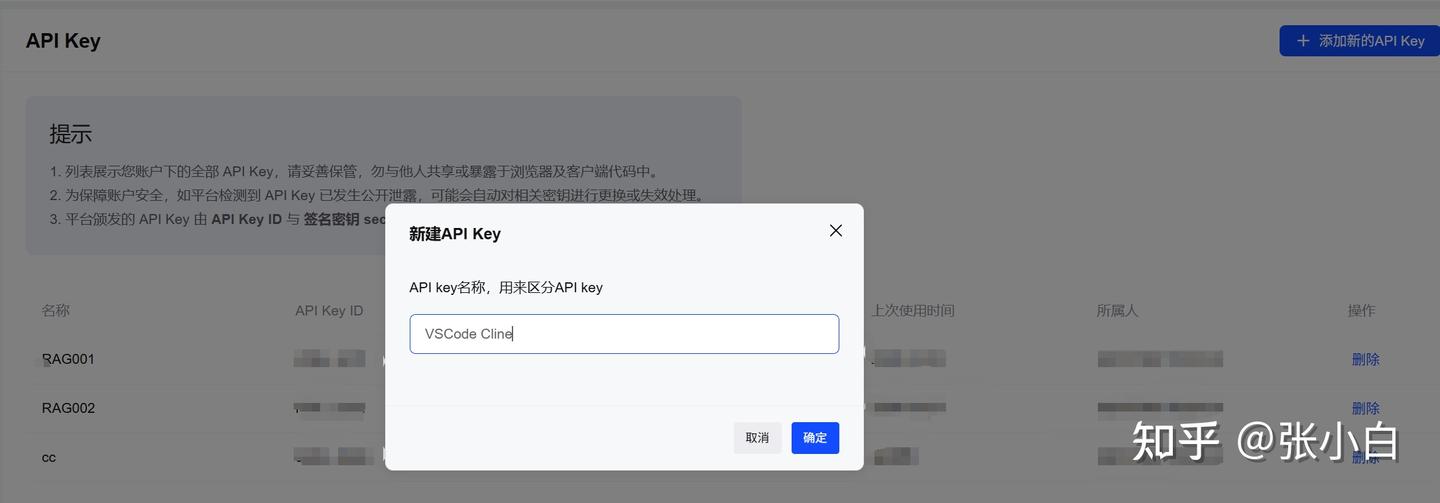
复制该API Key。
3、配置Cline中的GLM Coding Plan
回到主页面,点击左边的“猪头”:
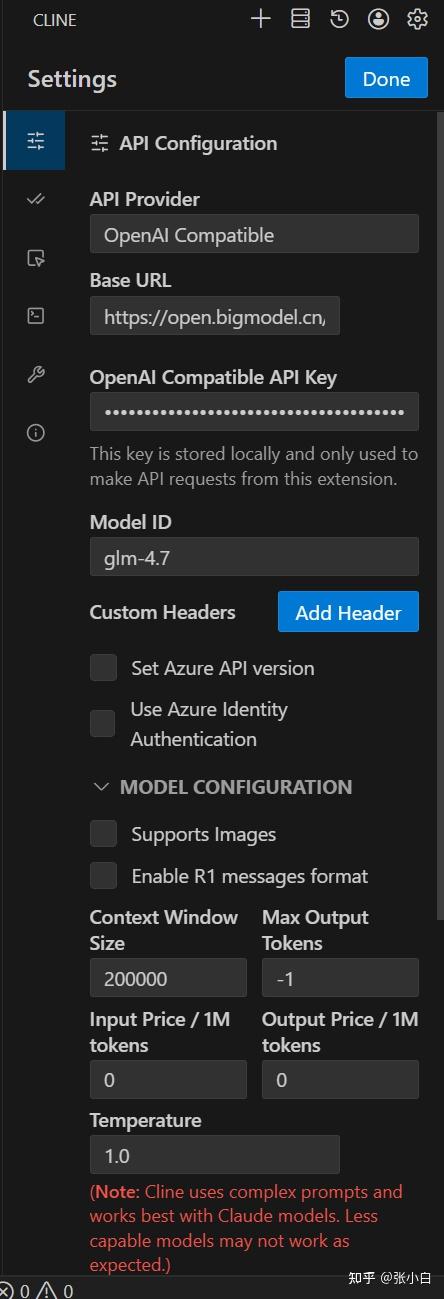
点击上图右上角的配置按钮。
在 API Configuration中,按以下方式选择:
API Provider:
OpenAI CompatibleBase URL:
https://open.bigmodel.cn/api/coding/paas/v4API Key:
贴入刚才的API Key选择自定义模型:
glm-4.7取消 Support Images
调整 Context Window Size 为 200000
temperature 改为1.0
4、验证配置
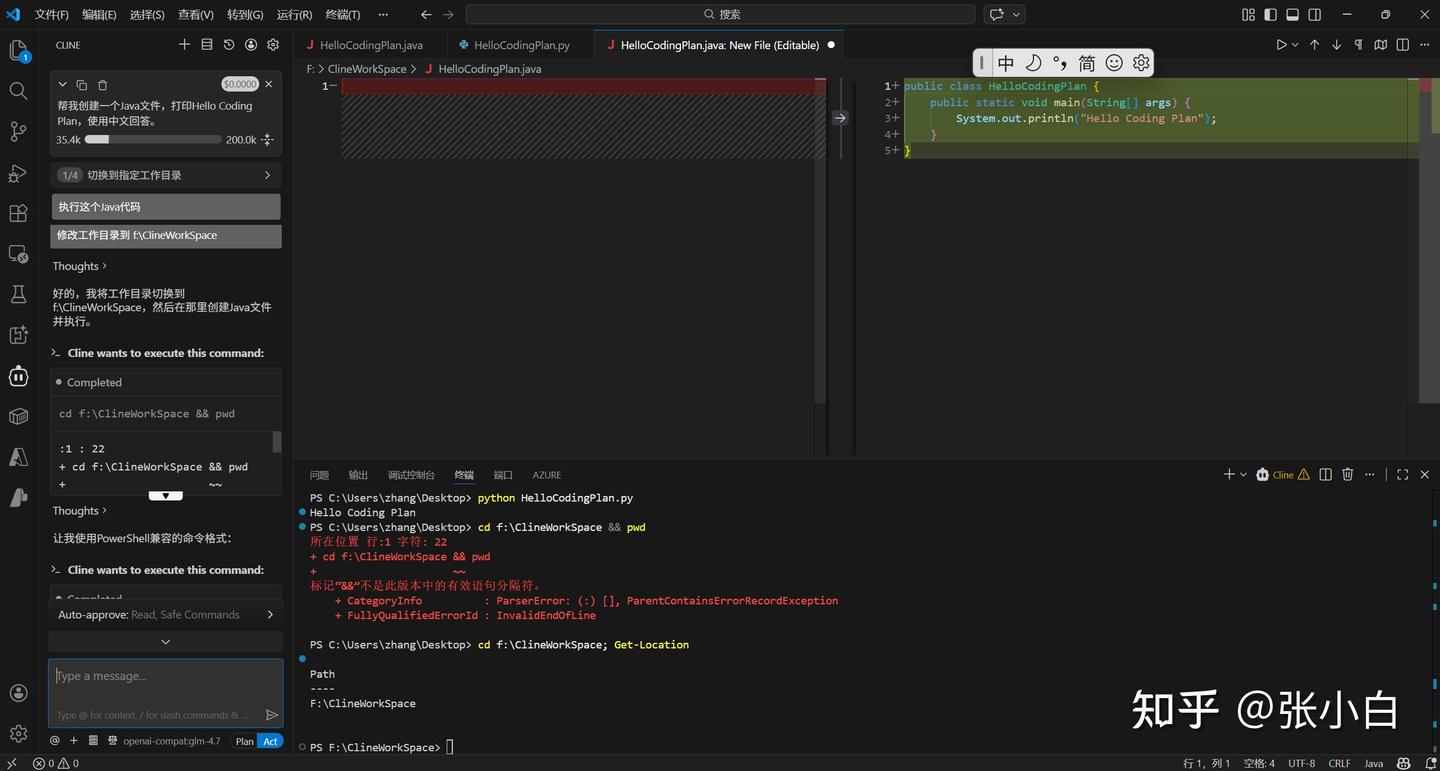
帮我创建一个Java文件,打印Hello Coding Plan,使用中文回答。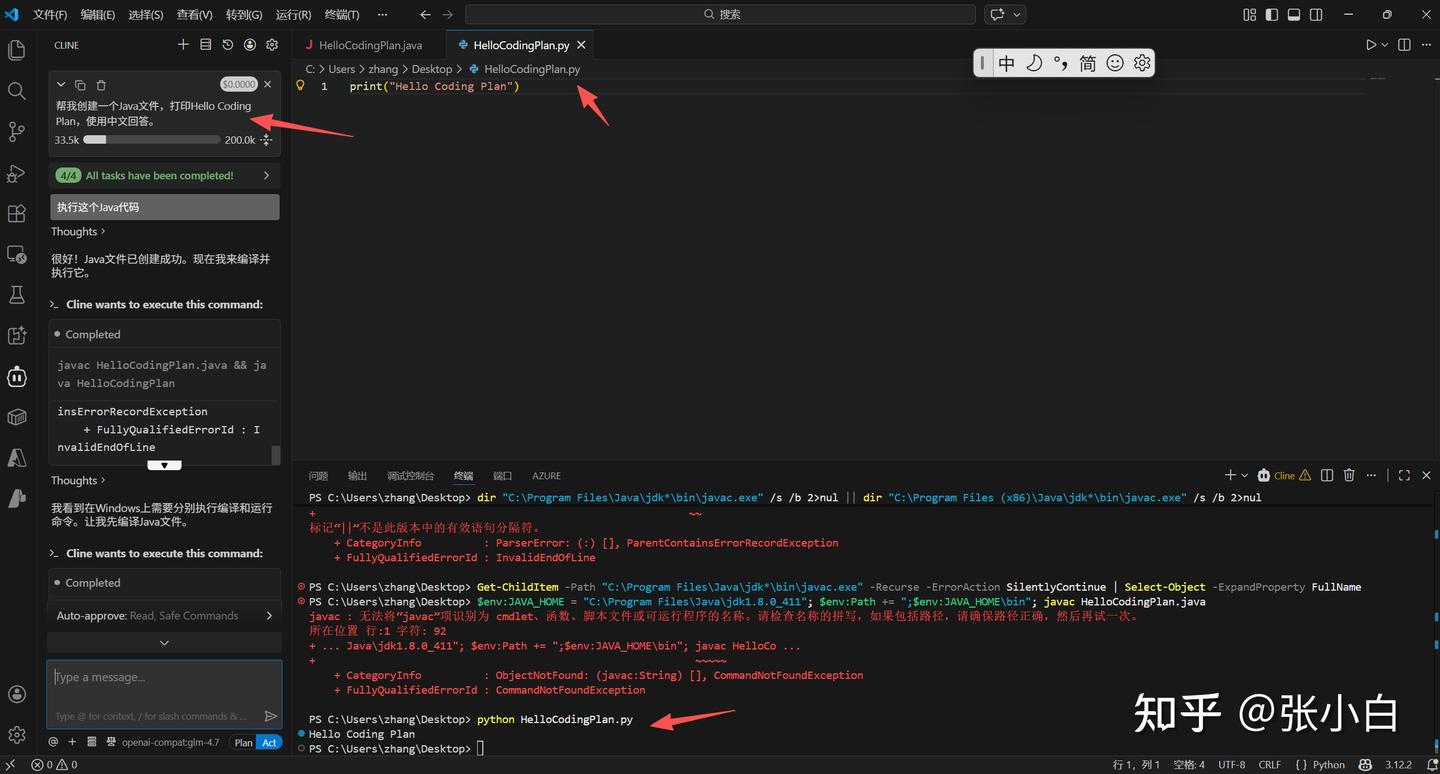
它创建了一个Java代码,然后编译的时候没有找到javac编译程序,所以就写了个Python代码凑数。
另外,工作区好像有点问题,代码写到 Desktop目录下了
还是把目录改成 f:\ClineWorkSpace 下吧!
于是我告诉Cline 编译器javac的位置:
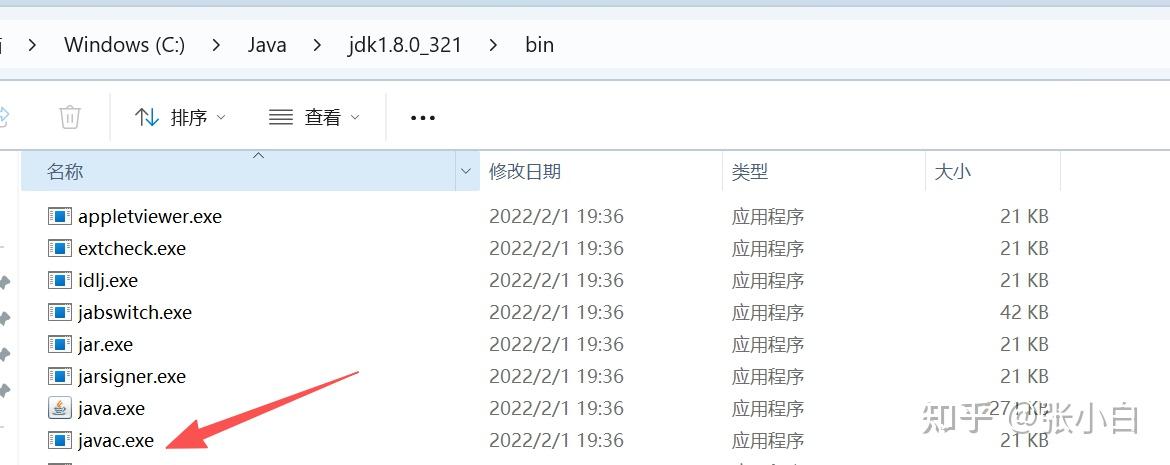
javac 在 C:\Java\jdk1.8.0_321\bin 目录下,请重新执行试试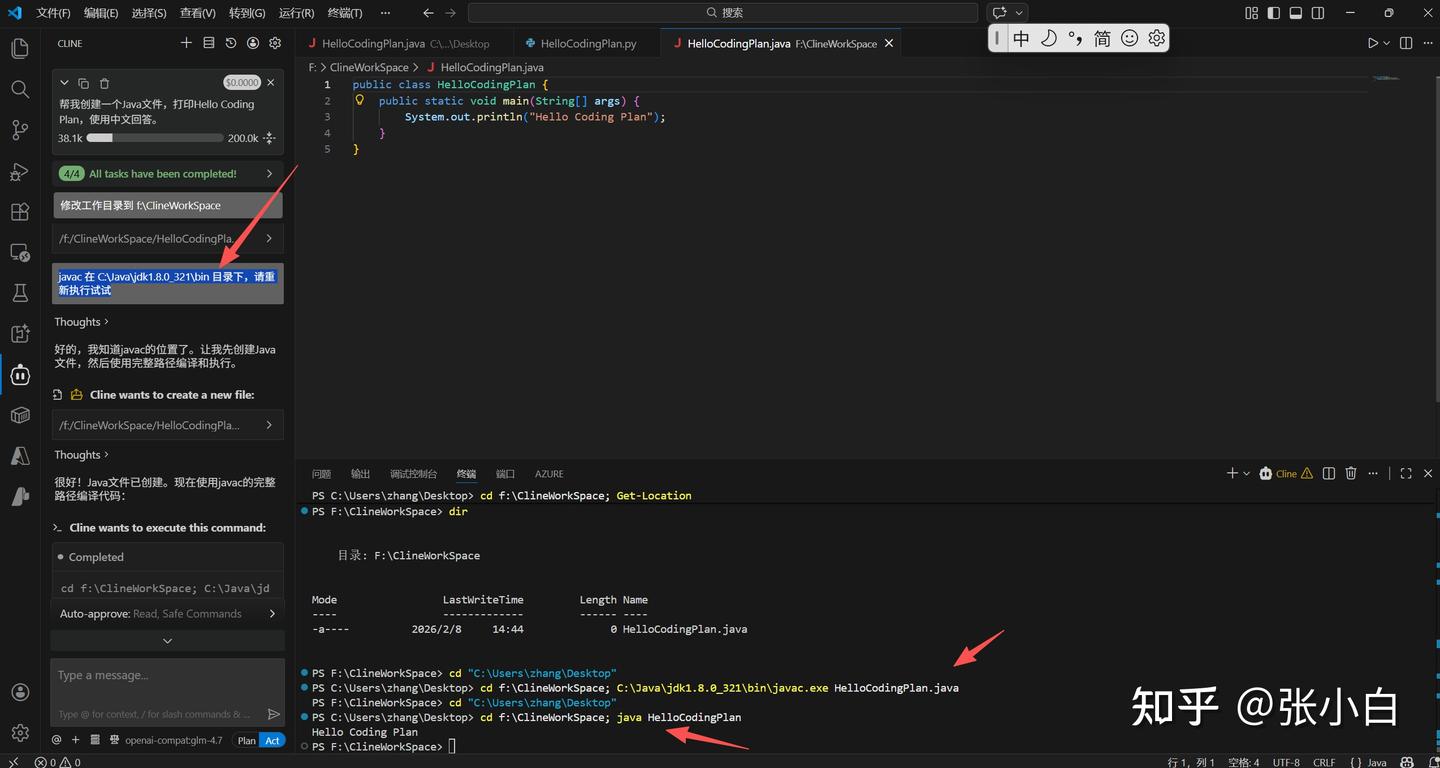
看来基本上应该是可行的。
三、使用VSCode+cline+GLM CodingPlan开发APP范例
Hello world体现不出AI的编程水平,我们换个系统试试。
1、需求
帮我做一个桌面app,查询企业的对外投资图。
具体的方式如下:
(1)打开风鸟网站(riskbird.com),在打开的页面点击[登录]按钮,在弹出的扫码登录窗口等待用户扫码登录,等用户登陆后,点击按钮”我已登录“。
(2)用户登陆后,打开URL https://riskbird.com/search/company?keyword={企业名称}的页面,这个页面会返回满足企业名称的列表,在这个返回页面中查找满足这个名称的链接类似 https://riskbird.com/ent/{企业名称}.html?entid={entid},显示这个entid。
(3)打开URL https://riskbird.com/atlas/{entid).html?entName={企业名称}&dataType=entlnvest的页面,这个页面会返回该企业的对外投资情况。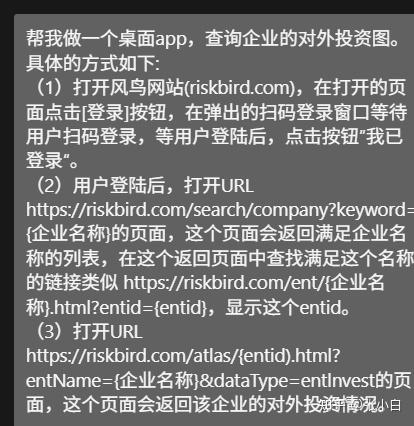
2、技术栈选型
cline让我挑一下选什么技术栈:
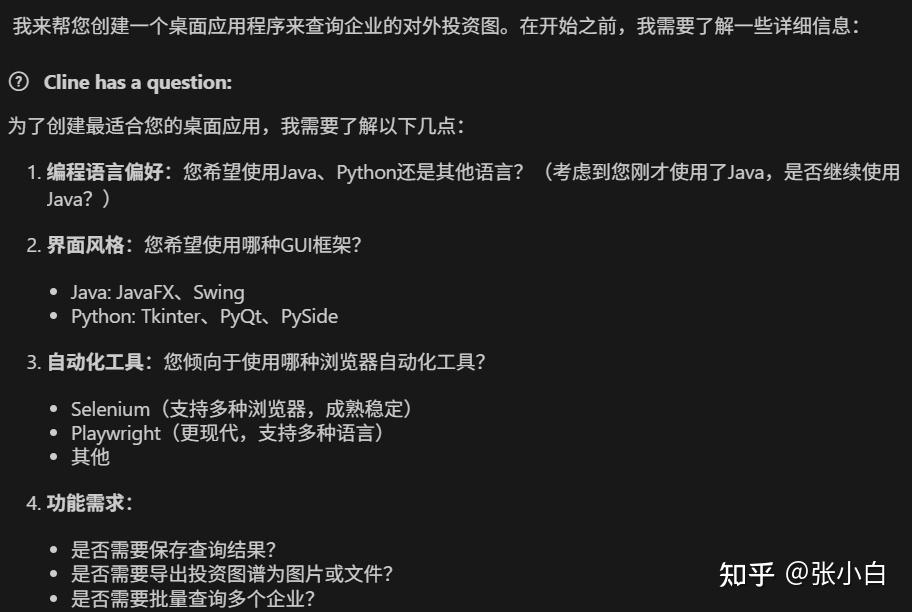
前端可以使用Node.js , 后端使用Java,自动化工具使用Selenium,需要保存查询结果,最好把最后的结果保存成文件。
3、AI自己完成编码开发
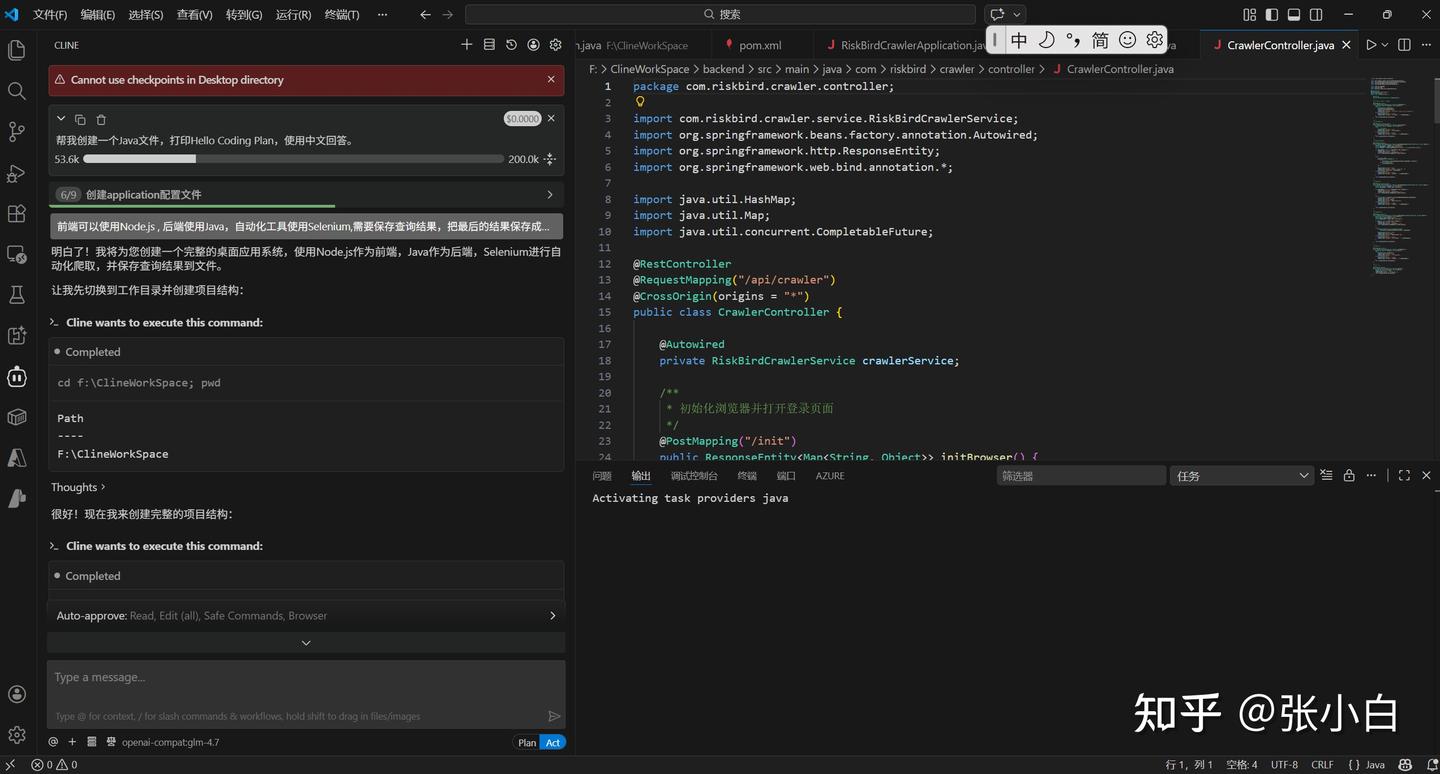
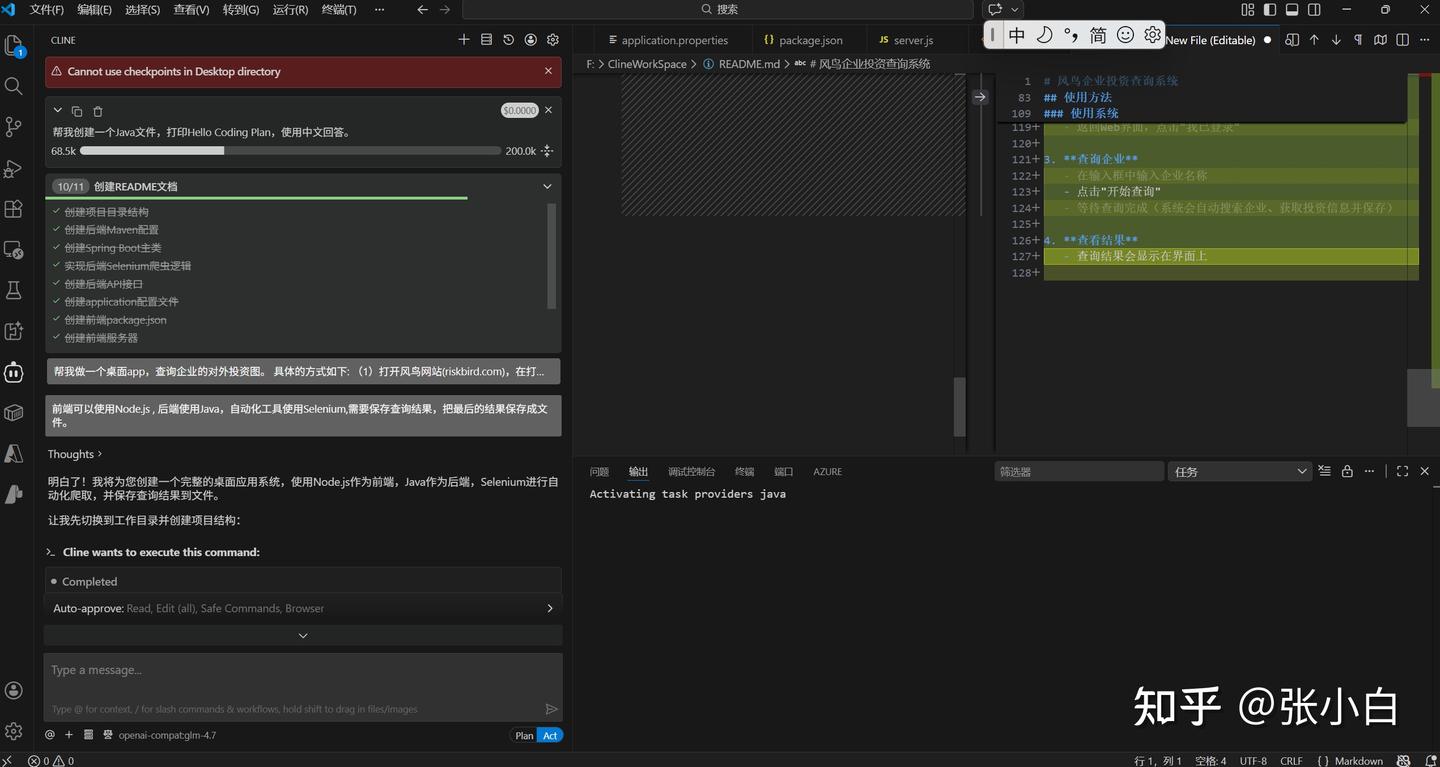
这个时候你基本上就是泡杯茶在旁边看着(短剧)
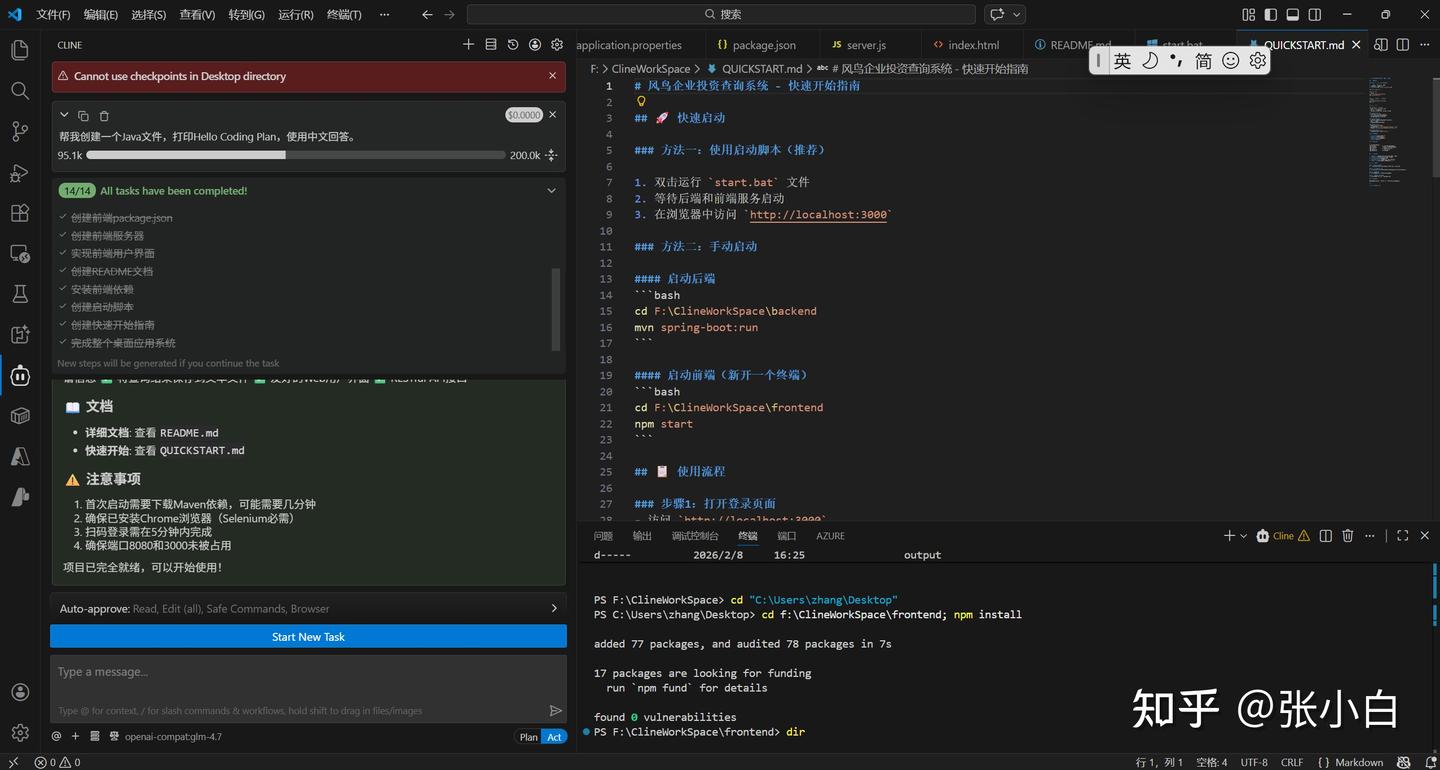
不一会儿,已经开发完毕了。
4、启动服务
启动前后台服务:
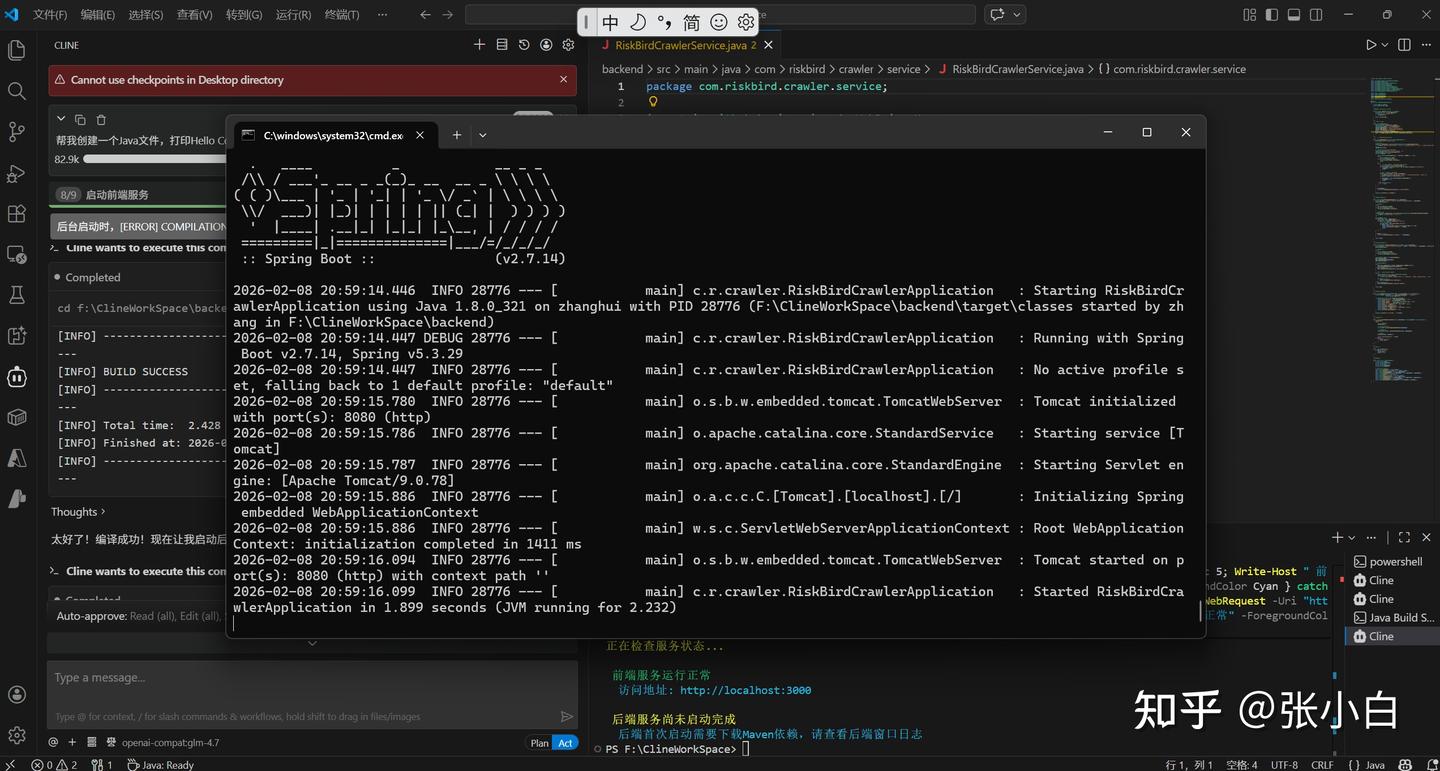
5、调试
下面又到了调试时间。
所谓的调试,就是你在启动的程序上输入内容,查看结果,把报错信息贴到对话框里面,等AI解决。
结果有两种,它解决了这个报错,然后你给它找到另一个报错,周而复始。。。
比如这次的错误有:
使用Selenium技术会自动下载ChromeDriver,而这个Driver的版本,跟Chrome的版本,以及WebSocket的版本老是发生冲突,导致时常报错:
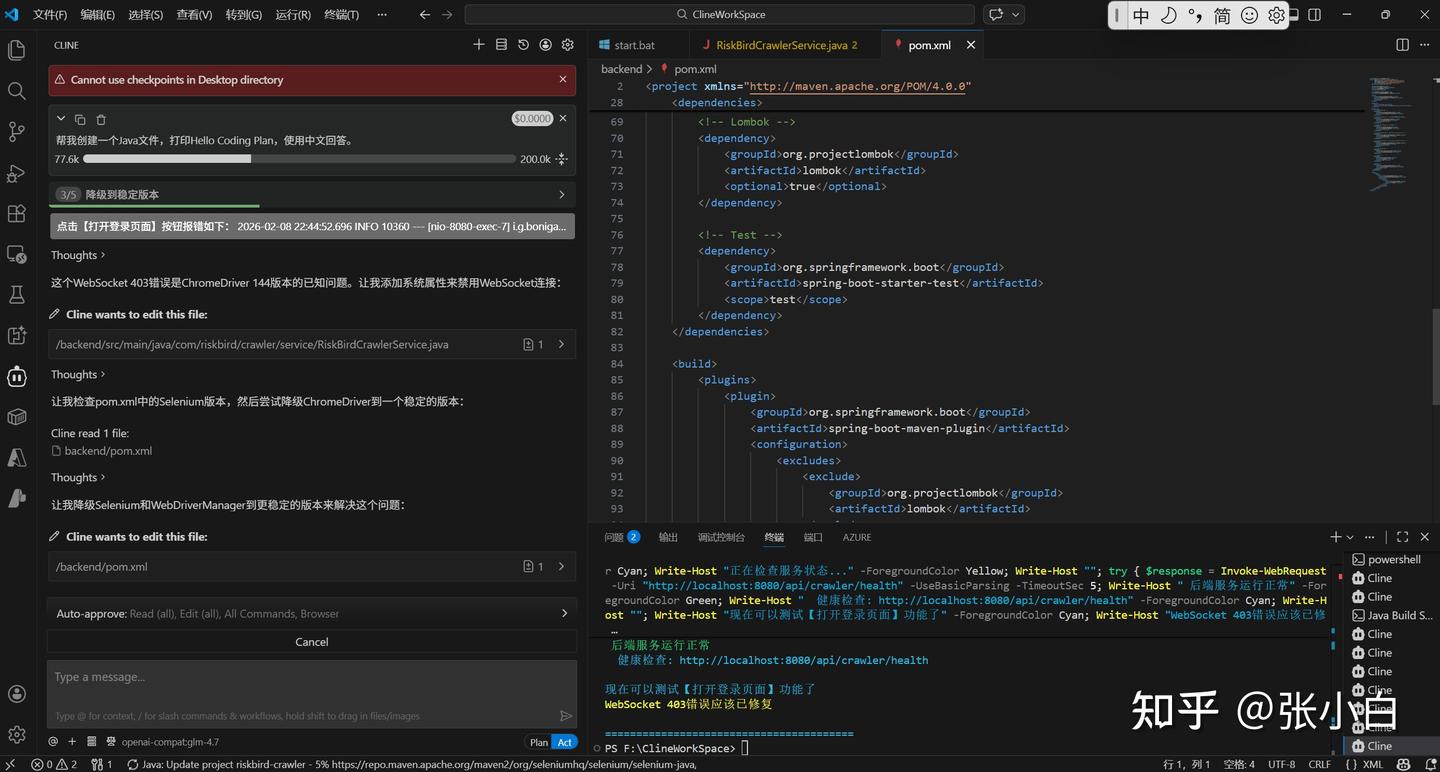
Cline+GLM4.7 Coding Plan来来回回改了多次也解决不了这个问题。
于是AI请求换框架:
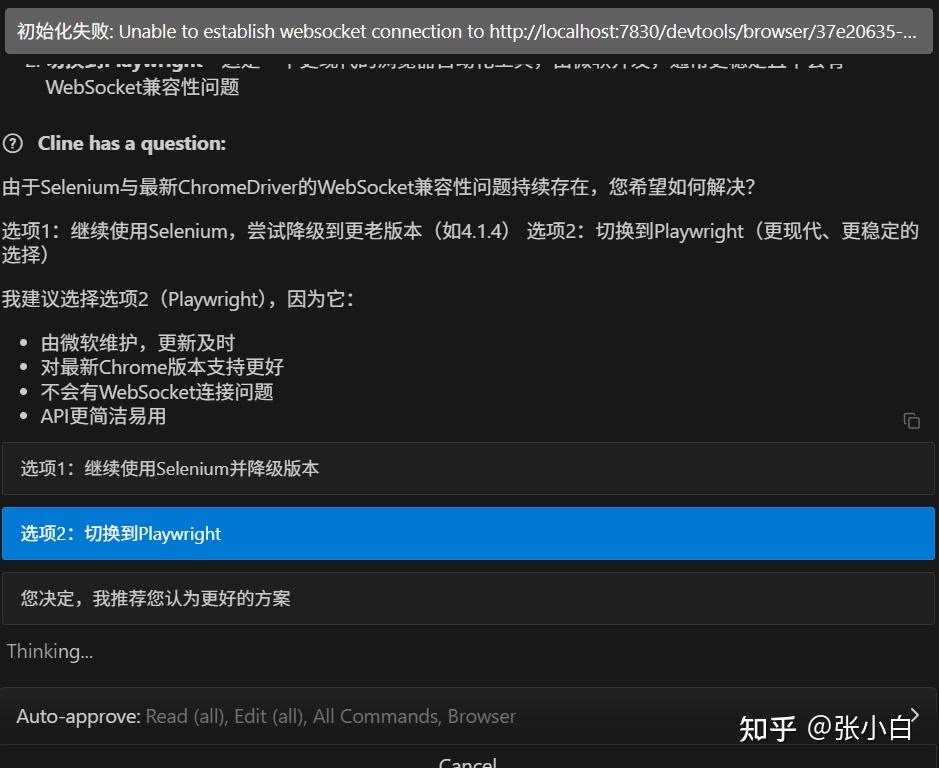
张小白果断同意。
然后,AI换了一套代码:
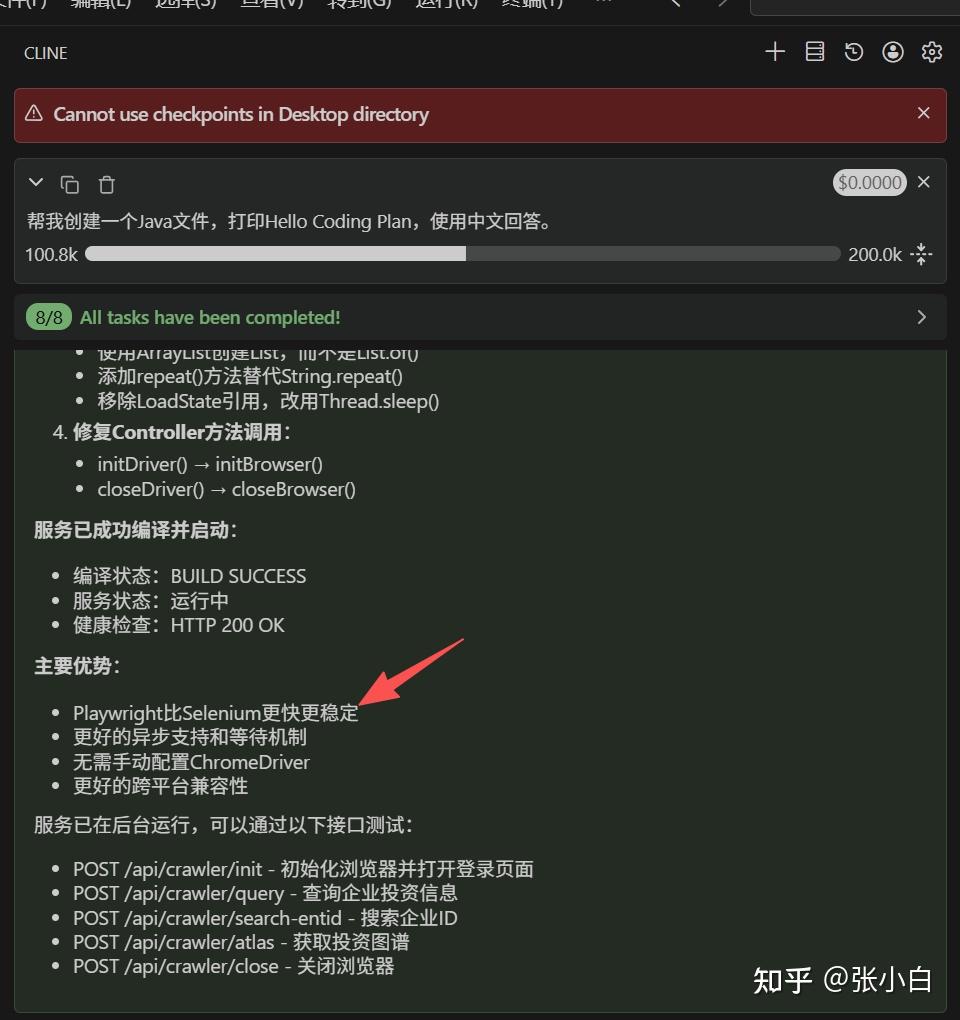
中间的过程就不再赘述了,跟OpenCode、Claude Code编程的方法差不多。
四、关于最近DataWhale的EasyVibe培训课
其实更多的编程方法可以参见:
Vibe Coding,就是通过对话来编程。
而Easy Vibe,就是Vibe Coding轻松入门。
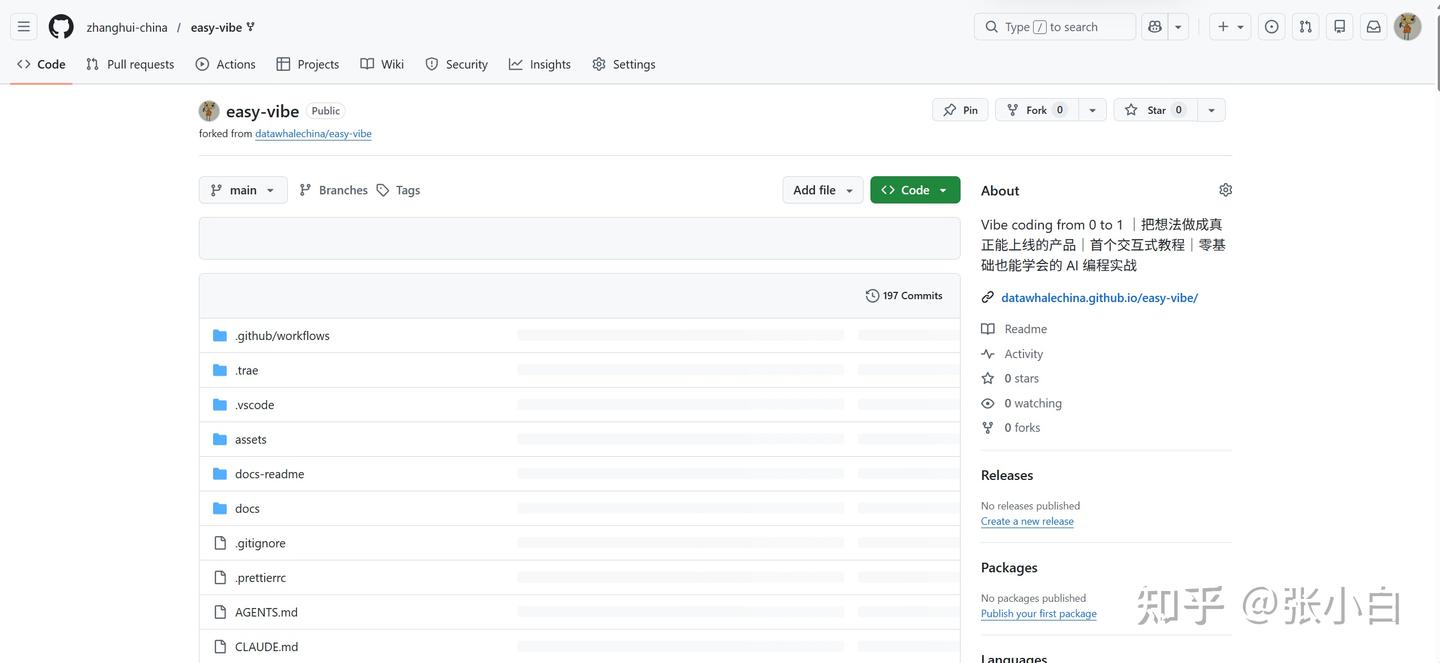
下面的代码库,请大家一键双连(fork,star)
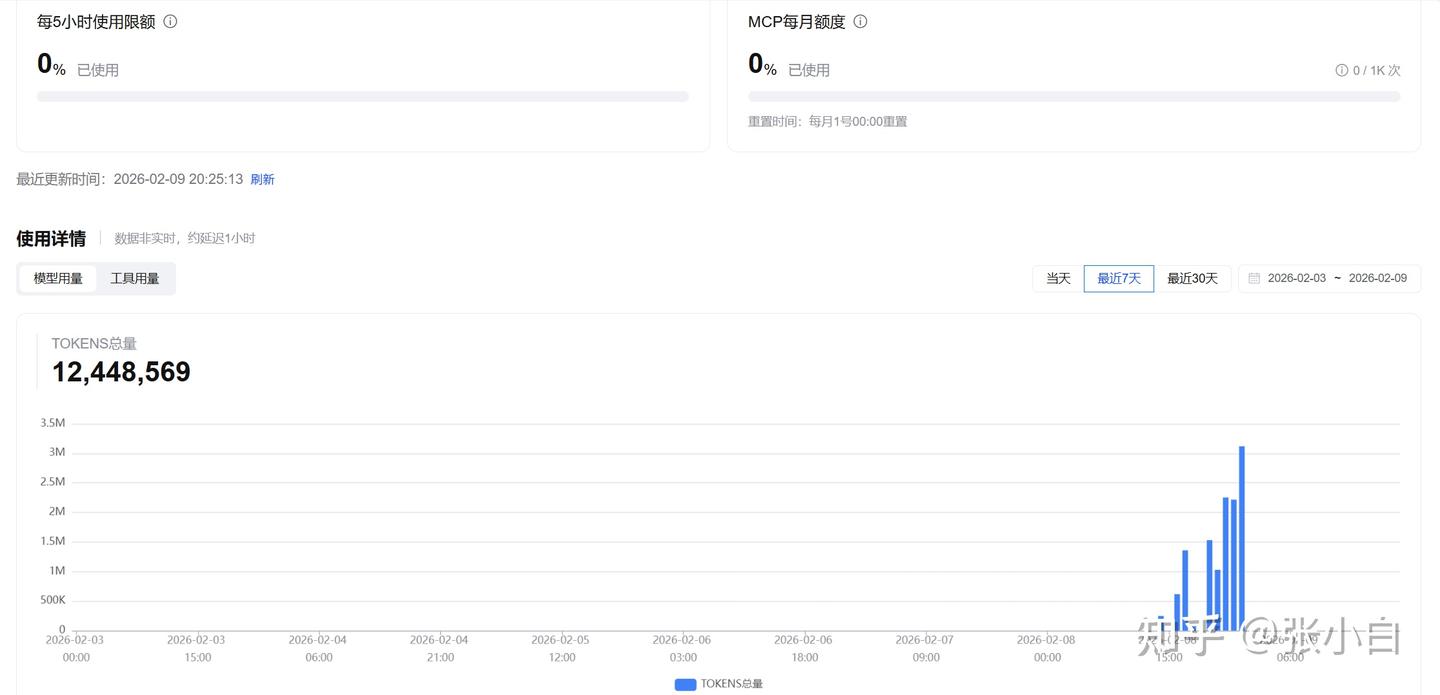
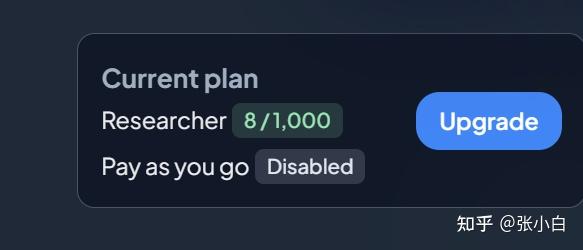
BTW,再看下GLM Coding Plan套餐的使用情况:
张小白先试一下这个技术方案。
一、在VSCode安装Cline插件
在VsCode 插件市场搜索,Cline
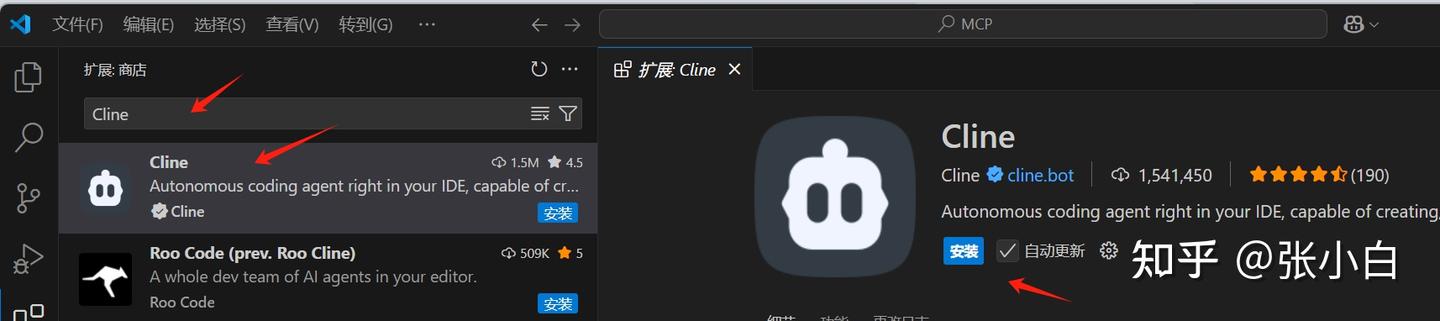
点击安装:
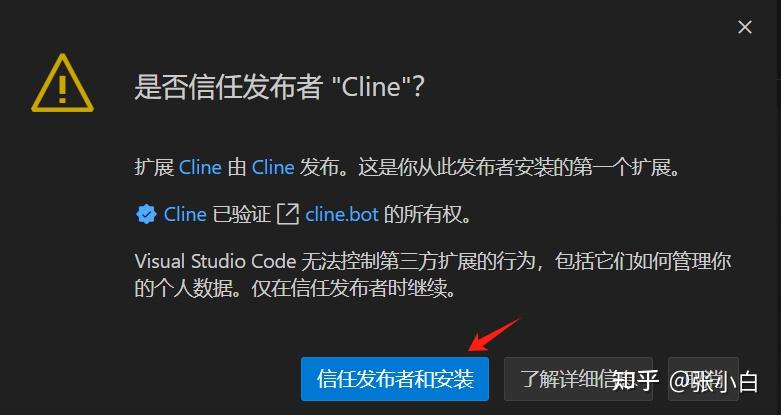
点击信任发布者和安装:

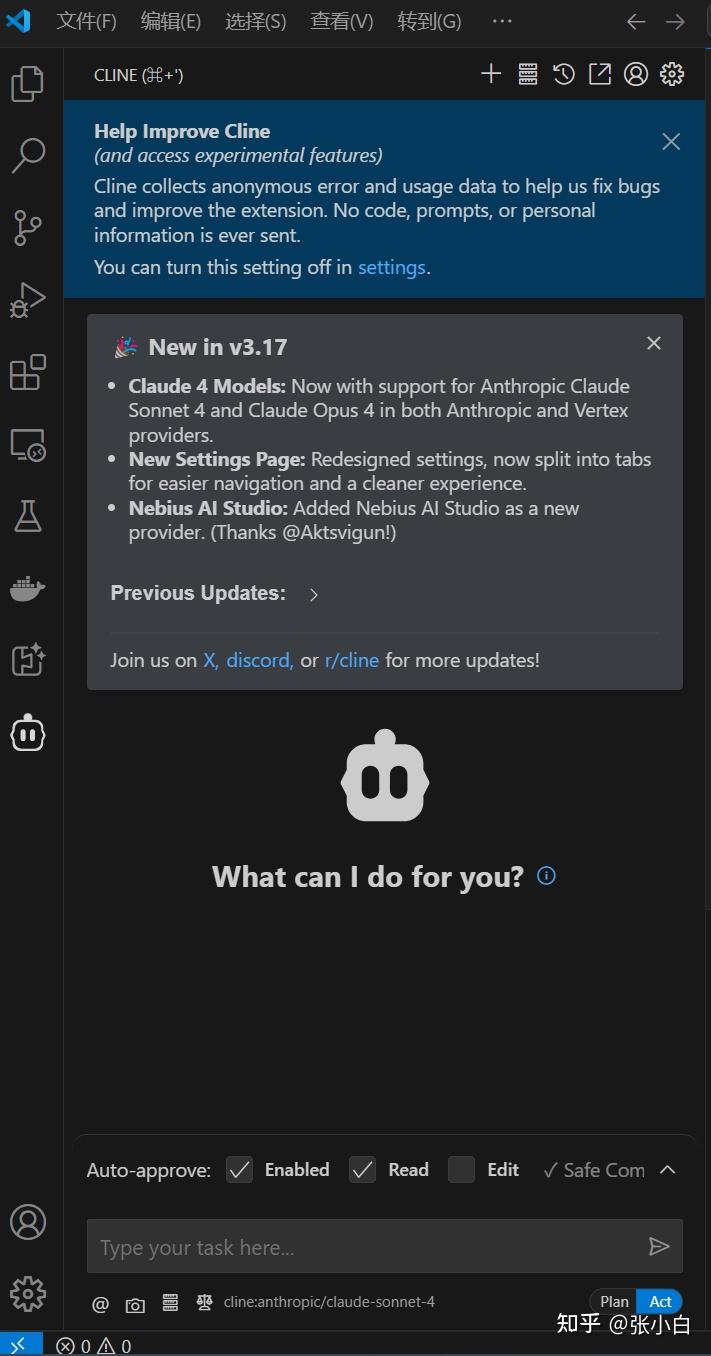
点击VSCode左边的Cline图标:

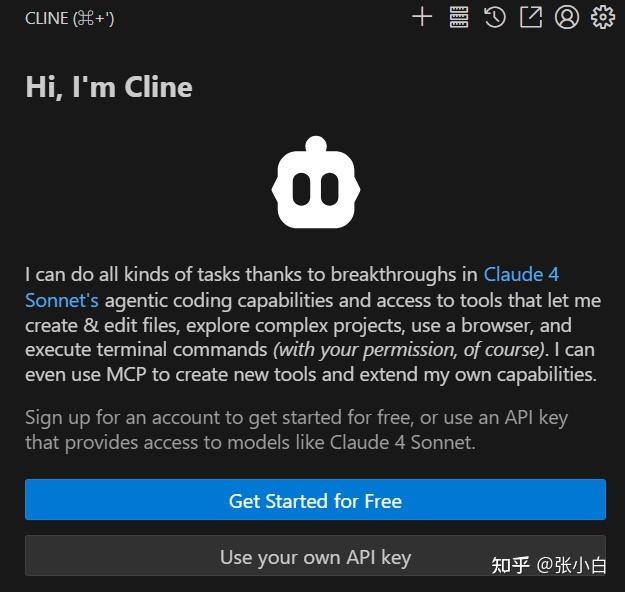
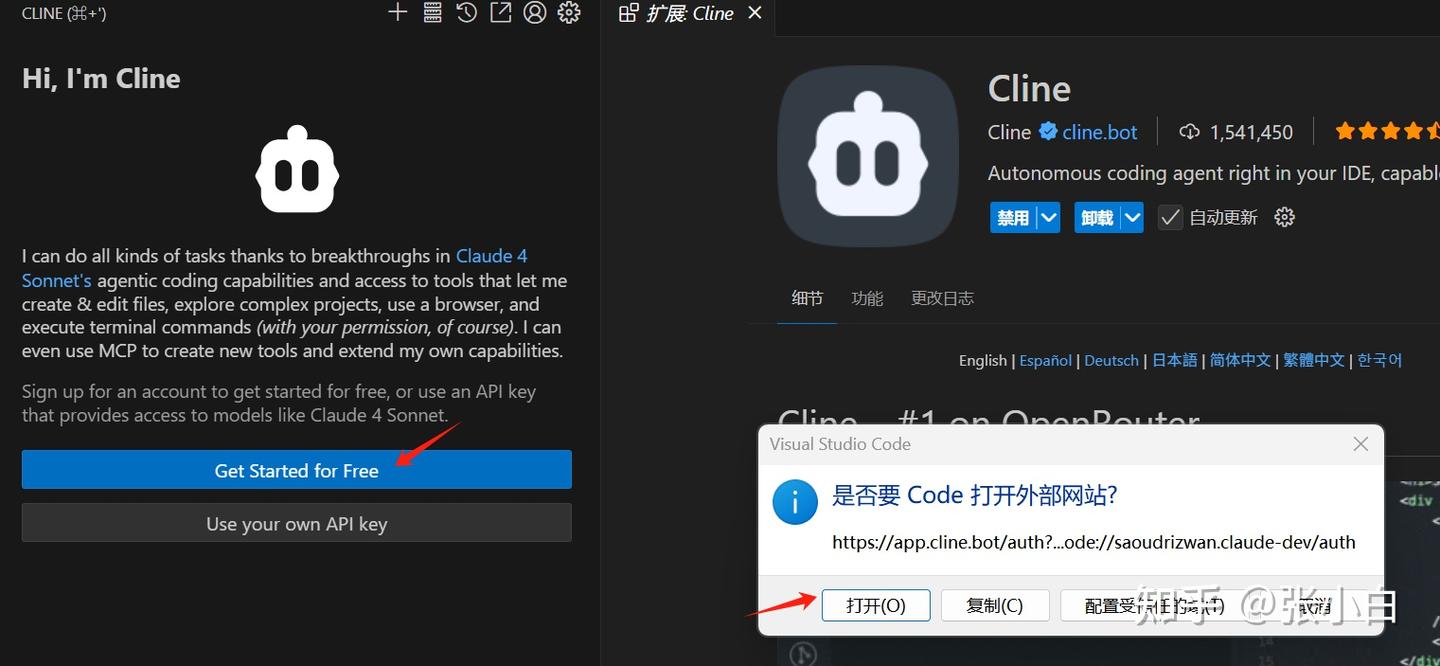
点击打开,会切换到Cline注册登录页面:
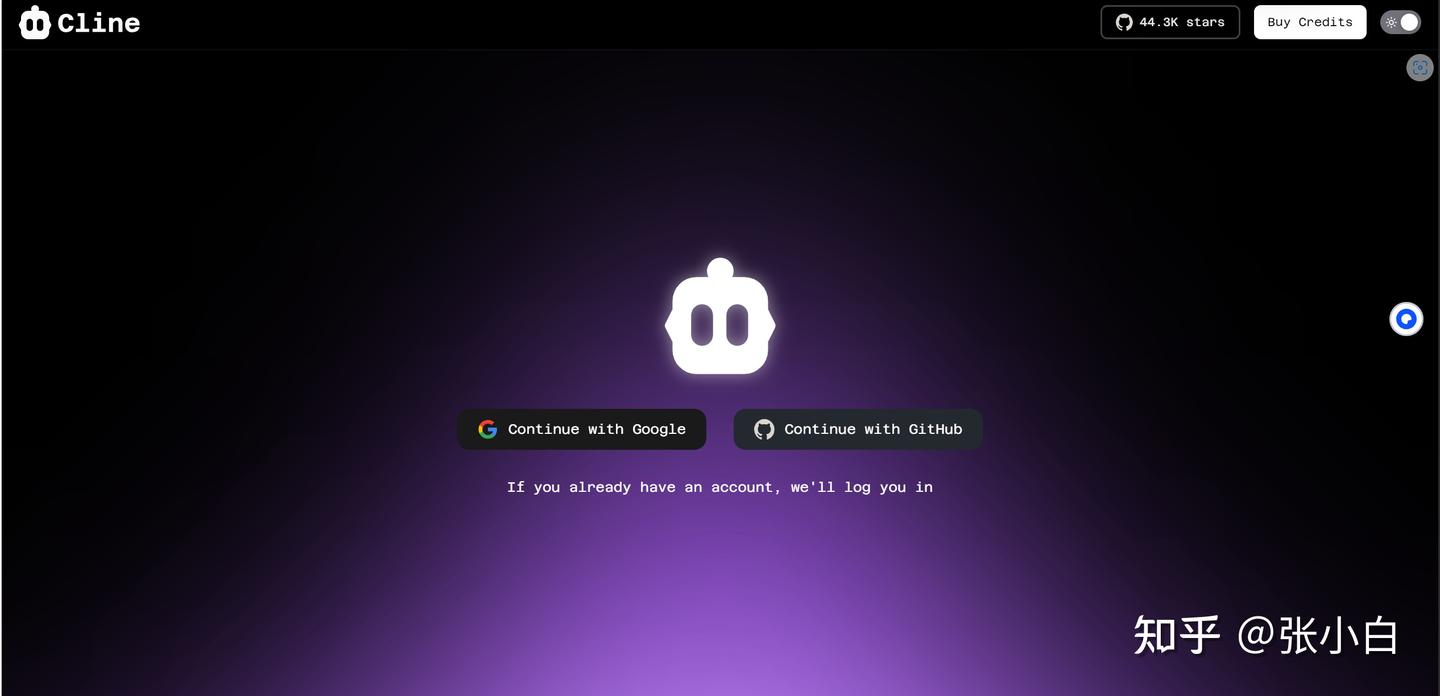
选择Github
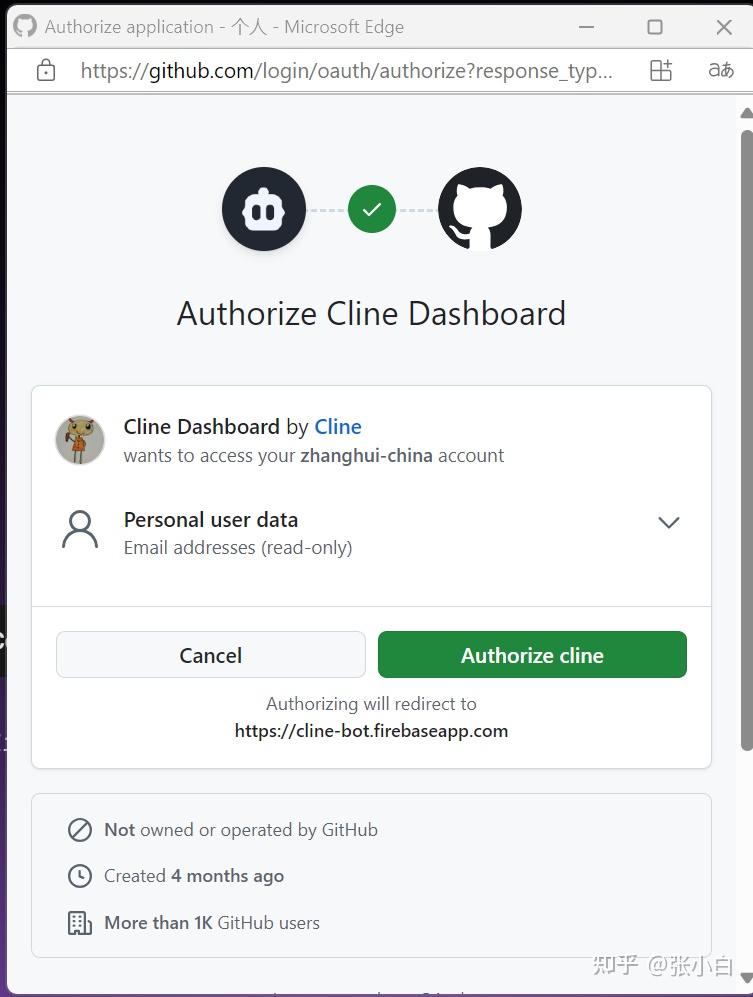
点击授权,经过来回跳转确认:
二、安装和配置MongDB
打开 https://www.mongodb.com/try/download/community
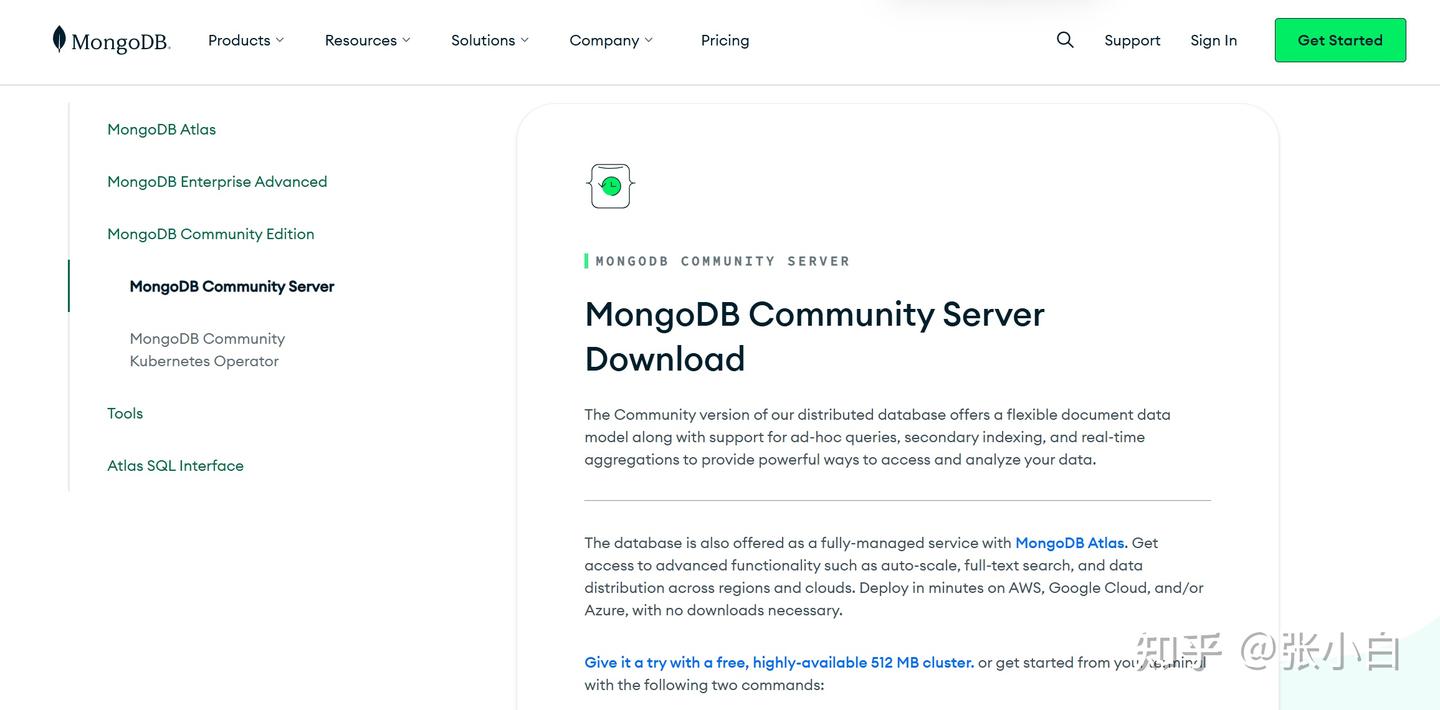
下载 MongoDB 的免费开源版本
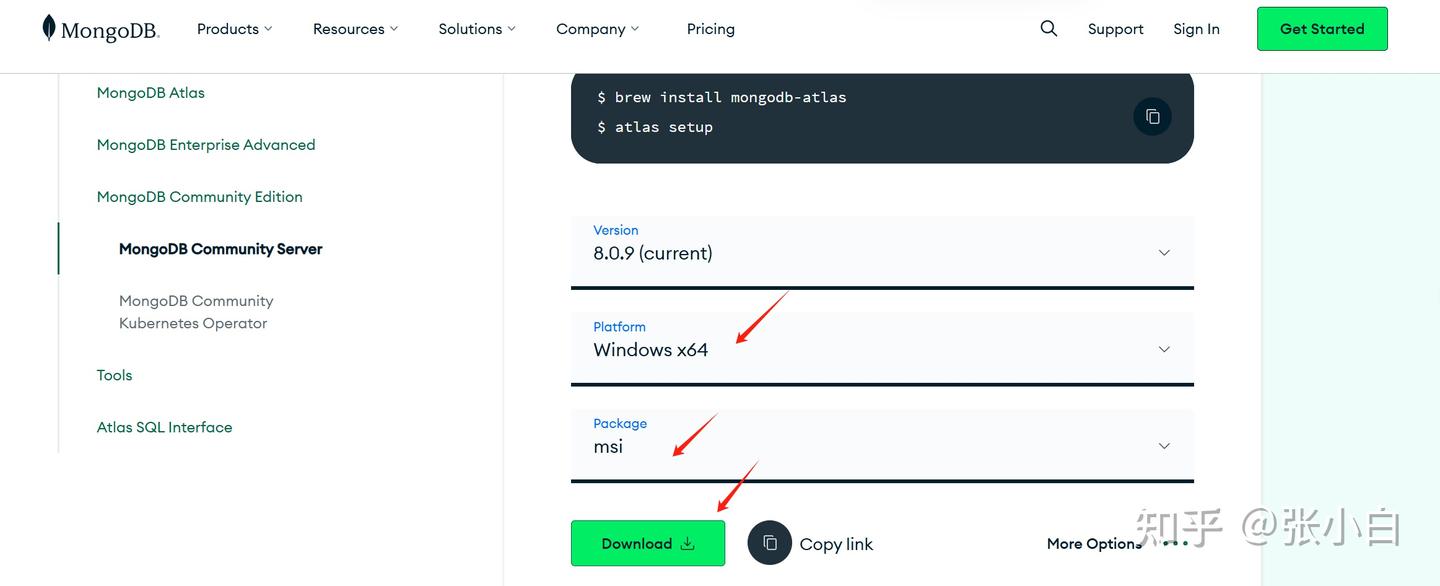

下载完毕后执行安装:
默认按Next继续:
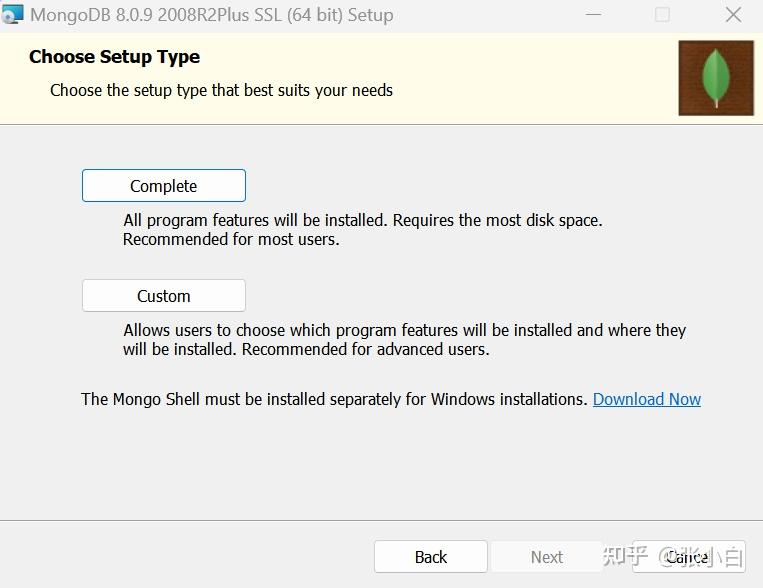
选择Complete(谁让张小白硬盘大)
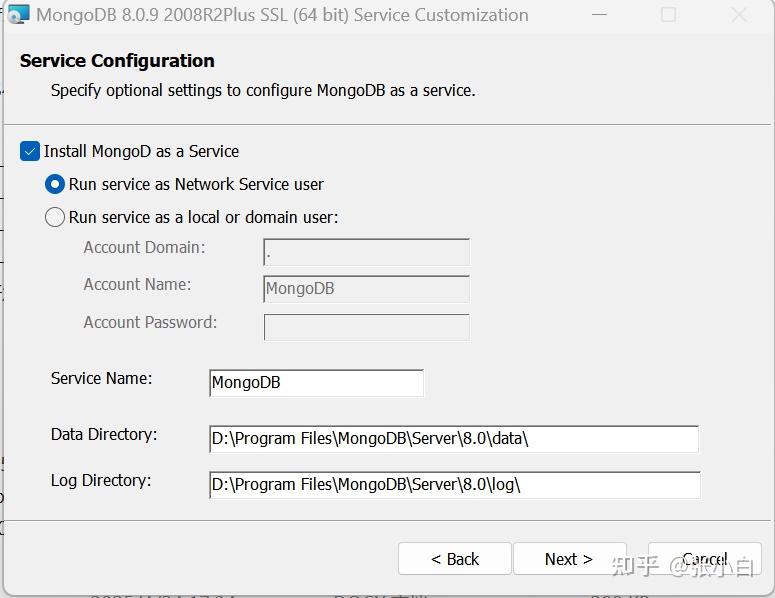
额,还是改成D盘吧。。地主家余粮多也不能放C盘。
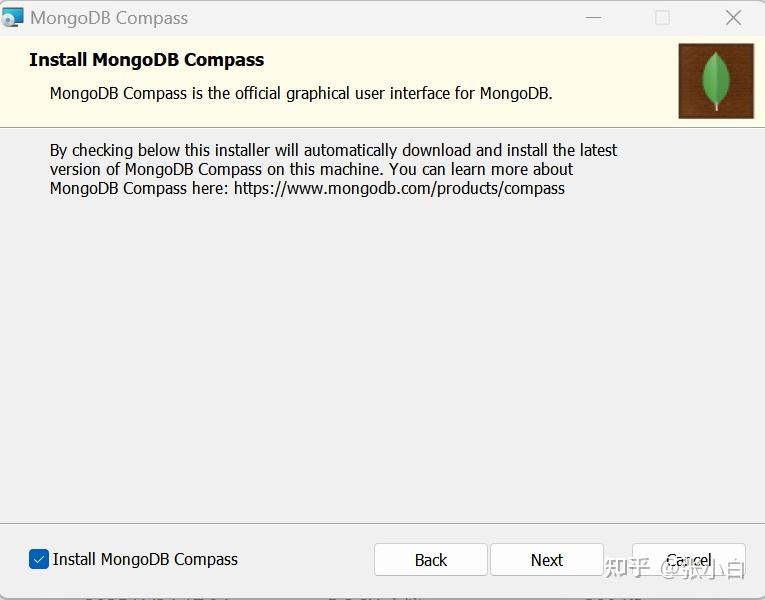
选择同时安装图形界面 MongoDB Compass:
耐心等待安装完毕。
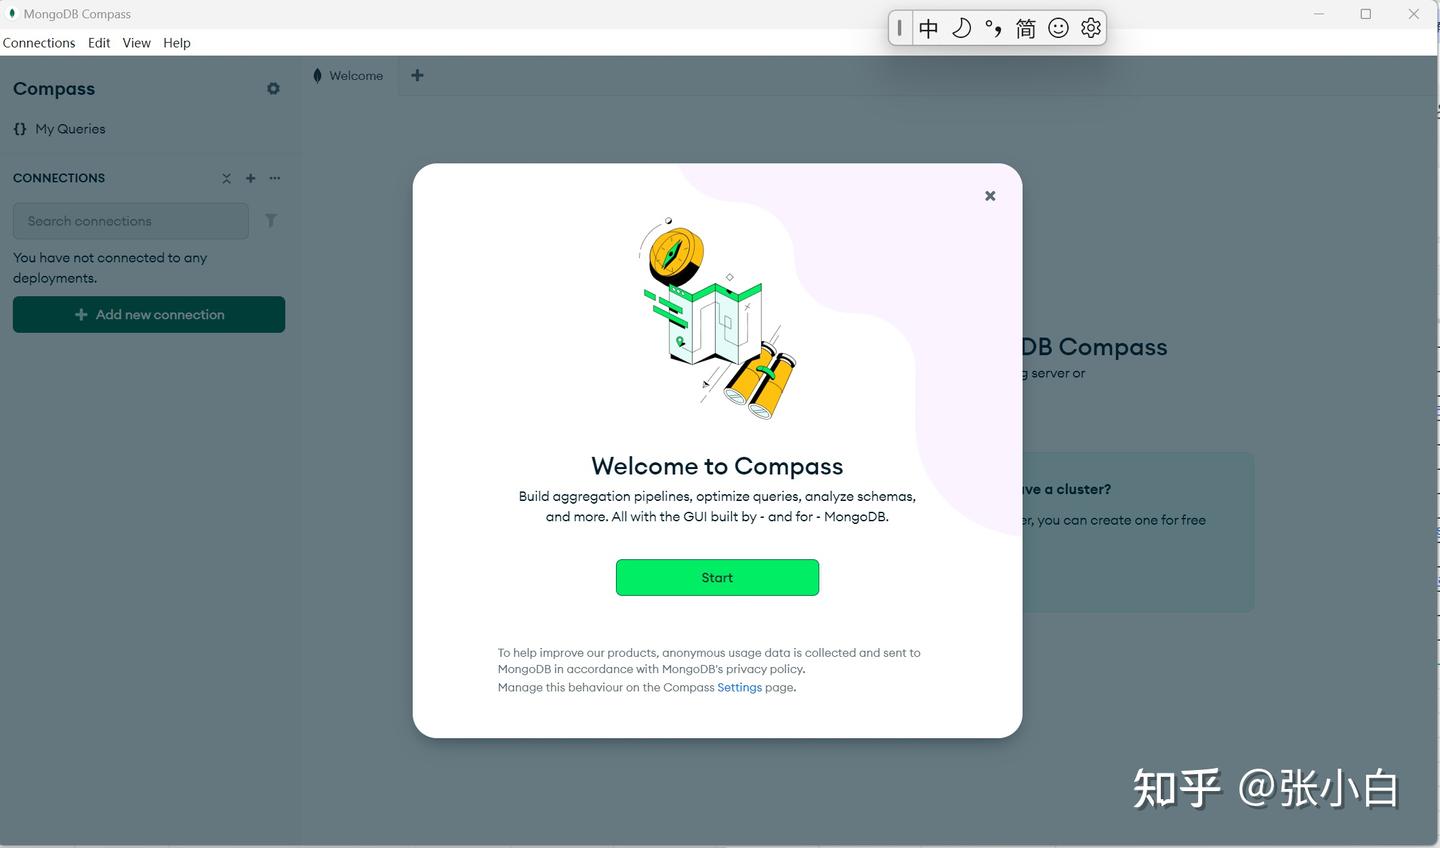
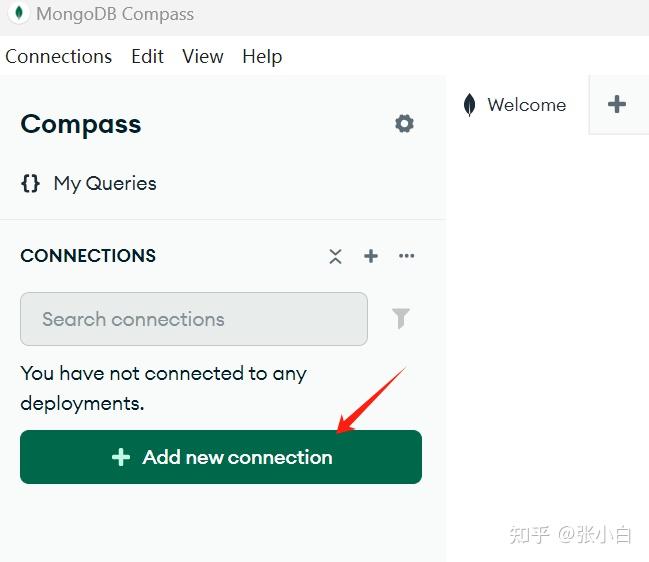
点击Start:
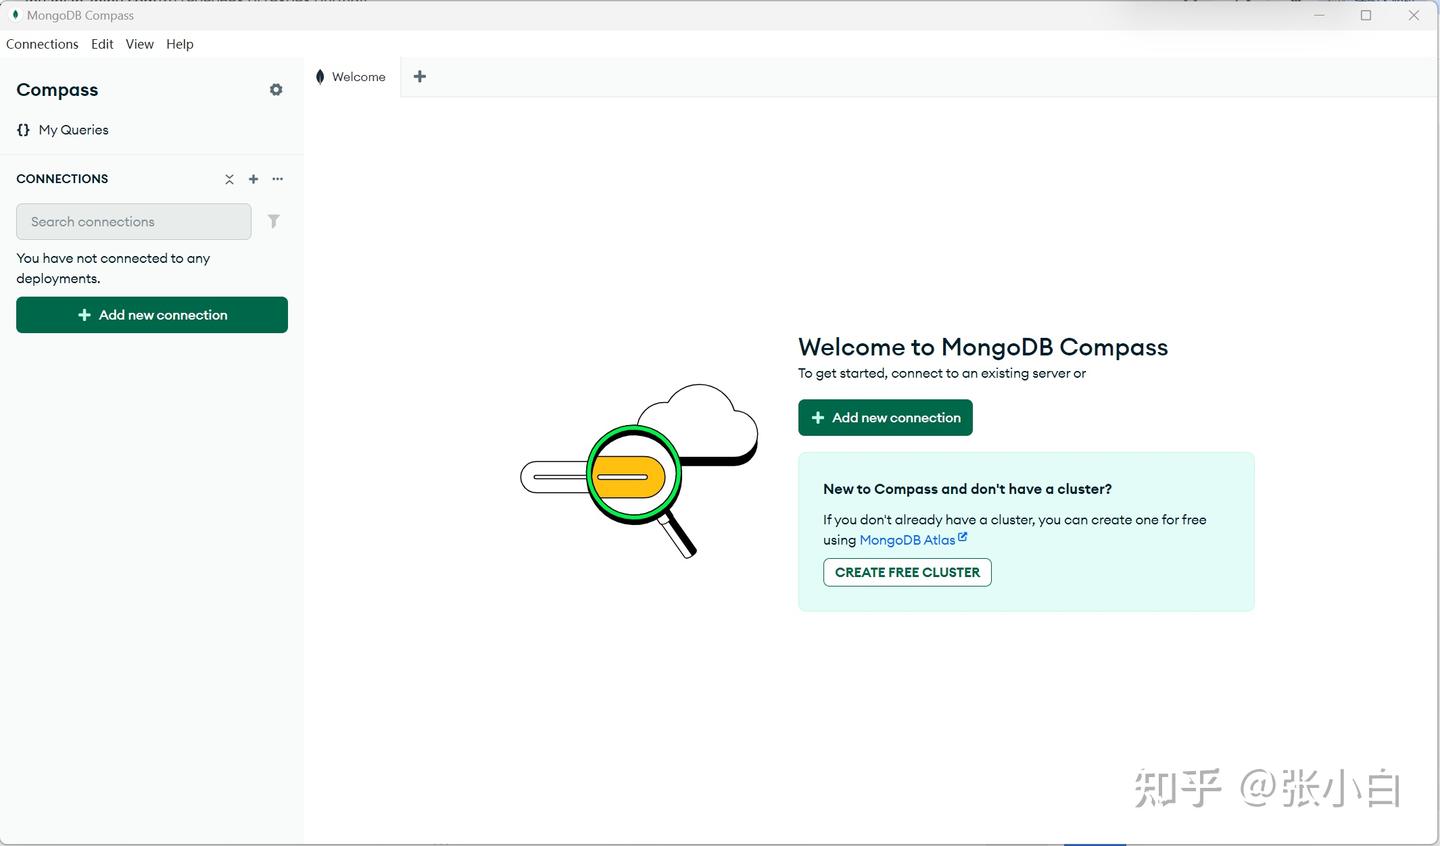
点击左边的Add new connection:
按如下方式输入:
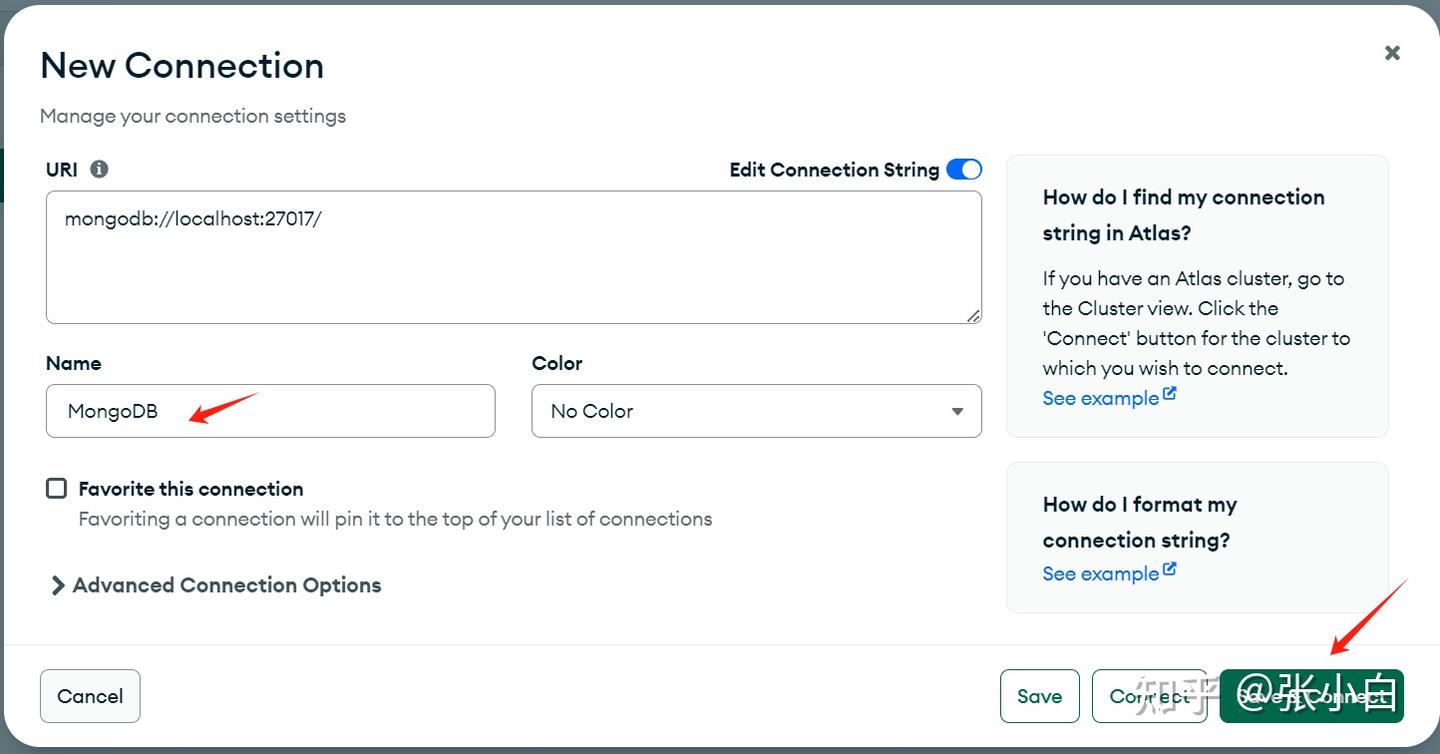
点击Save and connect:
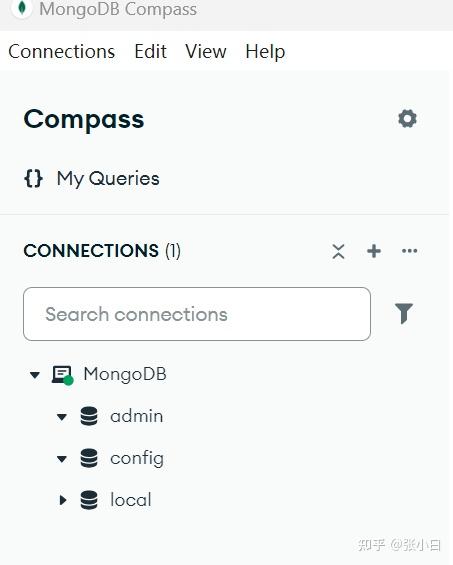
看起来已经连上MongoDB了。
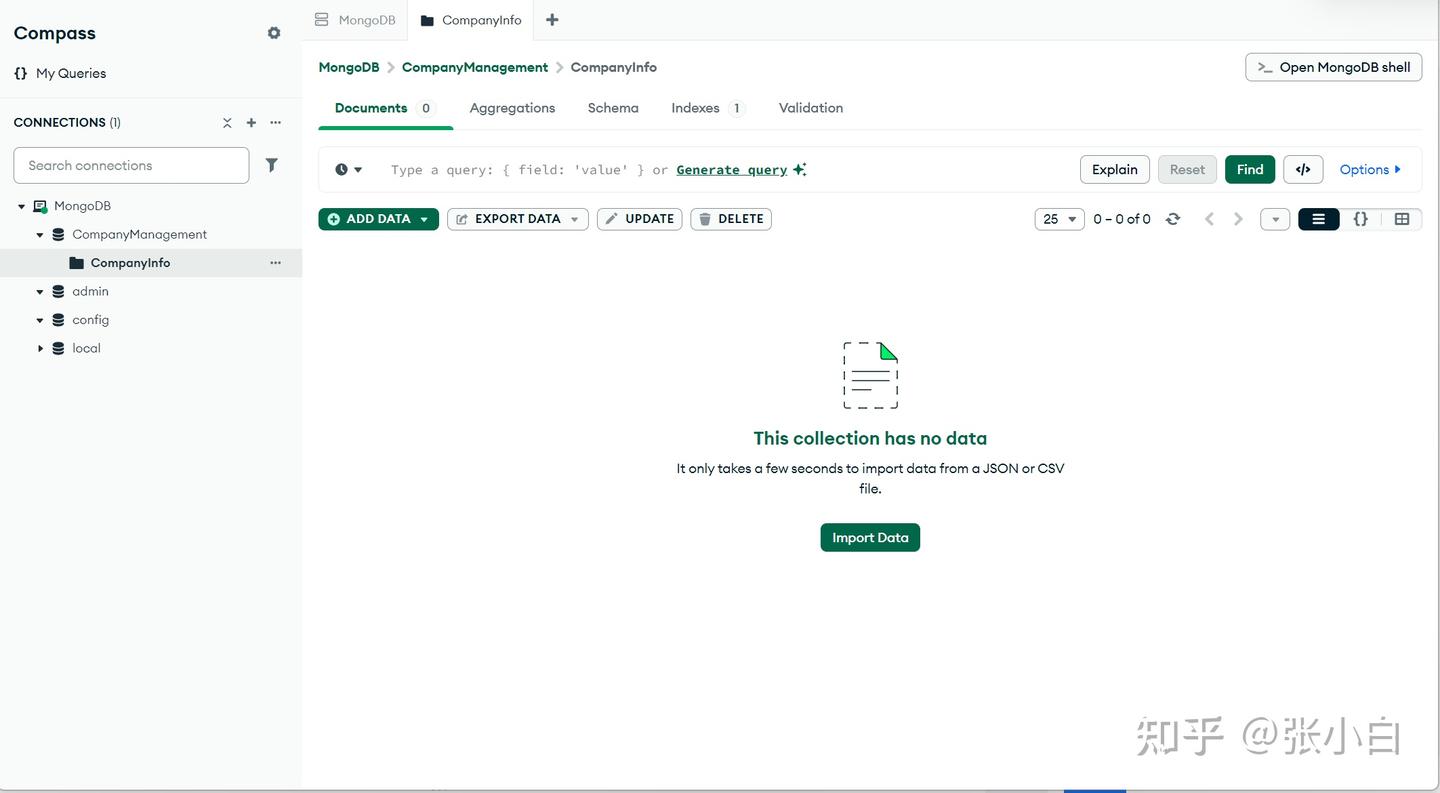
创建一个DataBase:CompanyManagement:

三、配置VScode的MongoDB MCP Server
先安装mcp server
npm install -g mcp-mongo-server
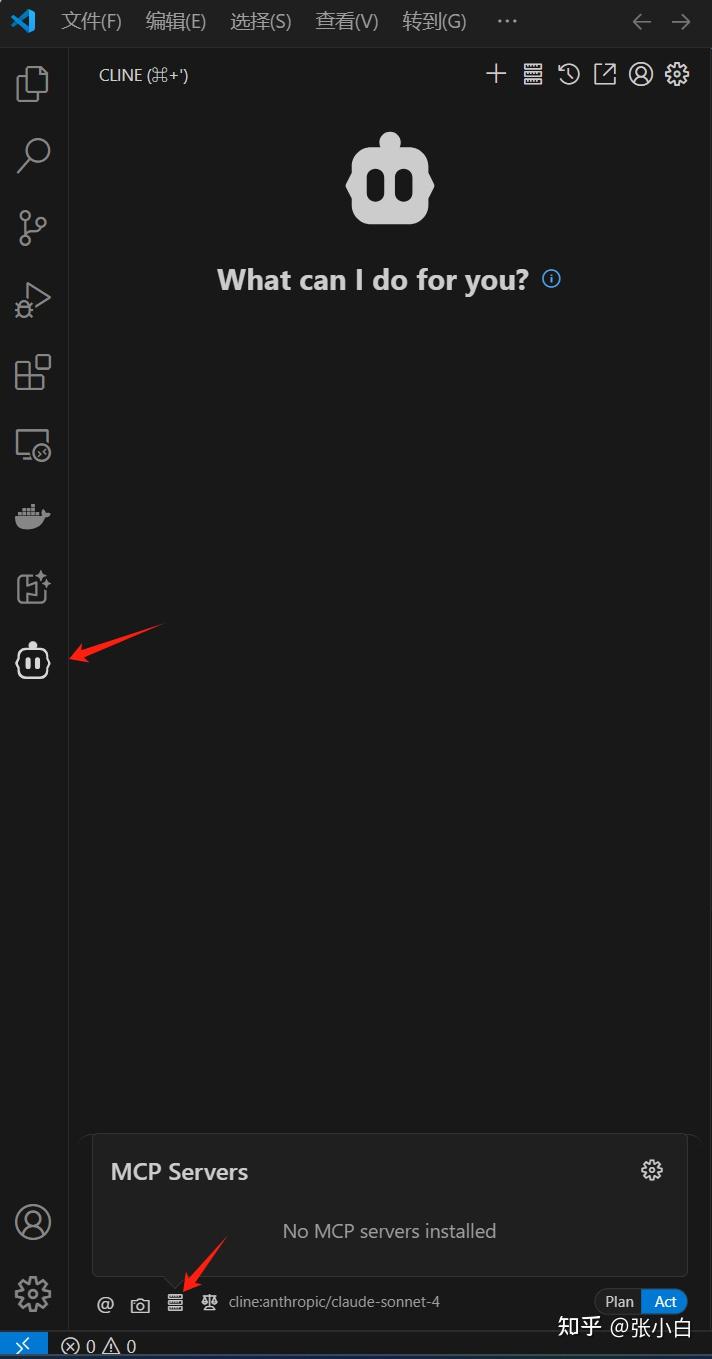
回到VSCode,点击Cline:
点击箭头上面指向的设置按钮,再点击右边的小齿轮:
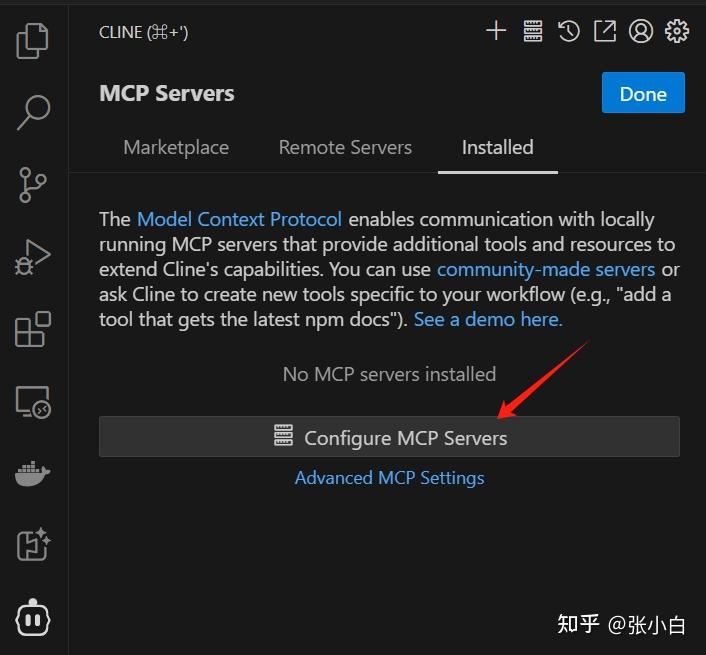
点击Configure MCP Server,并在右边输入:
{
  "mcpServers":{
    "mongodb":{
      "command":"npx",
      "args": [
        "mcp-mongo-server",
        "mongodb://localhost:27017/CompanyManagement?authSource=admin"
      ]
    }
  }
}
点击保存:
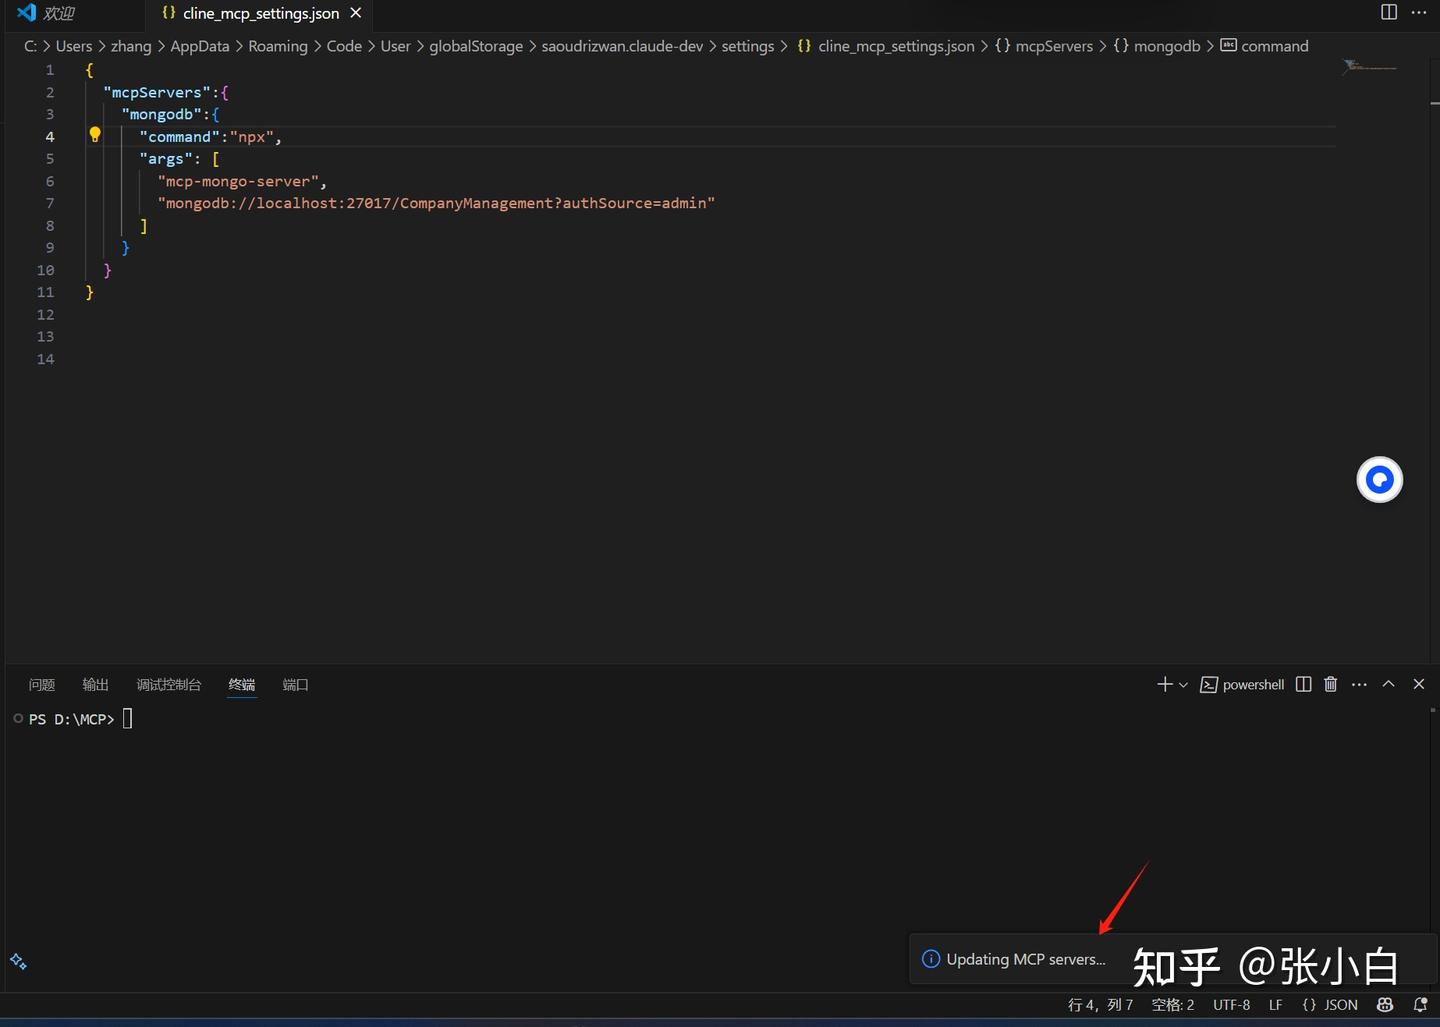
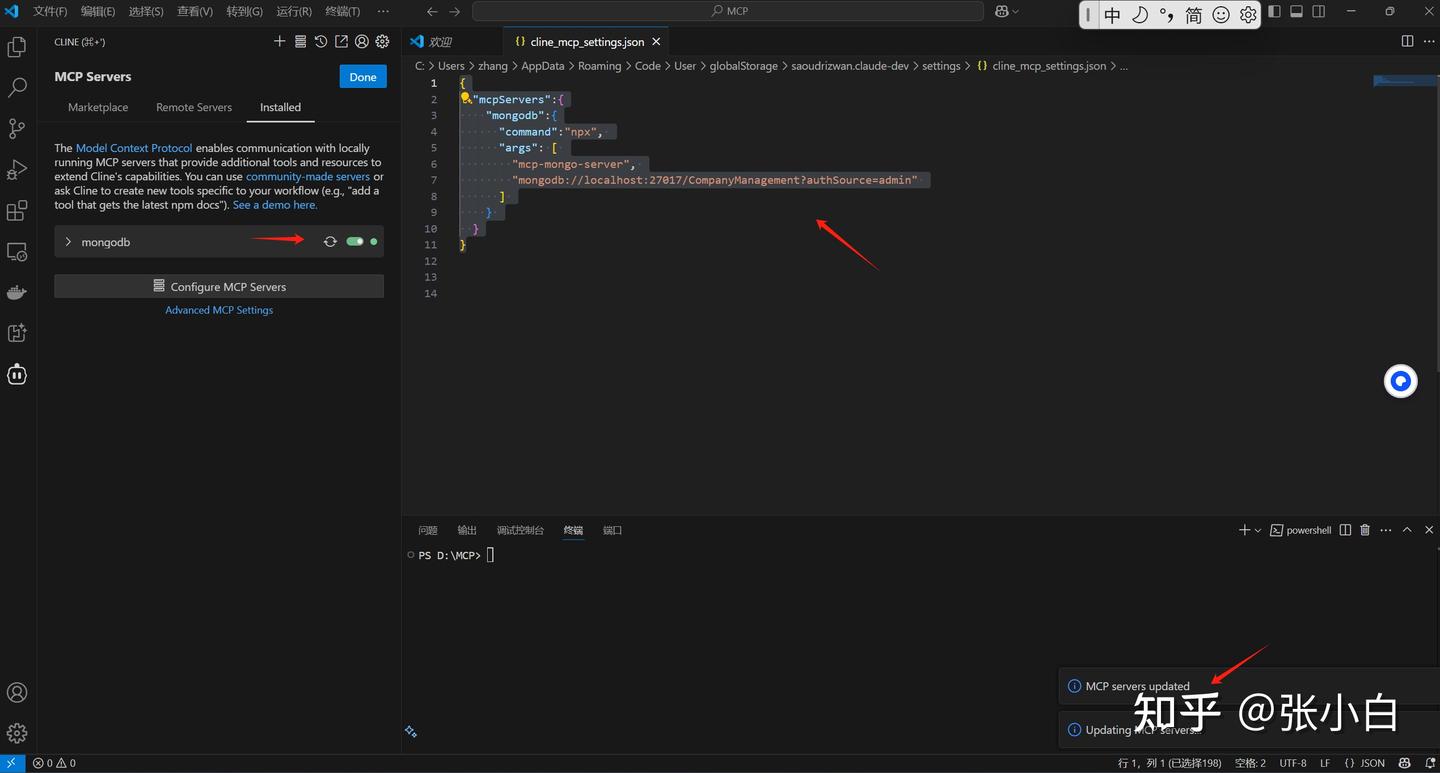
左边绿色表示MCP Server配置成功。
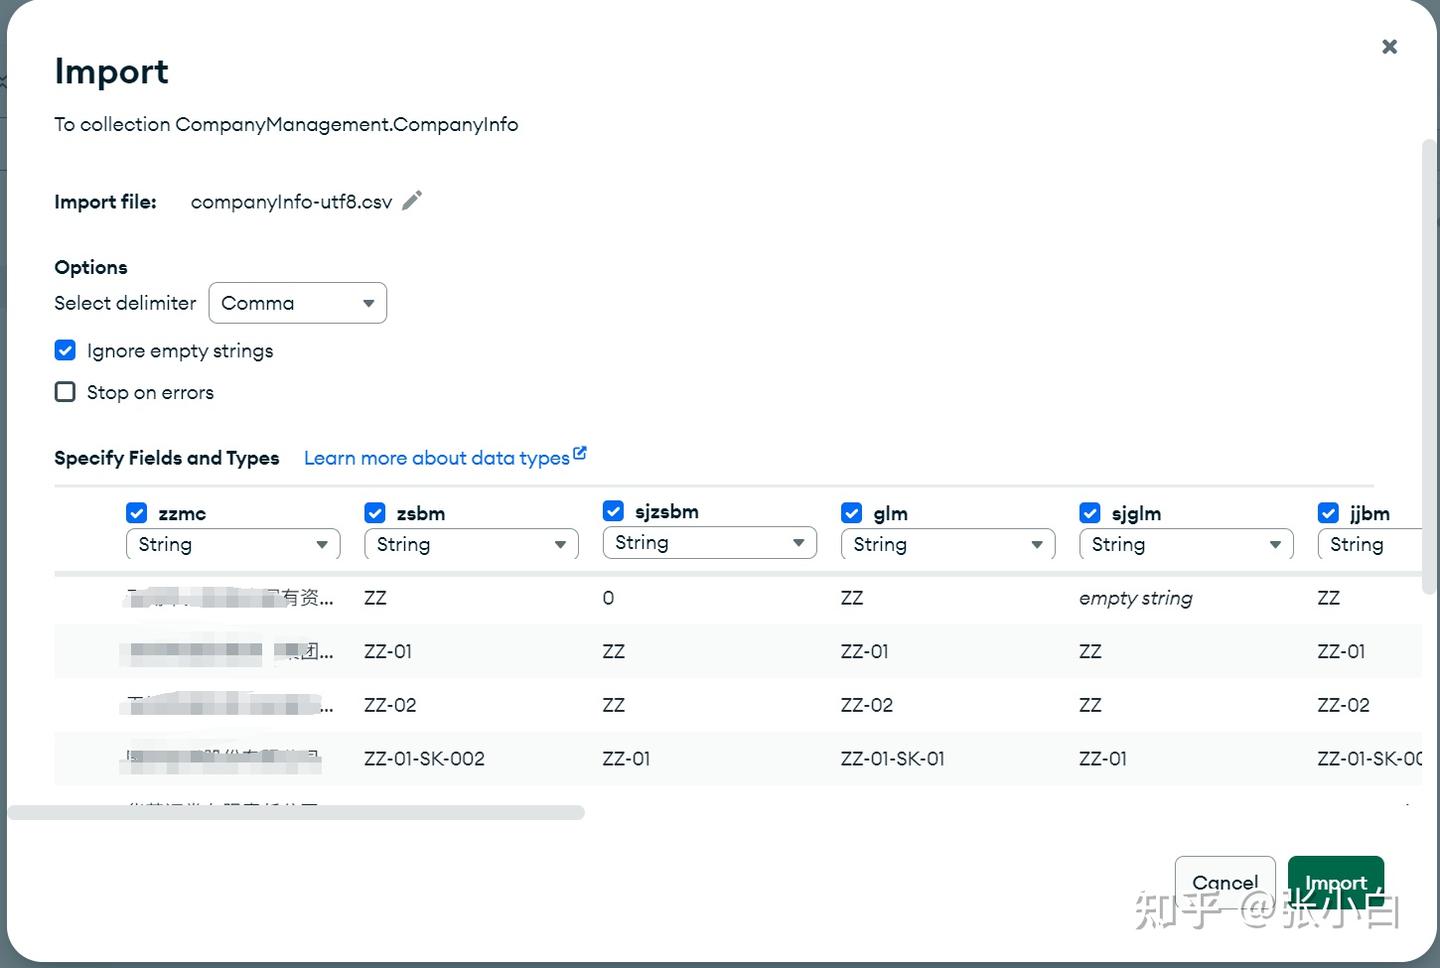
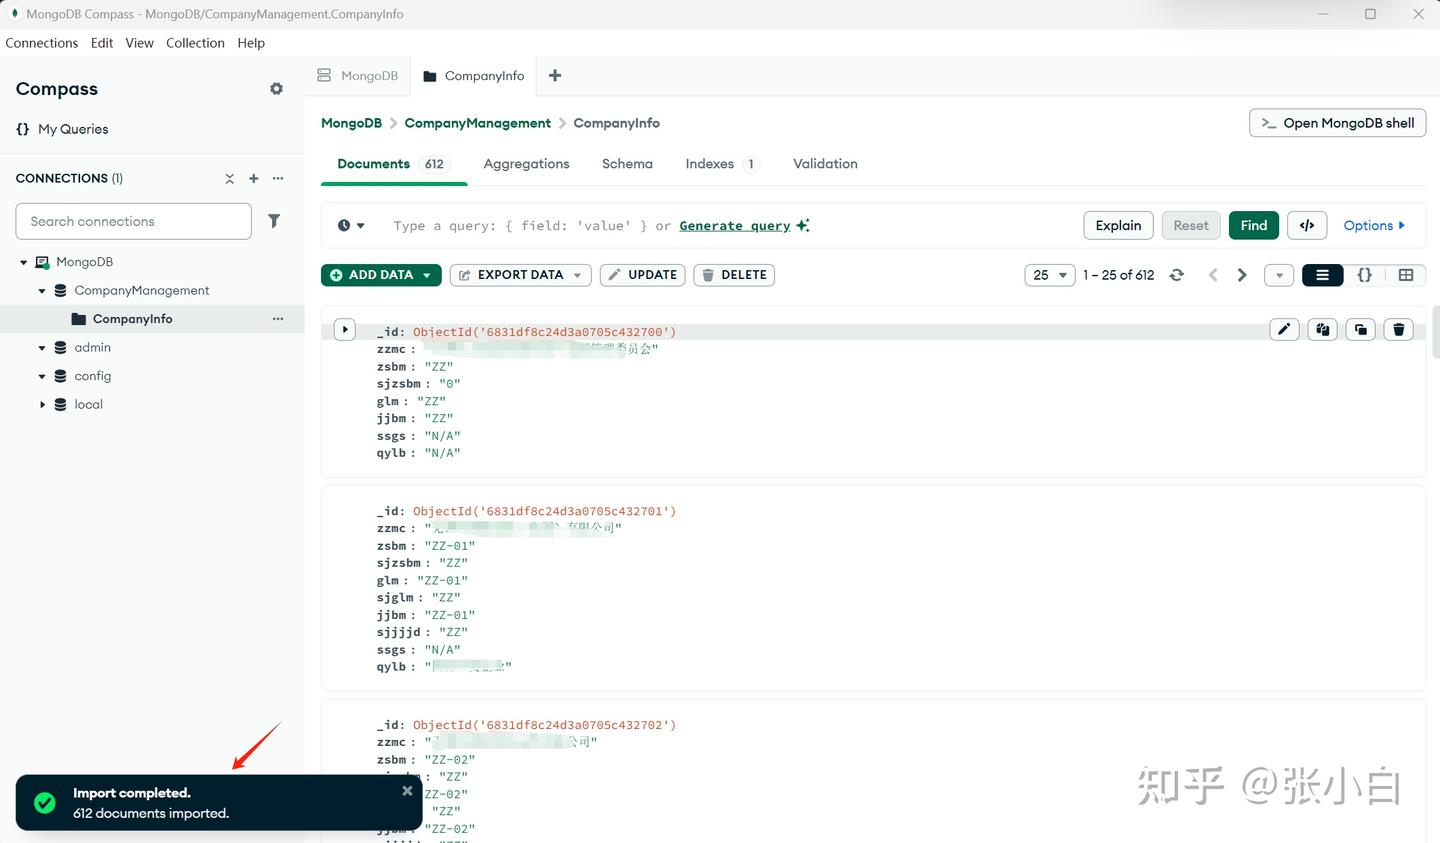
四、在MongoDB建表
我们使用MongDB compass工具,通过导入excel的方式,建立一张企业信息表CompanyInfo,包含企业名称,企业编码,上级企业名称,上级企业编码等信息:
五、在VSCode测试mongodb的MCP server
在VSCode的Cline提问:
目前一共有多少家企业?
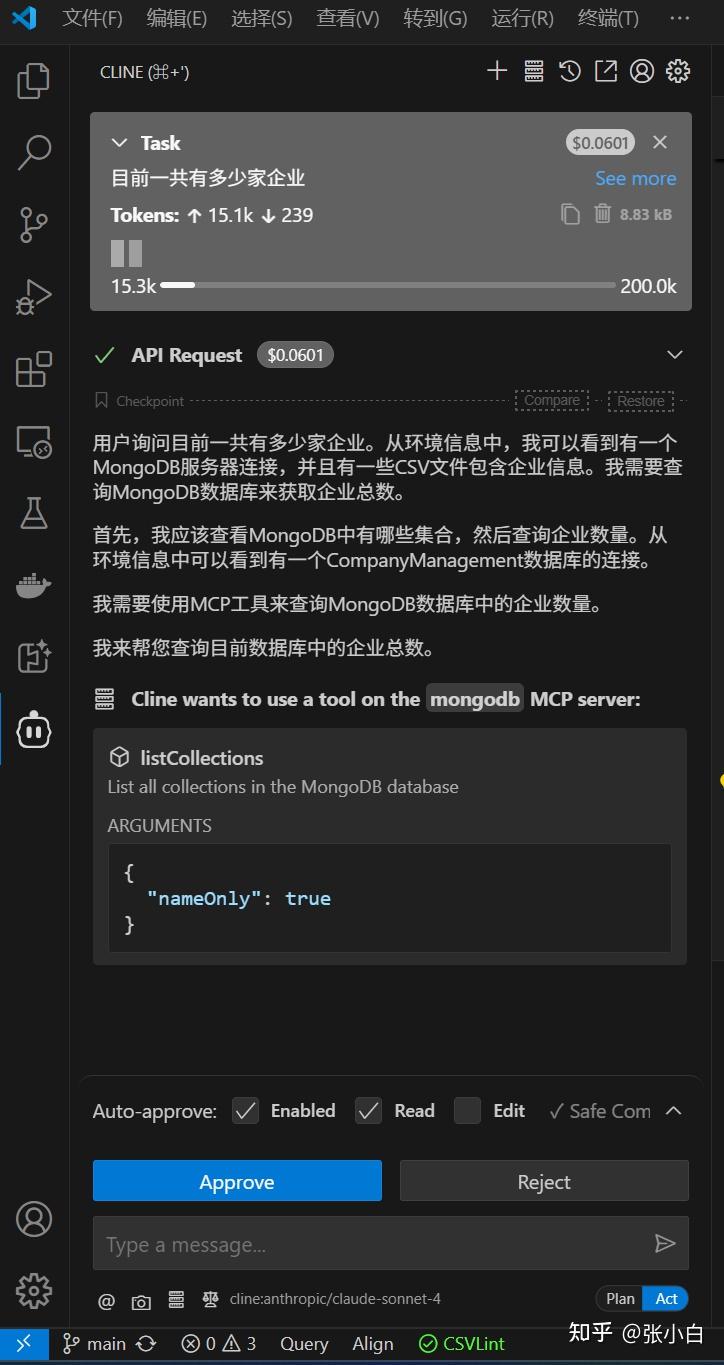
点击Approve:
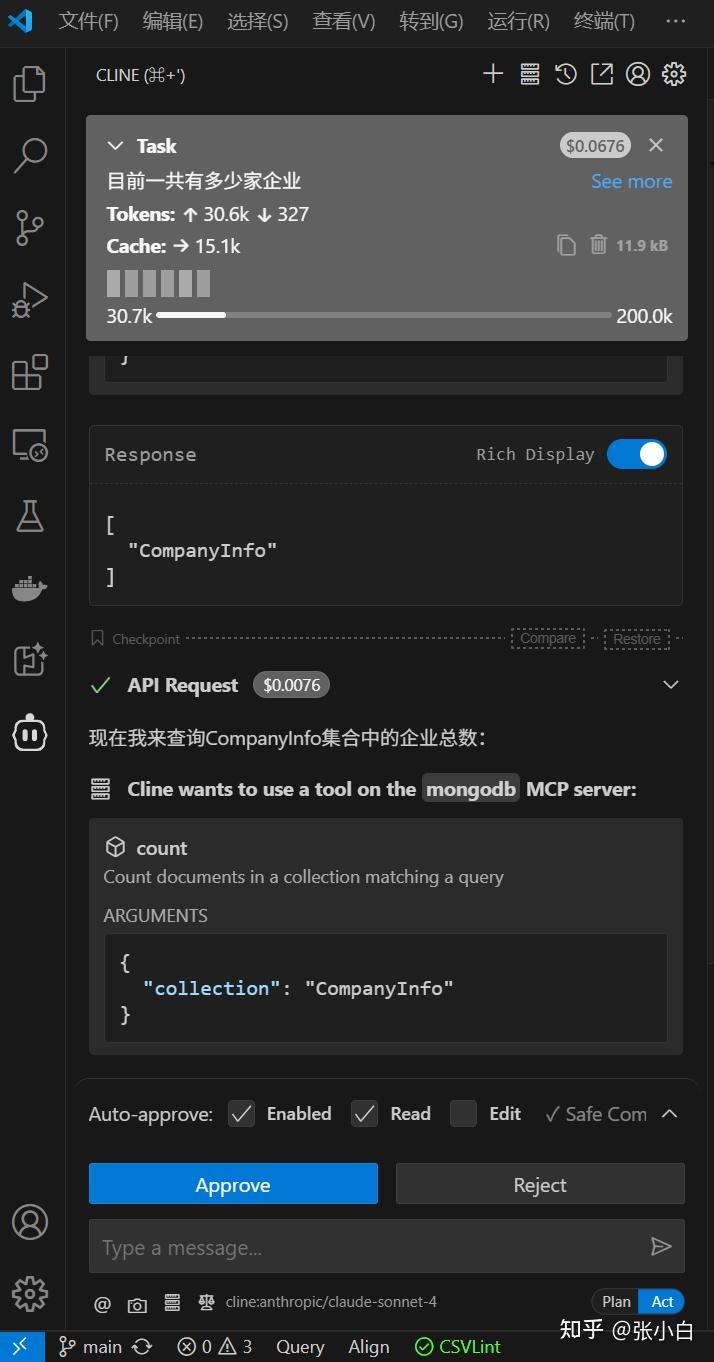
他会不停的提示你好像该缴费了。
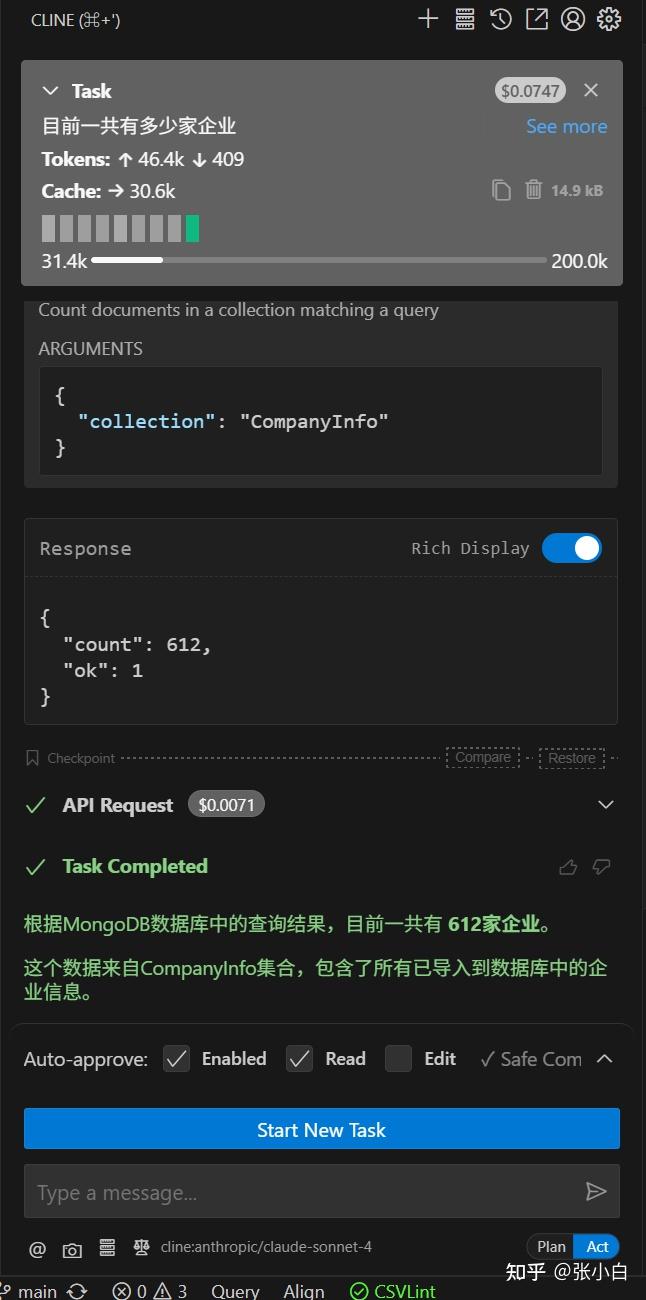
查出结果为 612家,跟前面导入的数据是相符的。
可见这个方案大致是可行的。
不过,看着 $0.0071,张小白是不是欠费了?
二、微软Jacky Wu老师介绍的《GitHub Copilot与MCP的发展》
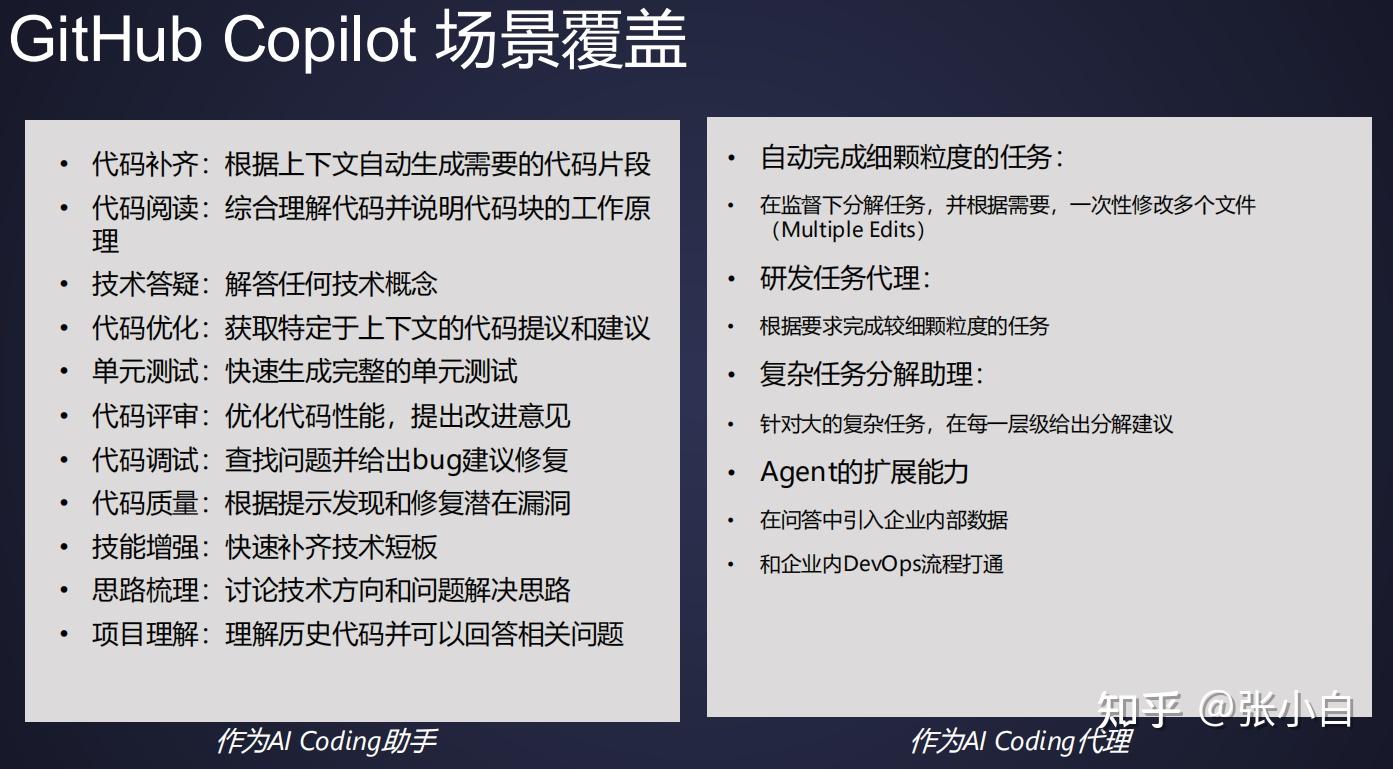
1、GitHub Copilot的使用场景
GitHub Copilot作为全球最广泛使用的AI辅助工具,已经广泛应用到了以下领域:
2、目前Agent架构以及存在的痛点
当前常见的Agent架构如下:
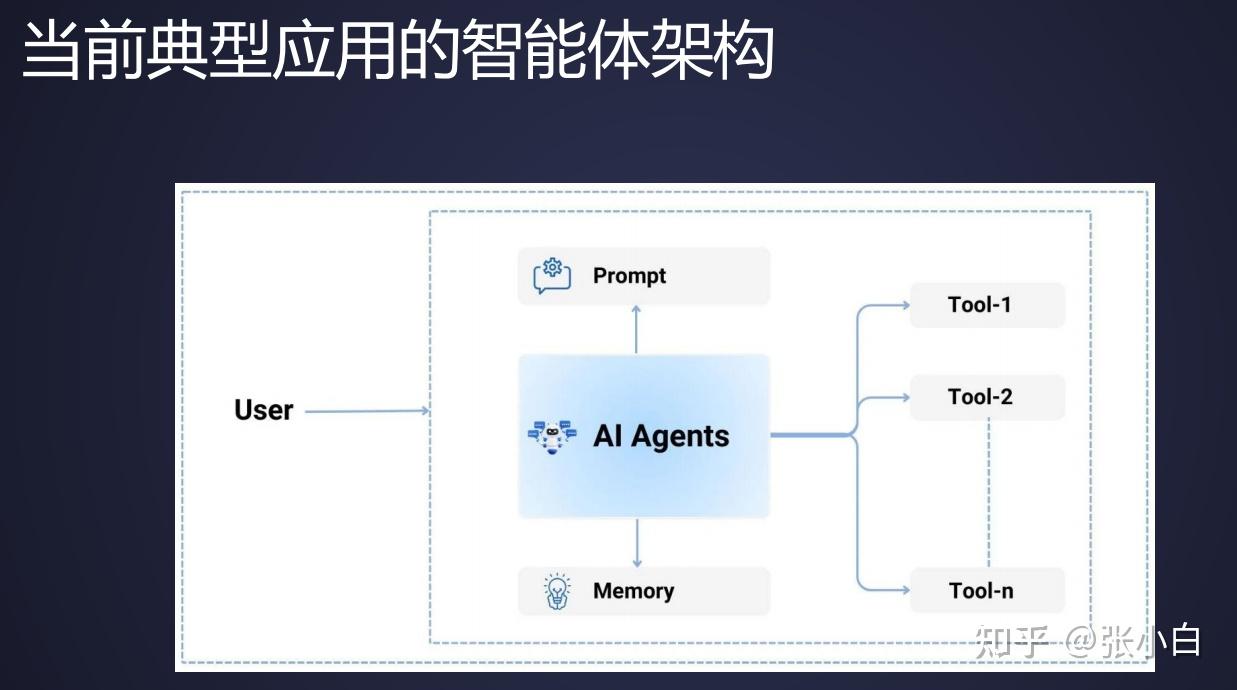
用户通过提示词跟Agent交互,Agent通过调用Tools实现各种大模型的扩展功能。
但是以上架构存在着一些痛点:
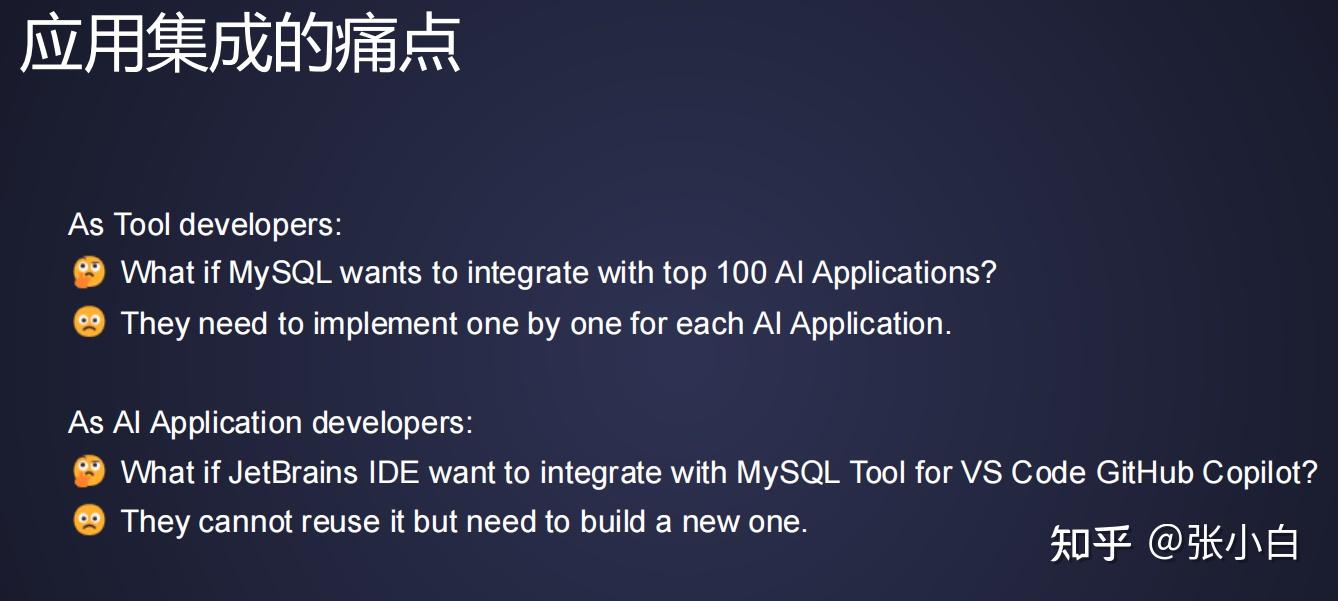
- 对于工具而言,要实现一个工具跟不同的AI应用适配,谁来做?
- 对于应用开发而言,如果已经在一个集成环境有一个工具了,如何在另一个集成环境上实现这个工具?
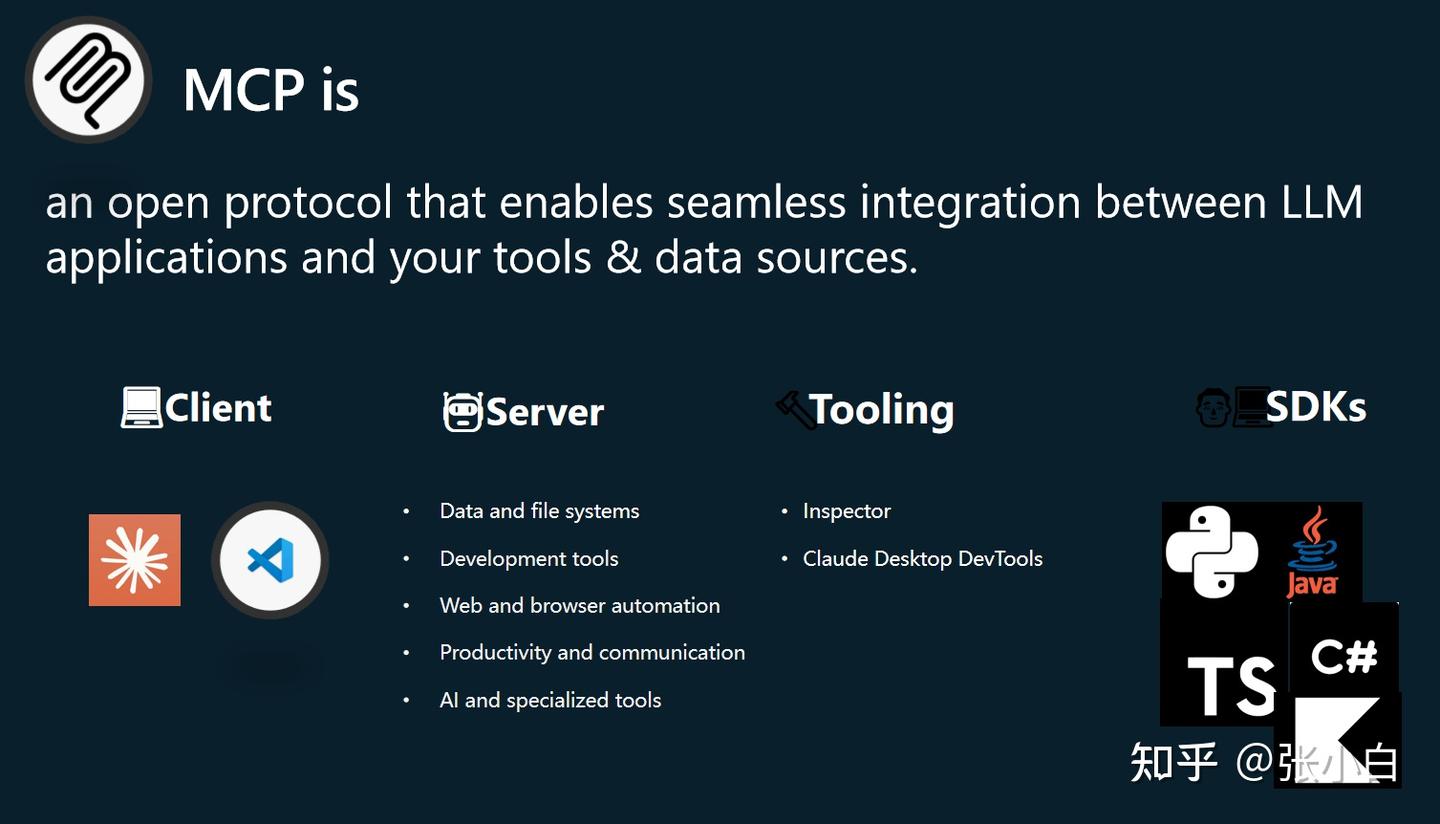
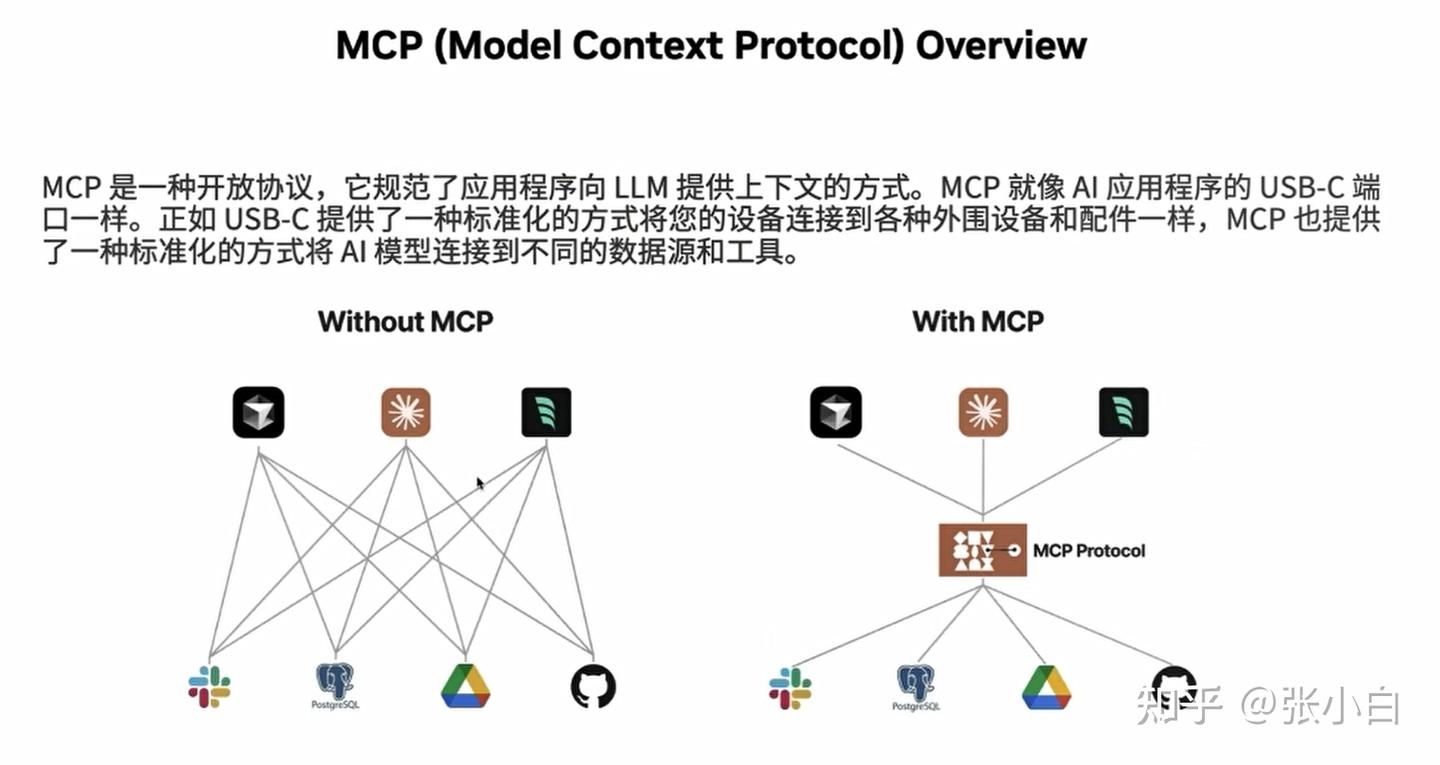
3、MCP简介
那么MCP起到了怎样的作用呢?
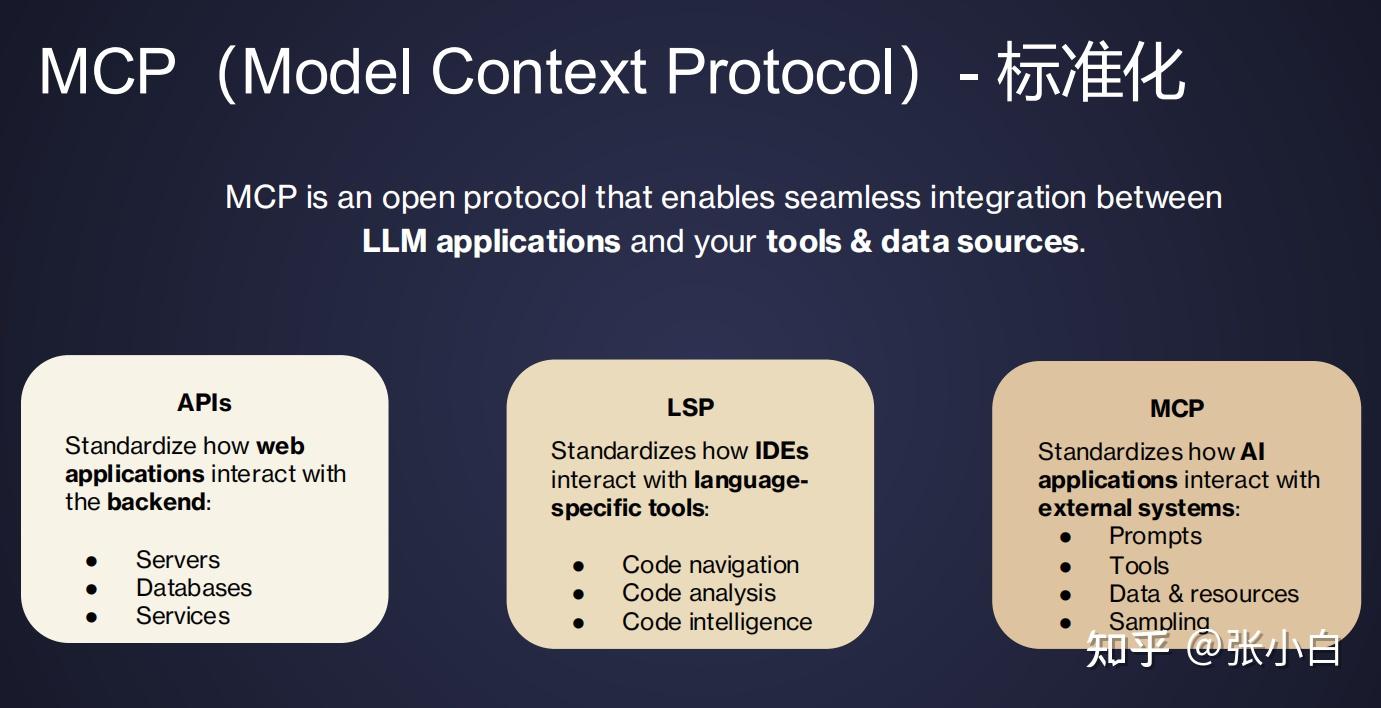
MCP是一个开放协议,提供了一种标准化的连接方式,能够实现大语言模型(LLM)应用与工具和数据源之间的无缝集成。
有三种连接方式:
- API:可以自我发现,可以实现web应用程序和后端的交互。
- LSP:编程语言和编程工具之间的标准化。
- MCP:AI外部程序和通讯工具之间的标准化。
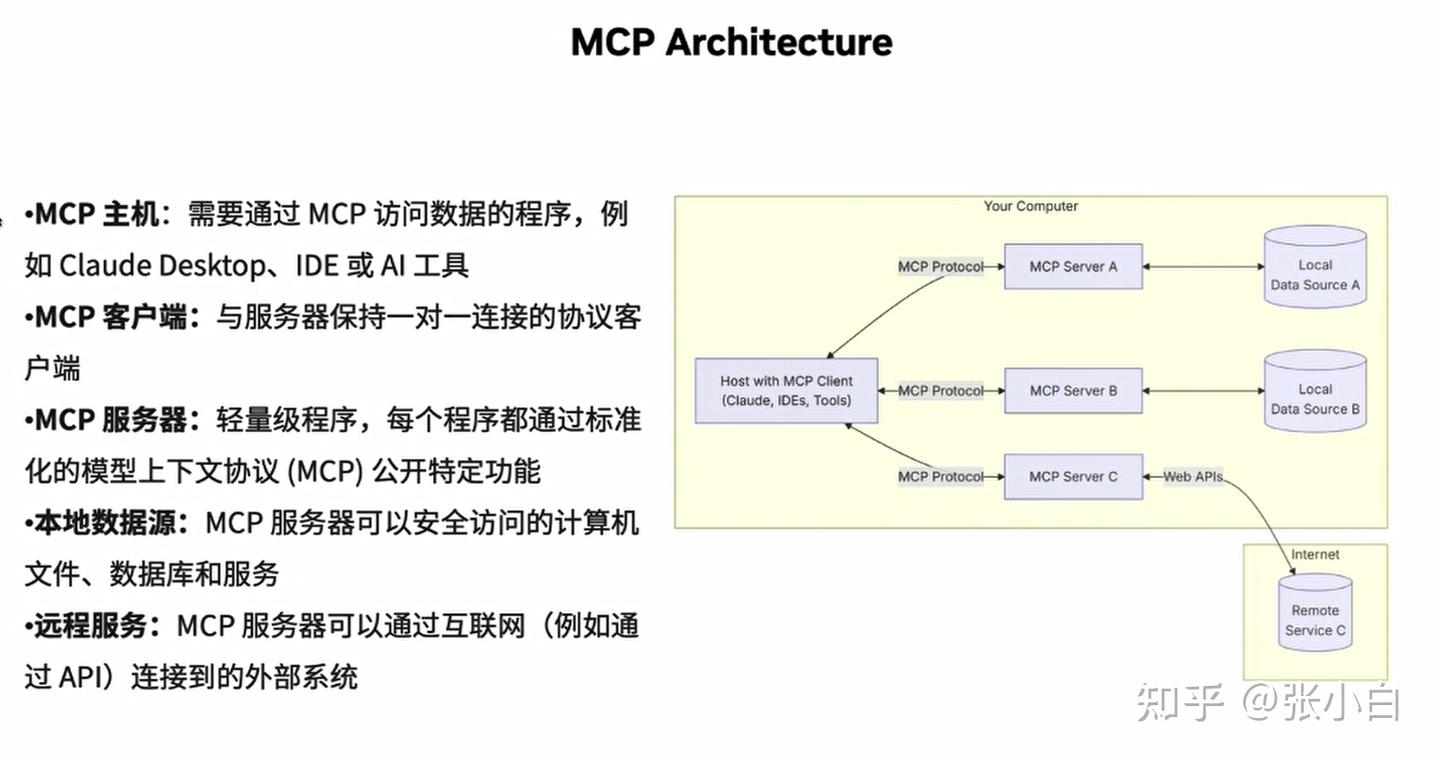
MCP的架构如下:

这里面有几个概念:
- MCP Hosts:例如Visual Studio,VSCode等桌面应用、IDE,AI工具的应用程序,它可以通过MCP去访问数据。
- MCP Clients:一般会在MCP Hosts的进程里面(维持跟MCP Server端一对一的连接)
- MCP Servers:提供满足特定功能,支持MCP协议调用的轻量级程序。可以允许在本地或者远程。
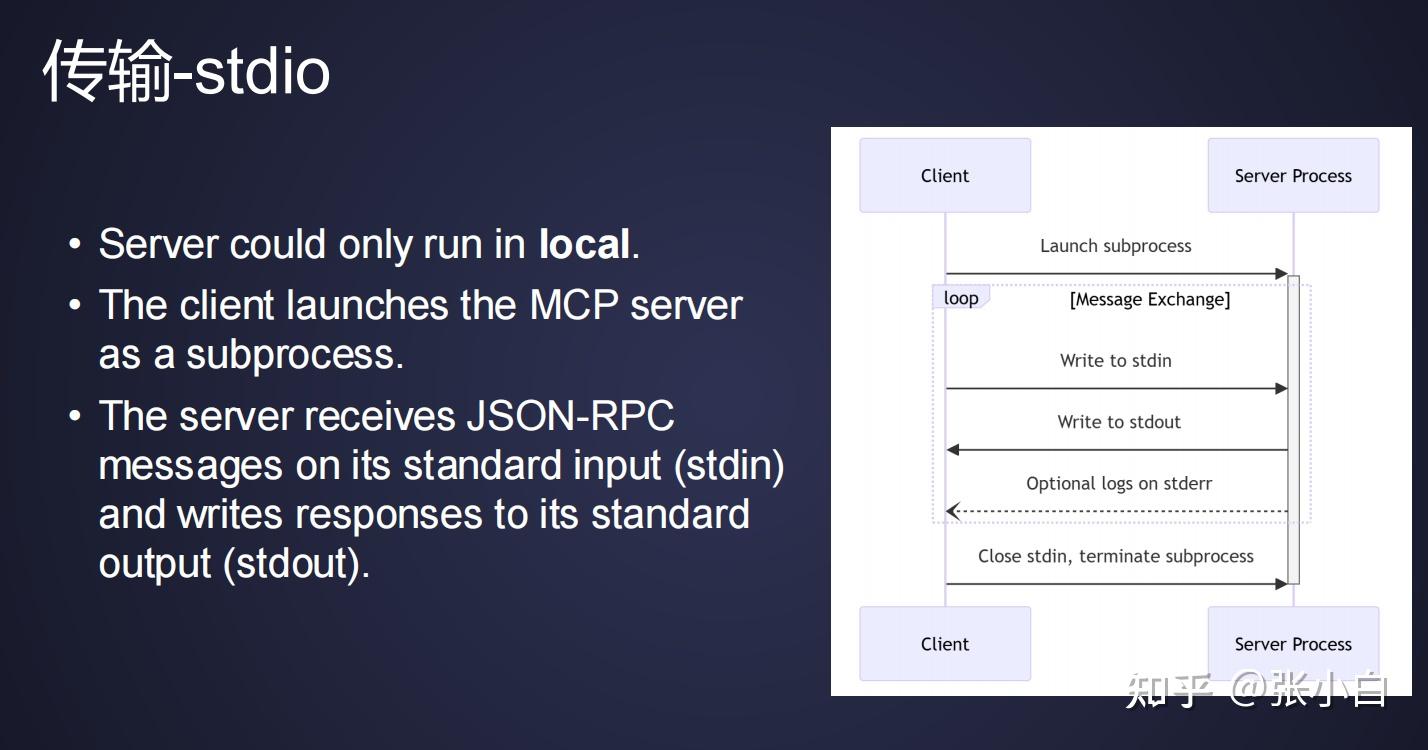

MCP在传输上支持stdio和HTTP with SSE两种方式:
第一个可以支持本地传输。Client发起一个请求的时候,将请求写到stdin;Server端处理之后,将响应写回到stdout。
第二个是基于HTTP的协议。Server要提供2个endpoint,一个是SSE的endpoint,一个是常规的http post endpoint。当Client去调用Server端能力的时候,它通过post请求发送消息到Server;而Server端返回信息时,是通过SSE message events将信息发送回来。
4、体验Github Copilot的MCP
(1)安装Github Copilot插件
这里先做个自动生成代码的试验:
首先我们在VSCode上安装Github Copilot插件:(在Extensions里面直接搜索即可)
(2)体验自动生成代码
建一个空的Python文件:

Ctrl-I打开对话框,输入 计算两个日期之间相差多少天,选择GPT-4o

点击发送:
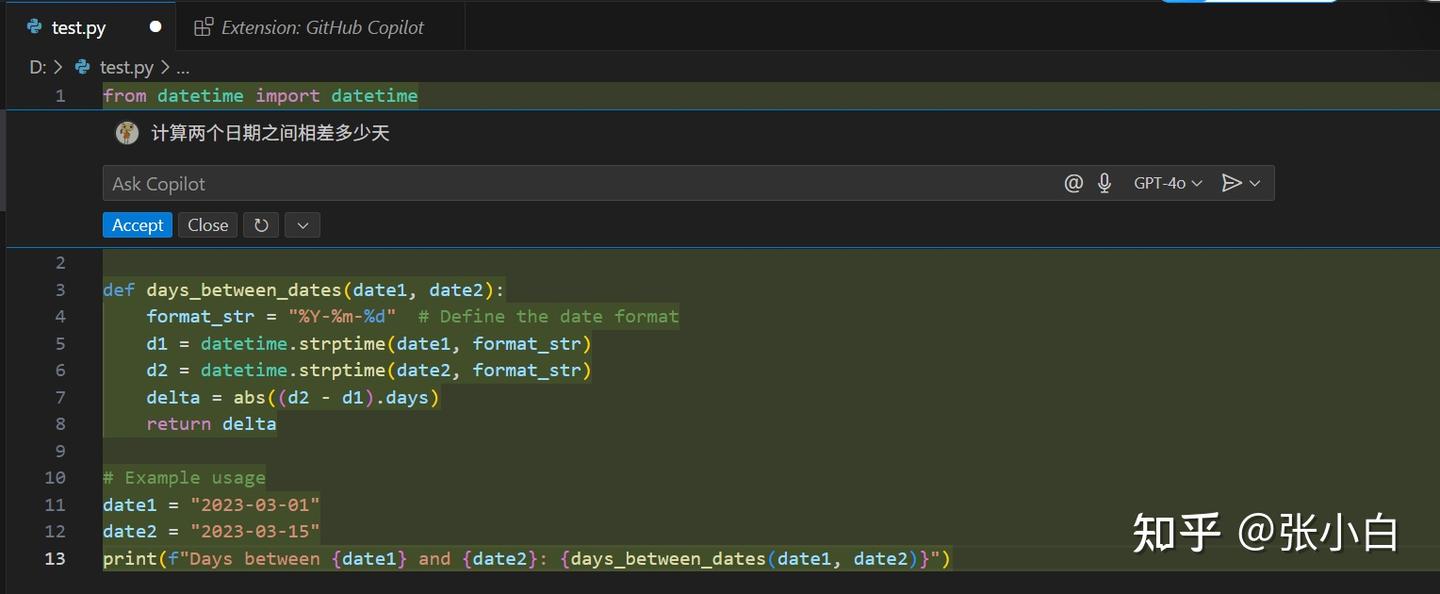
系统会自动弹出代码,点击Accept:
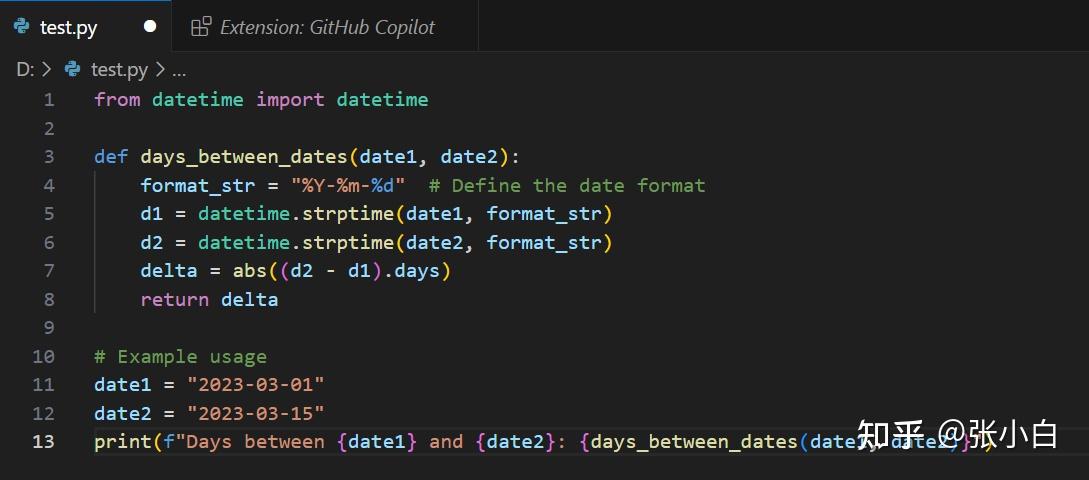
这样样例代码就形成了。
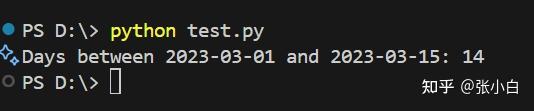
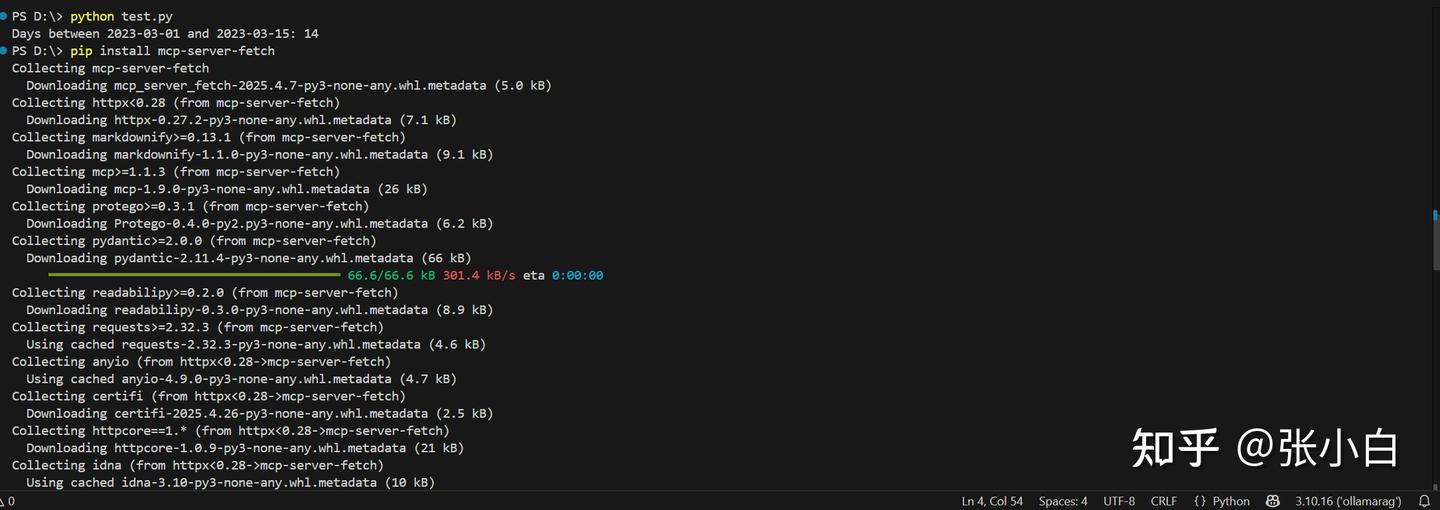
我们执行一下试试:
python test.py
VSCode右下角的猪鼻子会显示Github Copilot的情况:
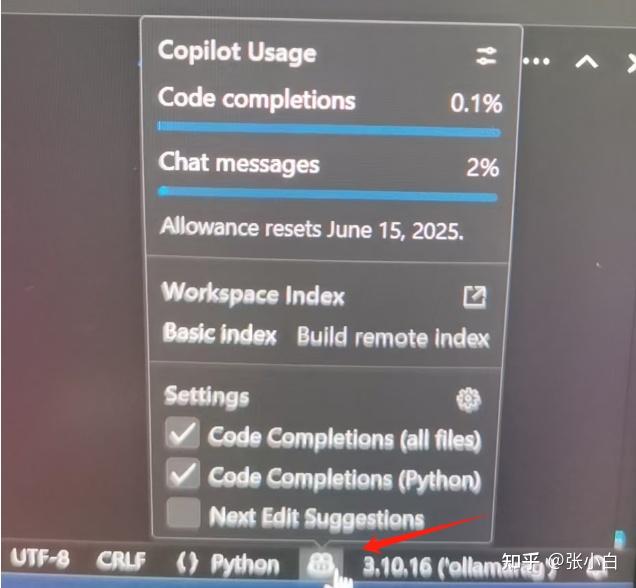
目前Github Copilot免费版可以支持每个月2000次代码补齐和50次对话消息:
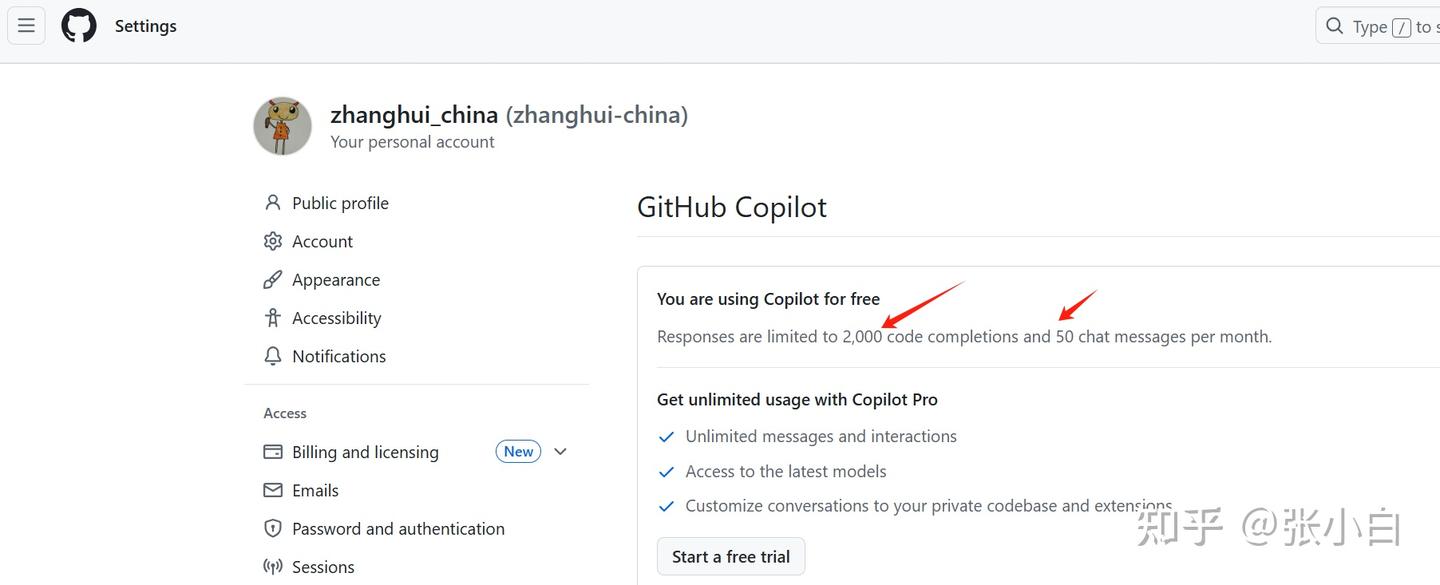
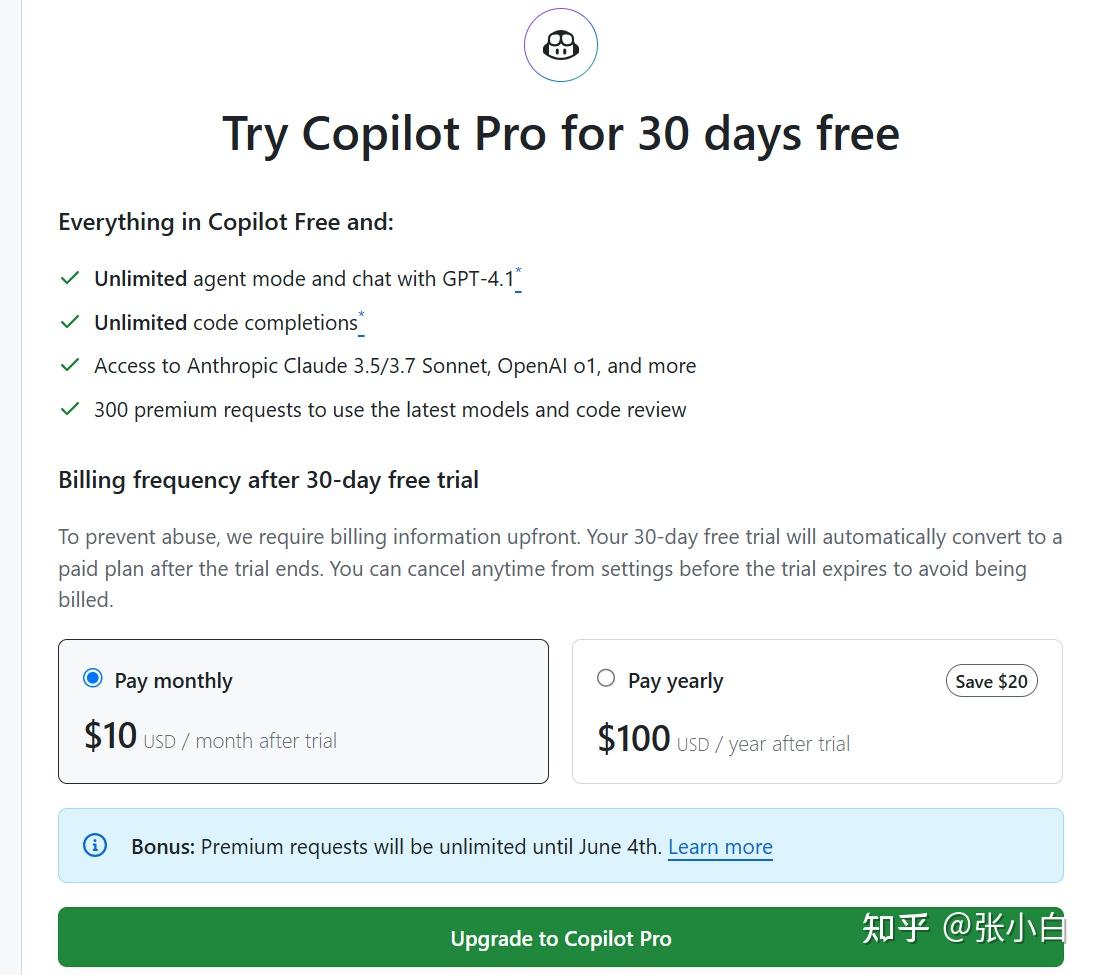
而收费版Github Copilot需要每个月10美元或者每年100美元,可以使用无限制的代码补齐、以及使用更好和更多的大模型服务。
(3)配置MCP服务
那么,Github Copilot怎么支持MCP服务呢?参考 :
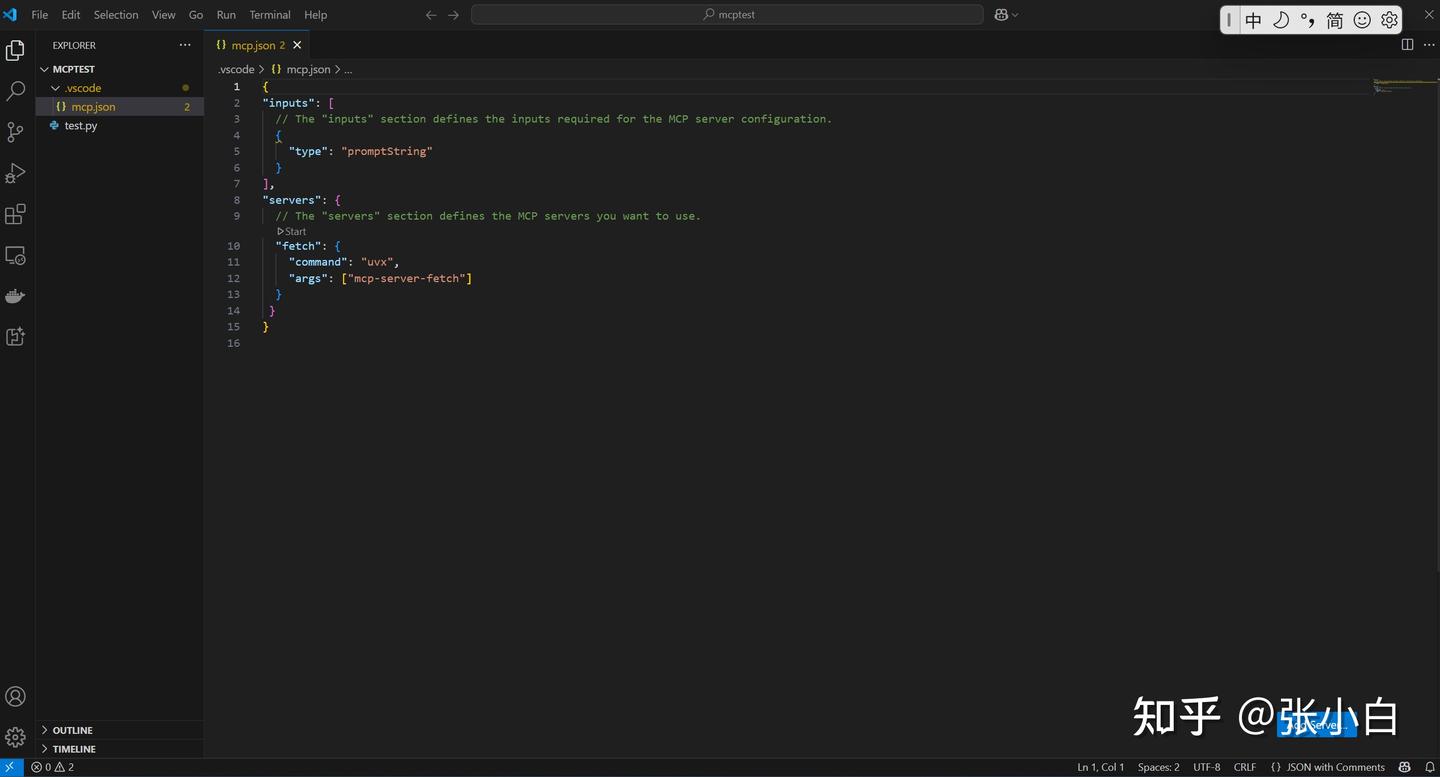
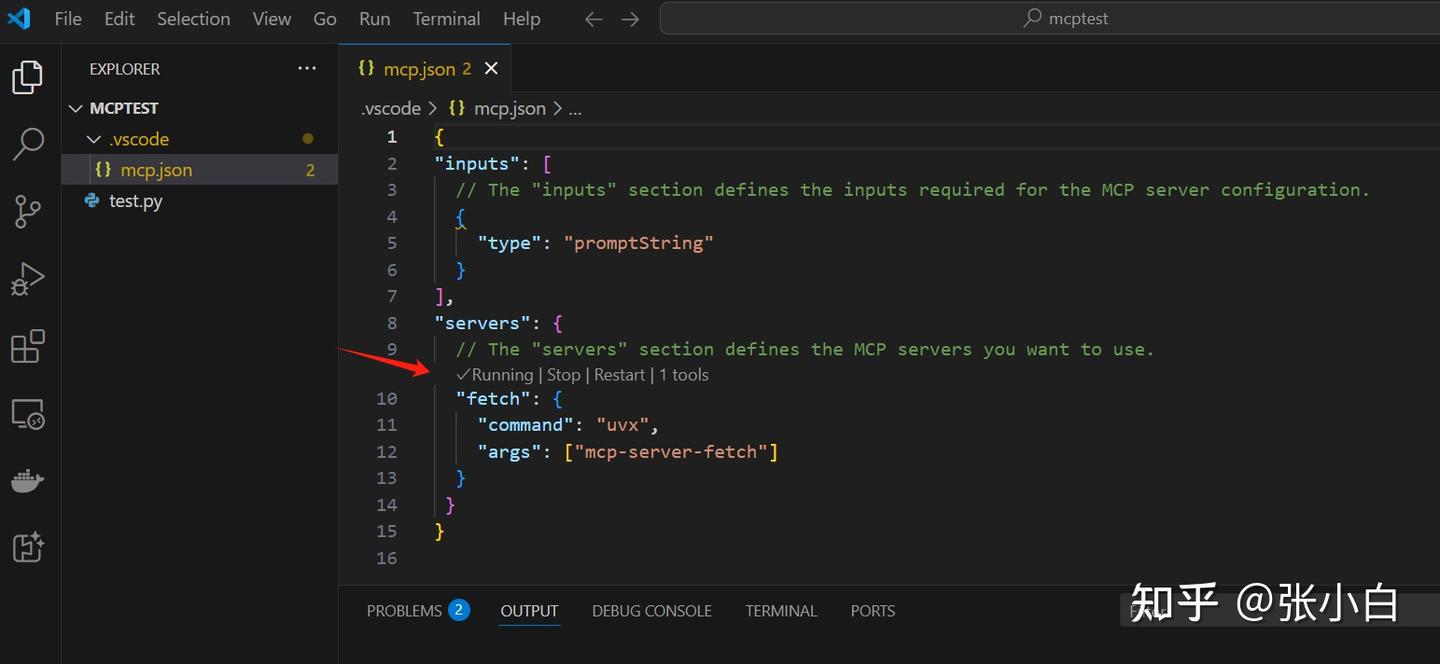
首先需要在VSCode项目根目录(这里是D:\mcptest目录)建一个 .vscode/mcp.json 文件,贴入以下内容:
{
"inputs": [
  // The "inputs" section defines the inputs required for the MCP server configuration.
  {
    "type": "promptString"
  }
],
"servers": {
  // The "servers" section defines the MCP servers you want to use.
  "fetch": {
    "command": "uvx",
    "args": ["mcp-server-fetch"]
  }
 }
}
然后点击下面的Start按钮:
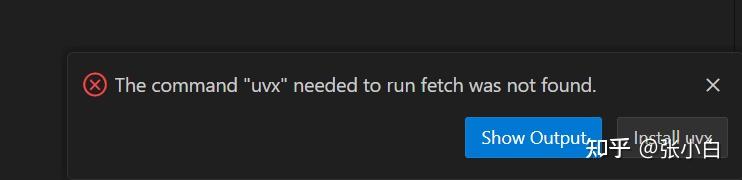
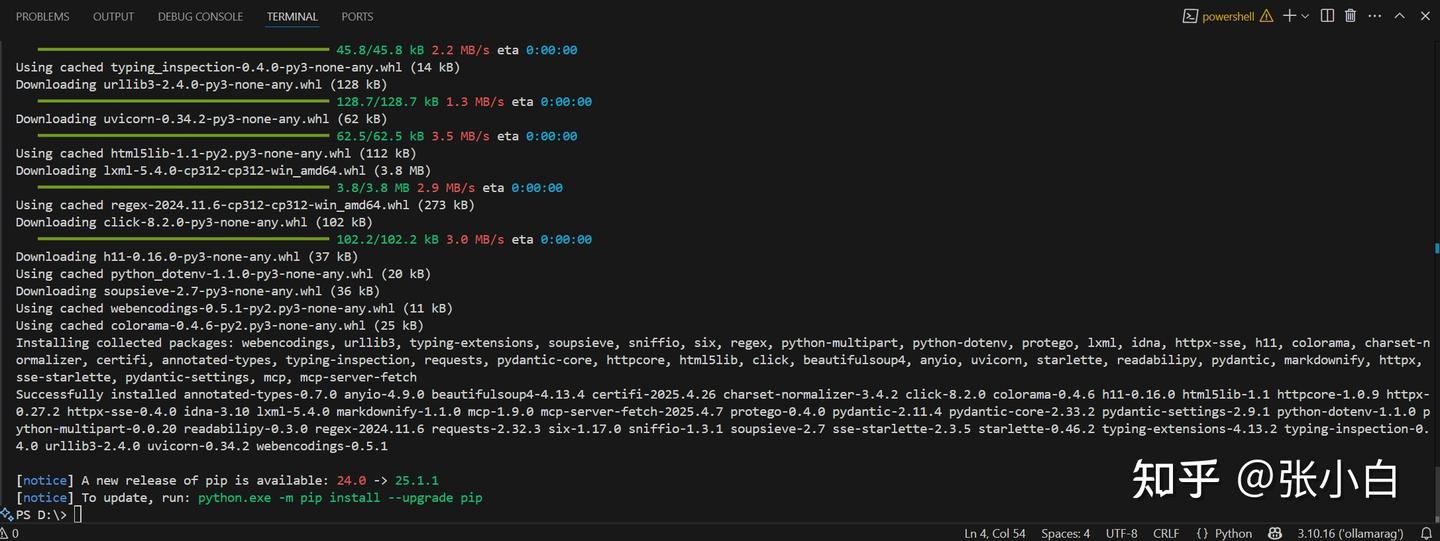
这里需要打开PowerShell命令行,安装uvx:
powershell -ExecutionPolicy ByPass -c "irm https://astral.sh/uv/install.ps1 | iex"
重启VSCode,再重新Start:
我们也可以打开老师的项目:
git clone https://github.com/jacwu/github-materials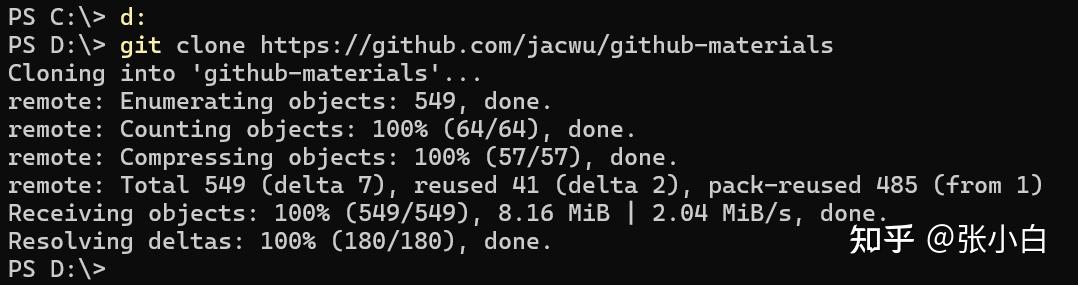
使用VScode打开项目目录:
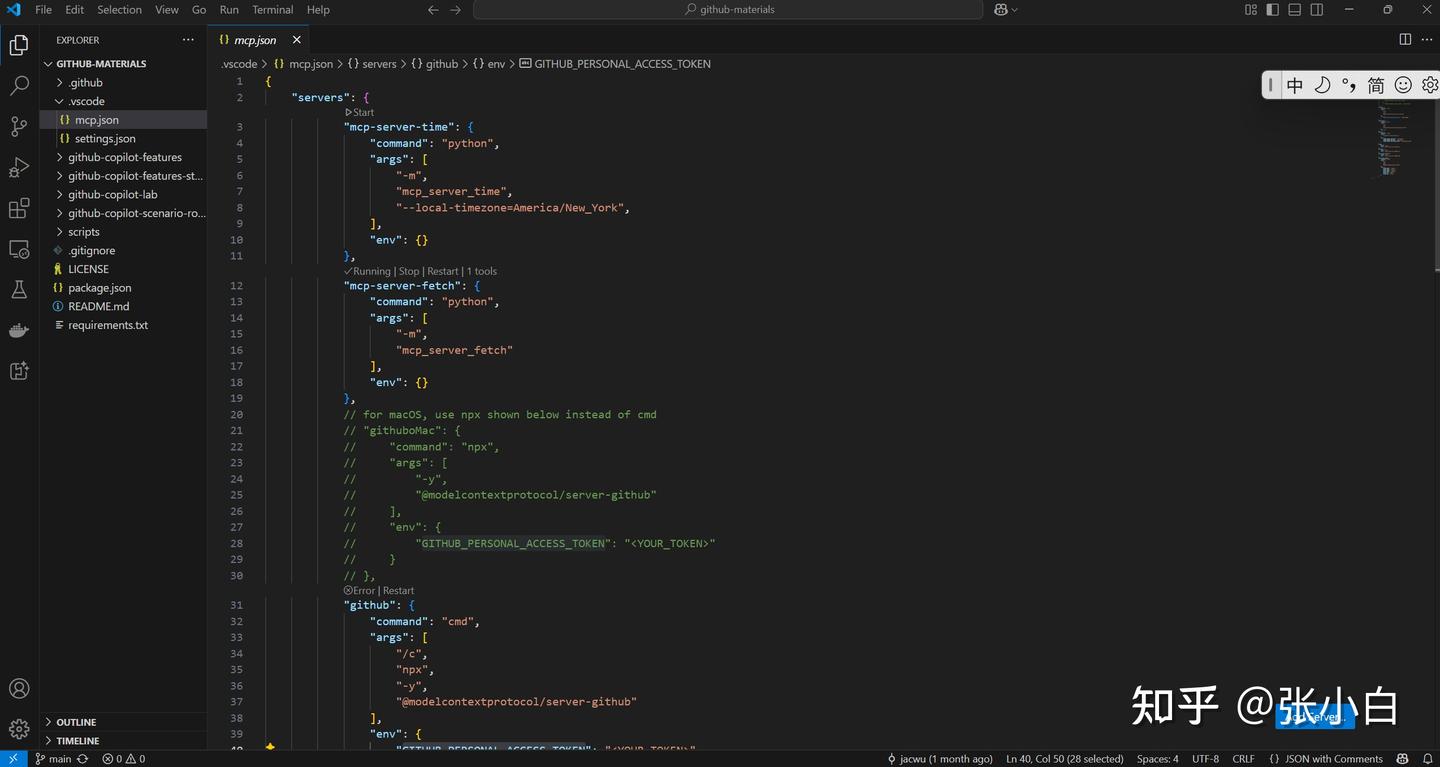
打开:
创建一个fine-grained access token:
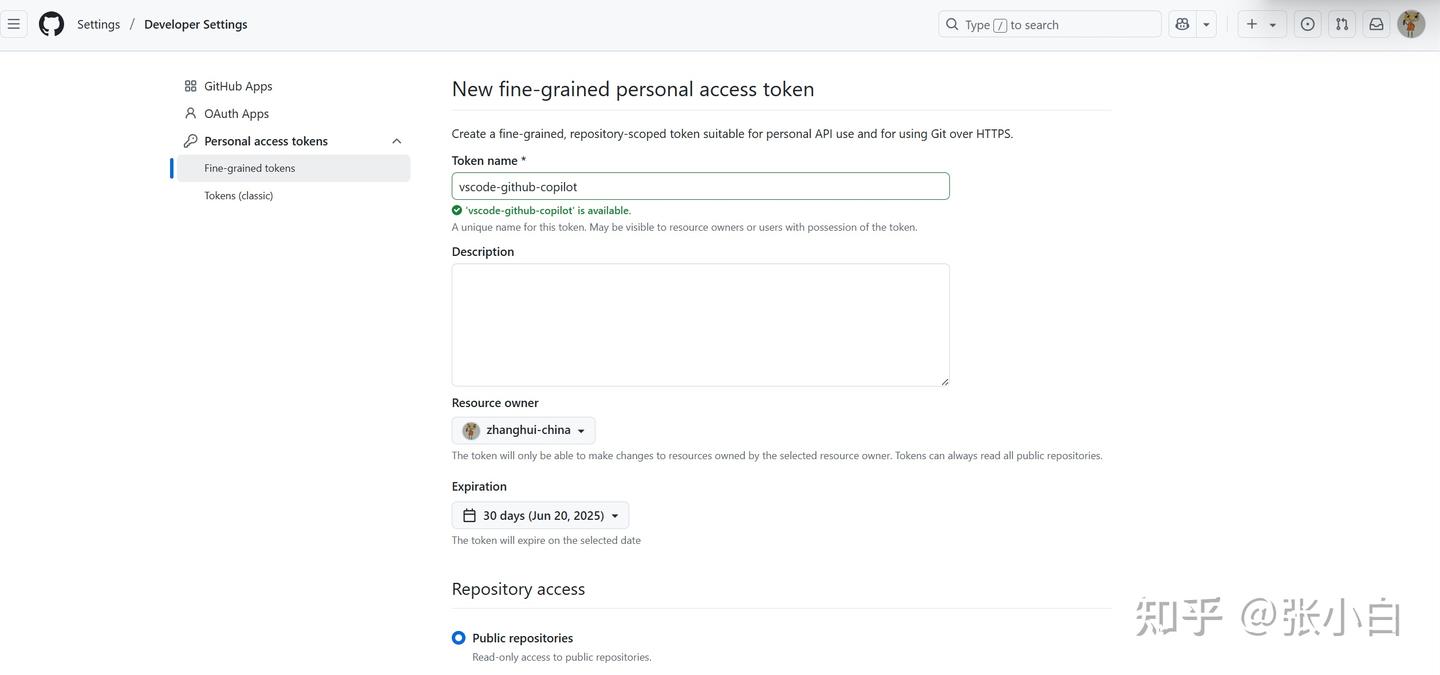

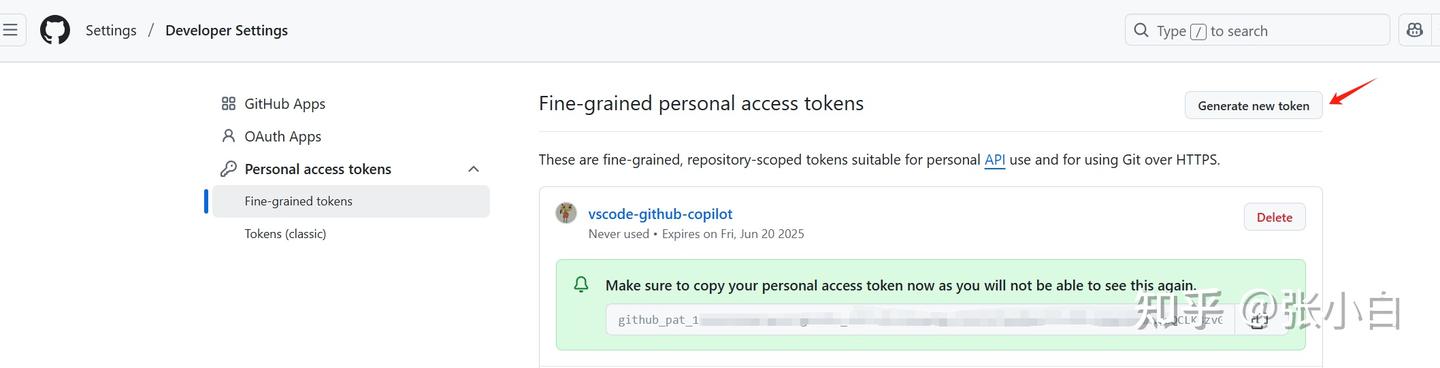
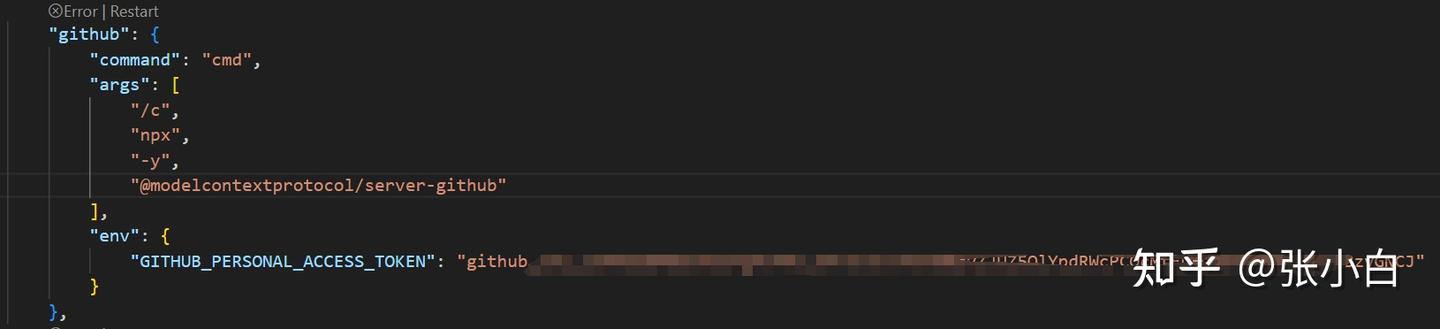
复制这个token替换mcp.json中的:
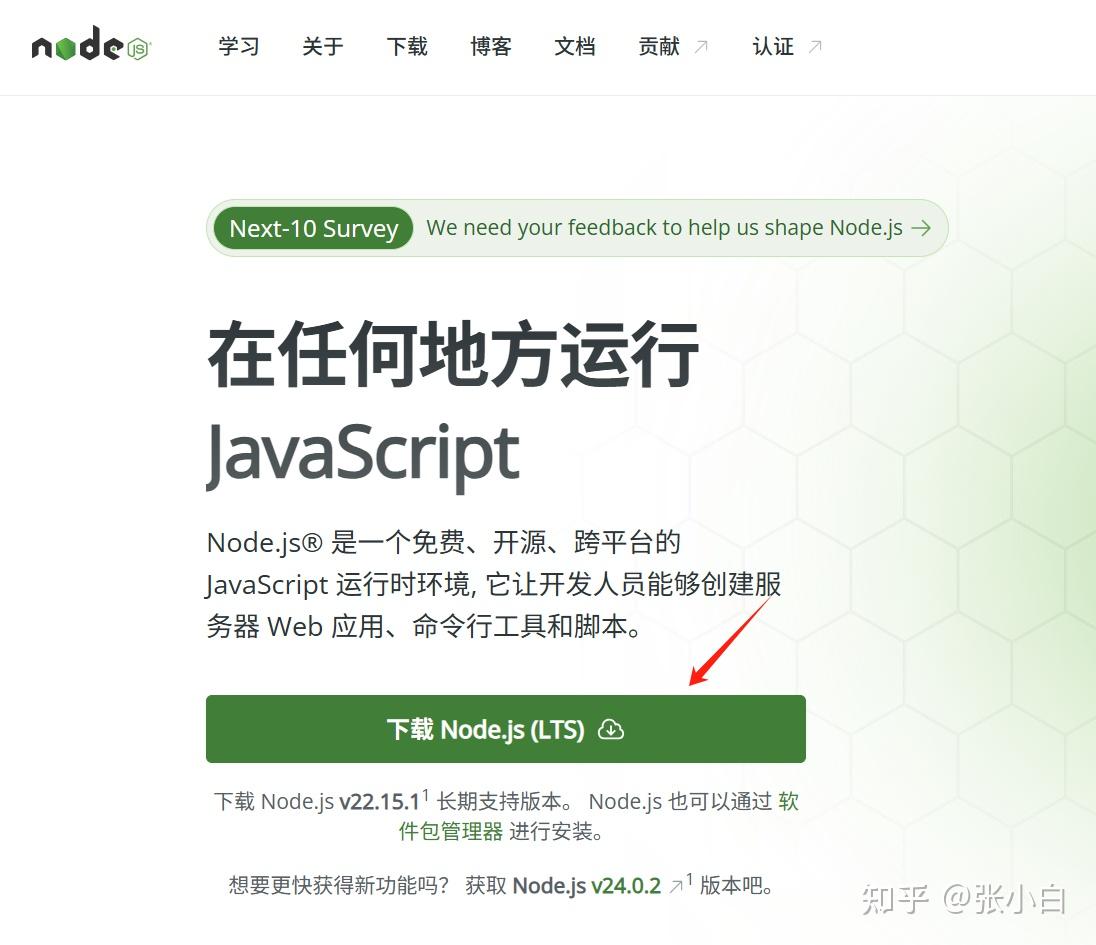
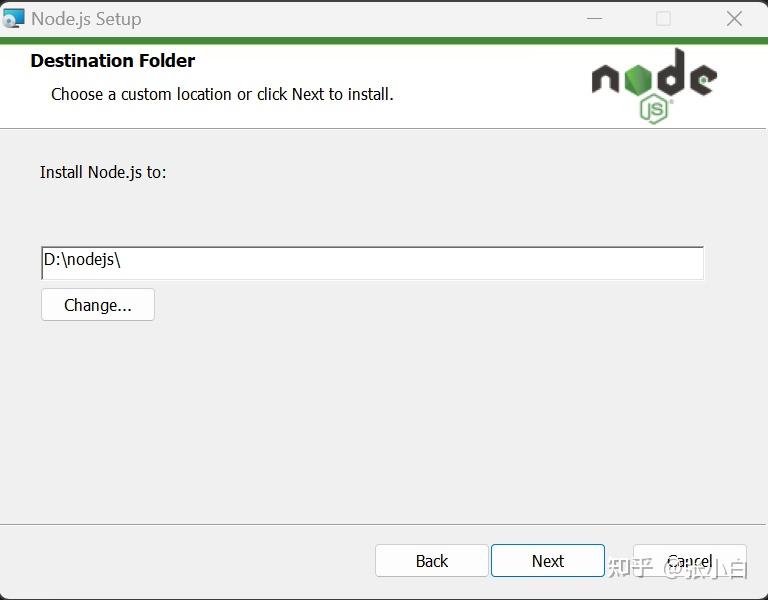
下载node.js安装包并执行安装:
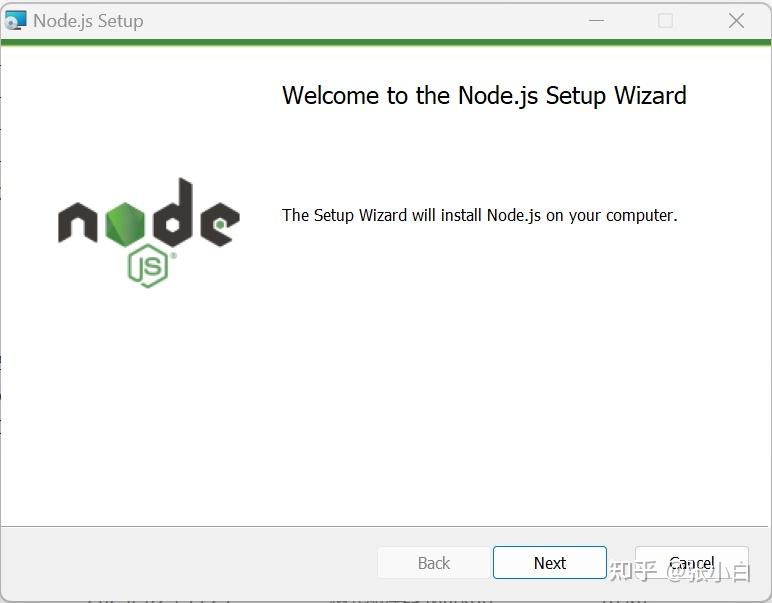
修改下安装位置:
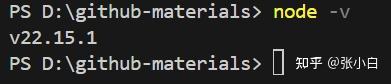
使用node -v查看安装结果:
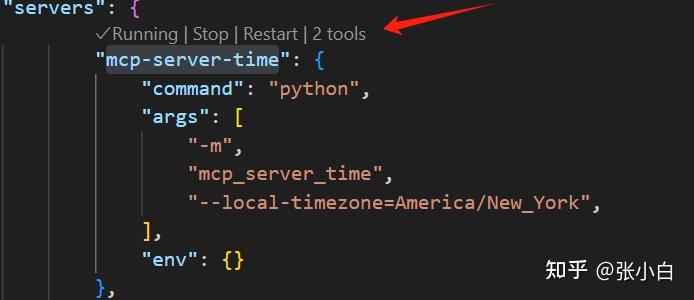
重启VScode,再点击Start按钮(或Restart),重新启动github copilot的MCP Server:
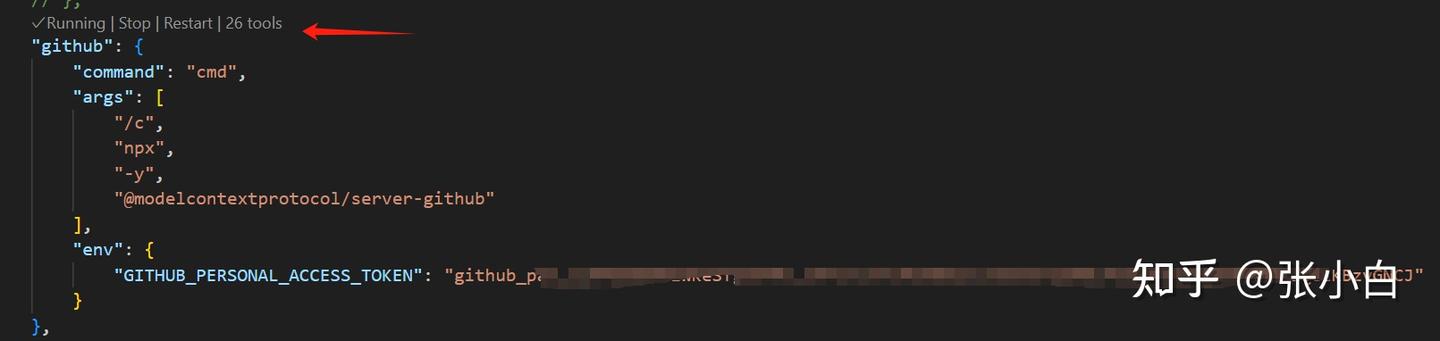
此时已经是running状态了。
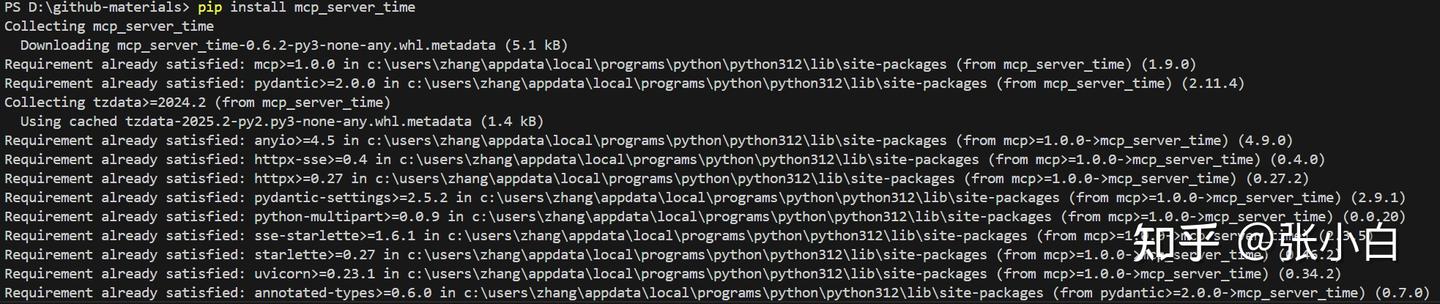
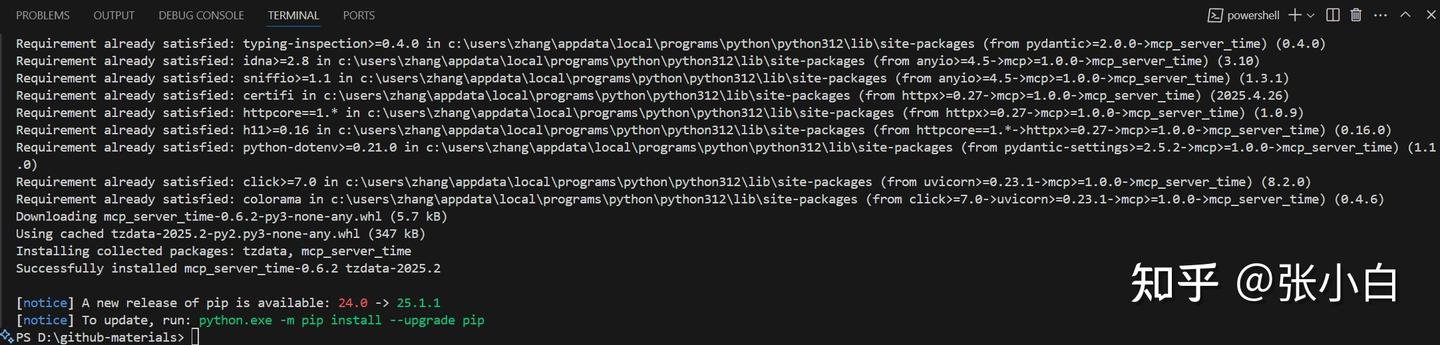
pip install mcp_server_time
启动 mcp-server-time服务:
(以下暂时忽略)
pip install mcp-server-fetch
(以上暂时忽略)
打开VScode上面偏右方向的小猪:
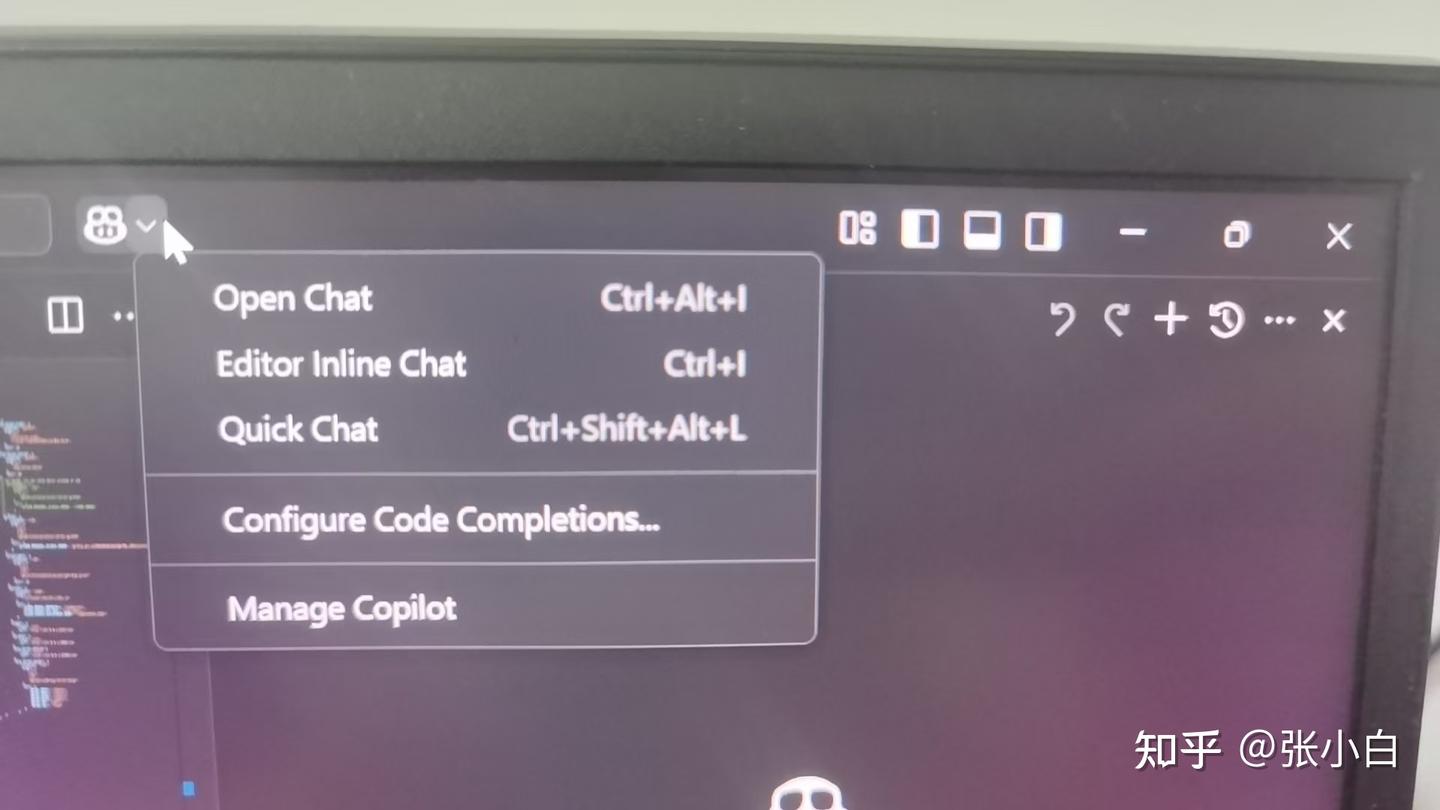
选择Open Chat,显示Copilot Chat 框:
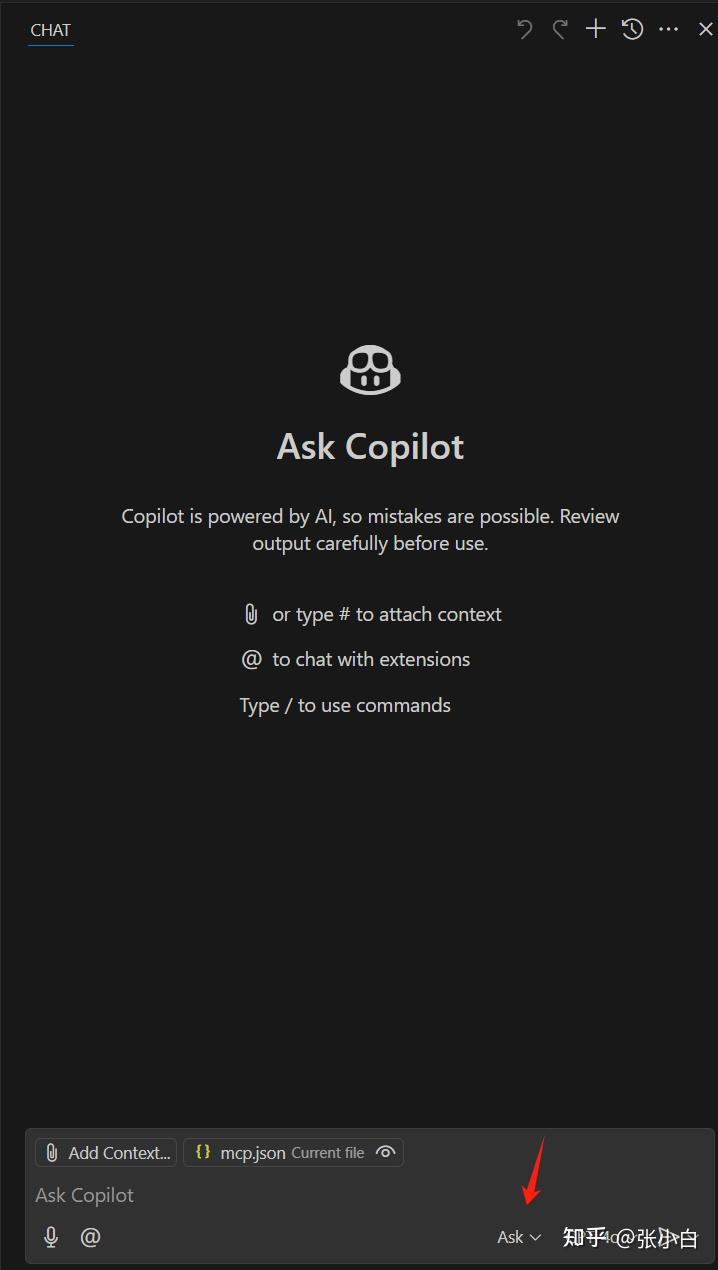
在箭头位置选择“Agent”
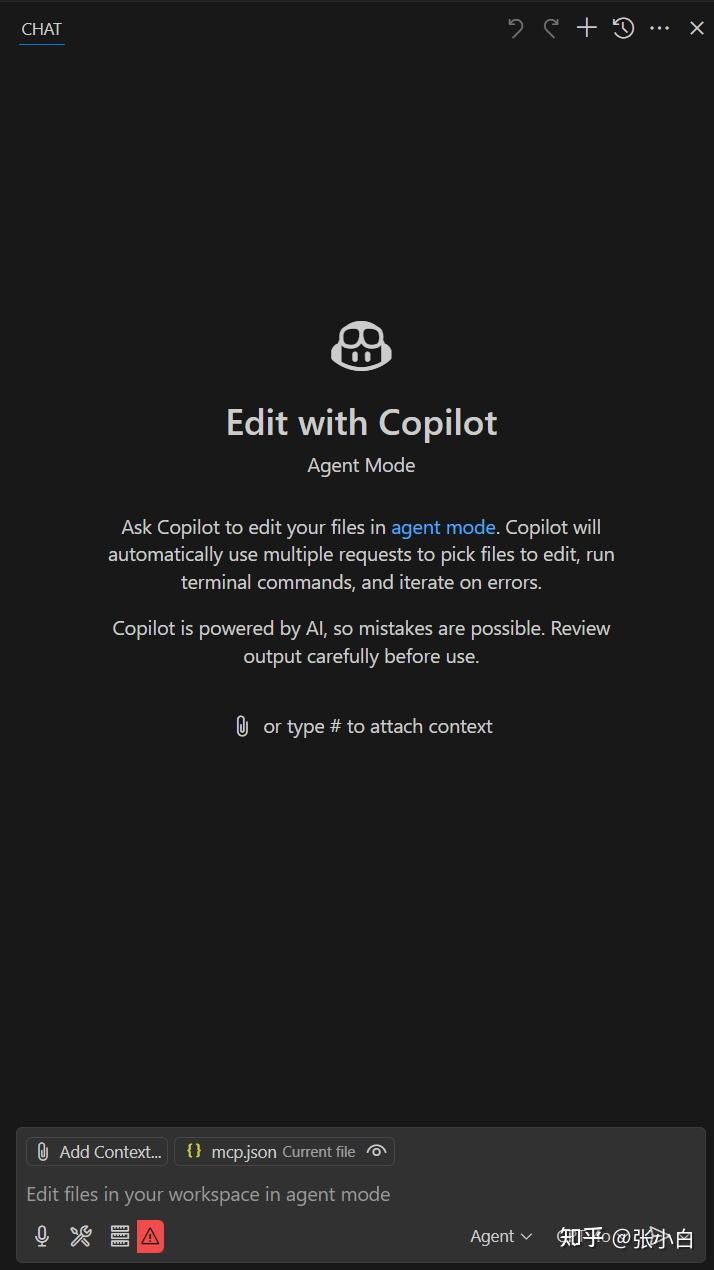
提问:现在是几点钟?

东京呢?
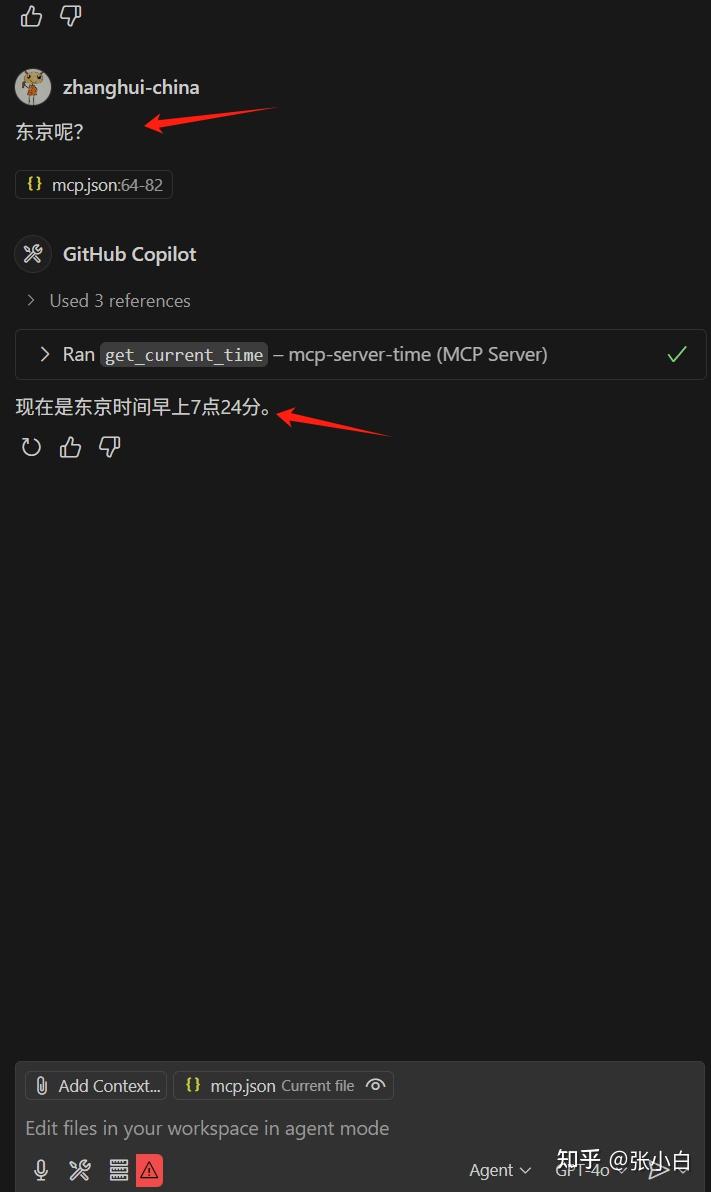
5、启动自建的MCP Server
cd D:\github-materials\github-copilot-features\mcp
准备mcp_server.py脚本:
import logging
import uvicorn
from starlette.applications import Starlette
from pathlib import Path
from starlette.routing import Route
from mcp.server import Server
from mcp.server.sse import SseServerTransport
from mcp.types import Tool, TextContent, ImageContent, EmbeddedResource
import json
from typing import Any, Sequence, Union, Dict, TypeVar, cast
import asyncio
from urllib.parse import quote_plus
import httpx

# Create logs directory if it doesn't exist
log_dir = Path("logs")
log_dir.mkdir(exist_ok=True)

# Configure logging
logging.basicConfig(
    level=logging.DEBUG,
    format="%(asctime)s [%(levelname)s] %(message)s",
    handlers=[logging.FileHandler("logs/mcp_server.log"), logging.StreamHandler()]
)
logger = logging.getLogger(__name__)

T = TypeVar('T')

class Weather:
    def __init__(self, locale: str = 'en', unit: str = 'imperial', timeout: float = 10.0):
        self.locale = locale
        self.unit = unit
        self.timeout = timeout

    async def get_forecast(self, location: str) -> Dict[str, Any]:
        """Get weather forecast for a specified location."""
        url = f'https://{self.locale}.wttr.in/{quote_plus(location)}?format=j1'
        logger.info(f"Requesting weather data for location: {location}")
        return await self._fetch_url(url)

    async def _fetch_url(self, url: str, raw: bool = False, max_retries: int = 3) -> Dict[str, Any]:
        """Fetch data from URL with retry logic and proper error handling."""
        headers = {
            'User-Agent': 'Mozilla/5.0 (Windows NT 10.0; Win64; x64; rv:131.0) Gecko/20100101 Firefox/131.0',
            'Content-Type': 'application/json'
        }

        for attempt in range(max_retries):
            try:
                async with httpx.AsyncClient(timeout=self.timeout) as client:
                    response = await client.get(url, headers=headers)

                    # Log response details at debug level instead of info to avoid excessive logging
                    logger.debug(f"Response from {url}: status={response.status_code}")

                    # Handle special case for 404 responses that still contain valid content
                    if response.status_code == 404 and response.text:
                        logger.warning(f'Got 404 but received content from URL: {url}')
                        return self._process_response(response, raw, url)

                    # Handle other status codes
                    response.raise_for_status()
                    return self._process_response(response, raw, url)

            except httpx.HTTPStatusError as e:
                if attempt == max_retries - 1:
                    logger.error(f'HTTP error occurred after {max_retries} attempts: {e}')
                    raise
                logger.warning(f'HTTP error on attempt {attempt+1}/{max_retries}: {e}. Retrying...')
                await asyncio.sleep(1 * (2 ** attempt))  # Better exponential backoff
            except httpx.RequestError as e:
                logger.error(f'Request error for {url}: {e}')
                raise
            except Exception as e:
                logger.error(f'Unexpected error fetching {url}: {e}', exc_info=True)
                raise

    def _process_response(self, response: httpx.Response, raw: bool, url: str) -> Dict[str, Any]:
        """Process HTTP response and return formatted content."""
        if raw:
            return cast(Dict[str, Any], response.text)
        return self._format_content(response.content, url)

    def _format_content(self, content: Union[str, bytes], url: str) -> Dict[str, Any]:
        """Format and parse JSON content from response."""
        try:
            if isinstance(content, bytes):
                content = content.decode('utf-8')
            return json.loads(content)
        except json.JSONDecodeError:
            logger.error(f"Failed to decode JSON from {url}")
            raise ValueError(f"Invalid JSON response from weather service: {content[:100]}...")
        except Exception as e:
            logger.error(f"Error formatting content from {url}: {str(e)}")
            raise ValueError(f"Failed to process weather data: {str(e)}")


class UserGenerator:
    """Class for generating random user data"""

    async def generate_user(self, gender=None, nationality=None) -> dict:
        """
        Generate random user data.

        Args:
            gender: gender for the user
            nationality: nationality for the user

        Returns:
            Dictionary containing random user data
        """
        # Build API URL
        url = "https://randomuser.me/api/"
        params = []

        if gender:
            params.append(f"gender={gender}")
        if nationality:
            params.append(f"nat={nationality}")

        if params:
            url += "?" + "&".join(params)

        logger.info(f"Calling Random User API: {url}")

        # Call API
        async with httpx.AsyncClient() as client:
            try:
                response = await client.get(url)
                response.raise_for_status()
                data = response.json()
                logger.info("Successfully retrieved random user data")
                return data
            except Exception as e:
                logger.error(f"Error generating random user: {str(e)}")
                raise RuntimeError(f"Random User API error: {str(e)}")


class MCP_Server:
    def __init__(self):
        logger.debug("Initializing MCP_Server")
        self.app = Server("mcp-server")
        self.setup_tools()

    def setup_tools(self):
        @self.app.list_tools()
        async def list_tools() -> list[Tool]:
            return [
                Tool(
                    name="get_current_weather",
                    description="Get current weather and forecast for a location",
                    inputSchema={
                        "type": "object",
                        "properties": {
                            "location_name": {
                                "type": "string",
                                "description": "The location to get the weather for"
                            }
                        },
                        "required": ["location_name"]
                    }
                ),
                Tool(
                    name="create_random_user",
                    description="Generate random user data",
                    inputSchema={
                        "type": "object",
                        "properties": {
                            "gender": {
                                "type": "string",
                                "enum": ["male", "female"],
                                "description": "gender for the user"
                            }
                        },
                        "required": ["gender"]
                    }
                )
            ]

        @self.app.call_tool()
        async def call_tool(name: str, arguments: Any) -> Sequence[TextContent | ImageContent | EmbeddedResource]:
            if name == "get_current_weather":
                if not isinstance(arguments, dict) or "location_name" not in arguments:
                    logger.error(f"Invalid weather arguments: {arguments} is not a 'dict'")
                    raise ValueError(f"Invalid weather arguments: {arguments} is not a 'dict'")

                try:
                    location_name = arguments["location_name"]
                    logger.info(f"Received weather request for location: {location_name}")
                    weather = await Weather(locale='zh-cn', unit='metric').get_forecast(location_name)
                    logger.info(f"Successfully received weather data for location")

                    return [
                        TextContent(
                            type="text",
                            text=json.dumps(weather, indent=3)
                        )
                    ]

                except Exception as e:
                    logger.error(f"Face Error processing weather request: {str(e)}")
                    raise RuntimeError(f"Weather API error: {str(e)}")

            elif name == "create_random_user":
                try:
                    gender = arguments.get("gender")

                    logger.info(f"Received user generation request with gender={gender}")
                    user_generator = UserGenerator()
                    user_data = await user_generator.generate_user(gender)

                    return [
                        TextContent(
                            type="text",
                            text=json.dumps(user_data, indent=3)
                        )
                    ]
                except Exception as e:
                    logger.error(f"Error processing user generation request: {str(e)}")
                    raise RuntimeError(f"User generation error: {str(e)}")
            else:
                logger.error(f"Unknown tool: {name}")
                raise ValueError(f"Unknown tool: {name}")


def create_app():
    myserver = MCP_Server()
    sse = SseServerTransport("/request")

    class HandleSSE:
        def __init__(self, sse, myserver):
            self.sse = sse
            self.myserver = myserver

        async def __call__(self, scope, receive, send):
            async with self.sse.connect_sse(scope, receive, send) as streams:
                await self.myserver.app.run(
                    streams[0],
                    streams[1],
                    self.myserver.app.create_initialization_options()
                )

    class HandleMessages:
        def __init__(self, sse):
            self.sse = sse

        async def __call__(self, scope, receive, send):
            await self.sse.handle_post_message(scope, receive, send)

    routes = [
        Route("/sse", endpoint=HandleSSE(sse, myserver), methods=["GET"]),
        Route("/request", endpoint=HandleMessages(sse), methods=["POST"])
    ]

    return Starlette(routes=routes)


if __name__ == "__main__":
    app = create_app()
    uvicorn.run(app, host="127.0.0.1", port=3000)
python mcp_server.py

回到mcp.json文件,找到3000端口的配置:
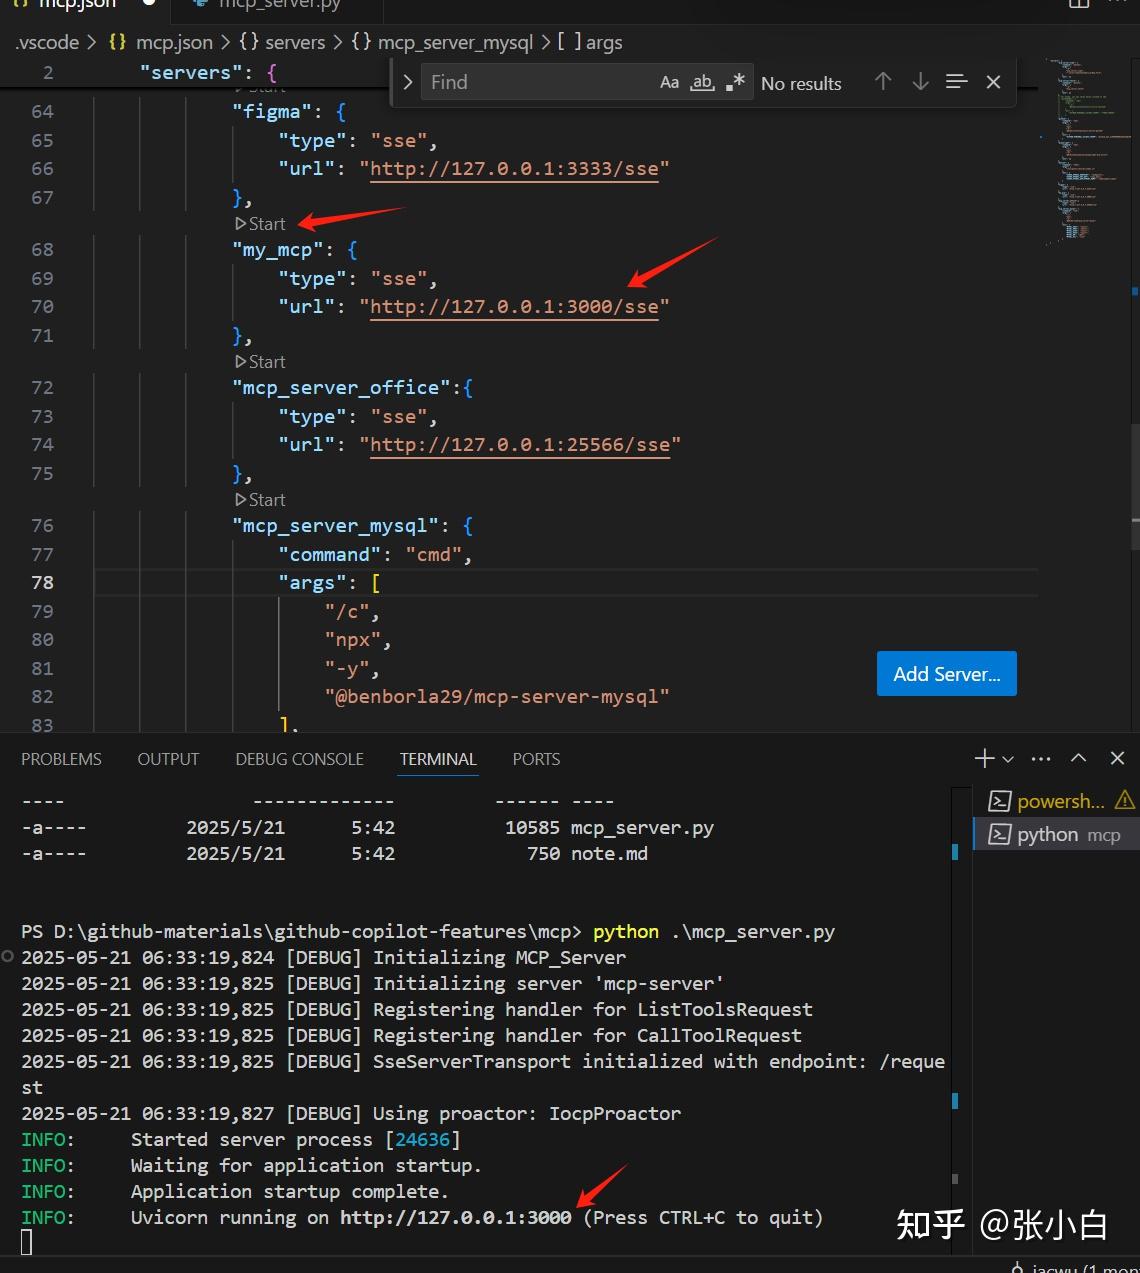
点击Start(如果出错可以多试几次)
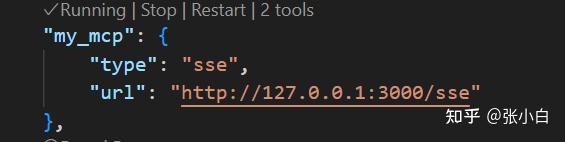
可以看到自建服务也启动了。
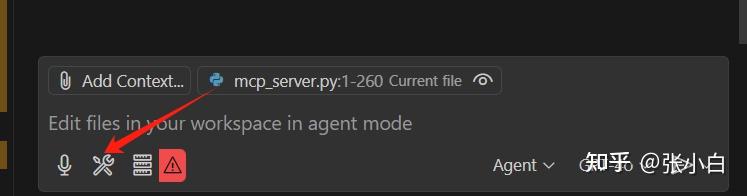
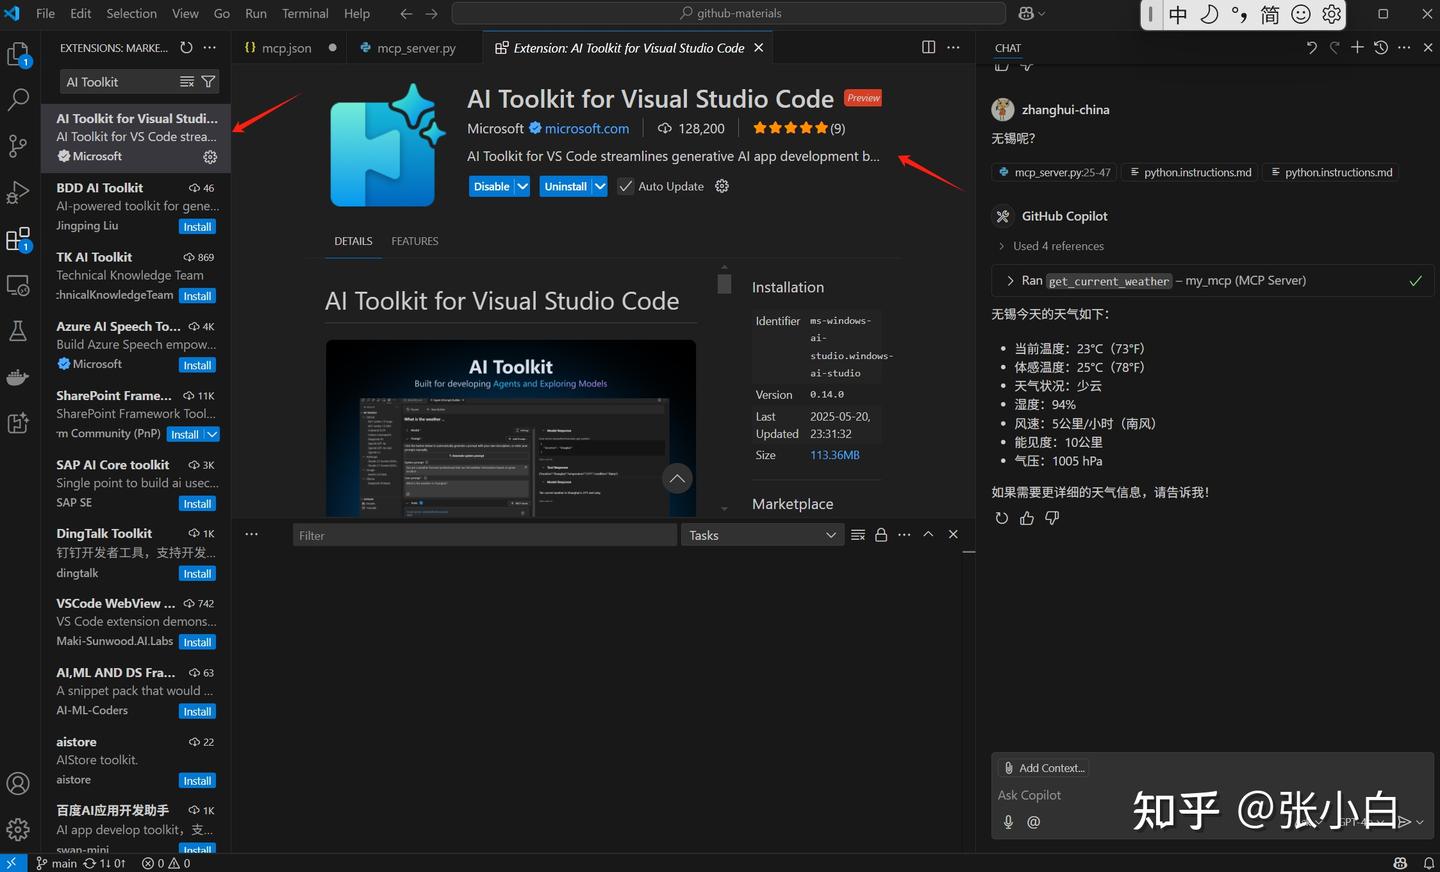
点击Chat窗口的tools按钮,可以看到my_mcp支持的功能清单:

这里有个获取天气的功能,尝试一下:
今天什么天气?
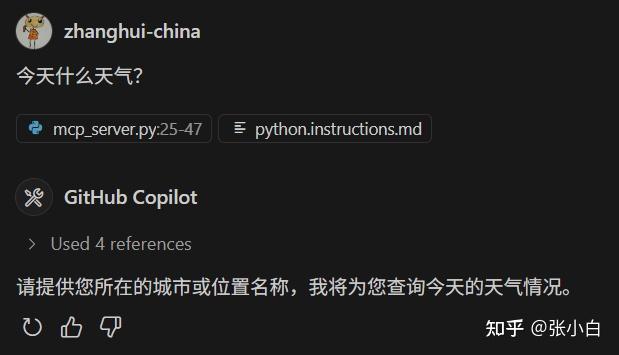
南京:

无锡呢?
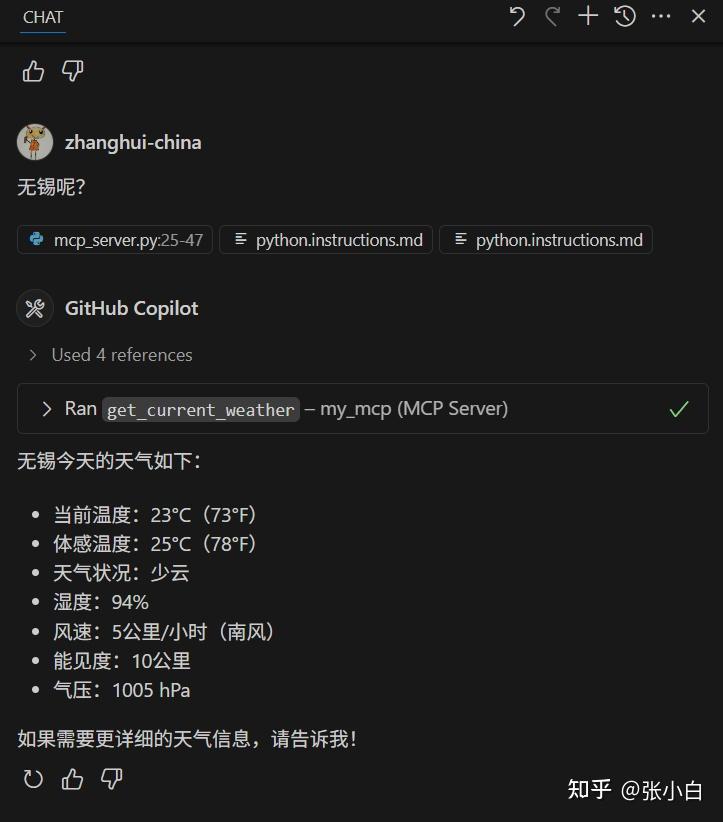
可以看到自制的MCP服务也将结果返回了。
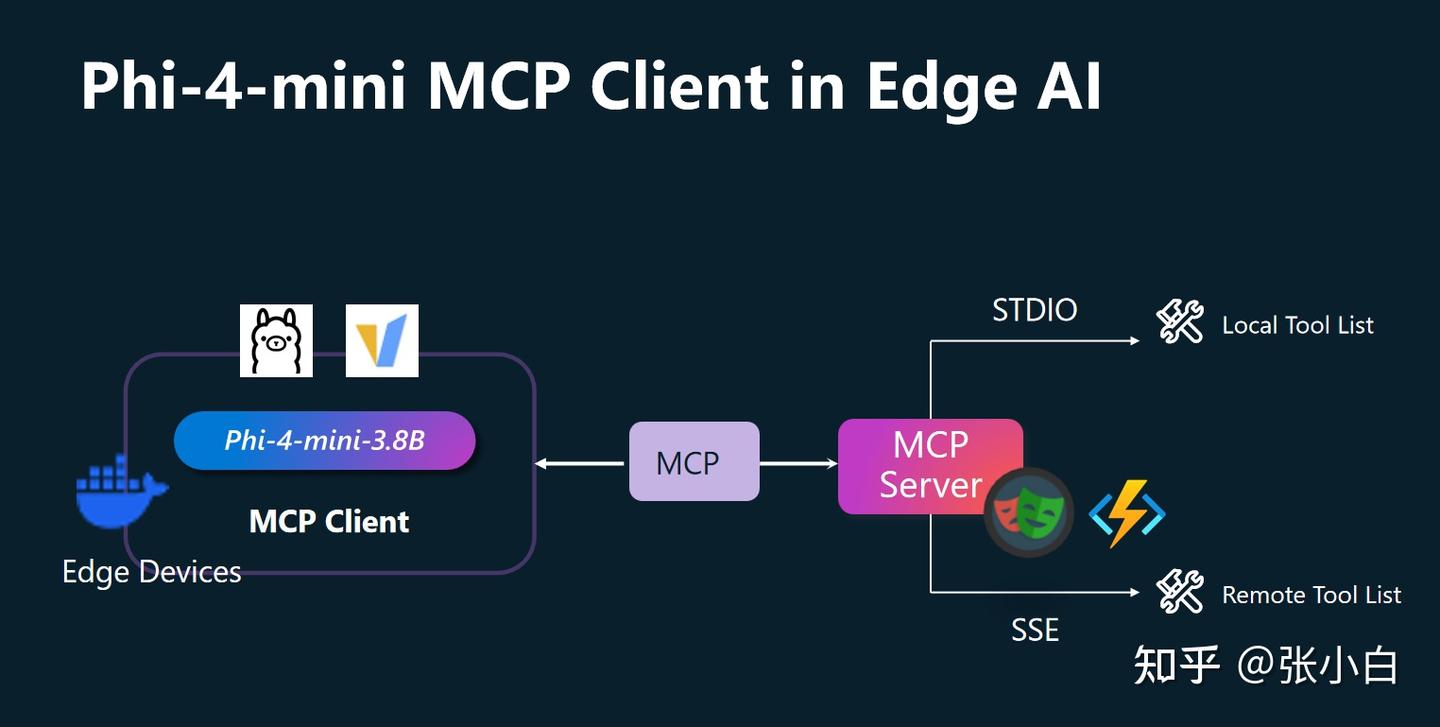
三、微软Alfred Zou老师介绍的《Phi-4-mini MCP 客户端在 Edge AI 中的应用》
1、MCP及其关键概念
MCP:大模型客户端与服务端交互的协议。可以理解为类似USB的协议。
MCP有以下关键概念:
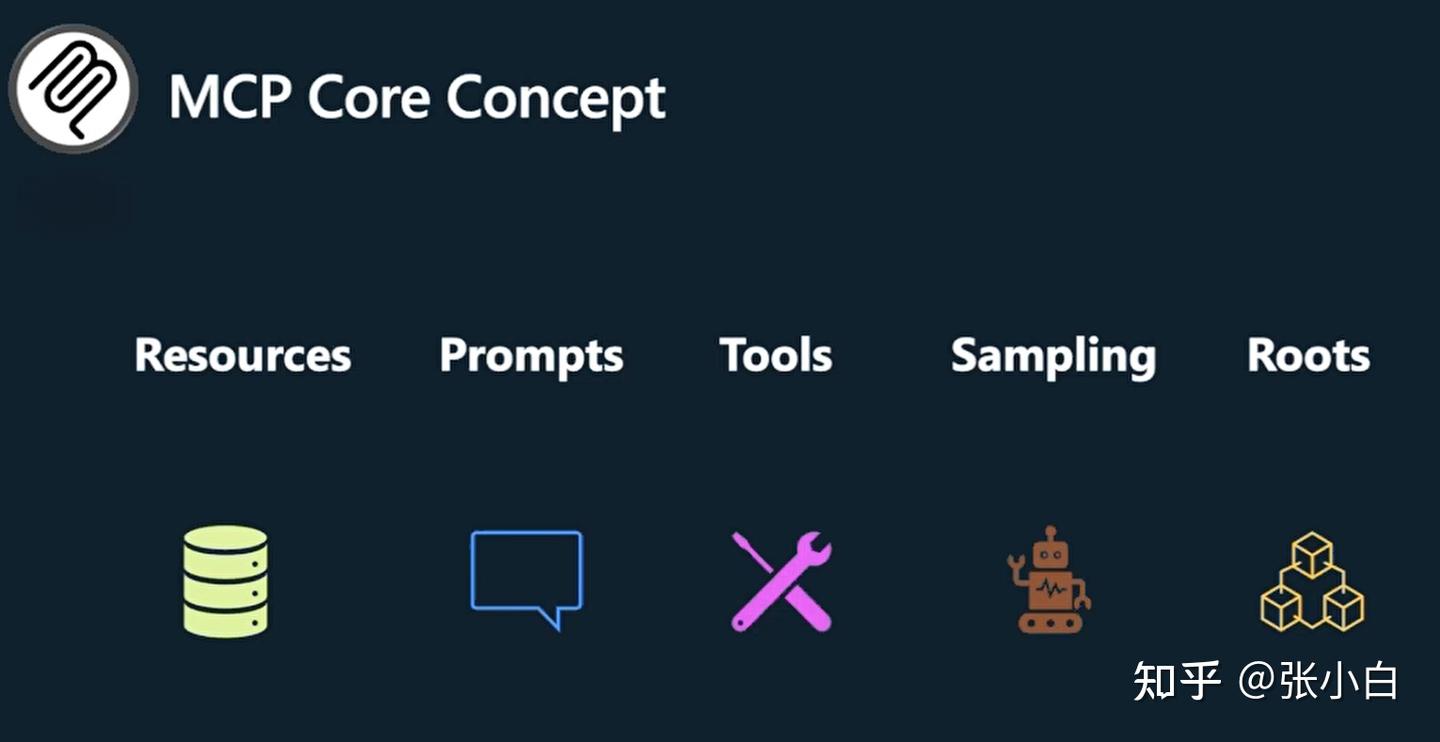
- Resources:MCP协议暴露出来的,可以被Client调用的只读信息。比如:数据库的Schema、表、字段、SQL Example等。可以理解为对Server资源的只读操作。注:Server端只负责暴露资源,Client端如何使用这些Resource,服务端是不care的。
- Prompts:MCP Server端暴露出来的可以给Client使用的提示词模板。Server提供模板和参数,Client填入这些参数。
- Tools:MCP协议中适配度最高应用最广的资源。Tools对Server资源的读写操作,原则上可以用来替代Resource。Tools是由LLM(Agent)控制。一般来说,先由LLM理解用户上下文,调用Tools之后,将原有信息和Tools的结果信息再调用LLM给出最后的结果。所以一般会对LLM做两次调用。
- Sampling:MCP Server端向MCP Client的一种反向操作。举例的场景是当用户有个安全密钥需要处理时,由Server端向Client端发起请求,Client收到时候,对本地的密钥进行加密操作,再将加密后的信息传递给Server。
- Roots:由Client端去限定Server端的边界。比如使用Roots来设定文件操作的目录路径。这只是一个建议,不是严格要求。
微软的MCP Server由以下几种:
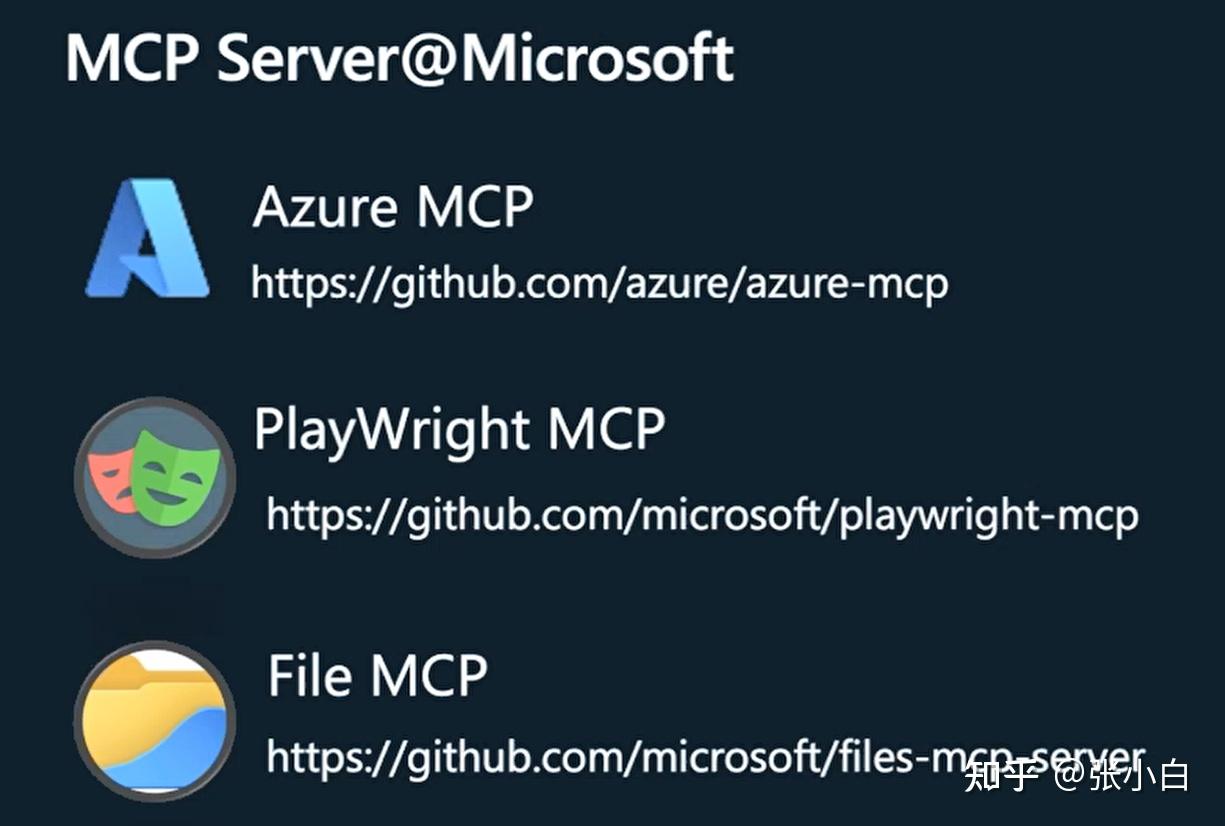
- Azure MCP:用于Azure云服务器的一些操作。
- PlayWright MCP:浏览器自动化测试工具。可以进行网页截图,抓取关键信息,网页剪辑等操作。
- File MCP:用于onedrive的MCP Server。
如何开发一个MCP Server:
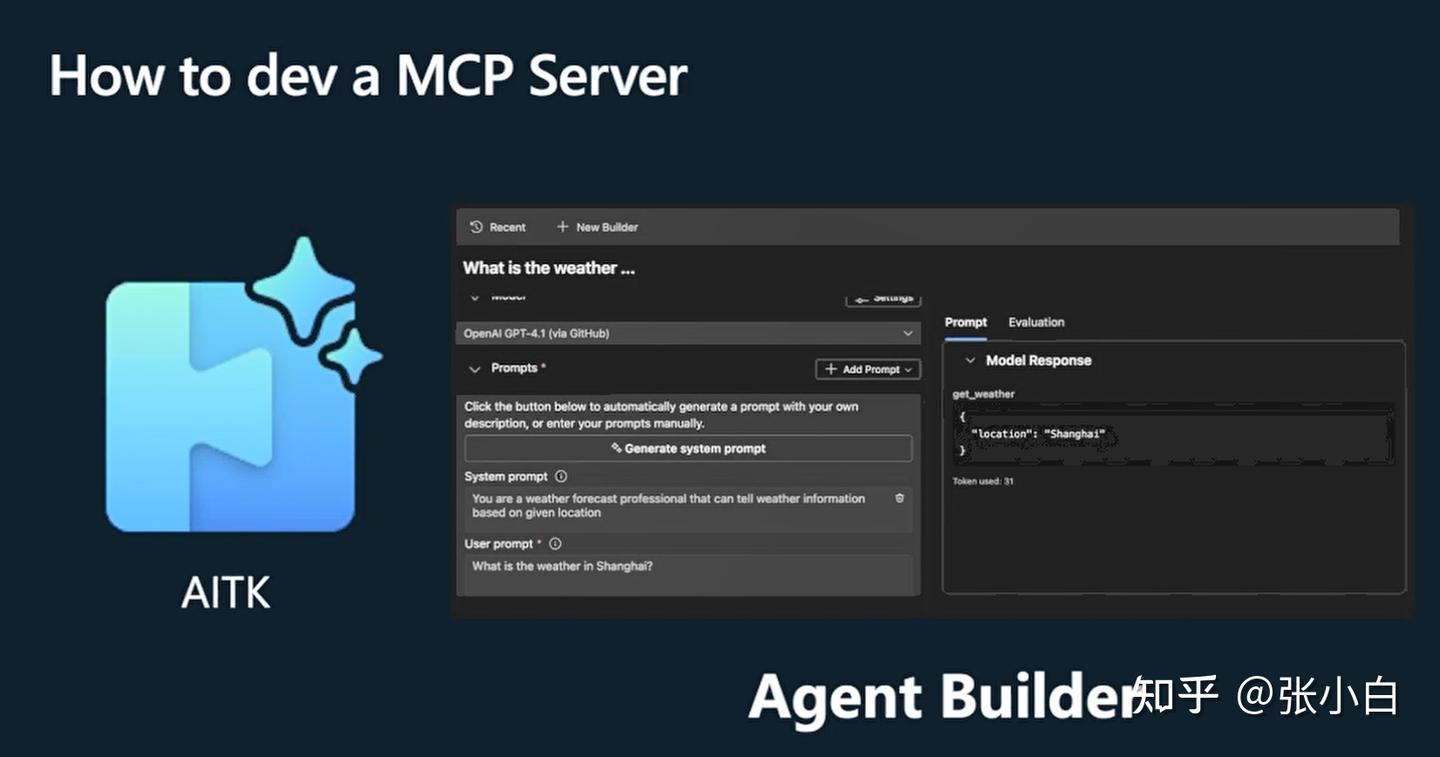
使用TypeScript或者Python开发MCP Server。
2、安装VSCode AI Toolkit
打开VSCode,在Extensions中搜索安装AI Toolkit For VSCode
点击左边的

图标。
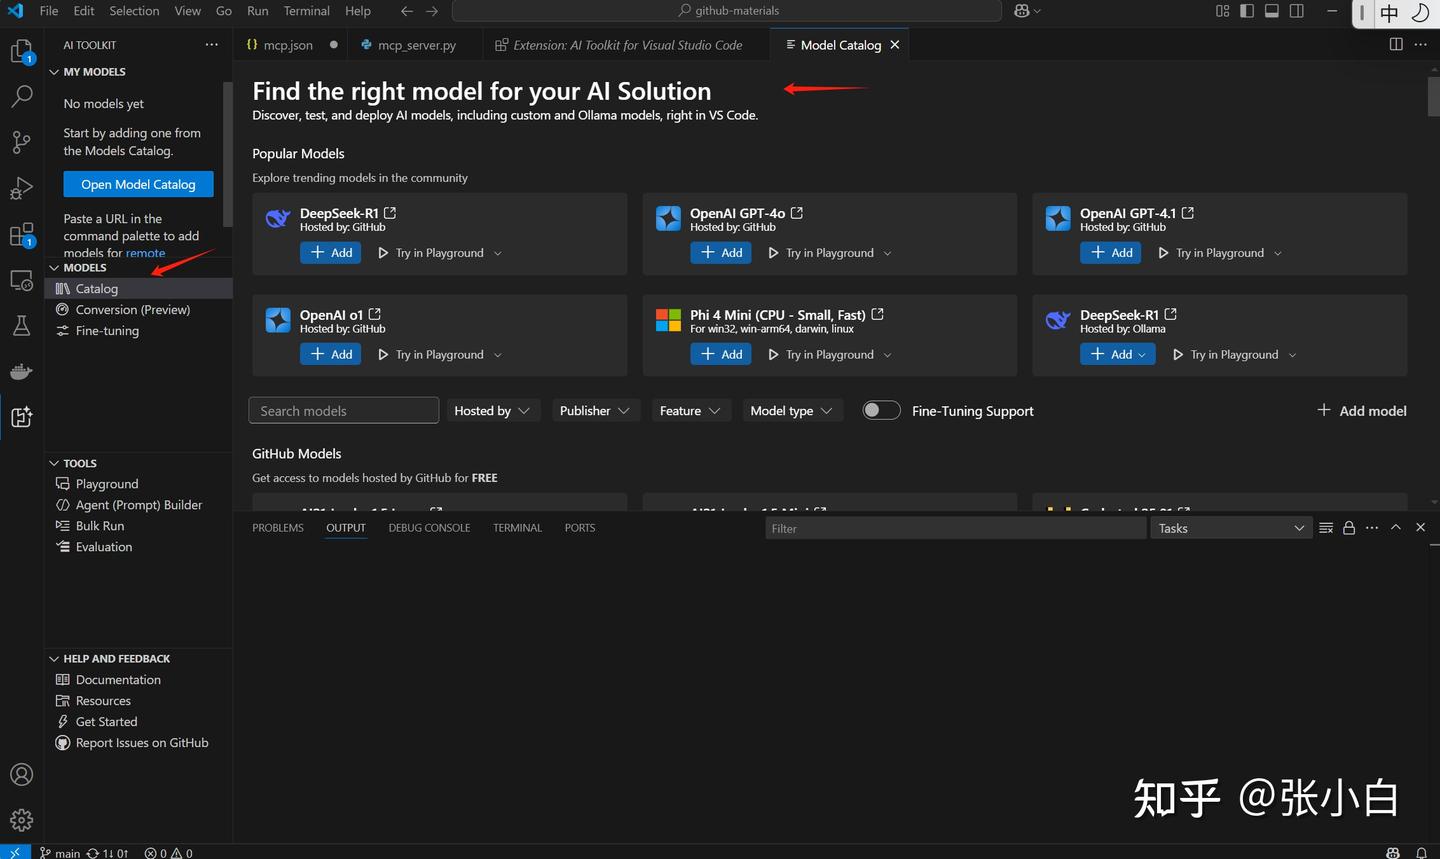
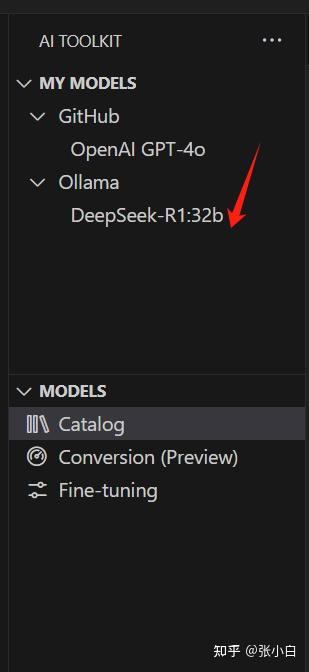
3、在AI Toolkit中增加Github模型:
Models下有很多模型,可以将其加入到Catalog里面(会出现在My Models里面)
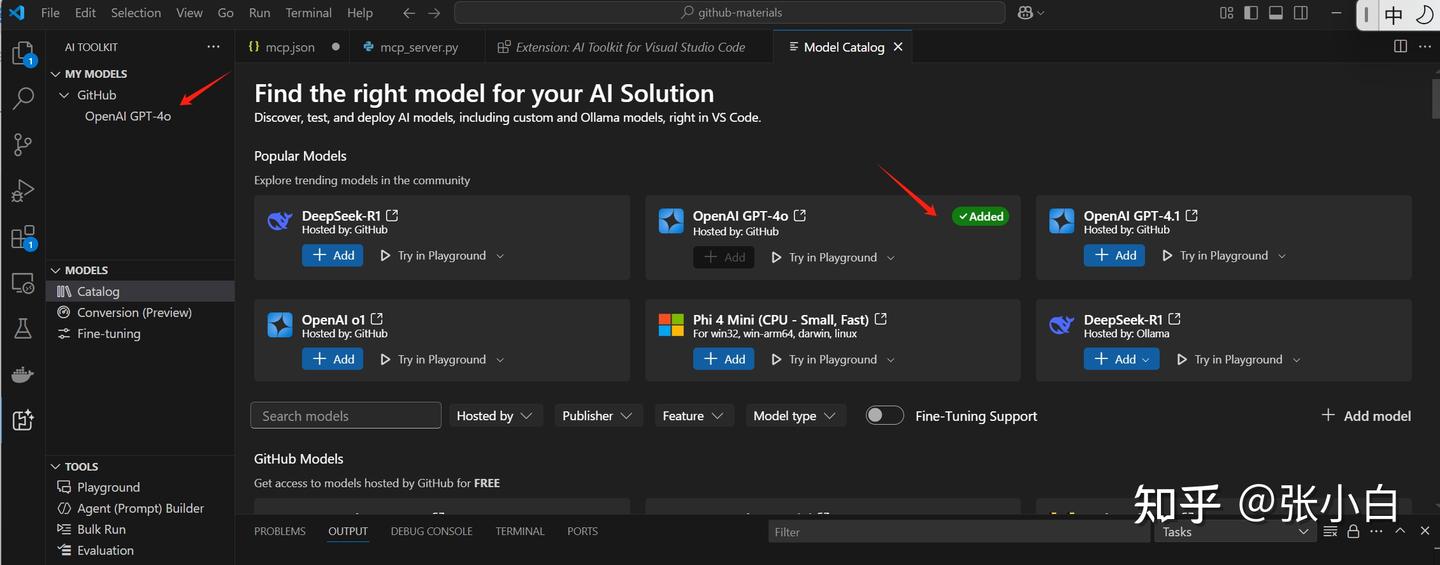
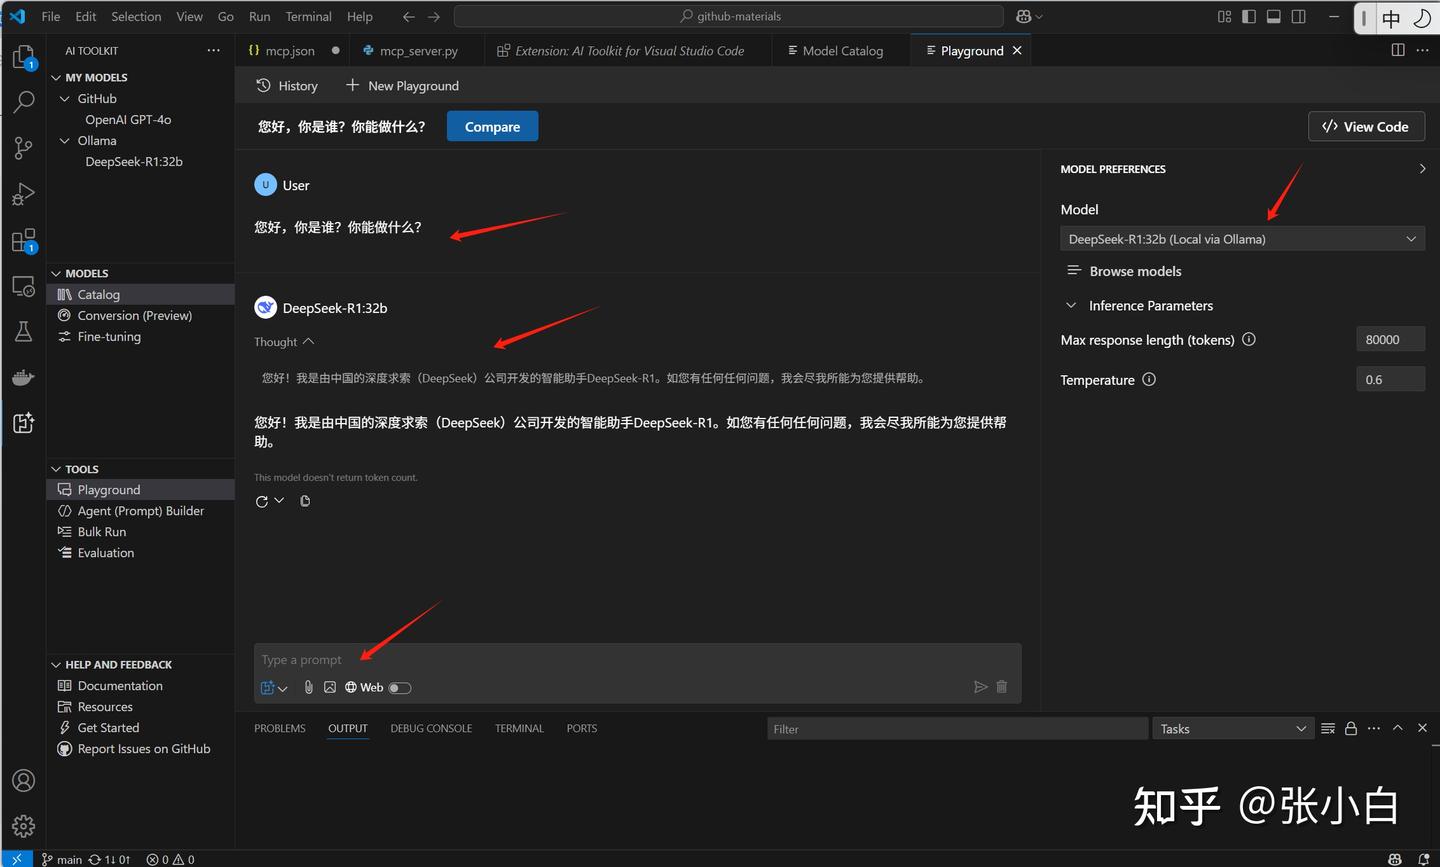
点击PlayGround可以对这个模型进行测试:
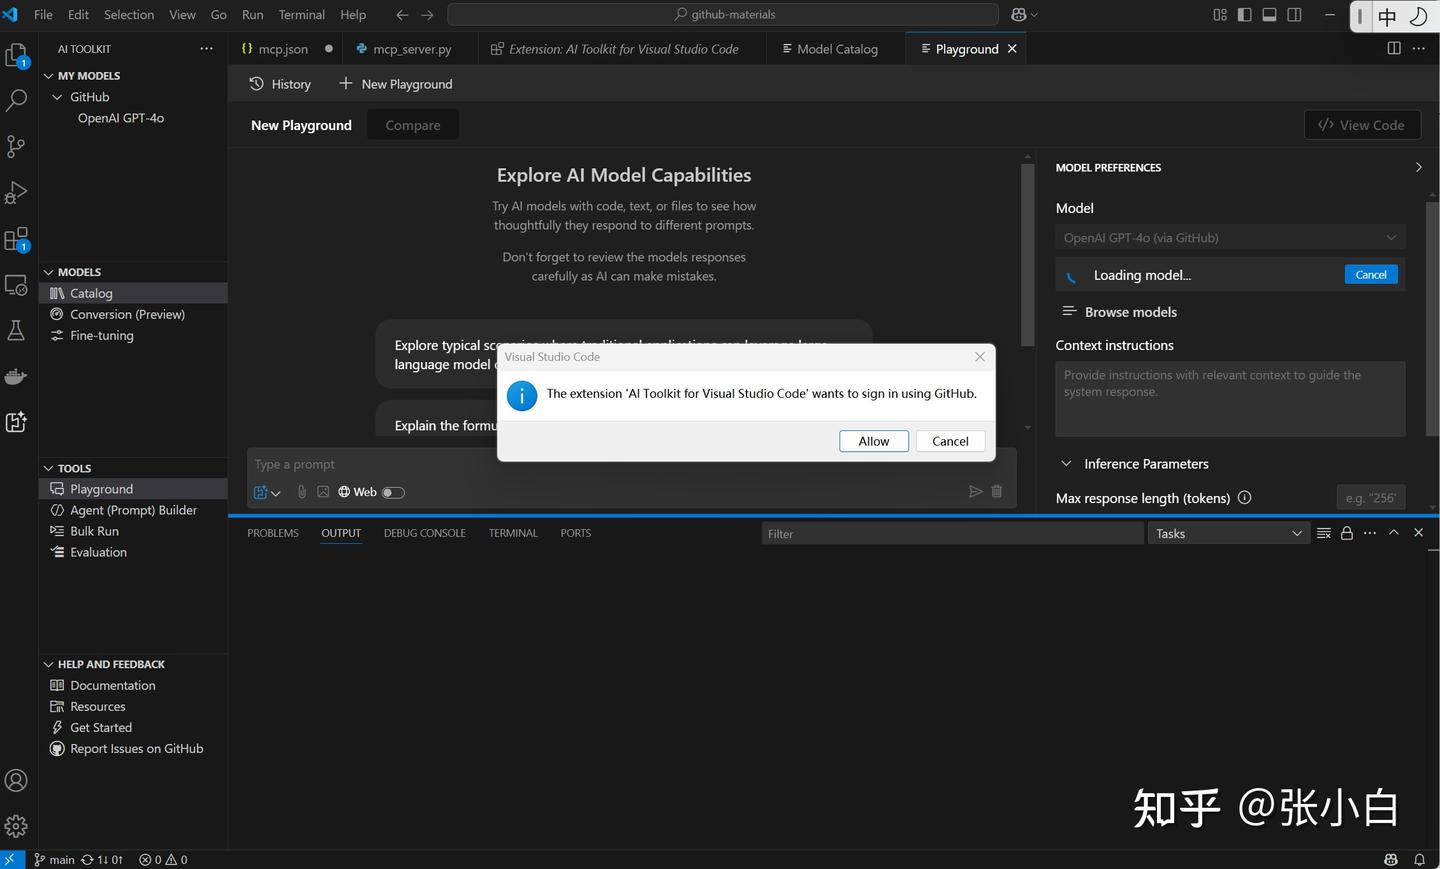
其间会进行Github授权:

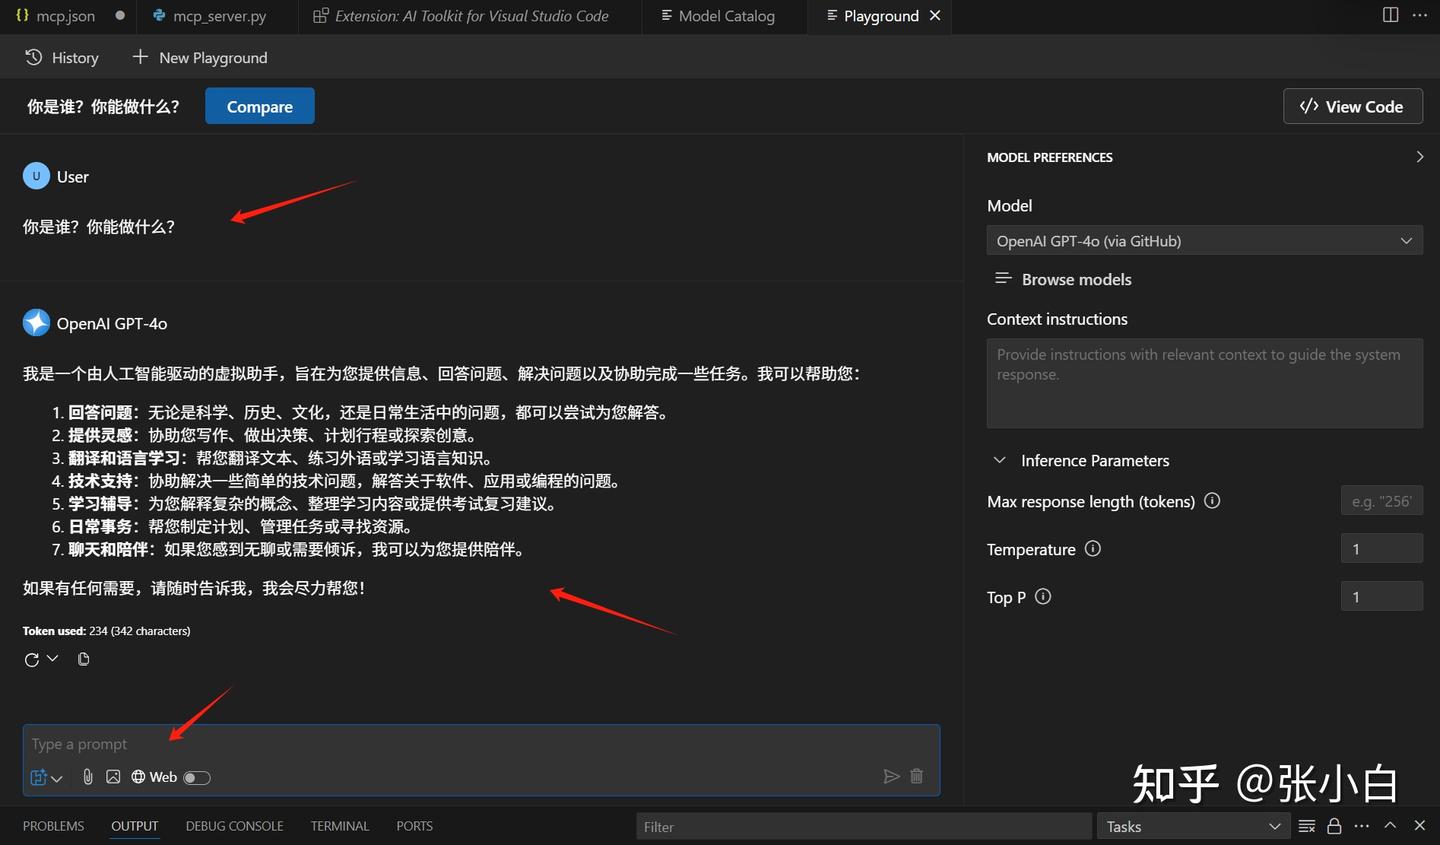
点击继续后,出现以下内容:
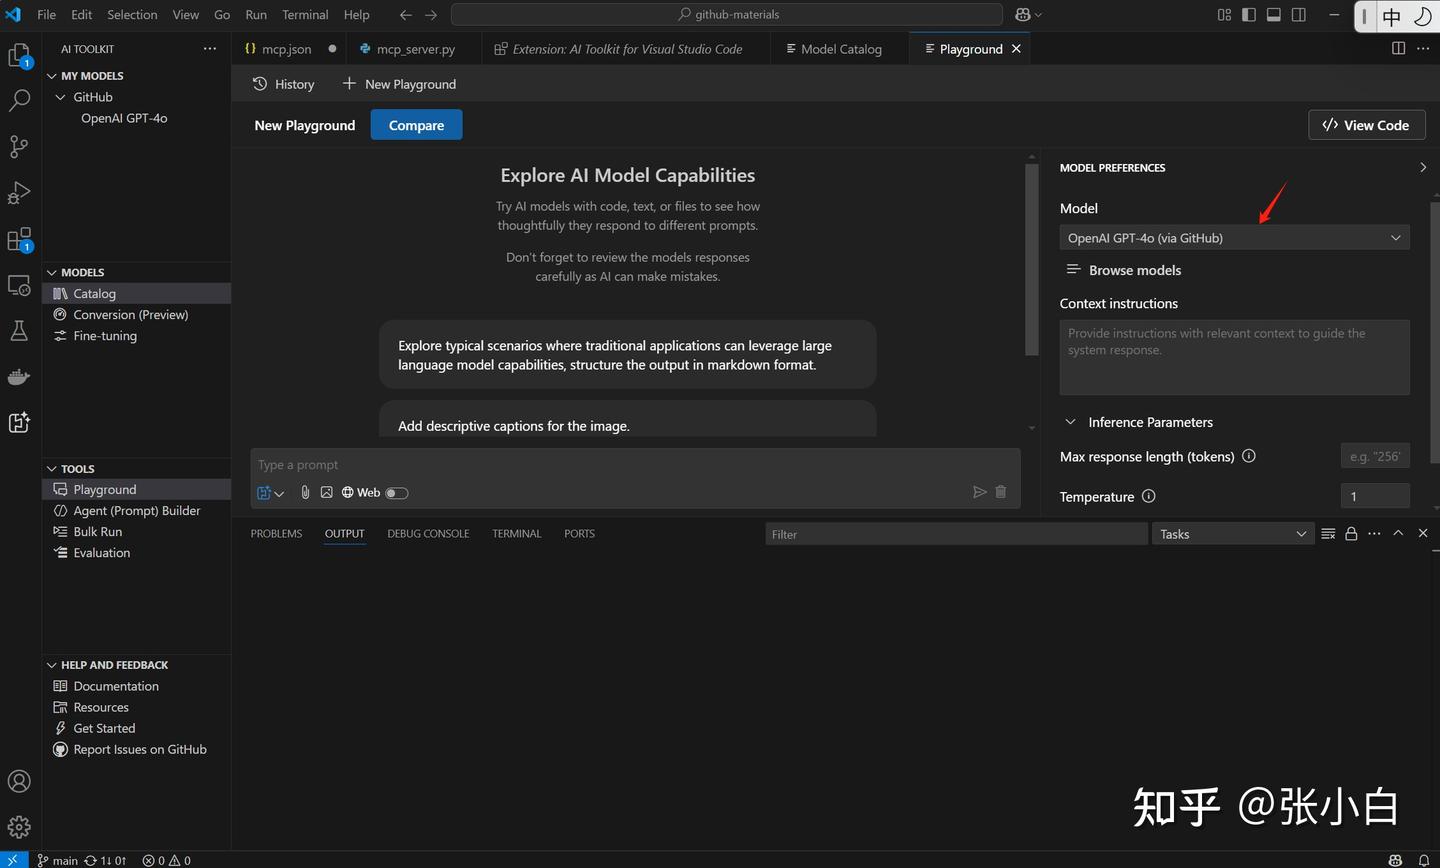
在这个页面就可以进行模型的测试。
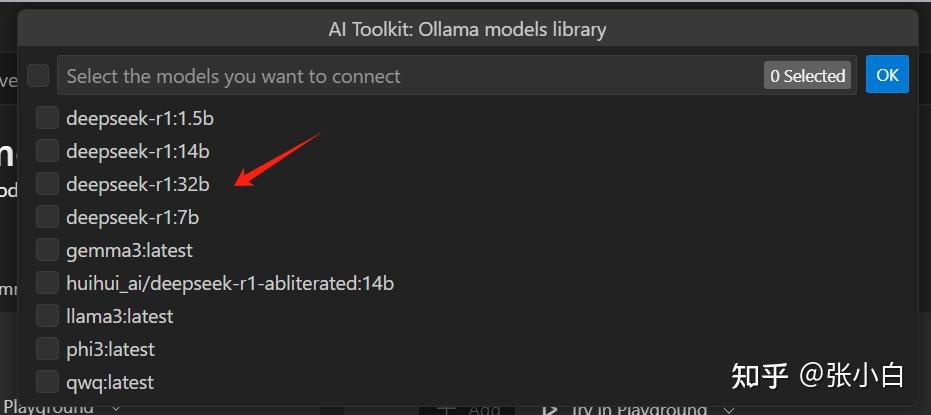
4、在AI Toolkit中增加本地Ollama模型
也可以在Catalog界面做Add Model,加入本地的Ollama模型:
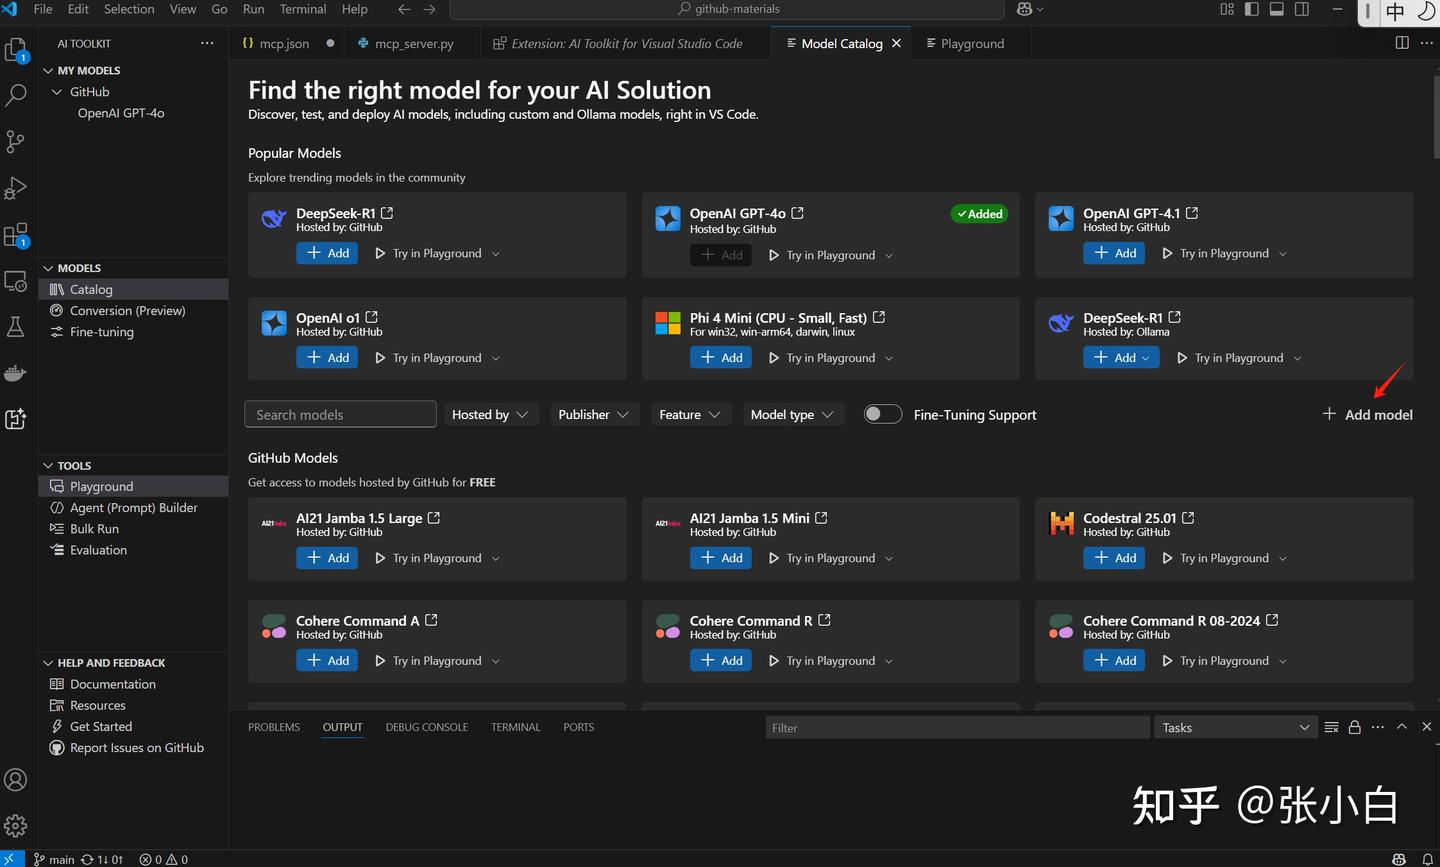
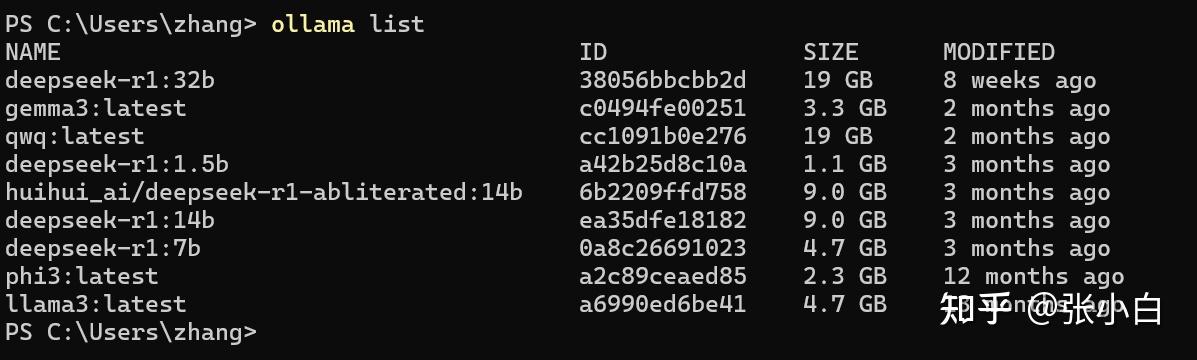
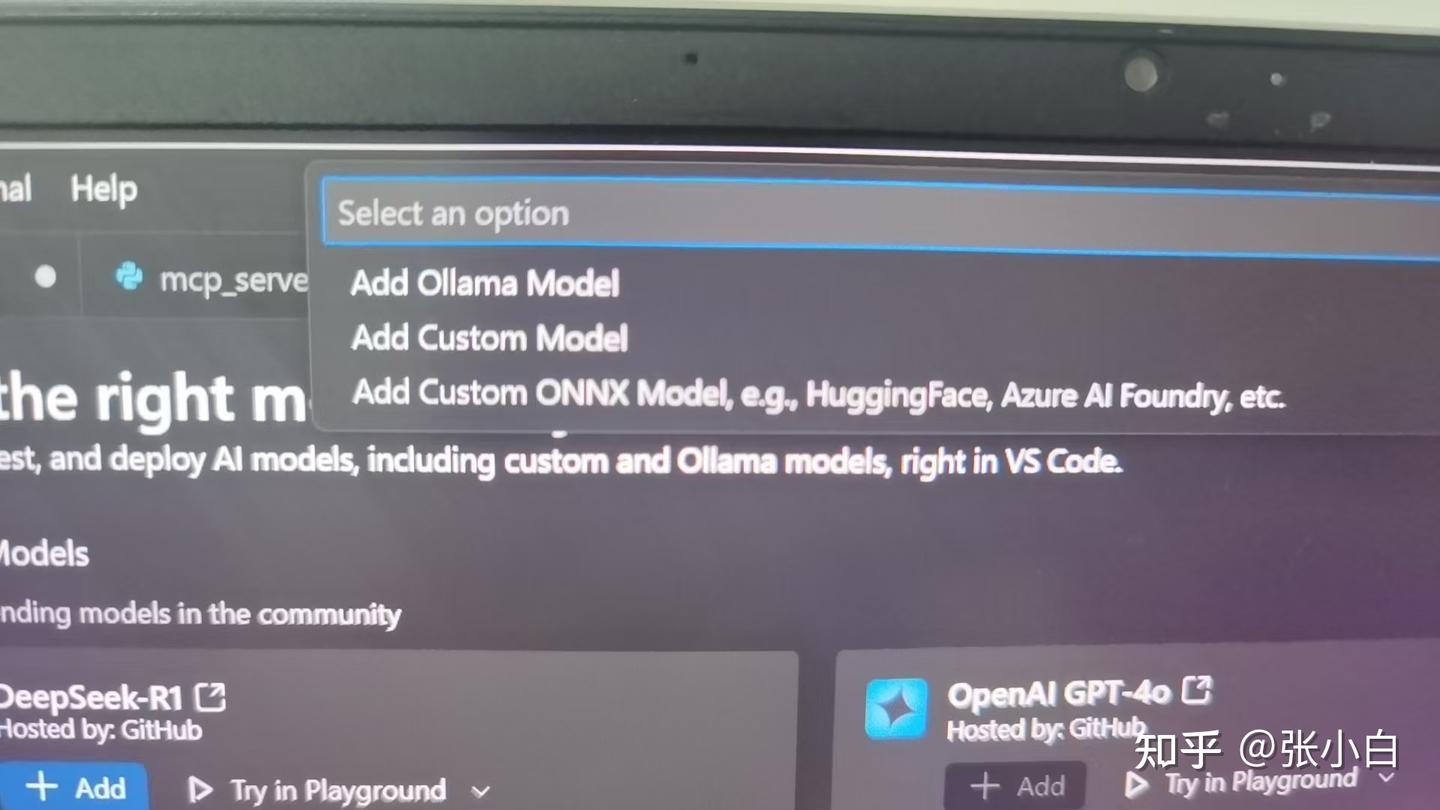
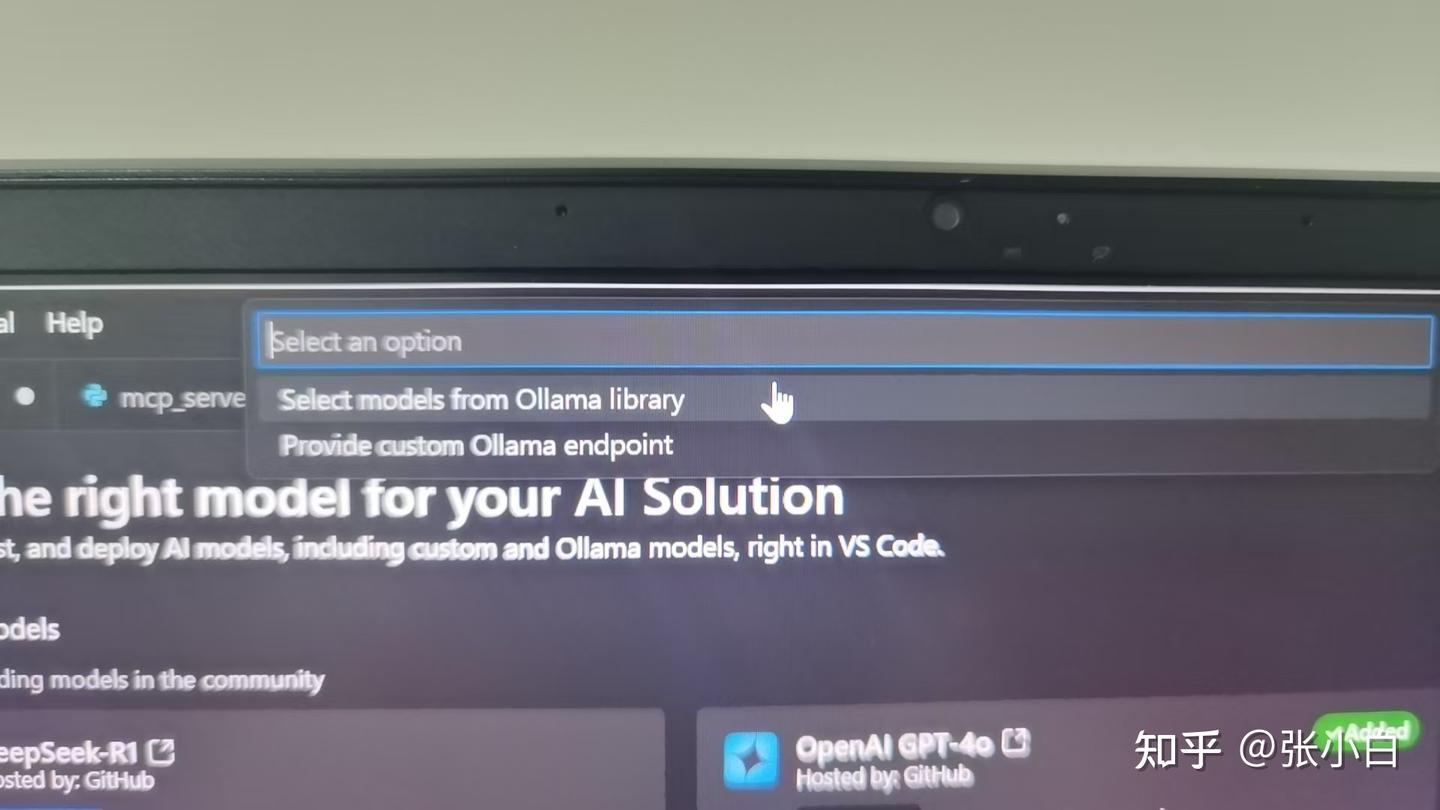
比如在这里选择Ollama本地的DeepSeek:
同样在PlayGround里面可以做测试:
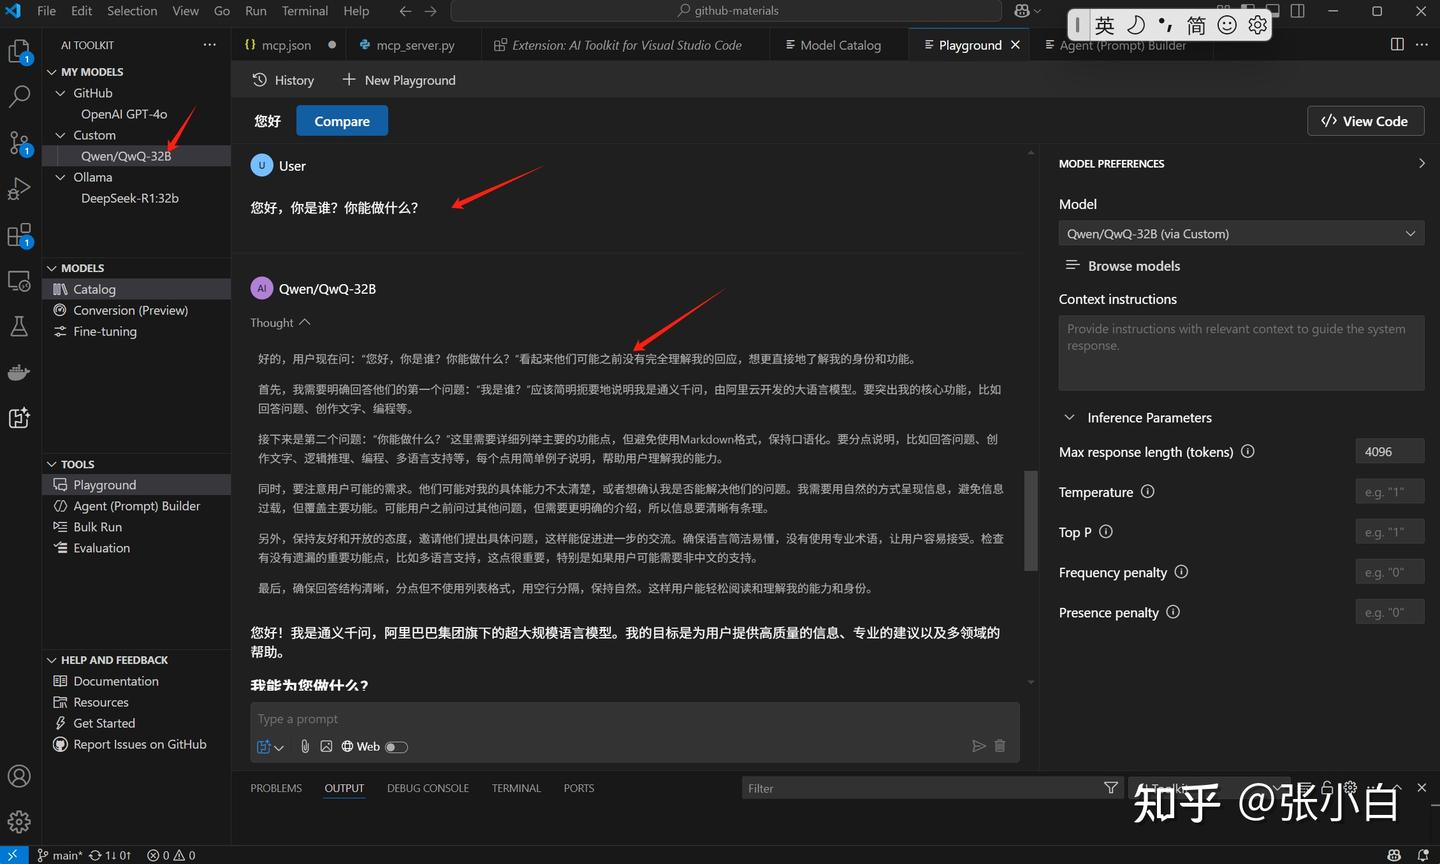
5、在AI Toolkit中增加远程模型(硅基流动)
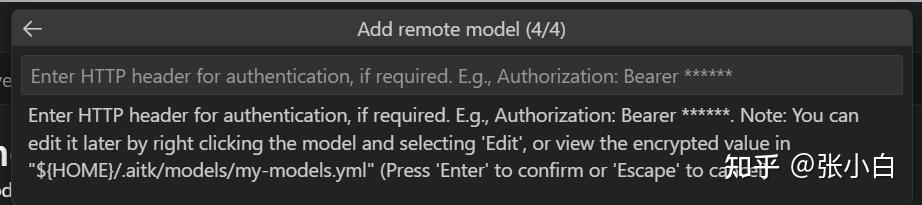
如果要增加一个远端的模型,可以在Add Models时选择Add remote model:
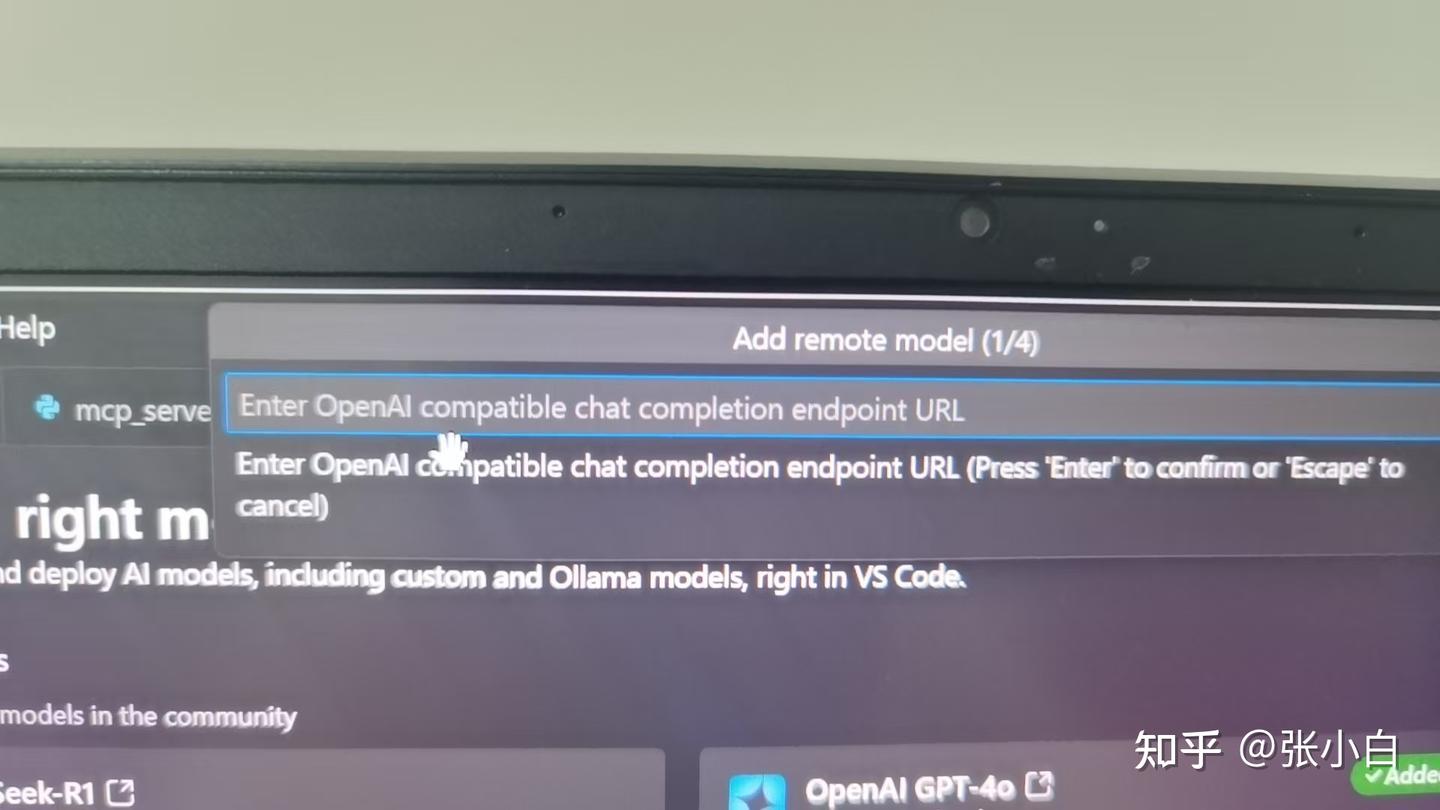
这个远端模型需要支持OpenAI的API协议。
我们试一下硅基流动的API行不行,依次输入URL:
https://api.siliconflow.cn/v1/chat/completions名称:SilconFlow
模型:Qwen/QwQ-32B

密钥:输入 Authorization: Bearer sk-****
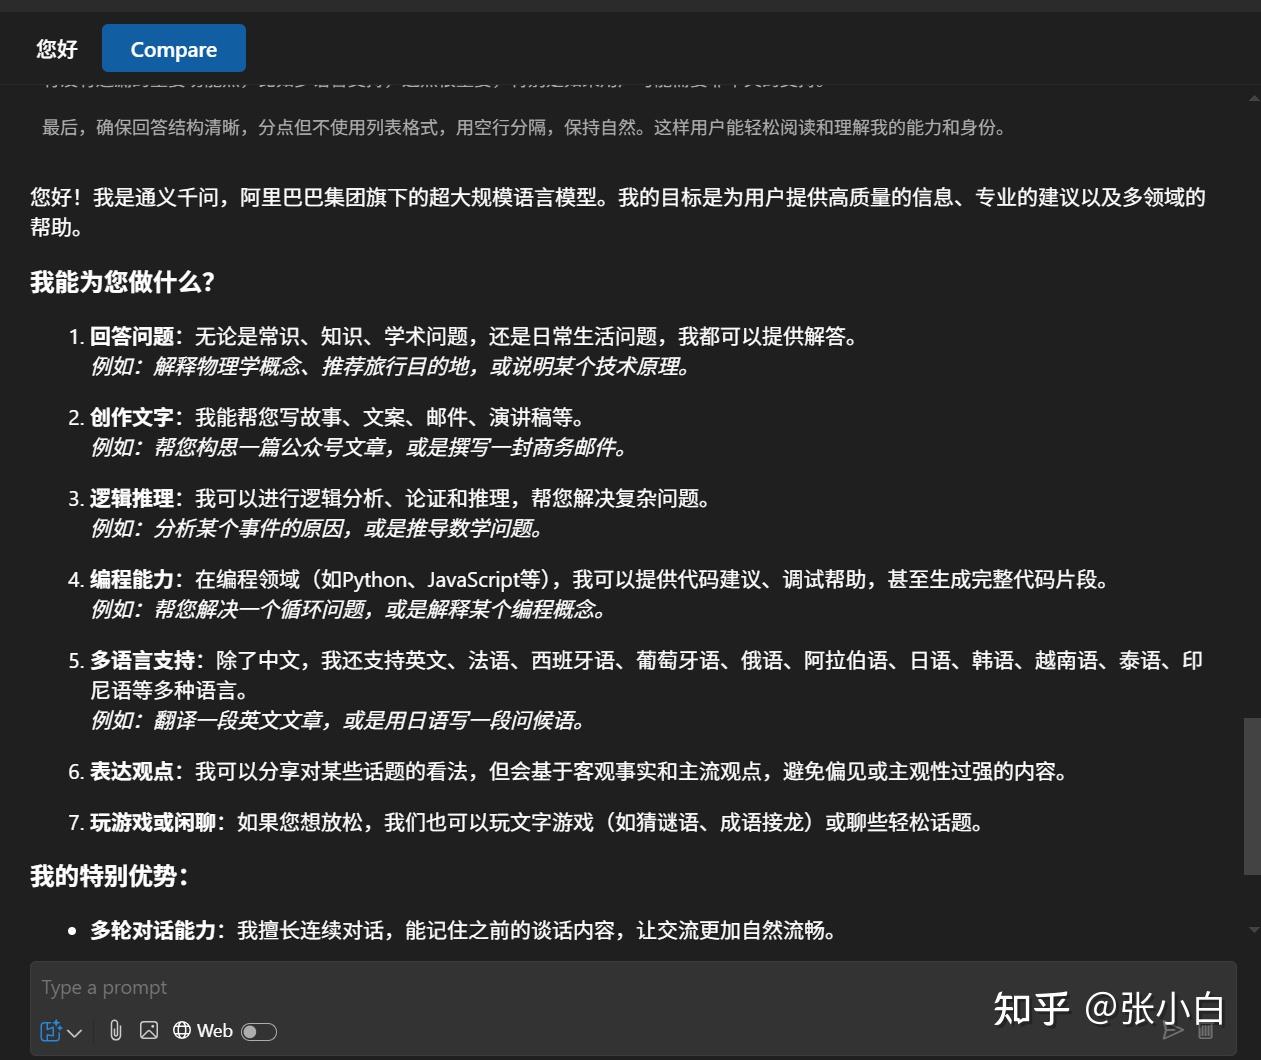
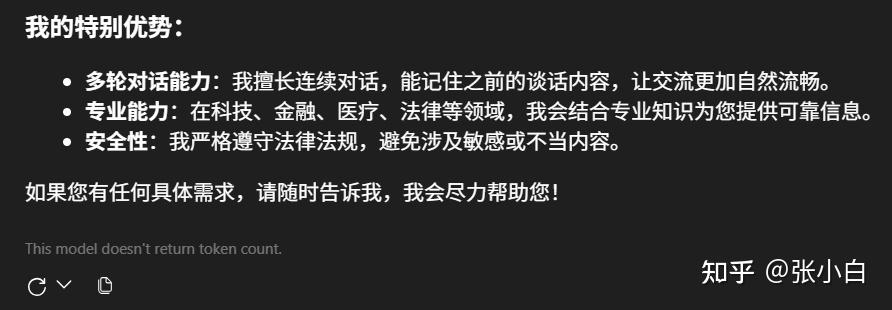
同样验证一下:
6、在VSCode AI Toolkit中增加MCP Server
打开Tools下的Agent Builder
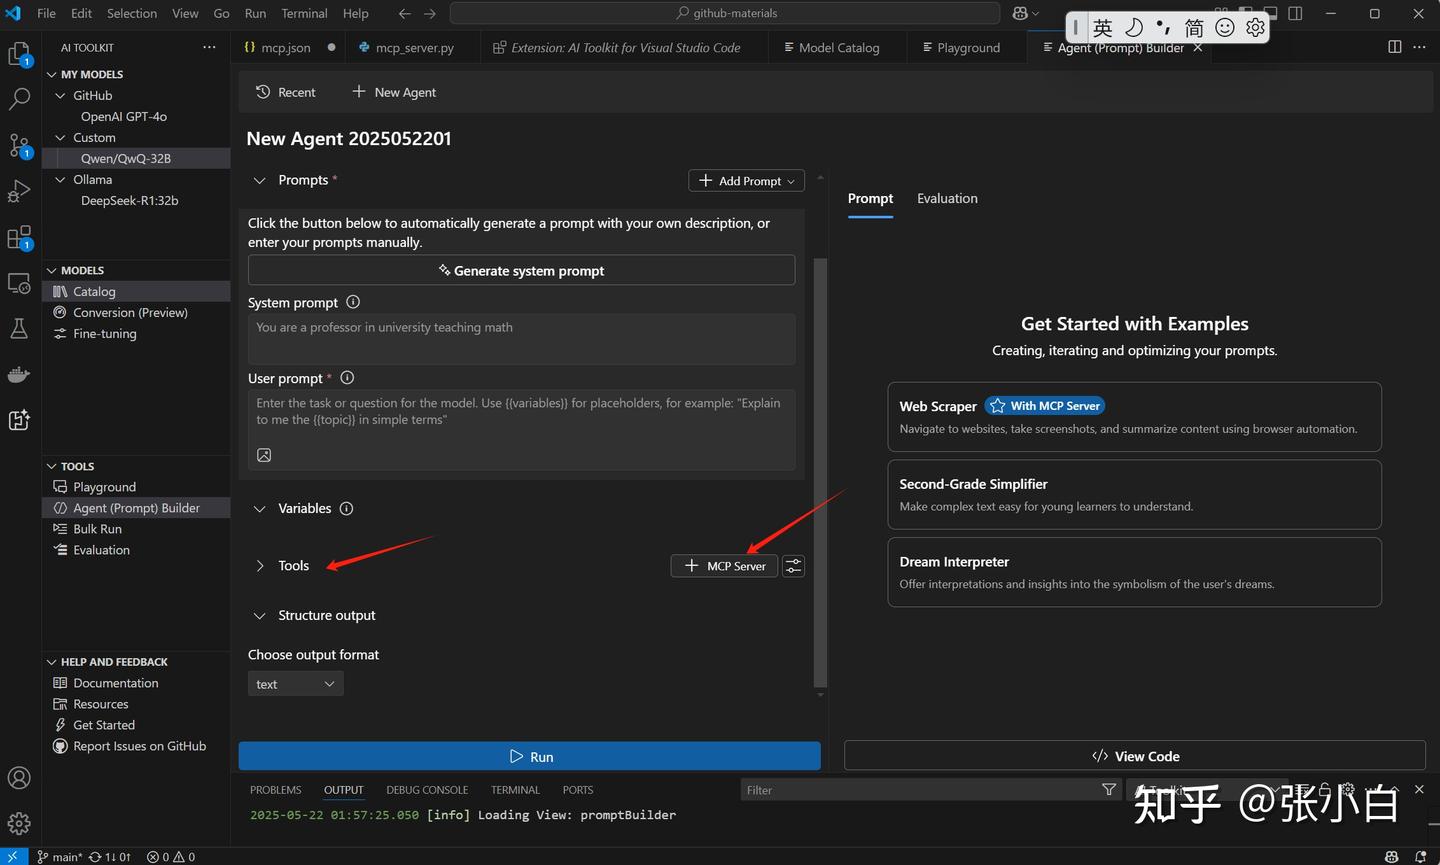
点击中间Tools下的 + MCP Server
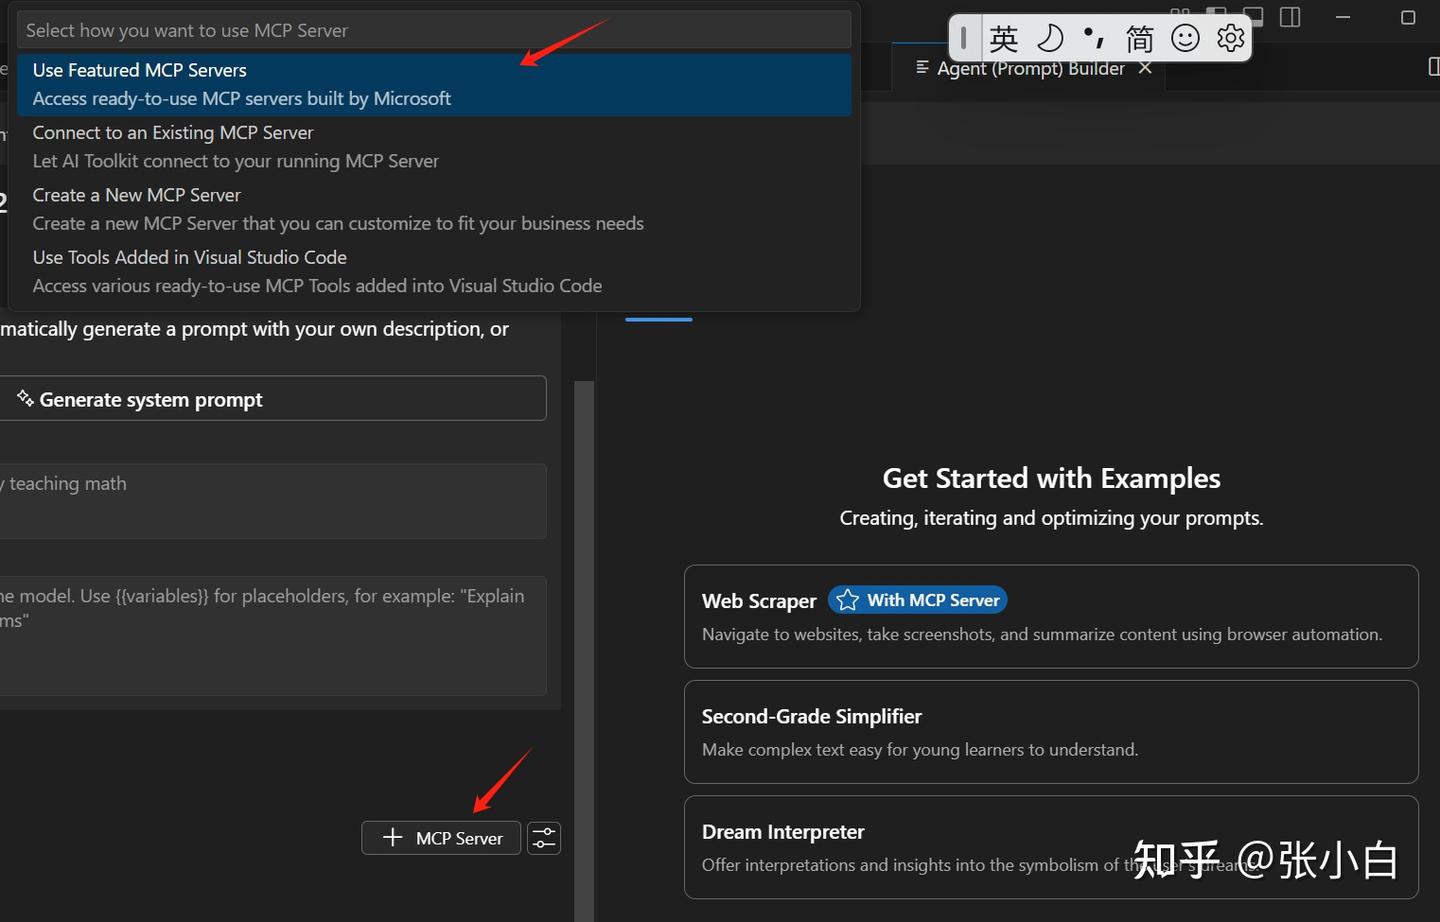
选择Create a New MCP Server(当然可以选择前面已经做好的MCP Server)
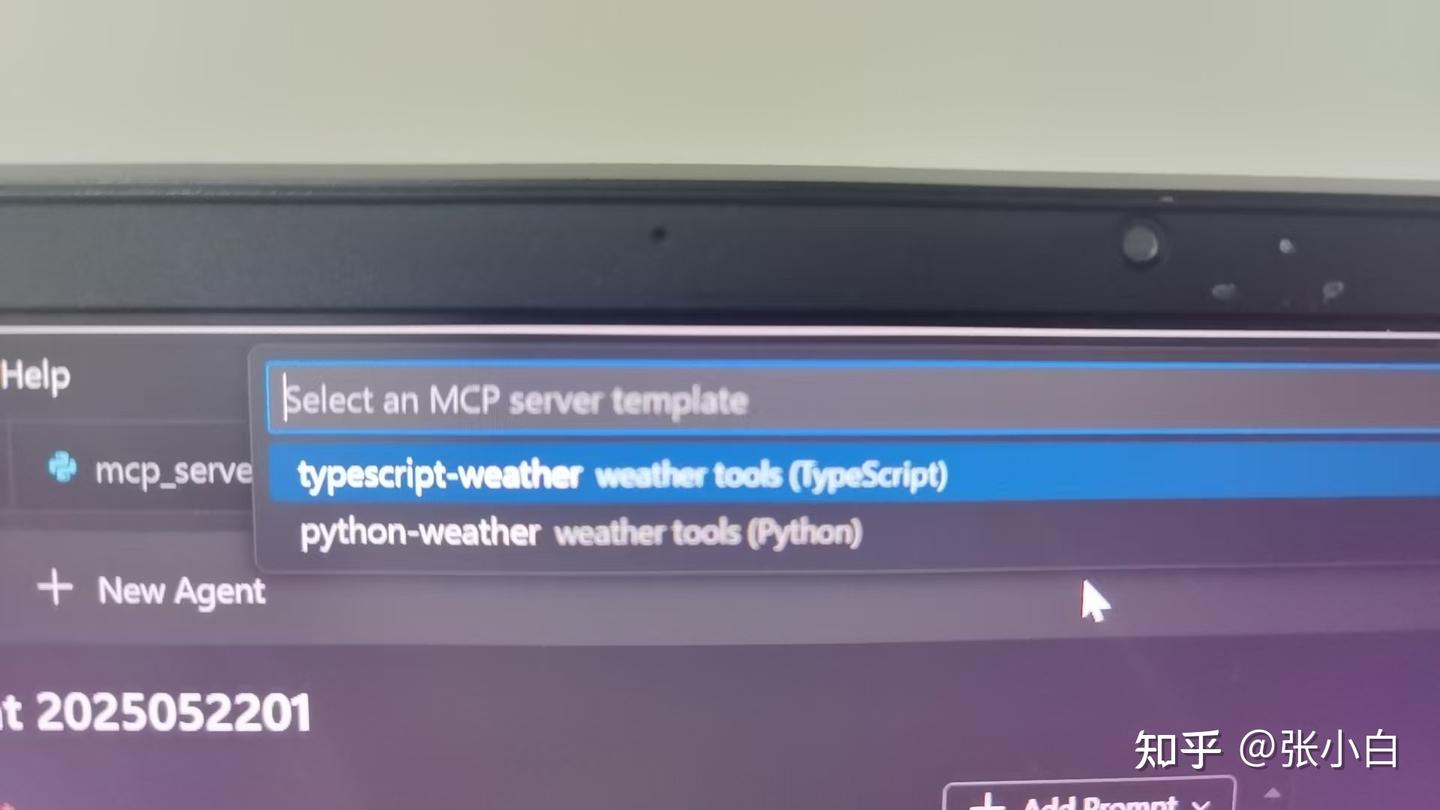
选择Python
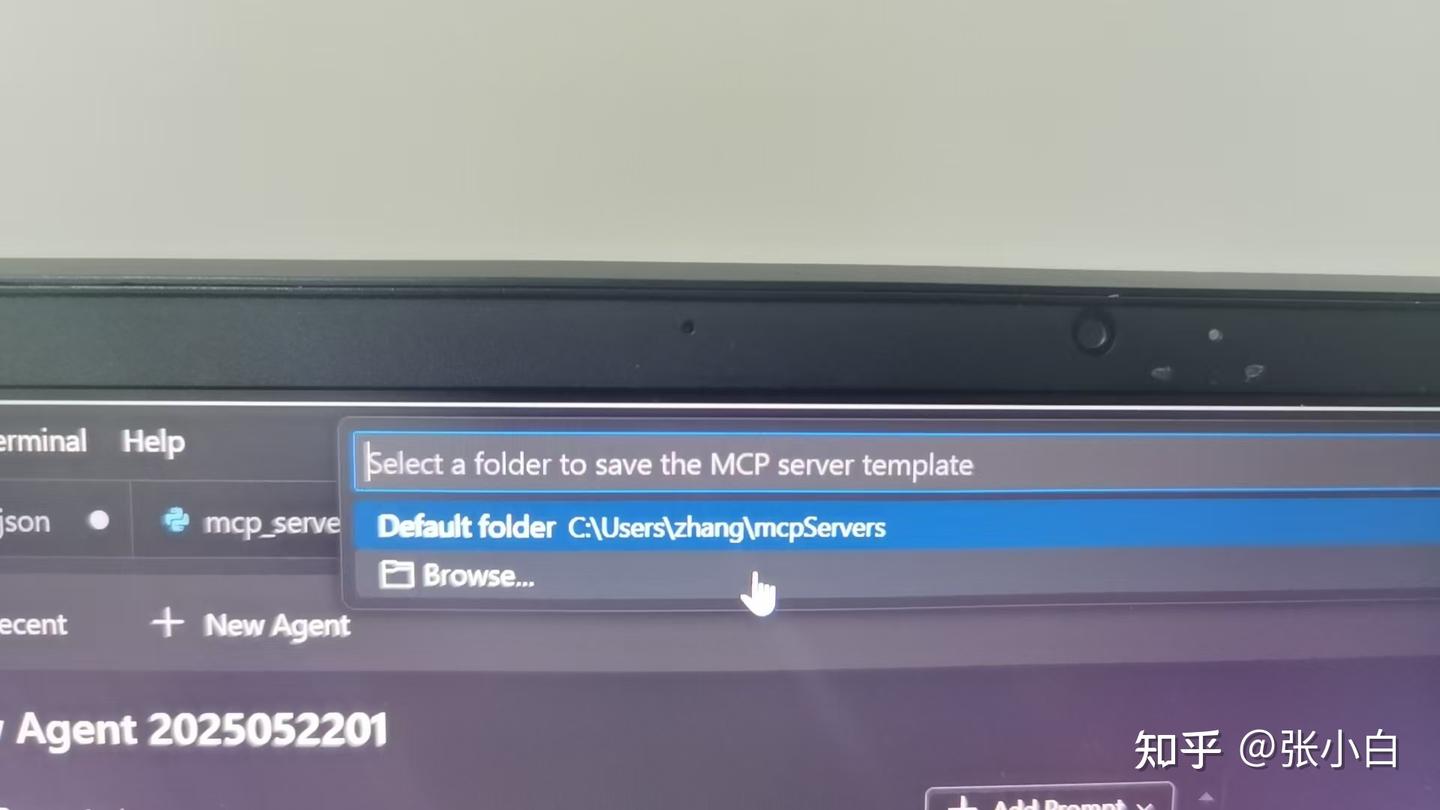
选择本地存放目录,这里建了一个D:\MCP目录
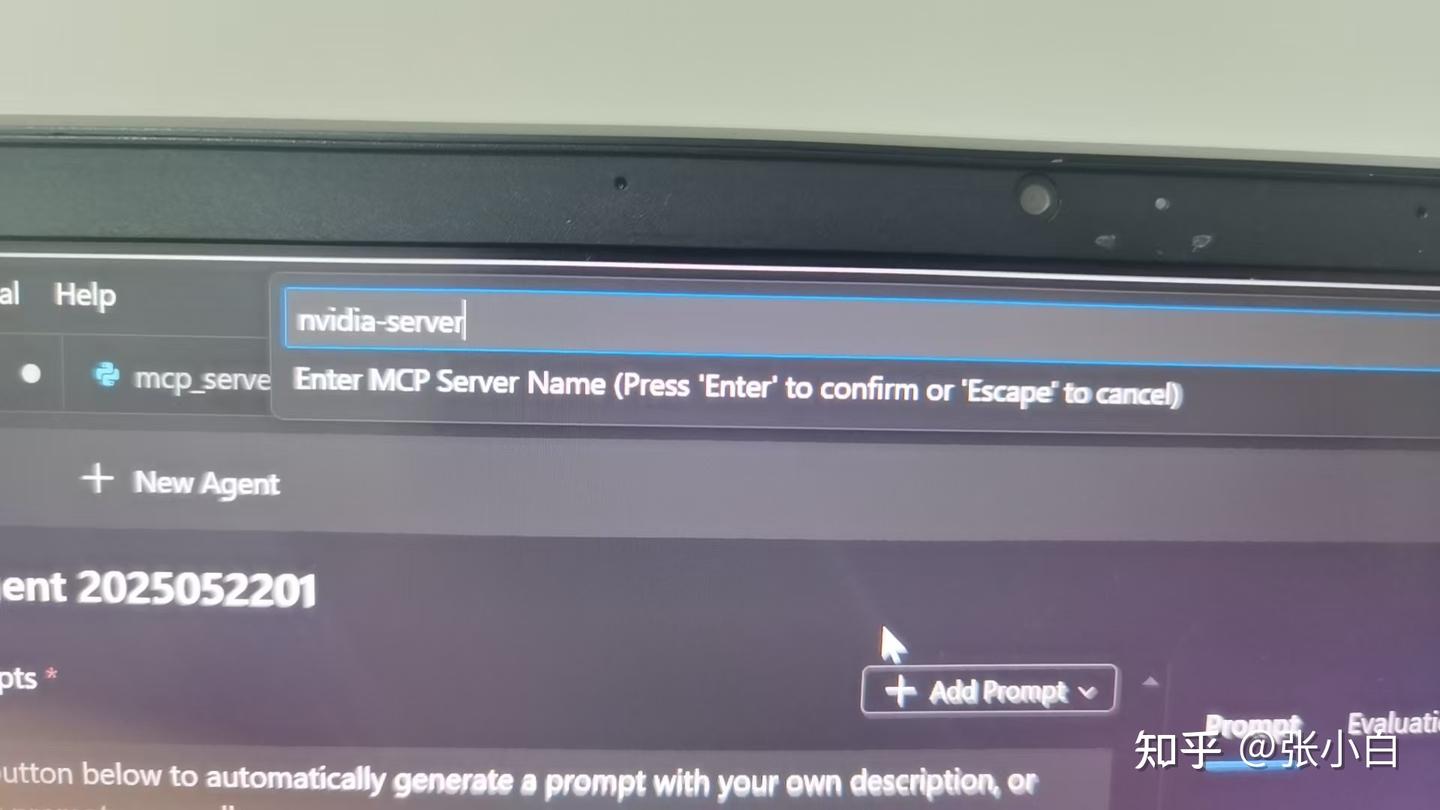
输入MCP Server名称:nvidia-server
系统会创建一个nvidia-server目录,自动生成了一些代码:
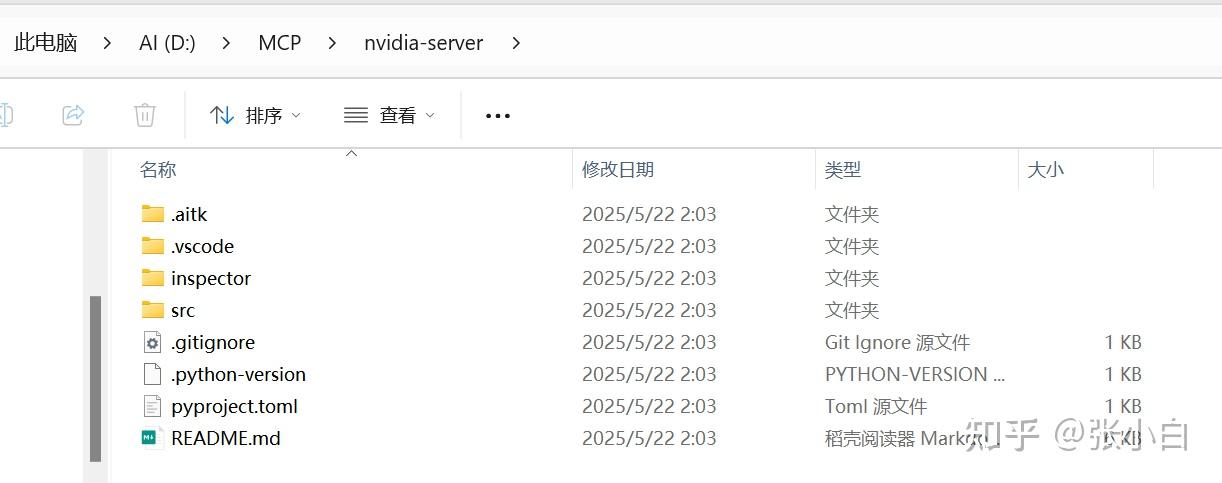
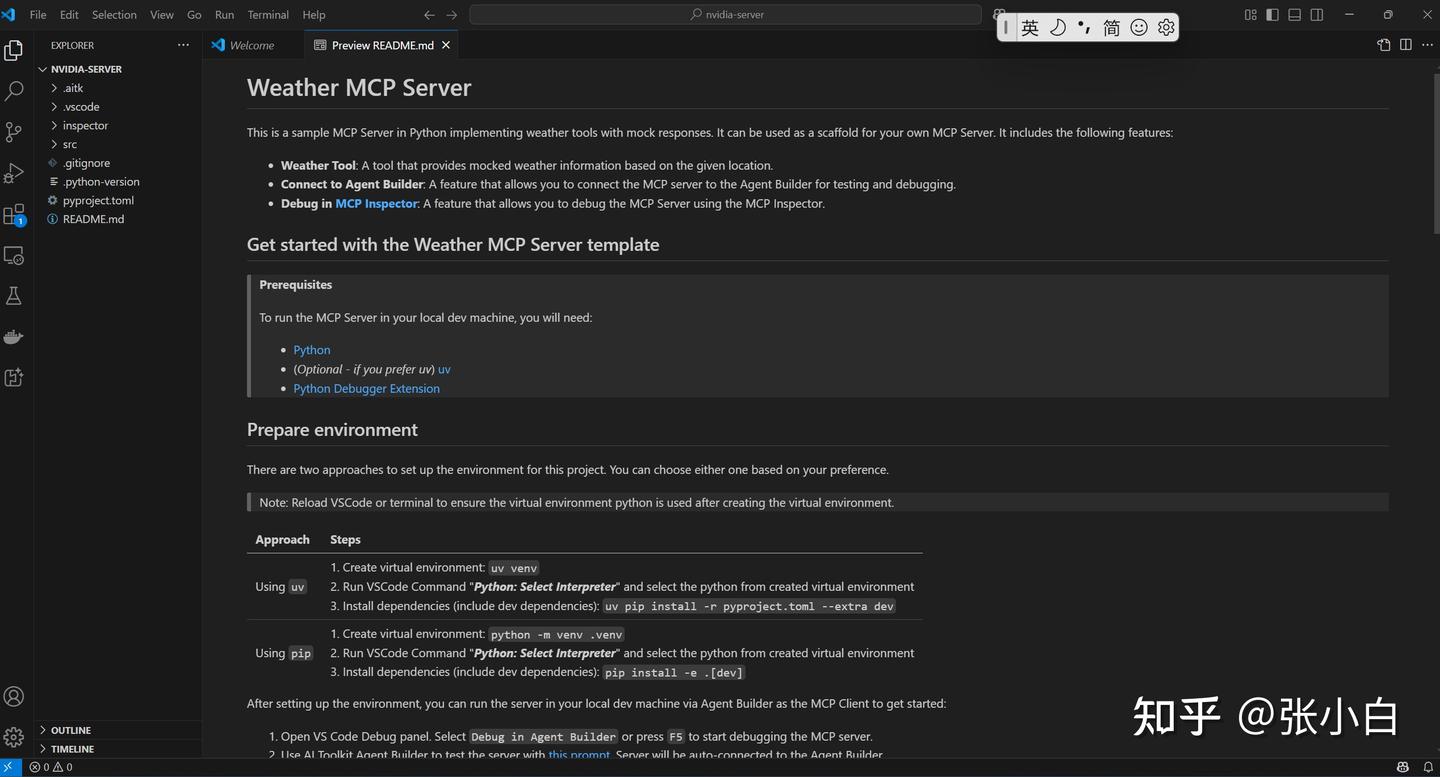
可以按照README一步一步去创建这个MCP Server
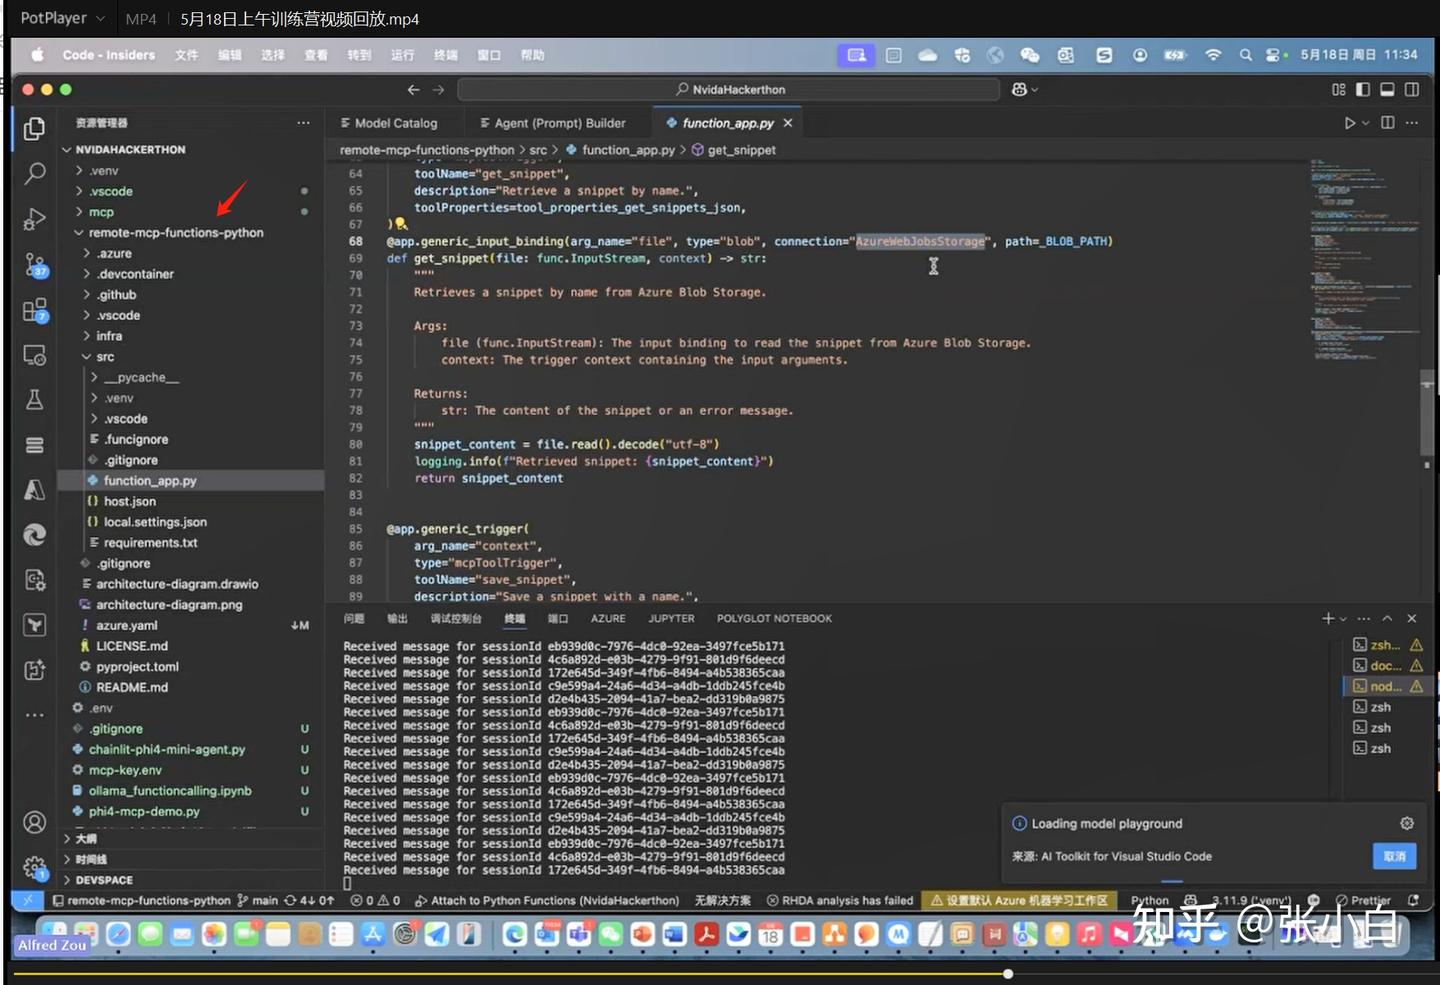
打开 src/server.py
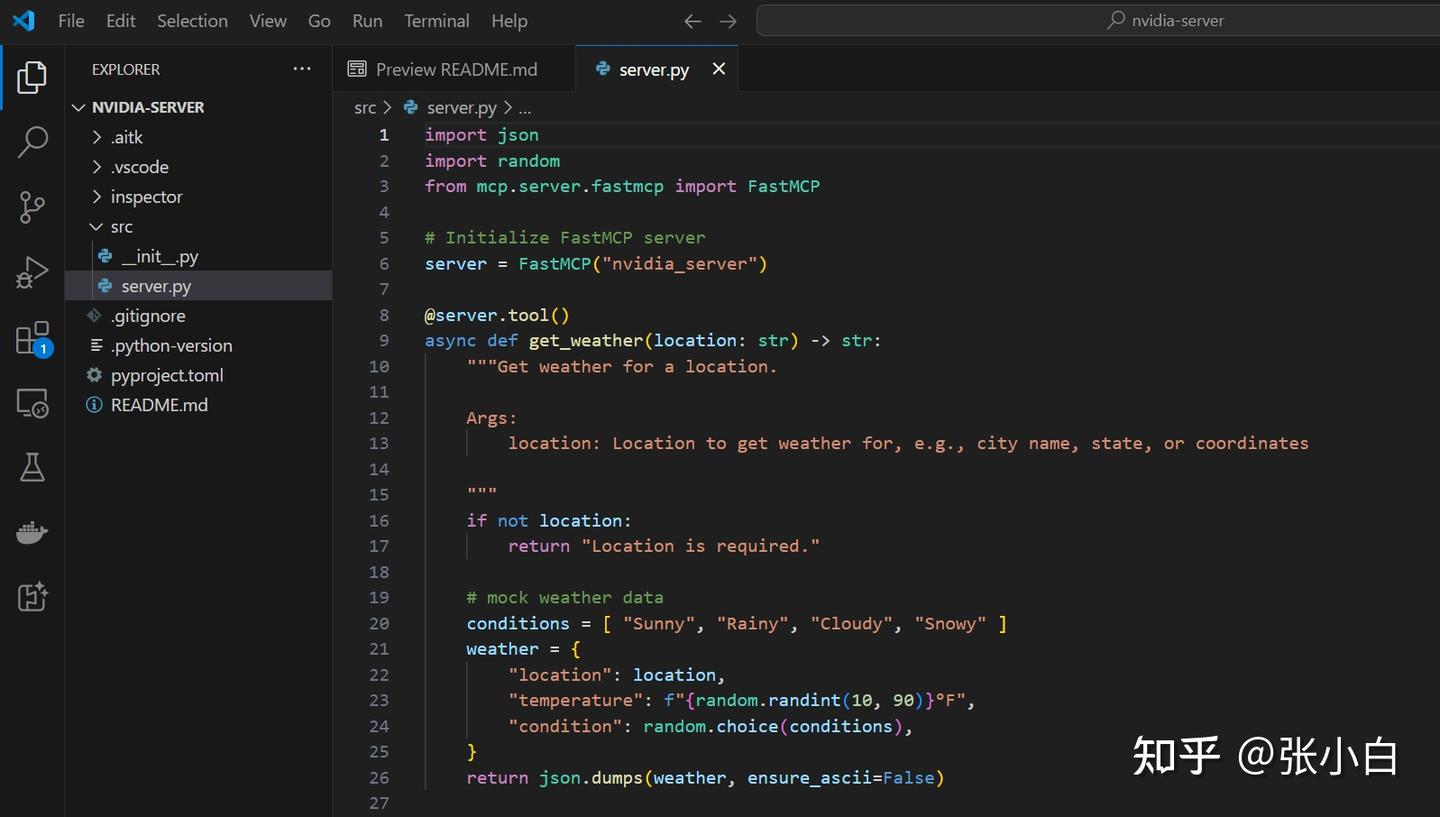
可以看到这个MCP server的模板:
import json
import random
from mcp.server.fastmcp import FastMCP

# Initialize FastMCP server
server = FastMCP("nvidia_server")

@server.tool()
async def get_weather(location: str) -> str:
    """Get weather for a location.

    Args:
        location: Location to get weather for, e.g., city name, state, or coordinates

    """
    if not location:
        return "Location is required."

    # mock weather data
    conditions = [ "Sunny", "Rainy", "Cloudy", "Snowy" ]
    weather = {
        "location": location,
        "temperature": f"{random.randint(10, 90)}°F",
        "condition": random.choice(conditions),
    }
    return json.dumps(weather, ensure_ascii=False)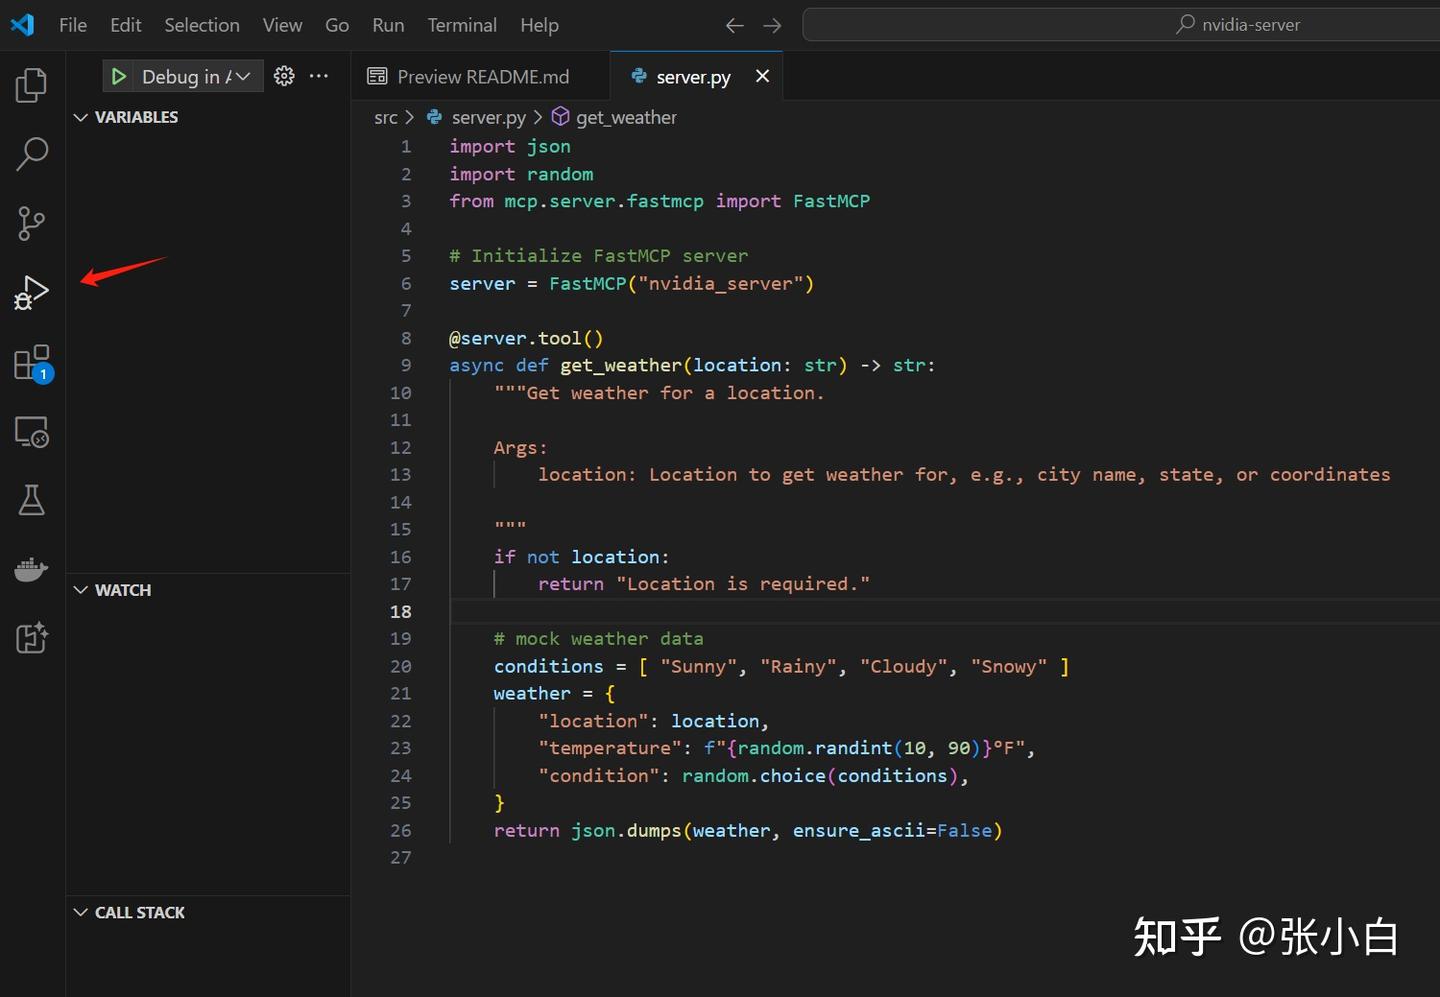
生成的代码是一个脚手架。用户可以基于这个脚手架进行代码扩写,实现自己MCP Server所需的功能。
TIPS:先将VSCode的界面变成中文。
在VSCode页面按CTRL-SHIFT-P,然后在>提示符中输入Configure,并选择中文:
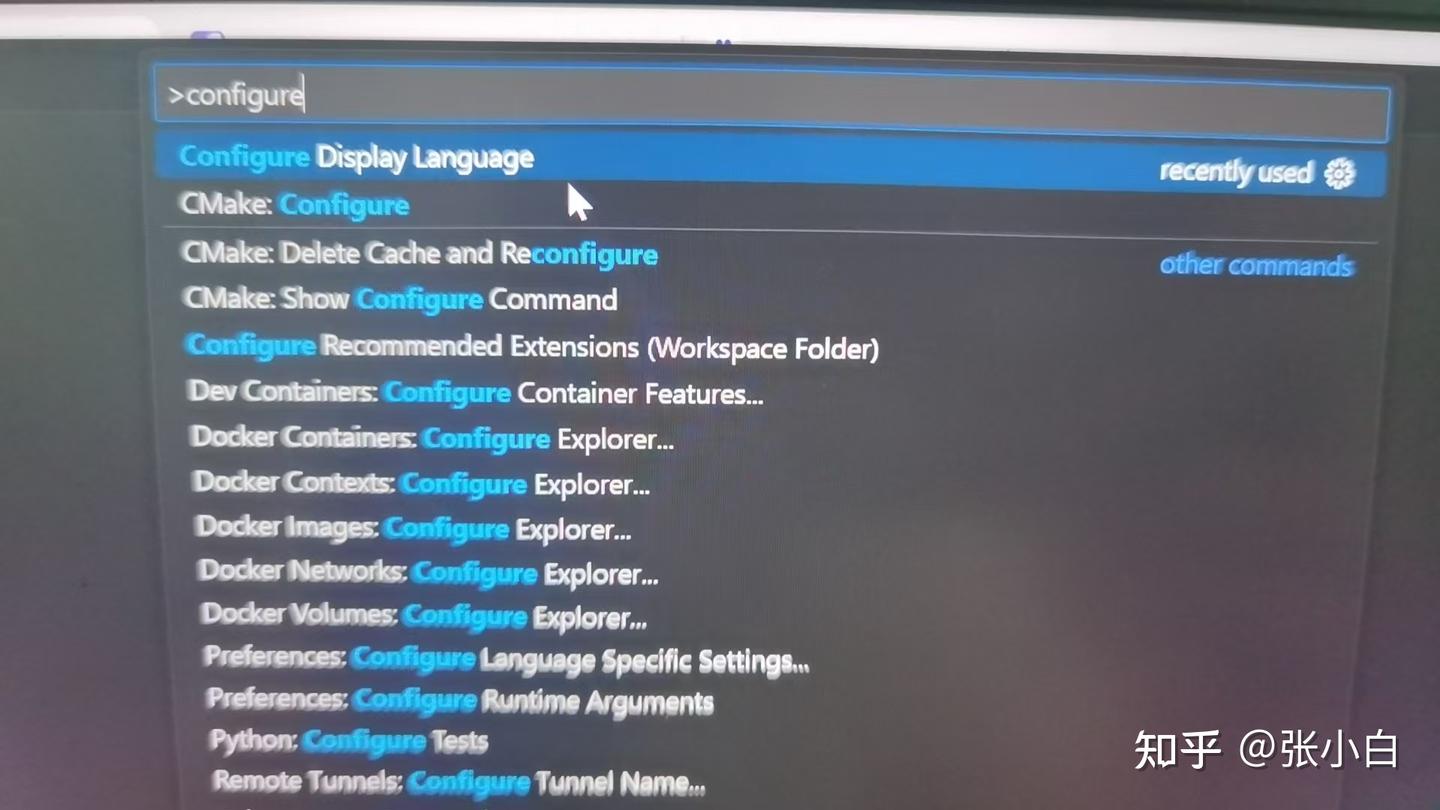
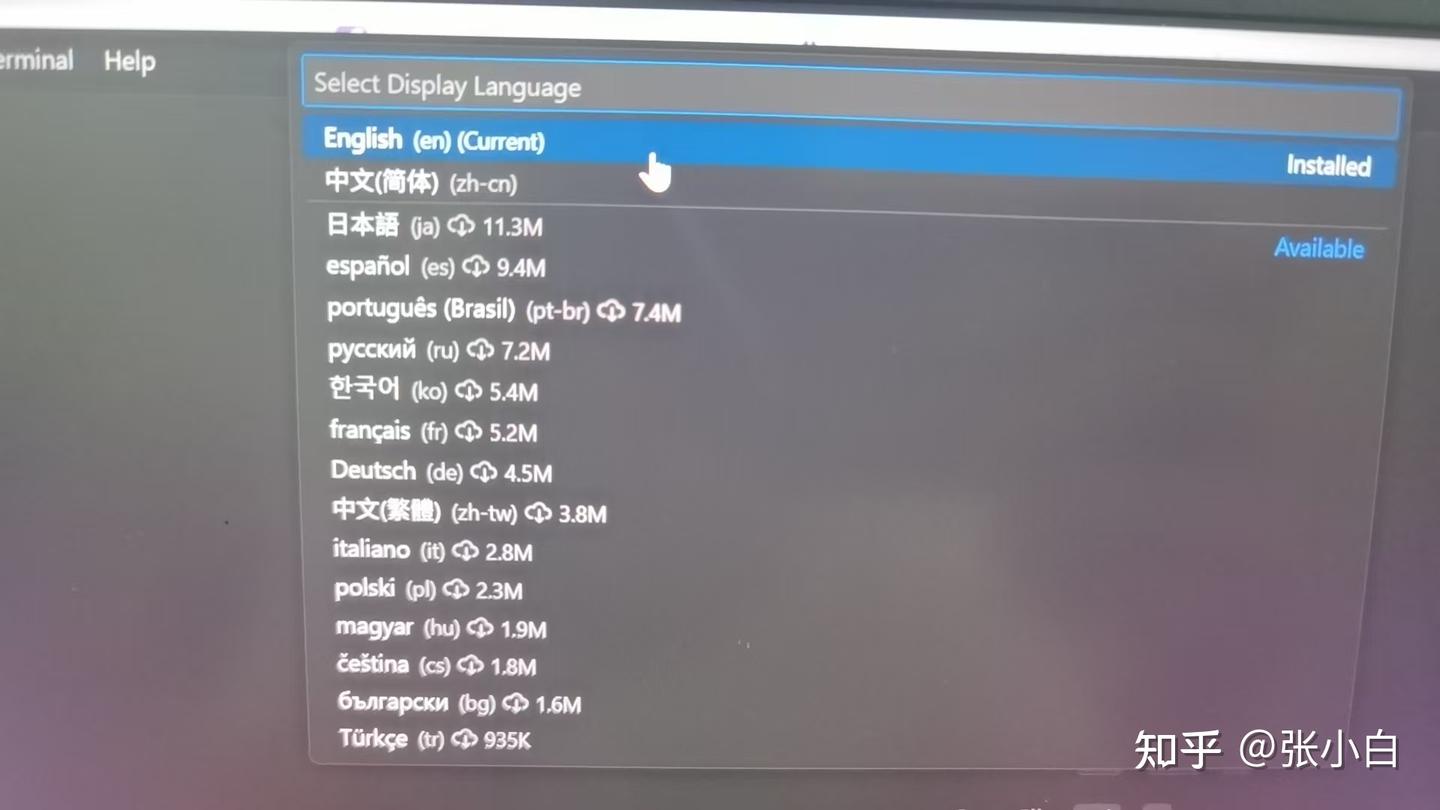
根据提示重启VSCode。

打开终端,执行
pip install debugpy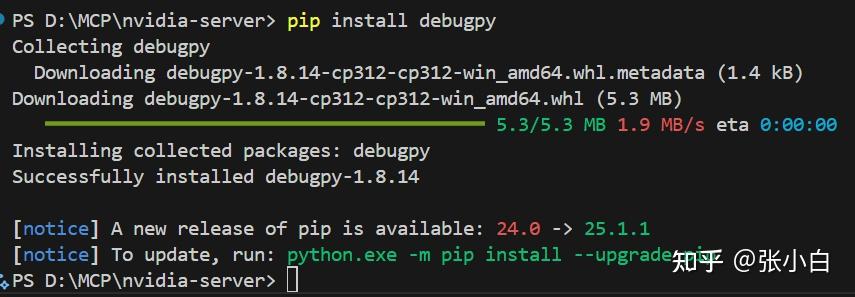
在Run and Debug模式启动:
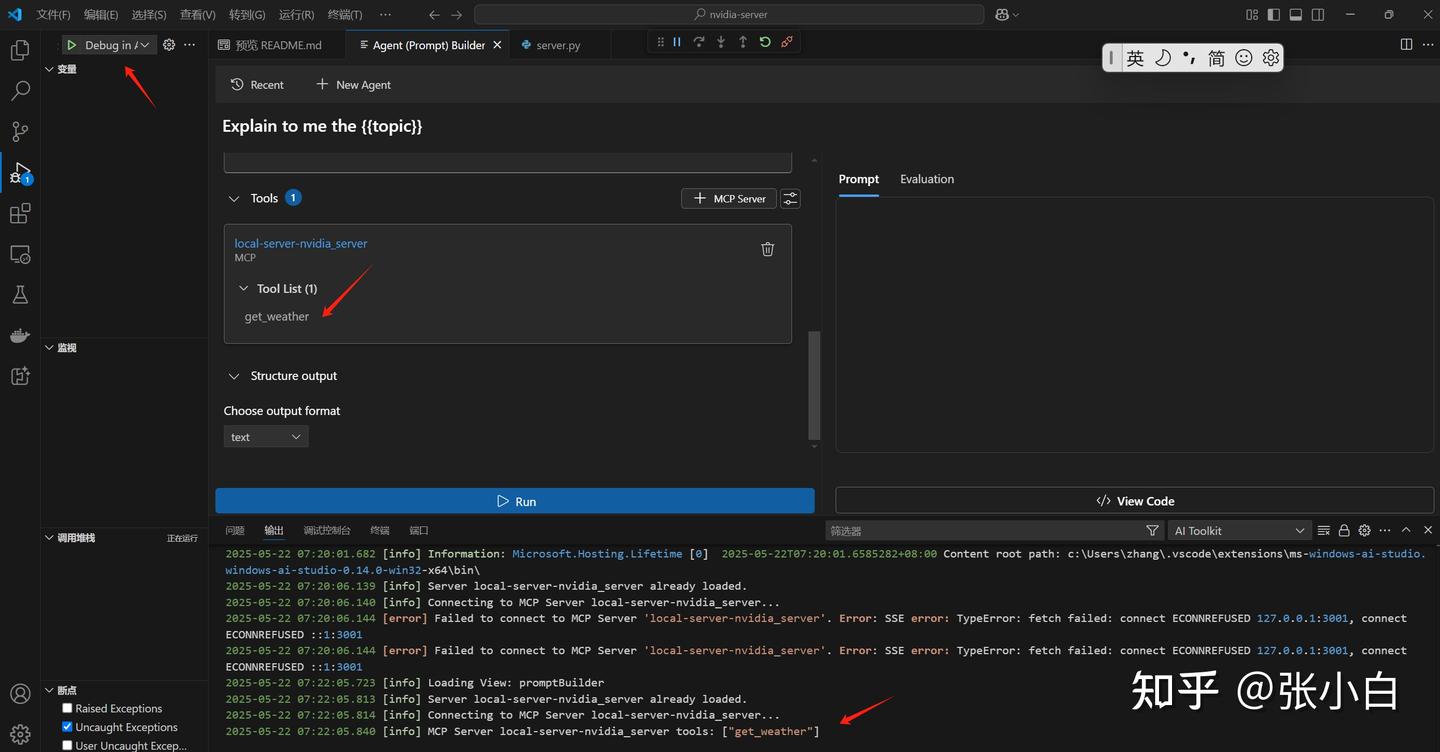
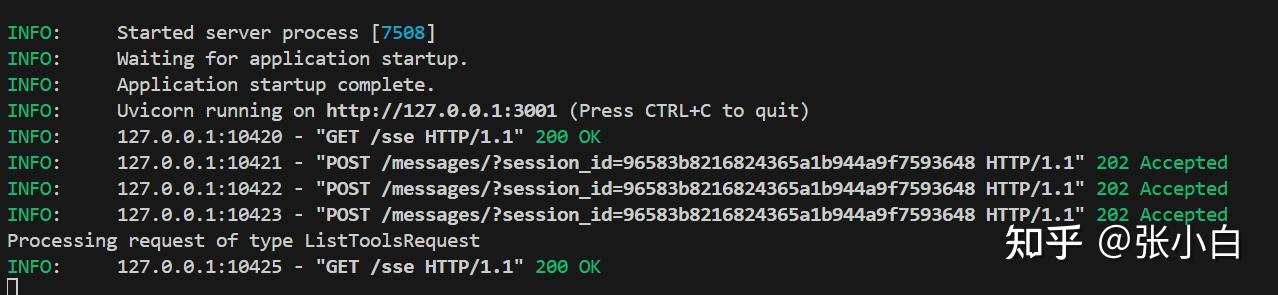
可见get_weather的MCP Server已经启动。
7、使用Azure Function方式增加MCP Server(未完成实操)
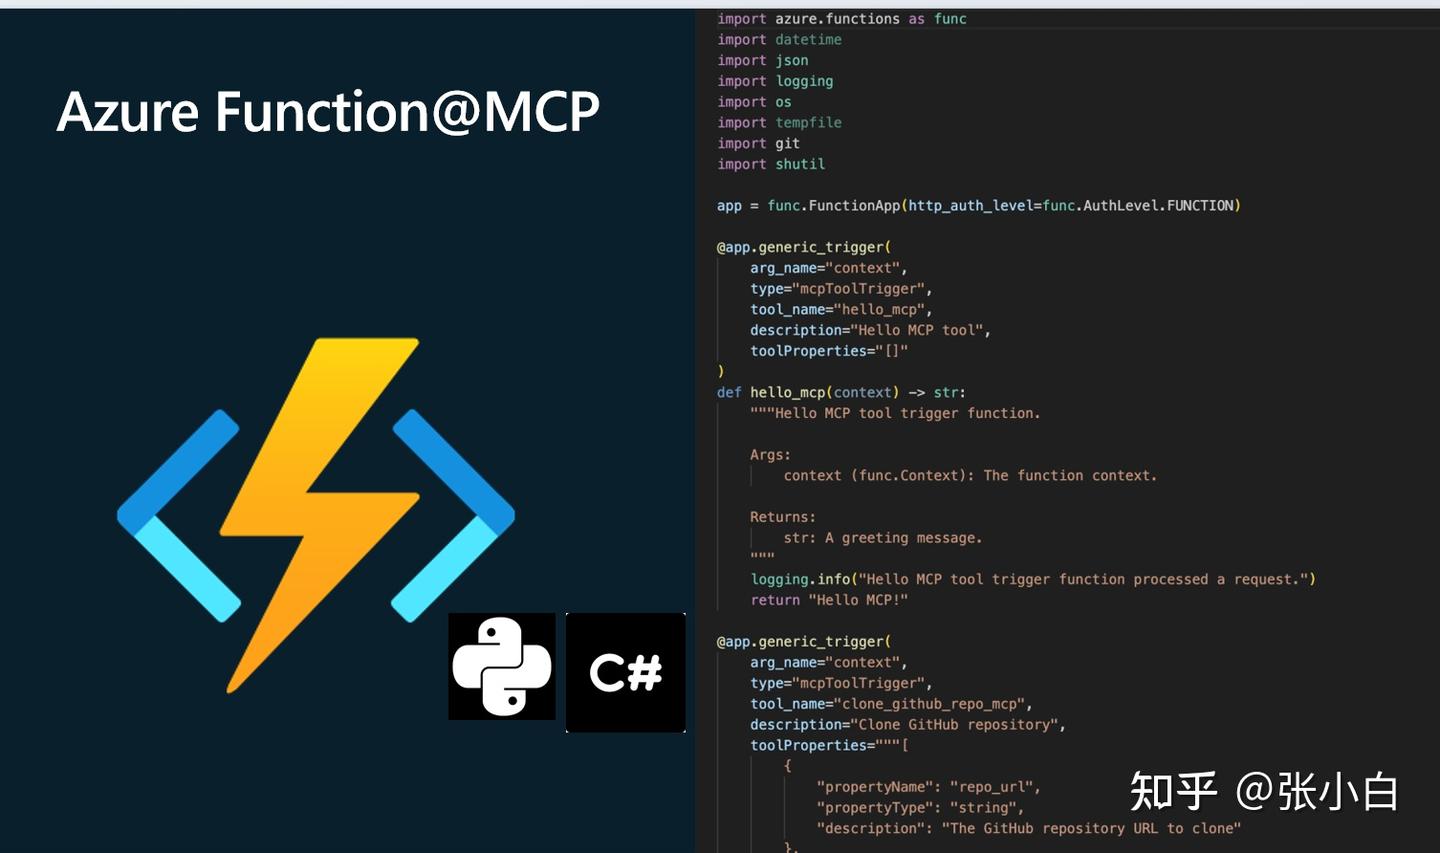
Azure Function是一种Serverless服务
启动Azure Function的代码可能是以下模样:
(此部分由于没有邹老师的代码,也没有Azure环境,张小白也无法实操)
8、Phi-4-mini模型在MCP中的应用
Phi-4-mini是支持Function Call的。
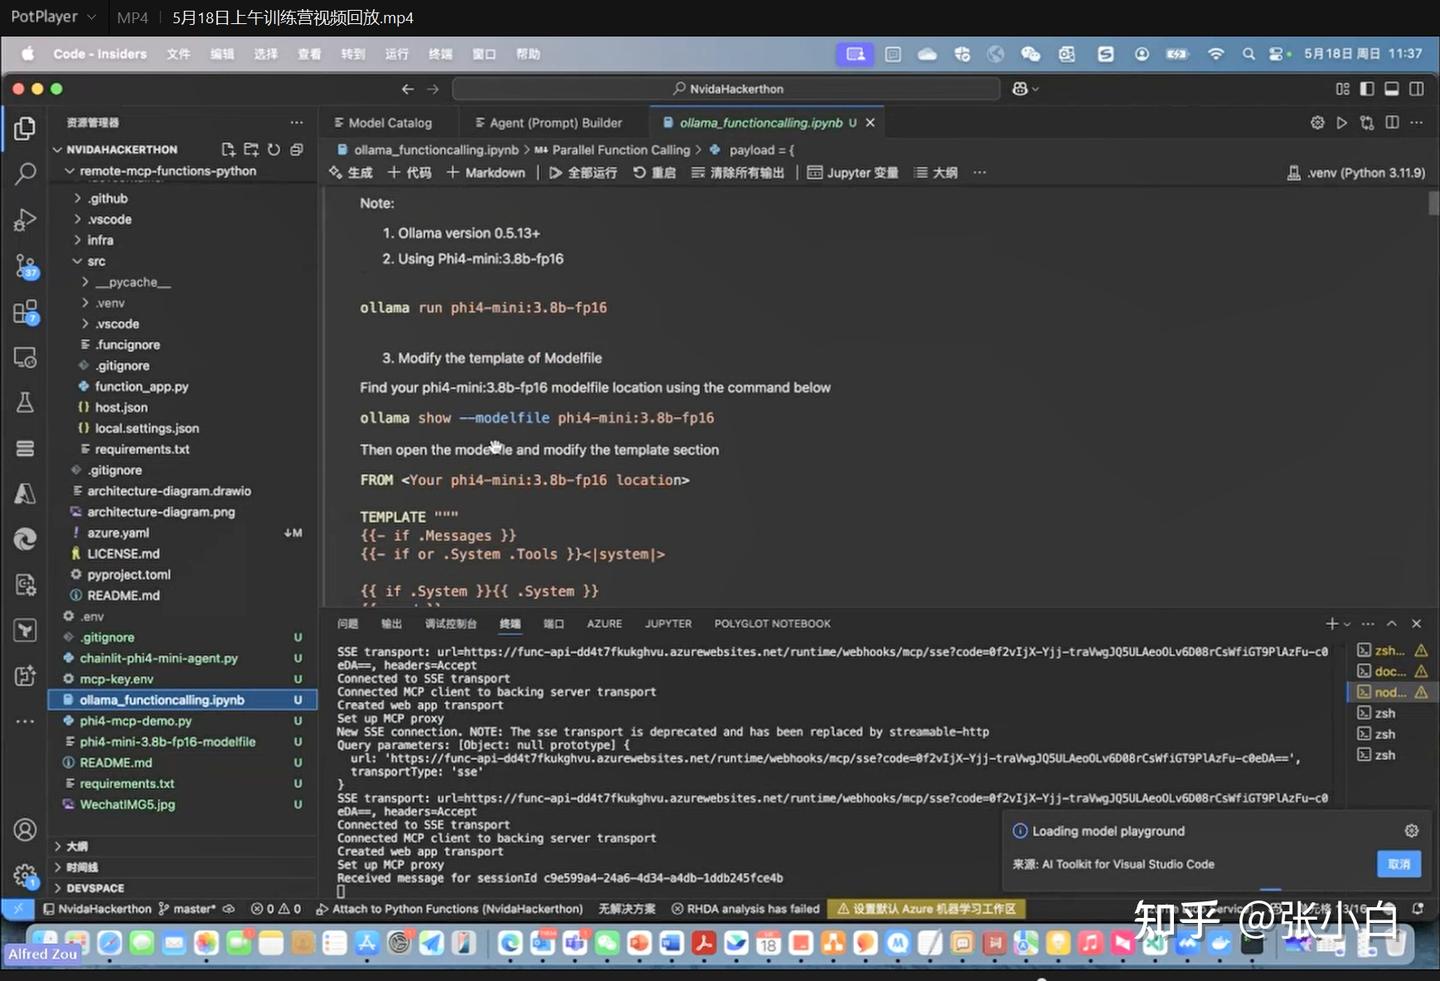
邹老师提供了一种使用Ollama Phi-4-mini模型执行MCP Server的方法
ollama --version 
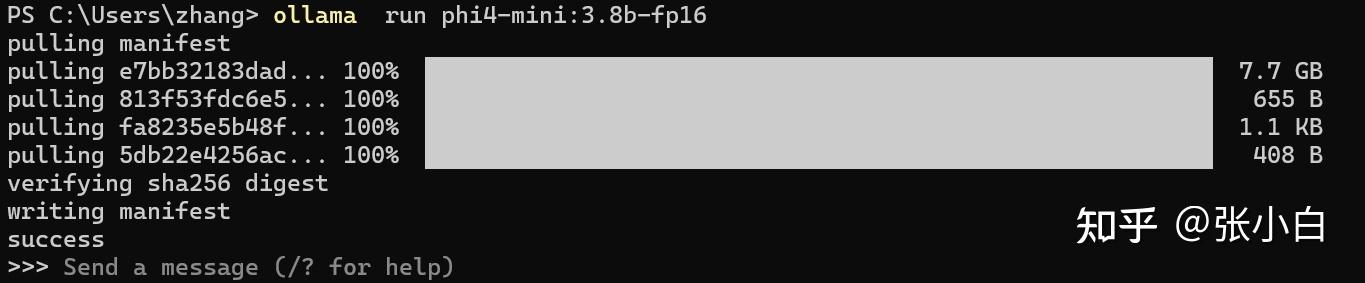
ollama run phi4-mini:3.8b-fp16

ollama show --modelfile phi4-mini:3.8b-fp16
PS C:\Users\zhang> ollama show --modelfile phi4-mini:3.8b-fp16
# Modelfile generated by "ollama show"
# To build a new Modelfile based on this, replace FROM with:
# FROM phi4-mini:3.8b-fp16

FROM D:\OllamaModels\models\blobs\sha256-e7bb32183dad1cc57730edf523bd6ac18716005bb579384d279e029e63828f97
TEMPLATE """{{- if or .System .Tools }}<|system|>{{ if .System }}{{ .System }}{{ end }}
{{- if .Tools }}{{ if not .System }}You are a helpful assistant with some tools.{{ end }}<|tool|>{{ .Tools }}<|/tool|><|end|>
{{- end }}
{{- end }}
{{- range $i, $_ := .Messages }}
{{- $last := eq (len (slice $.Messages $i)) 1 -}}
{{- if ne .Role "system" }}<|{{ .Role }}|>{{ .Content }}
{{- if .ToolCalls }}<|tool_call|>[{{ range .ToolCalls }}{"name":"{{ .Function.Name }}","arguments":{{ .Function.Arguments }}{{ end }}]<|/tool_call|>
{{- end }}
{{- if not $last }}<|end|>
{{- end }}
{{- if and (ne .Role "assistant") $last }}<|end|><|assistant|>{{ end }}
{{- end }}
{{- end }}"""
LICENSE """Microsoft.
Copyright (c) Microsoft Corporation.

MIT License

Permission is hereby granted, free of charge, to any person obtaining a copy
of this software and associated documentation files (the "Software"), to deal
in the Software without restriction, including without limitation the rights
to use, copy, modify, merge, publish, distribute, sublicense, and/or sell
copies of the Software, and to permit persons to whom the Software is
furnished to do so, subject to the following conditions:

The above copyright notice and this permission notice shall be included in all
copies or substantial portions of the Software.

THE SOFTWARE IS PROVIDED *AS IS*, WITHOUT WARRANTY OF ANY KIND, EXPRESS OR
IMPLIED, INCLUDING BUT NOT LIMITED TO THE WARRANTIES OF MERCHANTABILITY,
FITNESS FOR A PARTICULAR PURPOSE AND NONINFRINGEMENT. IN NO EVENT SHALL THE
AUTHORS OR COPYRIGHT HOLDERS BE LIABLE FOR ANY CLAIM, DAMAGES OR OTHER
LIABILITY, WHETHER IN AN ACTION OF CONTRACT, TORT OR OTHERWISE, ARISING FROM,
OUT OF OR IN CONNECTION WITH THE SOFTWARE OR THE USE OR OTHER DEALINGS IN THE
SOFTWARE."""
找到FROM的文件名
FROM D:\OllamaModels\models\blobs\sha256-e7bb32183dad1cc57730edf523bd6ac18716005bb579384d279e029e63828f97根据邹老师提供的Ollama模型创建替换文本
vi Modelfile
FROM D:\OllamaModels\models\blobs\sha256-e7bb32183dad1cc57730edf523bd6ac18716005bb579384d279e029e63828f97

TEMPLATE """
{{- if .Messages }}
{{- if or .System .Tools }}<|system|>

{{ if .System }}{{ .System }}
{{- end }}
In addition to plain text responses, you can chose to call one or more of the provided functions.

Use the following rule to decide when to call a function:
  * if the response can be generated from your internal knowledge (e.g., as in the case of queries like "What is the capital of Poland?"), do so
  * if you need external information that can be obtained by calling one or more of the provided functions, generate a function calls

If you decide to call functions:
  * prefix function calls with functools marker (no closing marker required)
  * all function calls should be generated in a single JSON list formatted as functools[{"name": [function name], "arguments": [function arguments as JSON]}, ...]
  * follow the provided JSON schema. Do not hallucinate arguments or values. Do to blindly copy values from the provided samples
  * respect the argument type formatting. E.g., if the type if number and format is float, write value 7 as 7.0
  * make sure you pick the right functions that match the user intent

Available functions as JSON spec:
{{- if .Tools }}
{{ .Tools }}
{{- end }}<|end|>
{{- end }}
{{- range .Messages }}
{{- if ne .Role "system" }}<|{{ .Role }}|>
{{- if and .Content (eq .Role "tools") }}

{"result": {{ .Content }}}
{{- else if .Content }}

{{ .Content }}
{{- else if .ToolCalls }}

functools[
{{- range .ToolCalls }}{{ "{" }}"name": "{{ .Function.Name }}", "arguments": {{ .Function.Arguments }}{{ "}" }}
{{- end }}]
{{- end }}<|end|>
{{- end }}
{{- end }}<|assistant|>

{{ else }}
{{- if .System }}<|system|>

{{ .System }}<|end|>{{ end }}{{ if .Prompt }}<|user|>

{{ .Prompt }}<|end|>{{ end }}<|assistant|>

{{ end }}{{ .Response }}{{ if .Response }}<|user|>{{ end }}
"""
再执行命令:
ollama create phi4-mini:3.8b-fp16-zhanghui -f ModelFile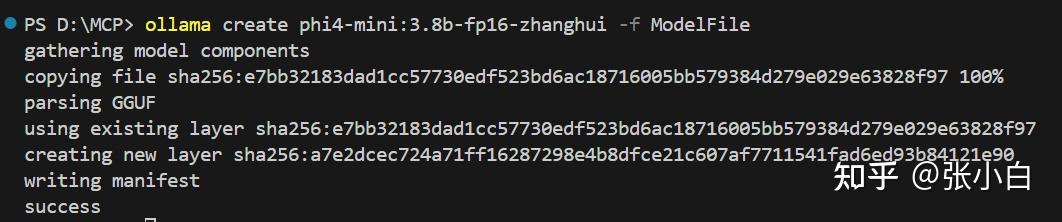
ollama list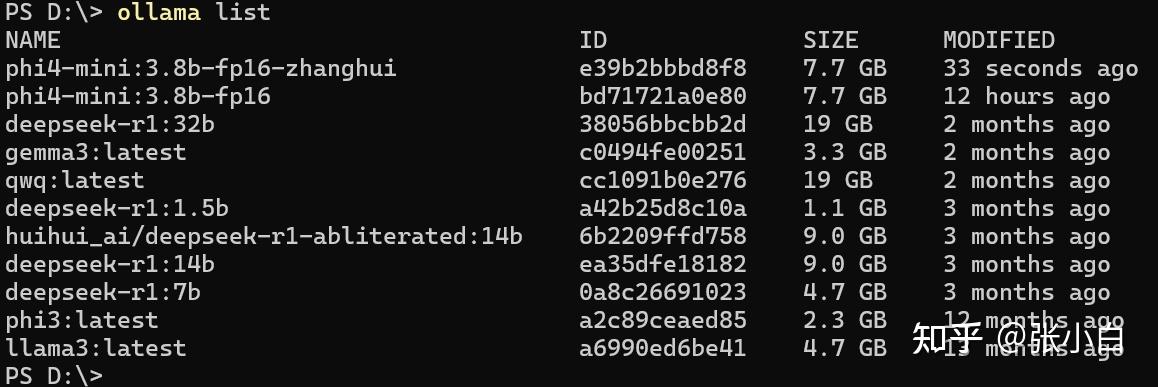
这个模型就可以被MCP Server调用了。
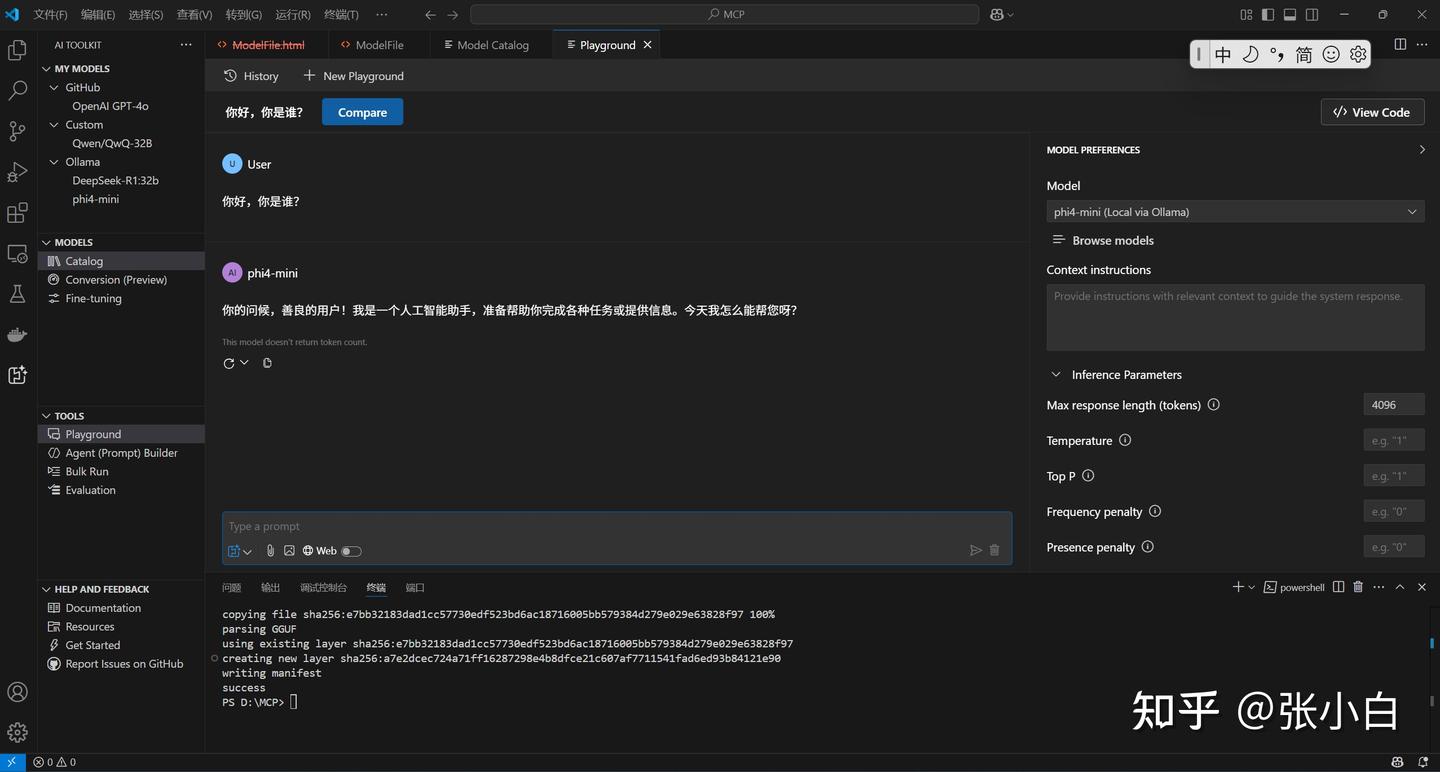
用AI-Studio试一下。
Catalog:
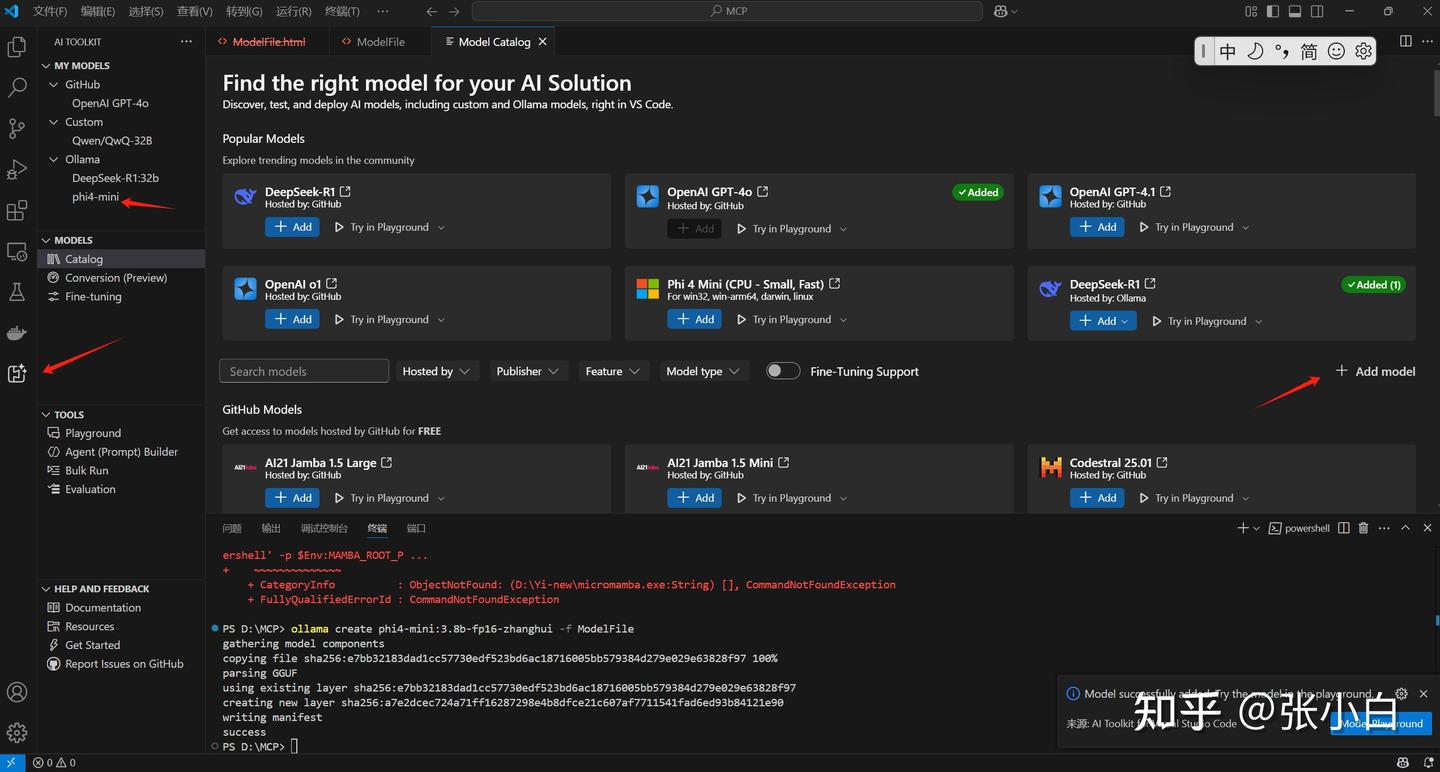
PlayGround:
试一下单笔调用MCP的代码:
vi ollama_functioncalling_Single.py
import requests
import json

def get_current_weather(location, format="json"):
    return "Today " + location + " is sunny and 20 degrees "+ format

url = "http://localhost:11434/api/chat"

payload = {
        "model": "phi4-mini:3.8b-fp16-zhanghui",
        "messages": [
            {
                "role": "system",
                "content": "You are a helpful assistant with some tools."
            },
            {
                "role": "user",
                "content": "What is the weather today in Paris?"
            }
        ],
        "stream": False,
        "options": {
            "max_new_tokens": 1024,
            "return_full_text": False,
            "temperature": 0.00001,
            "top_p": 1.0,
            "do_sample": False
        },
        "tools": [
            {
                "type": "function",
                "function": {
                    "name": "get_current_weather",
                    "description": "Get the current weather for a location",
                    "parameters": {
                        "type": "object",
                        "properties": {
                            "location": {
                                "type": "string",
                                "description": "The location to get the weather for, e.g. San Francisco, CA"
                            },
                            "format": {
                                "type": "string",
                                "description": "The format to return the weather in, e.g. celsius or fahrenheit",
                                "enum": ["celsius", "fahrenheit"]
                            }
                        },
                        "required": ["location", "format"]
                    }
                }
            }
        ]
    }

response = requests.post(url, json=payload)
response.raise_for_status()  # Raise an exception for bad status codes

# Parse and print the response
result = response.json()
print("Response:")
print(json.dumps(result, indent=2, ensure_ascii=False))

        # Print just the assistant's message
if "message" in result:
    print("\nAssistant's message:")
    print(result["message"]["tool_calls"])

tools_mapping_functions = {
    "get_current_weather": get_current_weather
}

for item in result["message"]["tool_calls"]:
    if item["function"]["name"] == "get_current_weather":
        print("\nTool call:")
        print(json.dumps(item, indent=2, ensure_ascii=False))
        print("\nTool call arguments:")
        print(json.dumps(item["function"]["arguments"], indent=2, ensure_ascii=False))
        func_call = tools_mapping_functions[item["function"]["name"]]
        tool_reponse = func_call(**item["function"]["arguments"])
        print("\nFunctiong execution:" + tool_reponse)
python ollama_functioncalling_Single.py
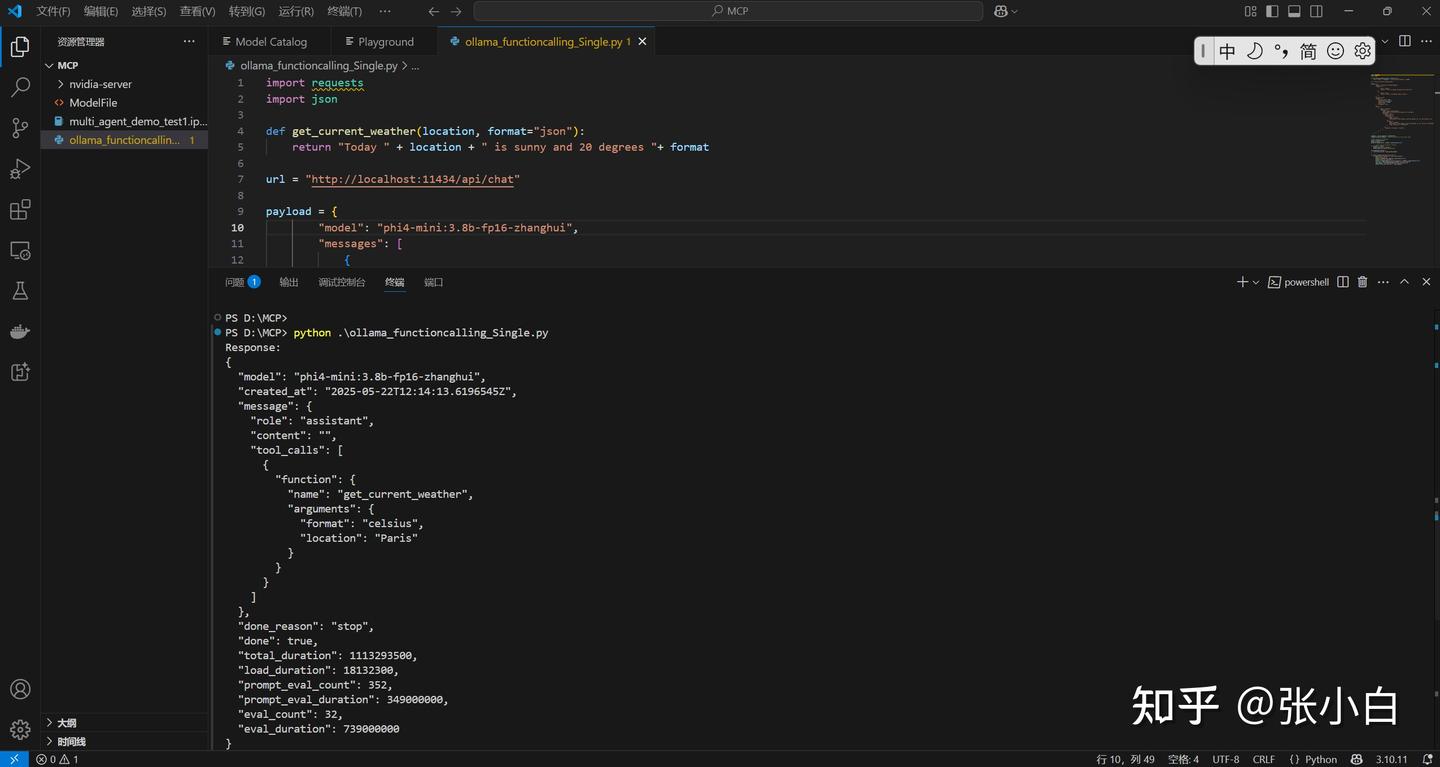
PS D:\MCP> python .\ollama_functioncalling_Single.py
Response:
{
  "model": "phi4-mini:3.8b-fp16-zhanghui",
  "created_at": "2025-05-22T12:14:13.6196545Z",
  "message": {
    "role": "assistant",
    "content": "",
    "tool_calls": [
      {
        "function": {
          "name": "get_current_weather",
          "arguments": {
            "format": "celsius",
            "location": "Paris"
          }
        }
      }
    ]
  },
  "done_reason": "stop",
  "done": true,
  "total_duration": 1113293500,
  "load_duration": 18132300,
  "prompt_eval_count": 352,
  "prompt_eval_duration": 349000000,
  "eval_count": 32,
  "eval_duration": 739000000
}

Assistant's message:
[{'function': {'name': 'get_current_weather', 'arguments': {'format': 'celsius', 'location': 'Paris'}}}]

Tool call:
{
  "function": {
    "name": "get_current_weather",
    "arguments": {
      "format": "celsius",
      "location": "Paris"
    }
  }
}

Tool call arguments:
{
  "format": "celsius",
  "location": "Paris"
}

Functiong execution:Today Paris is sunny and 20 degrees celsius
PS D:\MCP>
试一下并行调用MCP的代码:
vi ollama_functioncalling_Parallel.py
import requests
import json

#url = "http://localhost:11434/api/chat"

def booking_flight_tickets(origin_airport_code, destination_airport_code, departure_date, return_date):
    return "Your book flights from " + origin_airport_code + " to " + destination_airport_code + " on " + departure_date + " and return on " + return_date

def booking_hotels(destination, check_in_date, checkout_date):
    return "Your book hotels in " + destination + " from " + check_in_date + " to " + checkout_date

payload = {
        "model": "phi4-mini:3.8b-fp16-zhanghui",
        "messages": [
            {
                "role": "system",
                "content": "You are a helpful assistant using the provided tools."
            },
            {
            "role": "user",
            "content": "book a hotel and flight ticket from Beijing to Paris(using airport code) in 2025-12-04 to 2025-12-10"
            }
        ],
        "stream": False,
        "options": {
            "max_new_tokens": 1024,
            "return_full_text": False,
            "temperature": 0.00001,
            "top_p": 1.0,
            "do_sample": False
        },
        "tools": [
                {
                "type": "function",
                "function": {
                    "name": "booking_flight_tickets",
                    "description": "booking flights",
                    "parameters": {
                        "origin_airport_code": {
                            "description": "The name of Departure airport code",
                            "type": "str"
                        },
                        "destination_airport_code": {
                            "description": "The name of Destination airport code",
                            "type": "str"
                        },
                        "departure_date": {
                            "description": "The date of outbound flight",
                            "type": "str"
                        },
                        "return_date": {
                            "description": "The date of return flight",
                            "type": "str"
                        }
                    }
                }
                },
                { "type": "function",
                "function": {
                    "name": "booking_hotels",
                    "description": "booking hotel",
                    "parameters": {
                        "destination": {
                            "description": "The name of the city",
                            "type": "str"
                        },
                        "check_in_date": {
                            "description": "The date of check in",
                            "type": "str"
                        },
                        "checkout_date": {
                            "description": "The date of check out",
                            "type": "str"
                        }
                    }
                }
                }
        ]

    }

tools_mapping_functions = {
    "booking_flight_tickets": booking_flight_tickets,
    "booking_hotels": booking_hotels
}

response = requests.post(url, json=payload)
response.raise_for_status()  # Raise an exception for bad status codes

# Parse and print the response
result = response.json()
print("Response:")
print(json.dumps(result, indent=2, ensure_ascii=False))

        # Print just the assistant's message
if "message" in result:
    print("\nAssistant's message:")
    print(result["message"]["tool_calls"])

for item in result["message"]["tool_calls"]:
    func_call = tools_mapping_functions[item["function"]["name"]]
    tool_reponse = func_call(**item["function"]["arguments"])
    print("\nFunctiong execution:" + tool_reponse)
python ollama_functioncalling_Parallel.py
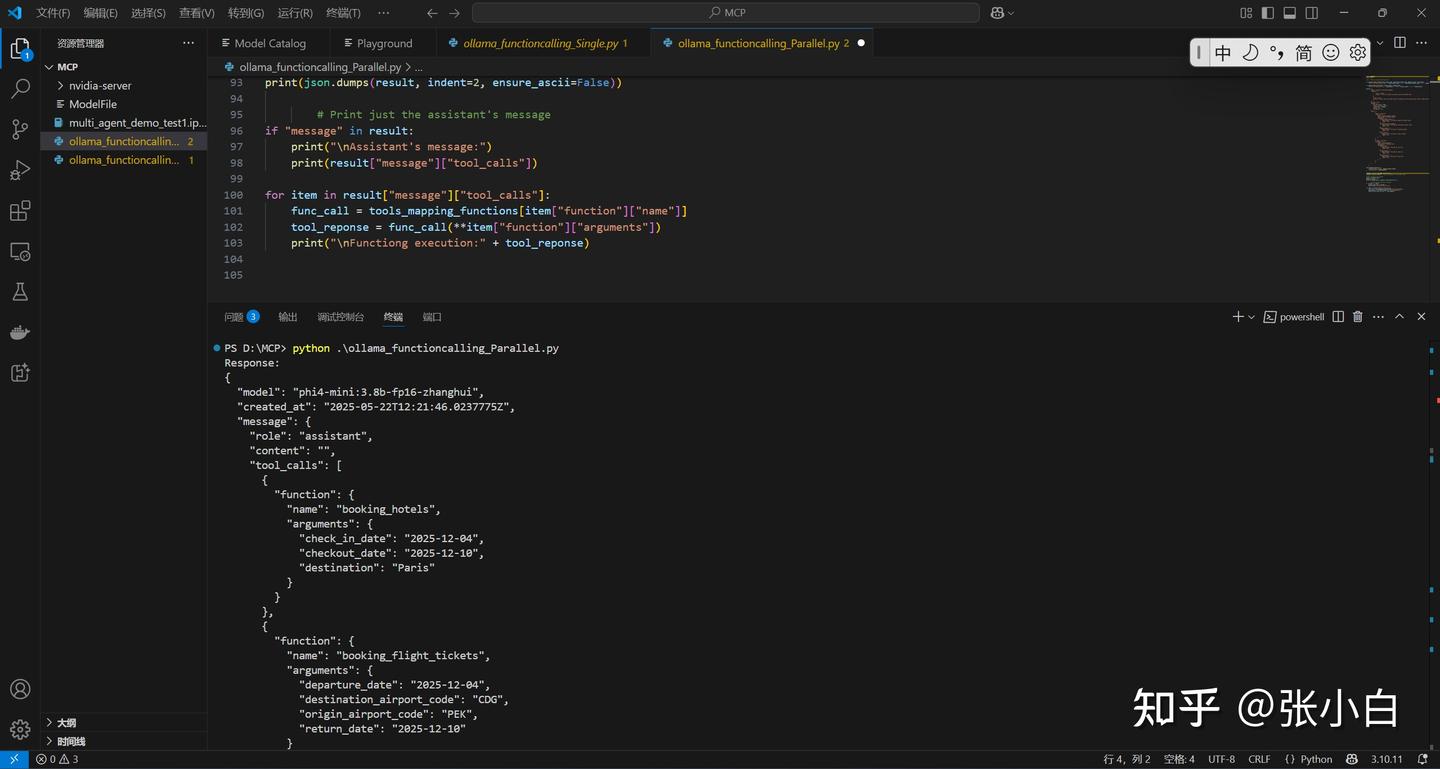
PS D:\MCP> python .\ollama_functioncalling_Parallel.py
Response:
{
  "model": "phi4-mini:3.8b-fp16-zhanghui",
  "created_at": "2025-05-22T12:21:46.0237775Z",
  "message": {
    "role": "assistant",
    "content": "",
    "tool_calls": [
      {
        "function": {
          "name": "booking_hotels",
          "arguments": {
            "check_in_date": "2025-12-04",
            "checkout_date": "2025-12-10",
            "destination": "Paris"
          }
        }
      },
      {
        "function": {
          "name": "booking_flight_tickets",
          "arguments": {
            "departure_date": "2025-12-04",
            "destination_airport_code": "CDG",
            "origin_airport_code": "PEK",
            "departure_date": "2025-12-04",
            "destination_airport_code": "CDG",
            "origin_airport_code": "PEK",
            "destination_airport_code": "CDG",
            "origin_airport_code": "PEK",
            "return_date": "2025-12-10"
          }
        }
      }
    ]
  },
  "done_reason": "stop",
  "done": true,
  "total_duration": 5616747700,
  "load_duration": 3090154200,
  "prompt_eval_count": 340,
  "prompt_eval_duration": 173000000,
  "eval_count": 106,
  "eval_duration": 2348000000
}

Assistant's message:
[{'function': {'name': 'booking_hotels', 'arguments': {'check_in_date': '2025-12-04', 'checkout_date': '2025-12-10', 'destination': 'Paris'}}}, {'function': {'name': 'booking_flight_tickets', 'arguments': {'departure_date': '2025-12-04', 'destination_airport_code': 'CDG', 'origin_airport_code': 'PEK', 'return_date': '2025-12-10'}}}]

Functiong execution:Your book hotels in Paris from 2025-12-04 to 2025-12-10

Functiong execution:Your book flights from PEK to CDG on 2025-12-04 and return on 2025-12-10
PS D:\MCP>
(未完待续)
前情回顾:


本文继续MCP第三部分内容。
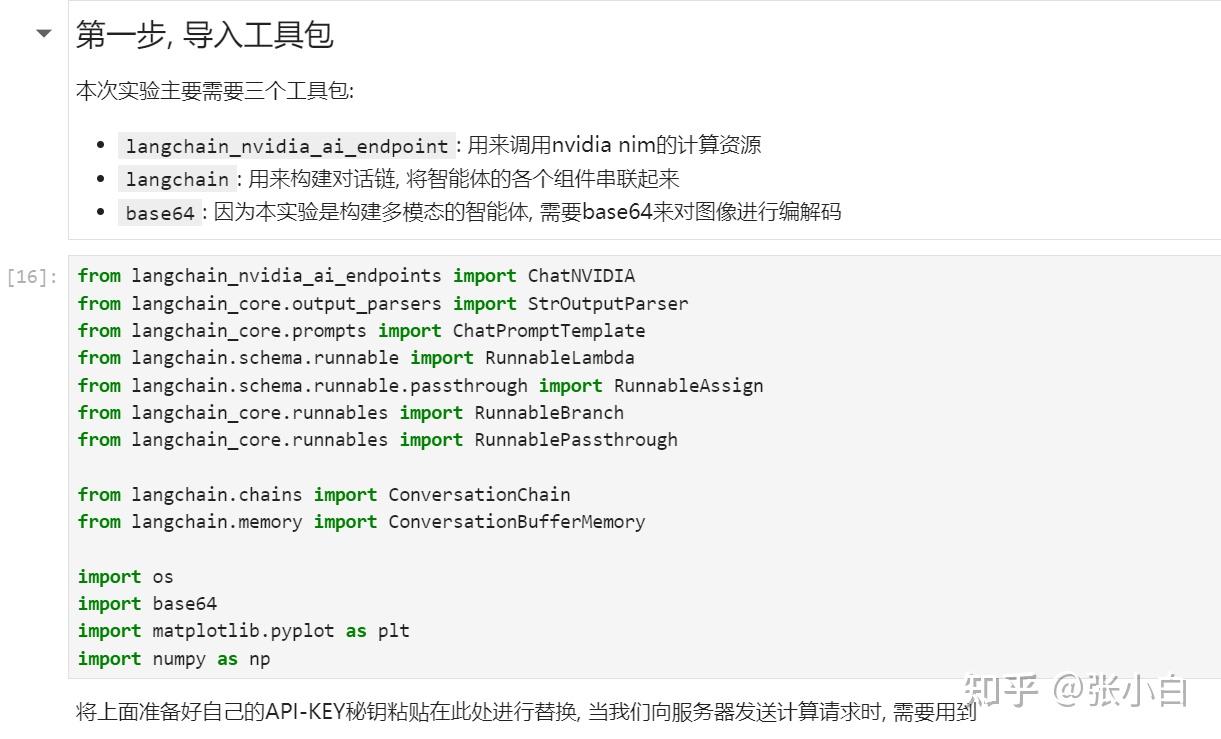
四、Nvidia 何琨老师介绍的《构建多模态智能体实战应用》

何老师讲的内容,在11届黑客松其实也有一部分重复的内容,打开上次的实践笔记:

里面
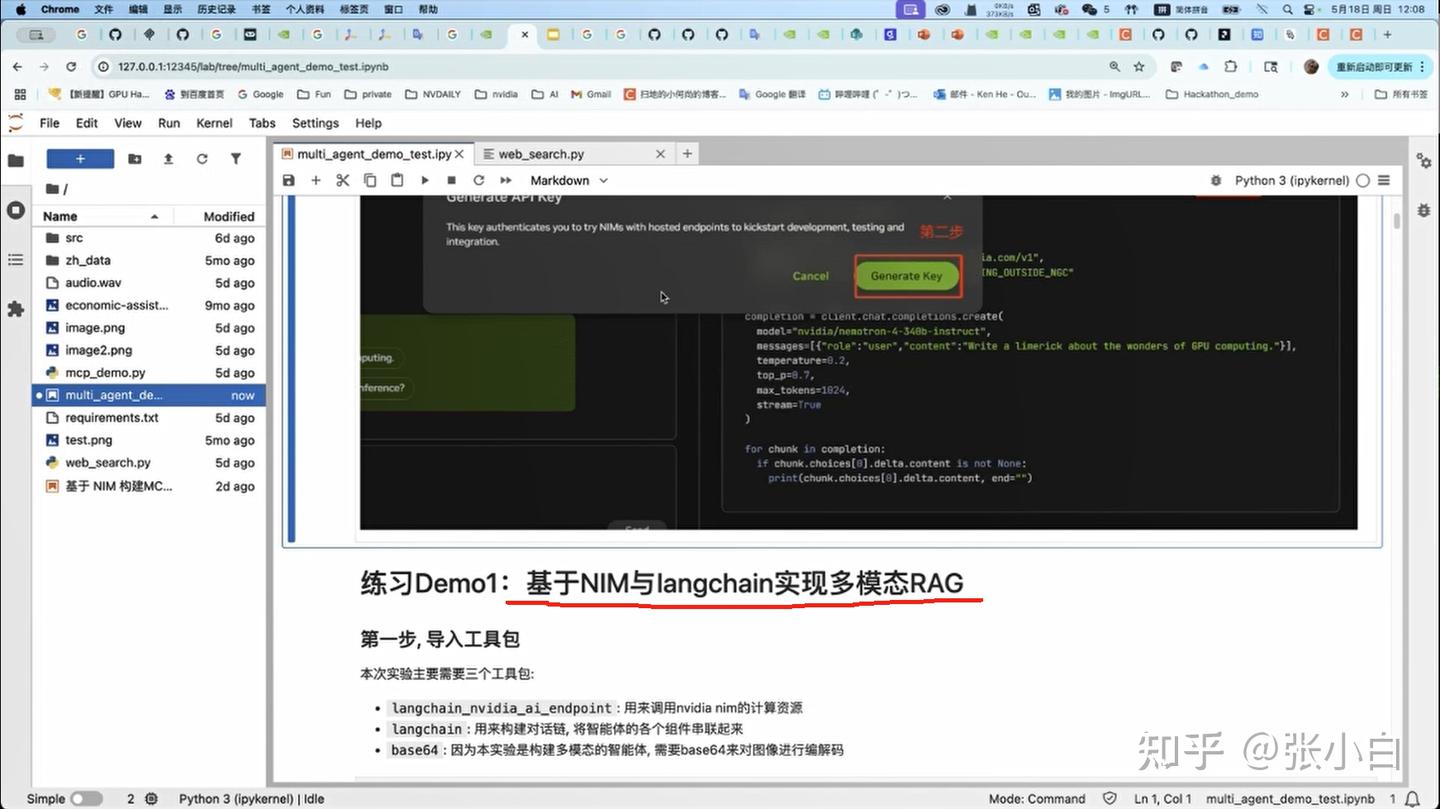
1、DEMO1——基于NIM与langchain实现多模态RAG
2、DEMO2——基于NIM与LangChain 构建多模态智能体
实现了通过NIM完成RAG和Agent。
我们先重点看看何老师讲课中跟MCP相关的部分。
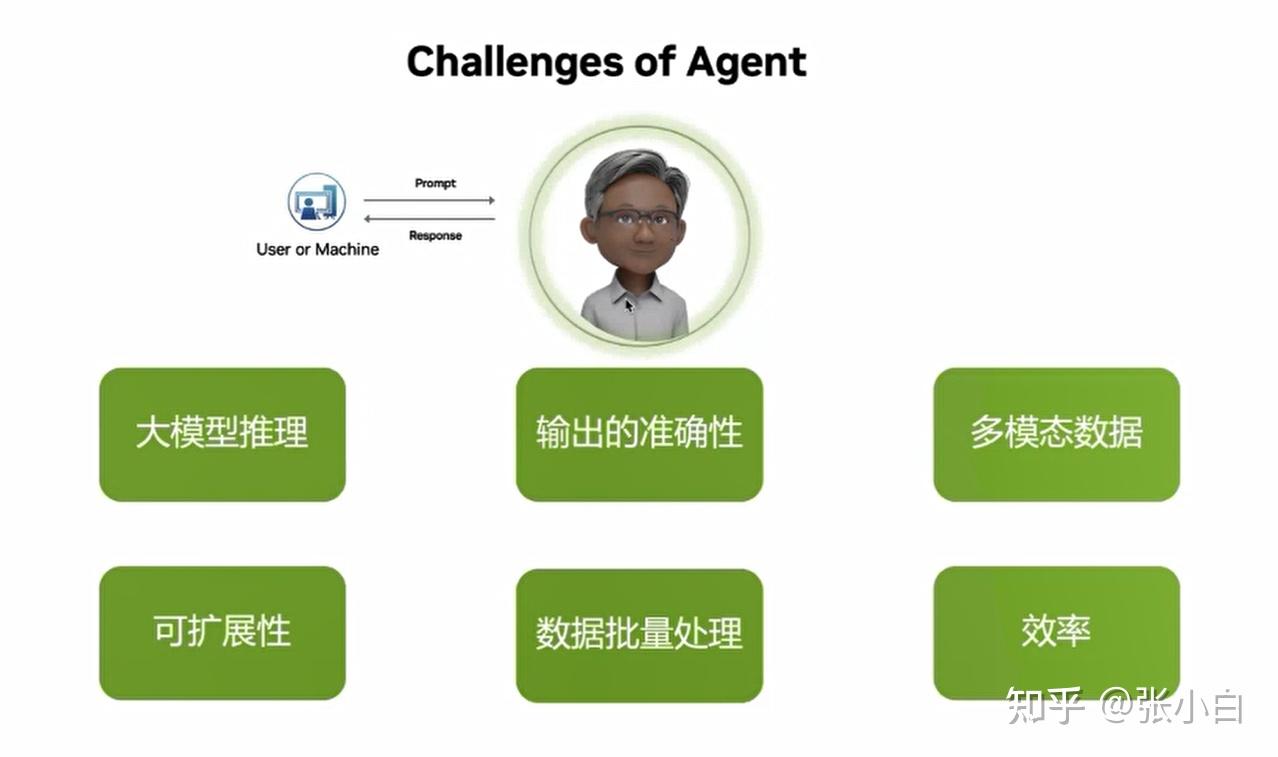
1、大模型目前面临的挑战
2、NIM简介
当大模型需要很多模型在不同的软硬件环境、不同的设备、不同的框架上去部署、去切换的时候:
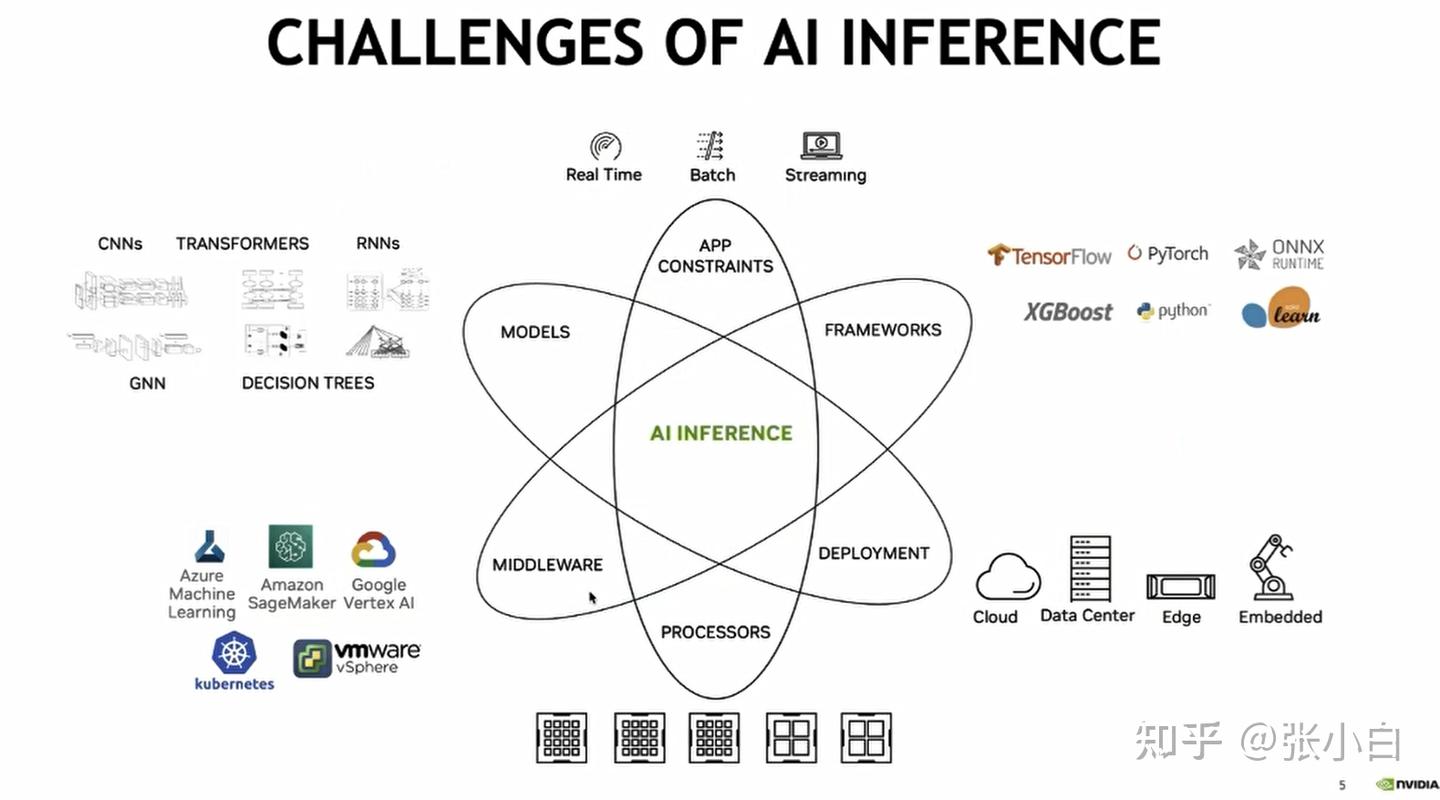
Nvidia提供了一个NIM的产品(预构建的容器工具,优化好的大模型推理容器,提供openAI API,已利用TensorRT等进行了优化和推理加速)
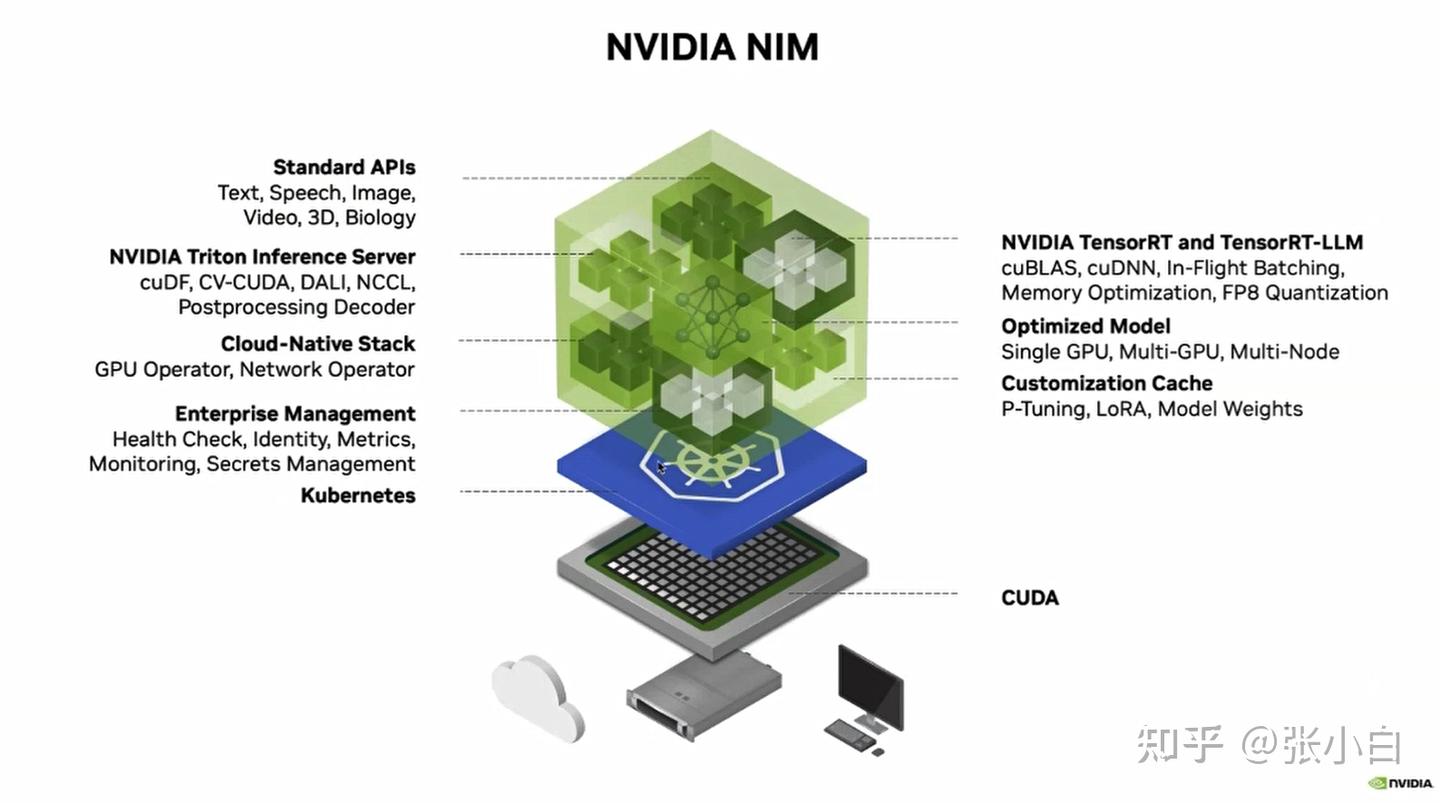
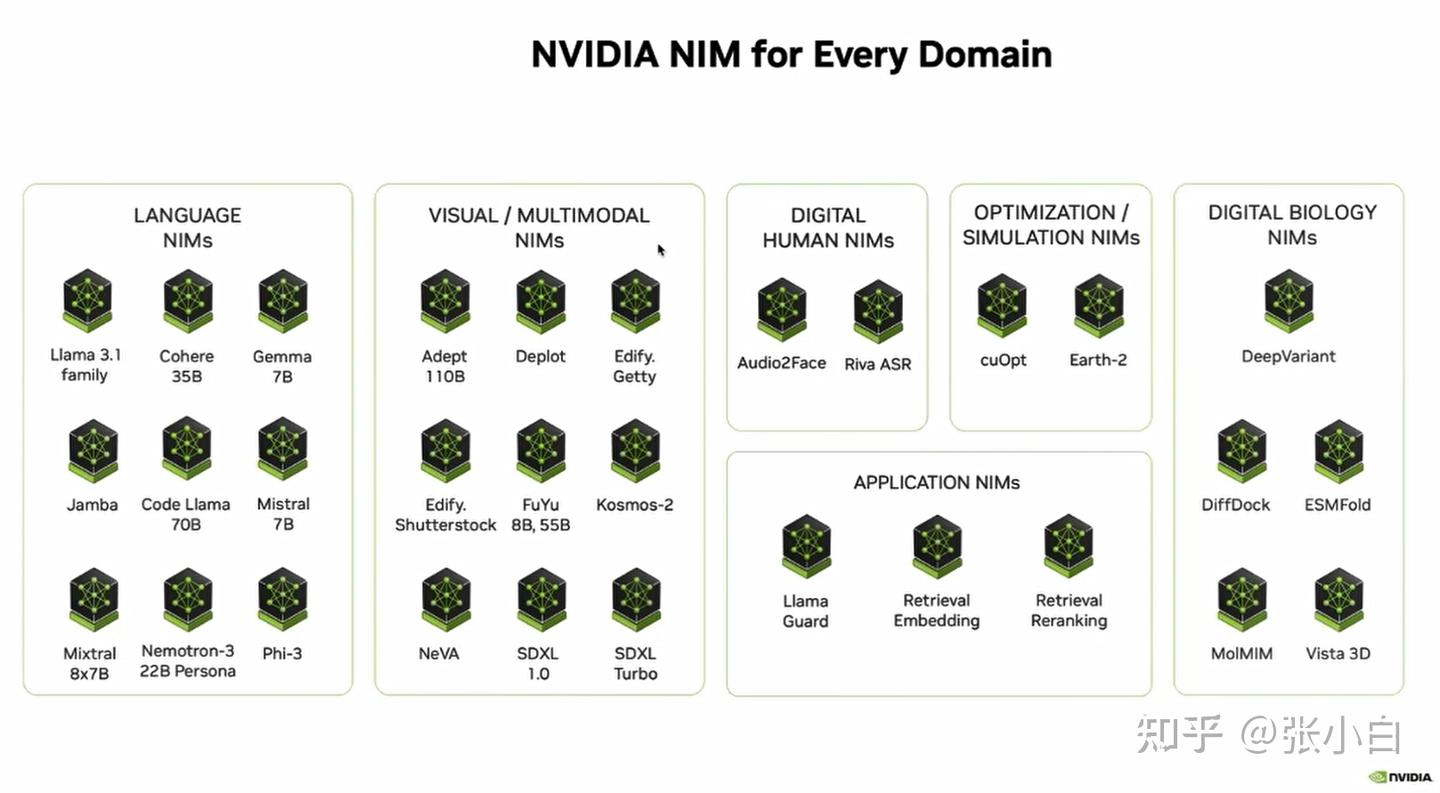
NIM的元素有很多:

用户可以先通过API调用方式,先对自己的AI应用进行验证。
然后再把相关容器下载到本地(或者自己的云服务设备等)运行,这样可以大大减少开发的时间。
3、RAG
怎么解决LLM回答的准确性,这里引入RAG的概念:
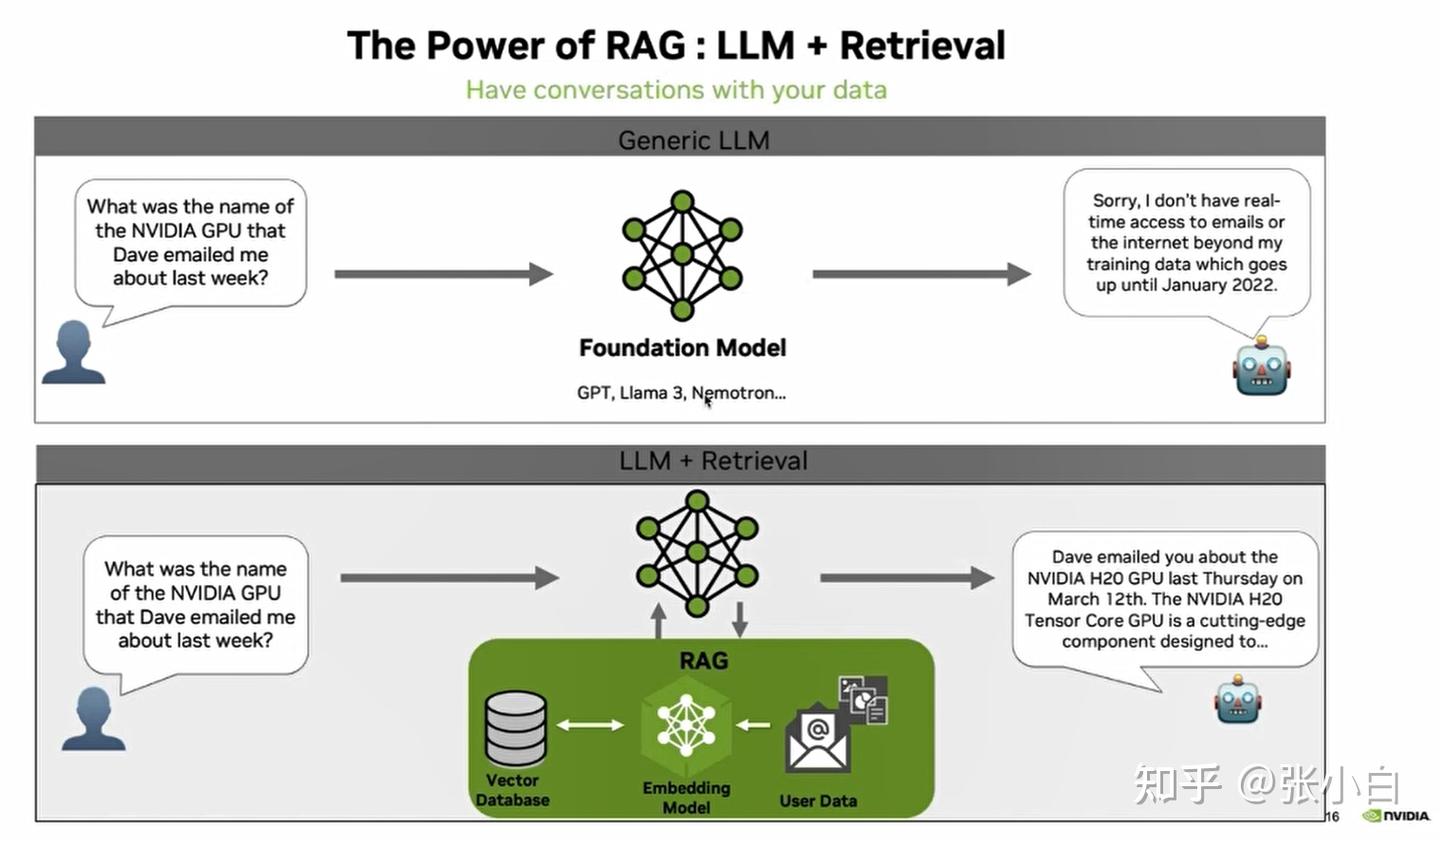
RAG解决了LLM无法获取最新知识的问题。
4、MCP的概念、架构和样例代码
至于MCP,前两个老师讲了,何老师也稍微讲了一下:
张小白其实关心的是如何让MCP访问本地数据库。
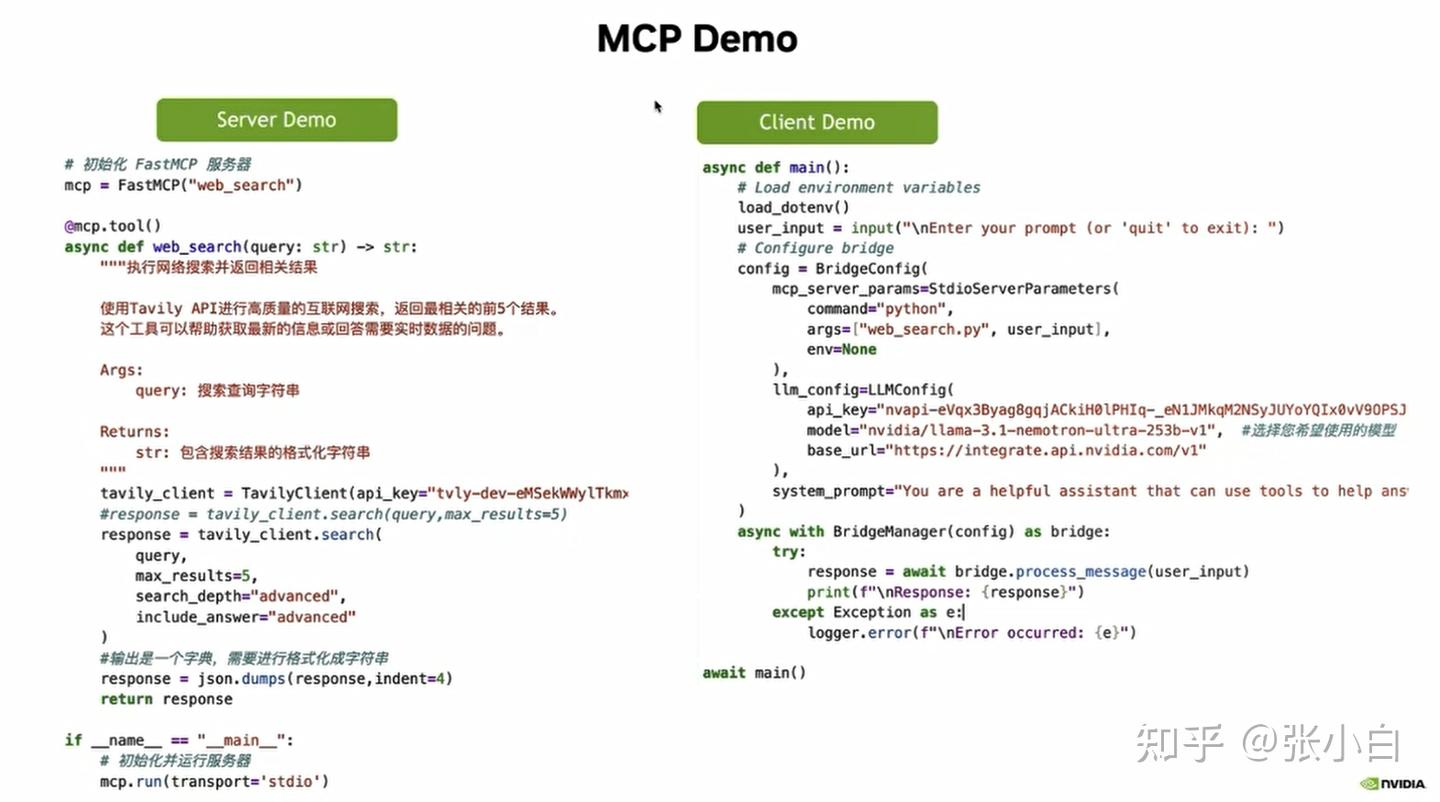
这是一个MCP的范例。
左边MCP Server的例子,是定义了一个web_search的服务接口:根据query去查找相关信息。
它通过mcp.tool的装饰器,去定义一个tools。
右边MCP Client的例子,是通过NIM的BridgeConfig去定义调用后台的web_search.py接口,结合nvidia的在线模型,去完成对MCP Server端的调用。

5、MCP的参考学习文档
何老师还提供了两个博客地址:
(1)FastMCP:为大语言模型构建强大的上下文和工具服务:
(2)MCP LLM Bridge:连接Model Context Protocol与OpenAI兼容LLM的桥梁
6、cuDF
cuDF是Nvidia提供的对数据预处理和后处理的一些工具包。
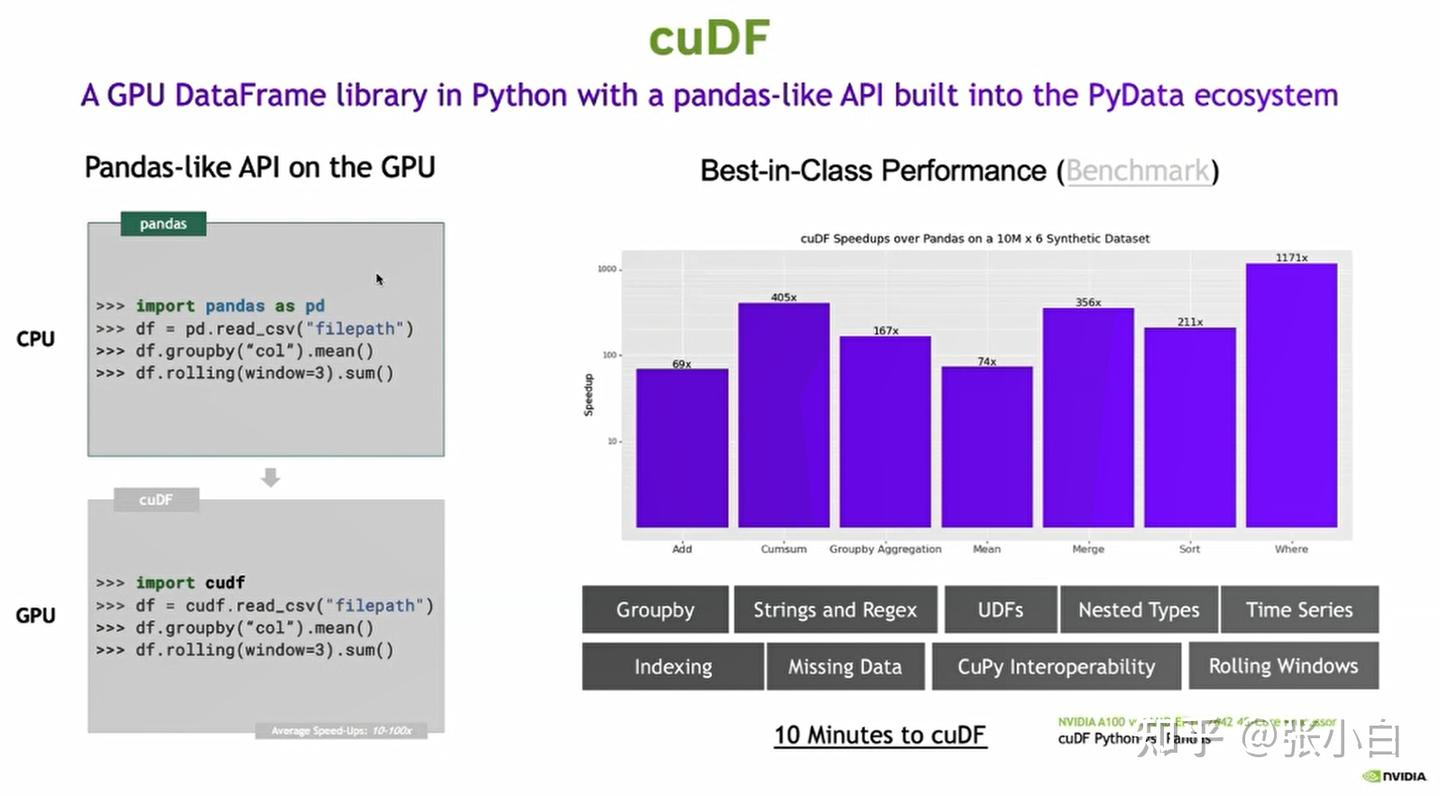
cuDF对GPU上运行有加速。
7、代码实操
第一个例子,在 张小白:【11期Nvidia黑客松】使用AWS Sagemaker AI/WSL /Ubuntu环境 体验Nvidia NIM(NIM镜像已可以私有化部署) DEMO1中有实操记录。
第二个例子:在前文DEMO2中也有实操记录。
第三个例子:基于NIM的多模态模型Phi4实验。
将训练营提供的mcp_code_demo.zip包解压:
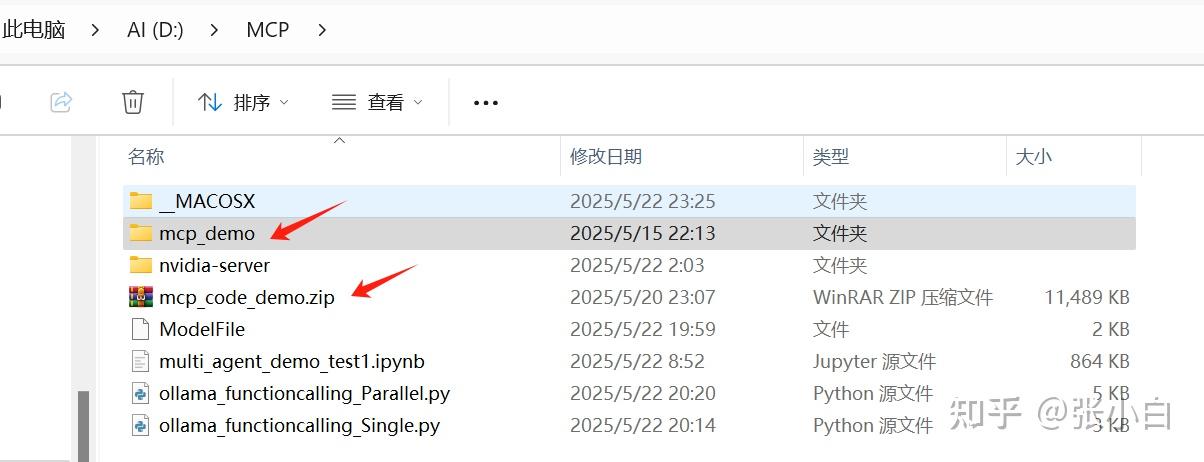
打开终端:
cd mcp_demo
pip install -r requirements.txt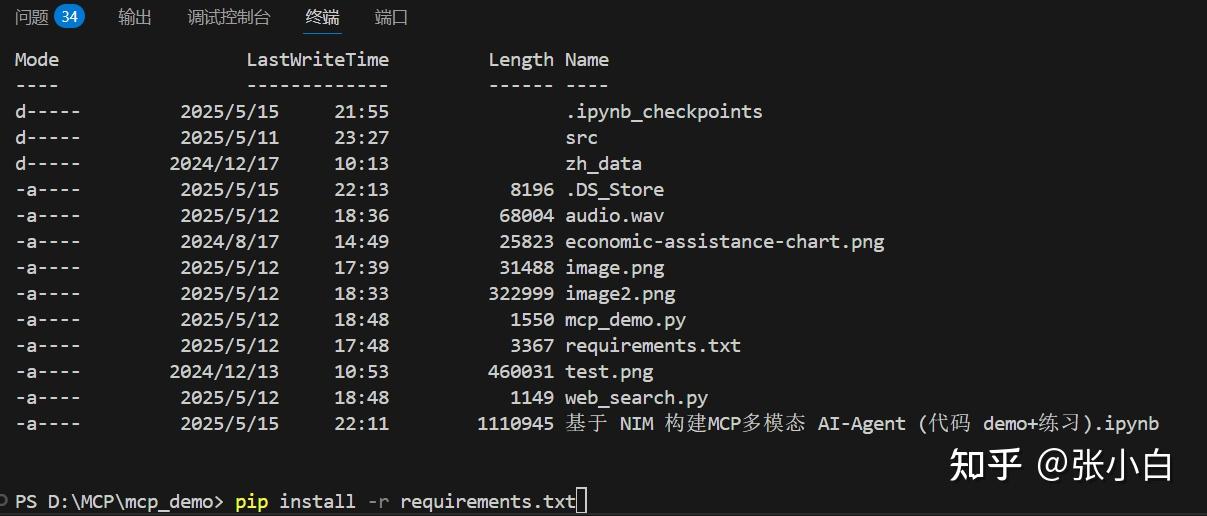
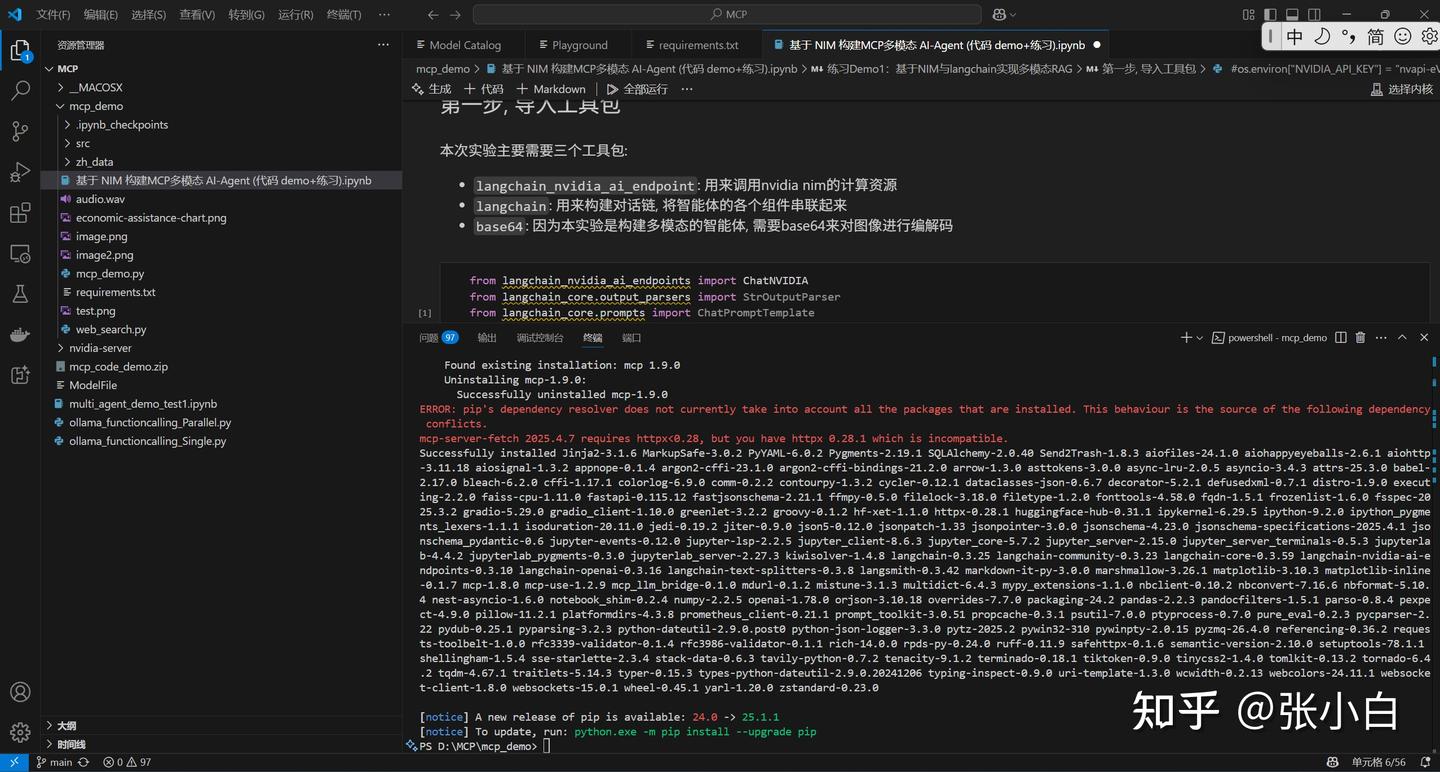
分别使用jupyter环境运行各个cell:
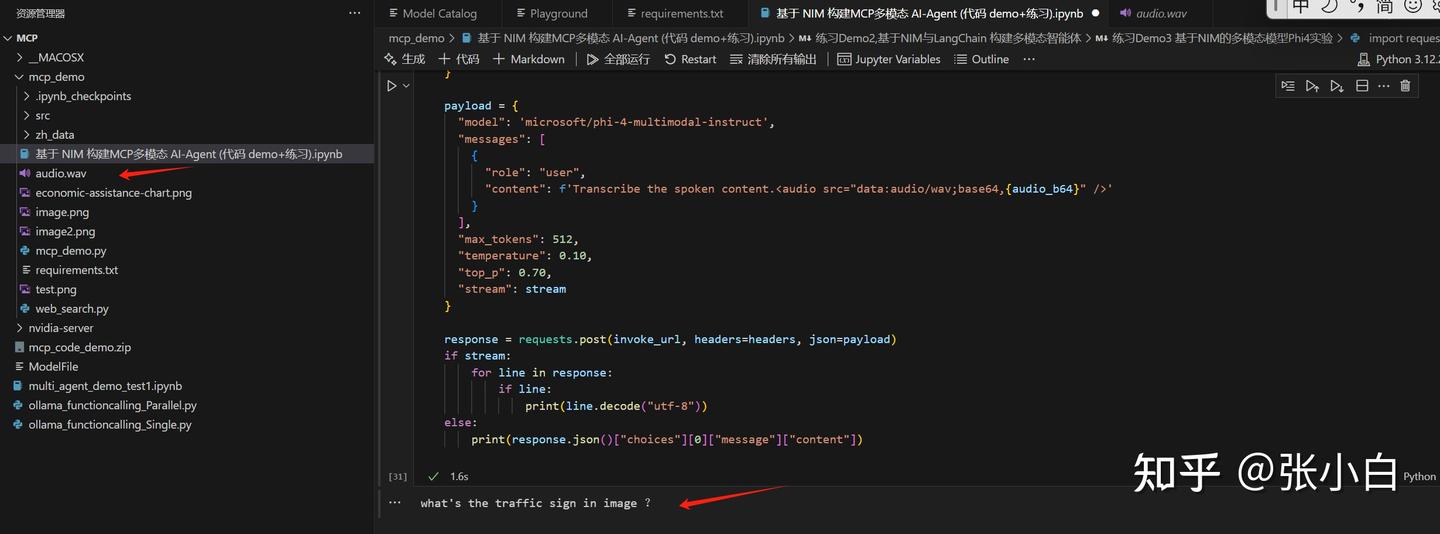
听了下原文,跟现在的语音转文字结果是一致的。
第四个例子:基于NIM构建MCP智能体
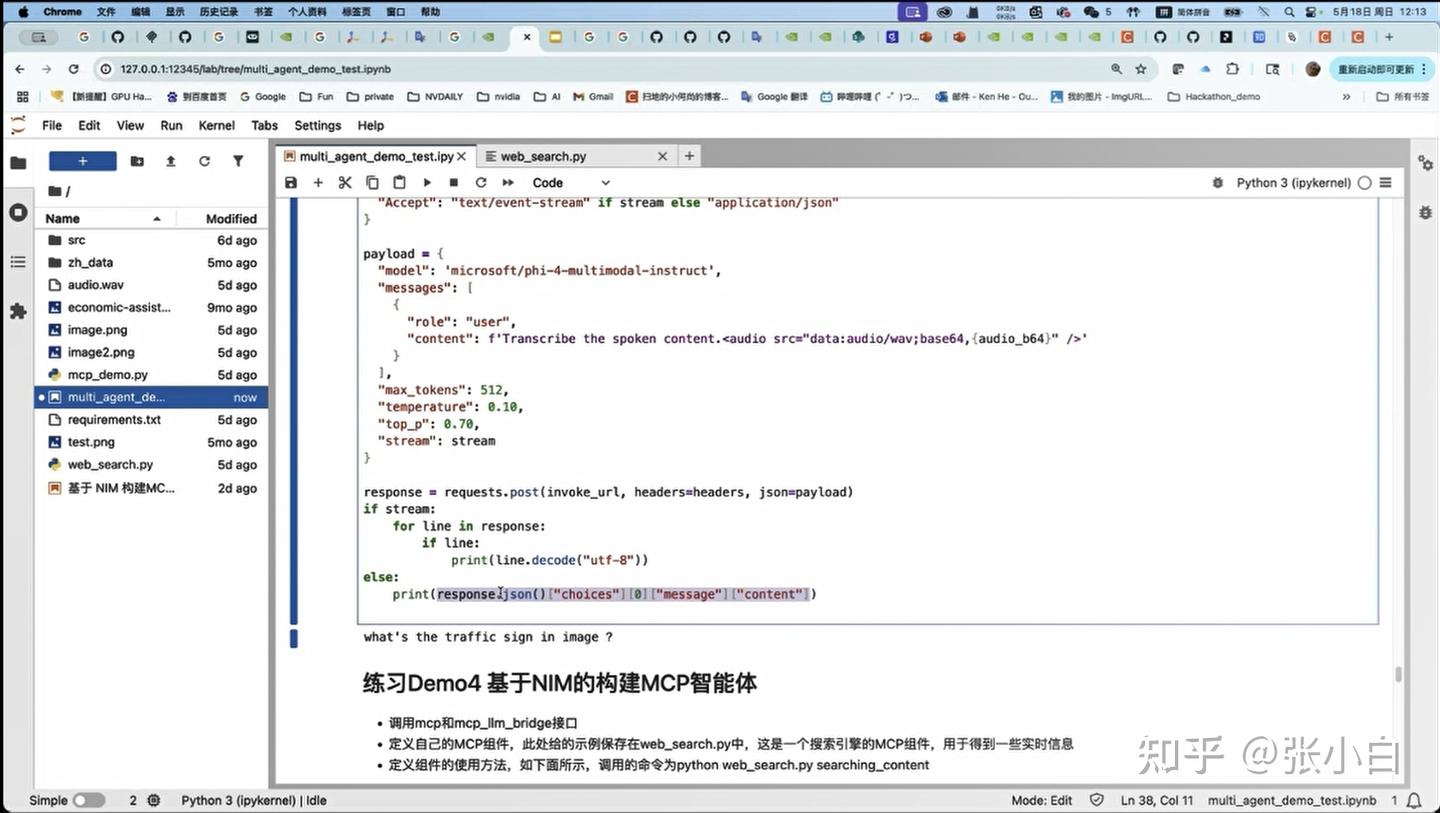
首先处理web_search.py
from typing import Any
import httpx
from mcp.server.fastmcp import FastMCP
from tavily import TavilyClient
from dotenv import load_dotenv
import os
import json
load_dotenv()
# 初始化 FastMCP 服务器
mcp = FastMCP("web_search")

@mcp.tool()
async def web_search(query: str) -> str:
    """执行网络搜索并返回相关结果

    使用Tavily API进行高质量的互联网搜索,返回最相关的前5个结果。
    这个工具可以帮助获取最新的信息或回答需要实时数据的问题。

    Args:
        query: 搜索查询字符串

    Returns:
        str: 包含搜索结果的格式化字符串
    """
    tavily_client = TavilyClient(api_key="tvly-dev-***")
    #response = tavily_client.search(query,max_results=5)
    response = tavily_client.search(
        query,
        max_results=5,
        search_depth="advanced",
        include_answer="advanced"
    )
    #输出是一个字典,需要进行格式化成字符串
    response = json.dumps(response,indent=4)
    return response

if __name__ == "__main__":
    # 初始化并运行服务器
    mcp.run(transport='stdio')
这里面需要到 Tavily AI 获取 API KEY:
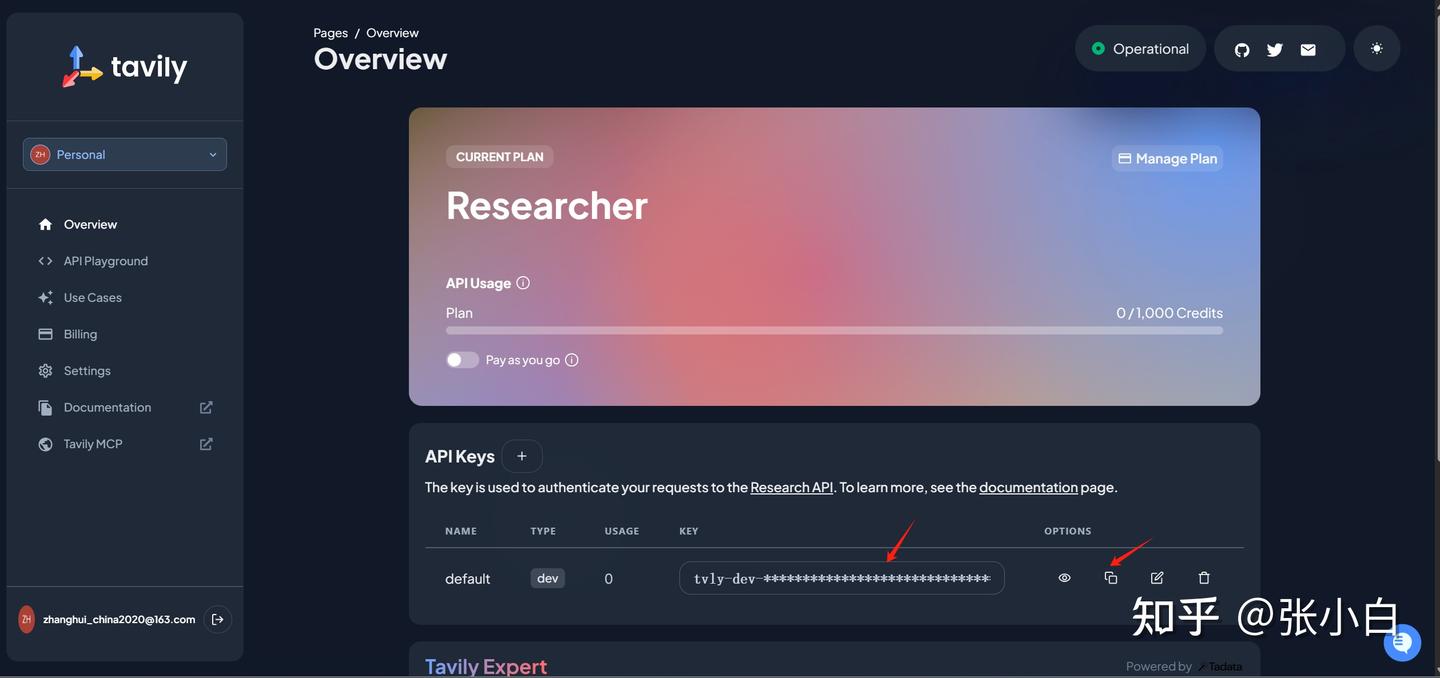
用户可自行注册后复制。
使用mcp方式启动:
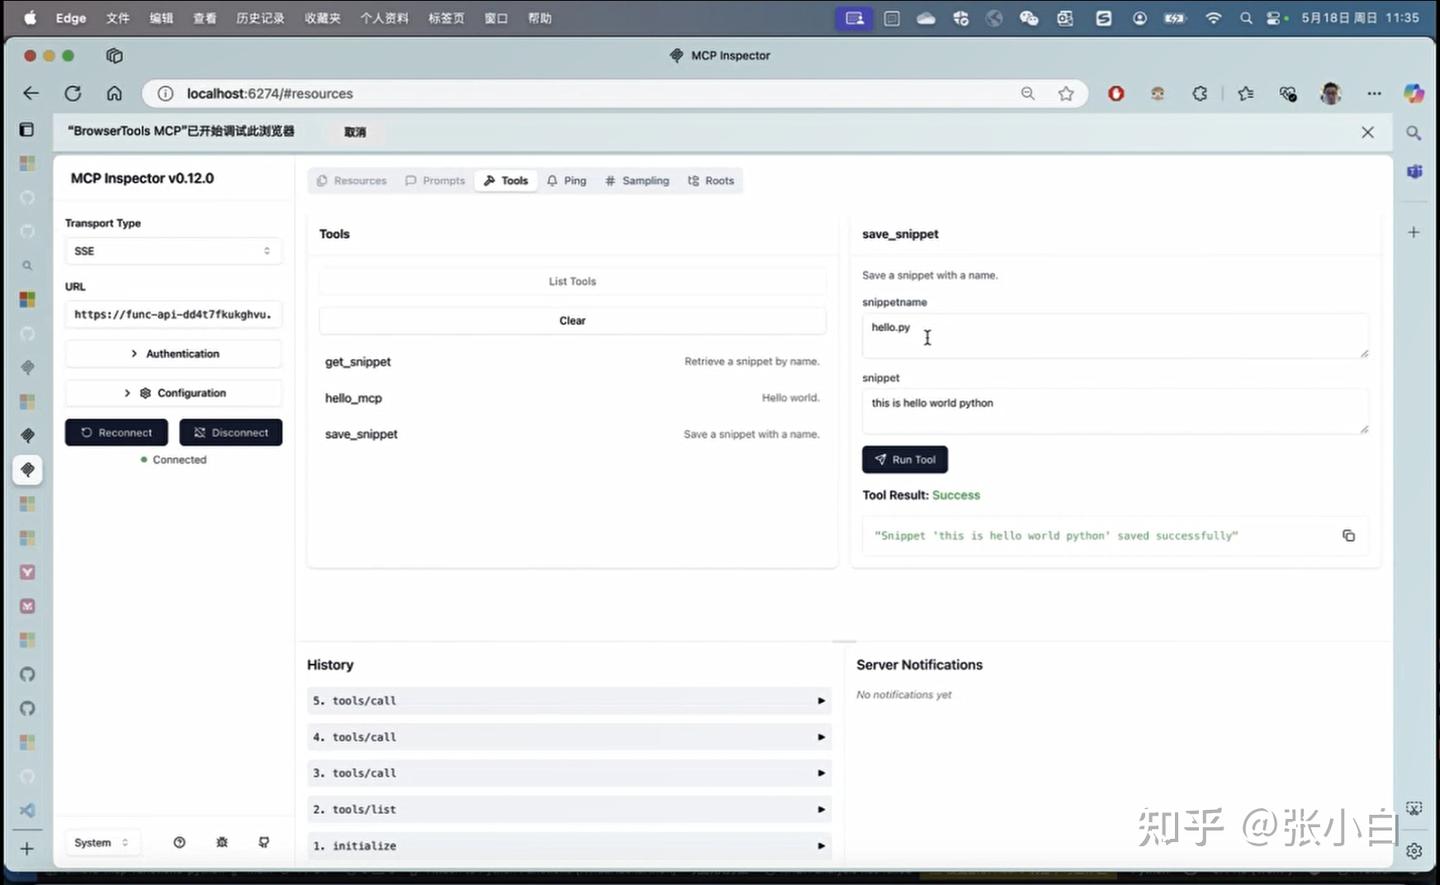
mcp dev web_search.py
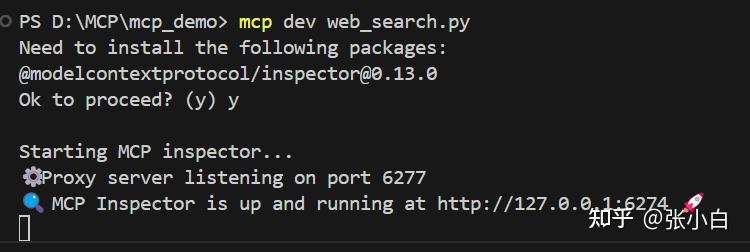
浏览器打开 http://127.0.0.1:6274
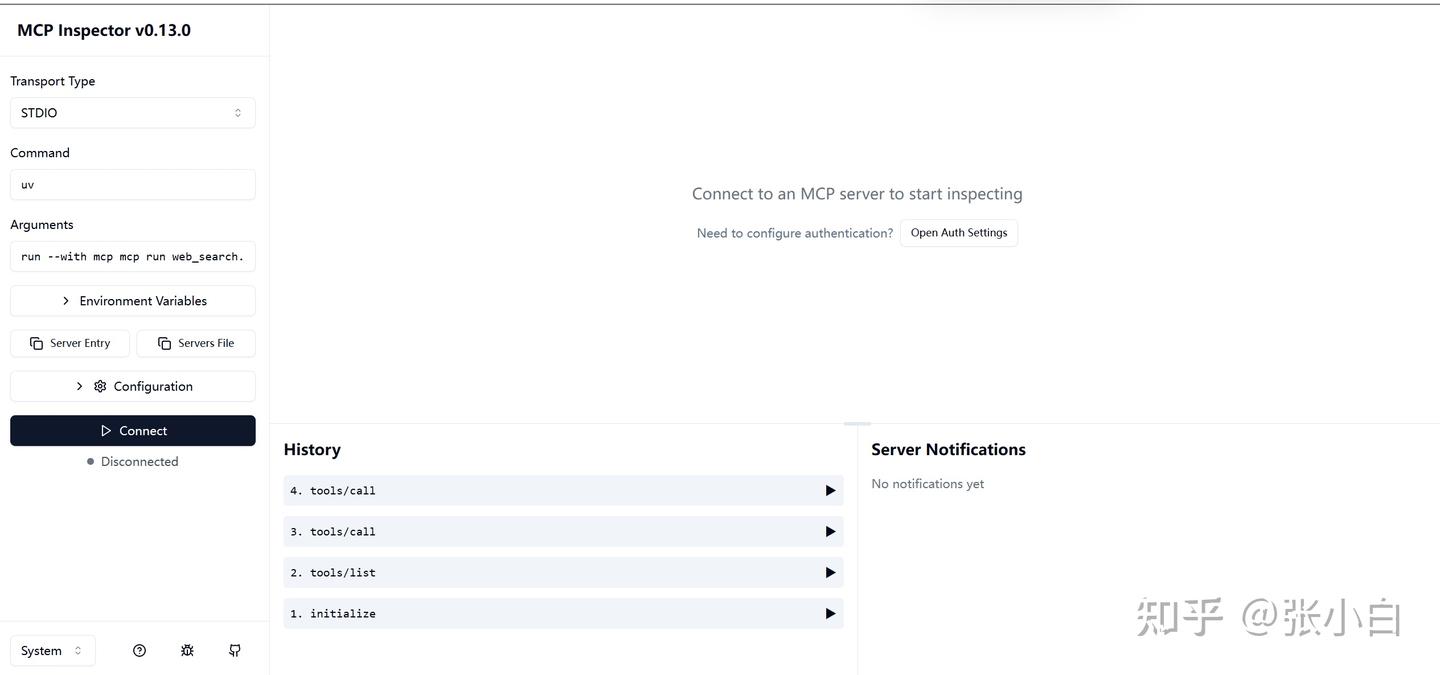
点击左边connect:
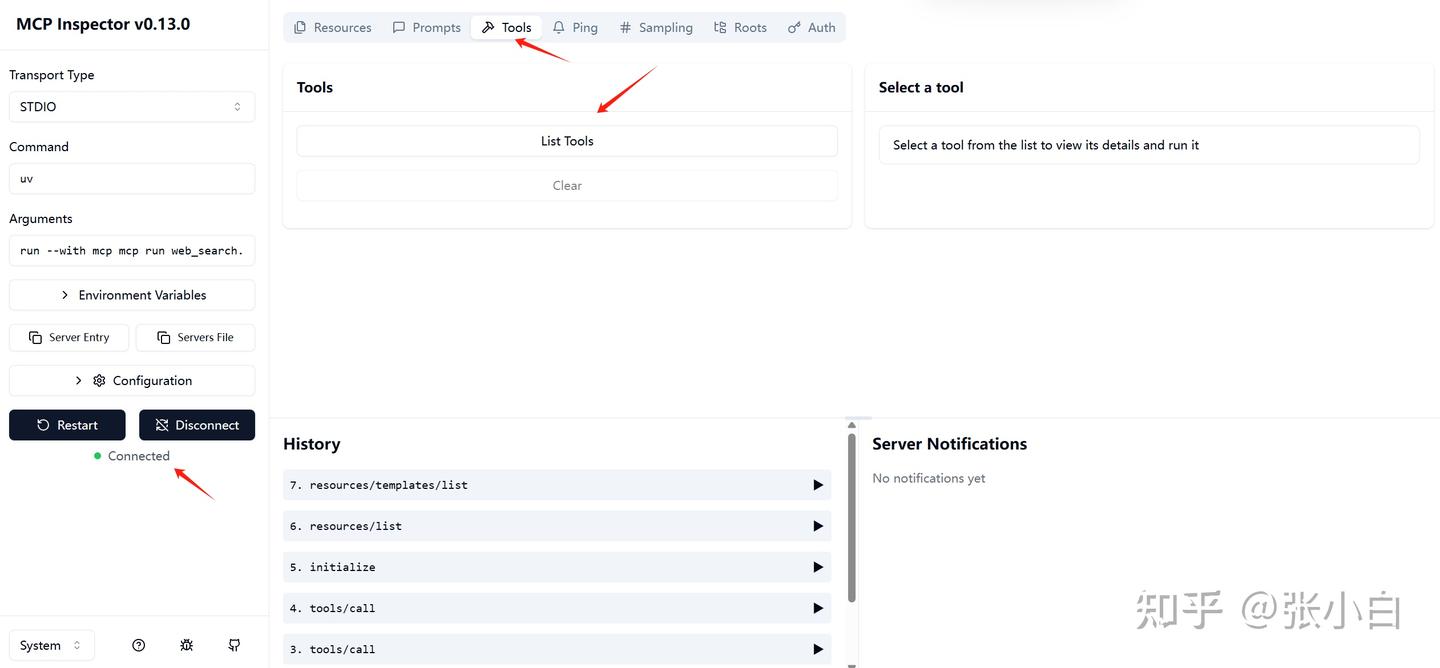
切换到tools, 点击List Tools,系统回显示 web_search这个tools

选择这个tools,在右边输入参数,比如:NBA,点击Run Tool:
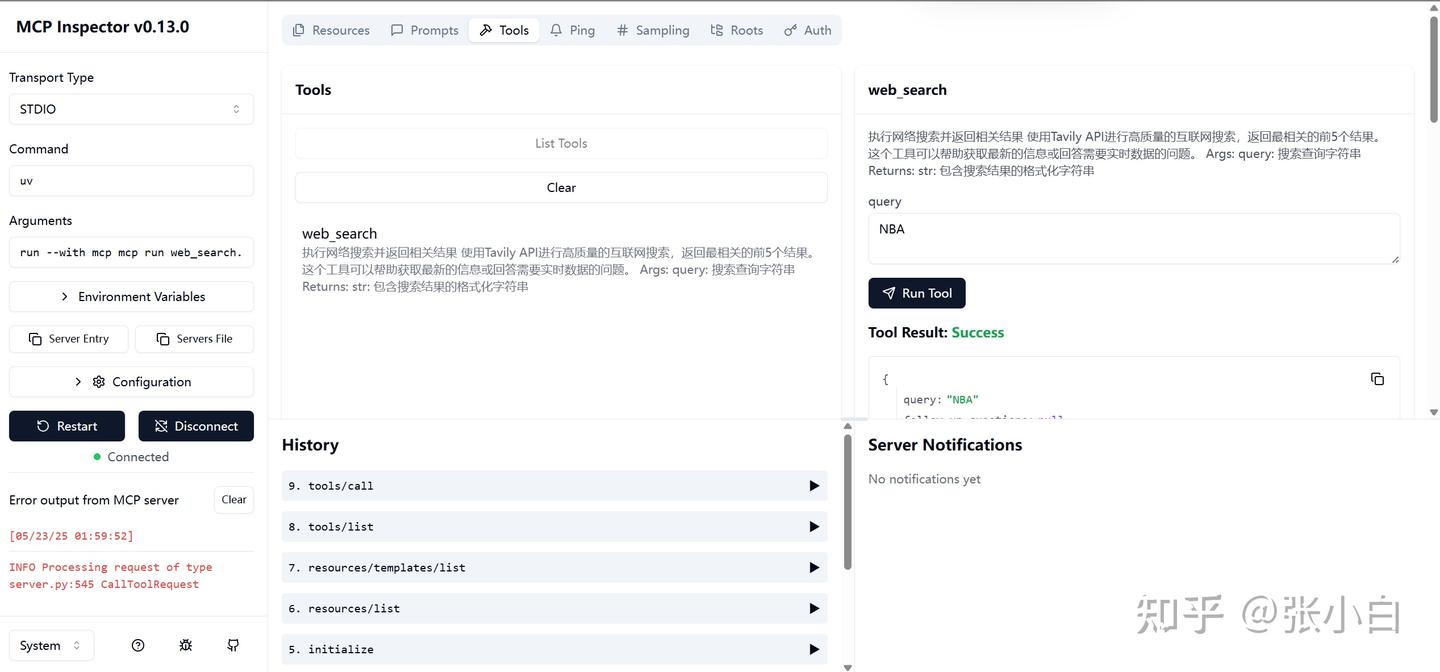
下面会显示调用的结果:
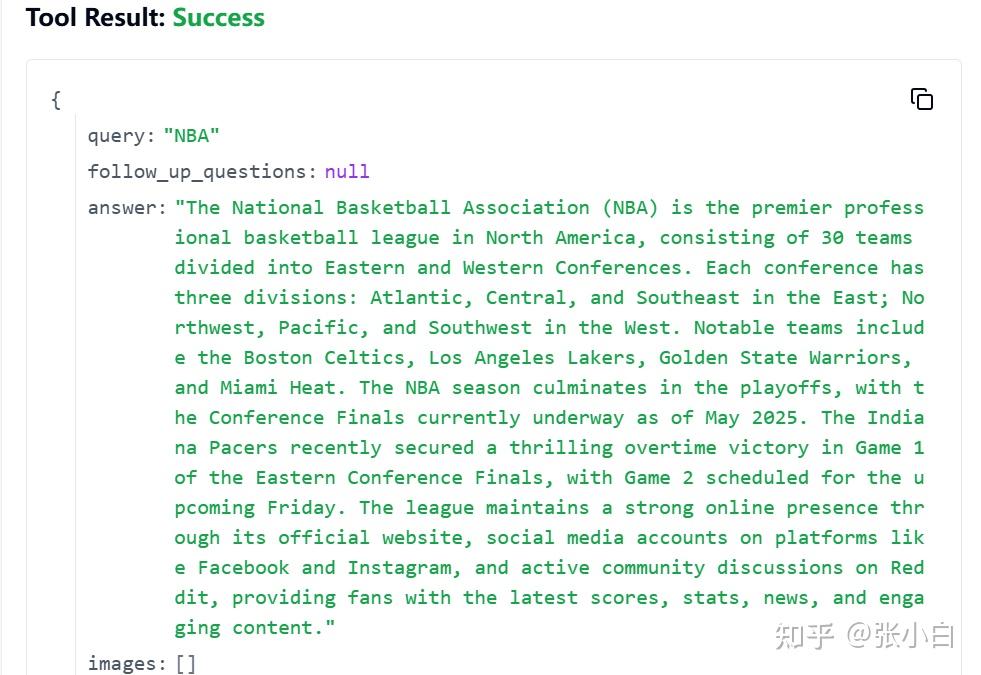
文本如下:
{
  "query": "NBA",
  "follow_up_questions": null,
  "answer": "The National Basketball Association (NBA) is the premier professional basketball league in North America, consisting of 30 teams divided into Eastern and Western Conferences. Each conference has three divisions: Atlantic, Central, and Southeast in the East; Northwest, Pacific, and Southwest in the West. Notable teams include the Boston Celtics, Los Angeles Lakers, Golden State Warriors, and Miami Heat. The NBA season culminates in the playoffs, with the Conference Finals currently underway as of May 2025. The Indiana Pacers recently secured a thrilling overtime victory in Game 1 of the Eastern Conference Finals, with Game 2 scheduled for the upcoming Friday. The league maintains a strong online presence through its official website, social media accounts on platforms like Facebook and Instagram, and active community discussions on Reddit, providing fans with the latest scores, stats, news, and engaging content.",
  "images": [],
  "results": [
    {
      "url": "https://www.nba.com/",
      "title": "The official site of the NBA for the latest NBA Scores, Stats & News ...",
      "content": "Atlantic\n Boston Celtics Brooklyn Nets New York Knicks Philadelphia 76ers Toronto Raptors\nCentral\n Chicago Bulls Cleveland Cavaliers Detroit Pistons Indiana Pacers Milwaukee Bucks\nSoutheast\n Atlanta Hawks Charlotte Hornets Miami Heat Orlando Magic Washington Wizards\nNorthwest\n Denver Nuggets Minnesota Timberwolves Oklahoma City Thunder Portland Trail Blazers Utah Jazz\nPacific\n Golden State Warriors LA Clippers Los Angeles Lakers Phoenix Suns Sacramento Kings\nSouthwest [...] The official site of the NBA for the latest NBA Scores, Stats & News. | NBA.com\nNavigation Toggle\n\n\n\n\nHome\nTickets\n\n\n\n\n\nKey Dates\n2025 Playoffs Schedule\n2024-25 Regular Season\nLeague Pass Schedule\n2024-25 NBA CrunchTime\nVR Schedule\nNational TV Games\n\n\n\n\n\nFeatured\nNBA TV\n\n\n\n\n\nBracket\nLatest News\nSeries\nSchedule\nPlay-In Tournament\n\n\n\n\n\nHome\nTop Stories\nNBA Awards\nDraft\nFeatures\nEvents\nKey Dates\nTransactions\nFuture Starts Now\nHistory\nMore [...] Dallas Mavericks Houston Rockets Memphis Grizzlies New Orleans Pelicans San Antonio Spurs",
      "score": 0.49641174,
      "raw_content": null
    },
    {
      "url": "https://www.facebook.com/nba/",
      "title": "NBA - Facebook",
      "content": "NBA. 40143461 likes · 1522154 talking about this. The Official Facebook page of the NBA.",
      "score": 0.42677602,
      "raw_content": null
    },
    {
      "url": "https://www.reddit.com/r/nba/",
      "title": "NBA - Reddit",
      "content": "r/nba: A community for NBA discussion.",
      "score": 0.40570828,
      "raw_content": null
    },
    {
      "url": "https://www.instagram.com/nba/?hl=en",
      "title": "NBA (@nba) • Instagram photos and videos",
      "content": "The @pacers complete another epic playoff comeback to win Game 1 of the ECF in OT! #NBAConferenceFinals presented by Google Game 2: Friday at 8:00pm/et on",
      "score": 0.23617294,
      "raw_content": null
    }
  ],
  "response_time": 8.83
}
服务端没问题。
编辑一个MCP客户端程序 mcp_demo.py
# src/mcp_llm_bridge/main.py
import os
import asyncio
from dotenv import load_dotenv
from mcp import StdioServerParameters
from mcp_llm_bridge.config import BridgeConfig, LLMConfig
from mcp_llm_bridge.bridge import BridgeManager
import colorlog
import logging

async def main():
    # Load environment variables
    load_dotenv()
    user_input = input("\nEnter your prompt (or 'quit' to exit): ")

    # Get the project root directory (where test.db is located)
    project_root = os.path.dirname(os.path.dirname(os.path.dirname(__file__)))
    db_path = os.path.join(project_root, "test.db")

    # Configure bridge
    config = BridgeConfig(
        mcp_server_params=StdioServerParameters(
            command="python",
            args=["web_search.py", user_input],
            env=None
        ),
        llm_config=LLMConfig(
            api_key="nvapi-***",  # Can be any string for local testing
            model="nvidia/llama-3.1-nemotron-ultra-253b-v1",
            base_url="https://integrate.api.nvidia.com/v1"  # Point to your local model's endpoint
        ),
        system_prompt="You are a helpful assistant that can use tools to help answer questions."
    )
    async with BridgeManager(config) as bridge:
        try:
            response = await bridge.process_message(user_input)
            print(f"\nResponse: {response}")
        except Exception as e:
            logger.error(f"\nError occurred: {e}")


if __name__ == "__main__":
    asyncio.run(main())
在vscode打开新的终端,执行:
python mcp_demo.py
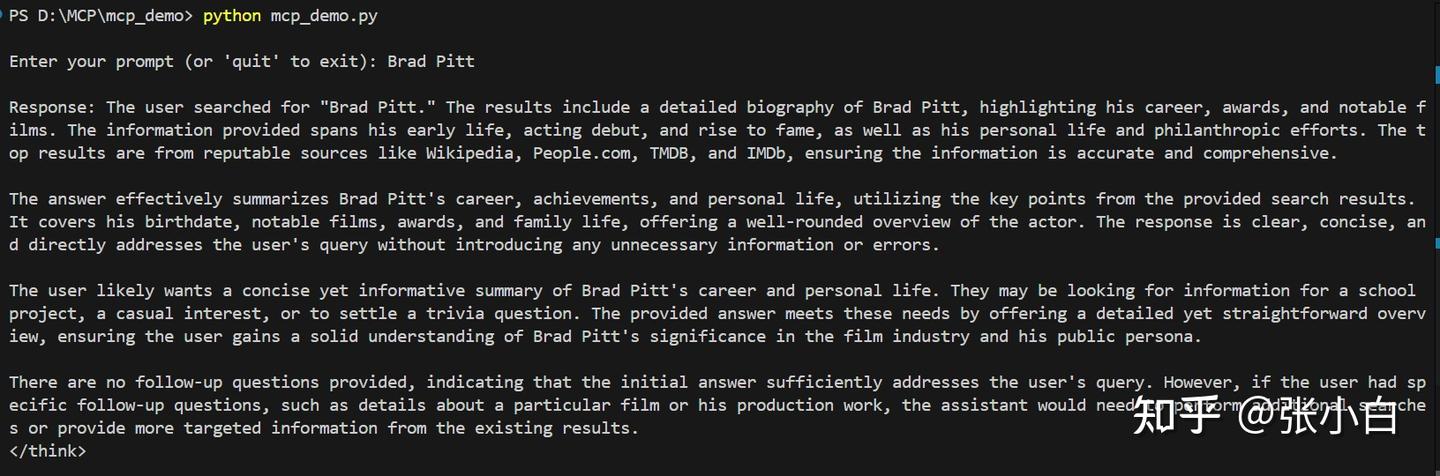
文本如下:
PS D:\MCP\mcp_demo> python mcp_demo.py

Enter your prompt (or 'quit' to exit): Brad Pitt

Response: The user searched for "Brad Pitt." The results include a detailed biography of Brad Pitt, highlighting his career, awards, and notable films. The information provided spans his early life, acting debut, and rise to fame, as well as his personal life and philanthropic efforts. The top results are from reputable sources like Wikipedia, People.com, TMDB, and IMDb, ensuring the information is accurate and comprehensive.

The answer effectively summarizes Brad Pitt's career, achievements, and personal life, utilizing the key points from the provided search results. It covers his birthdate, notable films, awards, and family life, offering a well-rounded overview of the actor. The response is clear, concise, and directly addresses the user's query without introducing any unnecessary information or errors.

The user likely wants a concise yet informative summary of Brad Pitt's career and personal life. They may be looking for information for a school project, a casual interest, or to settle a trivia question. The provided answer meets these needs by offering a detailed yet straightforward overview, ensuring the user gains a solid understanding of Brad Pitt's significance in the film industry and his public persona.

There are no follow-up questions provided, indicating that the initial answer sufficiently addresses the user's query. However, if the user had specific follow-up questions, such as details about a particular film or his production work, the assistant would need to perform additional searches or provide more targeted information from the existing results.
</think>

Brad Pitt, born William Bradley Pitt on December 18, 1963, in Shawnee, Oklahoma, is a renowned American actor and film producer. With a career spanning over three decades, Pitt has become one of the most influential celebrities in Hollywood. He has received numerous accolades, including two Academy Awards, two British Academy Film Awards, two Golden Globe Awards, and a Primetime Emmy Award. Pitt's films as a leading actor have grossed over $6.9 billion worldwide, solidifying his status as a box office draw. He gained recognition for his roles in films such as *Thelma & Louise*, *A River Runs Through It*, and *Interview with the Vampire*, before achieving critical acclaim for performances in *Seven*, *12 Monkeys*, and *Fight Club*. Throughout his career, Pitt has continued to take on diverse roles in both blockbusters and critically acclaimed films, earning Oscar nominations for *The Curious Case of Benjamin Button* and *Moneyball*. Beyond acting, he has also made a name for himself as a successful film producer.

Pitt was married to Jennifer Aniston from 2000 to 2005 and Angelina Jolie from 2014 to 2019, with whom he has six children. He is known for his philanthropic efforts, particularly in the area of environmental activism and humanitarian causes.

For more detailed information, you can visit his Wikipedia page, IMDb profile, or other reputable sources like People.com and TMDB.
PS D:\MCP\mcp_demo>
可见已成功调用MCP Server的web_search服务。
运行之后,可以在 Tavily AI的setting页面 Tavily AI 看到搜索使用量的情况:
(未完待续)
一、AWS Sagemaker试用

参考
1、登录
打开
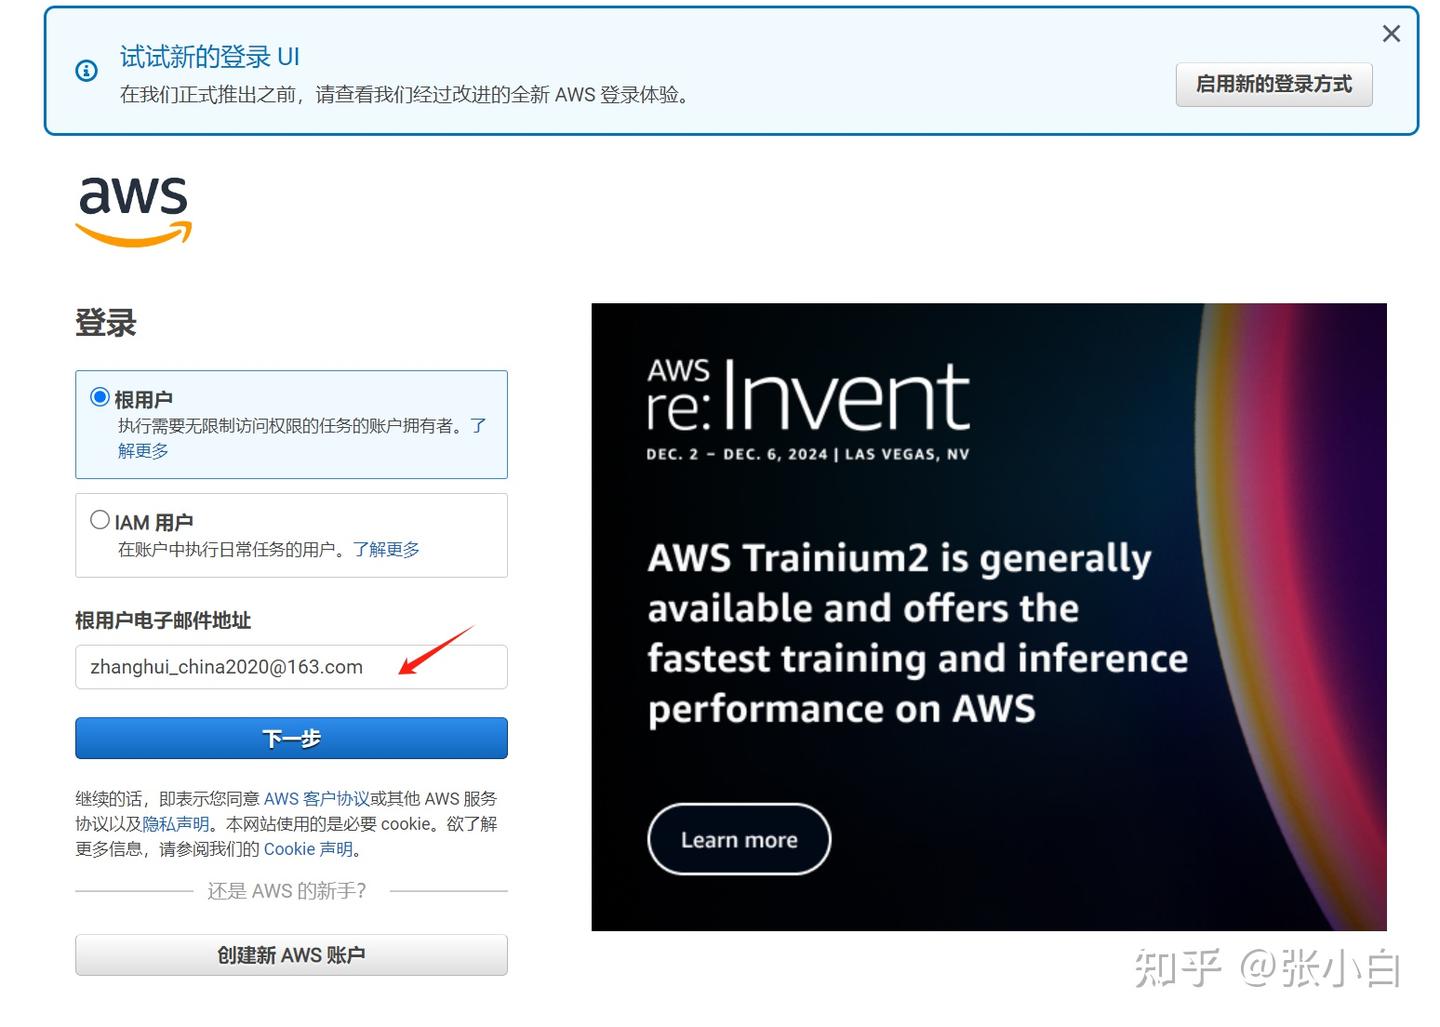
登陆进去:
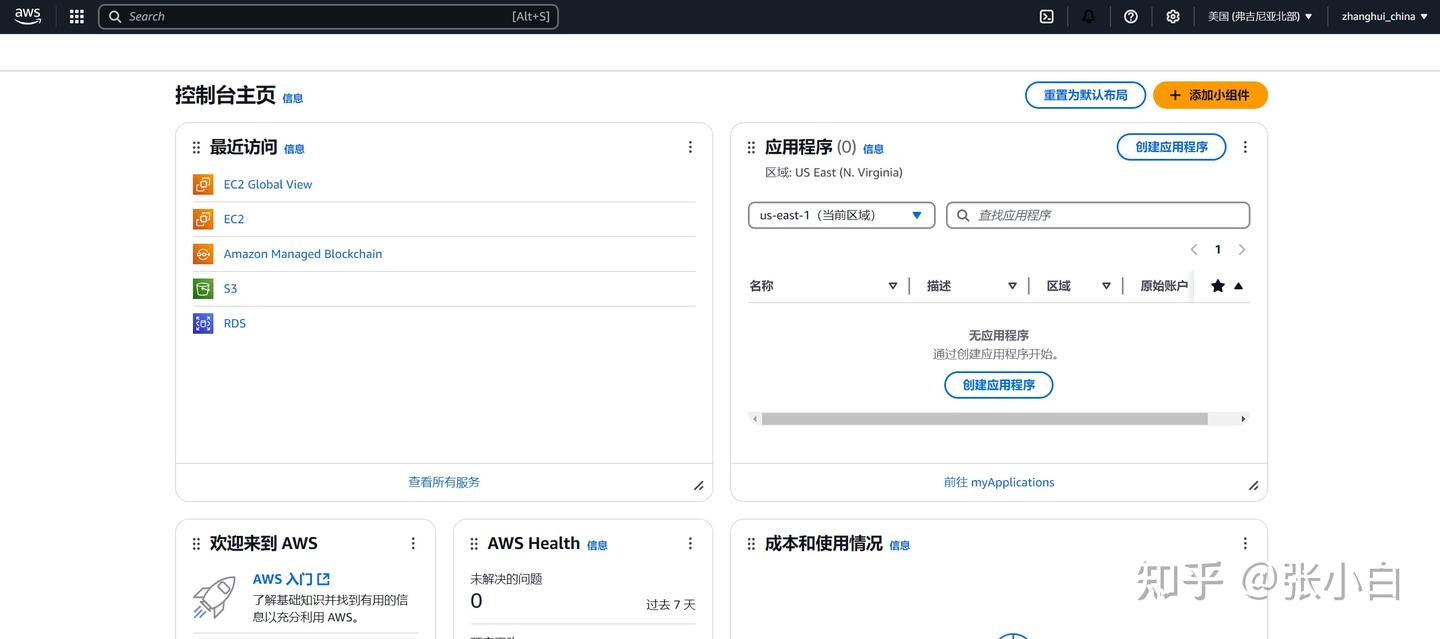
2、选择Sagemaker AI产品
搜索Sagemaker AI 并进入:
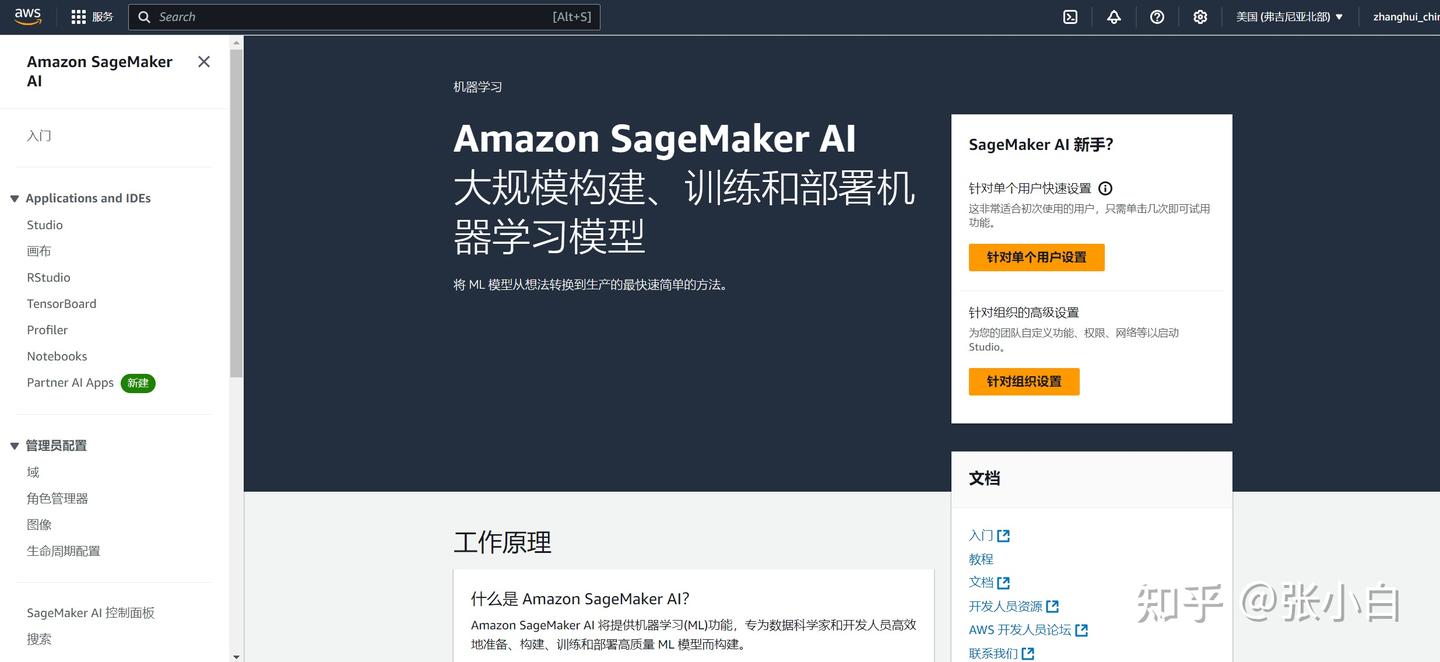
3、建立域
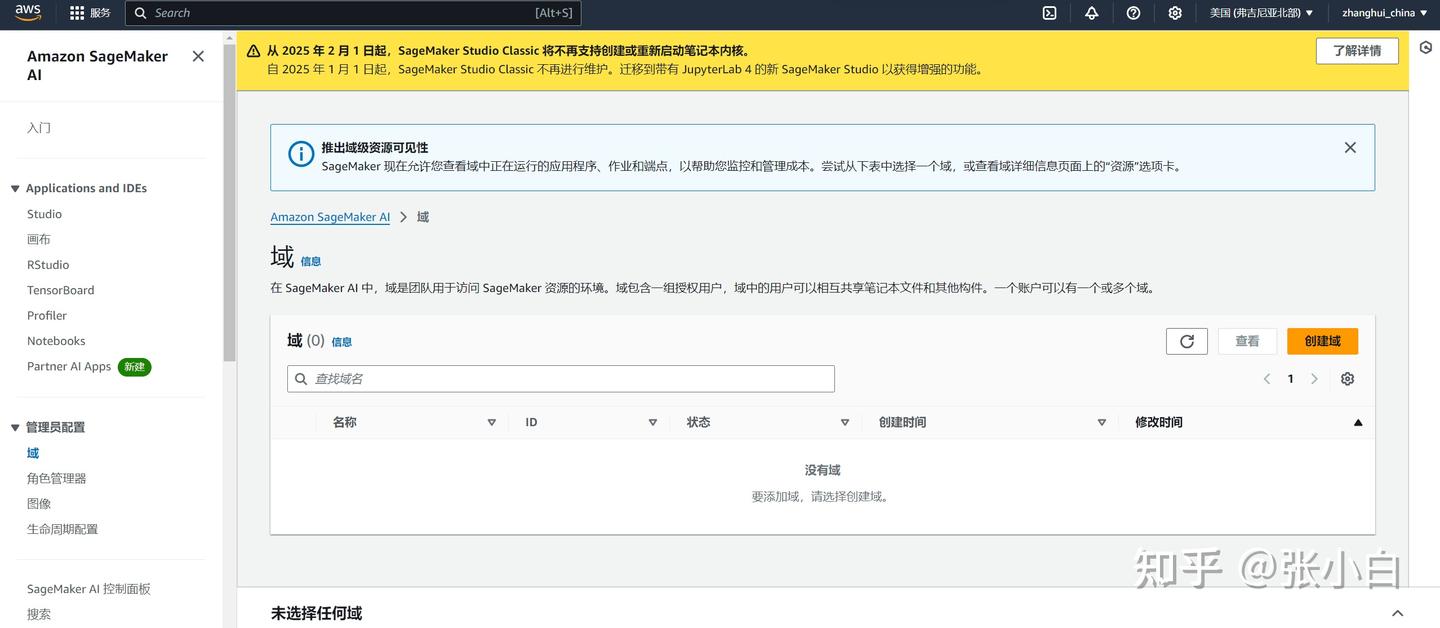
针对单个用户:
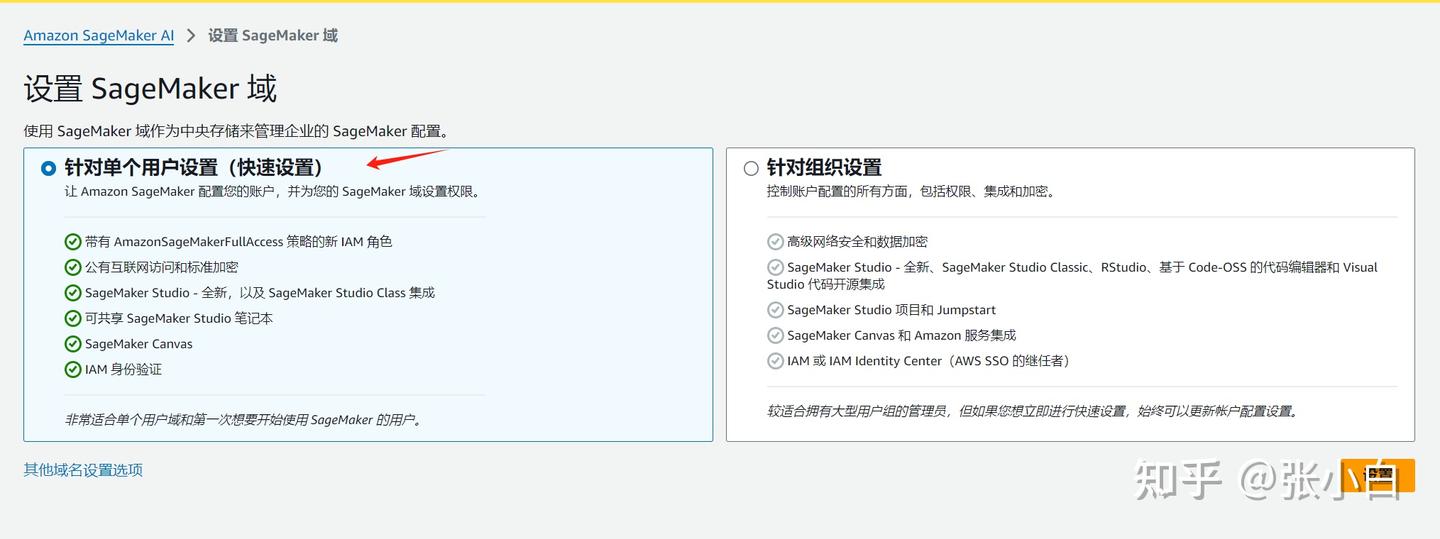
设置:
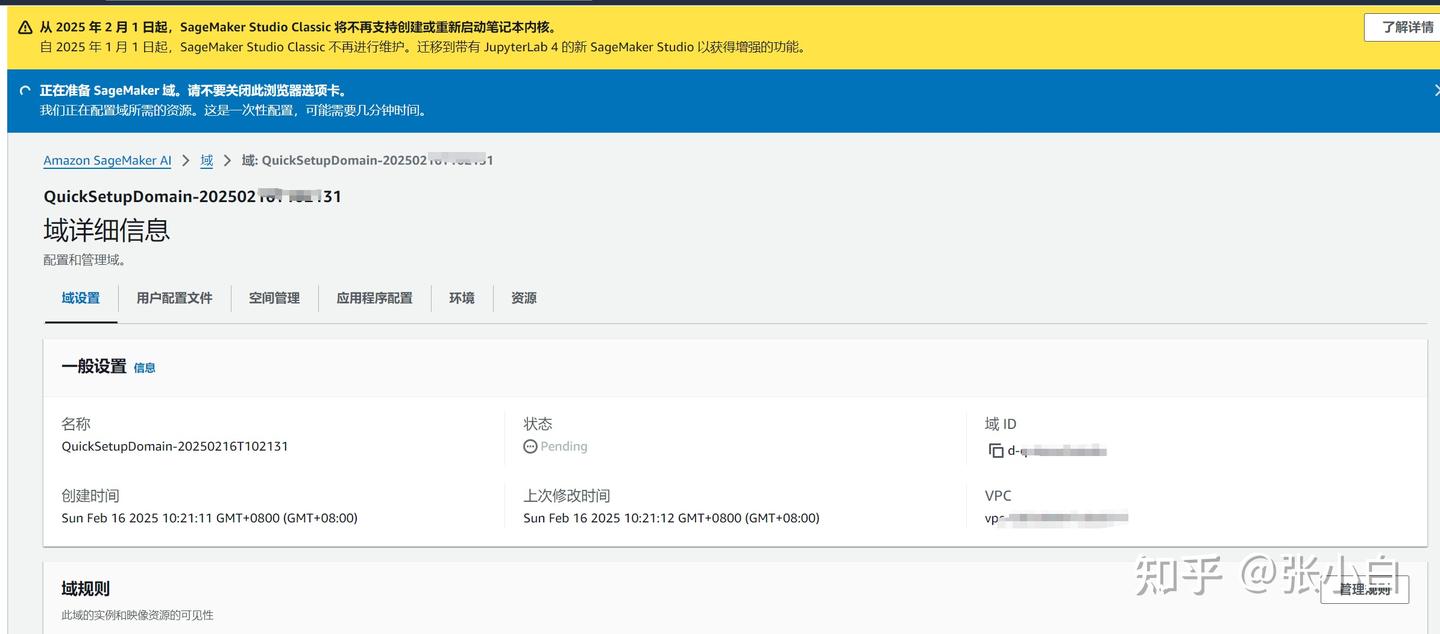
稍等片刻:

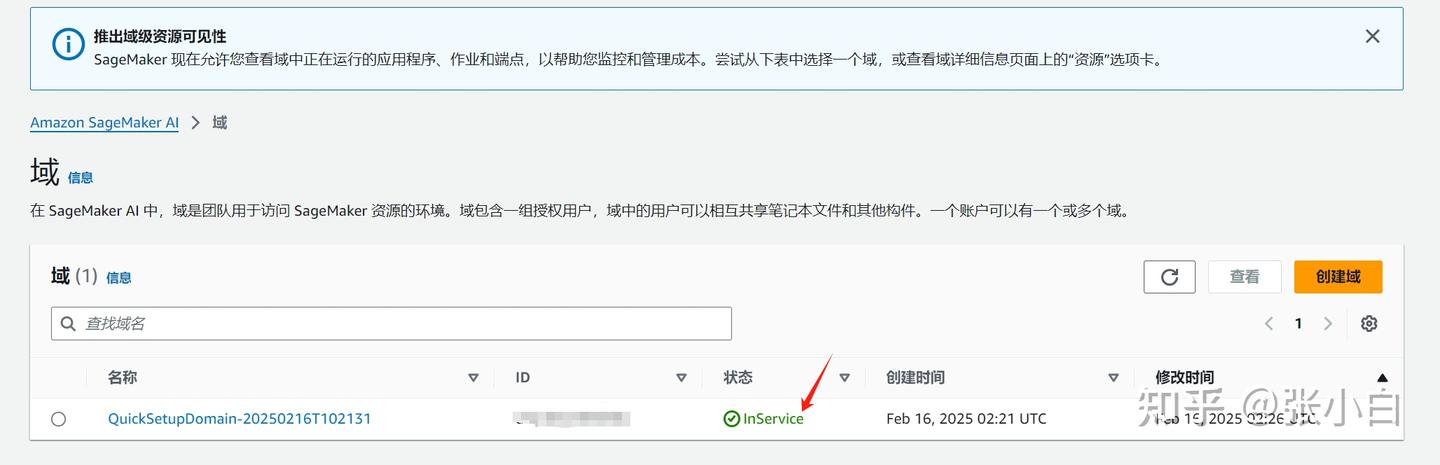
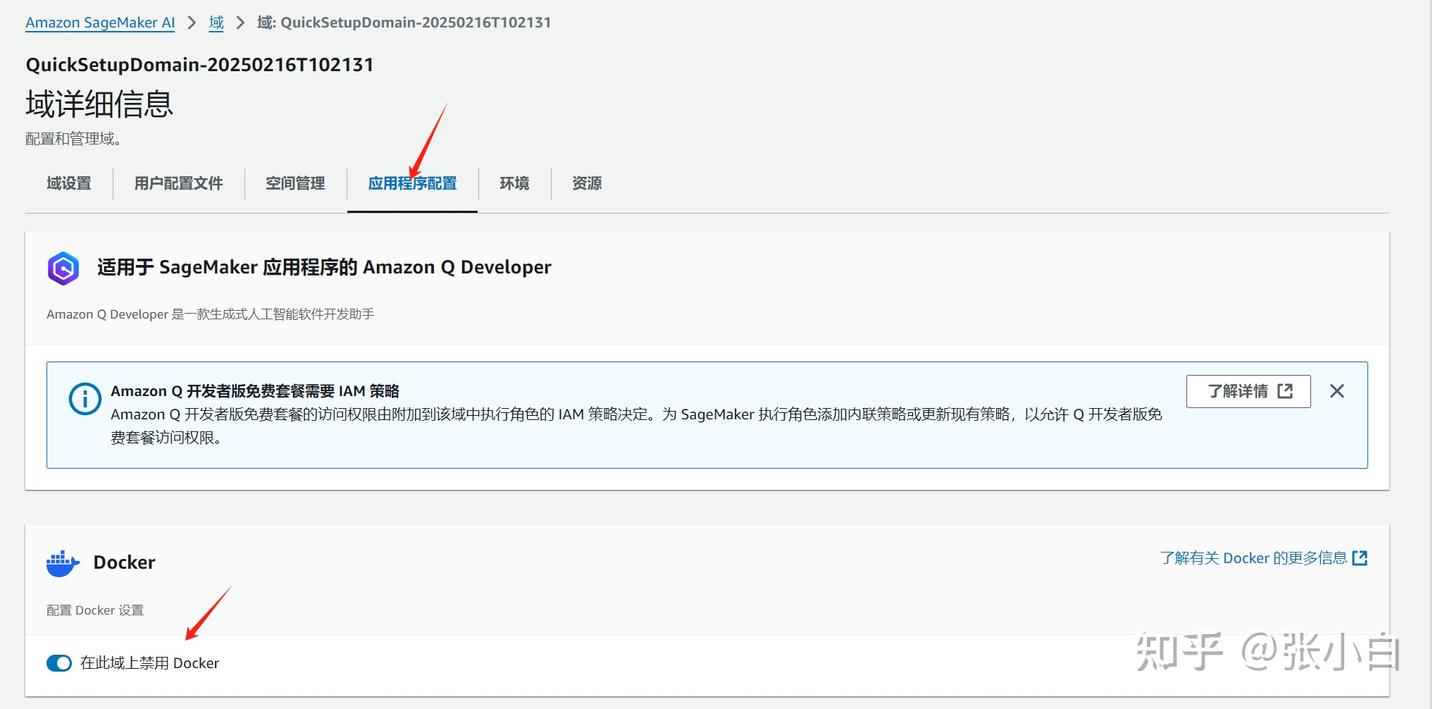
可以看到这个域已经inservice了。(有没有开始收费?张小白好怕怕)
进入该域,进行应用程序配置:
4、配置JupyterLab
点击Applications and IDEs栏目下的Studio

打开Studio

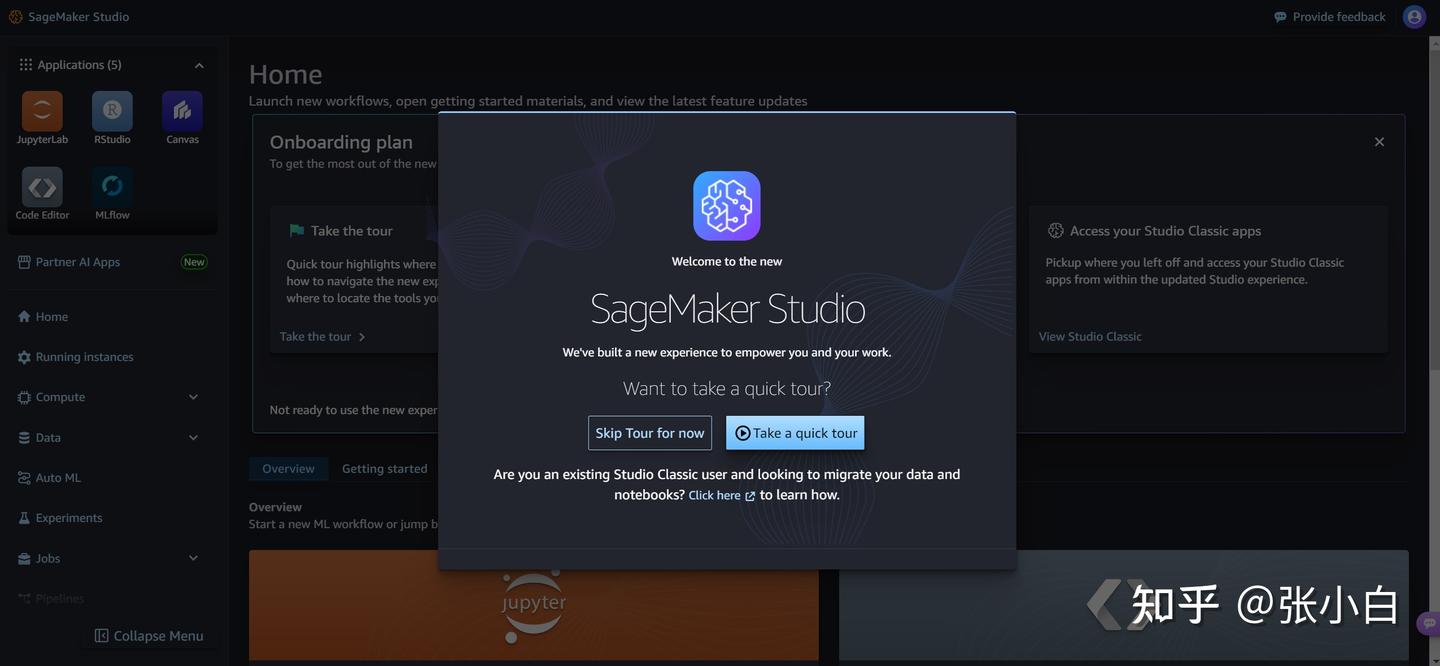
跳过tour
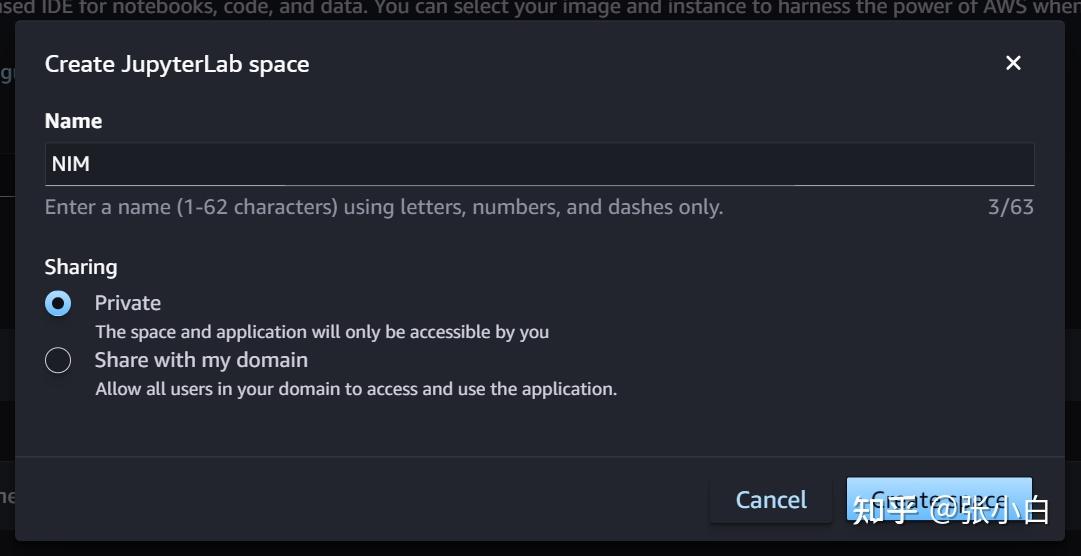
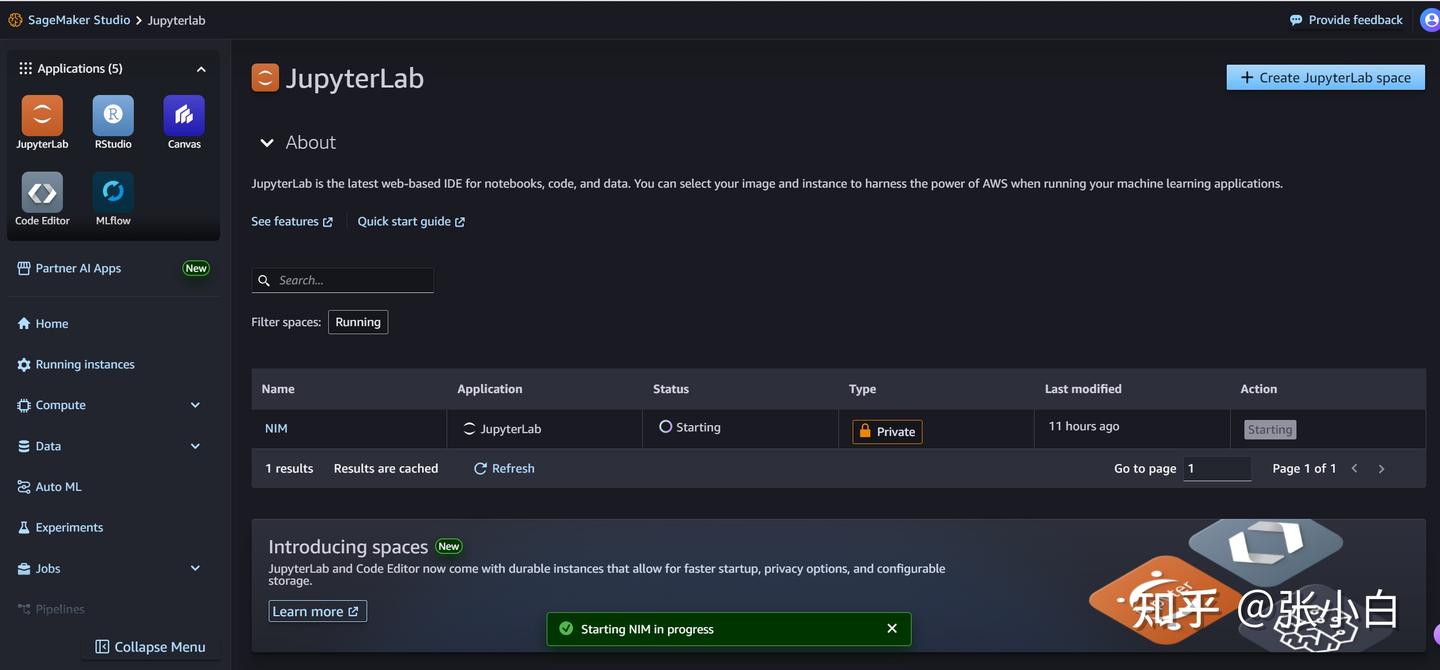
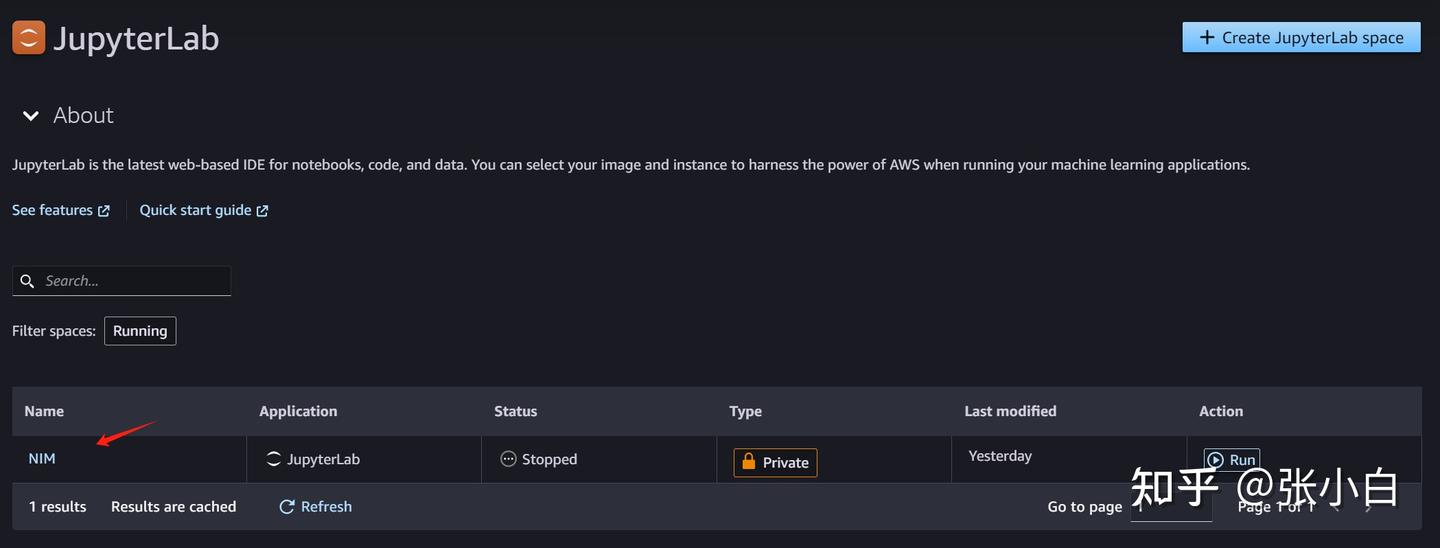
点击JupyterLab,点击右上角的Create JupyterLab space按钮,命名为NIM,并点击Create space按钮创建工作空间
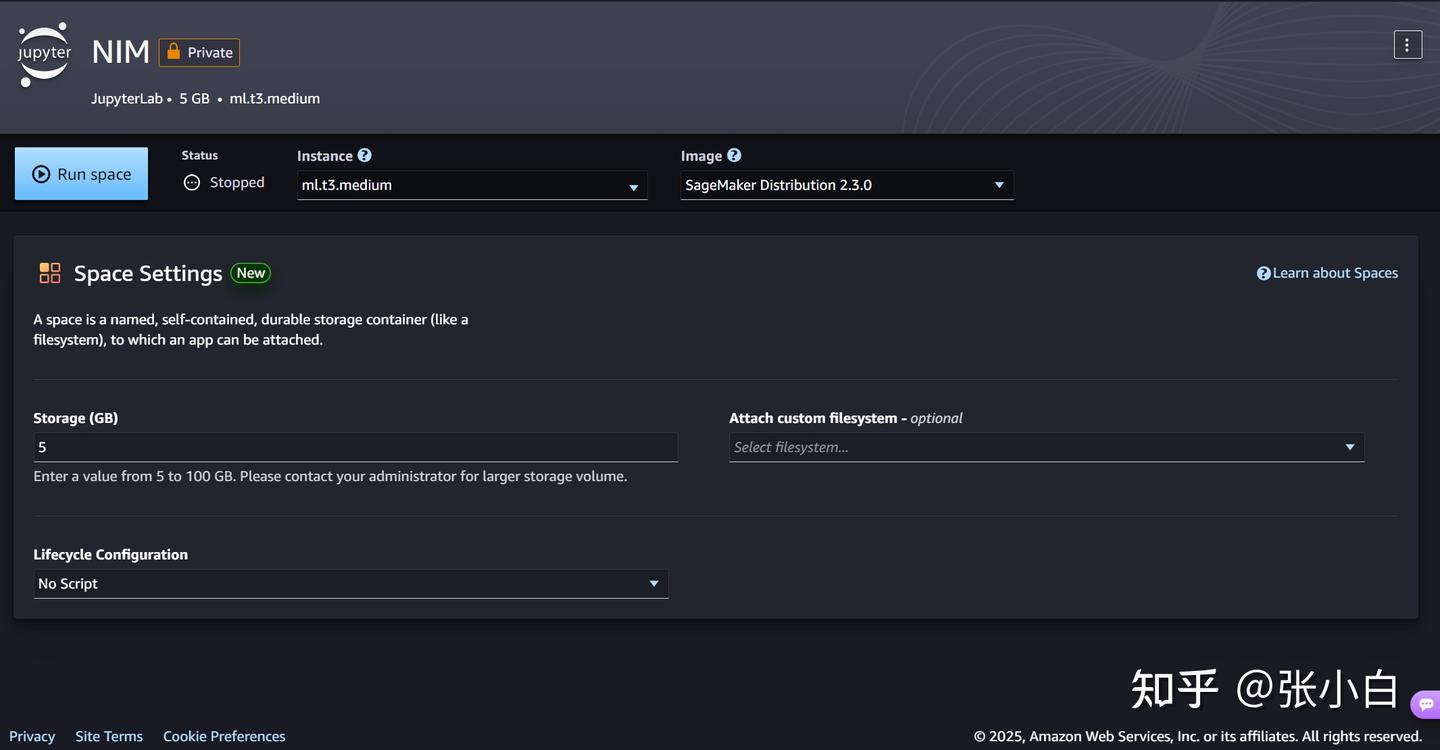
下面应该做这两步:
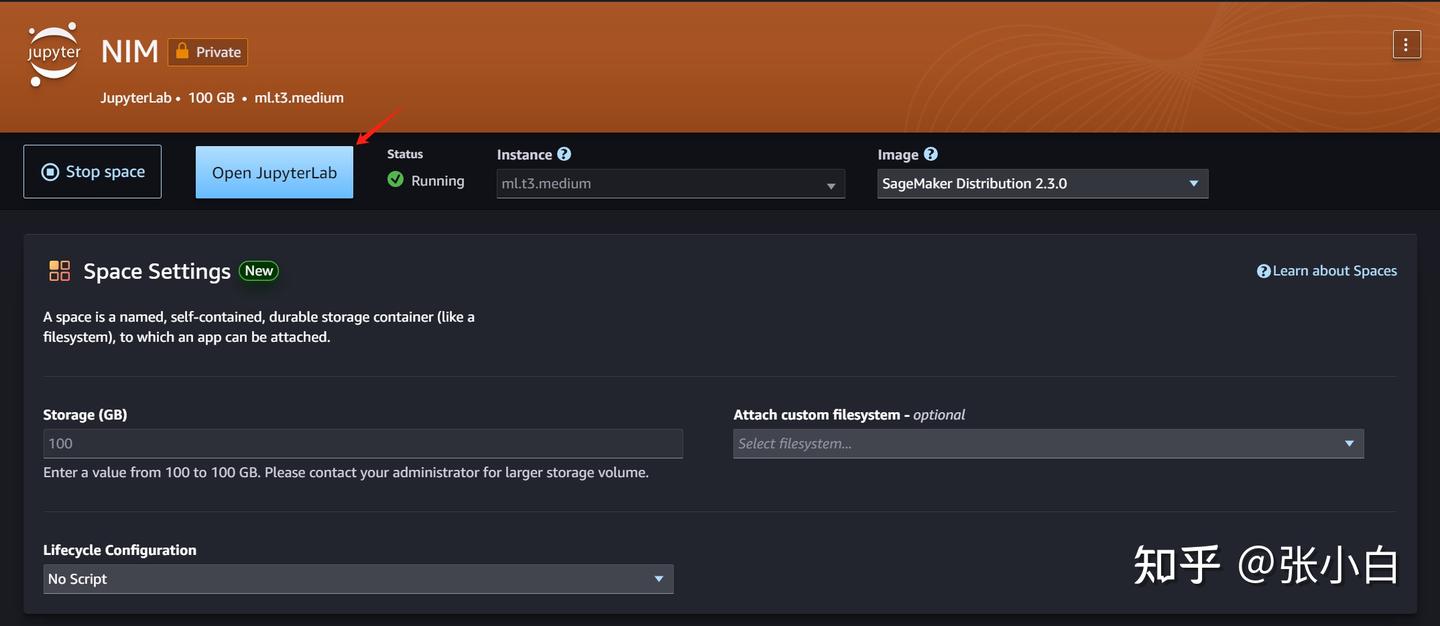
Run sapce按钮来打开JupyterLab页面:
点击Open JupyterLab按钮,进入JupyterLab工作空间:
不过这个张小白觉得费钱。
于是,决定把这些东西都搬到WSL环境执行。
二、WSL环境安装JupyterLab及其它环境
1、下载何老师的代码包
git clone https://gitcode.com/kunhe0512/11th_sky_hackathon_nim_sagemaker
2、创建并准备Conda环境
conda create -n hackathon python=3.10 -y
conda activate hackathon 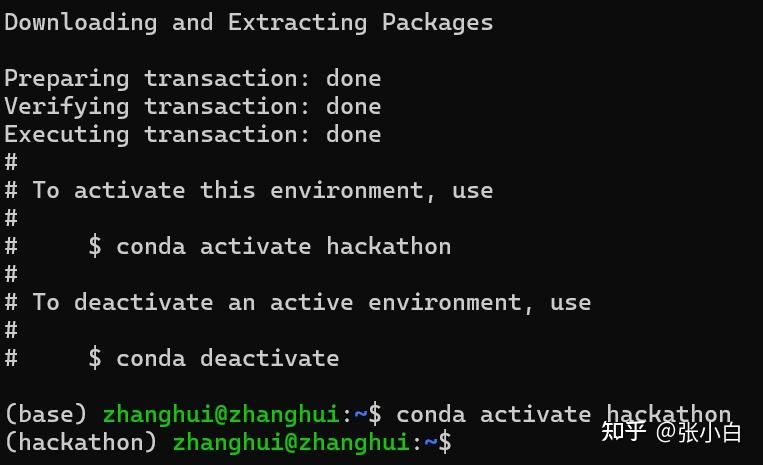
pip install langchain
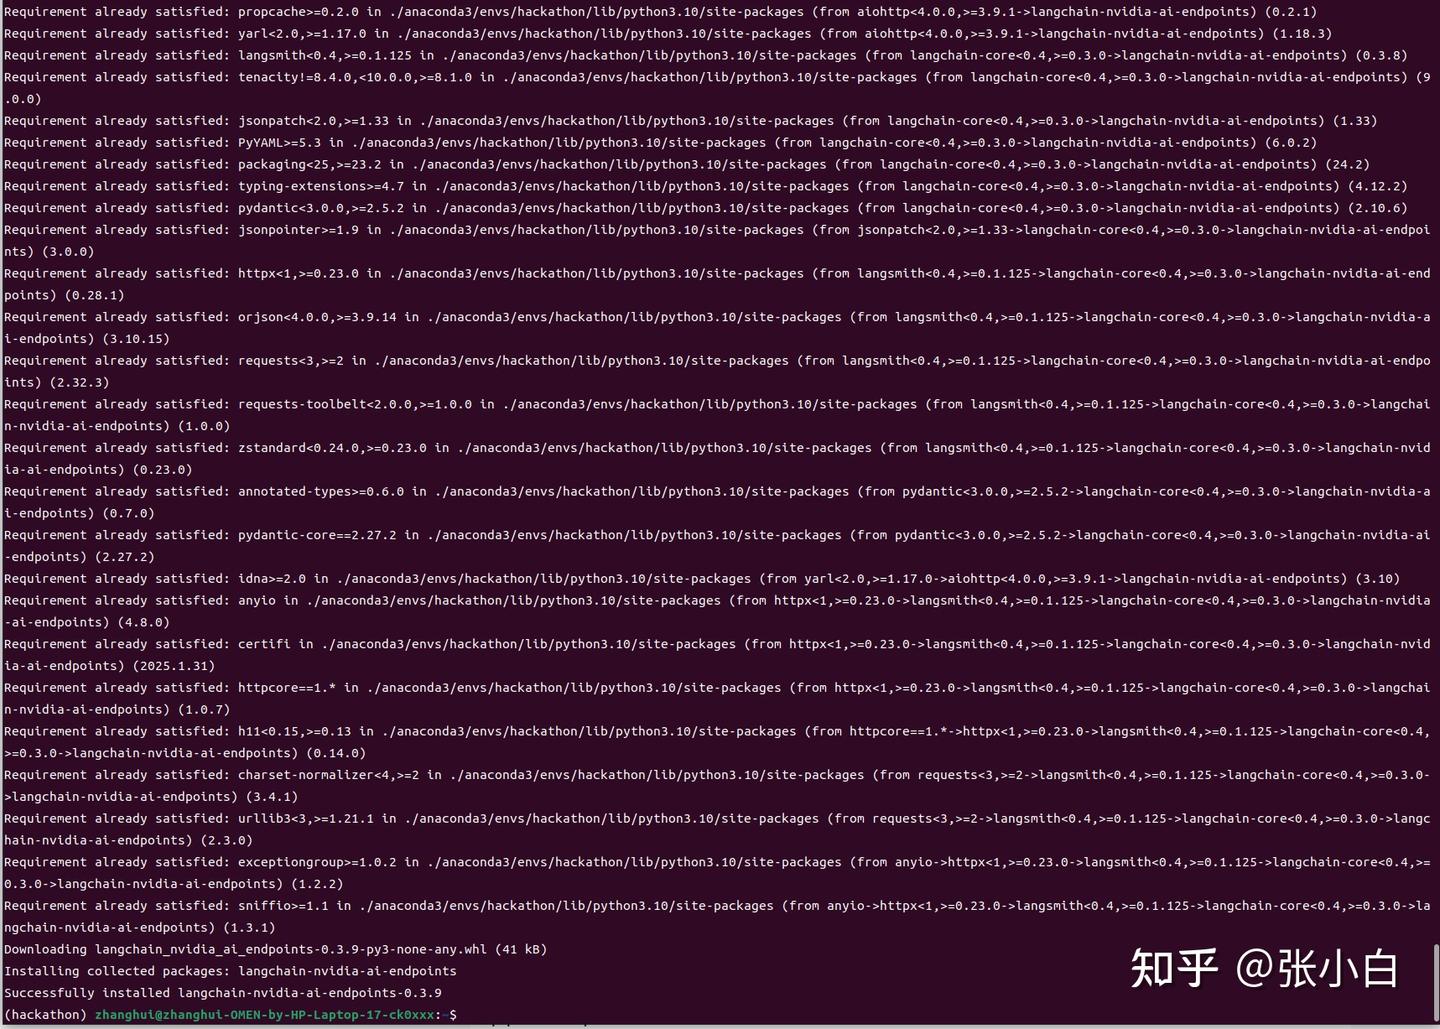
pip install -U langchain-nvidia-ai-endpoints
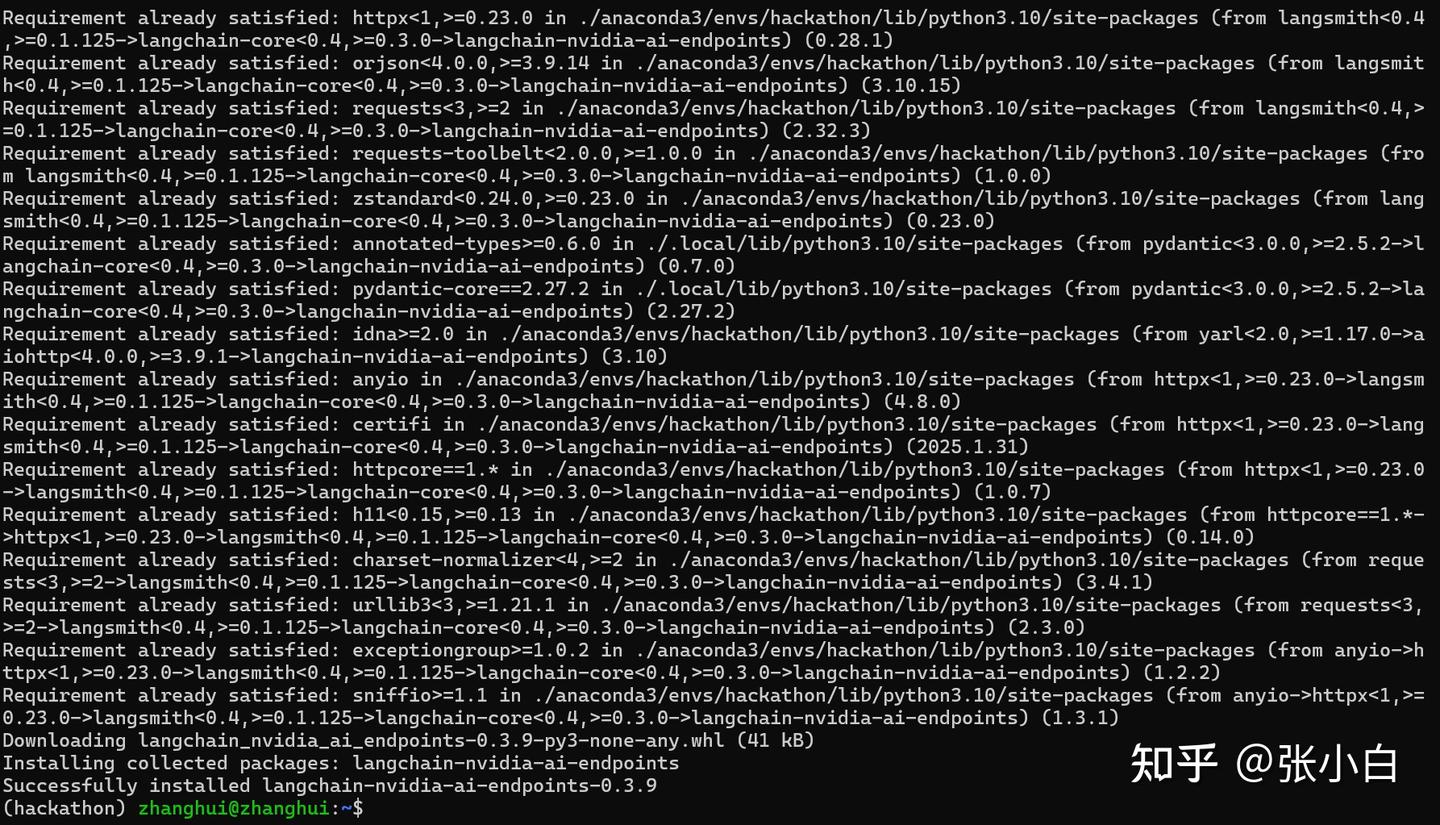
cd ~/11th_sky_hackathon_nim_sagemaker/
unzip 11th_sky_hackathon_demo.zip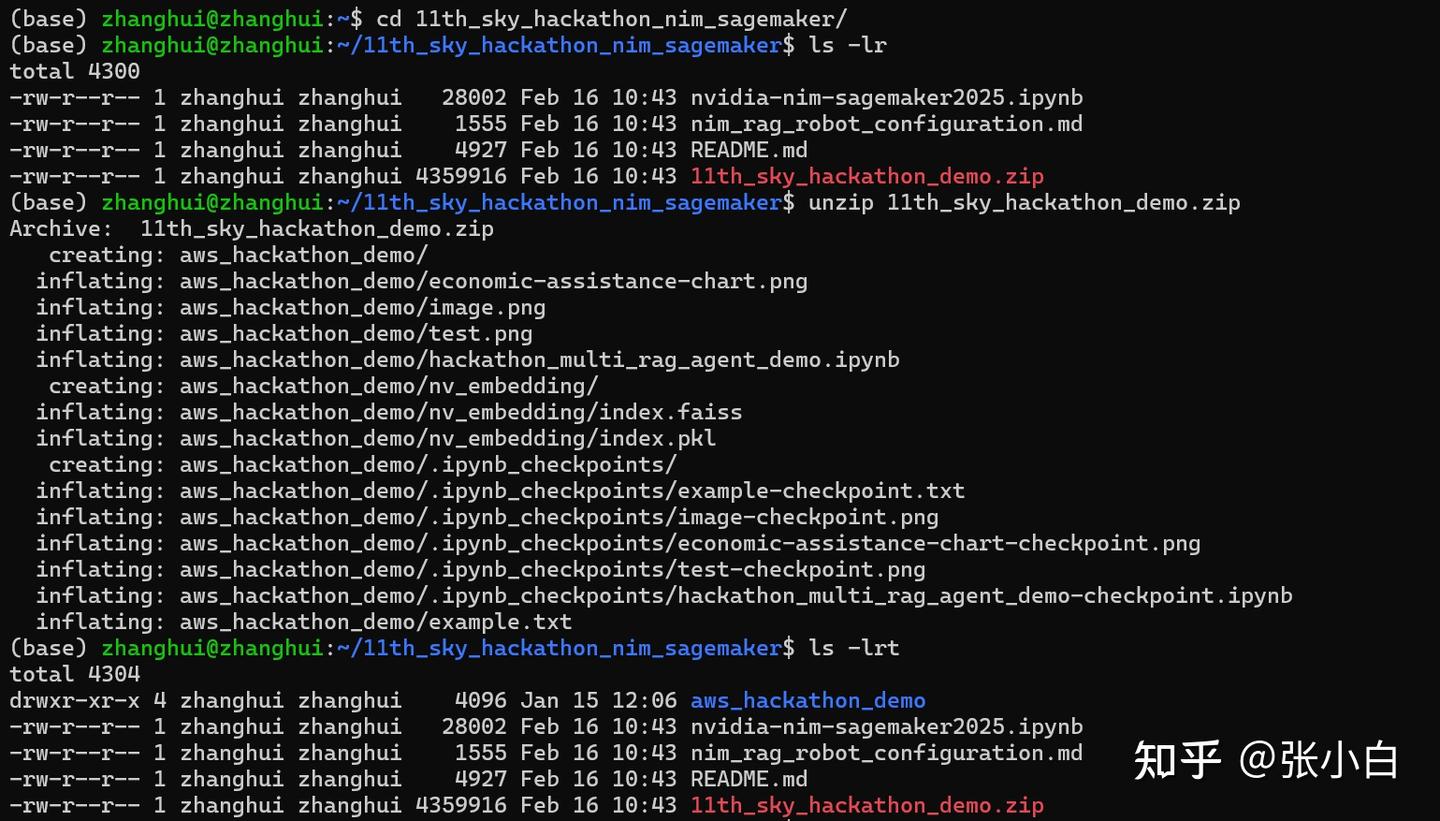
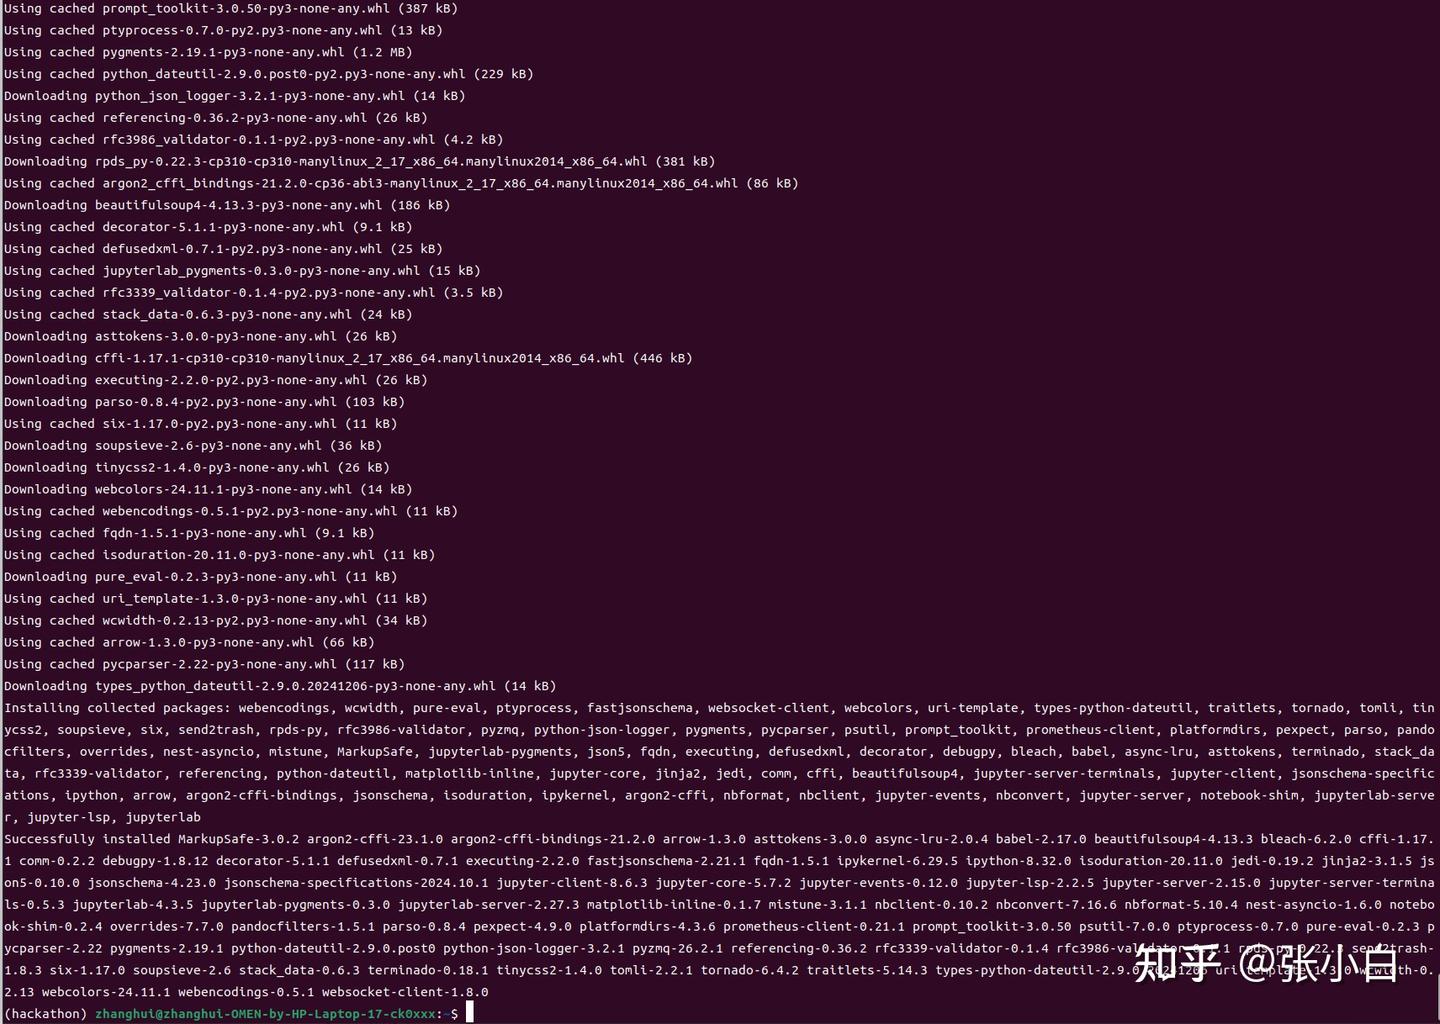
pip install jupyterlab
pip install Pillow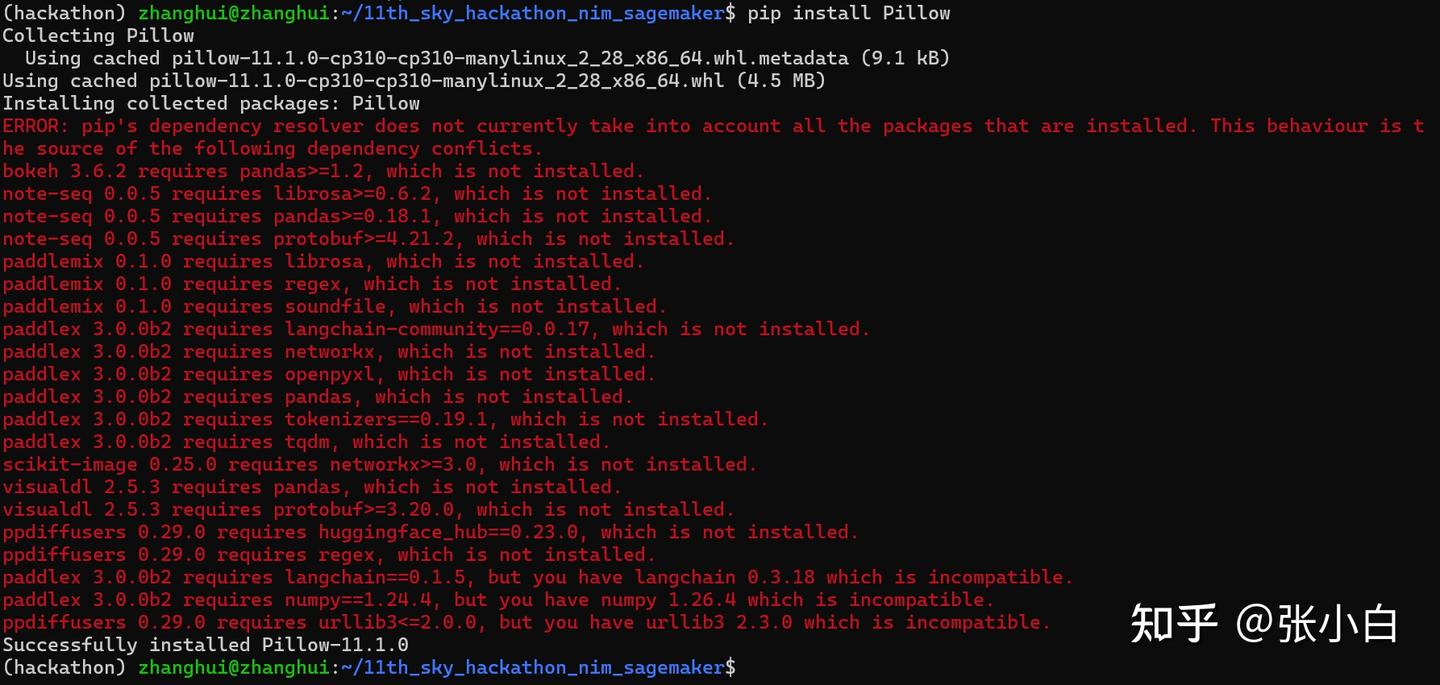
pip install tqdm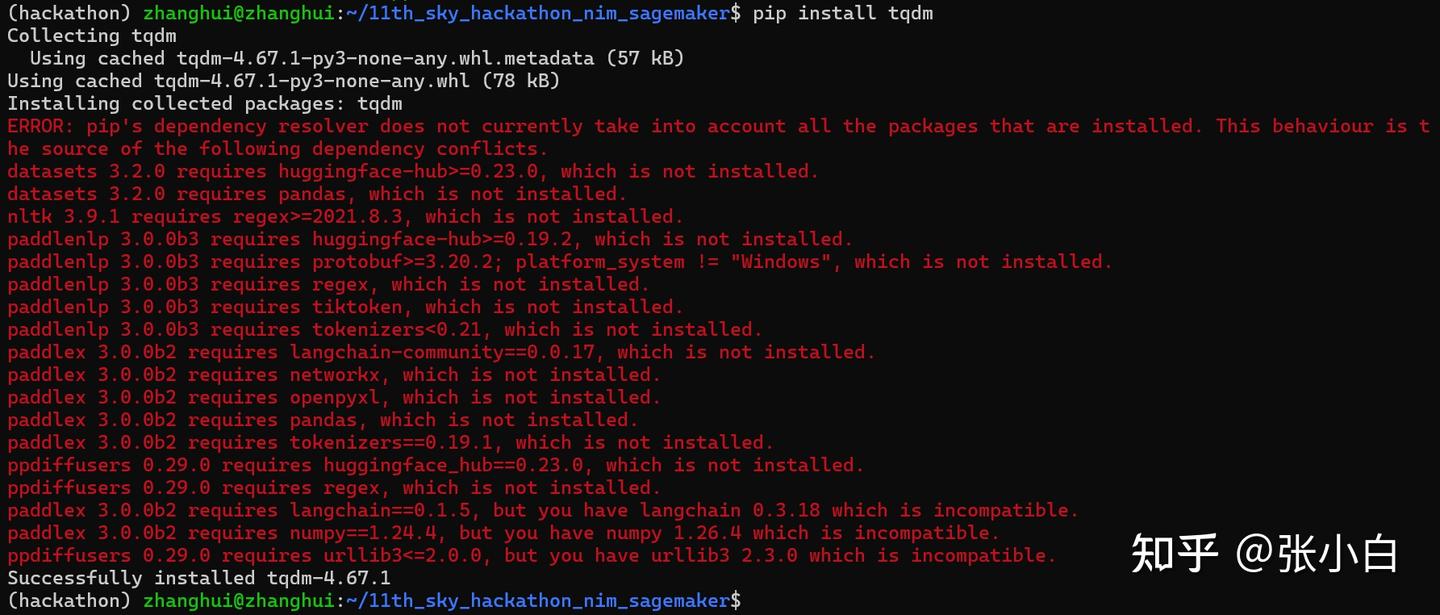
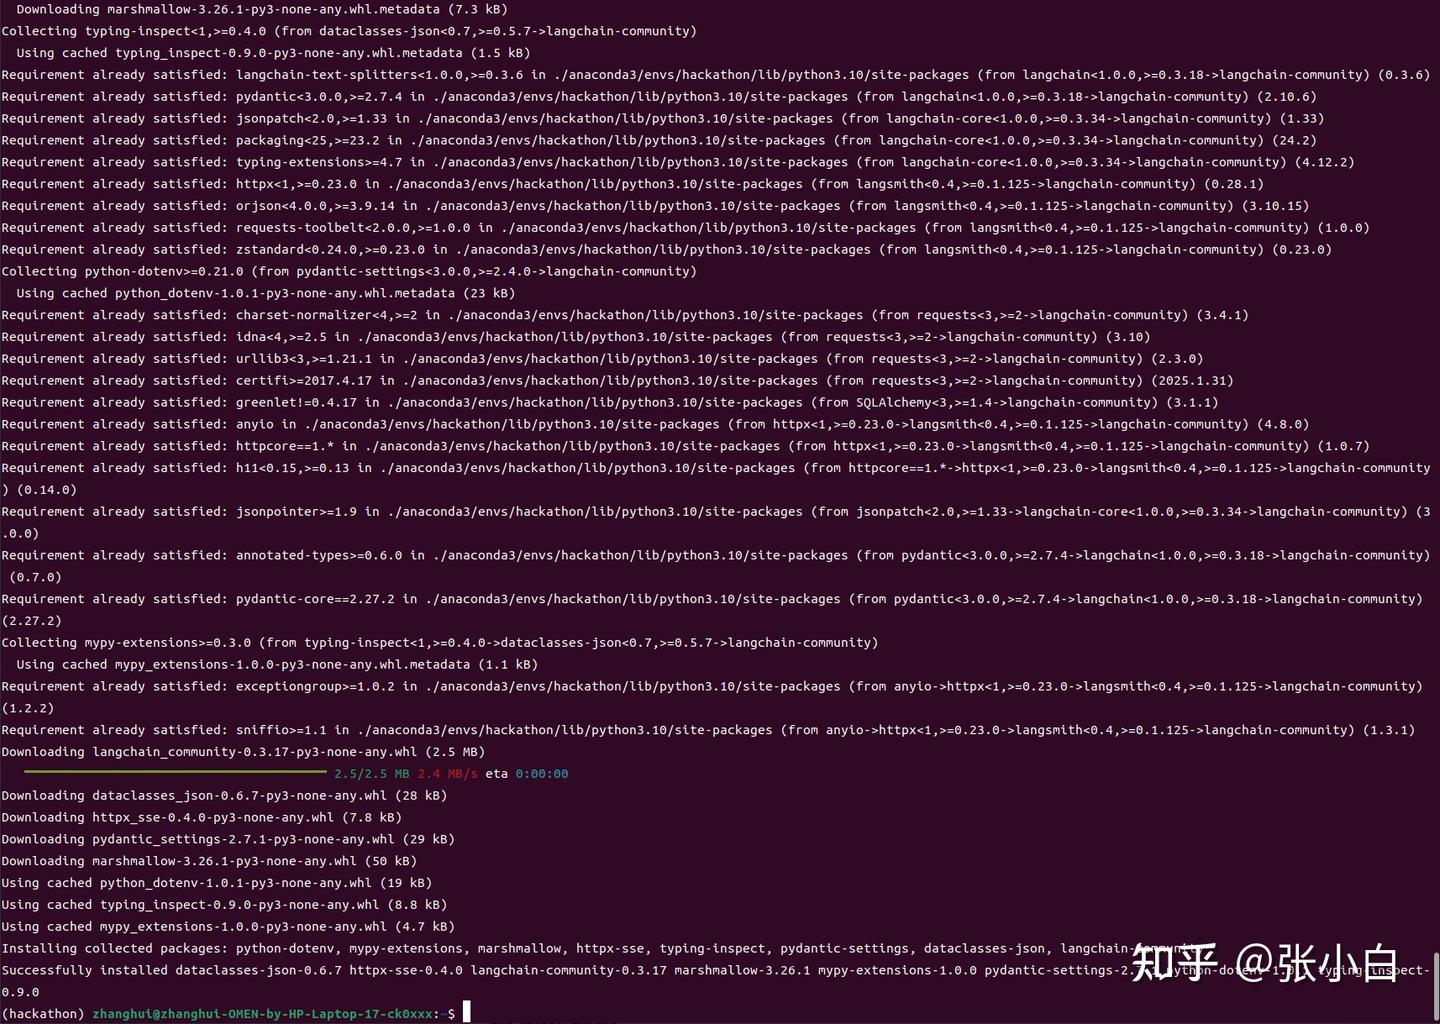
pip install -U langchain-community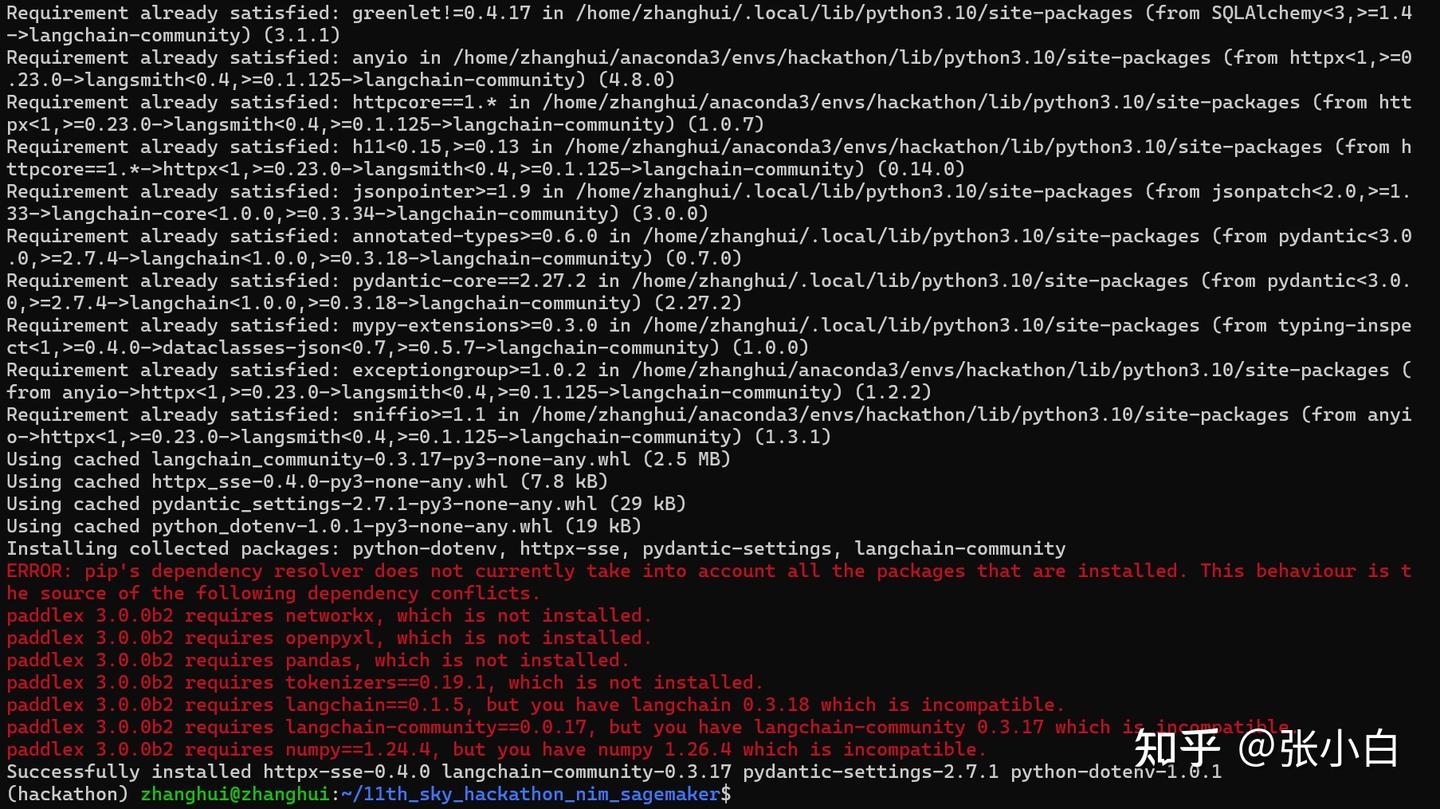
pip install openai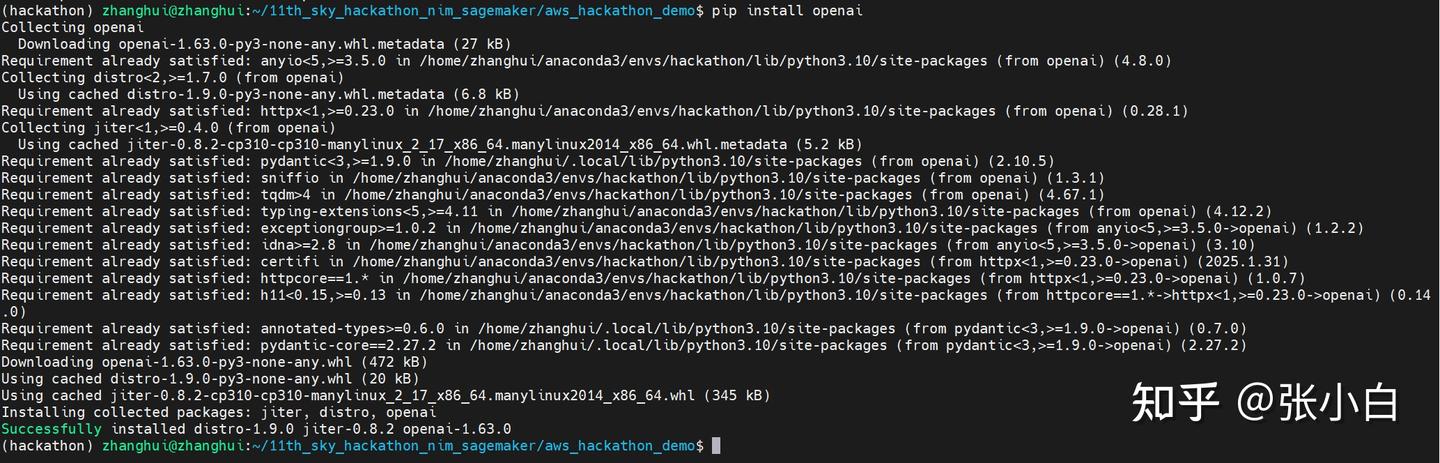
sudo apt-get install python3-tk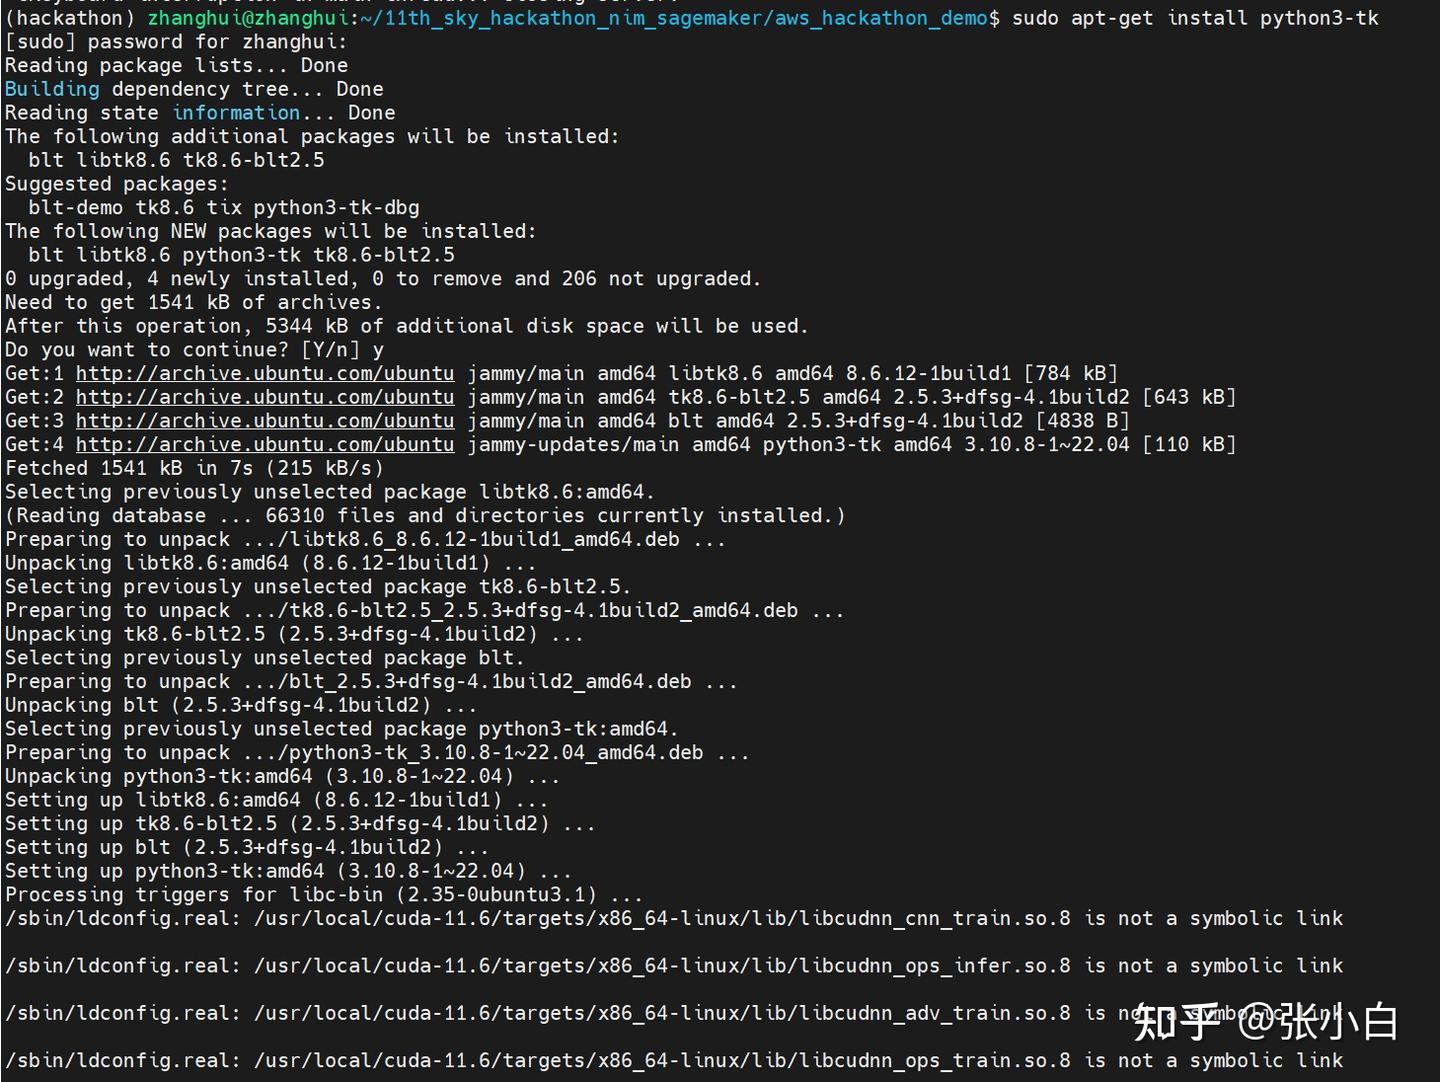
pip install pyqt5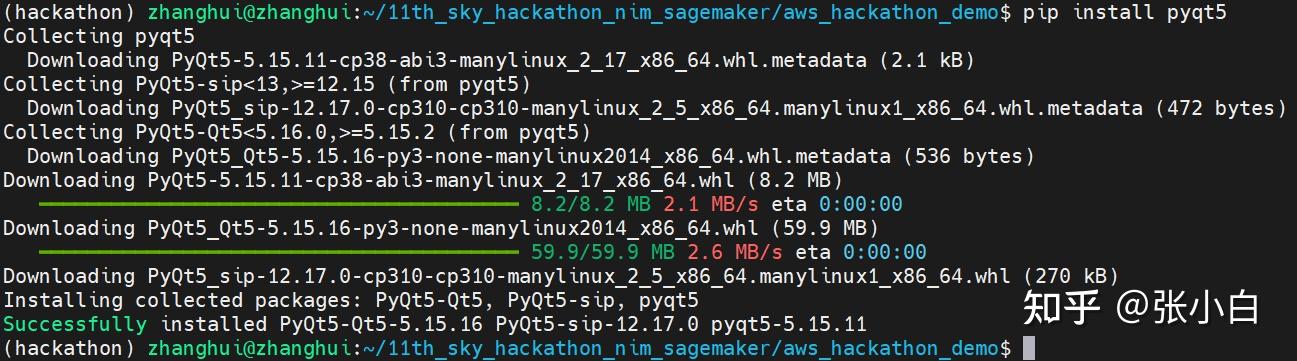
pip install gradio
jupyter lab --no-browser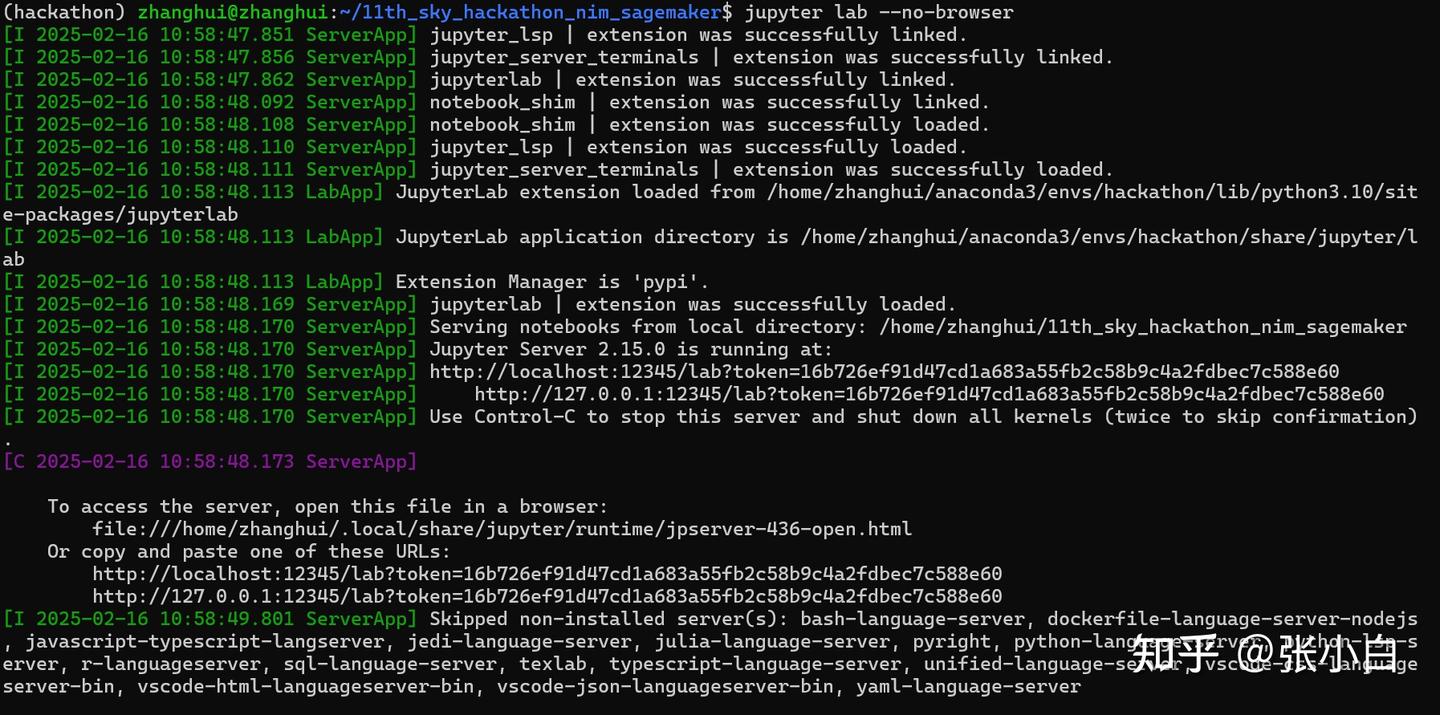
3、试用本地的JupyterLab
浏览器打开:
http://localhost:12345/lab?token=16b726ef91d47cd1a683a55fb2c58b9c4a2fdbec7c588e60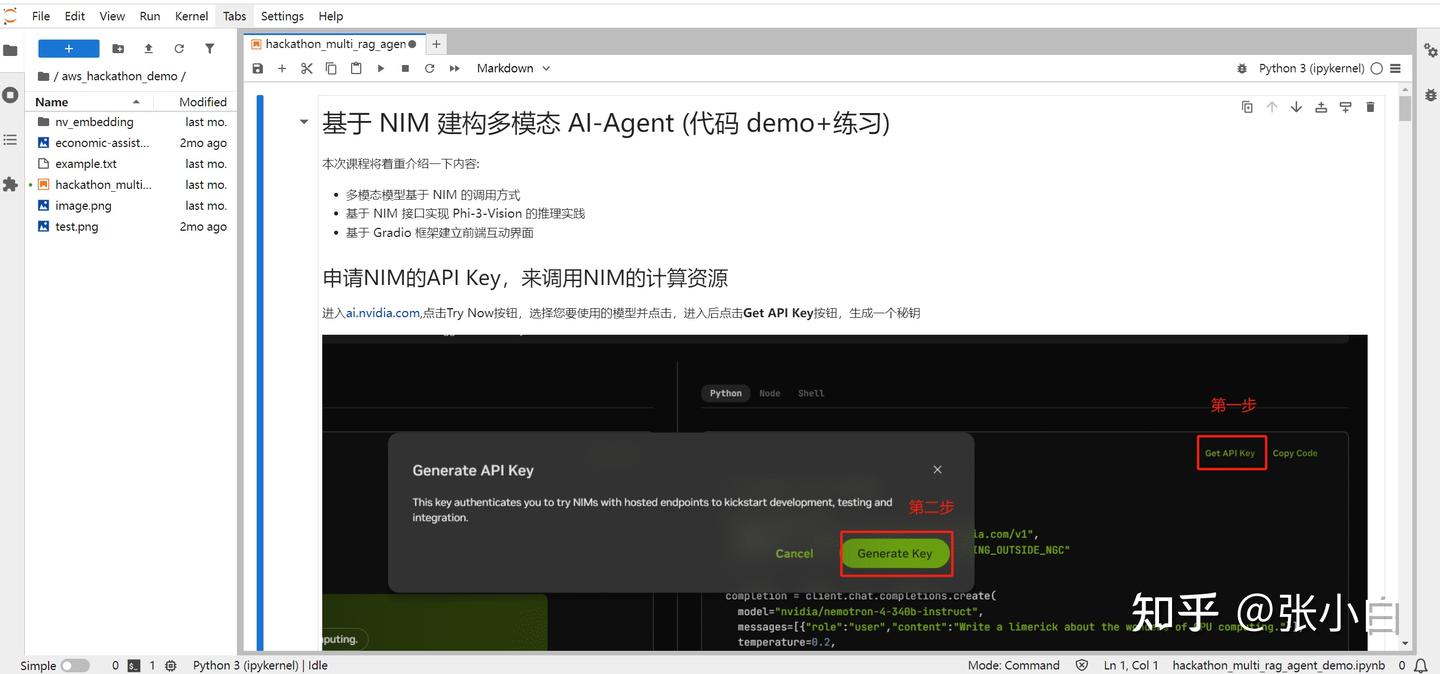
打开aws_hackathon_demo 目录下的 hackathon_multi_rag_agent_demo.ipynb
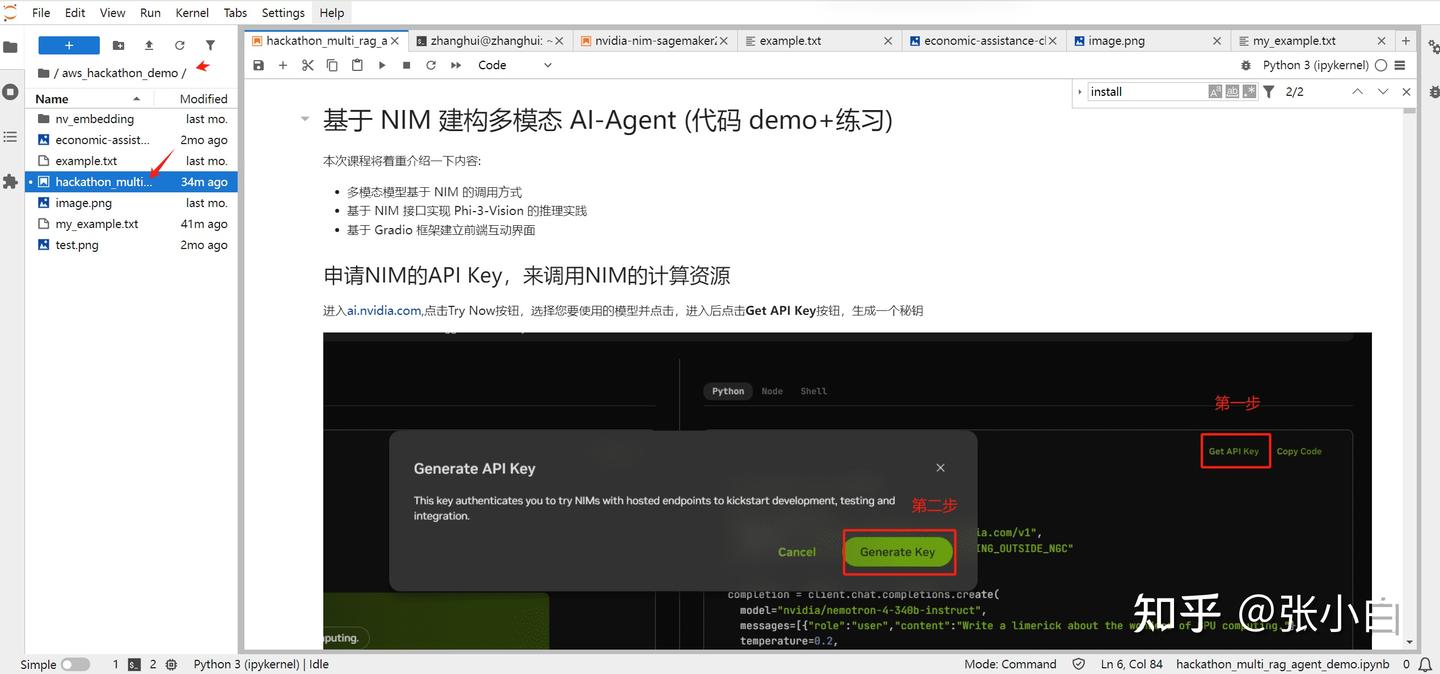
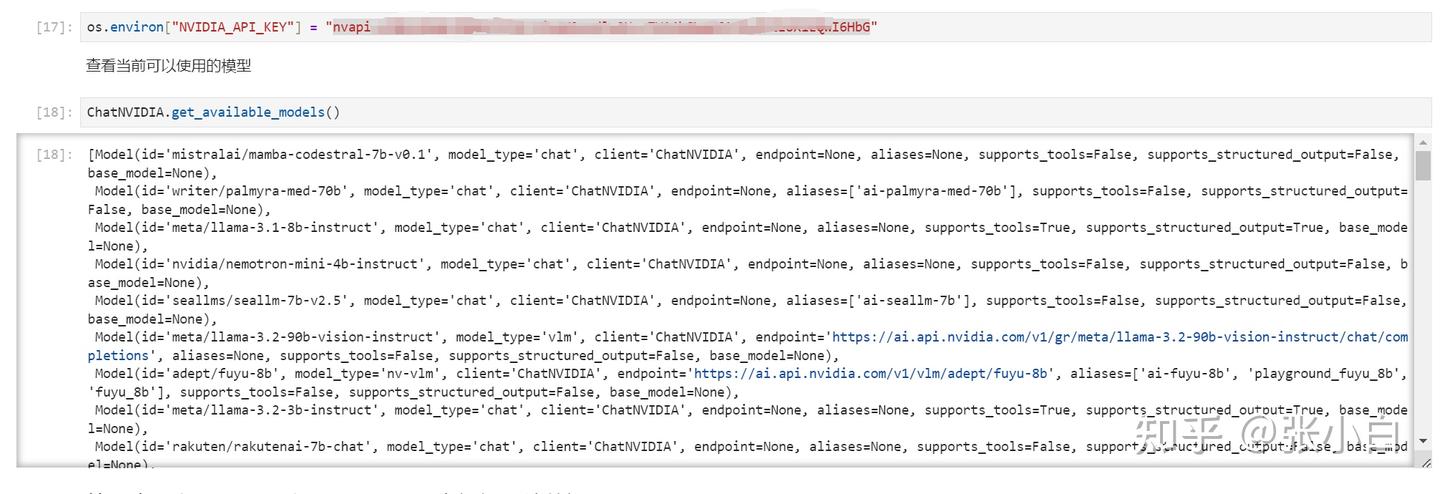
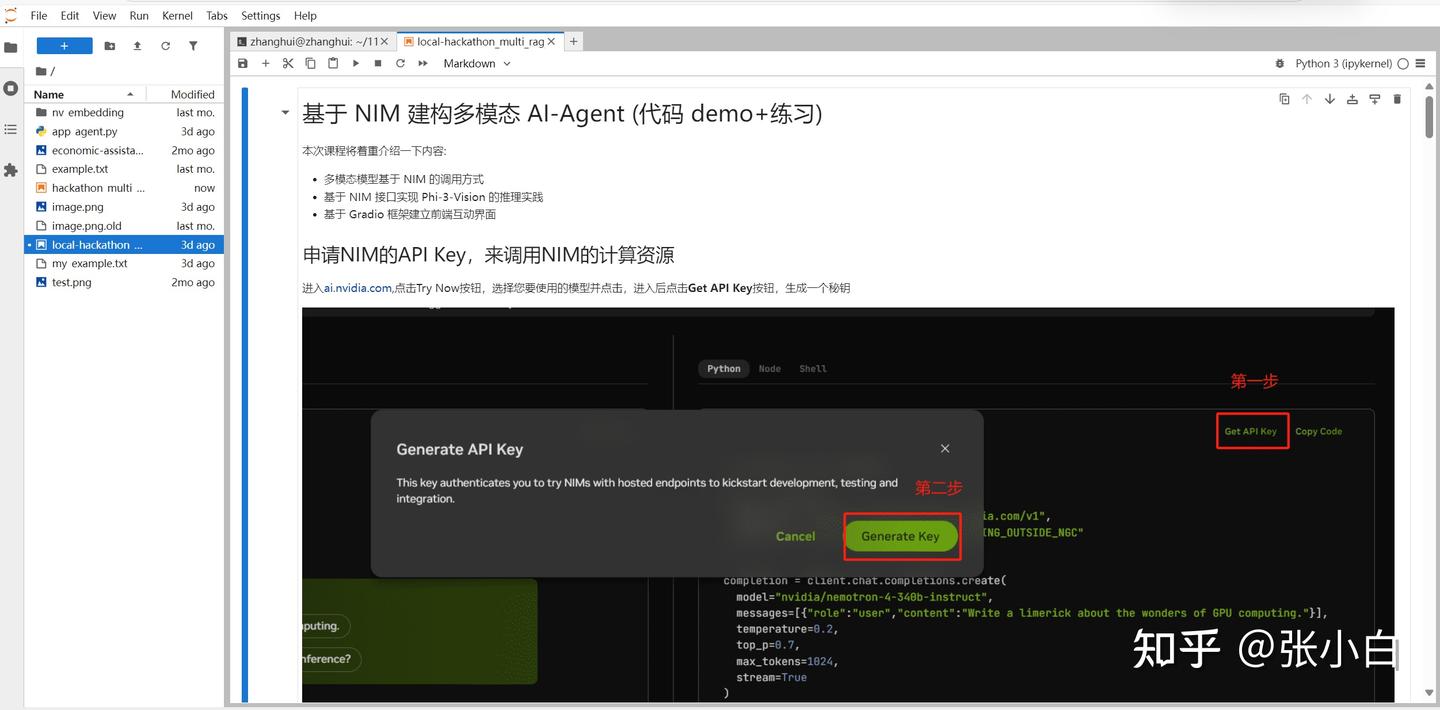
4、获取NIM的API Key
打开

login
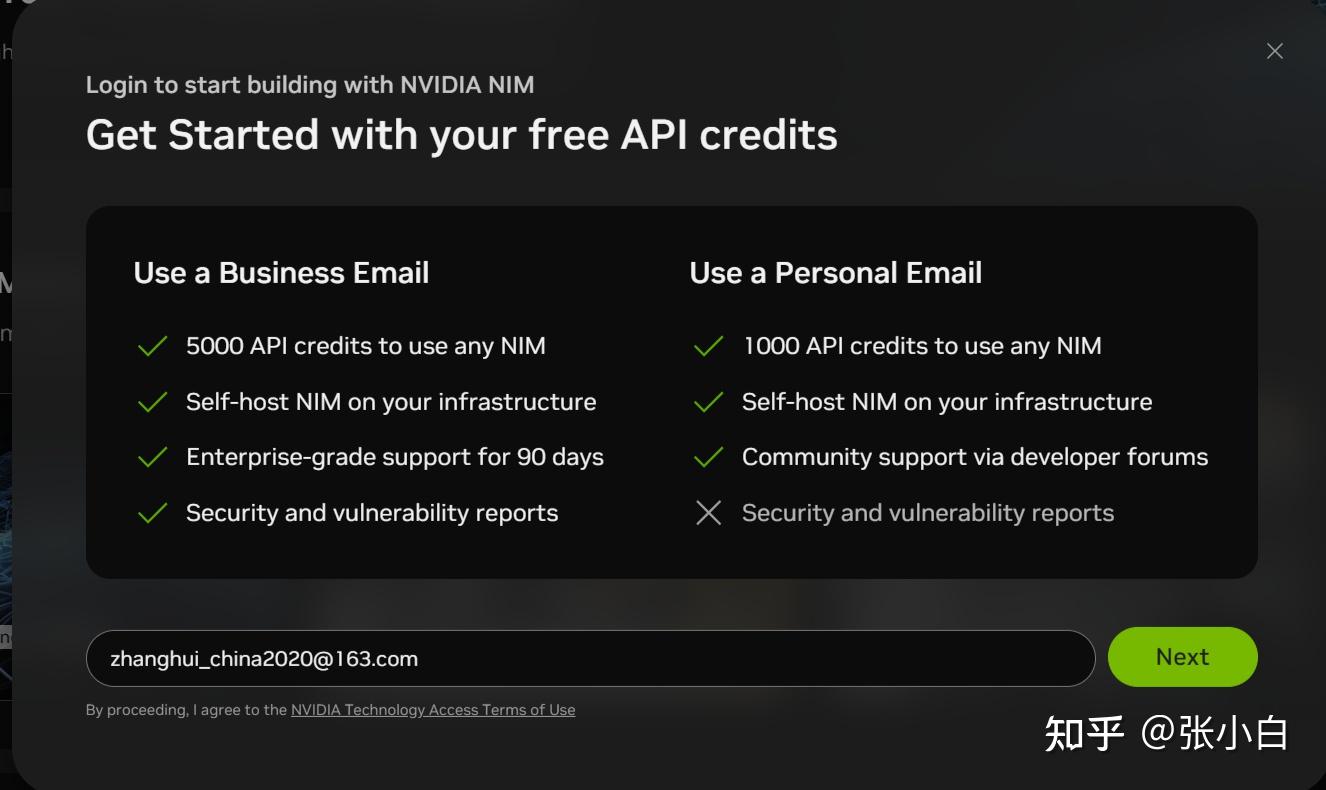
Next

create
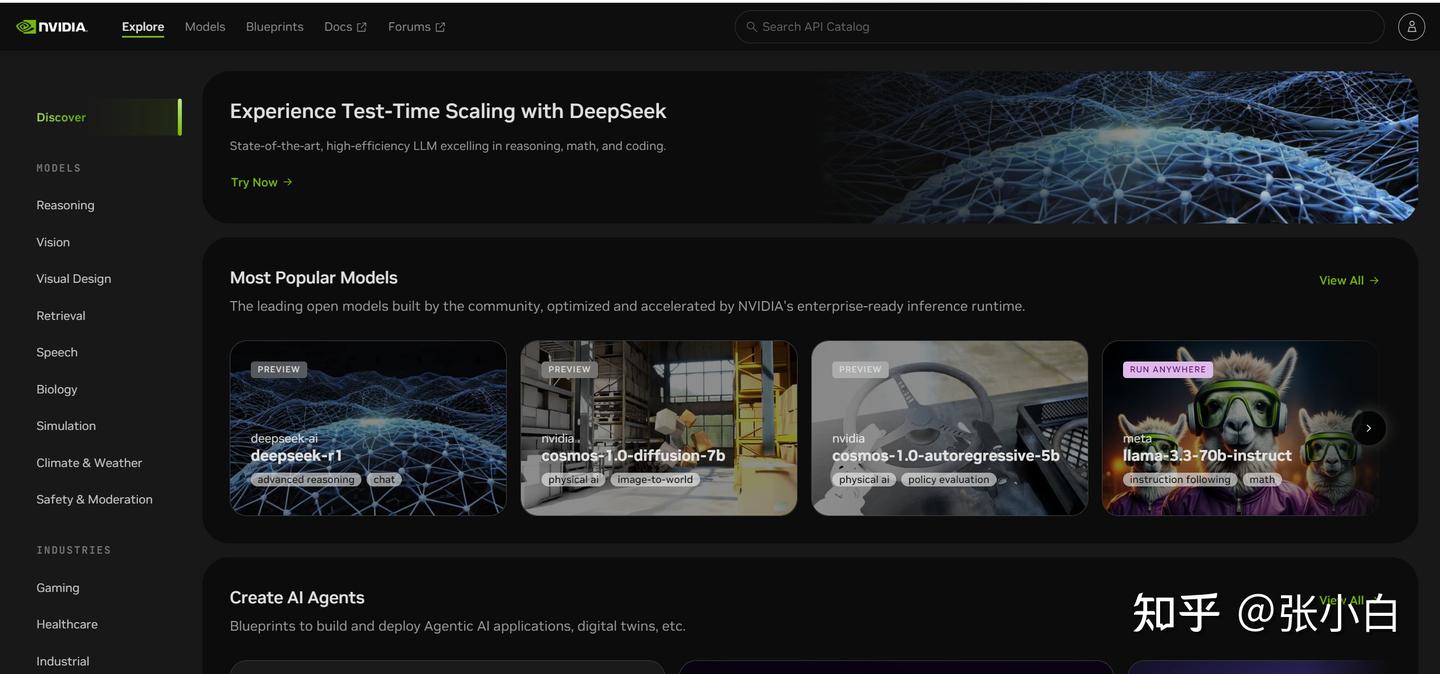
打开

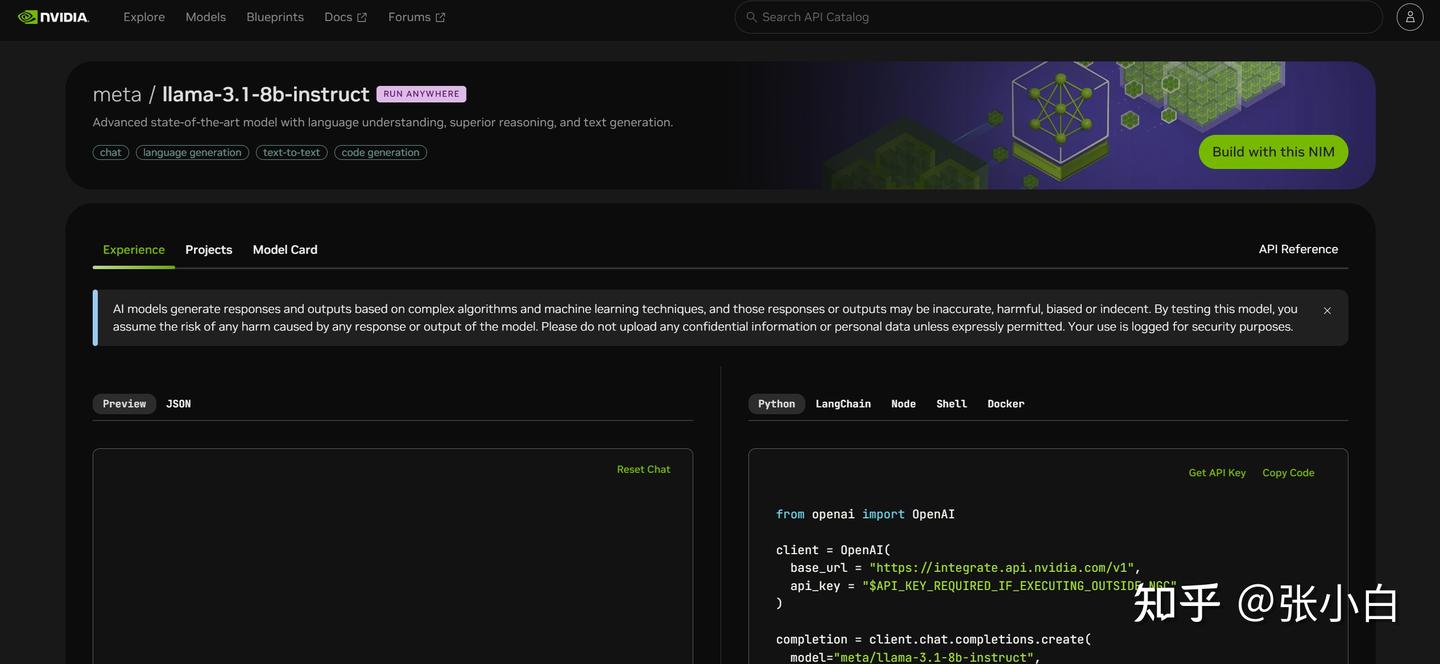
点击Get API Key
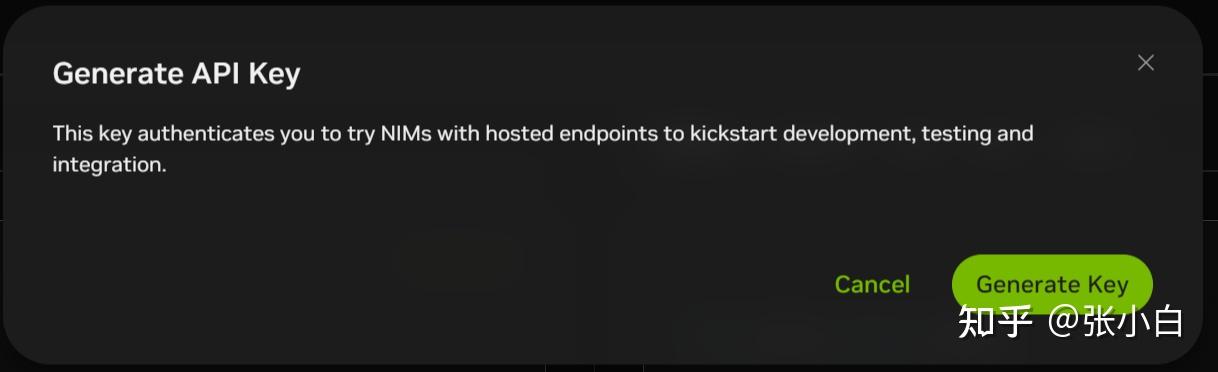
Generate Key
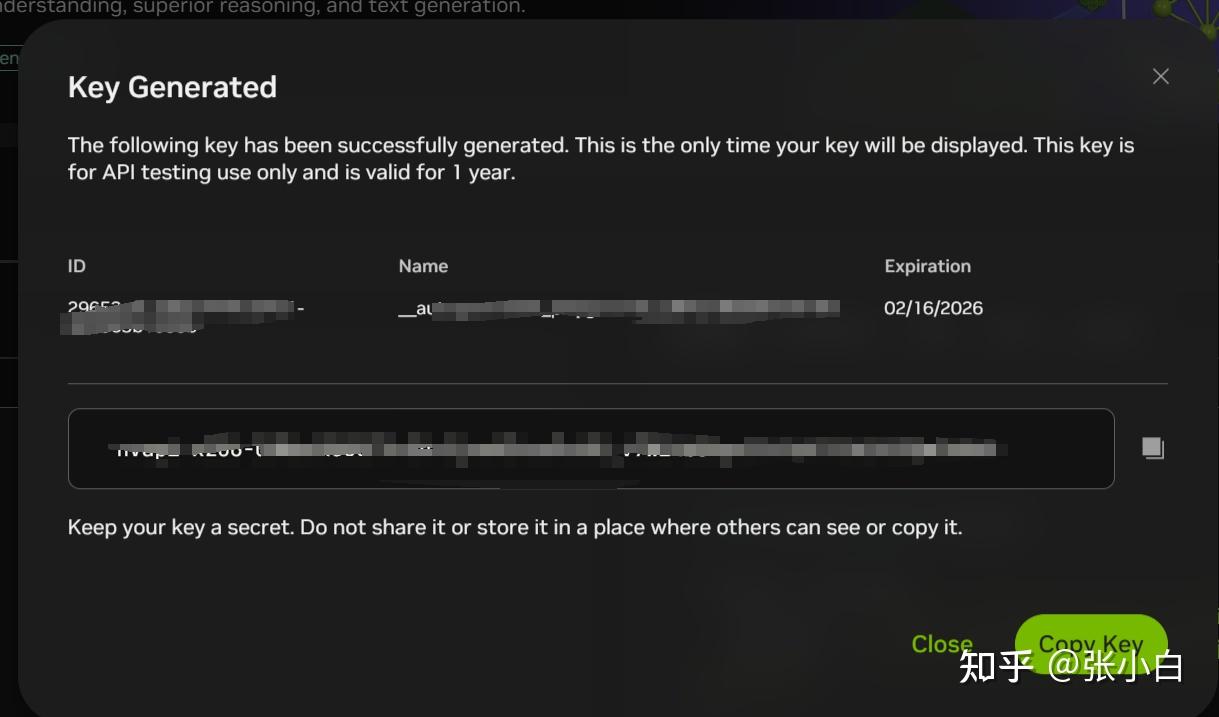
复制下面的key,贴到WSL环境的Jupyter Notebook里面:

三、试用DEMO
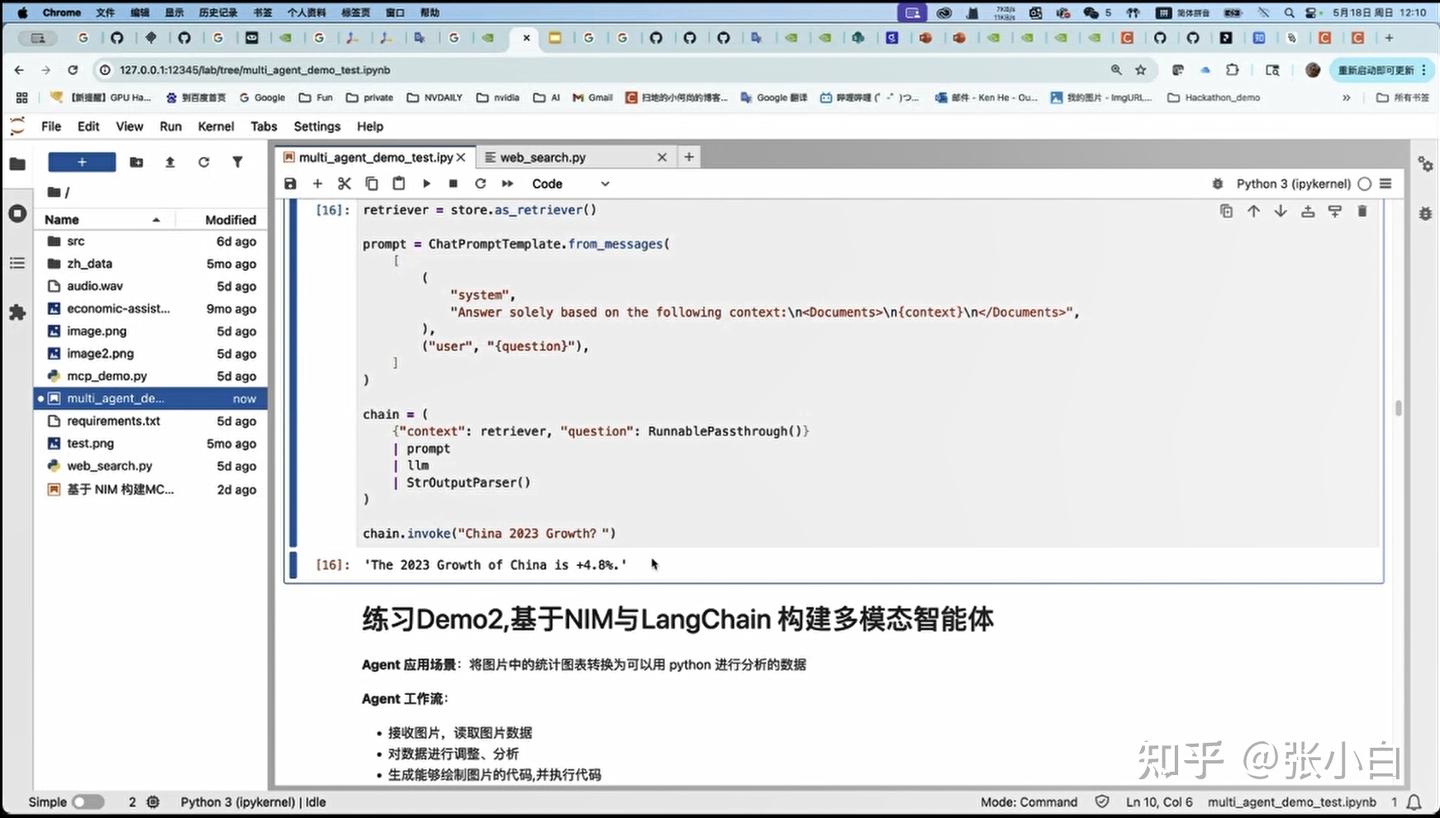
1、DEMO1——基于NIM与langchain实现多模态RAG
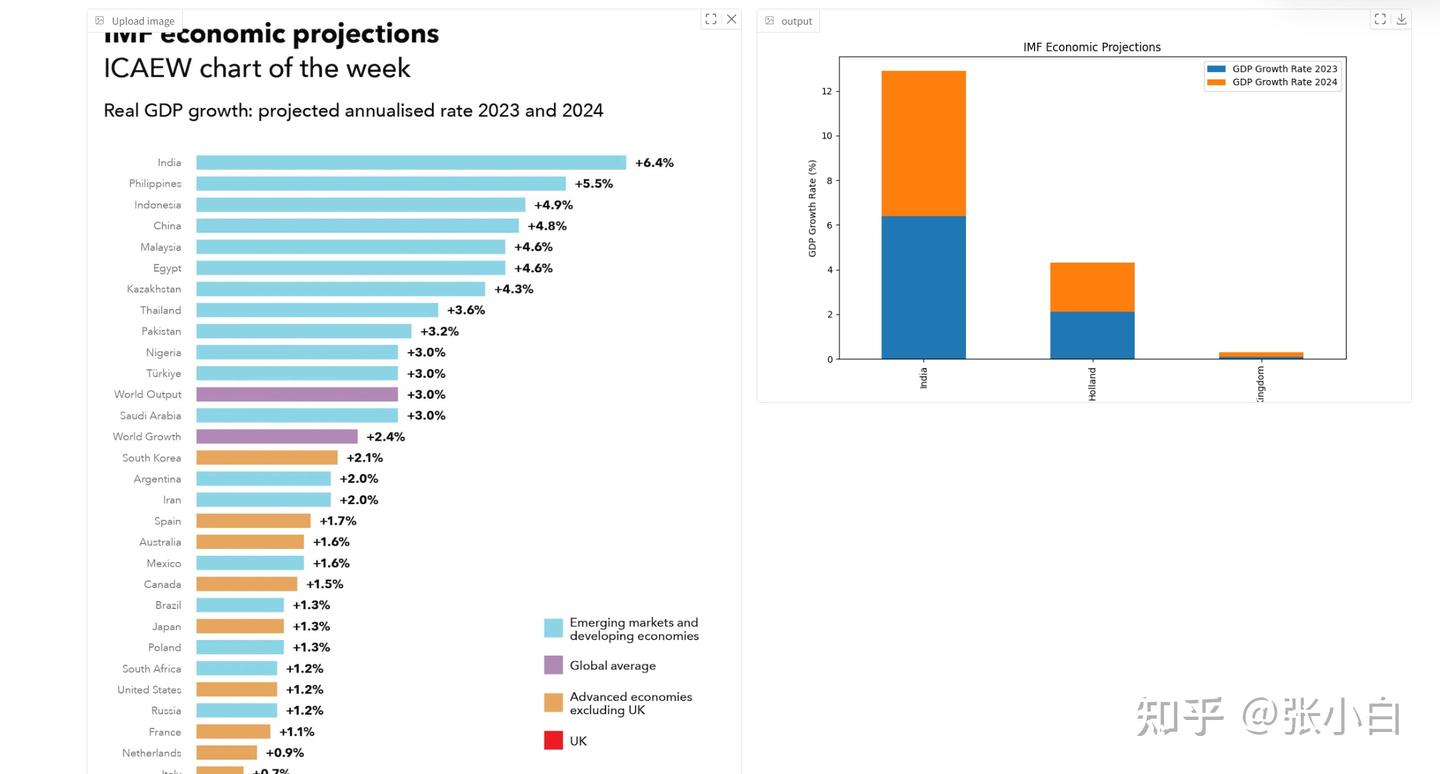
先使用phi-3-vision-128k-instruct多模态模型,识别出了图片,并转成了表格,将数据保存在向量数据库中;
然后通过Langchain构建调用链,串联了llama3-70b模型,查询出知识库中想要的结果。
以上结果说明密钥正确。
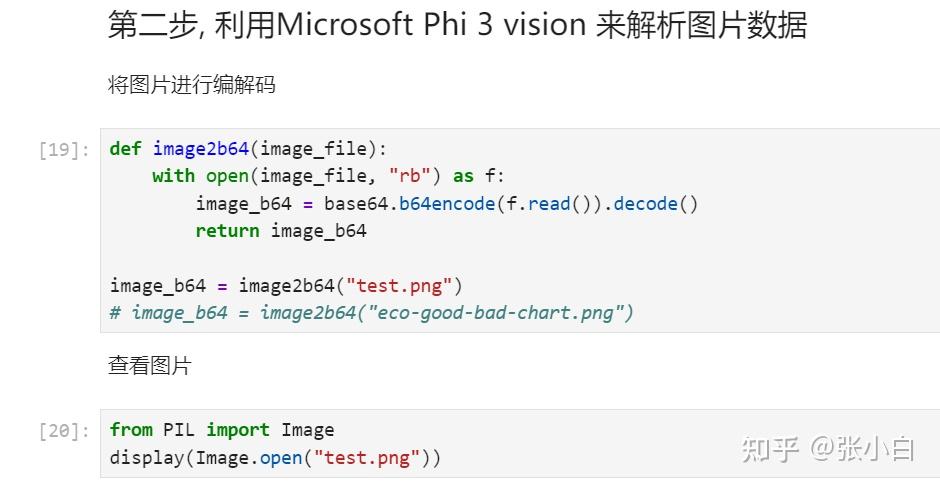
准备一张图片:test.png
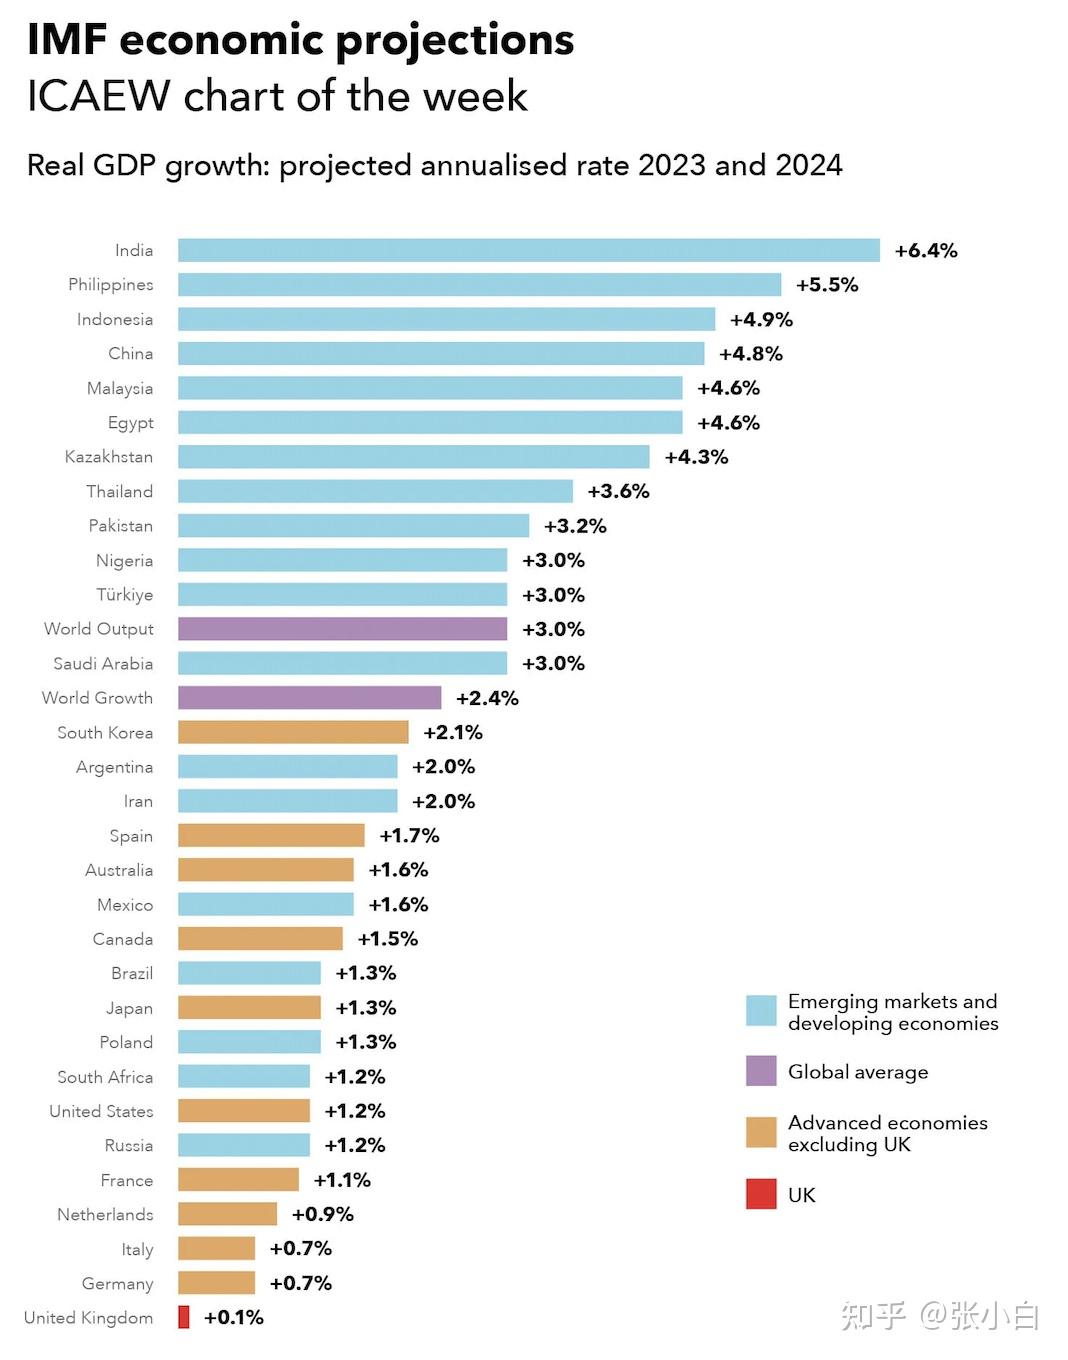
将图片变成base64格式:
调用NIM API,问Phi3多模态大模型:将上面的图片转为图表

将识别的结果写入文件:
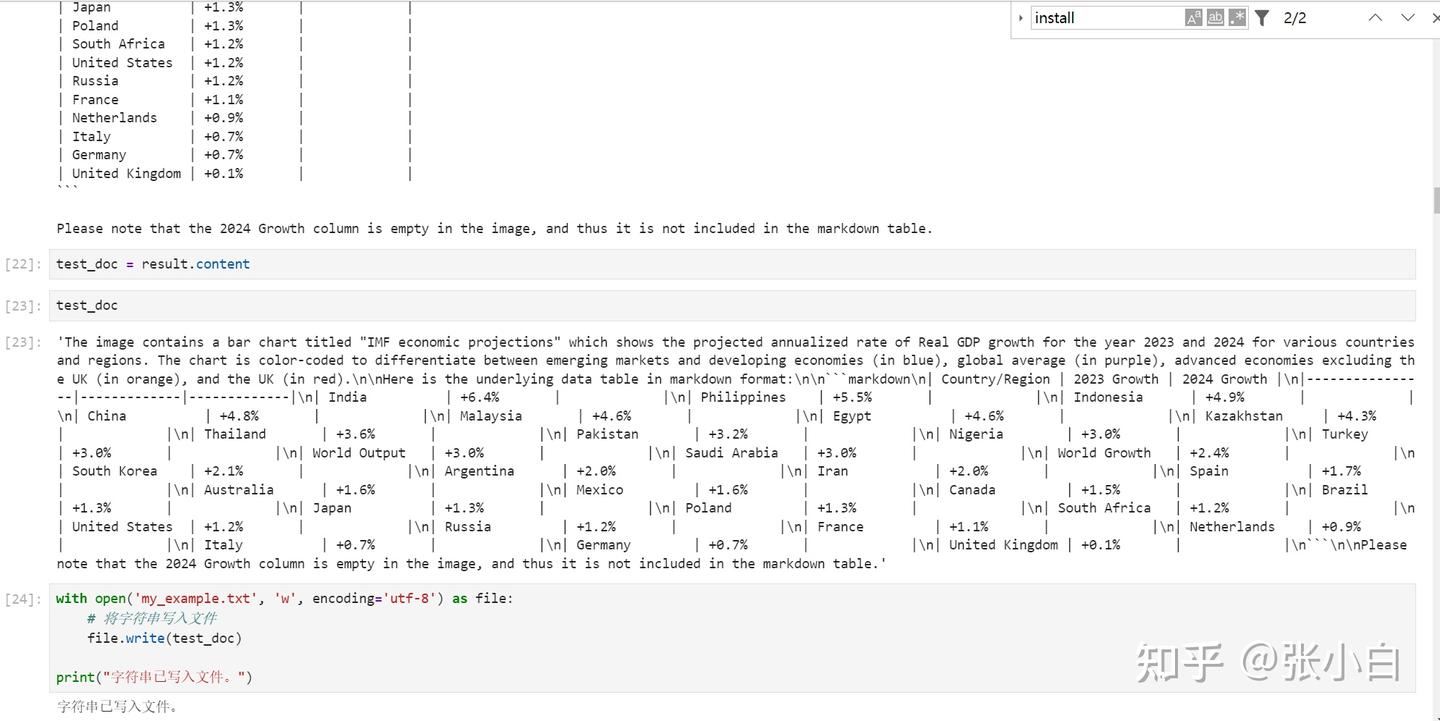
打开结果文件看看:
The image contains a bar chart titled "IMF economic projections" which shows the projected annualized rate of Real GDP growth for the year 2023 and 2024 for various countries and regions. The chart is color-coded to differentiate between emerging markets and developing economies (in blue), global average (in purple), advanced economies excluding the UK (in orange), and the UK (in red).

Here is the underlying data table in markdown format:

```markdown
| Country/Region | 2023 Growth | 2024 Growth |
|----------------|-------------|-------------|
| India          | +6.4%       |             |
| Philippines    | +5.5%       |             |
| Indonesia      | +4.9%       |             |
| China          | +4.8%       |             |
| Malaysia       | +4.6%       |             |
| Egypt          | +4.6%       |             |
| Kazakhstan     | +4.3%       |             |
| Thailand       | +3.6%       |             |
| Pakistan       | +3.2%       |             |
| Nigeria        | +3.0%       |             |
| Turkey         | +3.0%       |             |
| World Output   | +3.0%       |             |
| Saudi Arabia   | +3.0%       |             |
| World Growth   | +2.4%       |             |
| South Korea    | +2.1%       |             |
| Argentina      | +2.0%       |             |
| Iran           | +2.0%       |             |
| Spain          | +1.7%       |             |
| Australia      | +1.6%       |             |
| Mexico         | +1.6%       |             |
| Canada         | +1.5%       |             |
| Brazil         | +1.3%       |             |
| Japan          | +1.3%       |             |
| Poland         | +1.3%       |             |
| South Africa   | +1.2%       |             |
| United States  | +1.2%       |             |
| Russia         | +1.2%       |             |
| France         | +1.1%       |             |
| Netherlands    | +0.9%       |             |
| Italy          | +0.7%       |             |
| Germany        | +0.7%       |             |
| United Kingdom | +0.1%       |             |
```

Please note that the 2024 Growth column is empty in the image, and thus it is not included in the markdown table.
实现RAG检索
处理文件的准备工作
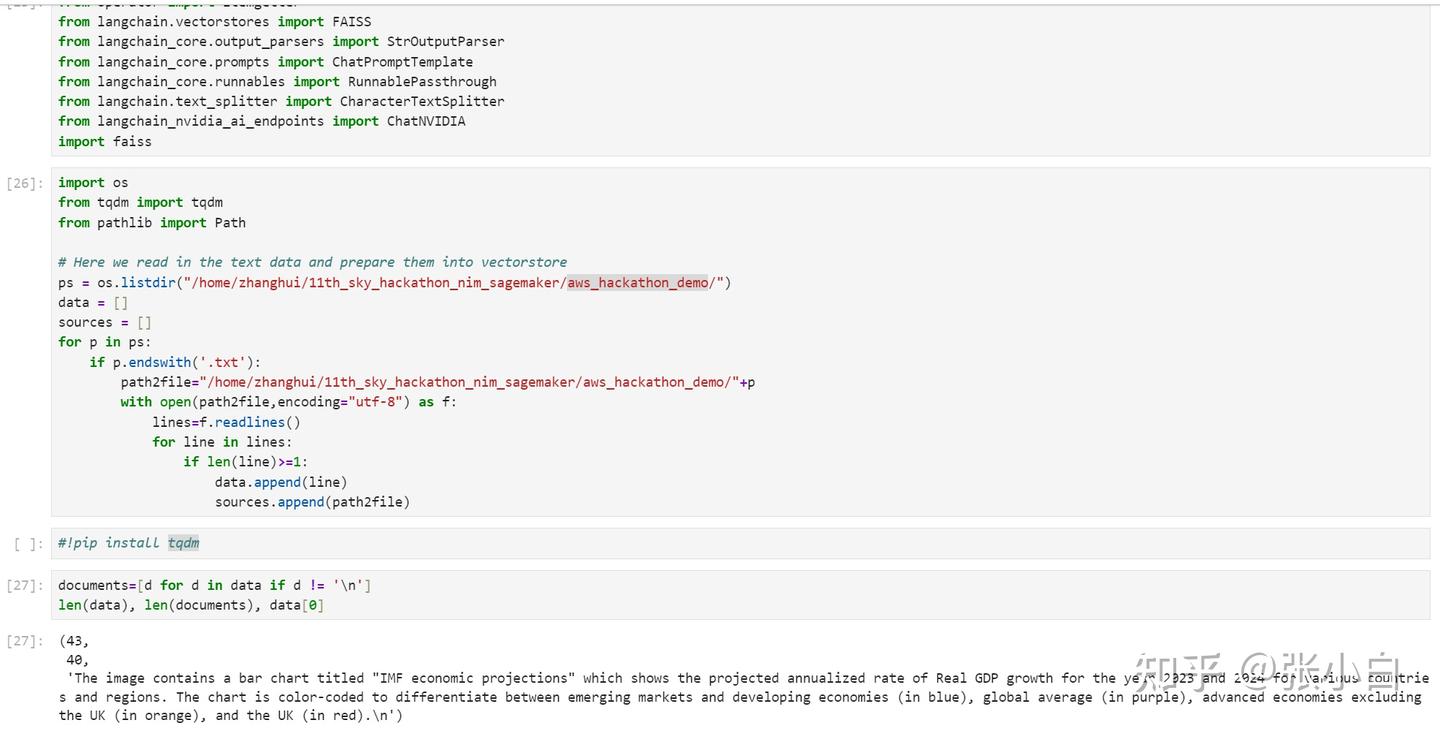
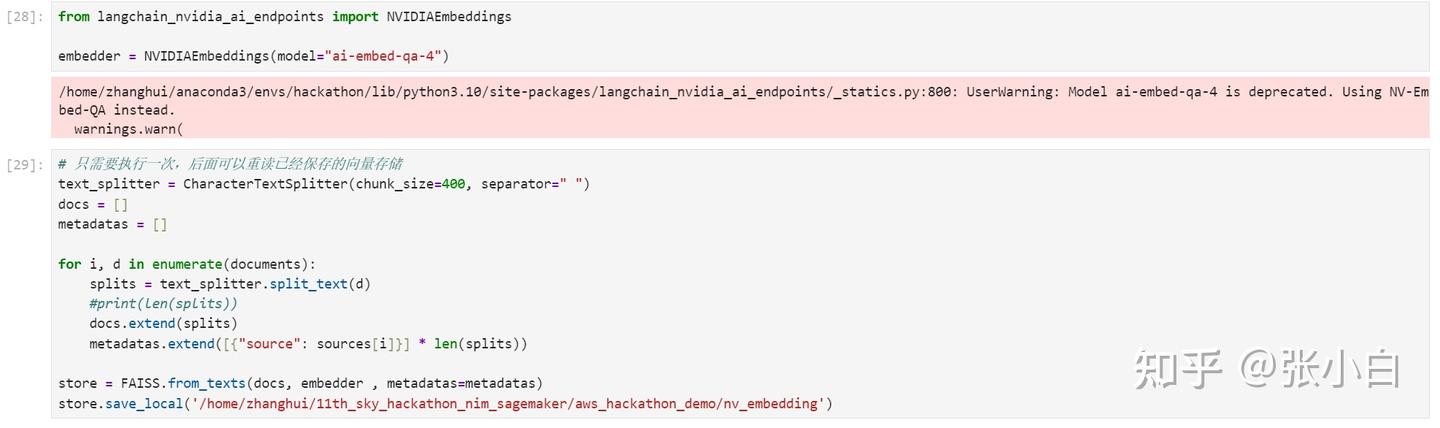
加载embedding模型,生成向量数据库
使用NIM的ai-llama3-70b模型,生成langchain调用链,进行推理
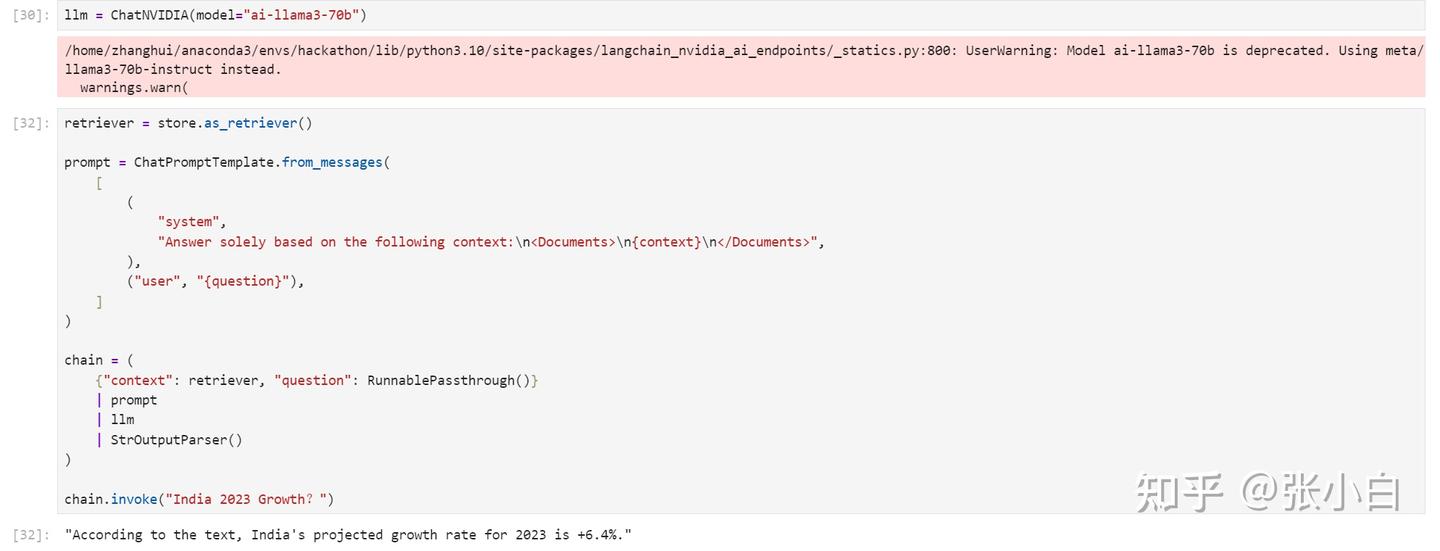
从上面看,获取到了印度2023年的增长率6.4%
但是奇怪的是:
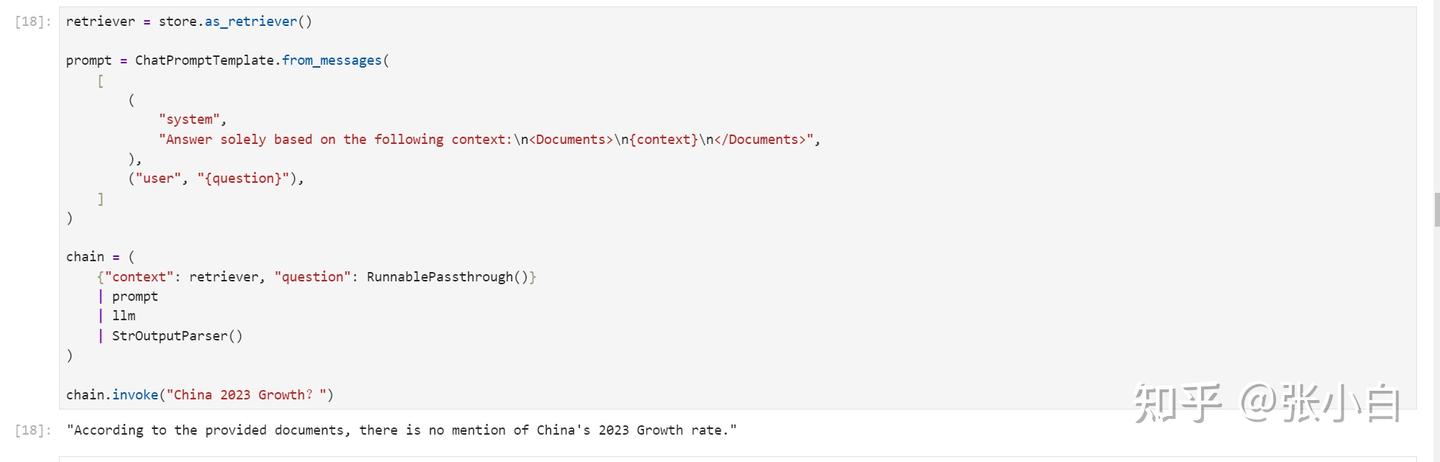
明明2023年China也是有的:

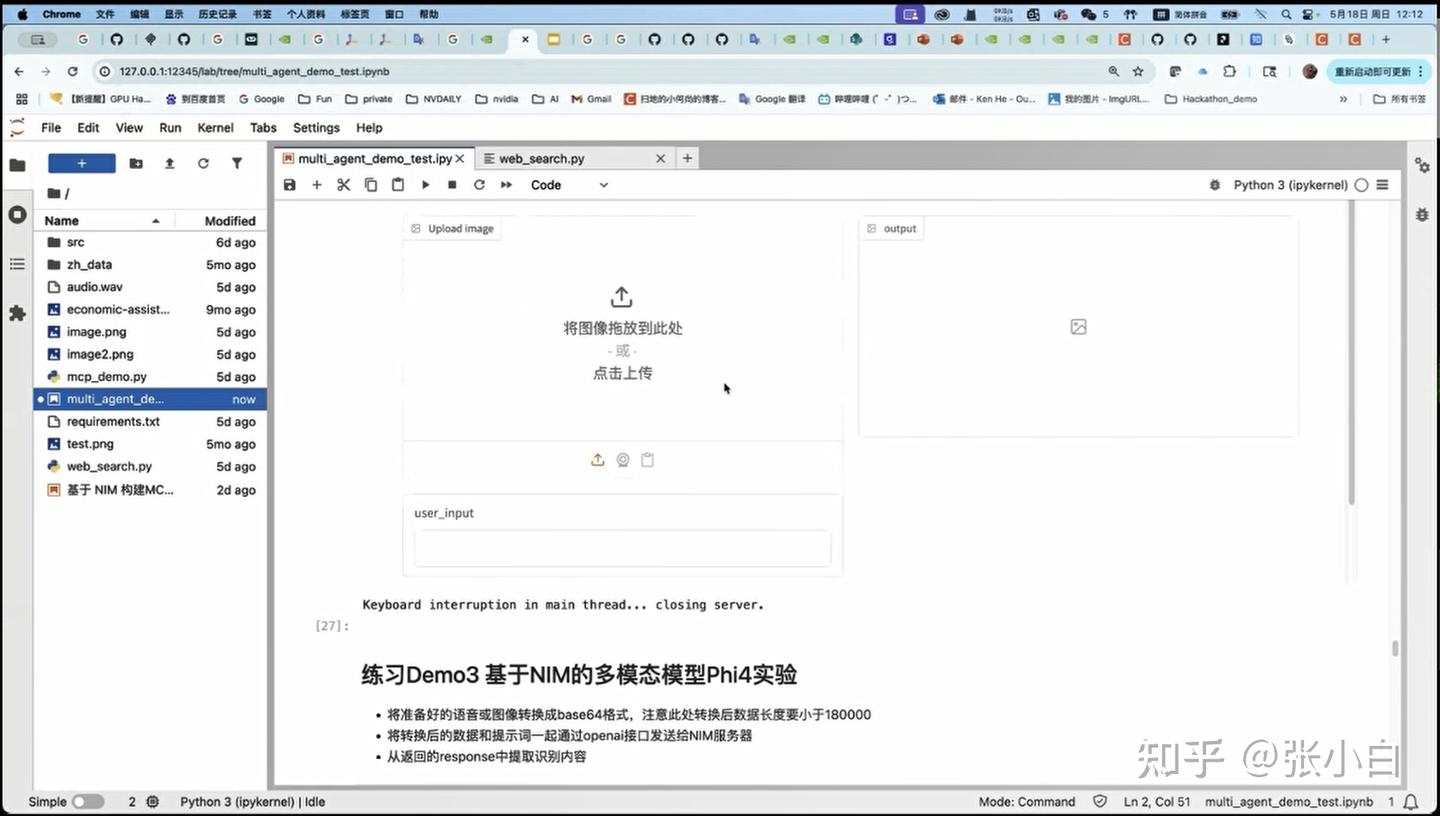
2、DEMO2——基于NIM与LangChain 构建多模态智能体
这里使用LangChain做了一个Agent。
先准备一些函数:
import re

# 将 langchain 运行状态下的表保存到全局变量中
def save_table_to_global(x):
    global table
    if 'TABLE' in x.content:
        table = x.content.split('TABLE', 1)[1].split('END_TABLE')[0]
    return x

# helper function 用于Debug
def print_and_return(x):
    print(x)
    return x

# 对打模型生成的代码进行处理, 将注释或解释性文字去除掉, 留下pyhon代码
def extract_python_code(text):
    pattern = r'```python\s*(.*?)\s*```'
    matches = re.findall(pattern, text, re.DOTALL)
    return [match.strip() for match in matches]

# 执行由大模型生成的代码
def execute_and_return(x):
    code = extract_python_code(x.content)[0]
    try:
        result = exec(str(code))
        #print("exec result: "+result)
    except ExceptionType:
        print("The code is not executable, don't give up, try again!")
    return x

# 将图片编码成base64格式, 以方便输入给大模型
def image2b64(image_file):
    with open(image_file, "rb") as f:
        image_b64 = base64.b64encode(f.read()).decode()
        return image_b64
定义Agent
def chart_agent(image_b64, user_input, table):
    # Chart reading Runnable
    chart_reading = ChatNVIDIA(model="ai-phi-3-vision-128k-instruct")
    chart_reading_prompt = ChatPromptTemplate.from_template(
        'Generate underlying data table of the figure below, : <img src="data:image/png;base64,{image_b64}" />'
    )
    chart_chain = chart_reading_prompt | chart_reading

    # Instruct LLM Runnable
    # instruct_chat = ChatNVIDIA(model="nv-mistralai/mistral-nemo-12b-instruct")
    # instruct_chat = ChatNVIDIA(model="meta/llama-3.1-8b-instruct")
    #instruct_chat = ChatNVIDIA(model="ai-llama3-70b")
    instruct_chat = ChatNVIDIA(model="meta/llama-3.1-405b-instruct")
    # instruct_chat = ChatNVIDIA(model="meta/llama-3.1-70b-instruct")

    instruct_prompt = ChatPromptTemplate.from_template(
        "Do NOT repeat my requirements already stated. Based on this table {table}, {input}" \
        "If has table string, start with 'TABLE', end with 'END_TABLE'." \
        "If has code, start with '```python' and end with '```'." \
        "Do NOT include table inside code, and vice versa."
    )
    instruct_chain = instruct_prompt | instruct_chat

    # 根据“表格”决定是否读取图表
    chart_reading_branch = RunnableBranch(
        (lambda x: x.get('table') is None, RunnableAssign({'table': chart_chain })),
        (lambda x: x.get('table') is not None, lambda x: x),
        lambda x: x
    )

    # 根据需求更新table
    update_table = RunnableBranch(
        (lambda x: 'TABLE' in x.content, save_table_to_global),
        lambda x: x
    )
    # 执行绘制图表的代码
    execute_code = RunnableBranch(
        (lambda x: '```python' in x.content, execute_and_return),
        lambda x: x
    )

    chain = (
        chart_reading_branch
        #| RunnableLambda(print_and_return)
        | instruct_chain
        #| RunnableLambda(print_and_return)
        | update_table
        | execute_code
    )

    return chain.invoke({"image_b64": image_b64, "input": user_input, "table": table}).content
初始化图像:
# 使用全局变量 table 来存储数据
table = None
# 将要处理的图像转换成base64格式
image_b64 = image2b64("/home/zhanghui/11th_sky_hackathon_nim_sagemaker/aws_hackathon_demo/economic-assistance-chart.png")

#展示读取的图片
from PIL import Image

display(Image.open("/home/zhanghui/11th_sky_hackathon_nim_sagemaker/aws_hackathon_demo/economic-assistance-chart.png"))
定义完了,下面开始调用过程:
用表格描述这个图:
user_input = "show this table in string"
chart_agent(image_b64, user_input, table)
print(table) # let's see what 'table' looks like now 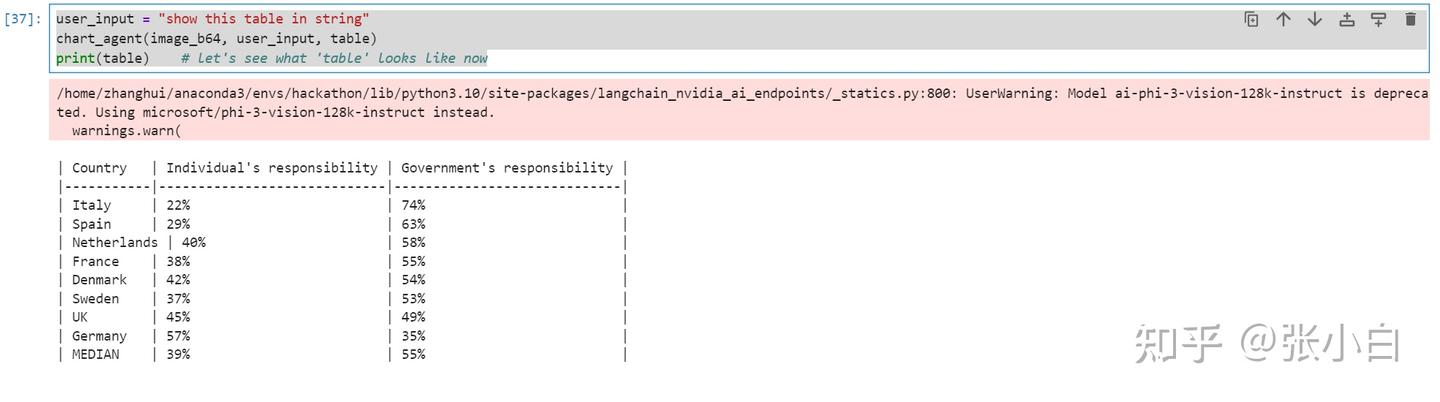
让Agent做一下修改:
user_input = "replace table string's 'Netherlands' with 'Holland'"
chart_agent(image_b64, user_input, table)
print(table)    # let's see what 'table' looks like now
让Agent把上面的表格做成图:
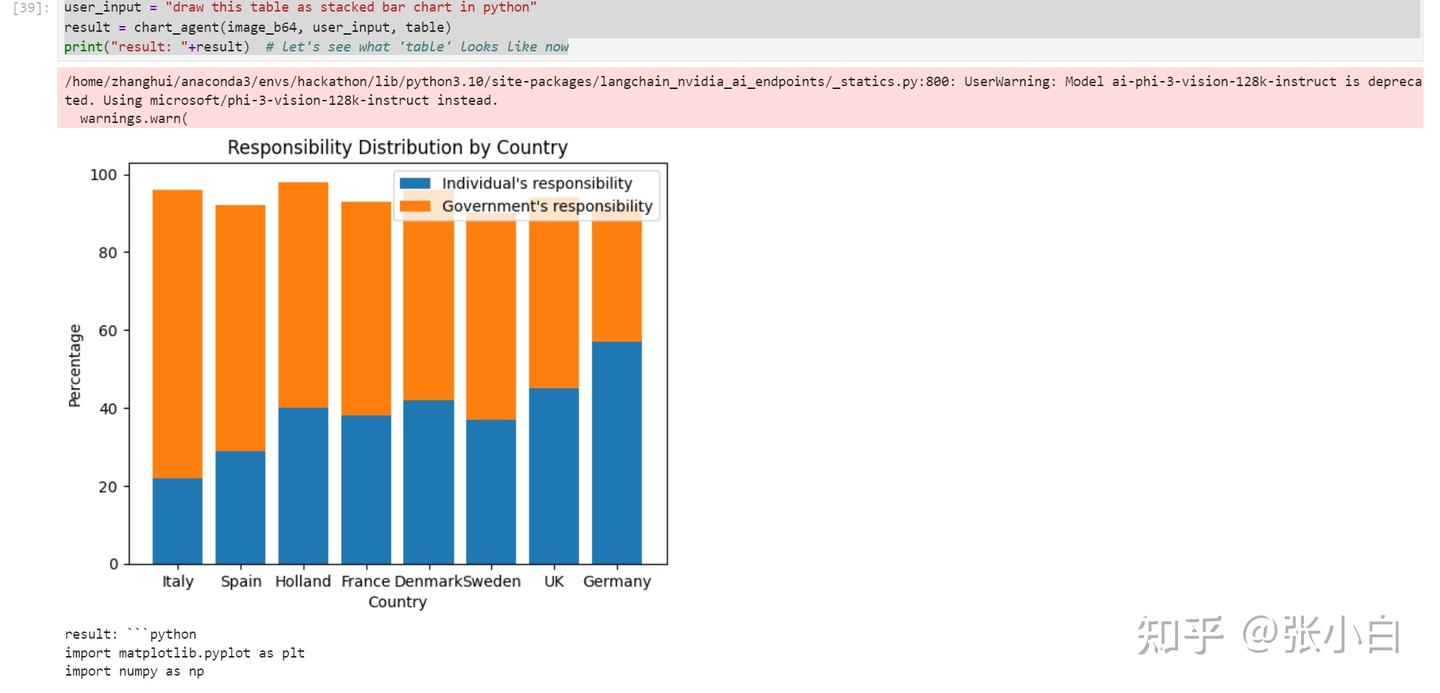
Agent其实是执行了下面的python脚本:
result: ```python
import matplotlib.pyplot as plt
import numpy as np

# Data
countries = ['Italy', 'Spain', 'Holland', 'France', 'Denmark', 'Sweden', 'UK', 'Germany']
individual_responsibility = [22, 29, 40, 38, 42, 37, 45, 57]
government_responsibility = [74, 63, 58, 55, 54, 53, 49, 35]

# Create a stacked bar chart
fig, ax = plt.subplots()
ax.bar(countries, individual_responsibility, label='Individual\'s responsibility')
ax.bar(countries, government_responsibility, bottom=individual_responsibility, label='Government\'s responsibility')

# Set the title and labels
ax.set_title('Responsibility Distribution by Country')
ax.set_xlabel('Country')
ax.set_ylabel('Percentage')

# Add legend
ax.legend()

# Show the plot
plt.show()
```
下面可以做一个gradio的界面,实现上述调用的Web展示。
vi app_agent.py
from langchain_nvidia_ai_endpoints import ChatNVIDIA
from langchain_core.output_parsers import StrOutputParser
from langchain_core.prompts import ChatPromptTemplate
from langchain.schema.runnable import RunnableLambda
from langchain.schema.runnable.passthrough import RunnableAssign
from langchain_core.runnables import RunnableBranch
from langchain_core.runnables import RunnablePassthrough
from langchain.chains import ConversationChain
from langchain.memory import ConversationBufferMemory
import os
import base64
import matplotlib.pyplot as plt
import numpy as np
os.environ["NVIDIA_API_KEY"] = "nvapi-*****"
global img_path
img_path = '/home/zhanghui/11th_sky_hackathon_nim_sagemaker/aws_hackathon_demo/'+'image.png'
print(img_path)
import re
# 将 langchain 运行状态下的表保存到全局变量中
def save_table_to_global(x):
global table
if 'TABLE' in x.content:
table = x.content.split('TABLE', 1)[1].split('END_TABLE')[0]
return x
# helper function 用于Debug
def print_and_return(x):
print(x)
return x
# 对打模型生成的代码进行处理, 将注释或解释性文字去除掉, 留下pyhon代码
def extract_python_code(text):
pattern = r'```python\s*(.*?)\s*```'
matches = re.findall(pattern, text, re.DOTALL)
return [match.strip() for match in matches]
# 执行由大模型生成的代码
def execute_and_return(x):
code = extract_python_code(x.content)[0]
try:
result = exec(str(code))
#print("exec result: "+result)
except ExceptionType:
print("The code is not executable, don't give up, try again!")
return x
# 将图片编码成base64格式, 以方便输入给大模型
def image2b64(image_file):
with open(image_file, "rb") as f:
image_b64 = base64.b64encode(f.read()).decode()
return image_b64
def execute_and_return_gr(x):
code = extract_python_code(x.content)[0]
try:
result = exec(str(code))
#print("exec result: "+result)
except ExceptionType:
print("The code is not executable, don't give up, try again!")
return img_path
def chart_agent_gr(image_b64, user_input, table):
image_b64 = image2b64(image_b64)
# Chart reading Runnable
chart_reading = ChatNVIDIA(model="microsoft/phi-3-vision-128k-instruct")
chart_reading_prompt = ChatPromptTemplate.from_template(
'Generate underlying data table of the figure below, : <img src="data:image/png;base64,{image_b64}" />'
)
chart_chain = chart_reading_prompt | chart_reading
# Instruct LLM Runnable
# instruct_chat = ChatNVIDIA(model="nv-mistralai/mistral-nemo-12b-instruct")
# instruct_chat = ChatNVIDIA(model="meta/llama-3.1-8b-instruct")
#instruct_chat = ChatNVIDIA(model="ai-llama3-70b")
#instruct_chat = ChatNVIDIA(model="meta/llama-3.1-405b-instruct")
instruct_chat = ChatNVIDIA(model="meta/llama-3.1-70b-instruct")
instruct_prompt = ChatPromptTemplate.from_template(
"Do NOT repeat my requirements already stated. Based on this table {table}, {input}" \
"If has table string, start with 'TABLE', end with 'END_TABLE'." \
"If has code, start with '```python' and end with '```'." \
"Do NOT include table inside code, and vice versa."
)
instruct_chain = instruct_prompt | instruct_chat
# 根据“表格”决定是否读取图表
chart_reading_branch = RunnableBranch(
(lambda x: x.get('table') is None, RunnableAssign({'table': chart_chain })),
(lambda x: x.get('table') is not None, lambda x: x),
lambda x: x
)
# 根据需求更新table
update_table = RunnableBranch(
(lambda x: 'TABLE' in x.content, save_table_to_global),
lambda x: x
)
execute_code = RunnableBranch(
(lambda x: '```python' in x.content, execute_and_return_gr),
lambda x: x
)
# 执行绘制图表的代码
chain = (
chart_reading_branch
#| RunnableLambda(print_and_return)
| instruct_chain
#| RunnableLambda(print_and_return)
| update_table
| execute_code
)
return chain.invoke({"image_b64": image_b64, "input": user_input, "table": table})
user_input = "replace table string's 'Netherlands' with 'Holland'', draw this table as stacked bar chart in python, and save the image in path: "+img_path
print(user_input)
import gradio as gr
multi_modal_chart_agent = gr.Interface(fn=chart_agent_gr,
inputs=[gr.Image(label="Upload image", type="filepath"), 'text'],
outputs=['image'],
title="Multi Modal chat agent",
description="Multi Modal chat agent",
allow_flagging="never")
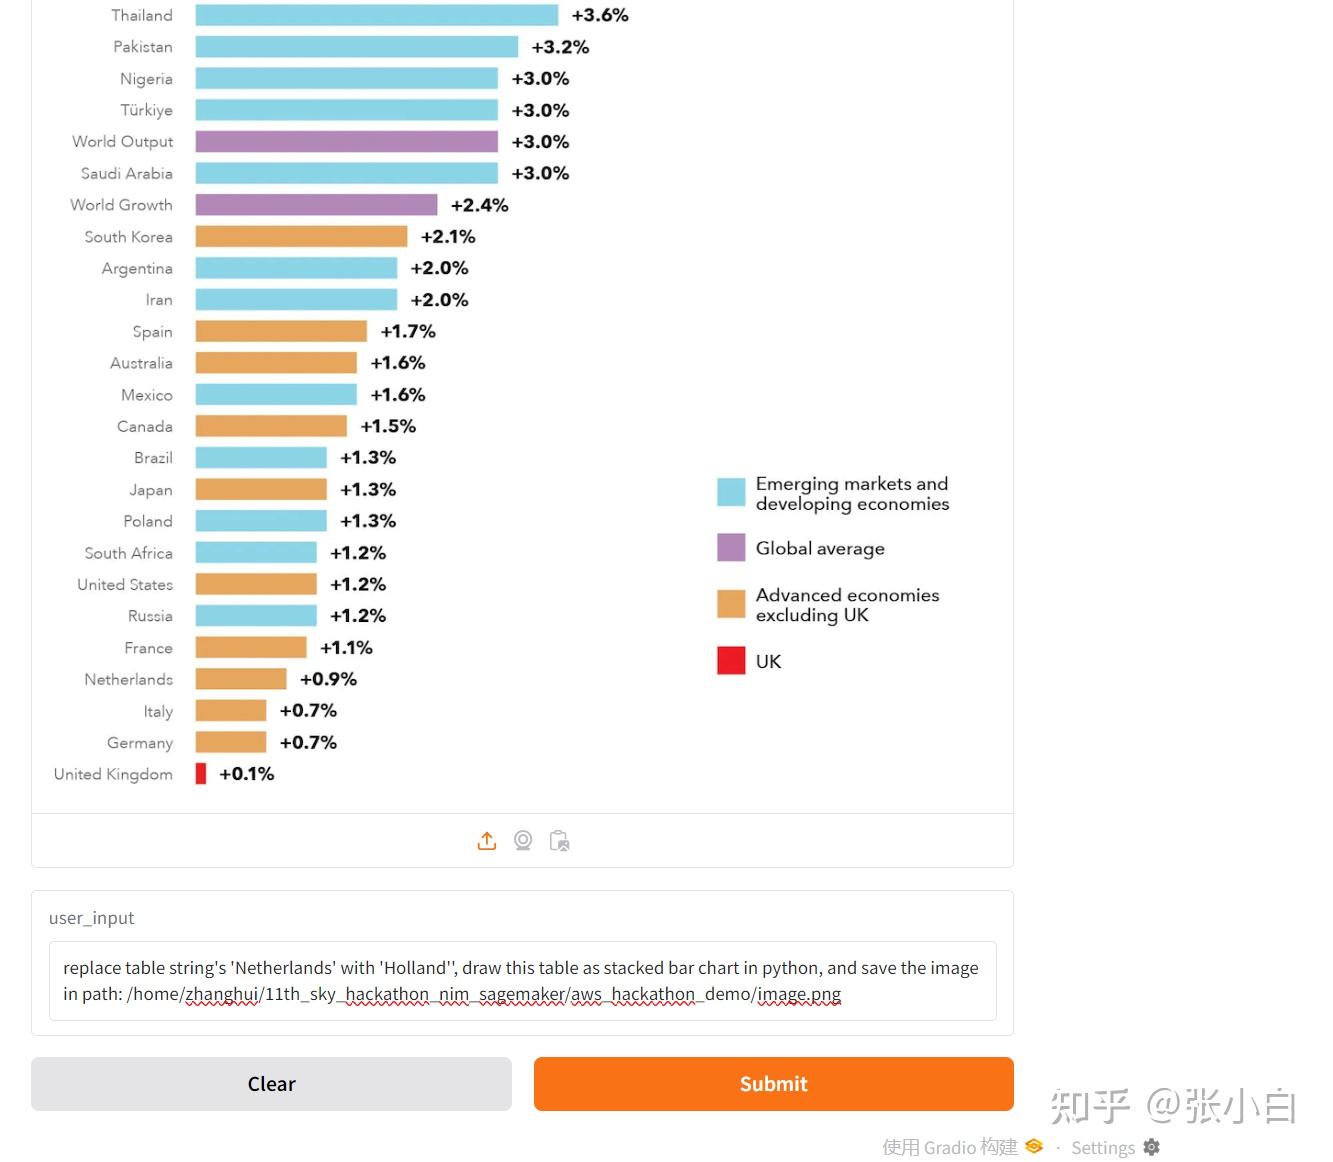
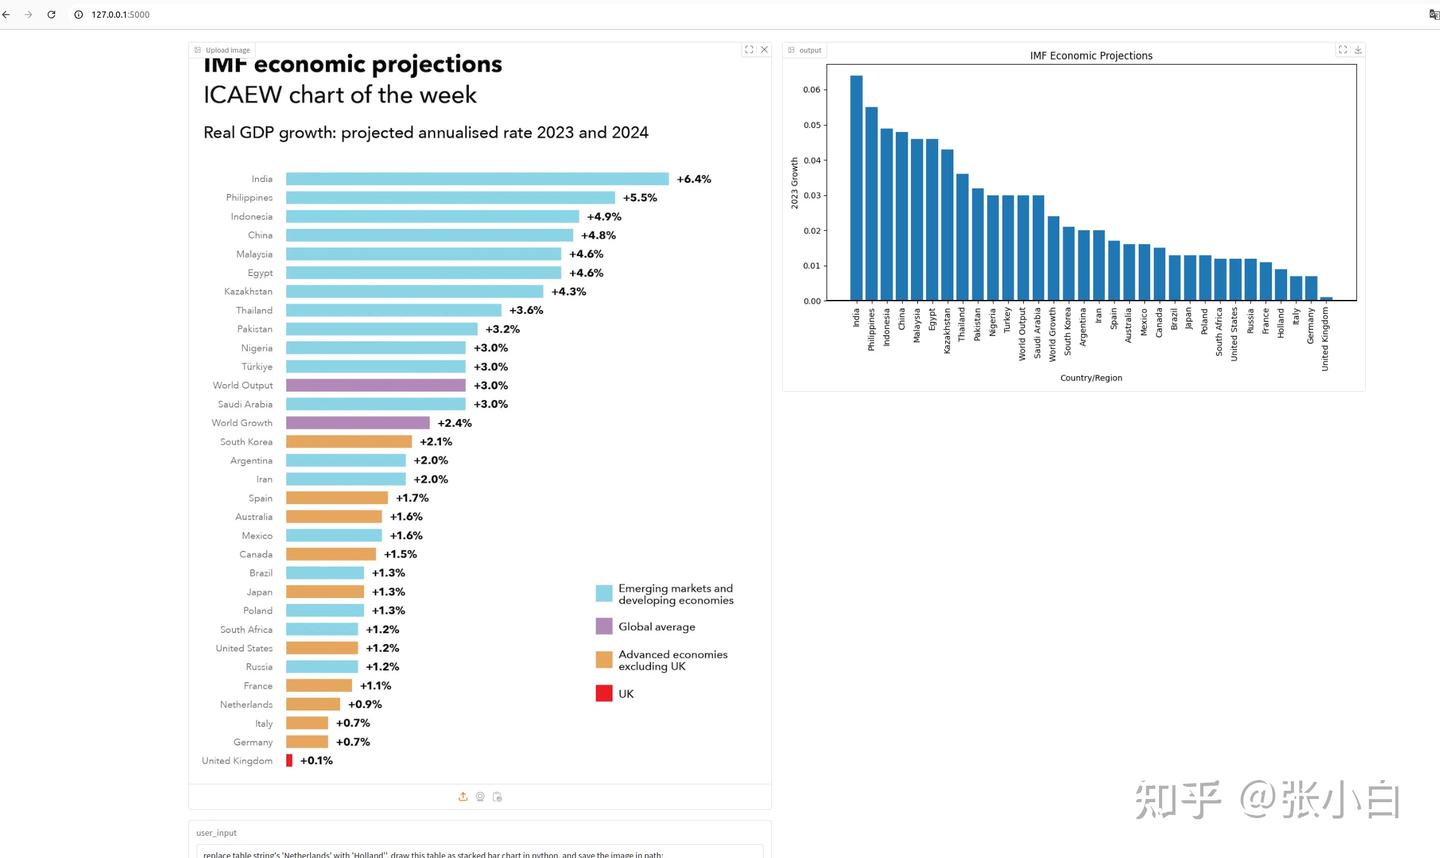
multi_modal_chart_agent.launch(debug=True, share=False, show_api=False, server_port=5000, server_name="0.0.0.0")python app_agent.py

浏览器打开 http://127.0.0.1:5000

上传图片,输入提示词
replace table string's 'Netherlands' with 'Holland'', draw this table as stacked bar chart in python, and save the image in path: /home/zhanghui/11th_sky_hackathon_nim_sagemaker/aws_hackathon_demo/image.png点击Submit.

四、搭建NIM环境(尚未完成)
1、下载NIM镜像
打开Jupyter Notebook,打开新的终端:
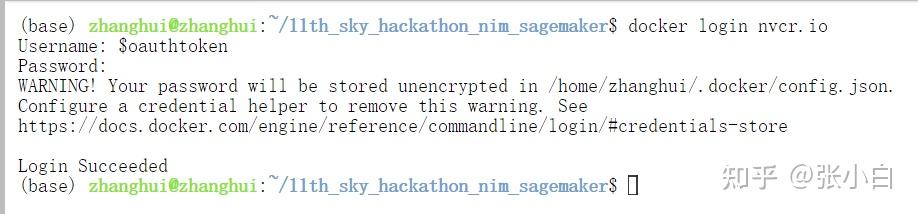
docker login http://nvcr.io
$oauthtoken
docker pull nvcr.io/nim/meta/llama-3.1-8b-instruct:latest
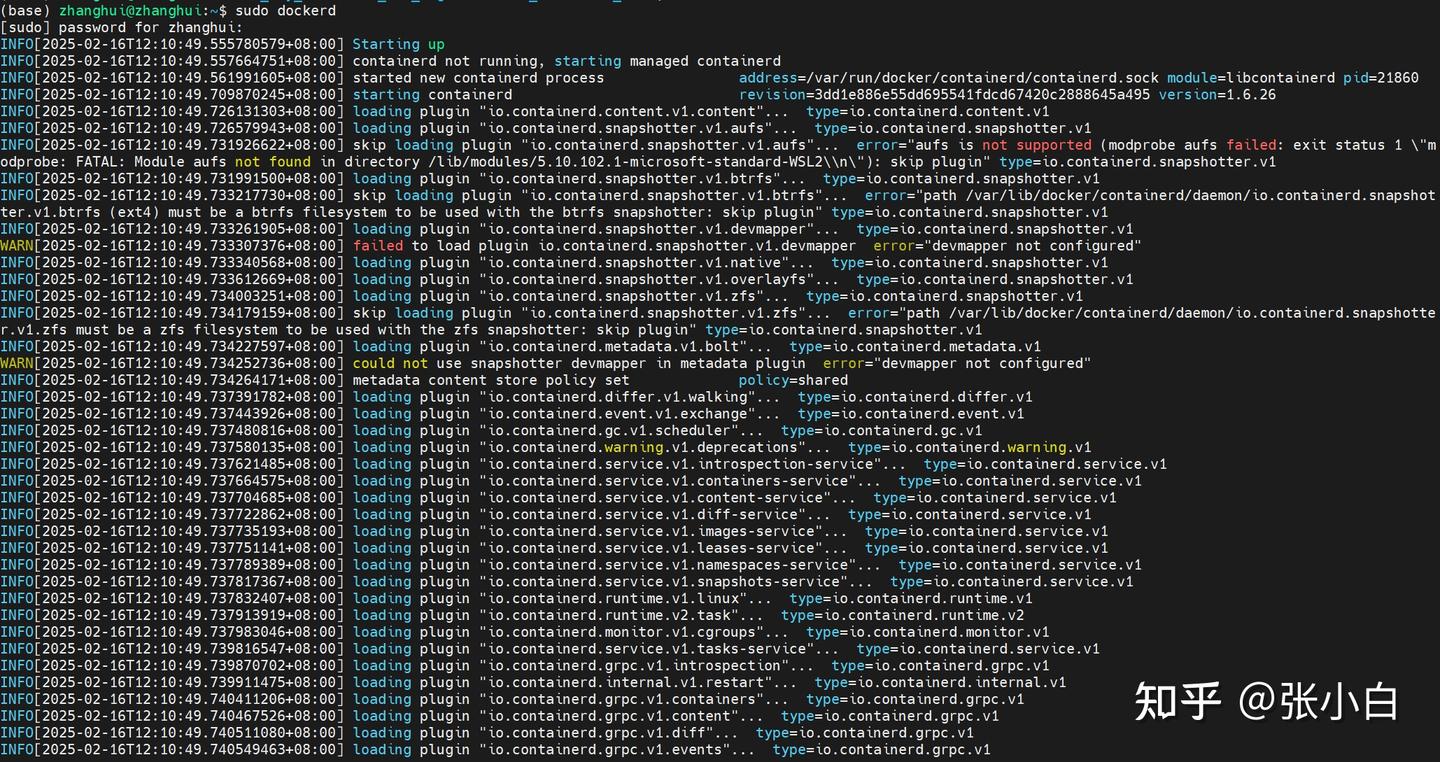
WSL还需要打开新的终端输入 sudo dockerd
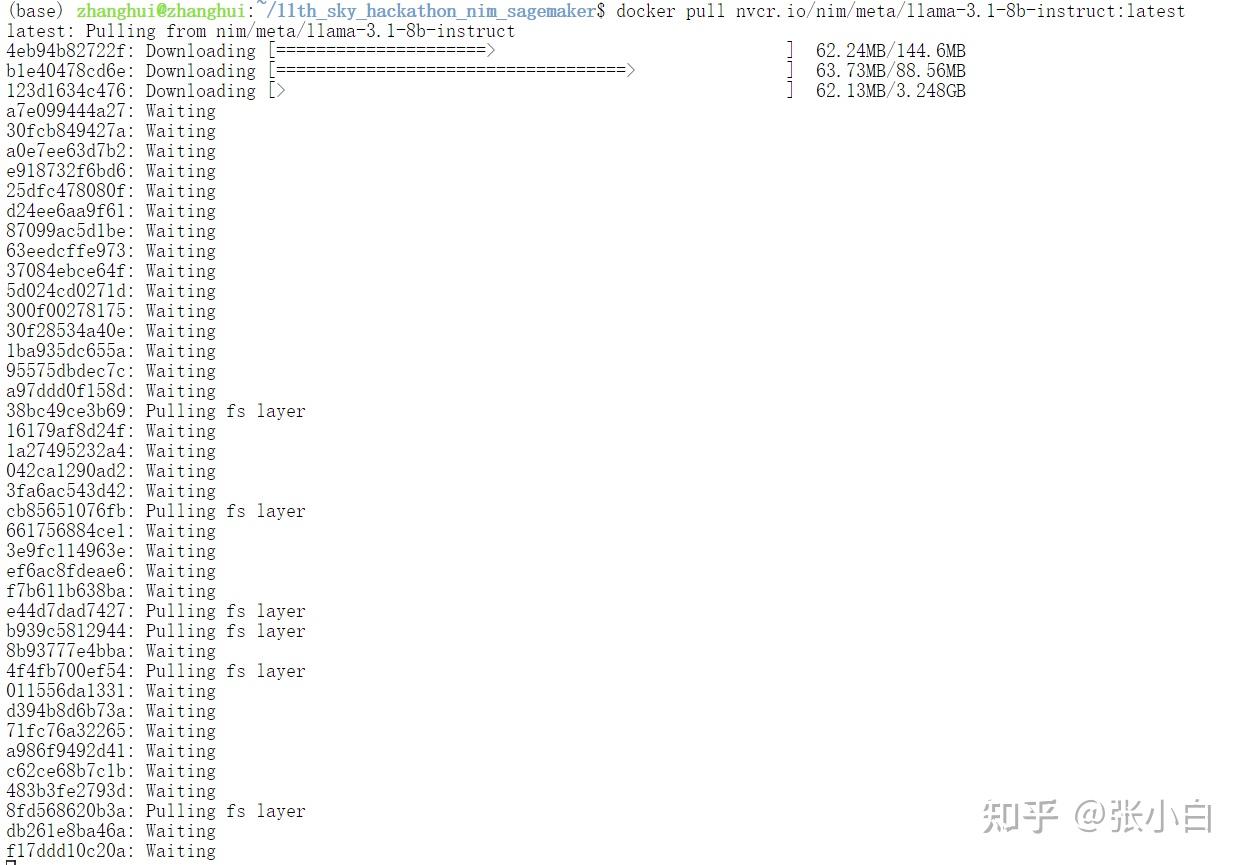
耐心等待docker镜像下载完毕。
启动docker
sudo docker run nvcr.io/nim/meta/llama-3.1-8b-instruct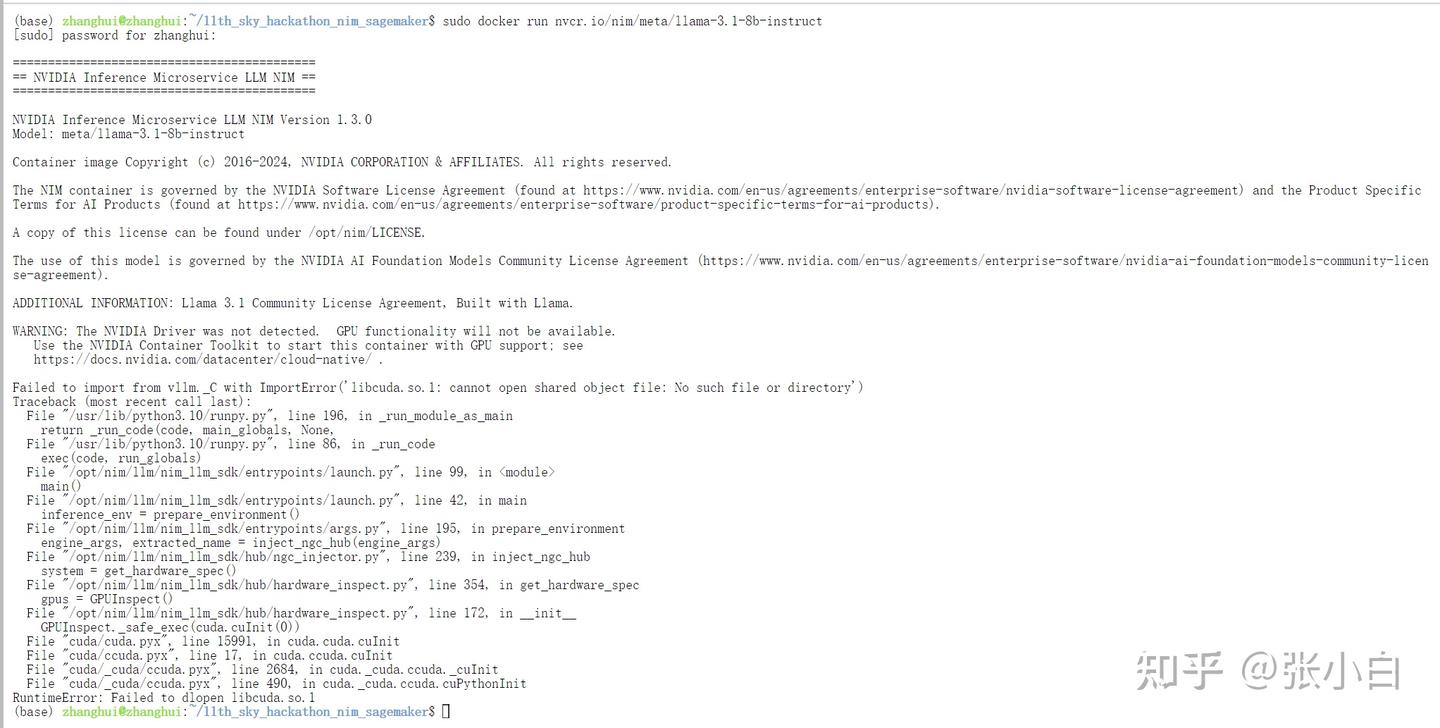
(好像有点问题,不知道怎么在WSL环境启动这个docker)
何老师说要回到AWS操作。。。这么说,还得赶回去吃回头草。。。
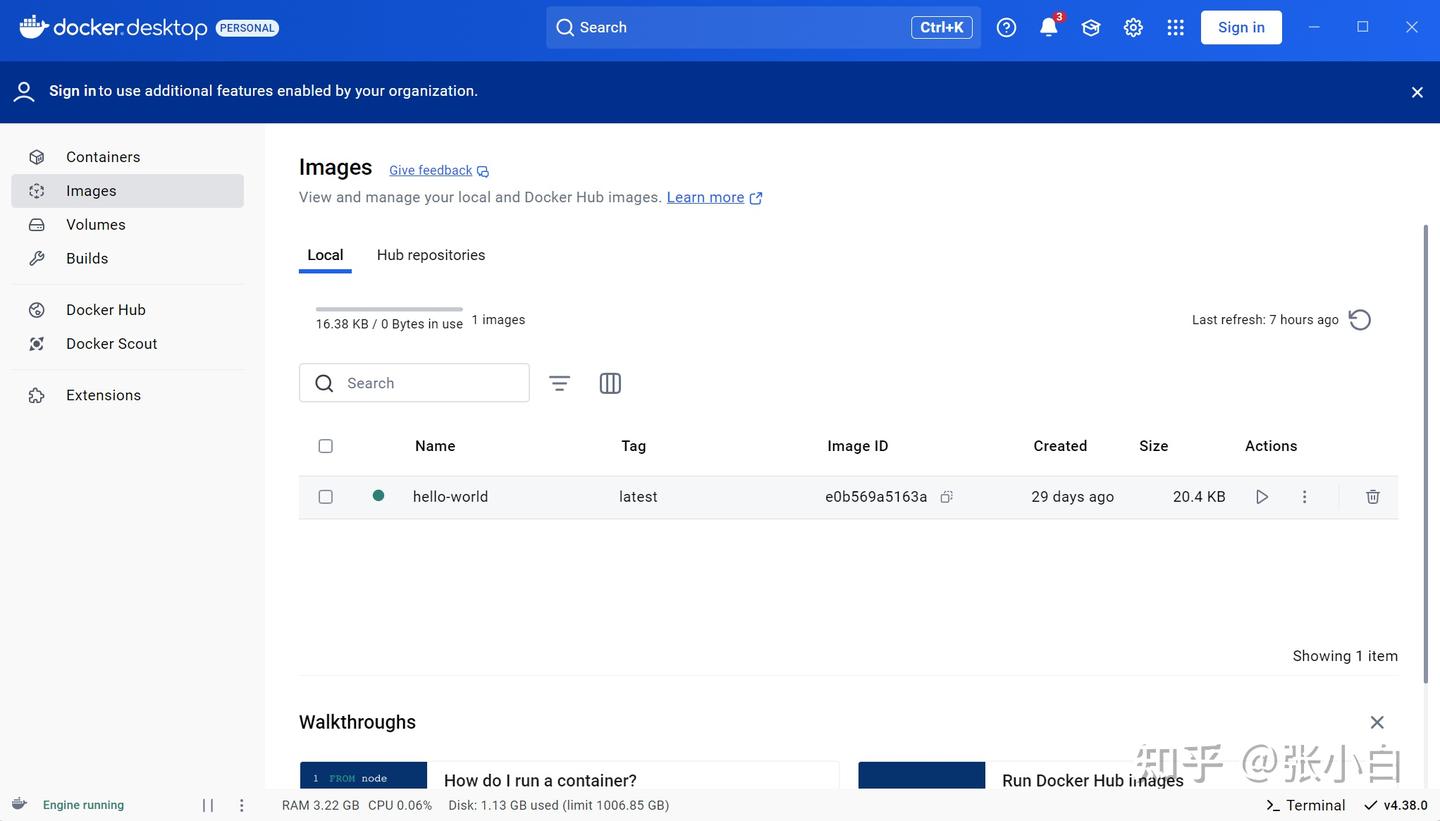
2、在WSL的宿主机上安装Docker Desktop
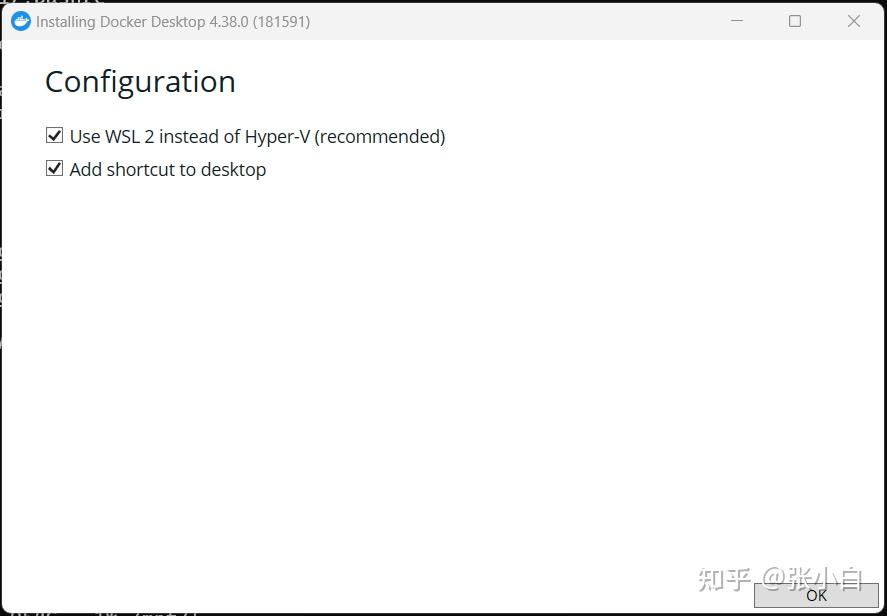
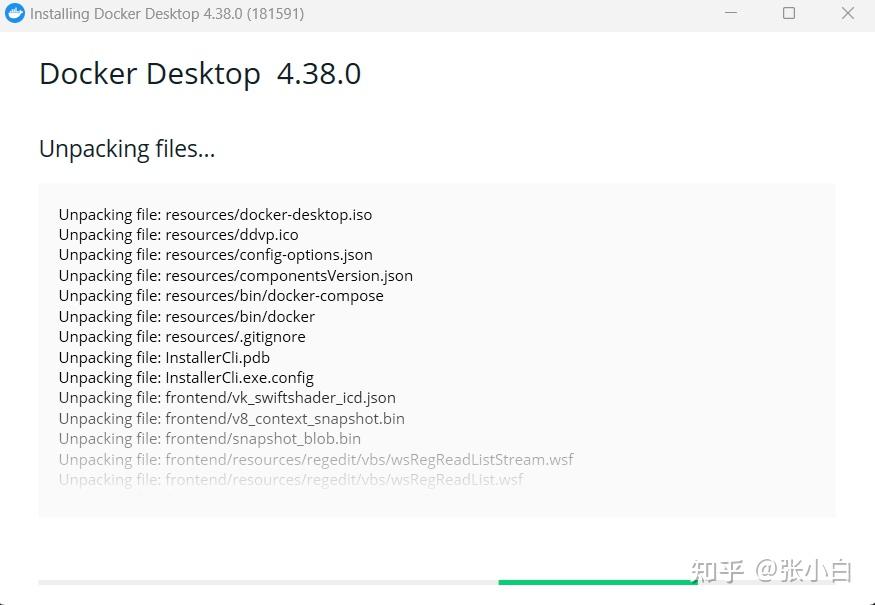
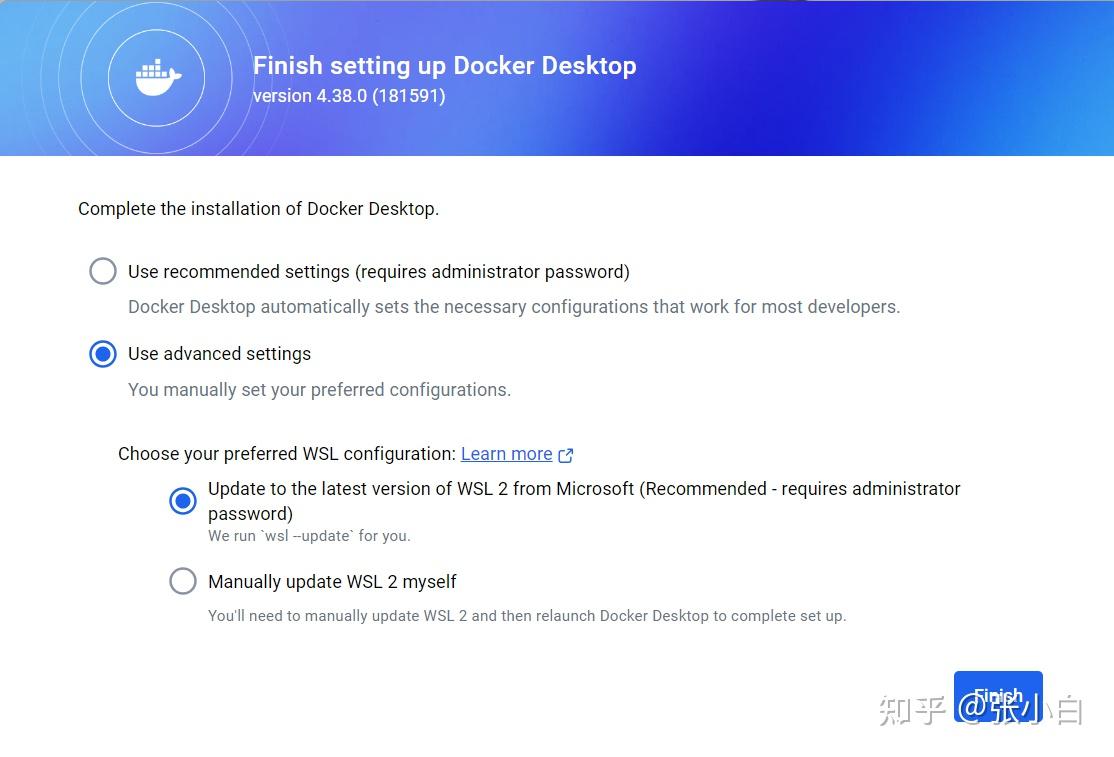
到http://docker.com下载Windows安装包,并执行安装:
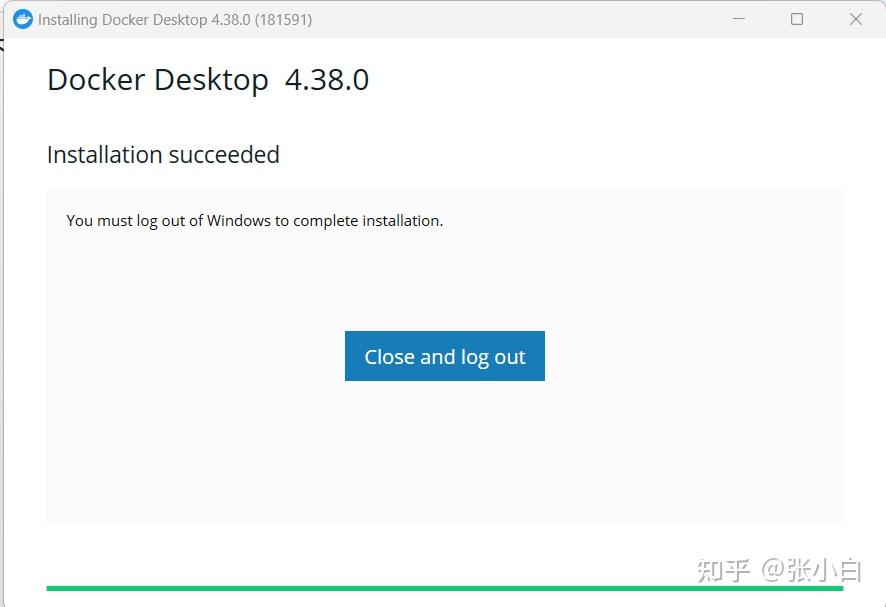
close and logout
accept
登录后发生一个奇怪的现象,原来
sudo docker images可以看到WSL里面的docker镜像:

等Docker Desktop启动后,可以看到Desktop的镜像了:
3、下载NIM镜像到Docker Desktop
我们把原来在WSL里面跑的镜像移到外面来:
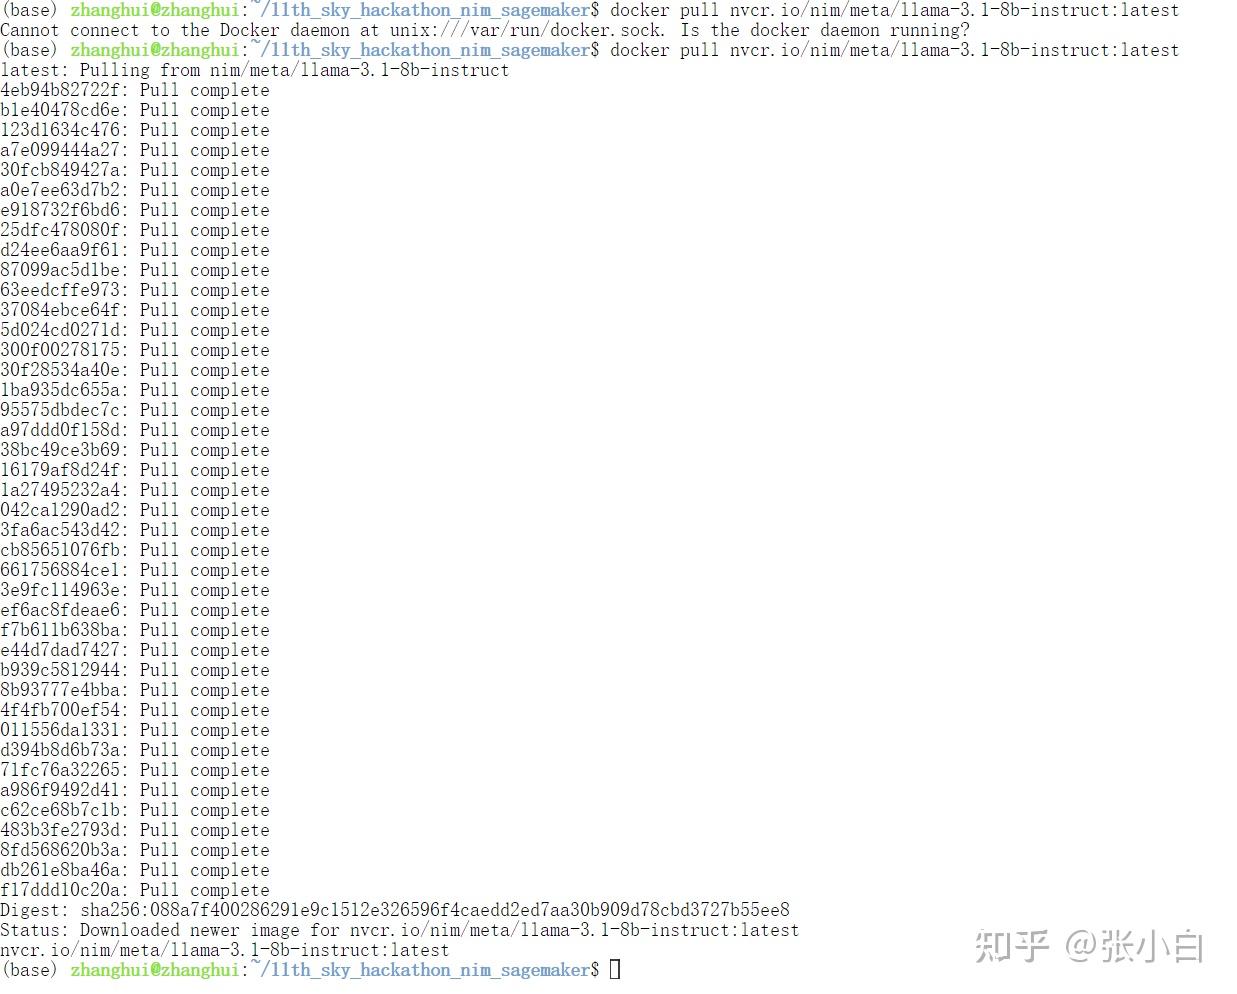
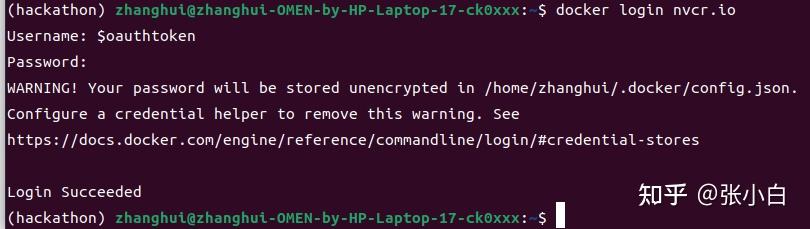
docker login nvcr.io
$oauthtoken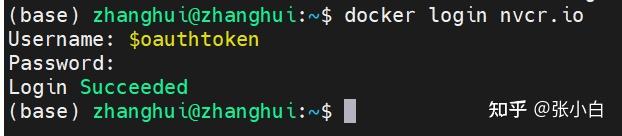
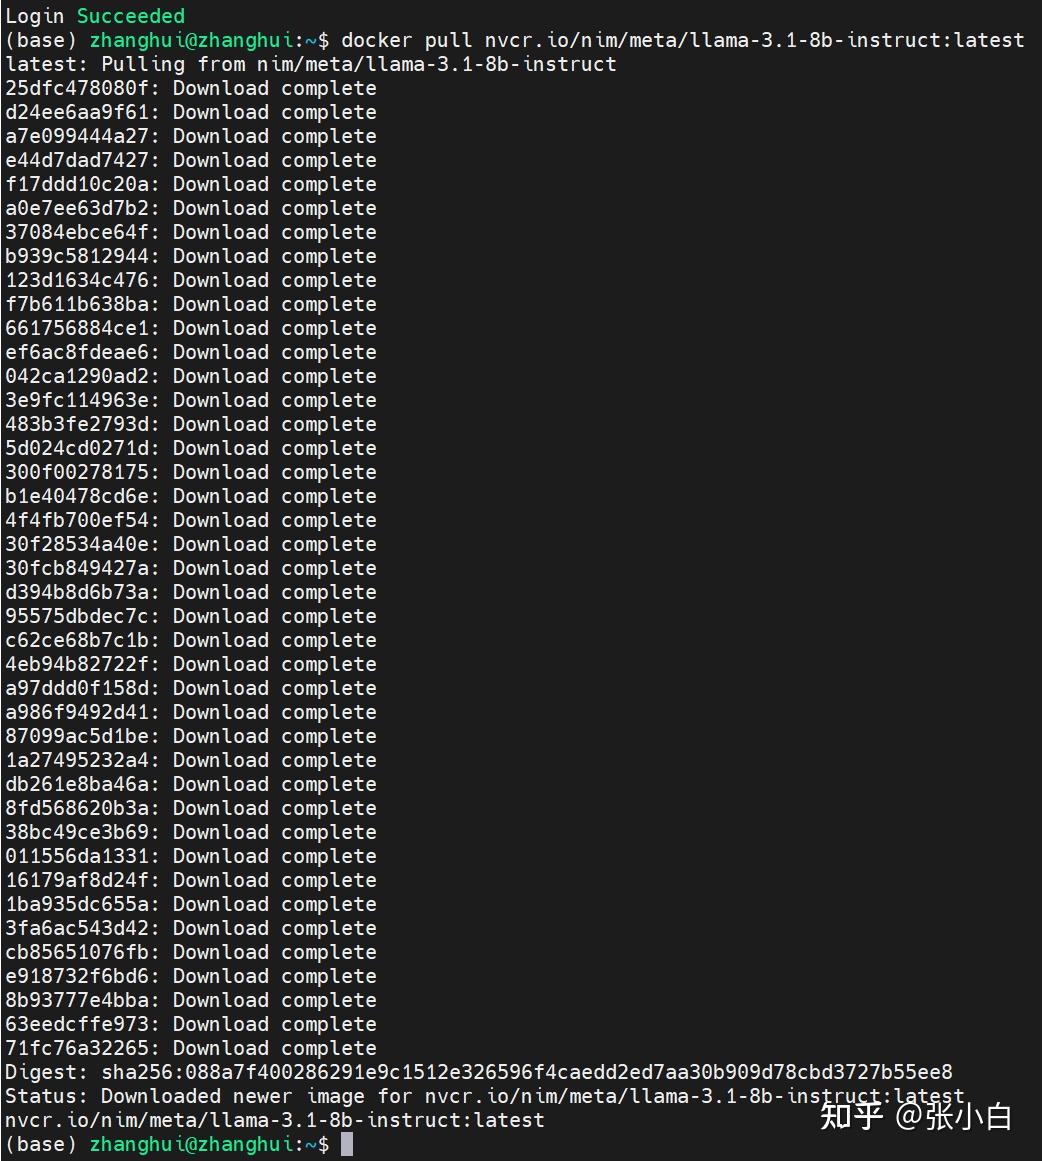
docker pull nvcr.io/nim/meta/llama-3.1-8b-instruct:latest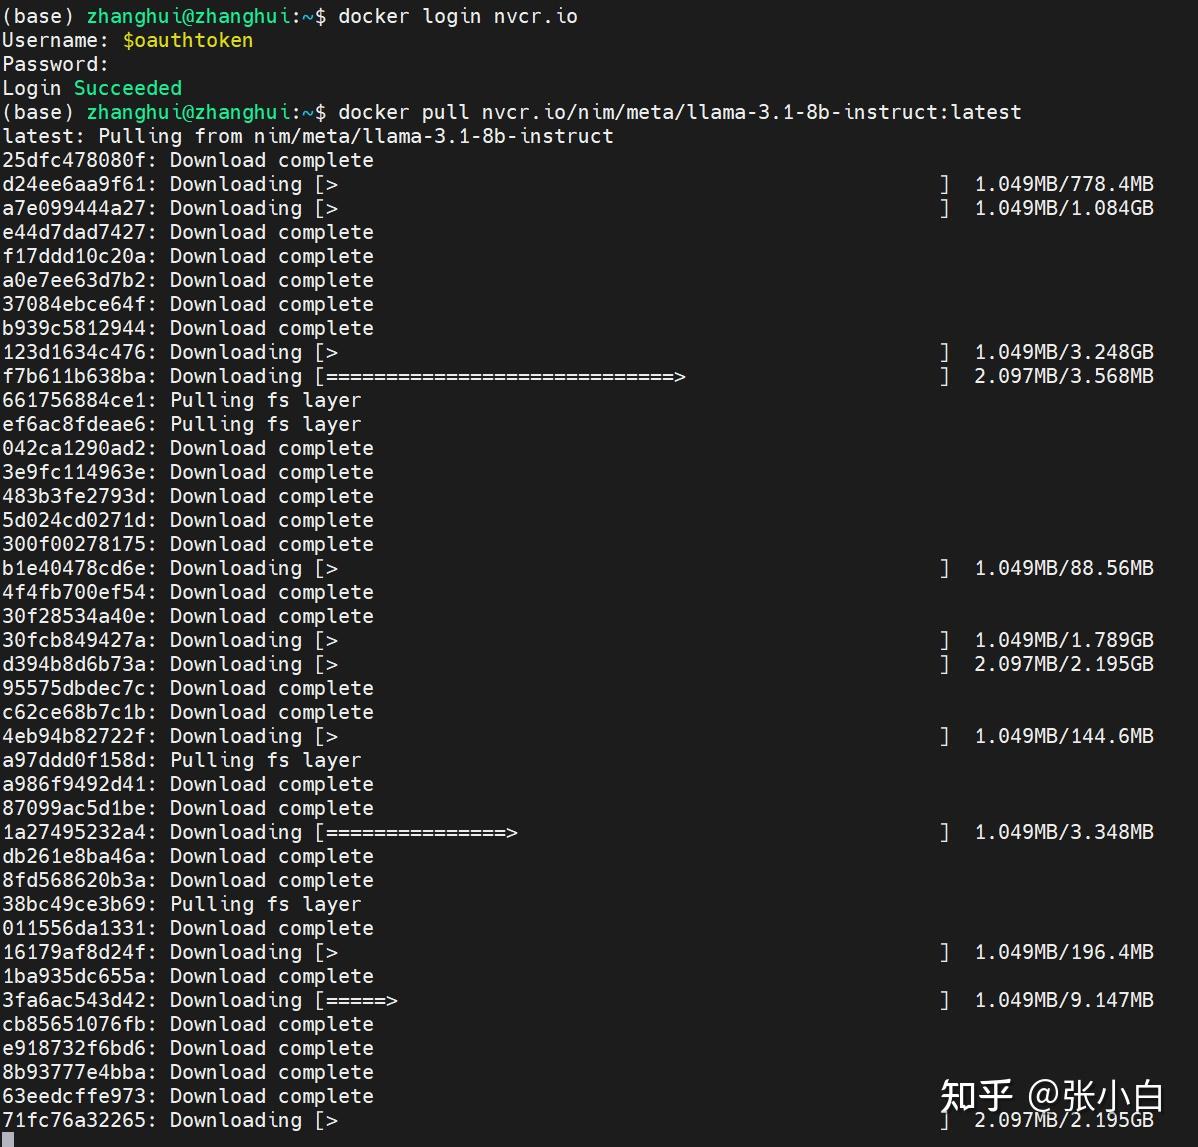
4、启动NIM镜像
vi start_docker.sh
export NGC_API_KEY=nvapi***
export LOCAL_NIM_CACHE=~/.cache/nim
mkdir -p "$LOCAL_NIM_CACHE"
docker run -it --rm \
    --gpus all \
    --shm-size=16GB \
    -e NGC_API_KEY \
    -v "$LOCAL_NIM_CACHE:/opt/nim/.cache" \
    -u $(id -u) \
    -p 8000:8000 \
    nvcr.io/nim/meta/llama-3.1-8b-instruct:latest
启动镜像:
chmod +x start_nim.sh
./start_nim.sh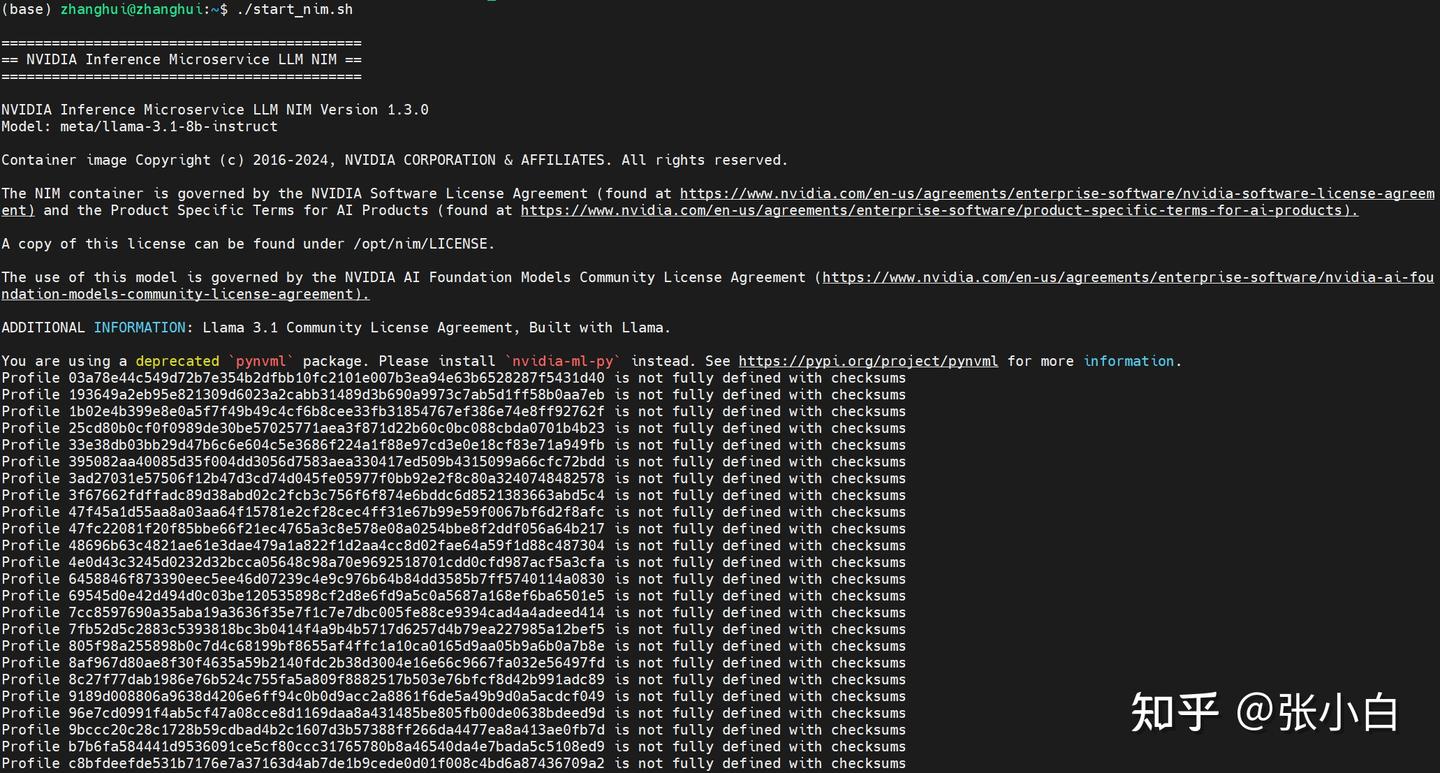
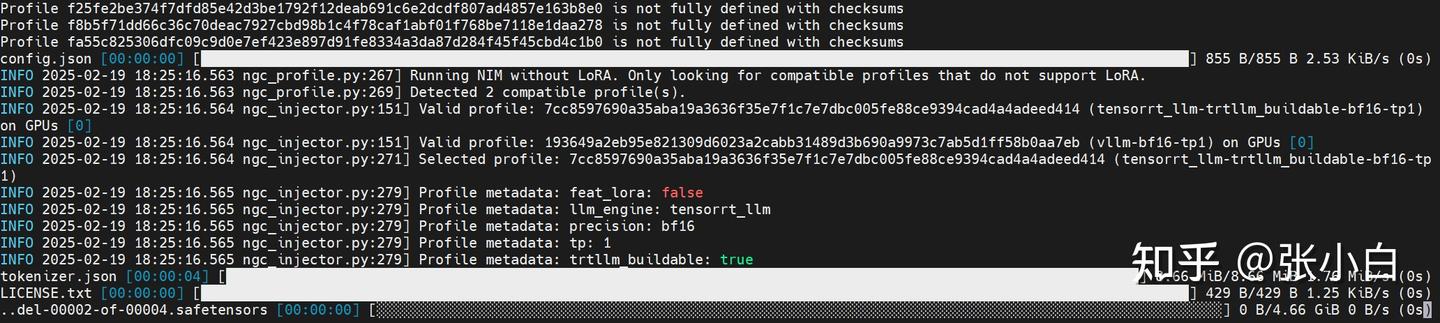
它好像在下载模型:

耐心等待下载结束。。。
同时进入docker容器:
docker ps
docker exec -it xxx /bin/bash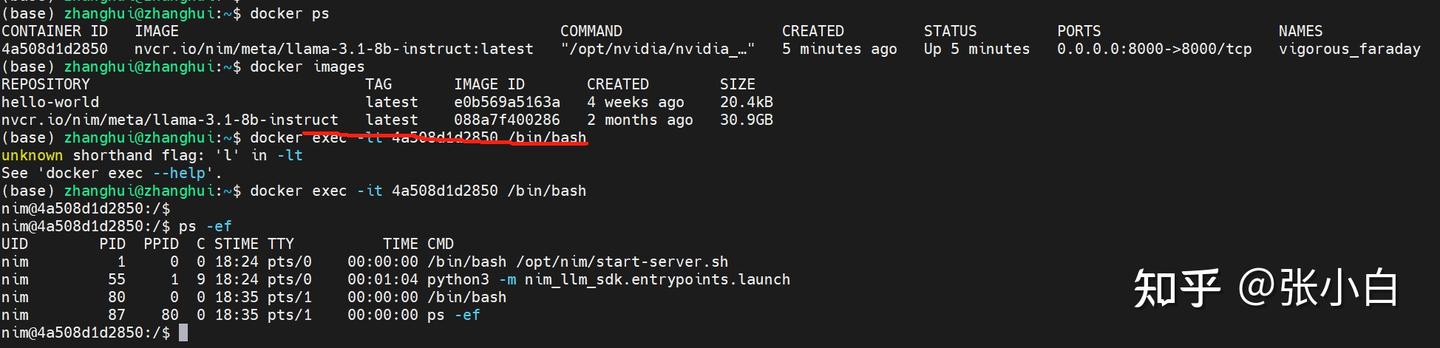

可以看到它在下载模型。
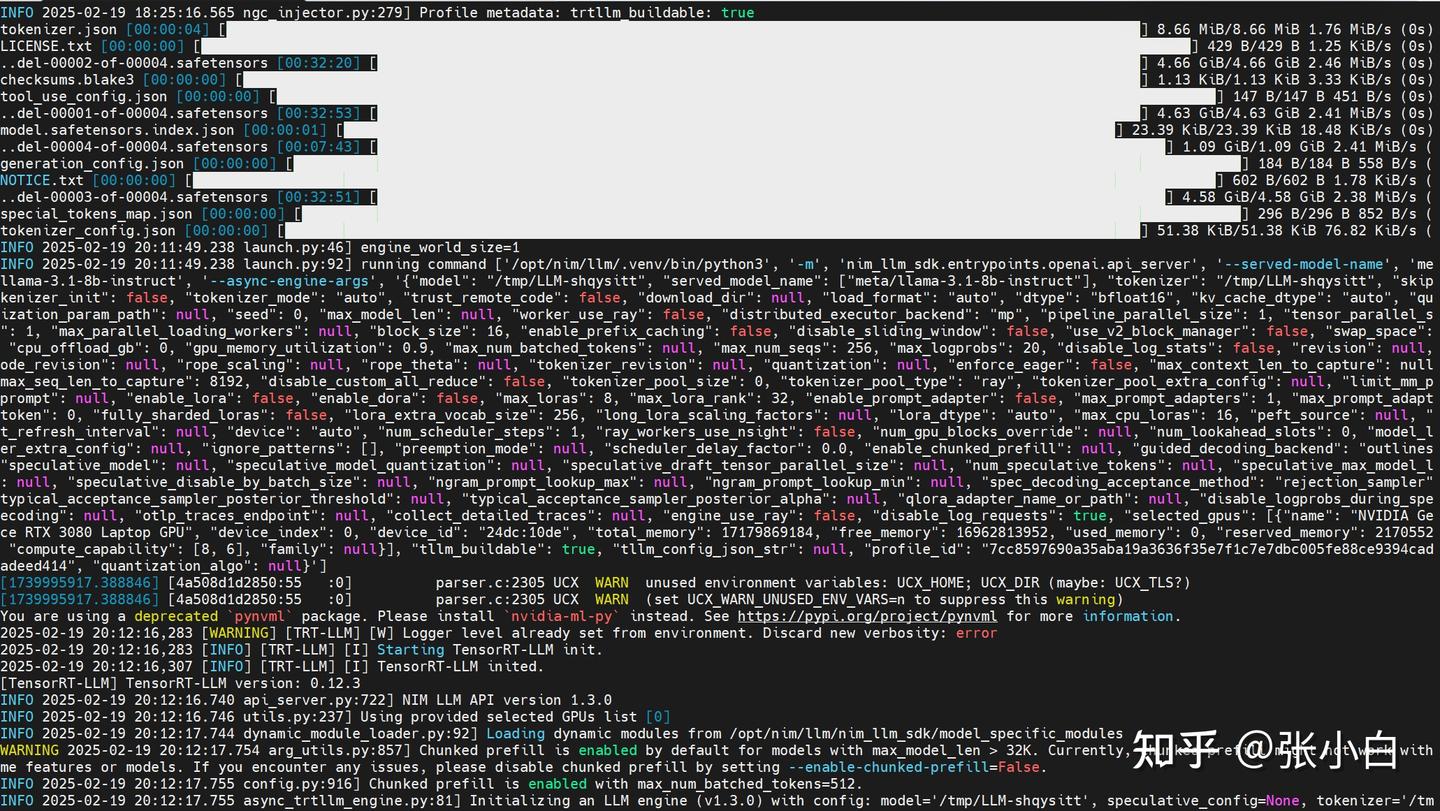
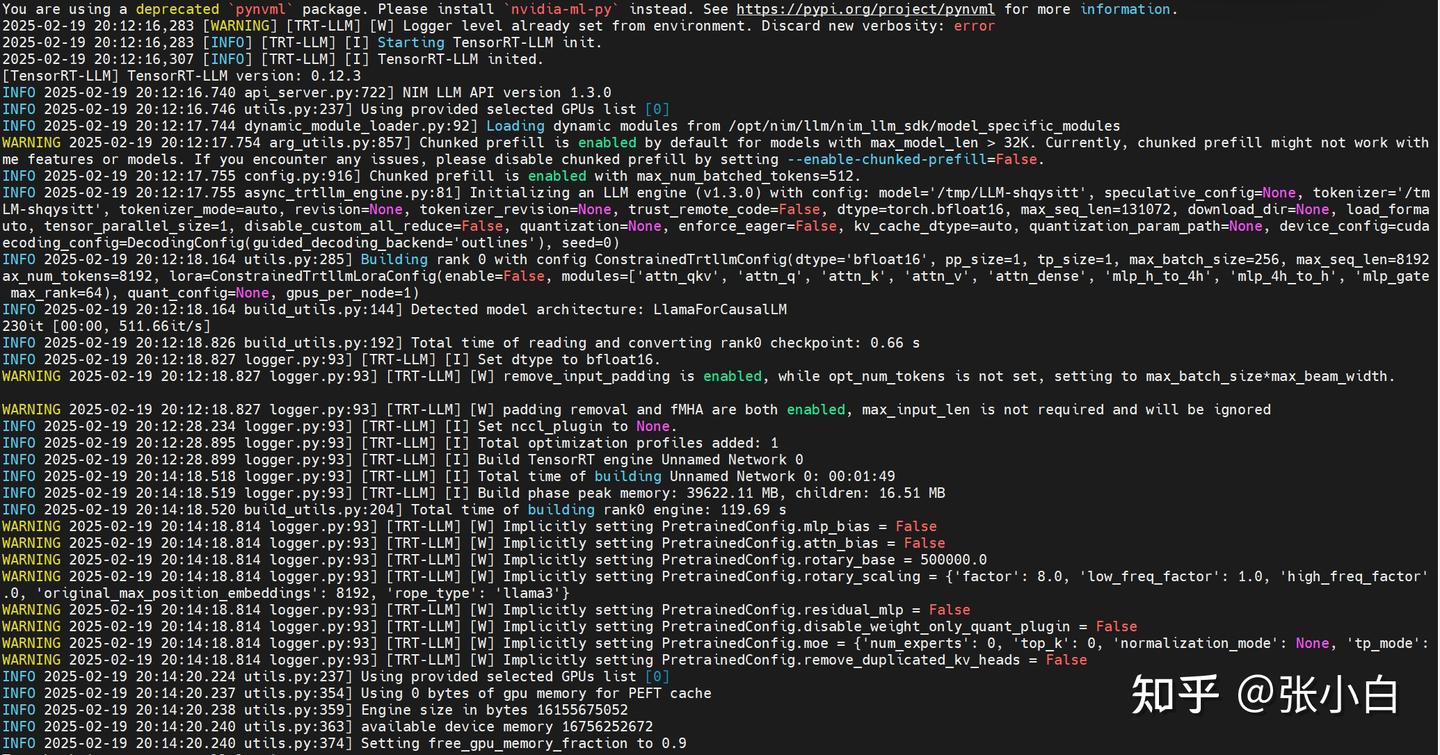
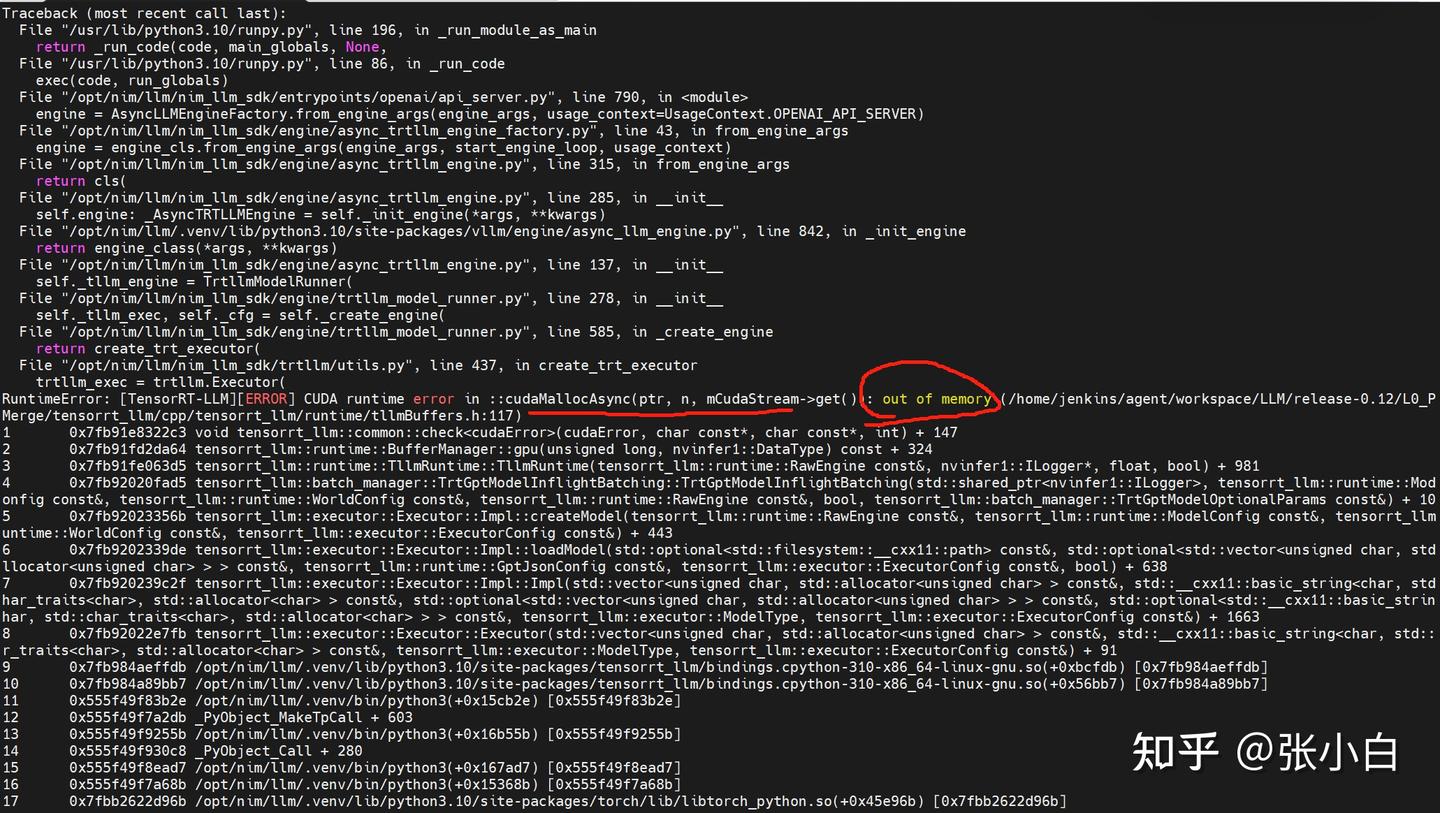
看日志是显存不足。
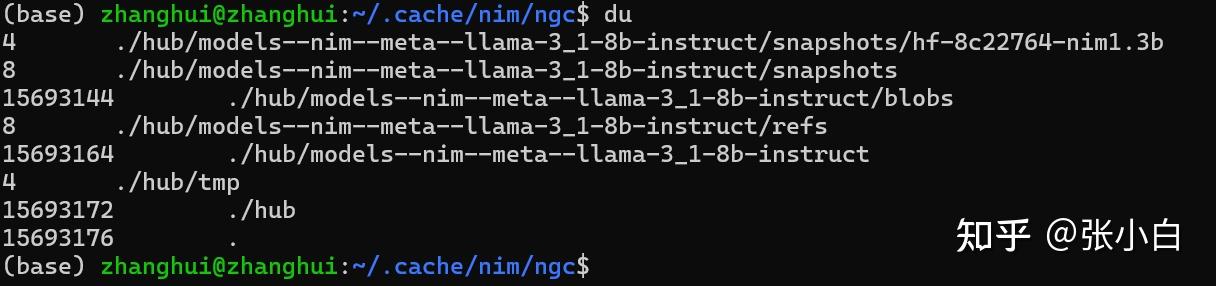
从WSL里面看镜像下载的大小:
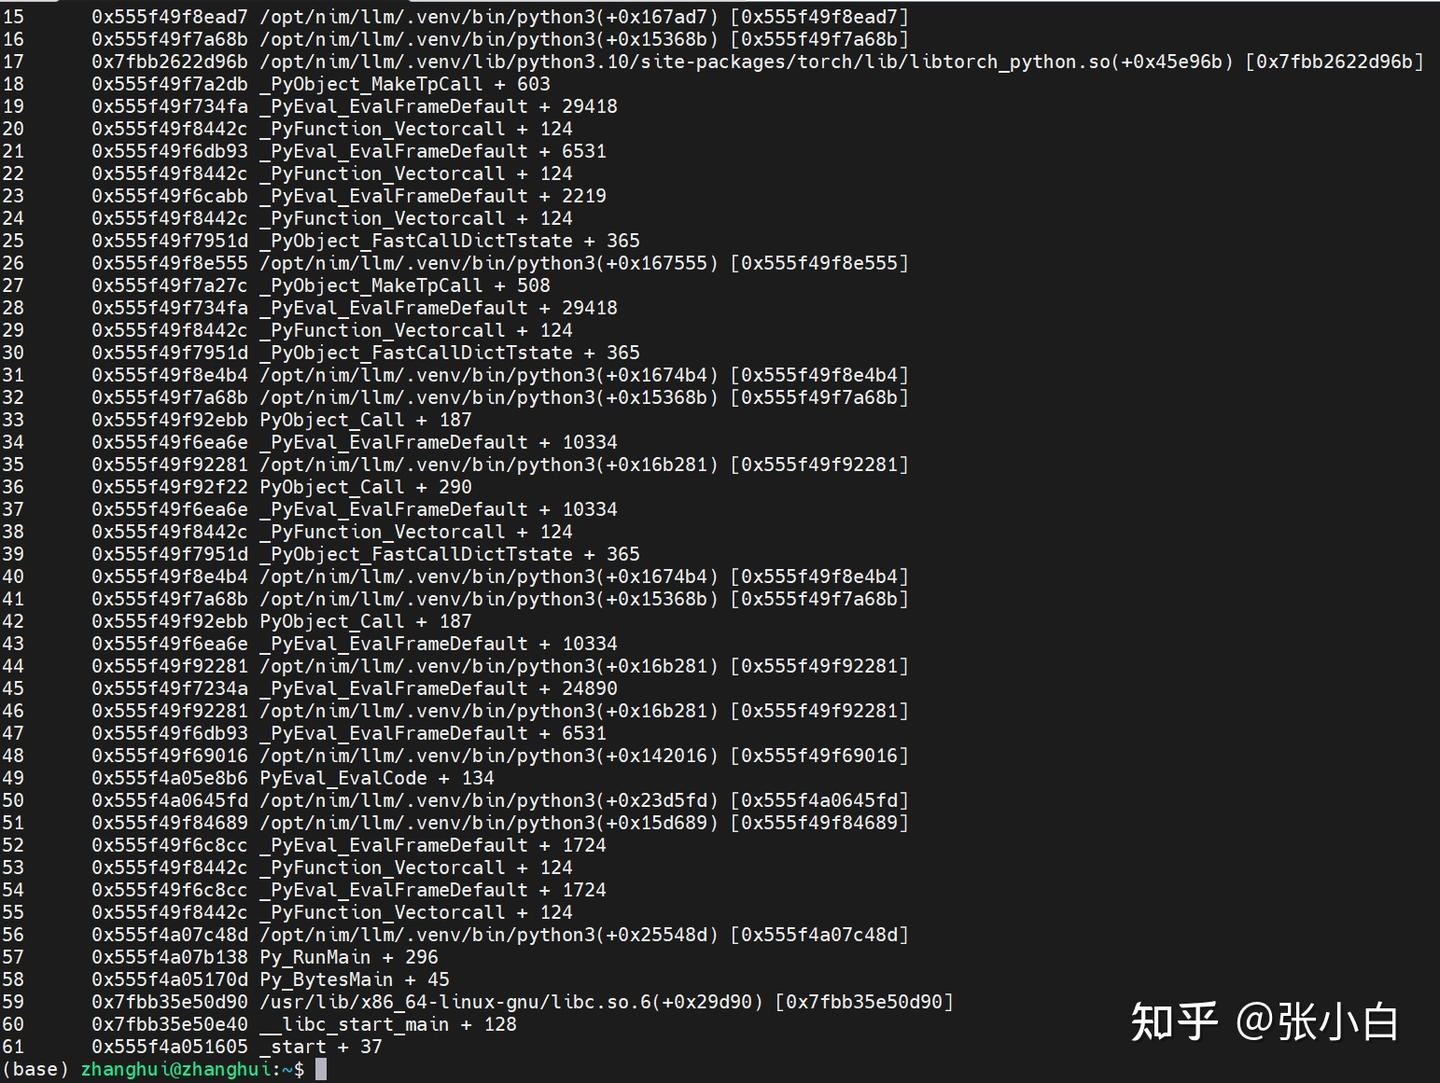
由于在容器内代码执行失败,容器也退出了。
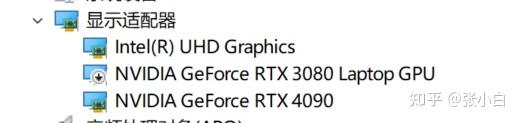
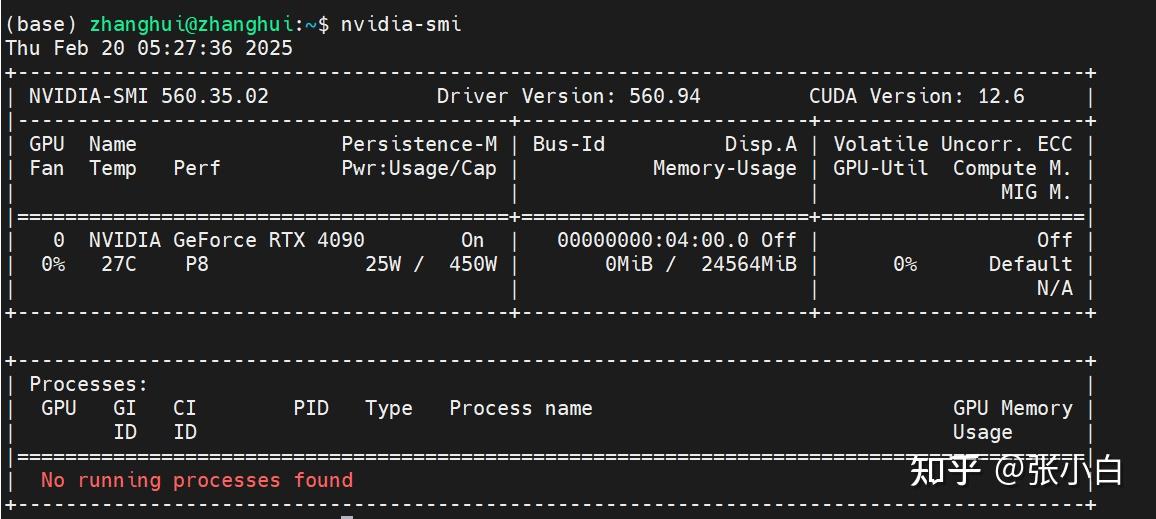
所以,切换到4090试一下。
docker login http://nvcr.io
$oauthtoken

./start_nim.sh
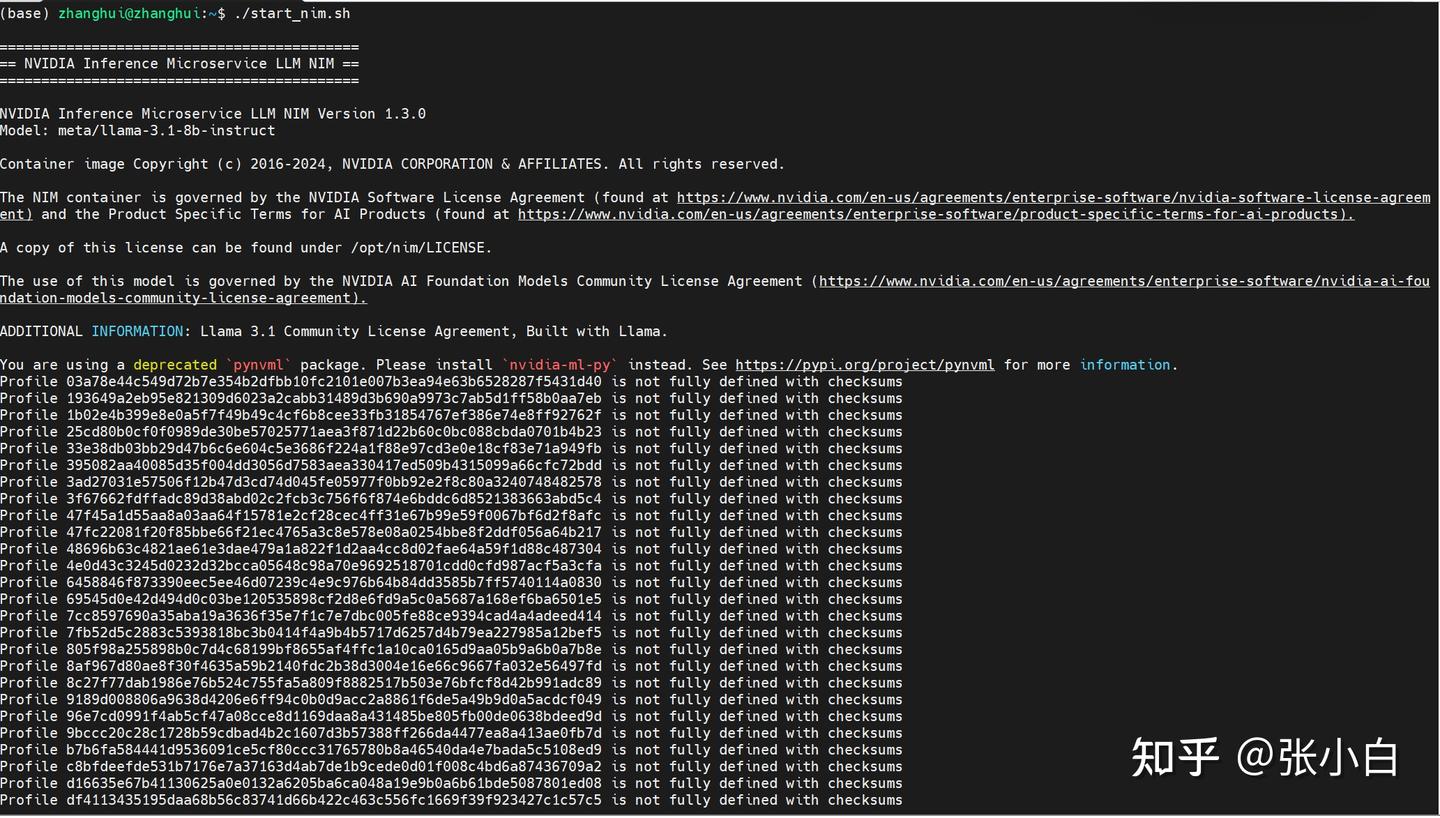
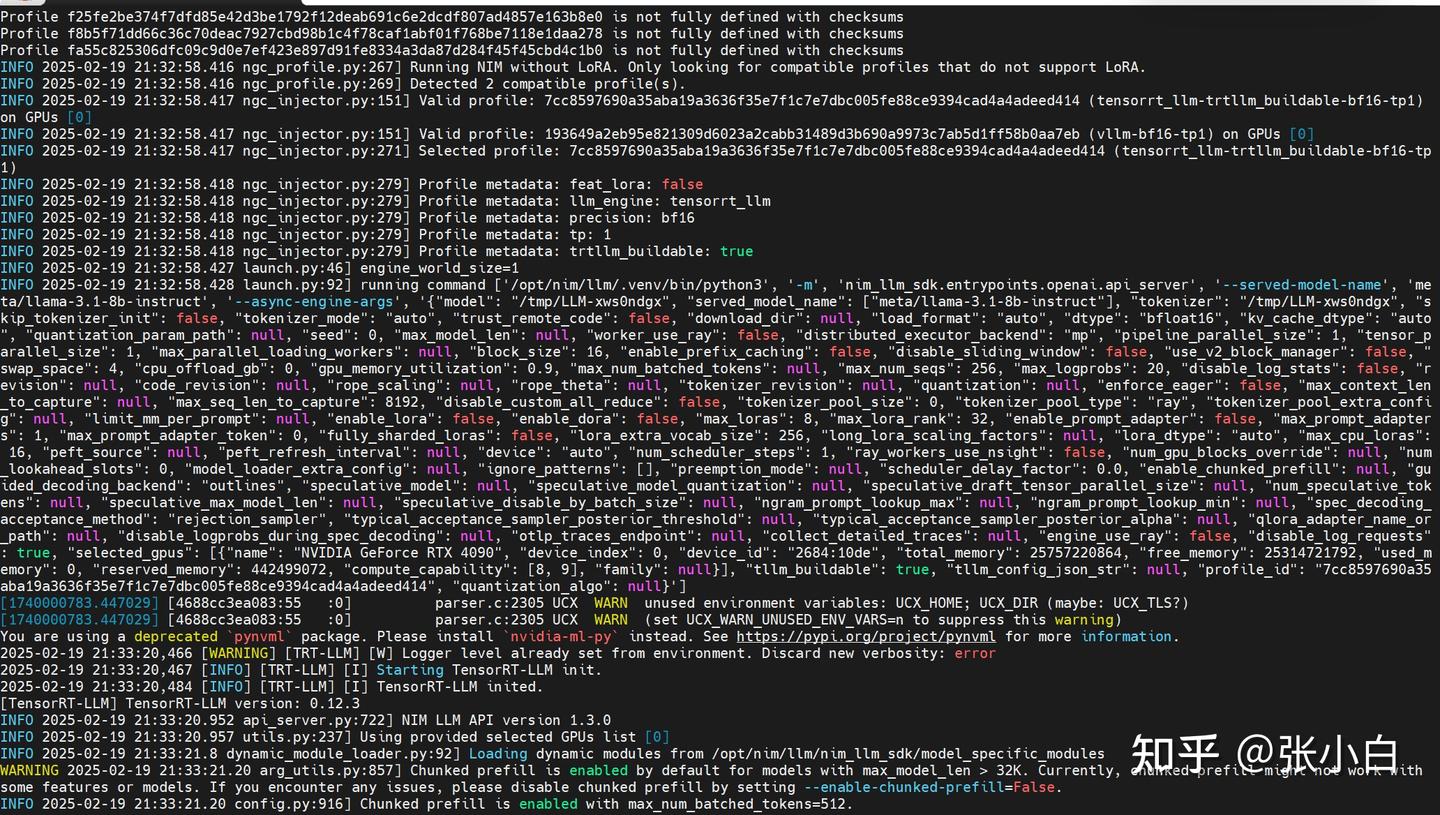
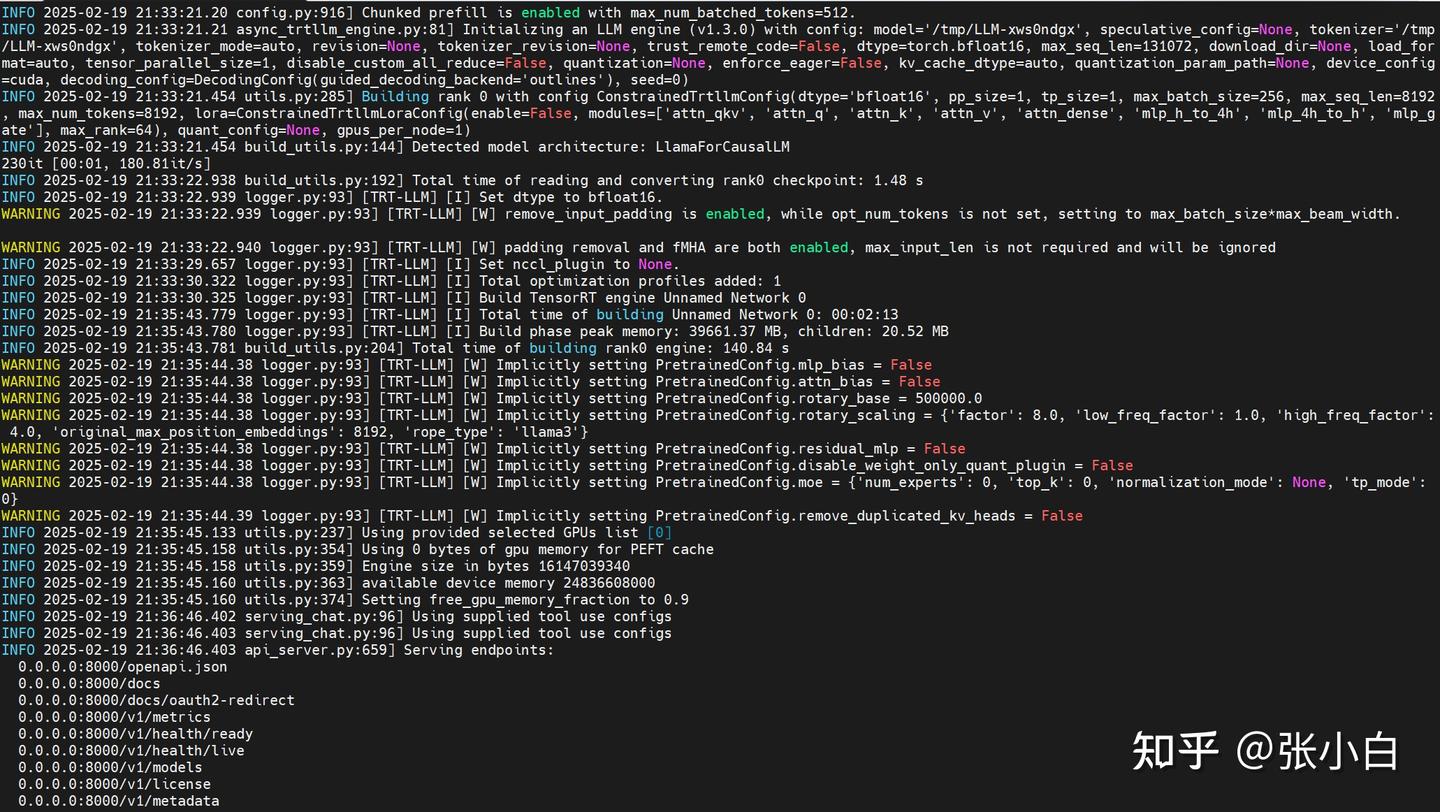
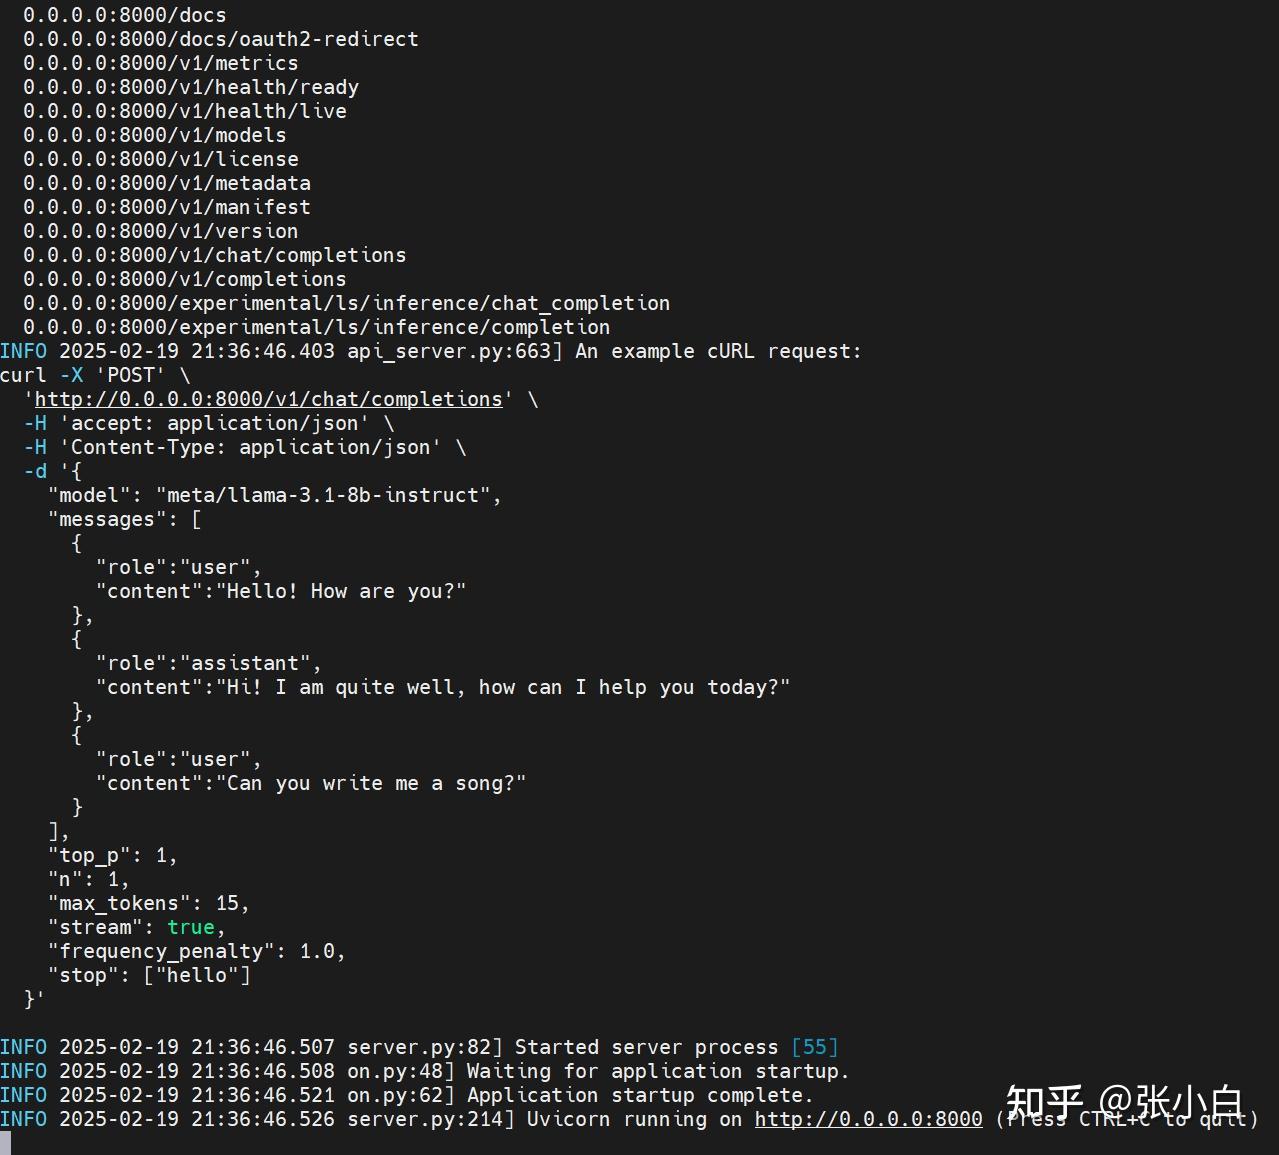
服务好像是用FastAPI启动的(Uvicorn),已经处于侦听状态了。
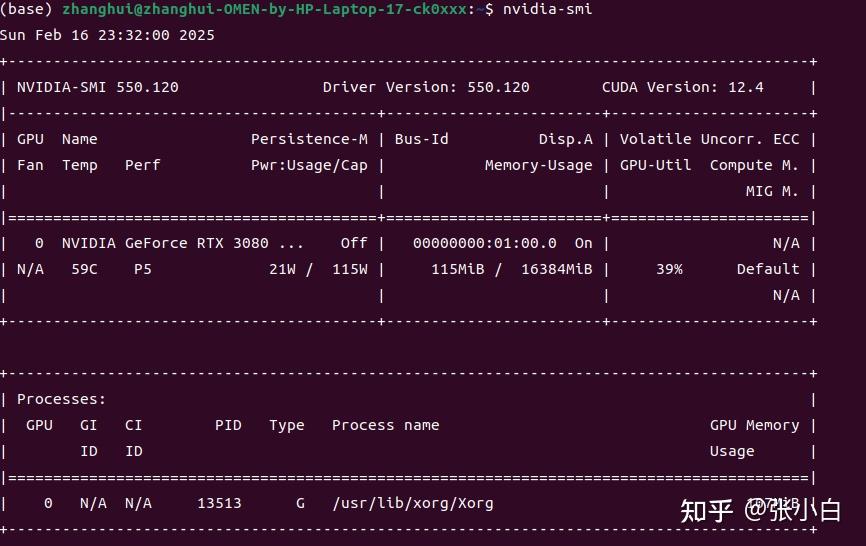
查看显存加载情况:
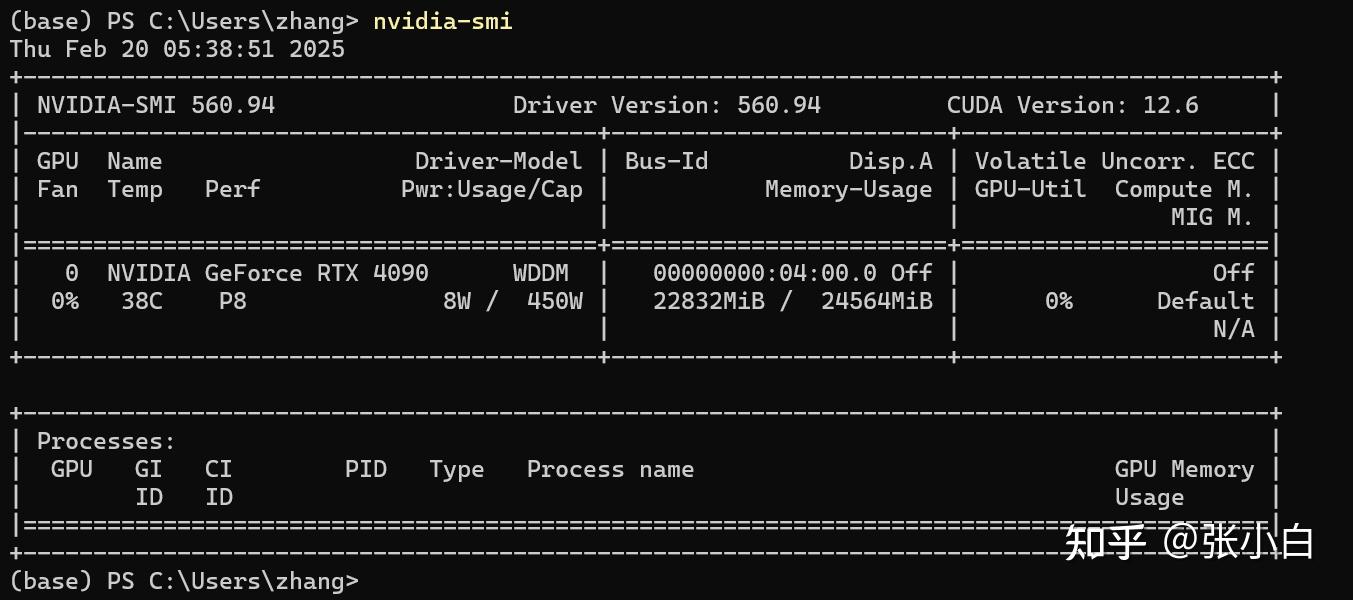
需要22G左右,怪不得3080的16G显卡会报显存不足。
vi test_nim.sh
curl -X 'POST' \
'http://0.0.0.0:8000/v1/chat/completions' \
-H 'accept: application/json' \
-H 'Content-Type: application/json' \
-d '{
"model": "meta/llama-3.1-8b-instruct",
"messages": [
{
"role":"user",
"content":"Hello! How are you?"
},
{
"role":"assistant",
"content":"Hi! I am quite well, how can I help you today?"
},
{
"role":"user",
"content":"Can you write me a song?"
}
],
"top_p": 1,
"n": 1,
"max_tokens": 15,
"stream": true,
"frequency_penalty": 1.0,
"stop": ["hello"]
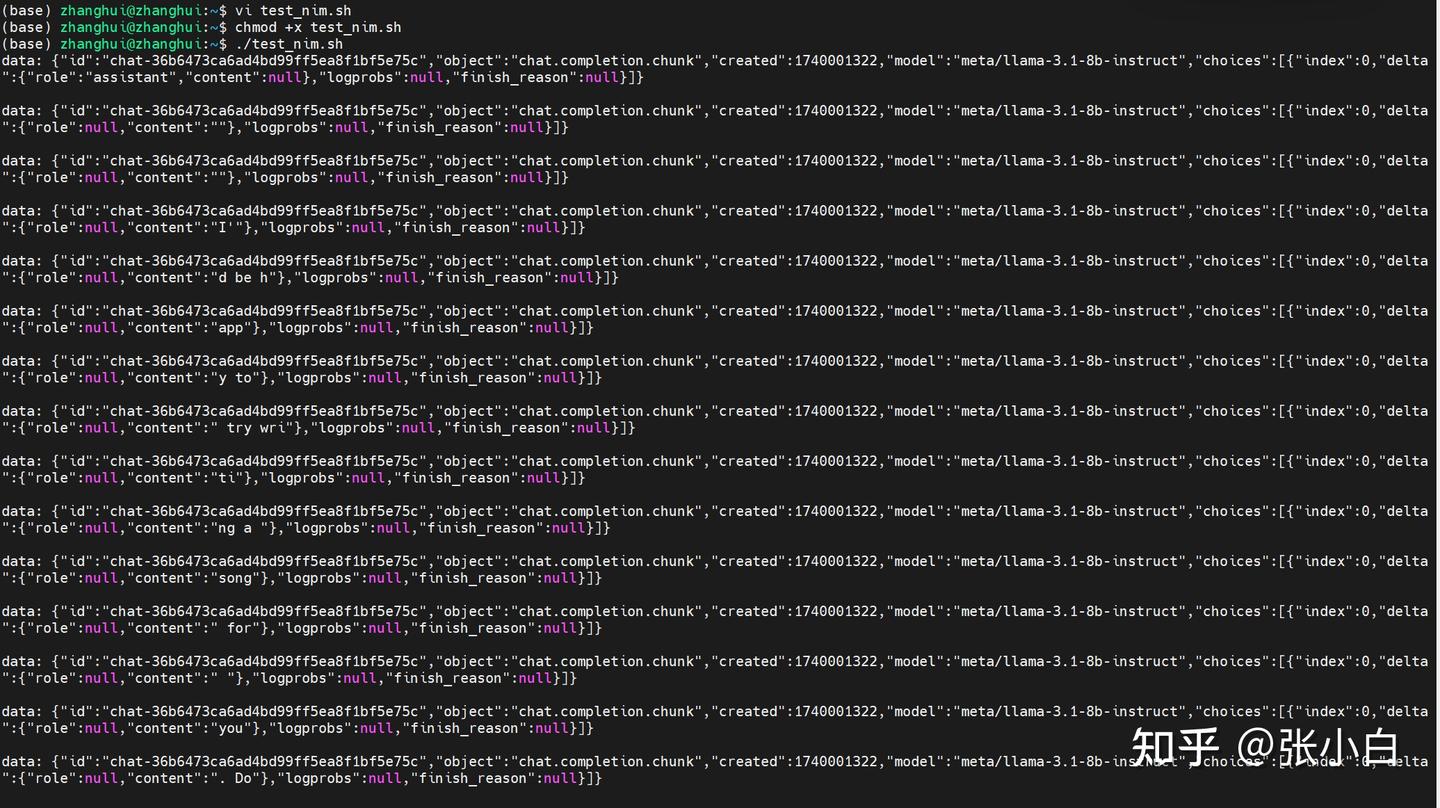
}'chmod +x test_nim.sh
./test_nim.sh
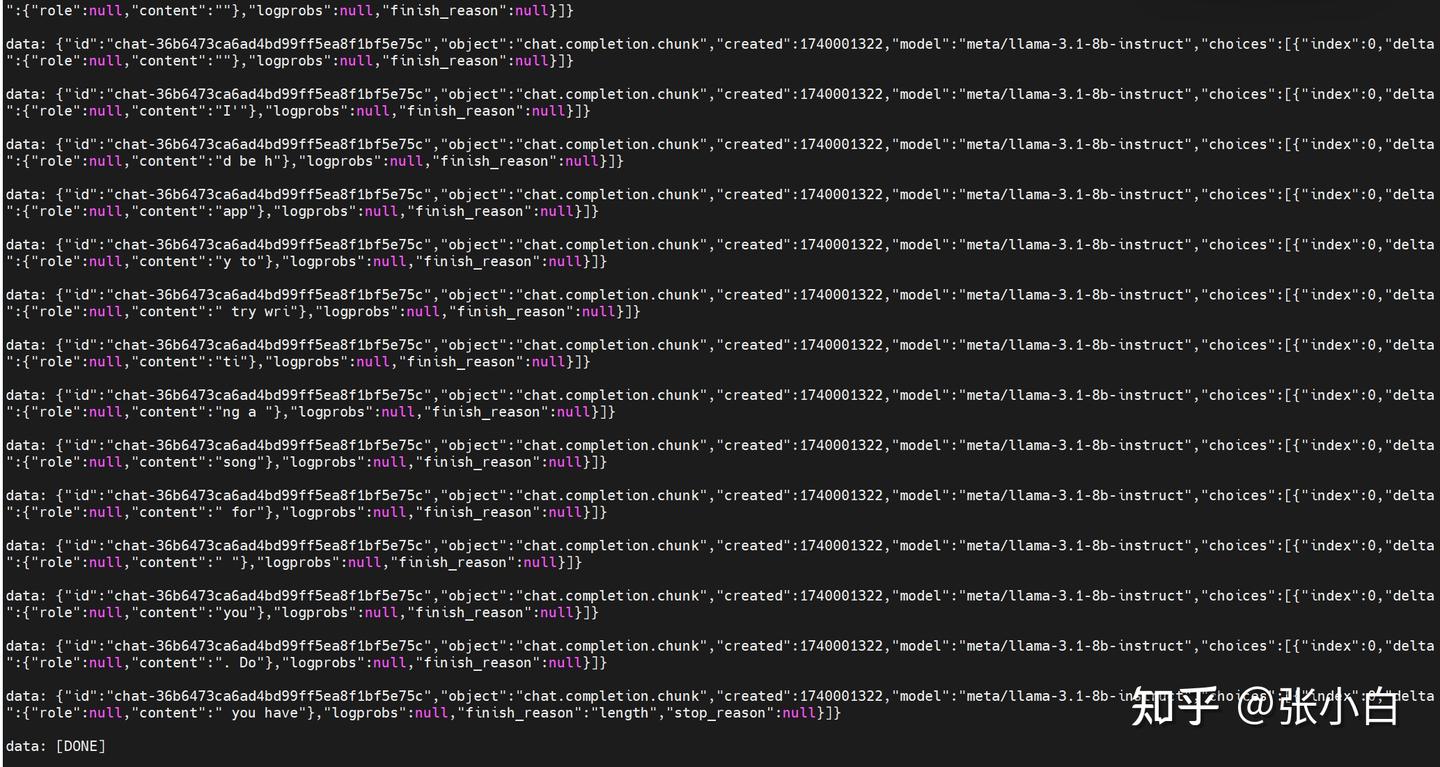
需要修改一个参数:
"stream": false./test_nim.sh

可见大模型能正常返回。
照何老师的说法:
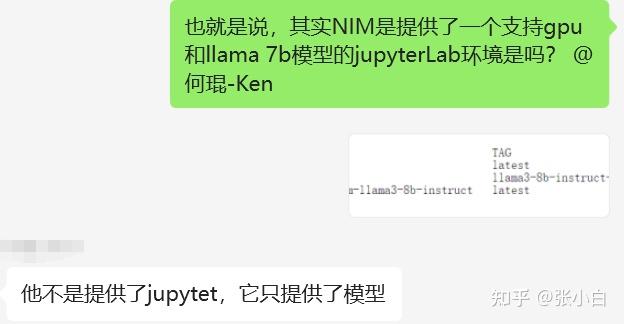
这么说,我们在WSL环境启动Jupyter Notebook打开脚本,然后让脚本去调用docker desktop提供的LLM服务,就可以实现(何老师,我的理解对吧?)
(我现在的4090其实是在模拟AWS服务的提供的GPU资源,而我本地完全可以几乎无需GPU来运行。
5、调试NoteBook脚本
启动JupyterLab
cd /home/zhanghui/11th_sky_hackathon_nim_sagemaker/aws_hackathon_demo
conda activate hackathon
jupyter lab --no-browser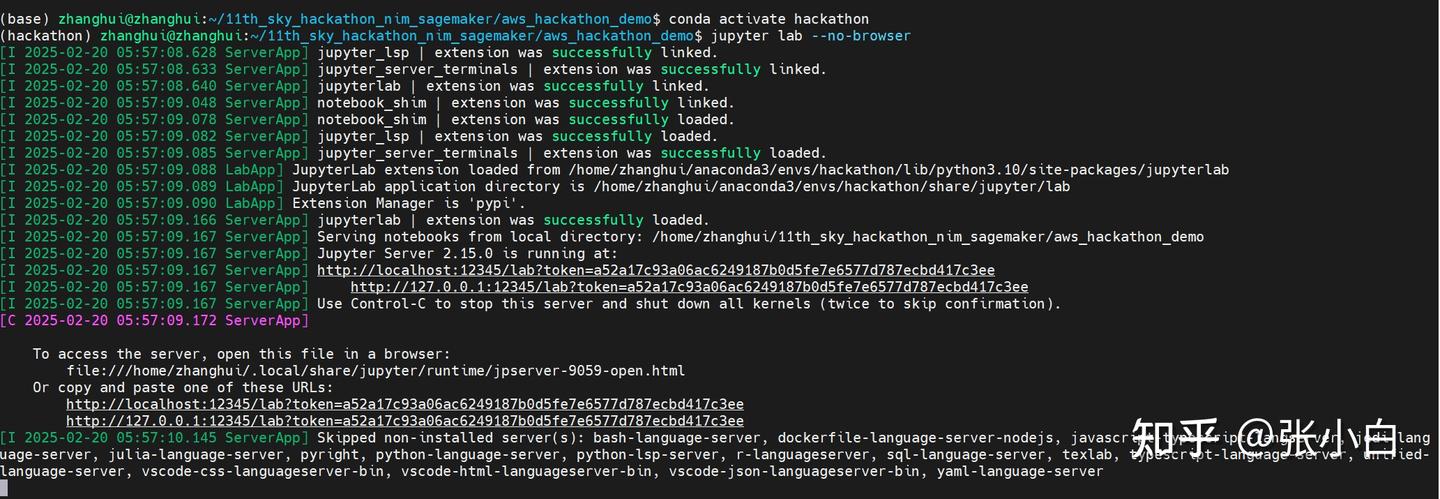
打开Notebook,复制并更名Notebook脚本:
local-hackathon_multi_rag_agent_demo
可能需要魔改一下langchain_nvidia_ai_endpoint这个包。
cd /home/zhanghui/anaconda3/envs/hackathon/lib/python3.10/site-packages/langchain_nvidia_ai_endpoints
让 ChatNVIDIA(model="meta/llama-3.1-8b-instruct") 去连本地的服务。
---------------------未完待续--------------------
五、回到AWS Sagemaker AI
1、进入Notebook
启动完毕

Open:
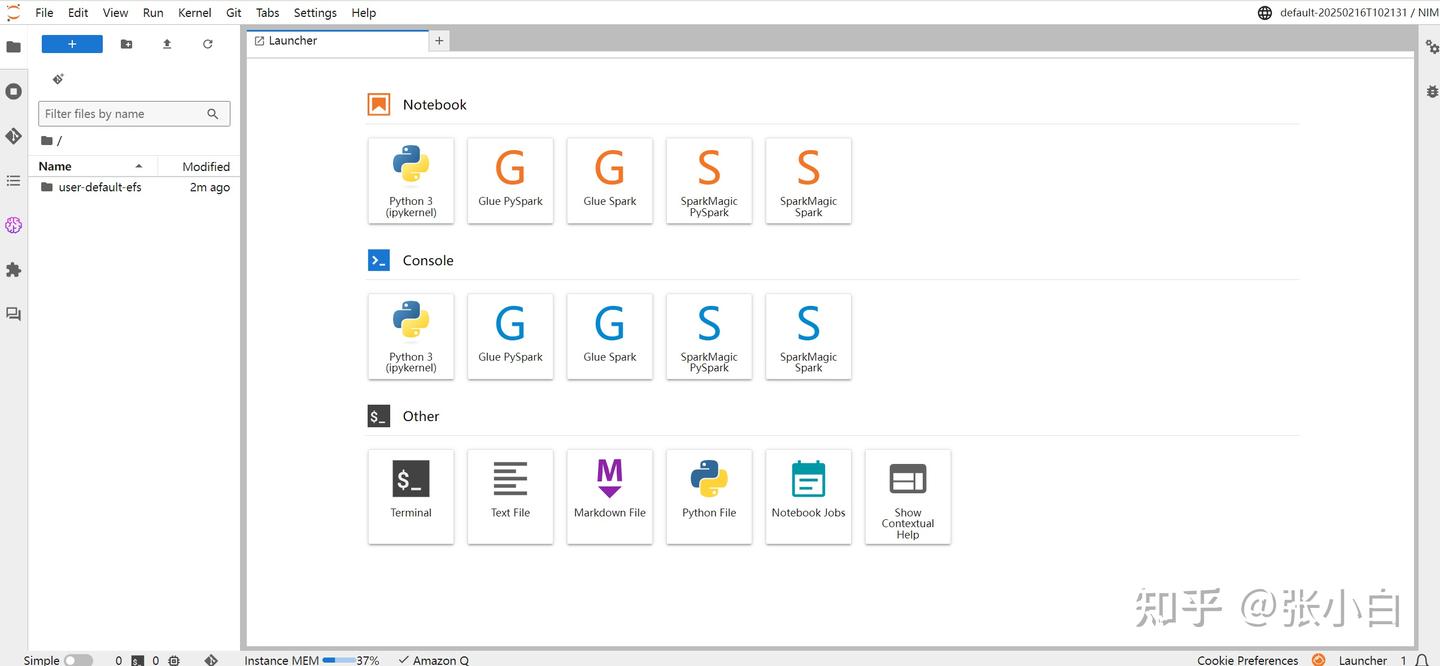
上传并打开 nvidia-nim-sagemaker2025.ipynb :
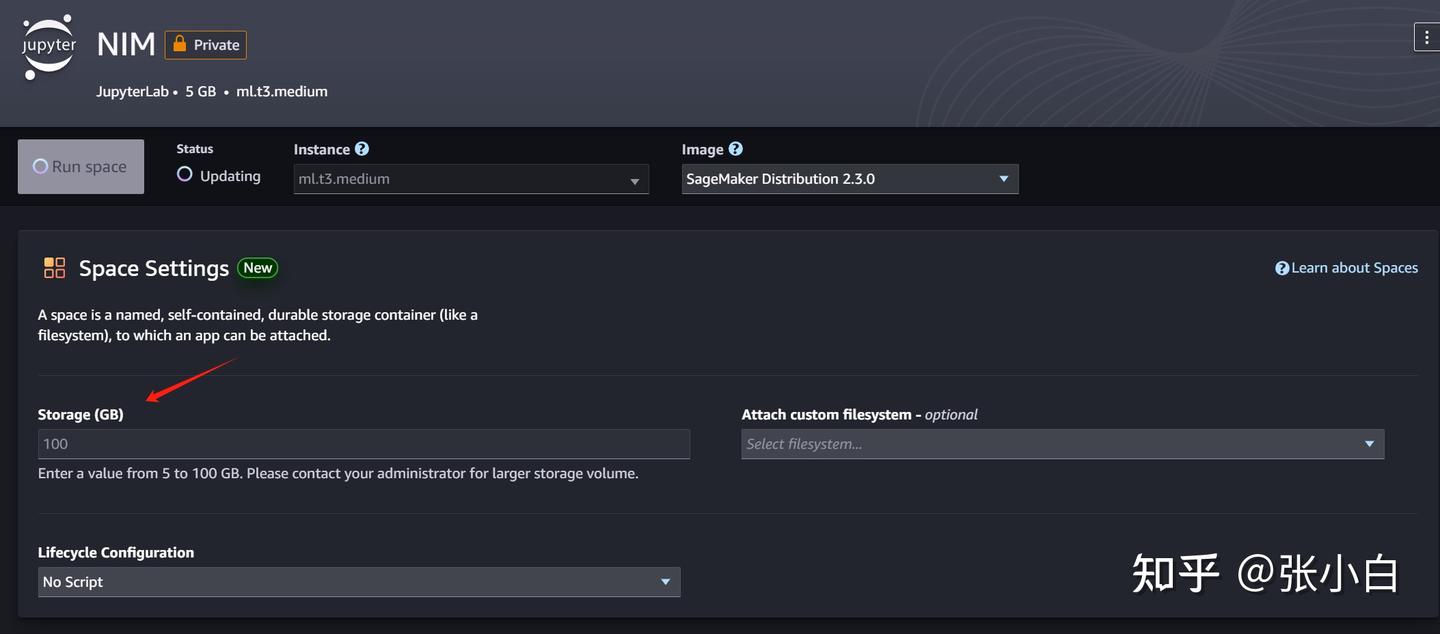
暂停,需要改一下存储到100G
2、下载NIM镜像(到AWS)
打开终端,执行:
docker login nvcr.io
$oauthtoken
密码为API-KEY
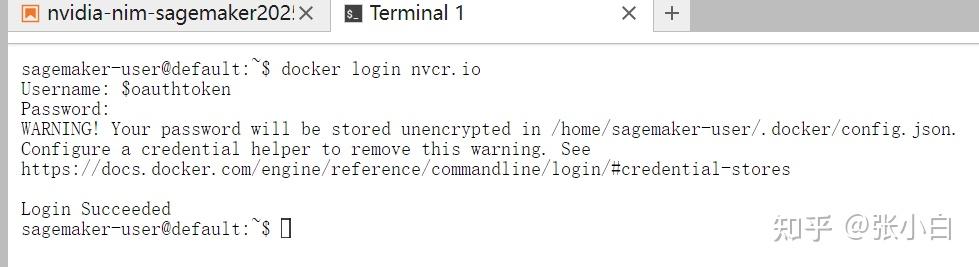
docker pull nvcr.io/nim/meta/llama-3.1-8b-instruct:latest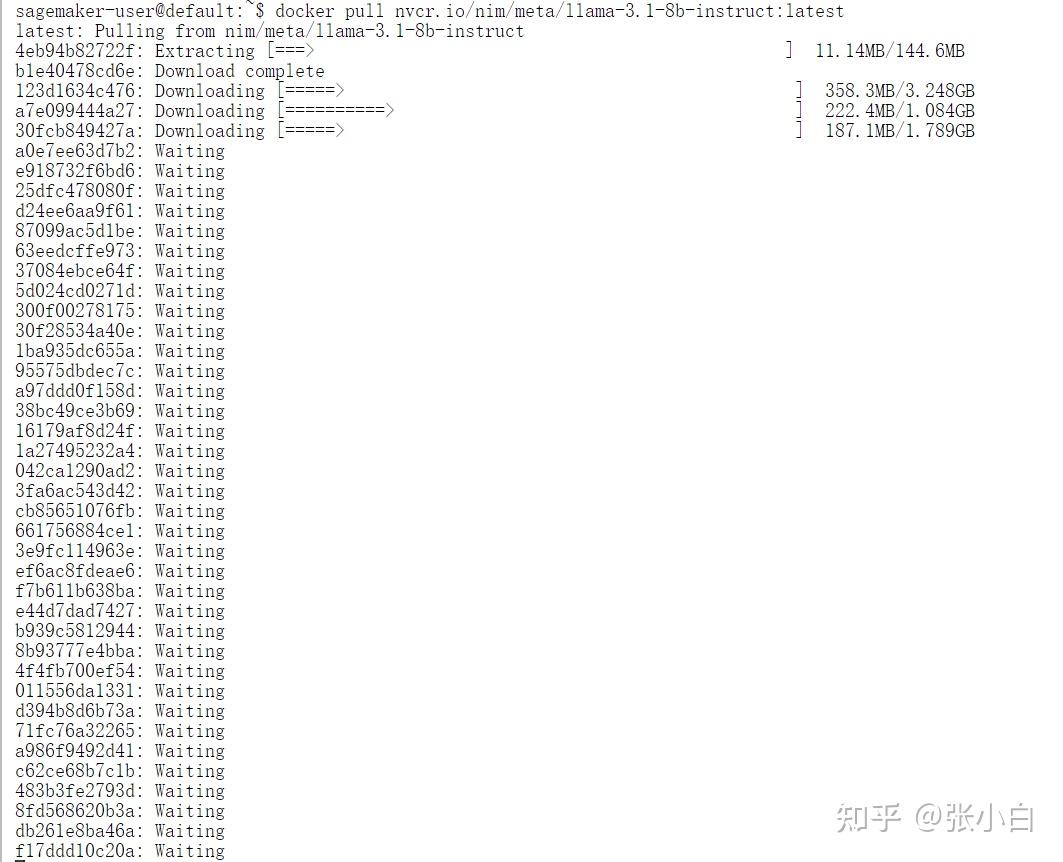
耐心等待下载完毕。
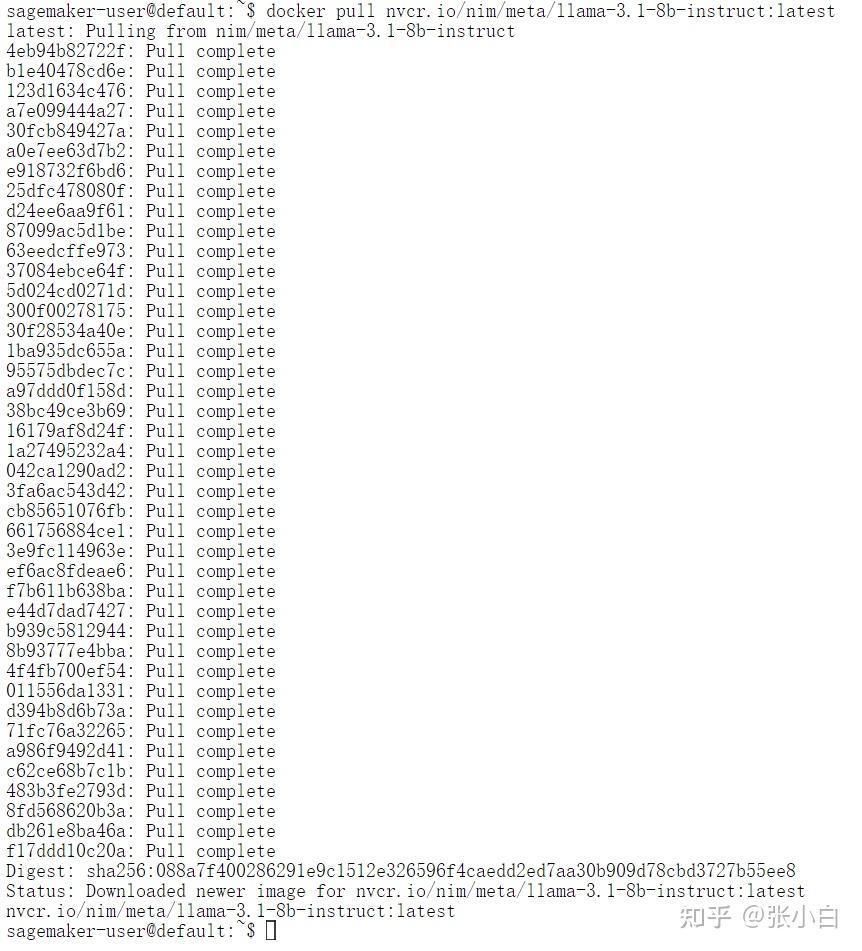
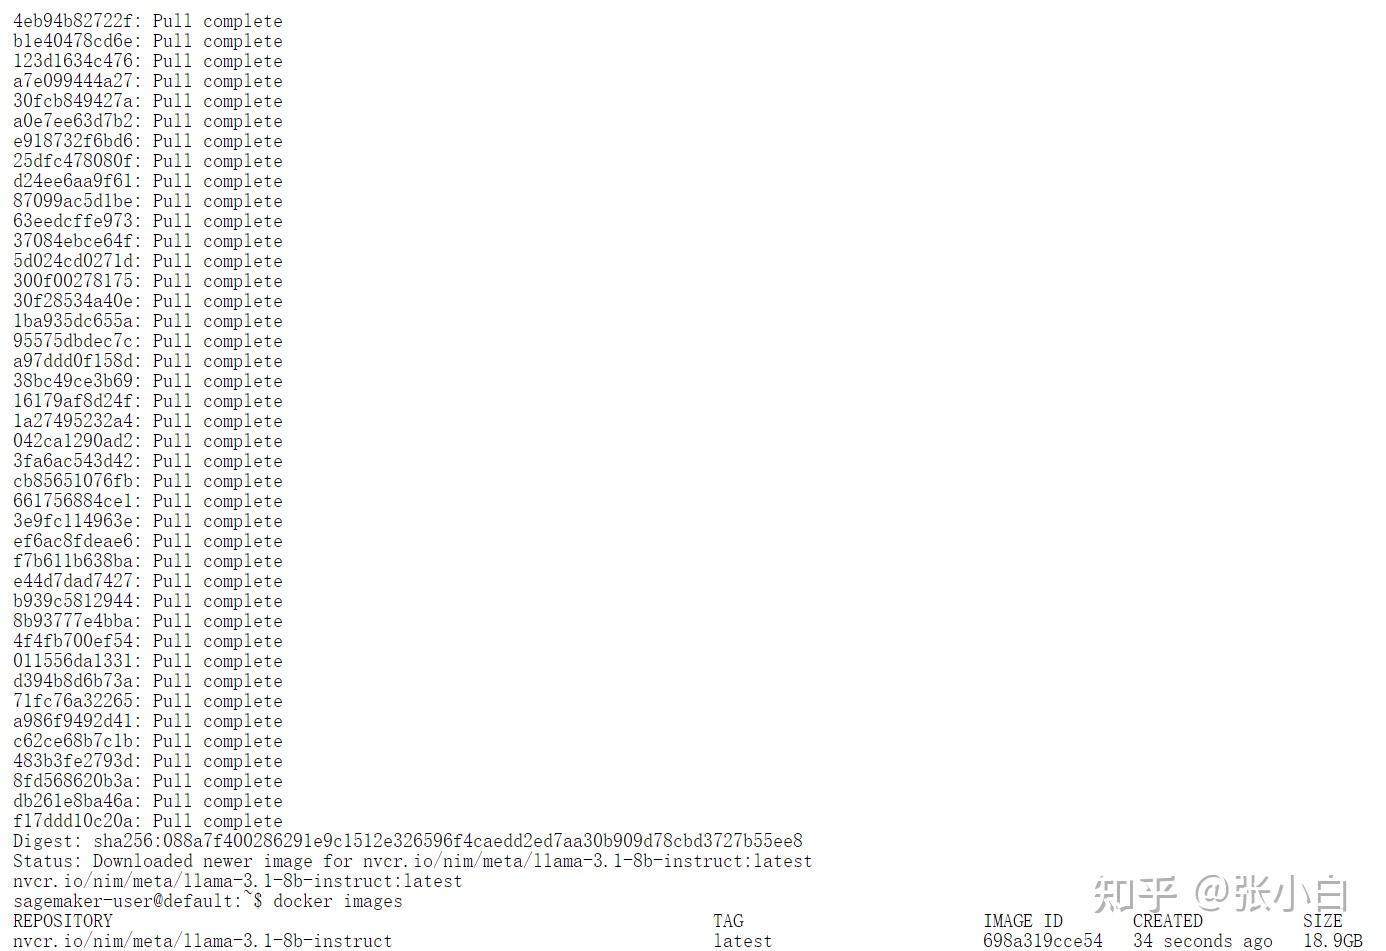
下载完毕:
docker images
docker ps
3、执行NIM脚本
那我们开始执行Jupyter Notebook里面的脚本吧!
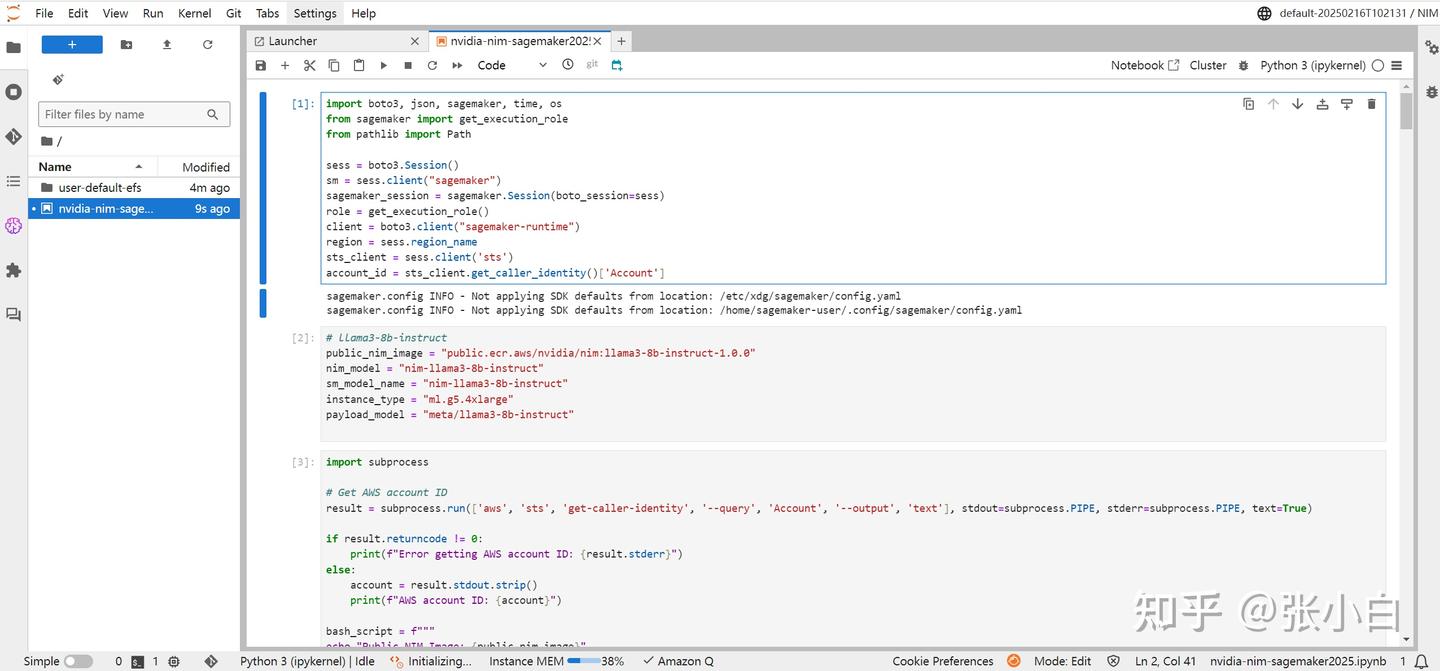
(1)cell 1
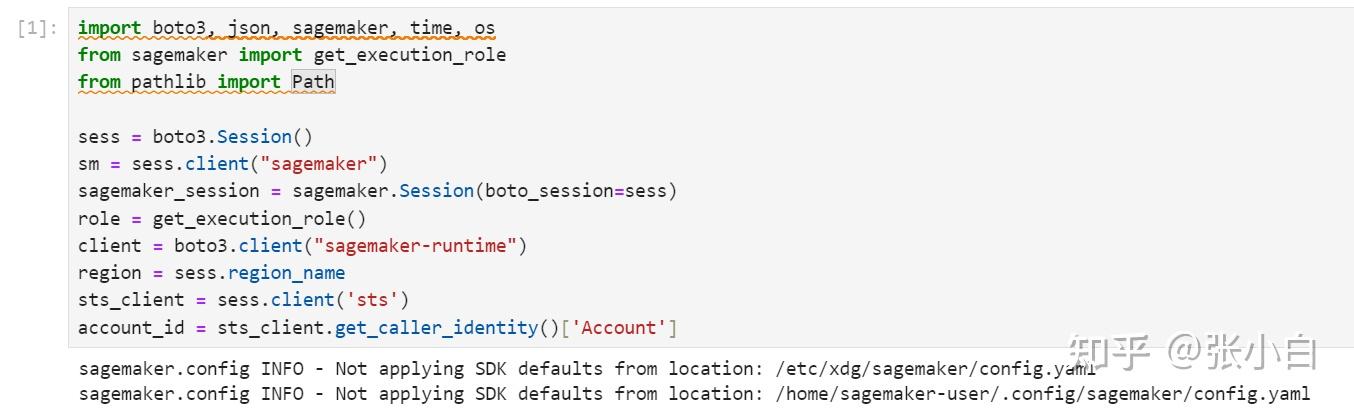
(2)cell 2
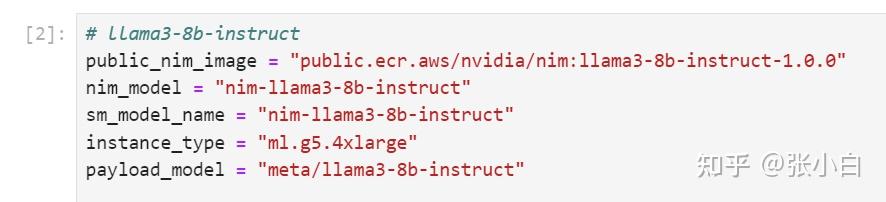
貌似这边的 public_nim_image跟 前面手工下载的不大一样。
这是现在下载的:
public.ecr.aws/nvidia/nim:llama3-8b-instruct-1.0.0 这是前面手工下载的:
nvcr.io/nim/meta/llama-3.1-8b-instruct:latest(3)cell 3
import subprocess

# Get AWS account ID
result = subprocess.run(['aws', 'sts', 'get-caller-identity', '--query', 'Account', '--output', 'text'], stdout=subprocess.PIPE, stderr=subprocess.PIPE, text=True)

if result.returncode != 0:
    print(f"Error getting AWS account ID: {result.stderr}")
else:
    account = result.stdout.strip()
    print(f"AWS account ID: {account}")

bash_script = f"""
echo "Public NIM Image: {public_nim_image}"
docker pull {public_nim_image}


echo "Resolved account: {account}"
echo "Resolved region: {region}"

nim_image="{account}.dkr.ecr.{region}.amazonaws.com/{nim_model}"

# Ensure the repository name adheres to AWS constraints
repository_name=$(echo "{nim_model}" | tr '[:upper:]' '[:lower:]' | tr -cd '[:alnum:]._/-')

# If the repository doesn't exist in ECR, create it.
aws ecr describe-repositories --repository-names "$repository_name" > /dev/null 2>&1

if [ $? -ne 0 ]
then
    aws ecr create-repository --repository-name "$repository_name" > /dev/null
fi

# Get the login command from ECR and execute it directly
aws ecr get-login-password --region {region} | docker login --username AWS --password-stdin "{account}.dkr.ecr.{region}.amazonaws.com"

docker tag {public_nim_image} $nim_image
docker push $nim_image
echo -n $nim_image
"""
nim_image=f"{account}.dkr.ecr.{region}.amazonaws.com/{nim_model}"
# Run the bash script and capture real-time output
process = subprocess.Popen(bash_script, shell=True, stdout=subprocess.PIPE, stderr=subprocess.PIPE)

while True:
    output = process.stdout.readline()
    if output == b'' and process.poll() is not None:
        break
    if output:
        print(output.decode().strip())

stderr = process.stderr.read().decode()
if stderr:
    print("Errors:", stderr)
貌似它又重新下载了吗?
貌似是说,没有权限push。不知道要在哪里设置权限。
查看镜像
docker images
这里面都有三个镜像了,不知道哪个是哪个。
(看来也面临着做不下去的问题)
4、到IAM赋权限
先在主控台搜索IAM,进入:
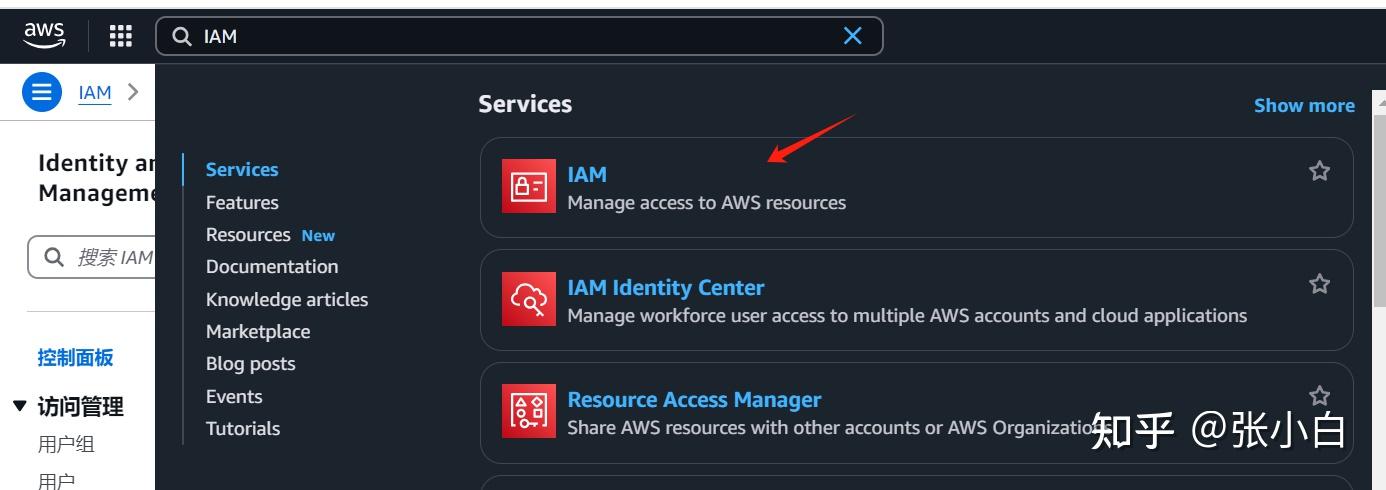

点击左边的角色:搜索AmazonSageMaker-ExecutionRole
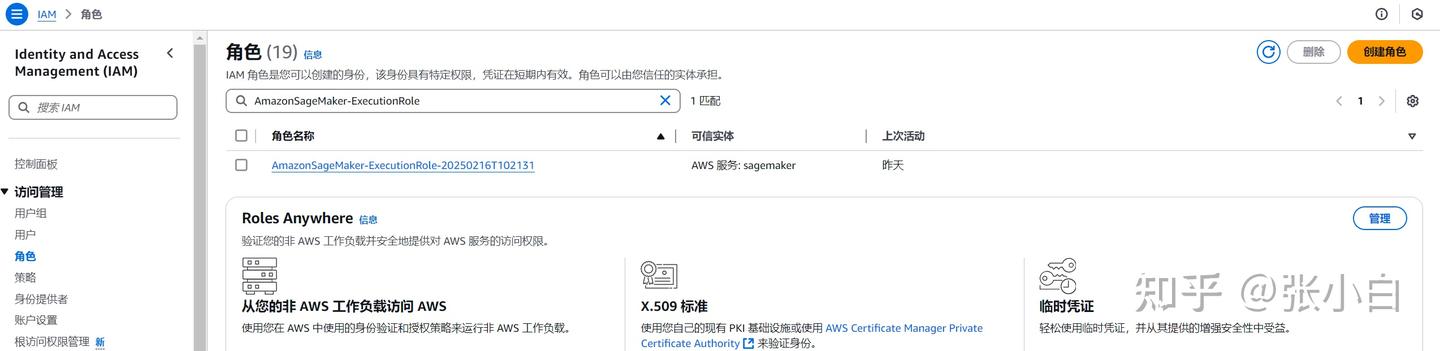
点击进入:
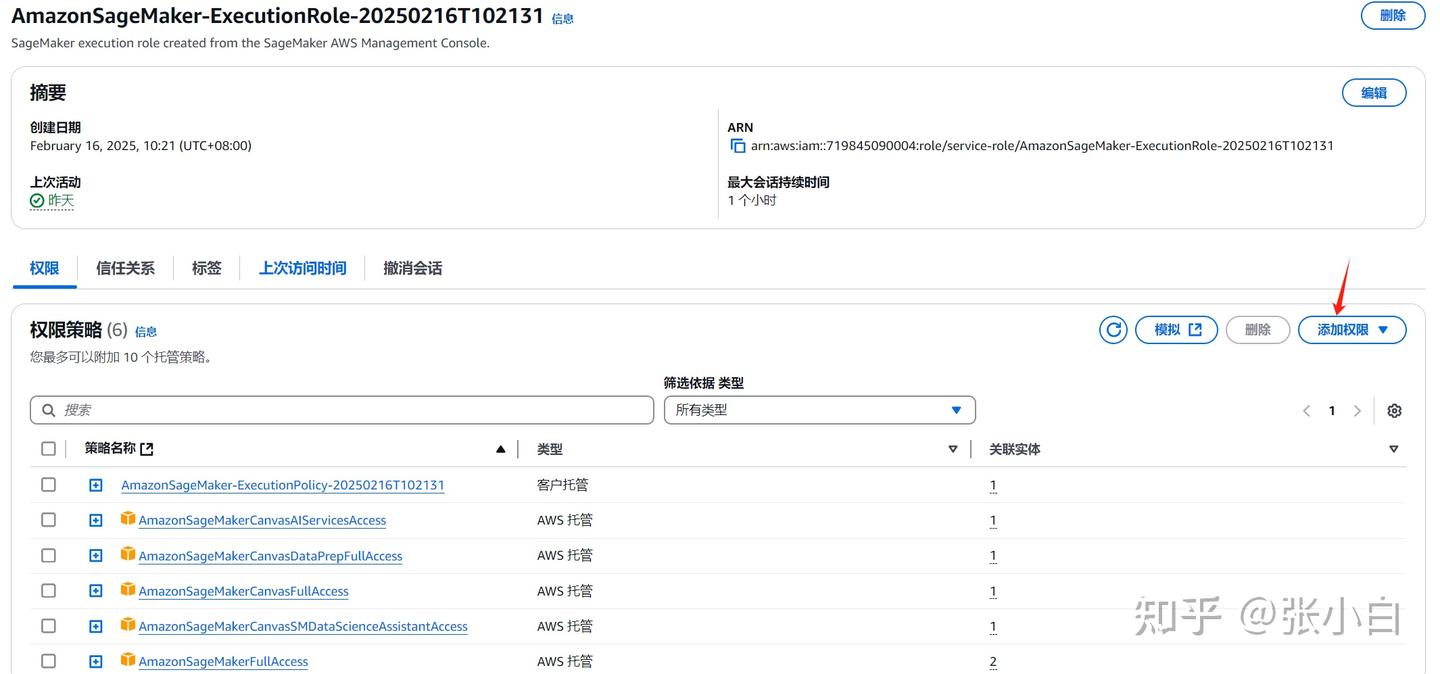
点击“添加权限”-》“附加策略”,搜索AdministratorAccess
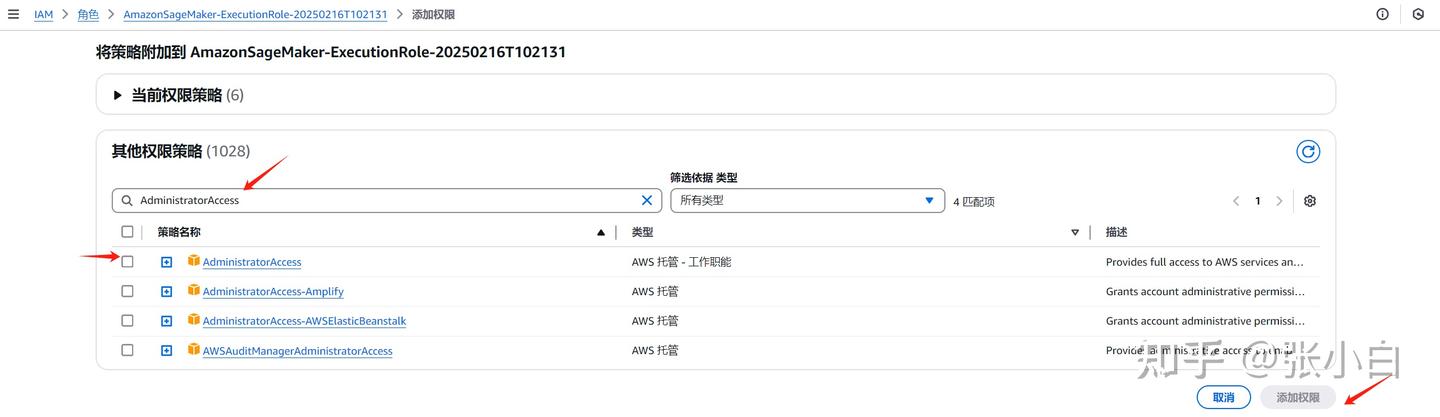
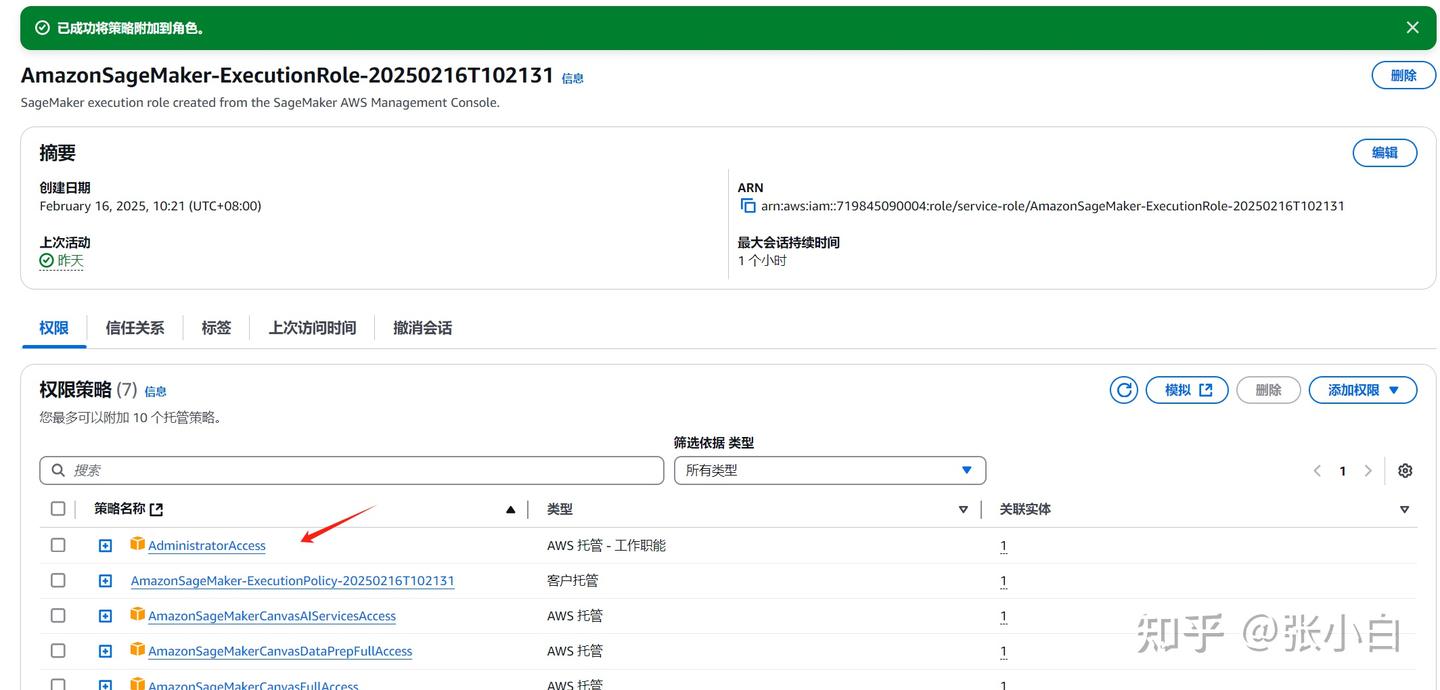
选中后,点击添加权限。
5、重新打开Notebook
在控制台重新进入Sagemaker AI
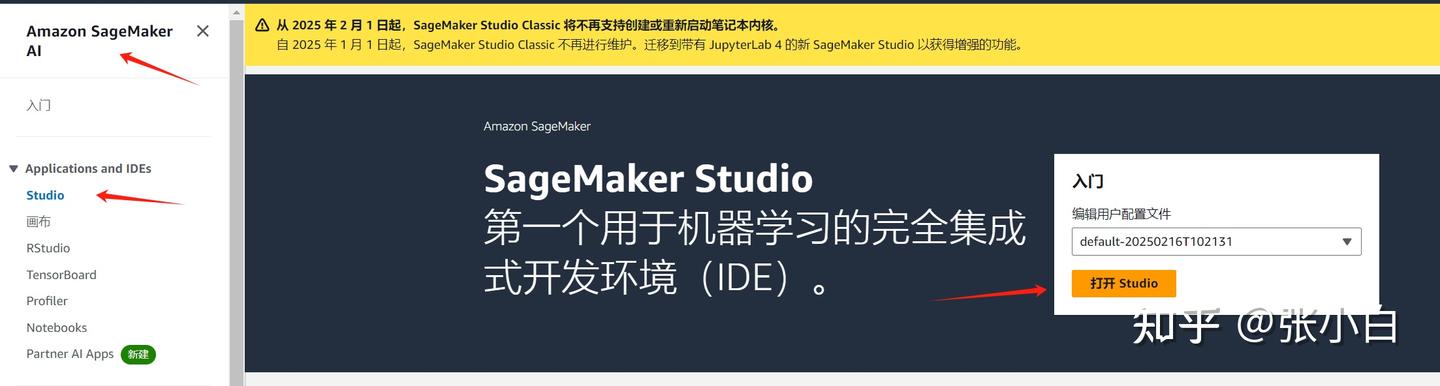
打开Studio:

JupyterLab
NIM

Run space
Open JupyterLab
打开终端:

docker pull nvcr.io/nim/meta/llama-3.1-8b-instruct:latest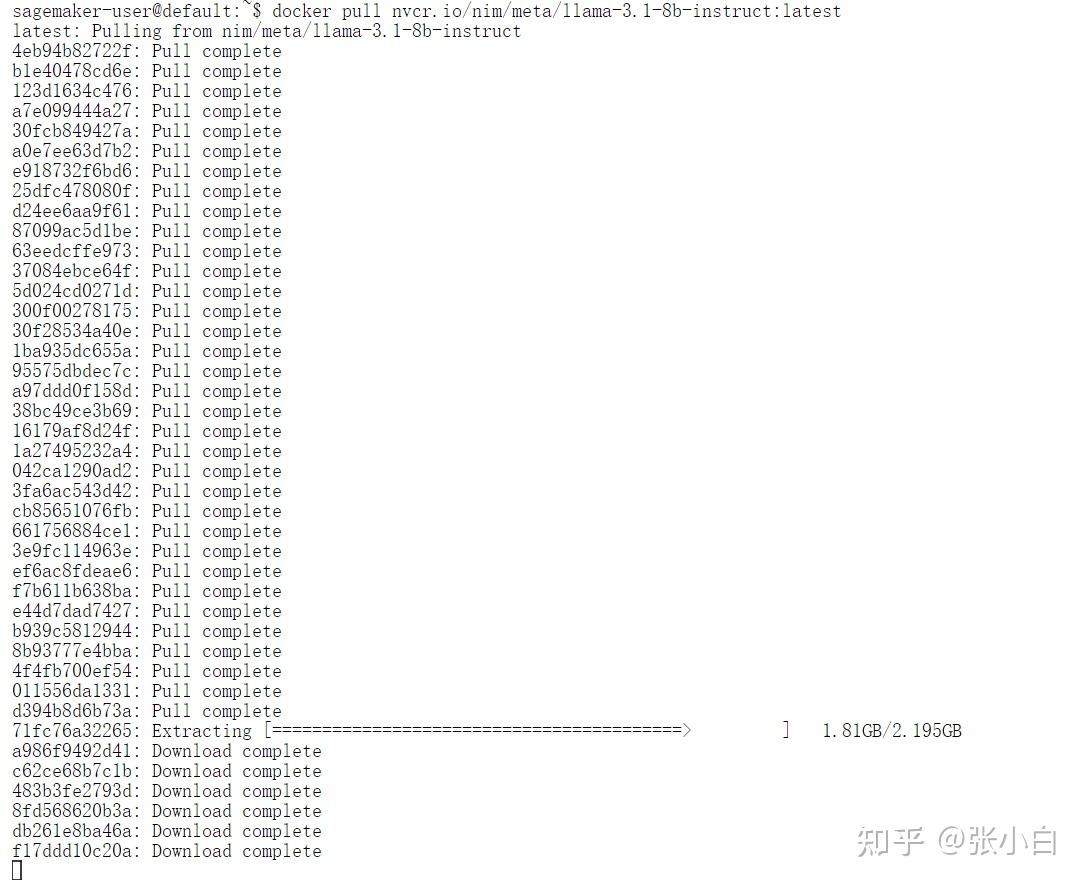
(张小白依然觉得这步没啥用)
6、依次执行Notebook的Cell
(1)执行Cell1、2

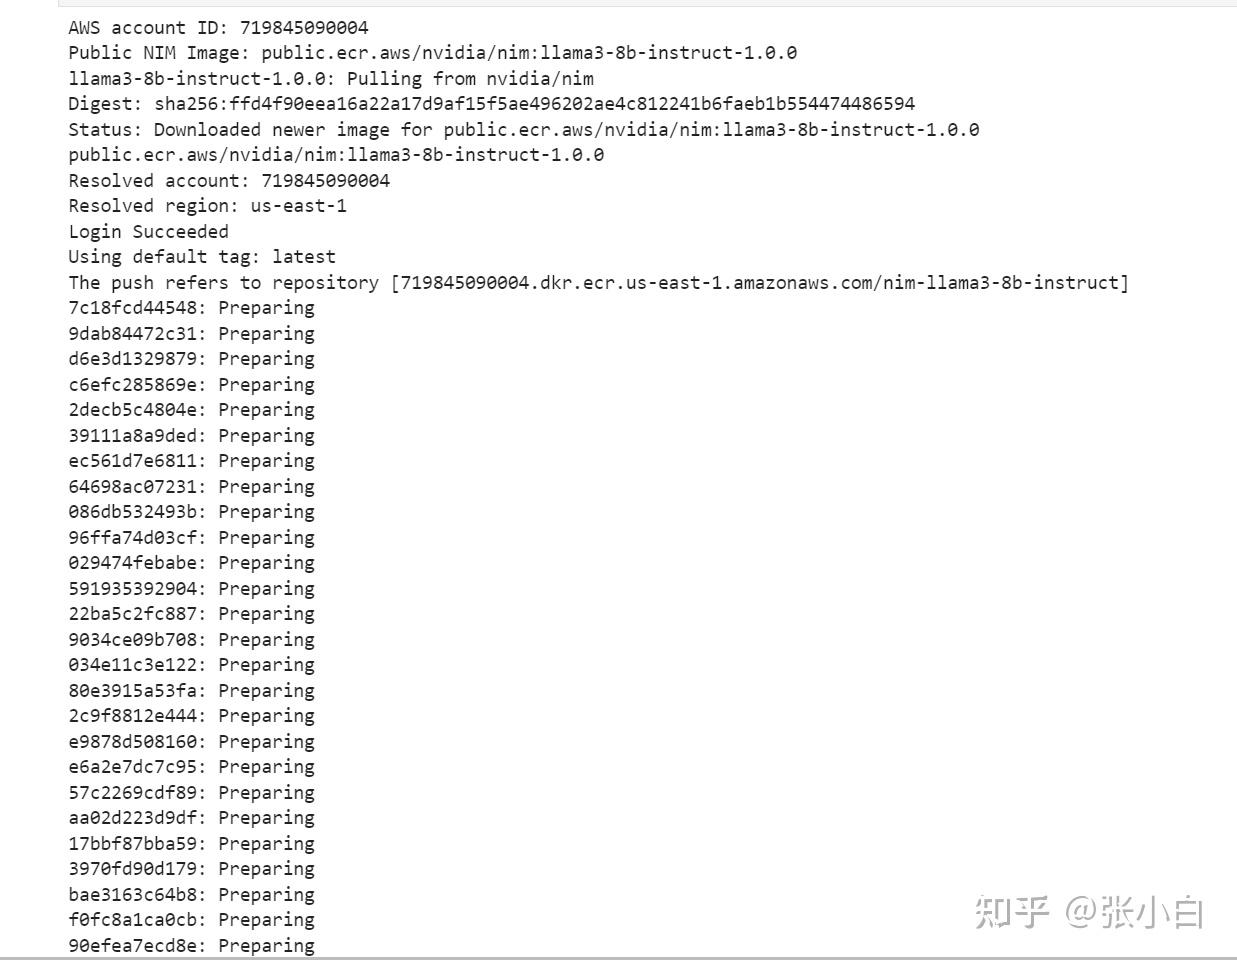
(2)执行Cell3
先pull镜像:
Public NIM Image: public.ecr.aws/nvidia/nim:llama3-8b-instruct-1.0.0
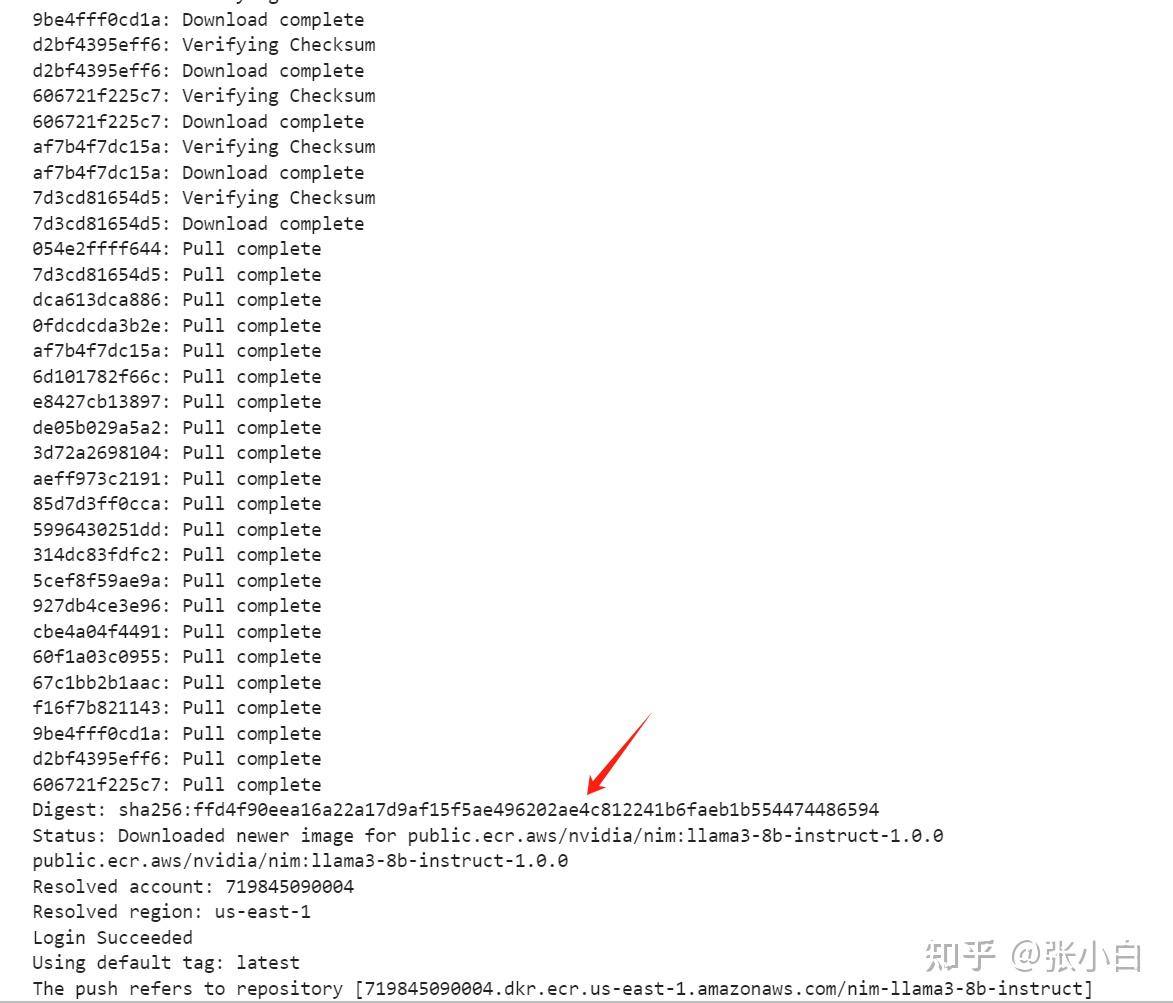
再push到ECR仓库:
The push refers to repository [719845090004.dkr.ecr.us-east-1.amazonaws.com/nim-llama3-8b-instruct]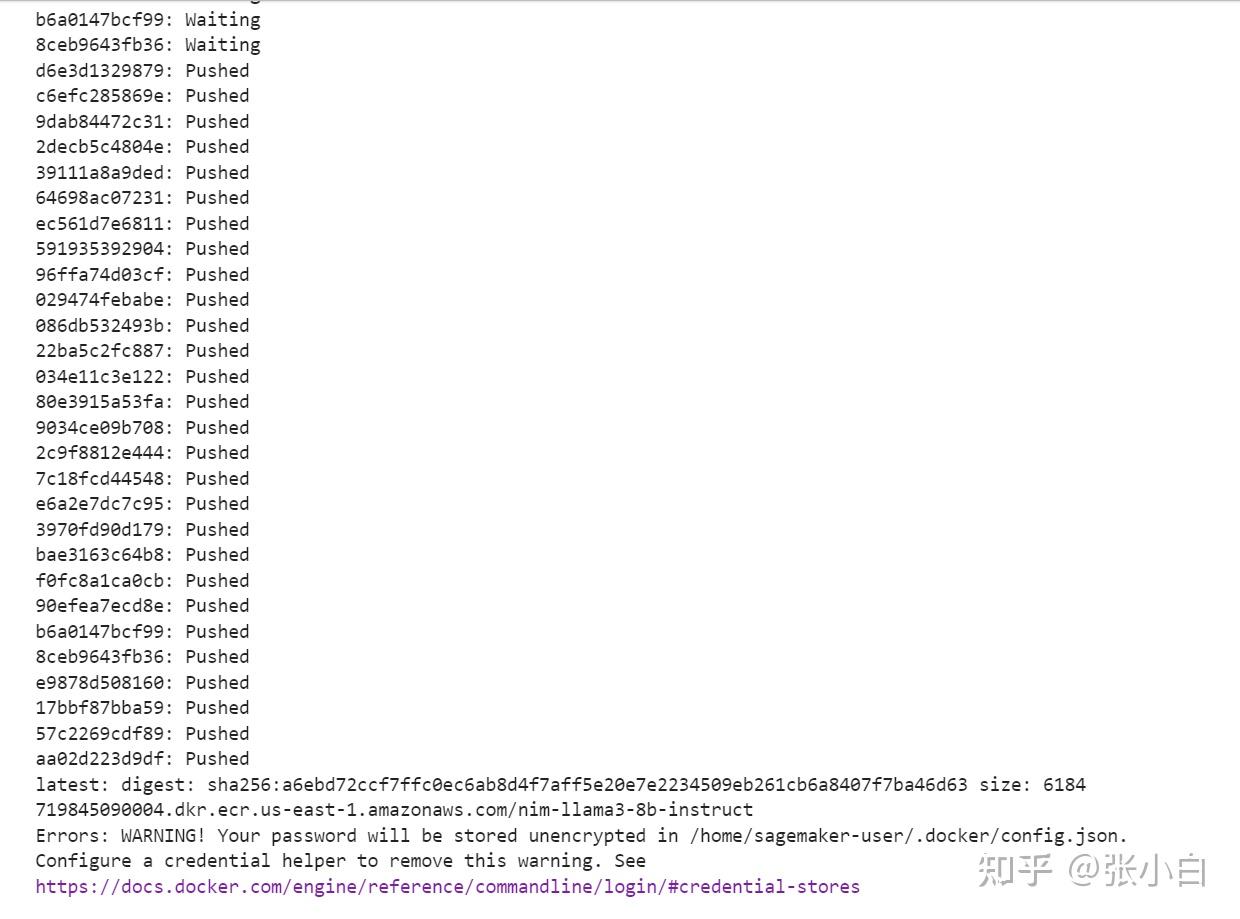
这回成功结束了。
看看现在的镜像情况:

除了前面手工下载的镜像后,还有后面2个镜像。一个是拉过来的,一个是push过去的。
(3)执行Cell4、5

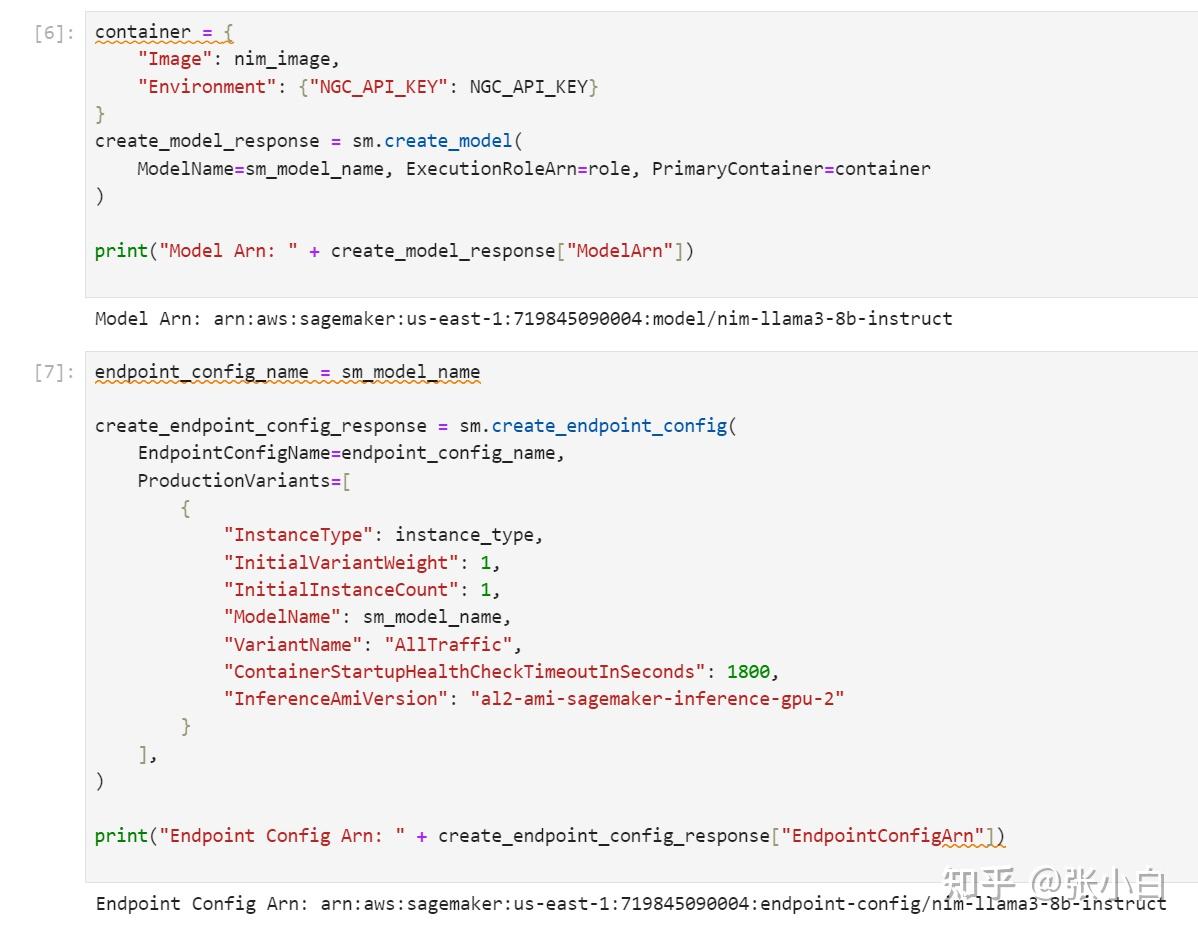
(4)执行Cell6、7
(5)执行Cell8
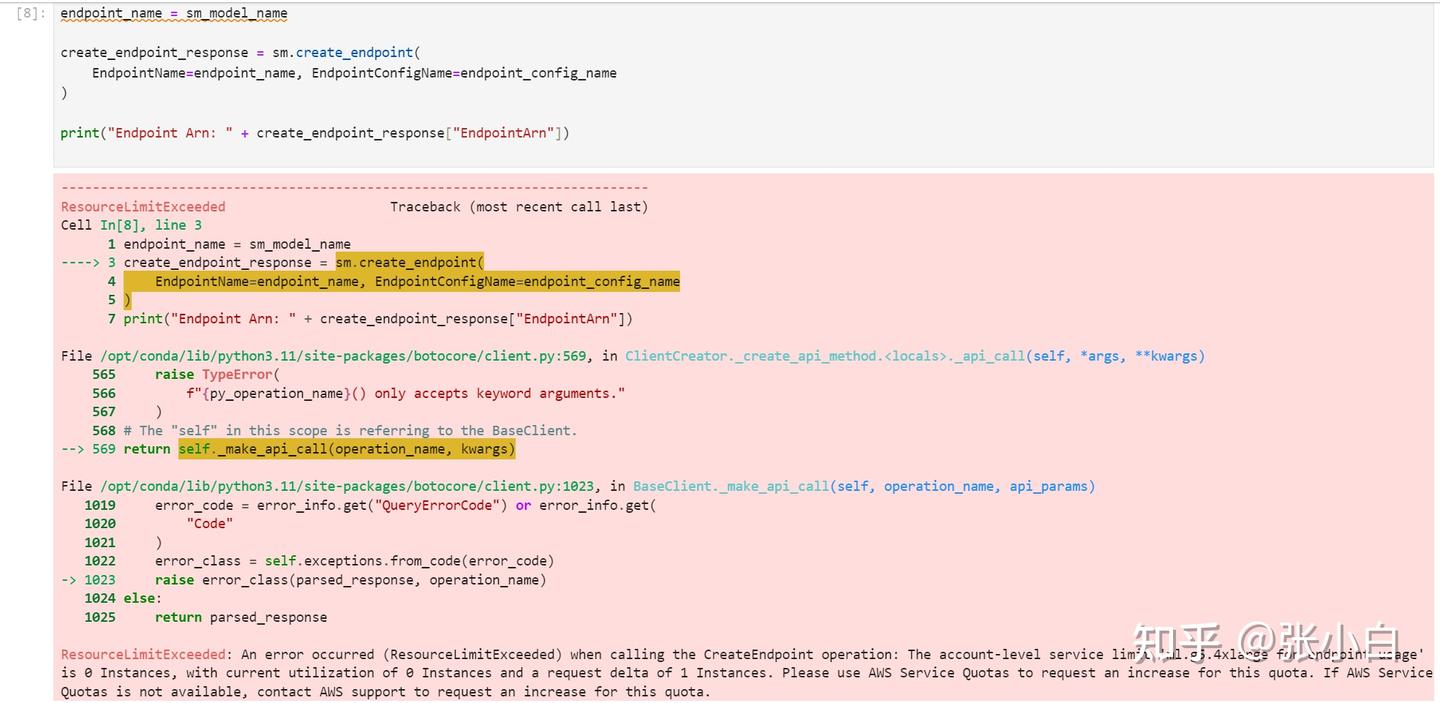
貌似又爆了一个权限问题。
ml.t3.medium ?
修改一下,重新执行Cell2

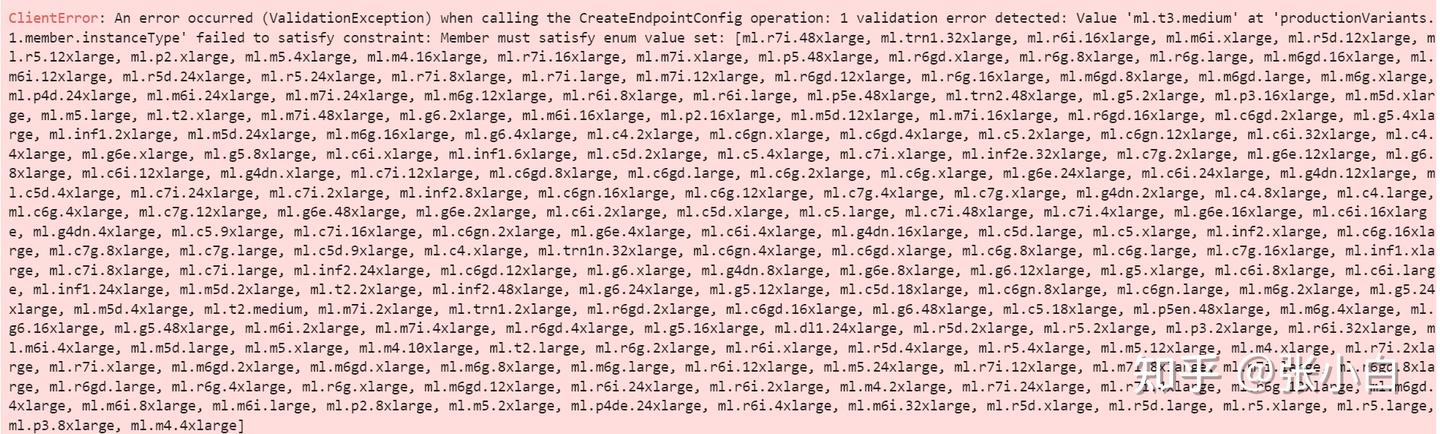
好像不是这个问题。还是Quota的问题。
ResourceLimitExceeded                     Traceback (most recent call last)
Cell In[15], line 3
      1 endpoint_name = sm_model_name
----> 3 create_endpoint_response = sm.create_endpoint(
      4     EndpointName=endpoint_name, EndpointConfigName=endpoint_config_name
      5 )
      7 print("Endpoint Arn: " + create_endpoint_response["EndpointArn"])

File /opt/conda/lib/python3.11/site-packages/botocore/client.py:569, in ClientCreator._create_api_method.<locals>._api_call(self, *args, **kwargs)
    565     raise TypeError(
    566         f"{py_operation_name}() only accepts keyword arguments."
    567     )
    568 # The "self" in this scope is referring to the BaseClient.
--> 569 return self._make_api_call(operation_name, kwargs)

File /opt/conda/lib/python3.11/site-packages/botocore/client.py:1023, in BaseClient._make_api_call(self, operation_name, api_params)
   1019     error_code = error_info.get("QueryErrorCode") or error_info.get(
   1020         "Code"
   1021     )
   1022     error_class = self.exceptions.from_code(error_code)
-> 1023     raise error_class(parsed_response, operation_name)
   1024 else:
   1025     return parsed_response

ResourceLimitExceeded: An error occurred (ResourceLimitExceeded) when calling the CreateEndpoint operation: The account-level service limit 'ml.g5.4xlarge for endpoint usage' is 0 Instances, with current utilization of 0 Instances and a request delta of 1 Instances. Please use AWS Service Quotas to request an increase for this quota. If AWS Service Quotas is not available, contact AWS support to request an increase for this quota.
(等待专家解释吧。下课。。。)
(未完待续)
六、用Unbuntu X86裸机环境试试?
重启电脑,切换到双系统的Ubuntu
试着用搭建DEMO1或者DEMO2的方法,看看能不能搭建成功NIM环境。
1、下载何老师的代码包
git clone https://gitcode.com/kunhe0512/11th_sky_hackathon_nim_sagemaker
cd ~/11th_sky_hackathon_nim_sagemaker/
unzip 11th_sky_hackathon_demo.zip
2、创建并准备Conda环境
conda create -n hackathon python=3.10 -y
conda activate hackathon
3、安装系统软件包
sudo apt-get install python3-tk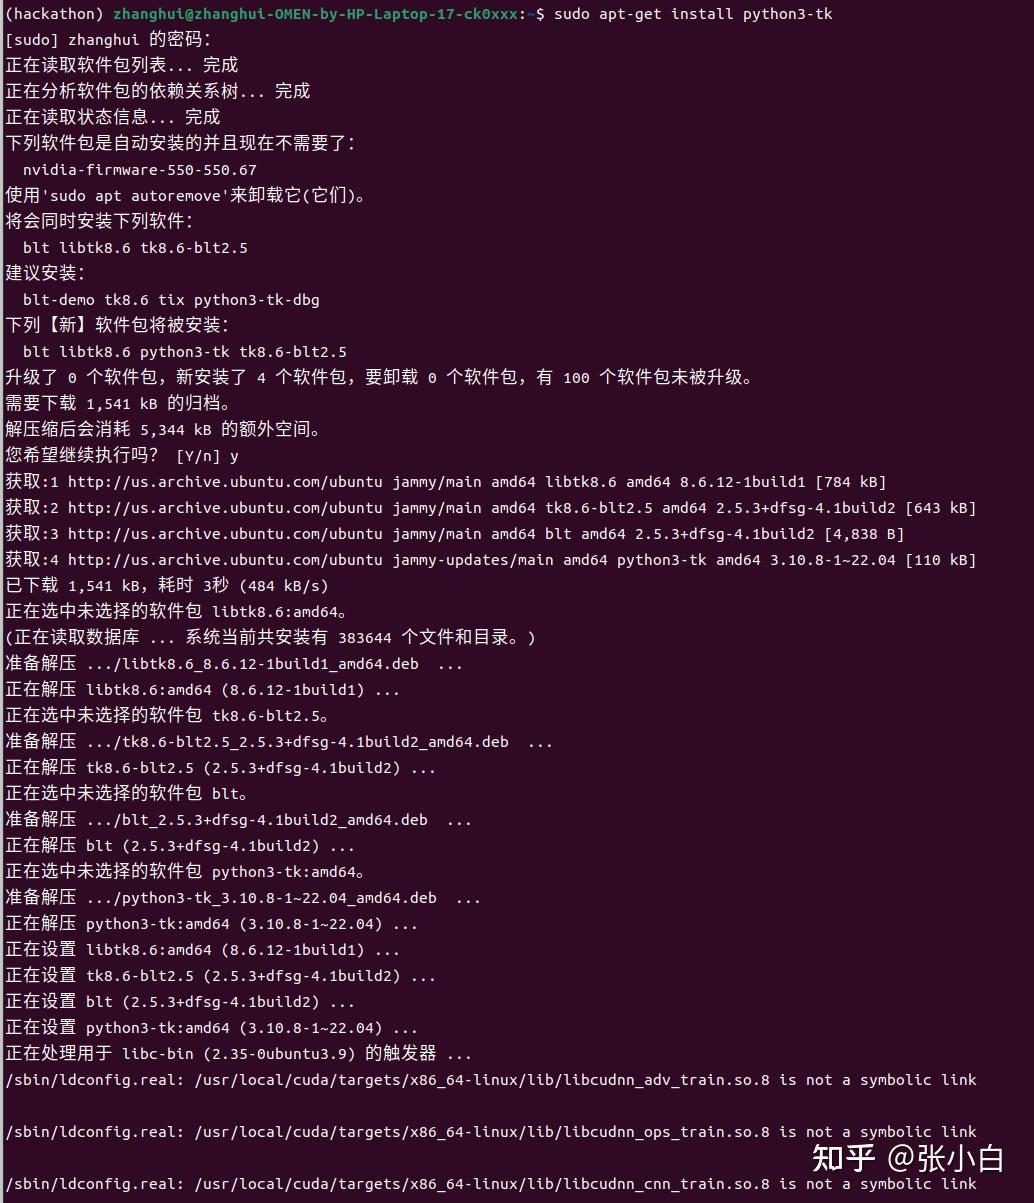
4、安装PIP软件包
pip install langchain
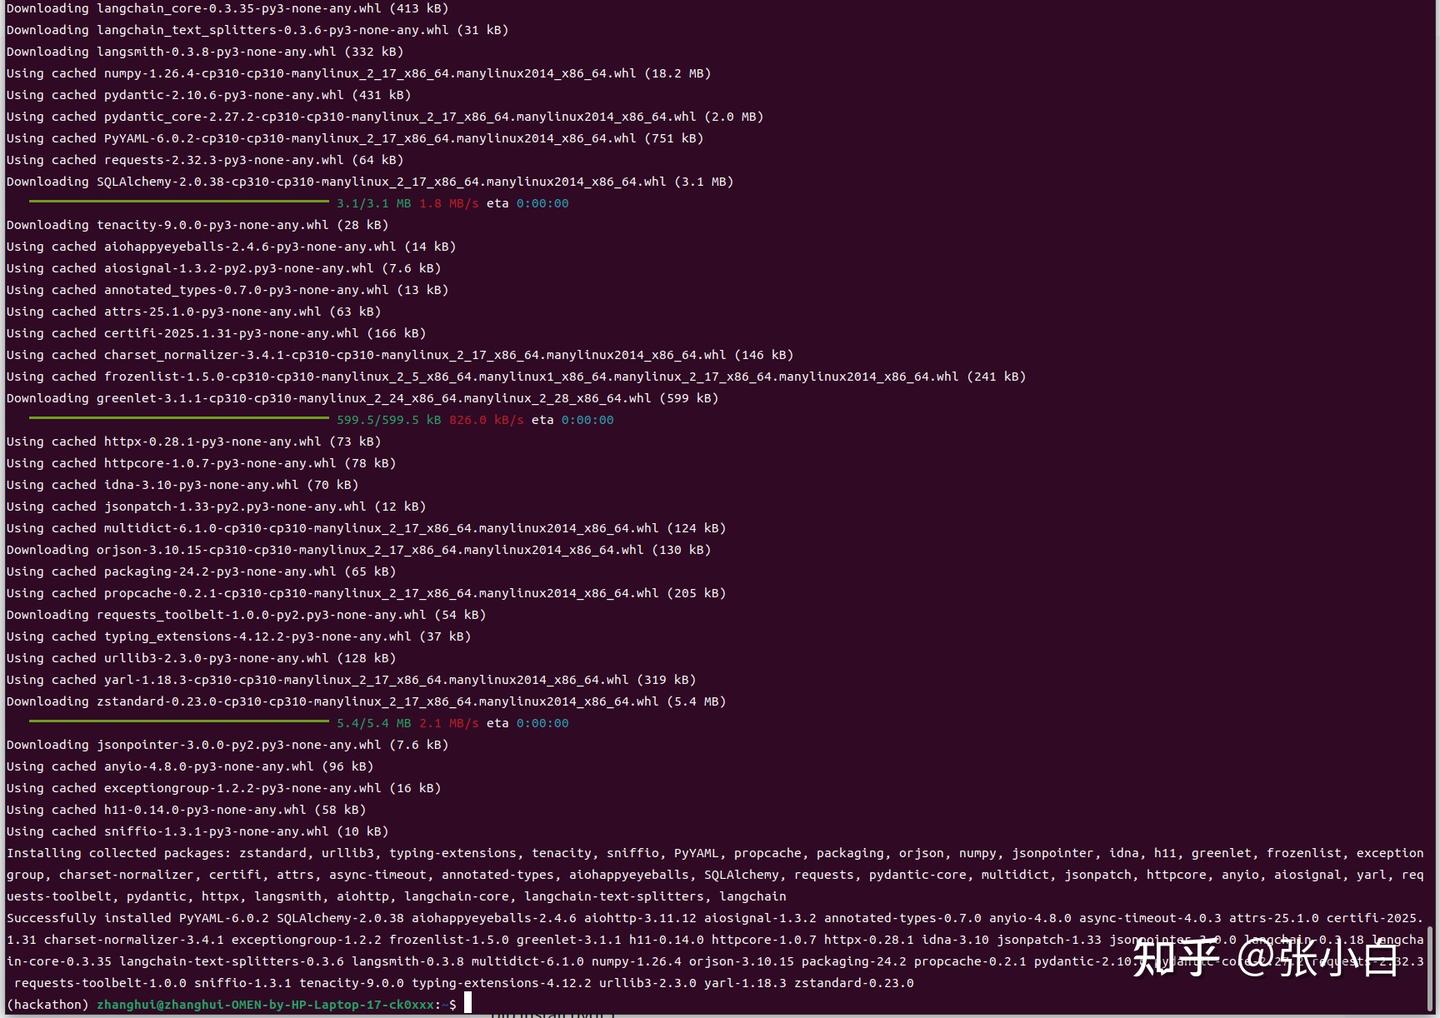
pip install -U langchain-nvidia-ai-endpoints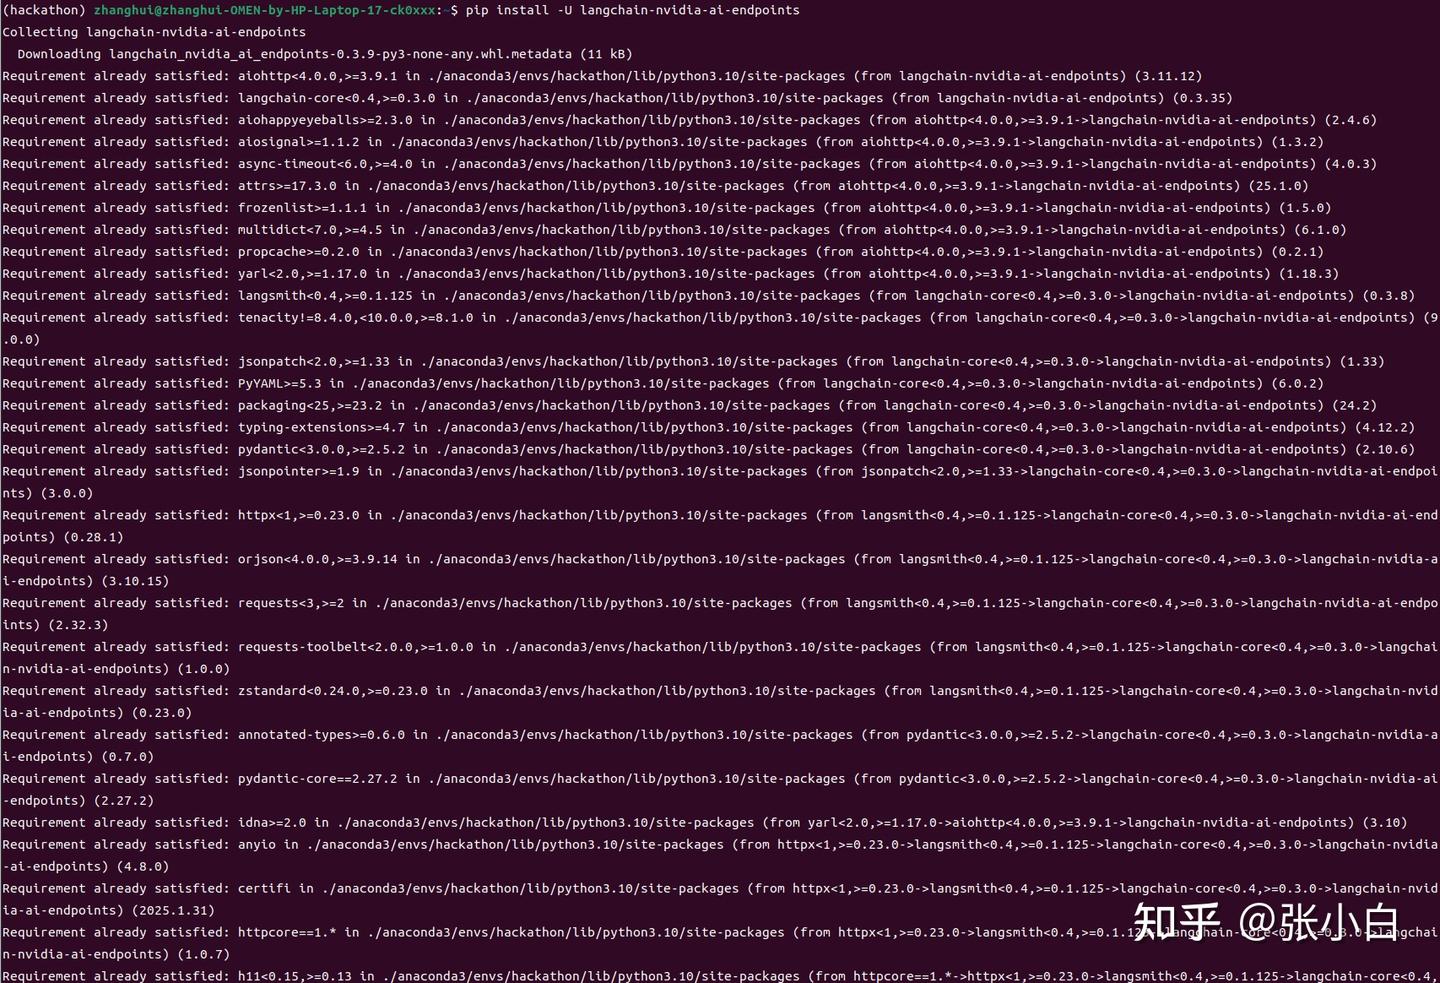
pip install -U langchain-community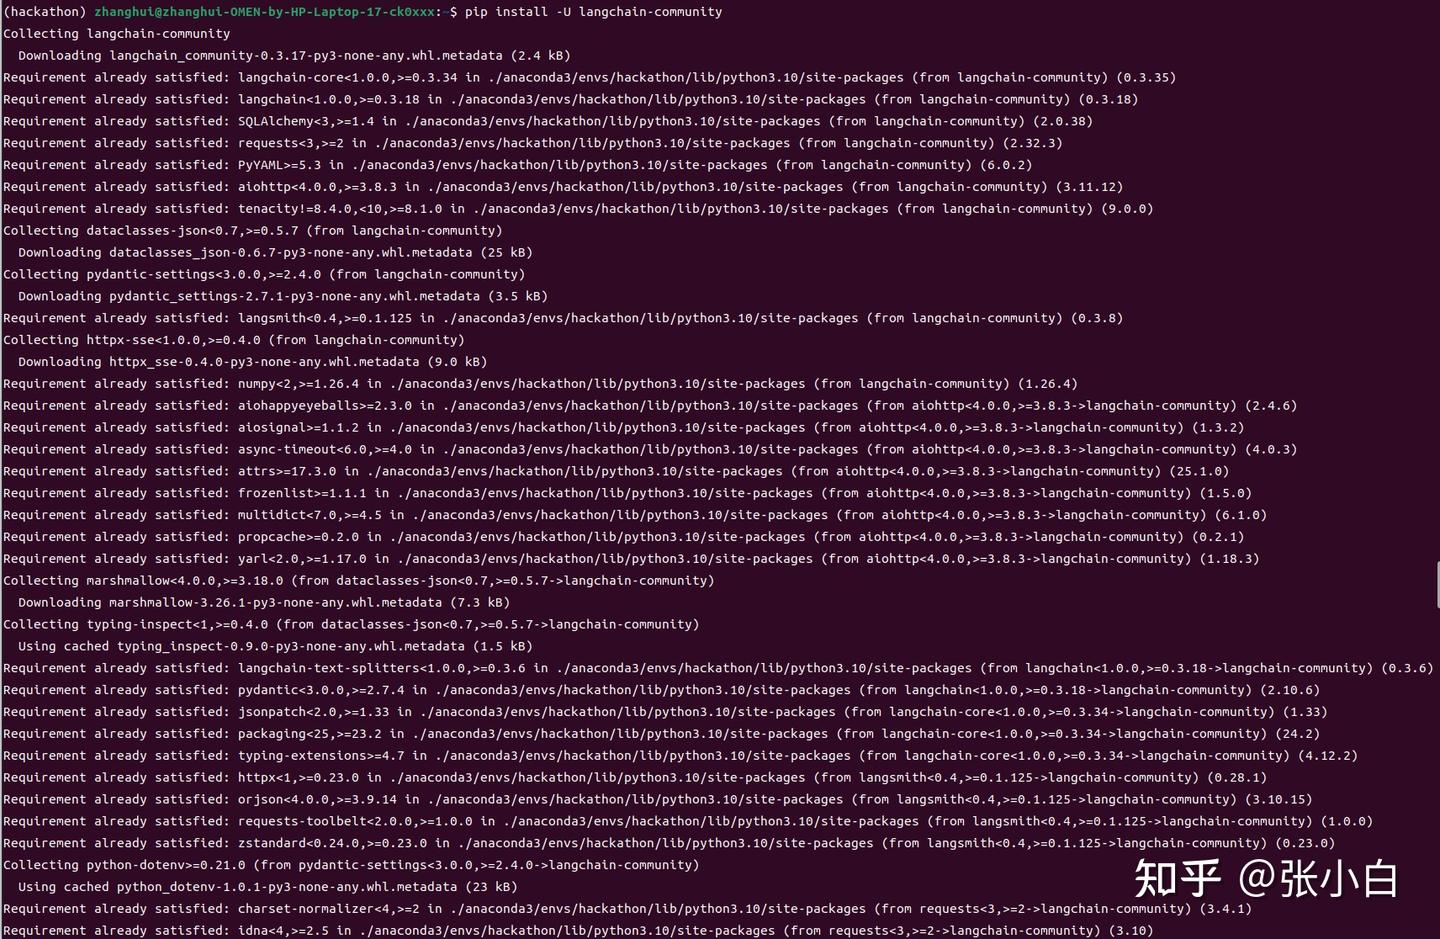
pip install jupyterlab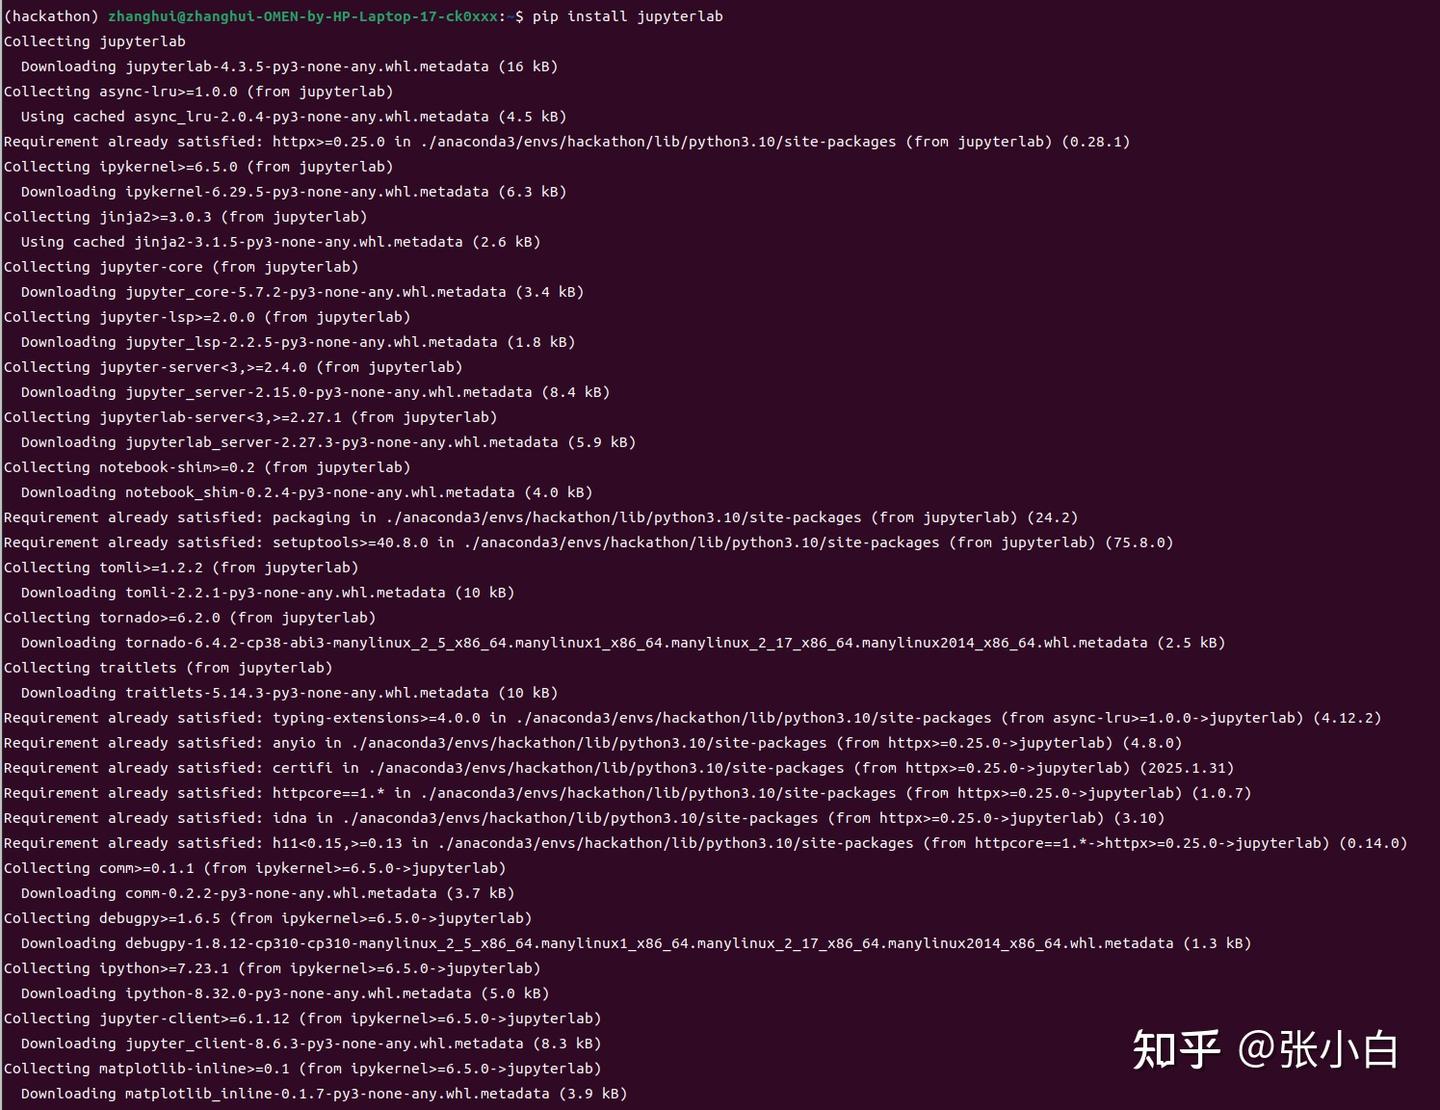
pip install Pillow
pip install tqdm
pip install openai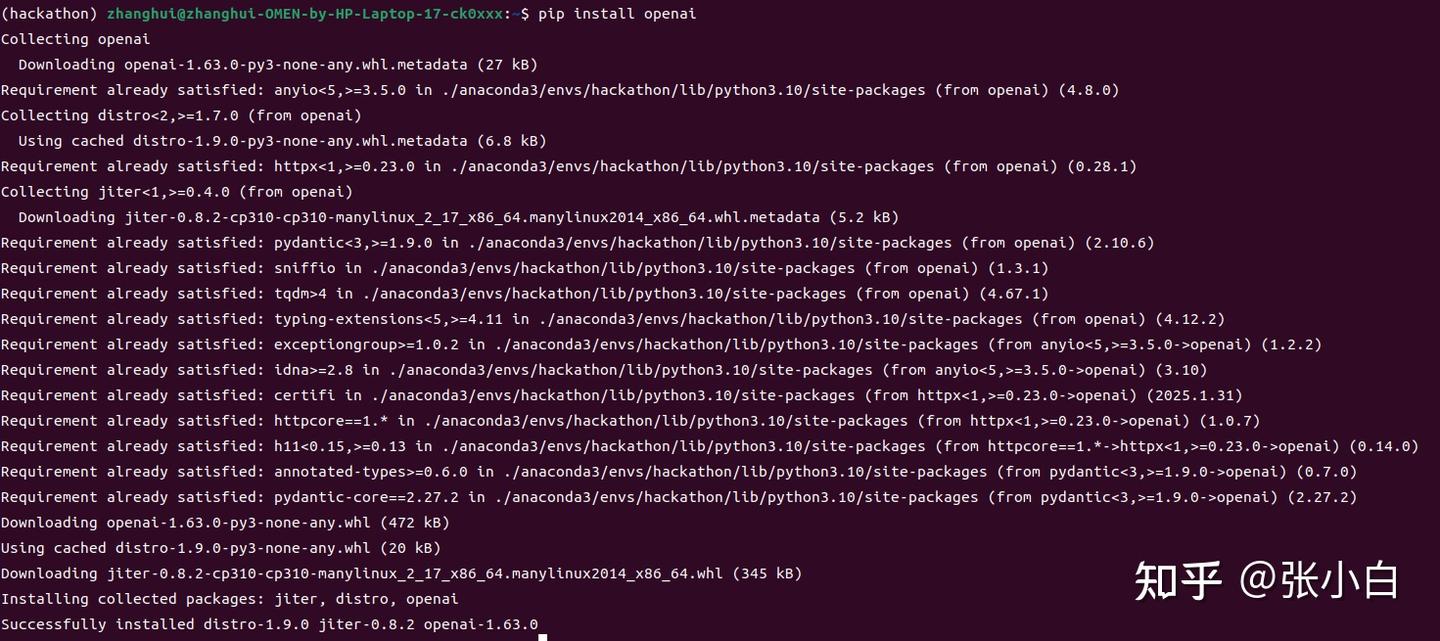
pip install pyqt5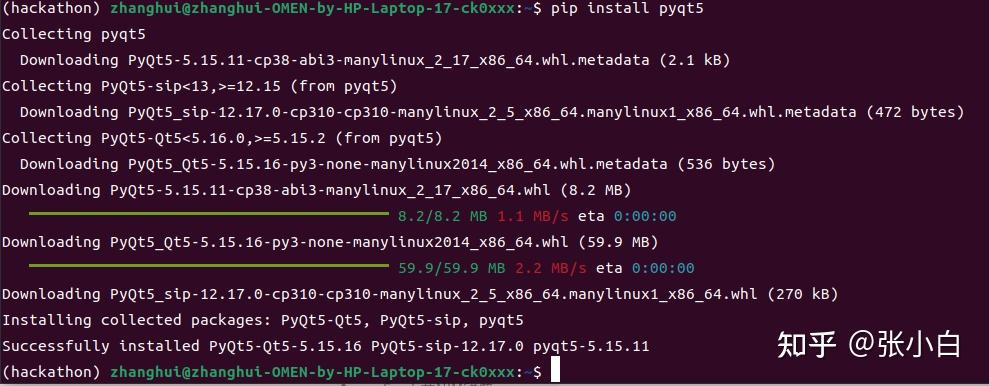
pip install gradio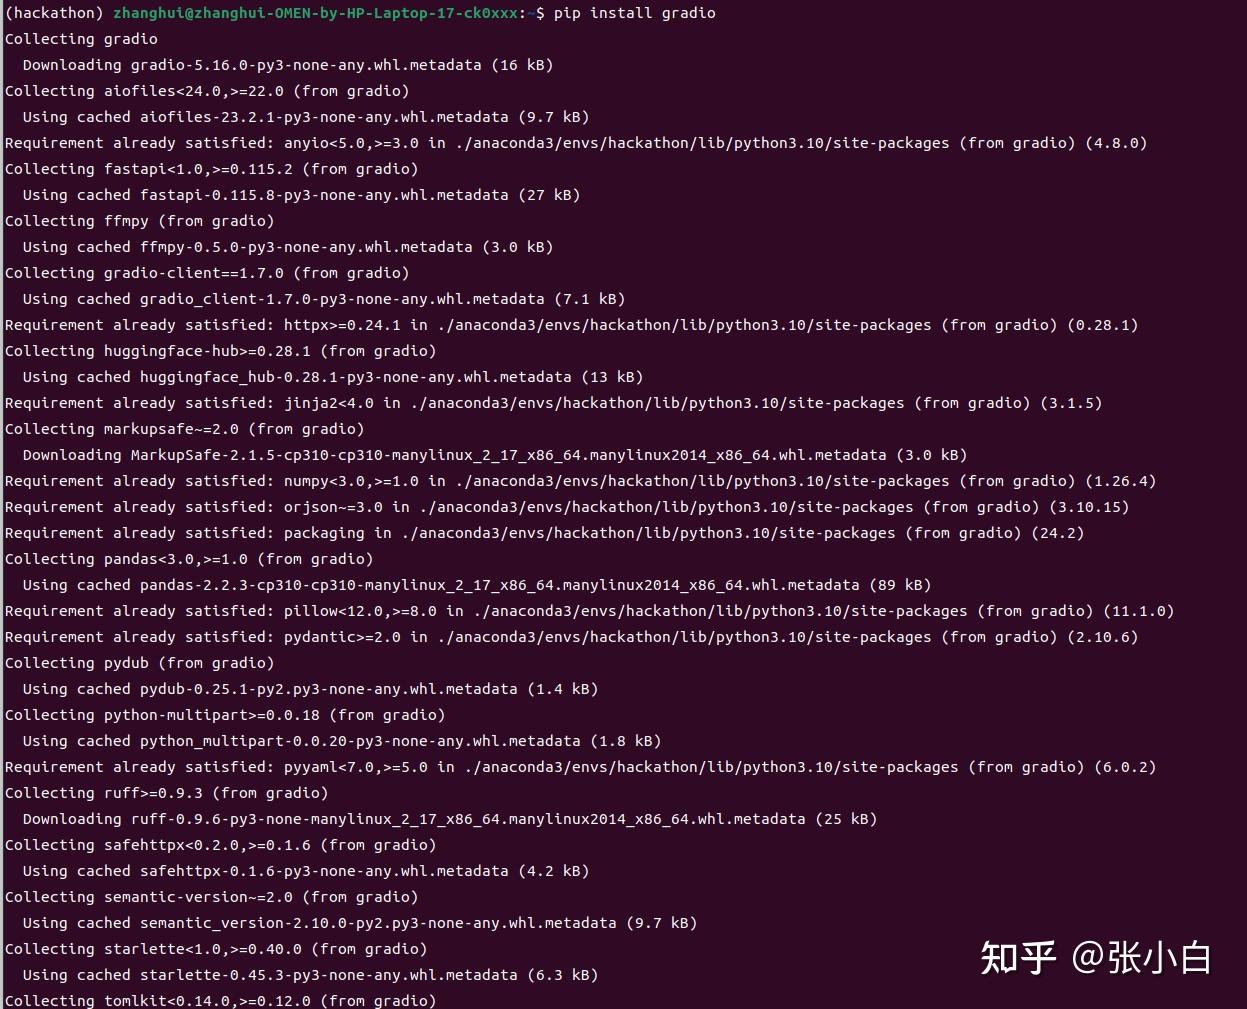

pip install matplotlib
pip install faiss-cpu
5、配置JupyterLab
cd ~/11th_sky_hackathon_nim_sagemaker/
jupyter lab --no-browser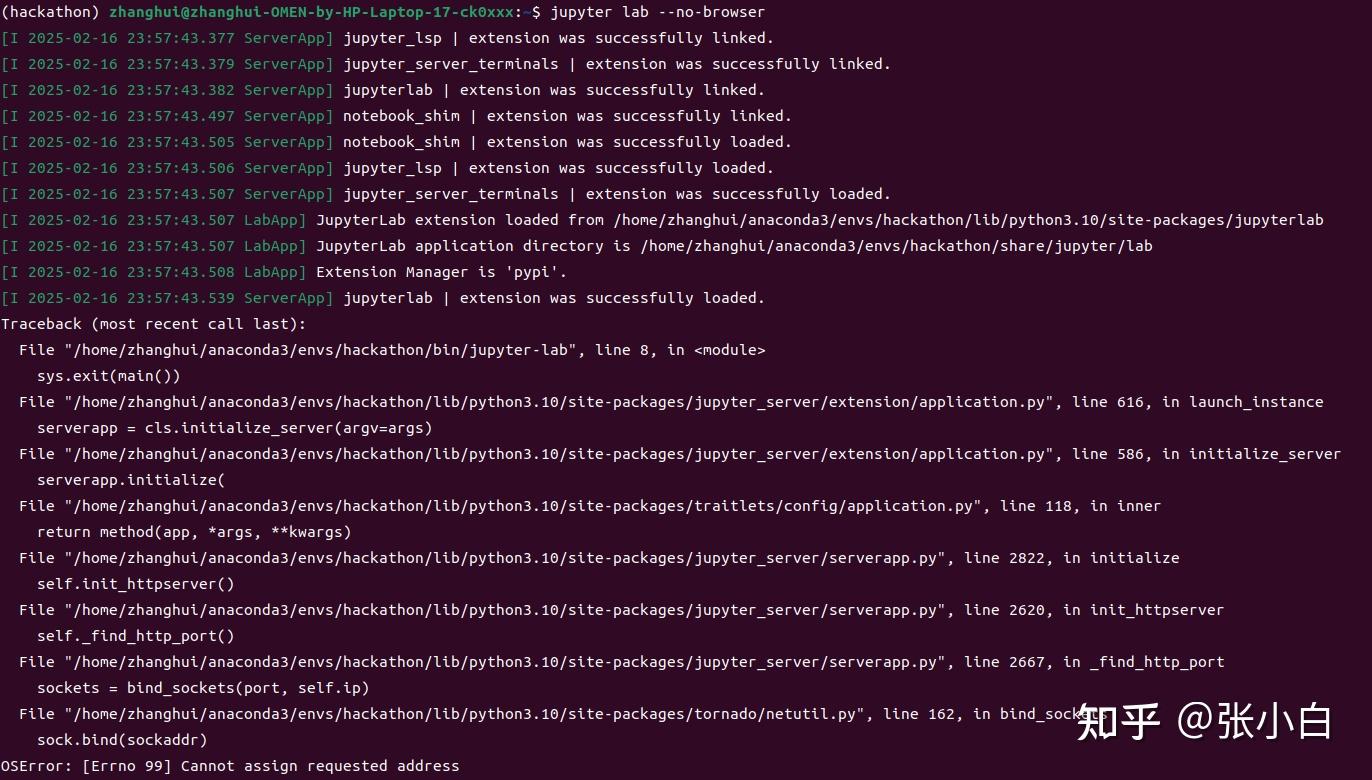
vi /home/zhanghui/.jupyter/jupyter_lab_config.py
c.ServerApp.port = 7777
c.ServerApp.ip = '*'
cd ~/11th_sky_hackathon_nim_sagemaker/
jupyter lab --no-browser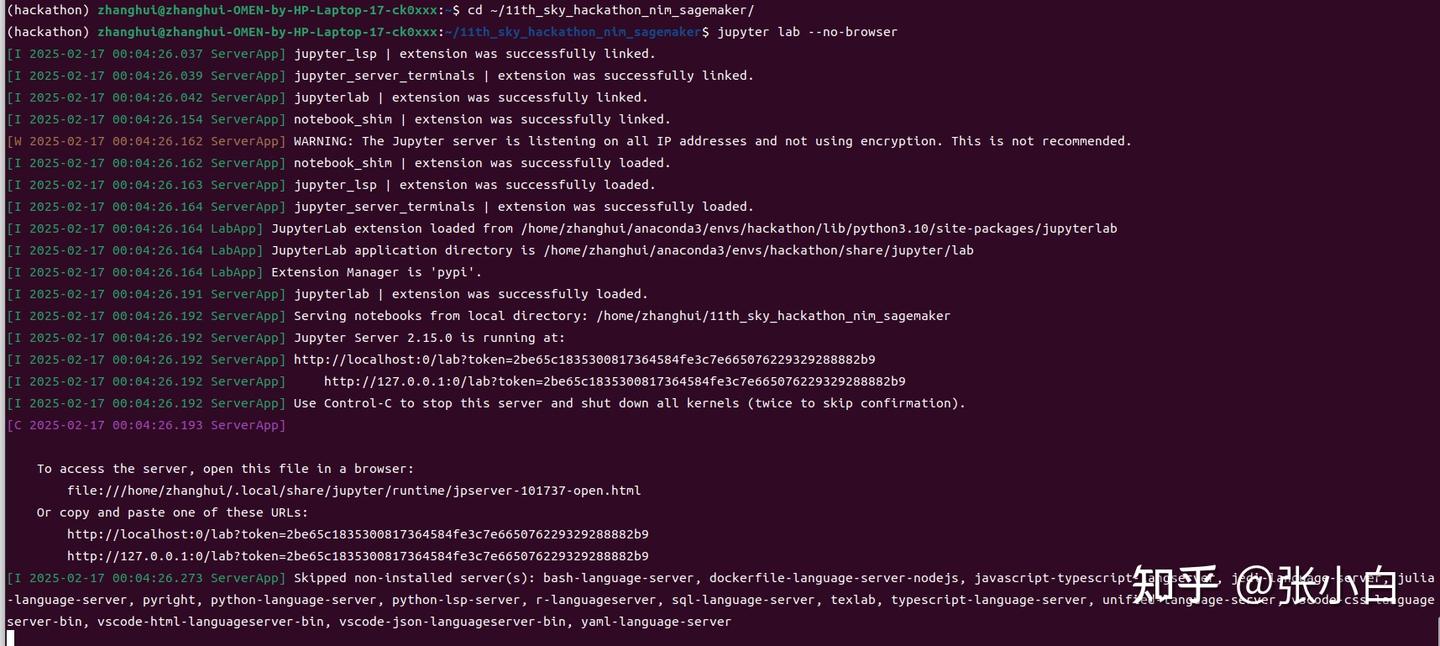
6、体验DEMO1、DEMO2
浏览器打开:http://localhost:7777/lab?token=0fa955e801c8718cb3c5bc8f44e6833526b5c75798a0f89cDEMO1结果:
略略略。
DEMO2结果:
7、下载NIM镜像
docker login nvcr.io
$oauthtoken
密码为API_KEY
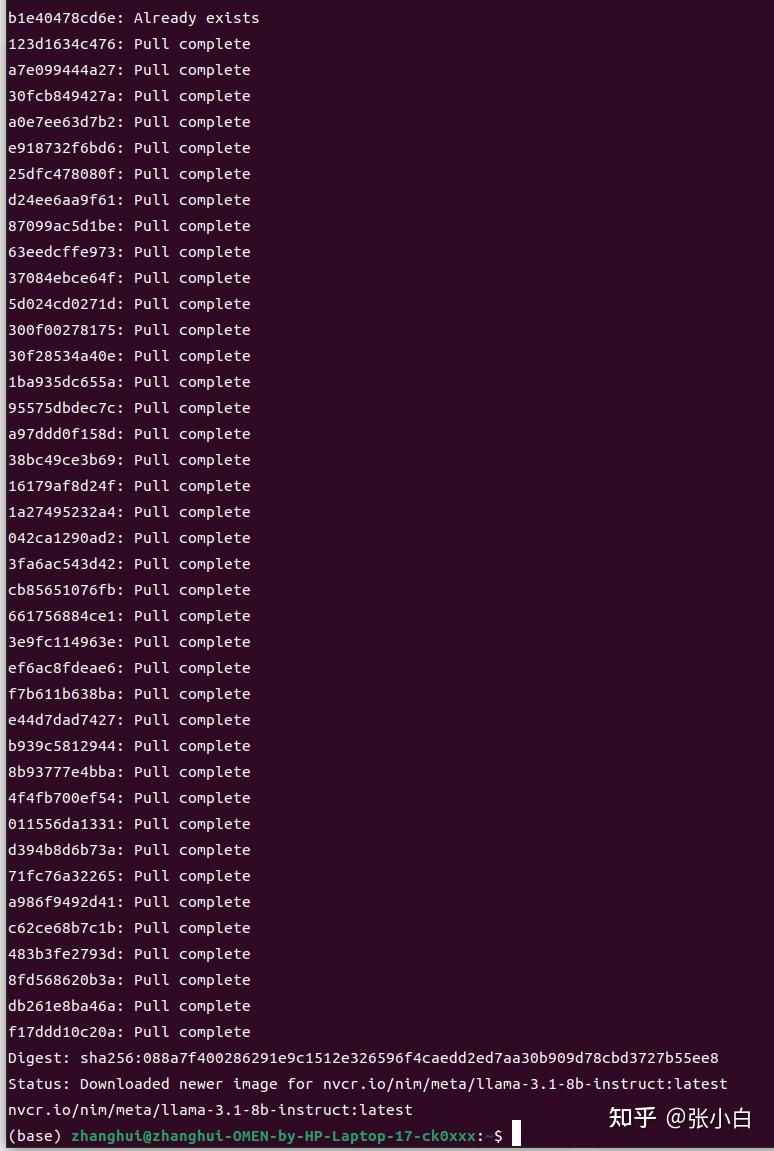
sudo docker pull nvcr.io/nim/meta/llama-3.1-8b-instruct:latest可能是KEY不对。重设一个吧!
让zhanghui用户有docker pull权限:

docker pull nvcr.io/nim/meta/llama-3.1-8b-instruct:latest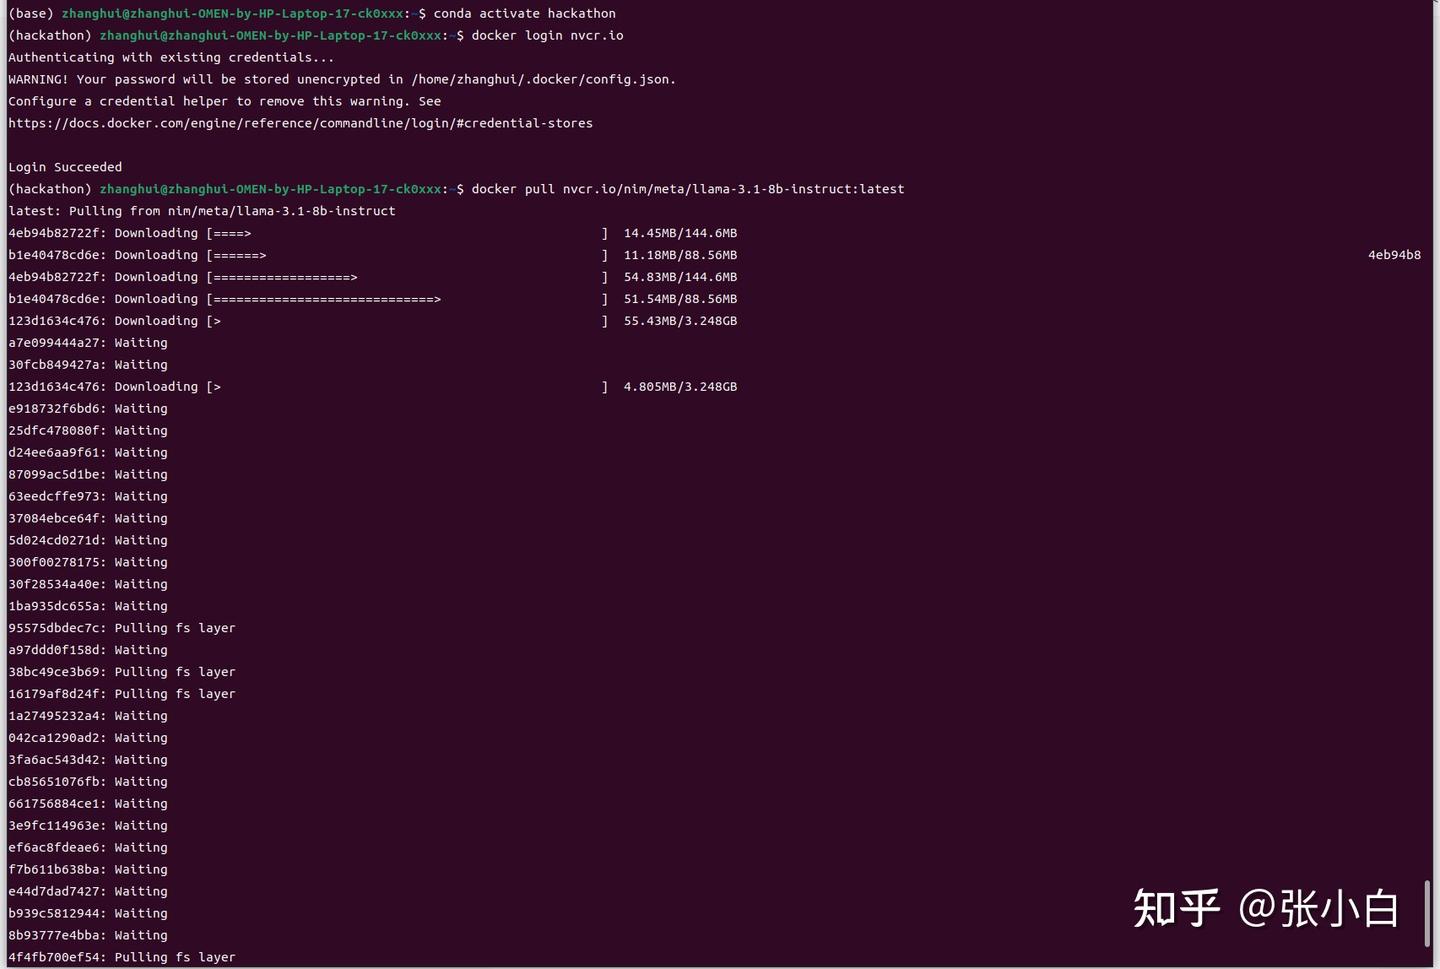
耐心等待下载完毕。
vi start.sh
export NGC_API_KEY=<PASTE_API_KEY_HERE>
export LOCAL_NIM_CACHE=~/.cache/nim
mkdir -p "$LOCAL_NIM_CACHE"
docker run -it --rm \
    --gpus all \
    --shm-size=16GB \
    -e NGC_API_KEY \
    -v "$LOCAL_NIM_CACHE:/opt/nim/.cache" \
    -u $(id -u) \
    -p 8000:8000 \
    nvcr.io/nim/meta/llama-3.1-8b-instruct:latest
启动docker镜像:
sh ./start.sh
CUDA需要12.6,现在不够。
打开
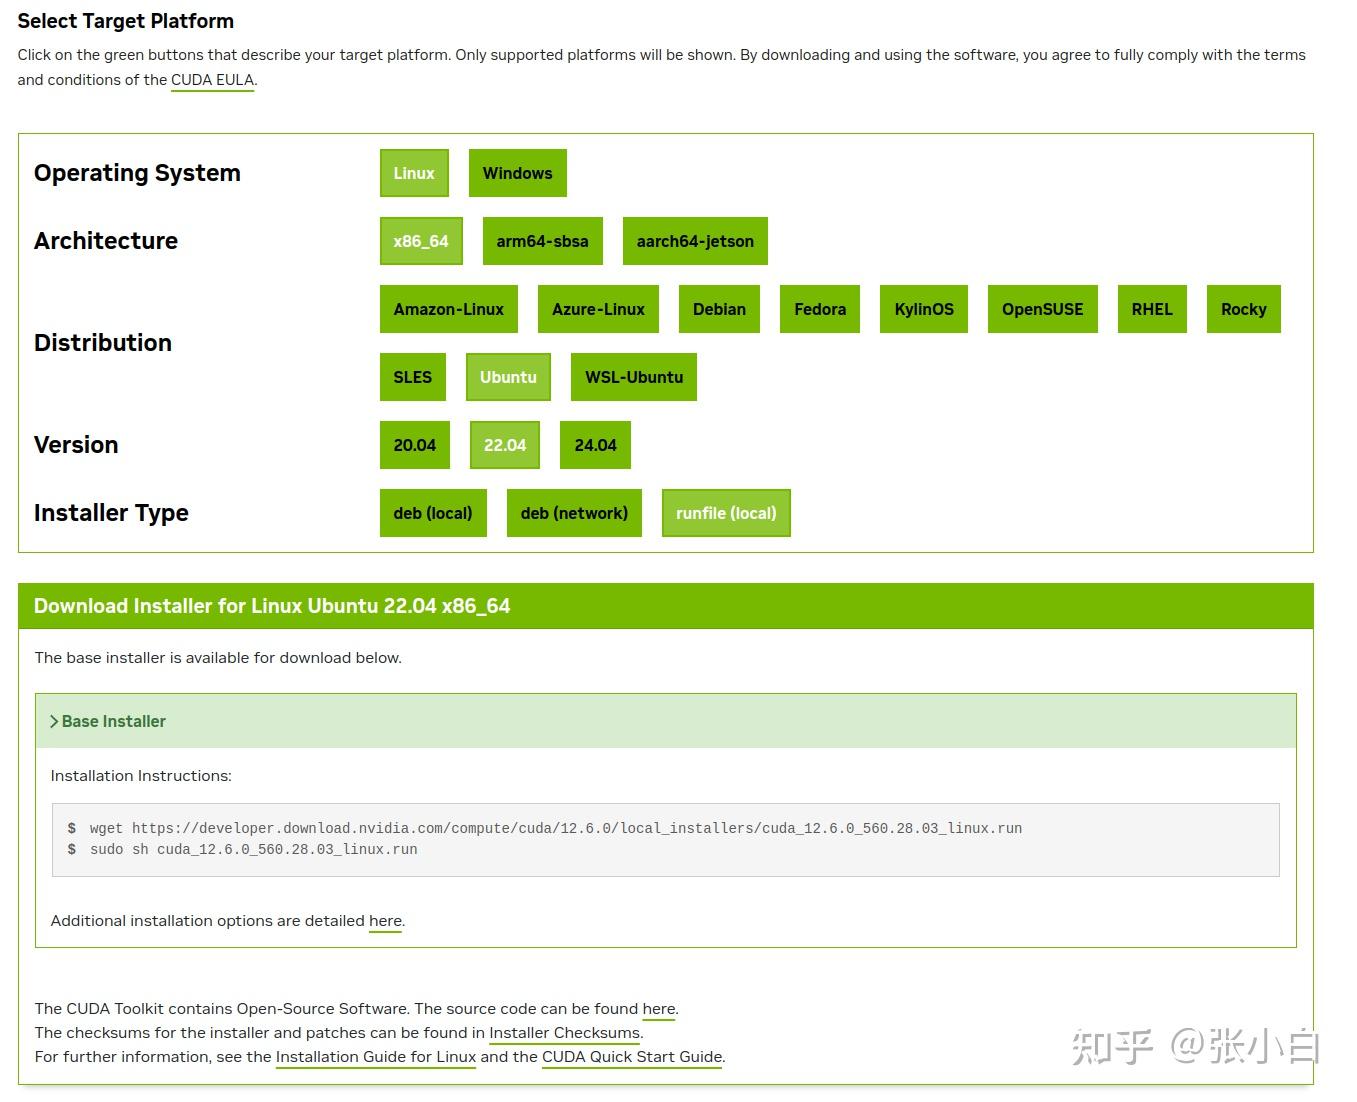
wget https://developer.download.nvidia.com/compute/cuda/12.6.0/local_installers/cuda_12.6.0_560.28.03_linux.run
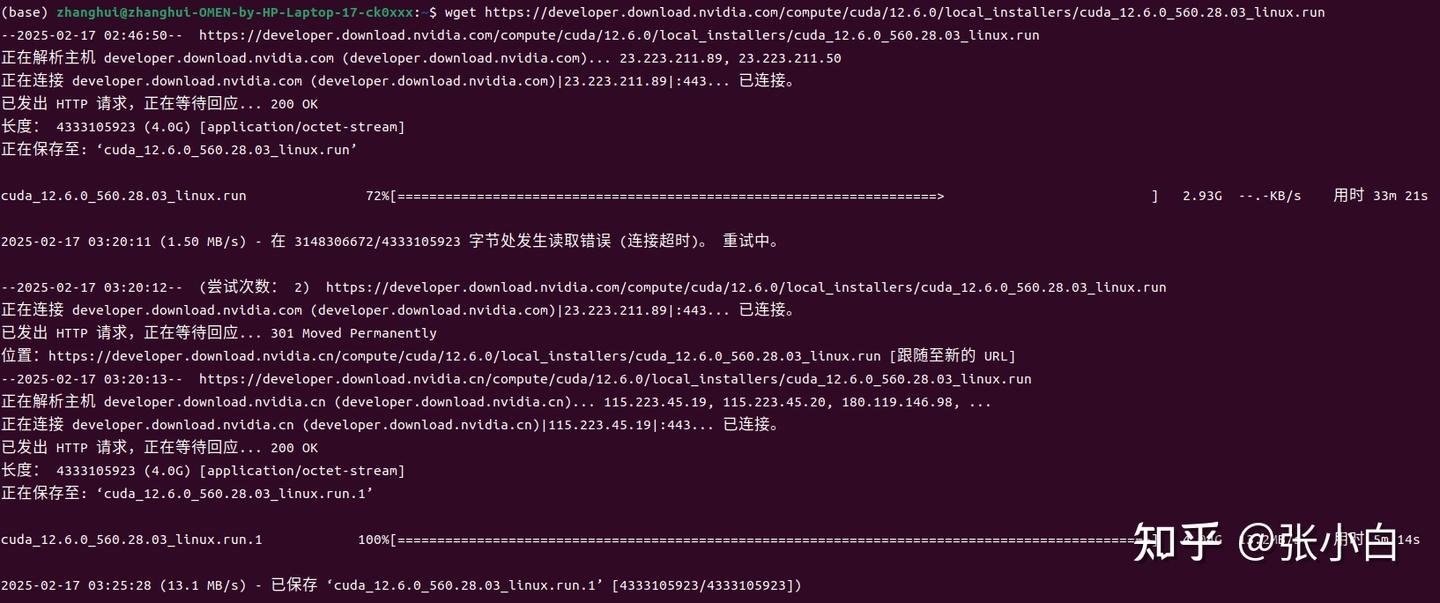
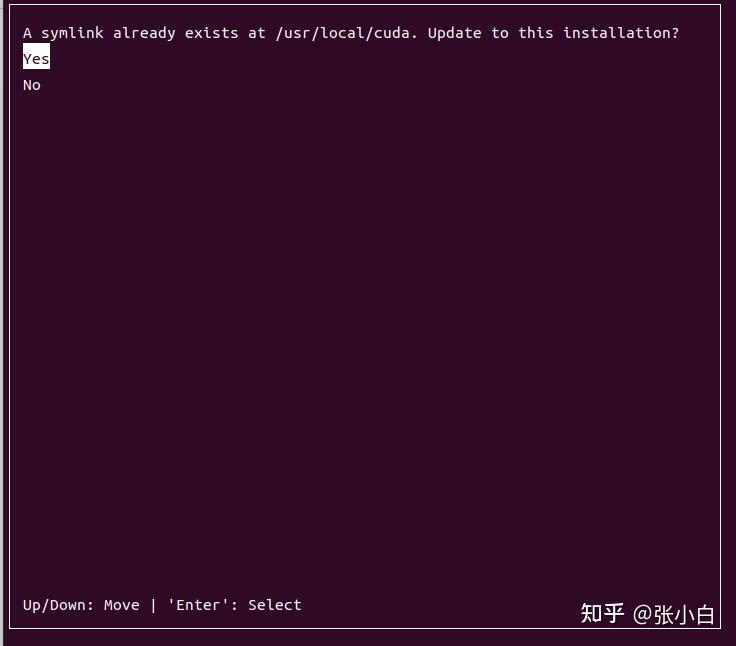
sudo sh cuda_12.6.0_560.28.03_linux.run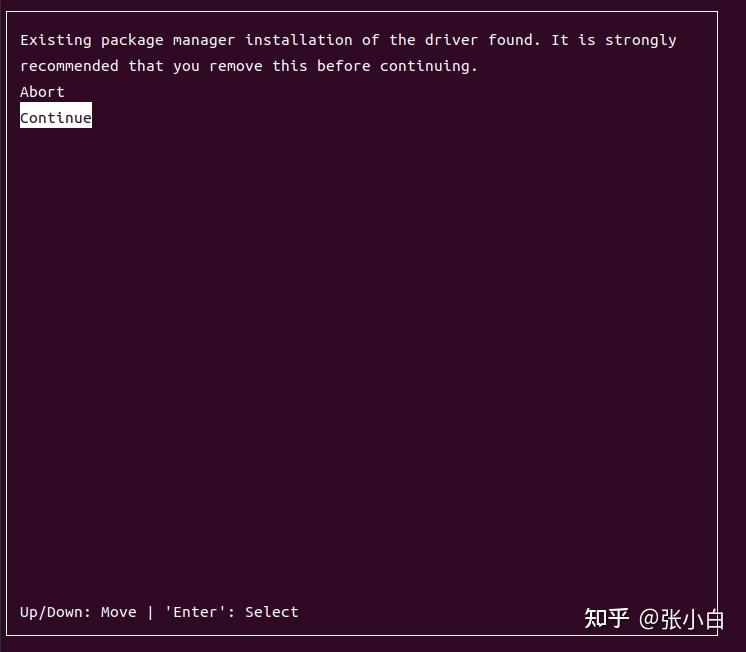

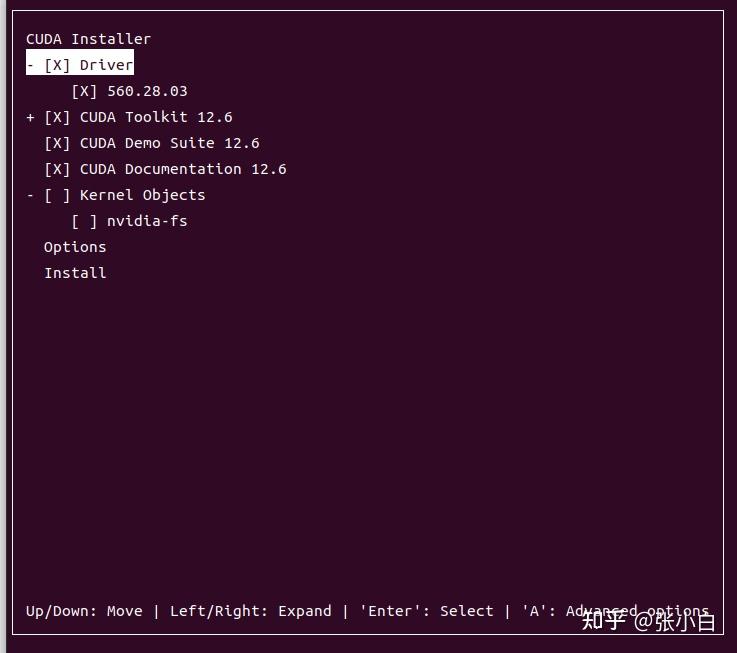
只安装CUDA Toolkit 12.6,其他都不装试试。

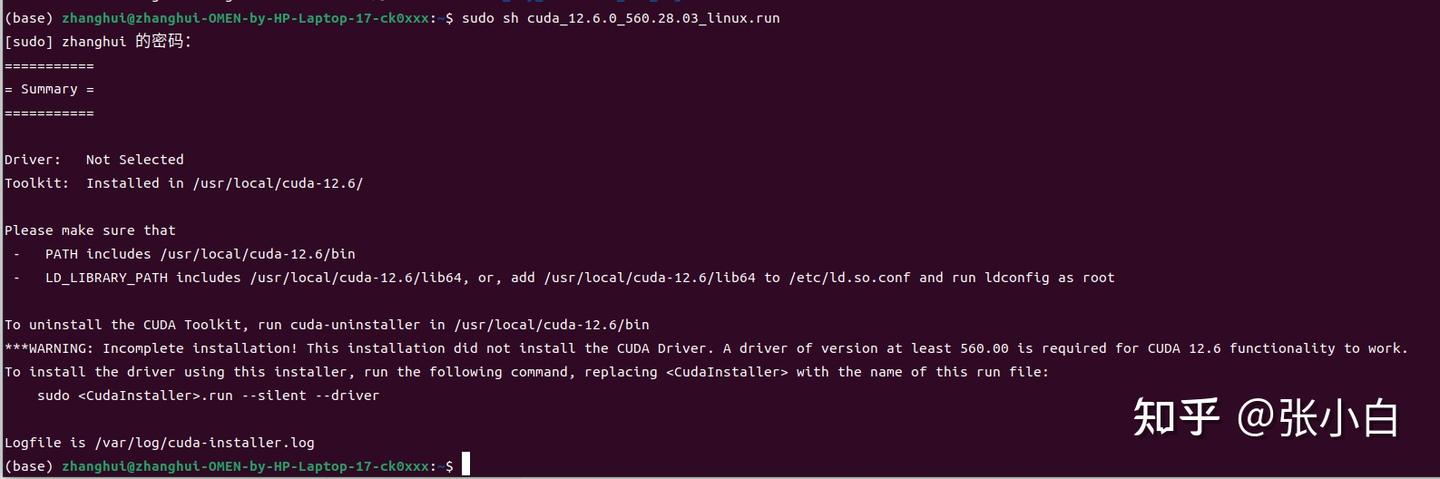
source ~/.bashrc 使得新CUDA路径生效
可见已经升级成功。
再次执行:

还是有问题。
要不重新安装一下nvidia-docker
--------------------------TODO----------------------------
进入docker镜像
docket exec xxx启动docker里面的jupyterlab
cd xxx
jupyter lab --no-browser
把 nvidia-nim-sagemaker2025.ipynb 上传到docker中。
依次执行各个CELL.

 浙公网安备 33010602011771号