spring schedule 实时更新 cron 表达式,并且立即生效。(单机,非分布式调度,无需quartz)
本文的讨论,仅限于 单机下的调度,不是分布式调度的管理。分布式请参考 xxl-job ,redission分布式锁 等框架
-
主要解决3个问题:
-
1) @Scheduled(cron = "0/5 * * * * ?") 注解写死后,不能更新 cron 表达式;
-
2) 即使能更新,也不能立刻生效;
-
3) 事务管理失效。
总共3个目标:
1》quartz有点重,所以不考虑用quartz实现
2》 实现实时的更新cron,立刻生效;接口调用方式
3》实现事务管理 ,解决定时任务的run方法上直接注解 @Transactional 不生效的问题
效果展示:
$.post("http://localhost:你的端口号/schedule/update/customservice",{cron:"0/2 * * * * ?"})![]()
核心代码只有3 句话
-
// 核心代码只有 3句话:
-
// 1 获取任务句柄
-
ScheduledFuture<?> future = taskScheduler.schedule(service.getTask(), service.getTrigger());
-
-
// 2 使用句柄,终止任务
-
future.cancel(true);
-
-
//3 保证事务控制 ,仅对单机事务有效,未考虑分布式事务
-
ContextLoader.getCurrentWebApplicationContext().getBean(CustomeService.class).run1();
-
package com.stormfeng.test.config.schedule;
-
-
import com.stormfeng.test.model.vo.ResultVo;
-
import com.stormfeng.test.service.schedule.task.ITriggerTask;
-
import lombok.NonNull;
-
import lombok.extern.slf4j.Slf4j;
-
import org.springframework.beans.factory.DisposableBean;
-
import org.springframework.context.annotation.Bean;
-
import org.springframework.context.annotation.Configuration;
-
import org.springframework.scheduling.TaskScheduler;
-
import org.springframework.scheduling.annotation.EnableScheduling;
-
import org.springframework.scheduling.annotation.SchedulingConfigurer;
-
import org.springframework.scheduling.concurrent.ThreadPoolTaskScheduler;
-
import org.springframework.scheduling.config.ScheduledTaskRegistrar;
-
import org.springframework.scheduling.support.CronTrigger;
-
-
import java.util.Collection;
-
import java.util.HashMap;
-
import java.util.Map;
-
import java.util.Set;
-
import java.util.concurrent.ConcurrentHashMap;
-
import java.util.concurrent.ScheduledFuture;
-
-
/**
-
* @author stormfeng
-
* @date 2020-11-06 10:29
-
*/
-
-
-
-
public class JobsConfigTest implements SchedulingConfigurer, DisposableBean {
-
-
-
// 自定义,参考 TriggerTask,为了统一在实现类中,调用 getTrigger() 和 getTask()
-
public Collection<ITriggerTask> scheduledServices;
-
// 句柄,方便后期获取 future
-
TaskScheduler taskScheduler;
-
-
// spring特性: 初始化该类时,自动获取和装配 项目中 所有的子类 ITriggerTask
-
public JobsConfigTest(Collection<ITriggerTask> scheduledServices) {
-
this.scheduledServices = scheduledServices;
-
}
-
-
/**
-
* Future handles, to cancel the running jobs
-
*/
-
private static final Map<String, ScheduledFuture> FUTURE_MAP = new ConcurrentHashMap<>();
-
/**
-
* 获取 定时任务的具体的类,用于后期 重启,更新等操作
-
*/
-
private static final Map<String, ITriggerTask> SERVICE_MAP = new ConcurrentHashMap<>();
-
-
/**
-
* 线程池任务调度器
-
* <p>
-
* 支持注解方式,@Scheduled(cron = "0/5 * * * * ?")
-
*/
-
-
public TaskScheduler taskScheduler() {
-
ThreadPoolTaskScheduler scheduler = new ThreadPoolTaskScheduler();
-
scheduler.setPoolSize(Runtime.getRuntime().availableProcessors() / 3 + 1);
-
scheduler.setThreadNamePrefix("TaskScheduler-");
-
scheduler.setRemoveOnCancelPolicy(true); // 保证能立刻丢弃运行中的任务
-
-
taskScheduler = scheduler; // 获取 句柄,方便后期获取 future
-
-
return scheduler;
-
}
-
-
/**
-
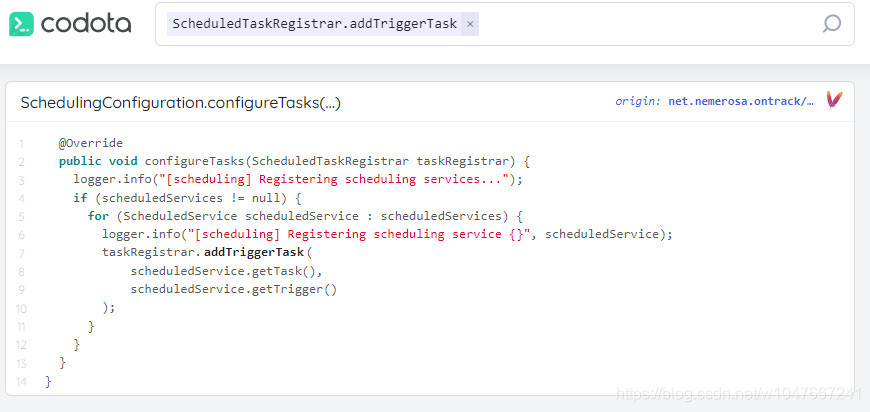
* @see <a href='https://www.codota.com/code/java/methods/org.springframework.scheduling.config.ScheduledTaskRegistrar/addTriggerTask'>codota 代码提示工具</a>
-
*/
-
-
public void configureTasks(ScheduledTaskRegistrar taskRegistrar) {
-
taskRegistrar.setScheduler(taskScheduler()); // 不用担心,这里的scheduler跟 上面的注解 Bean 是同一个对象,亲自打断点验证
-
-
if (null != scheduledServices && scheduledServices.size() > 0) {
-
for (final ITriggerTask service : scheduledServices) {
-
// old 方式,不推荐,因为无法获取 调度任务的 future 对象。
-
// taskRegistrar.addTriggerTask(scheduledService.getTask(),scheduledService.getTrigger());
-
-
//但是,最近发现用该对象也可以拿到 任务的引用,参考 大神博客 。但是该方法有些鸡肋,并不能作为万能的瑞士军刀,所以放弃 。 https://my.oschina.net/u/2411391/blog/3147701
-
/*Set<ScheduledTask> tasks = taskRegistrar.getScheduledTasks();
-
for (ScheduledTask task : tasks) {
-
task.cancel();
-
}*/
-
-
ScheduledFuture<?> schedule = taskScheduler.schedule(service.getTask(), service.getTrigger());
-
FUTURE_MAP.put(service.type().toLowerCase(), schedule);
-
SERVICE_MAP.put(service.type().toLowerCase(), service);
-
}
-
}
-
}
-
-
//=============================动态配置 cron 表达式,立刻生效,支持 停止、重启、更新cron==============================================
-
-
public Object get() {
-
final Set<String> names = FUTURE_MAP.keySet();
-
HashMap<String, Object> map = new HashMap<String, Object>();
-
-
map.put("futures", names);
-
map.put("services", new HashMap<Object, Object>() {{
-
for (Map.Entry<String, ITriggerTask> entry : SERVICE_MAP.entrySet()) {
-
put(entry.getKey(), entry.getValue().getTrigger().getExpression());
-
}
-
}});
-
-
return map.toString();
-
}
-
-
/**
-
* 新增
-
*/
-
public Object add( ITriggerTask task) {
-
String type = task.type(), cron = task.getTrigger().getExpression();
-
-
if (FUTURE_MAP.containsKey(type)) {
-
return "请重新指定 任务的 type 属性";
-
}
-
-
ScheduledFuture<?> future = taskScheduler.schedule(task.getTask(), task.getTrigger());
-
FUTURE_MAP.put(type, future);
-
SERVICE_MAP.put(type, task);
-
-
String format = String.format("添加新任务成功: :[%s],[%s]", type, cron);
-
log.info(format);
-
return format;
-
}
-
-
/**
-
* 更新
-
*/
-
public void update( final String type, final String cron) {
-
if (!FUTURE_MAP.containsKey(type)) {
-
return;
-
}
-
//BUG 修复
-
ScheduledFuture future = FUTURE_MAP.get(type);
-
if (future != null) {
-
future.cancel(true);
-
}
-
-
ITriggerTask service = SERVICE_MAP.get(type);
-
CronTrigger old = service.getTrigger(), newTri = service.setTrigger(cron);
-
-
ScheduledFuture<?> future = taskScheduler.schedule(service.getTask(), newTri);
-
FUTURE_MAP.put(type, future); // 必须更新一下对象,否则下次cencel 会失败
-
}
-
-
/**
-
* 取消
-
*/
-
public Object cancel( String type) {
-
if (!FUTURE_MAP.containsKey(type)) {
-
return "取消失败,不存在该任务,请检查 type: " + type;
-
}
-
-
ScheduledFuture future = FUTURE_MAP.get(type);
-
if (future != null) {
-
future.cancel(true);
-
}
-
-
FUTURE_MAP.remove(type);
-
-
return "成功取消执行中的任务 : " + type;
-
}
-
-
/**
-
* 重启已经存在的任务
-
*/
-
public Object restart( String type) {
-
ITriggerTask service = SERVICE_MAP.get(type);
-
if (service == null) {
-
return "无法启动任务,请检查 type: " + type;
-
}
-
-
if (FUTURE_MAP.containsKey(type)) {
-
ScheduledFuture future = FUTURE_MAP.get(type);
-
if (future != null) {
-
future.cancel(true);
-
}
-
}
-
-
ScheduledFuture<?> future = taskScheduler.schedule(service.getTask(), service.getTrigger());
-
FUTURE_MAP.put(type, future); // 必须更新一下对象,否则下次cencel 会失败
-
-
return "成功重启任务 type: " + type + ",cron: " + service.getTrigger().getExpression();
-
}
-
-
-
public void destroy() throws Exception {
-
for (ScheduledFuture future : FUTURE_MAP.values()) {
-
if (future != null) {
-
future.cancel(true);
-
}
-
}
-
FUTURE_MAP.clear();
-
SERVICE_MAP.clear();
-
-
((ThreadPoolTaskScheduler) taskScheduler).destroy();
-
-
}
-
-
-
}
其中,上面的 用到的自定义的接口 ITriggerTask
-
/**
-
* TriggerTask 必须实现的方法,为了支持动态配置 cron表达式,所以
-
*
-
* @author stormfeng
-
* @date 2020-11-03 11:21
-
*/
-
public interface ITriggerTask {
-
/**
-
* 获取 类别,区分 不同的Bean 对象
-
* @return
-
*/
-
String type();
-
-
/**
-
* 获取 run 方法
-
* @return
-
*/
-
Runnable getTask();
-
-
/**
-
* 获取触发器,一般是 CronTrigger
-
* @return
-
*/
-
CronTrigger getTrigger();
-
-
/**
-
* 接口 动态修改 定时任务的表达式
-
*/
-
CronTrigger setTrigger(String cron);
-
}
默认的父类实现,以后的所有类,均应该继承该父类,这样可以简化子类实现类的 type() 方法, 子类可以重写 其他三个方法
-
/**
-
* @author stormfeng
-
* @date 2020-11-04 16:49
-
*/
-
-
public abstract class TriggerTaskSupport implements ITriggerTask {
-
-
-
public String type() {
-
return this.getClass().getSimpleName().toLowerCase();
-
}
-
-
-
public String toString() {
-
return "TriggerTask{" +
-
"type=" + type() +
-
", task=" + getTask() +
-
"cronTrigger=" + getTrigger().getExpression() +
-
'}';
-
}
-
}
但是子类 extends TriggerTaskSupport 后, 还是要重写其他三个方法的:
-
Runnable getTask();
-
CronTrigger getTrigger();
-
CronTrigger setTrigger(String cron);
至此,上面的代码完全可以拷贝到你的项目中,下面 是你需要 自己自定义的具体的任务实现类
借助 lombok 简化写法,示例如下
-
-
-
public class CustomService extends TriggerTaskSupport {
-
-
-
.Default
-
private CronTrigger trigger = new CronTrigger("0 0 0/6 * * ?");
-
-
-
public CronTrigger setTrigger(String expression) {
-
String old = trigger.getExpression();
-
this.trigger = new CronTrigger(expression);
-
log.info("update cron success, old: {} , new: {}", old, trigger.getExpression());
-
-
return this.trigger;
-
}
-
-
-
.Default
-
private Runnable task = new Runnable() {
-
-
public void run() {
-
System.out.println("\n");
-
log.info("================start runnig================");
-
// service.run(); // 该service 是另外一个类的对象,这样才能 使得事务起作用
-
-
-
// 也可以 用当前的Bean 对象 作为 target 调用,才能被AOP 拦截,进而达到事务管理的目的
-
// ContextLoader.getCurrentWebApplicationContext().getBean(CustomService.class).run1();
-
log.info("================ end runnig================");
-
}
-
};
-
-
/* 测试专用 ,使用当前类的 Bean对象. run1 方法,事务控制 也能生效
-
@Transactional(value = "txManager", rollbackFor = Exception.class)
-
public void run1() {
-
int i = jdbcTemplate.update(" INSERT INTO T_TEST VALUES(555555)", null);
-
int a = 1 / 0;
-
}*/
-
}
如此,所有代码配置完成,以后如果再次新增一个任务,就可以 参考 上面这个 CustomService ,新增一个class 就行了
那么,怎么用对外开放接口,接受http请求,到动态实时的修改定时任务呢? 很明显,我们还需要 controller层,示例如下:
-
-
JobsConfigTest jobsConfigTest;
-
-
/**
-
* 更新 定时任务
-
*/
-
-
public Object update( String op, String type, String cron) {
-
type= type.toLowerCase();
-
switch (op.toLowerCase()) {
-
case "update":
-
return jobsConfigTest.update(type, cron);
-
case "cancel":
-
case "delete":
-
return jobsConfigTest.cancel(type);
-
case "restart":
-
case "reload":
-
return jobsConfigTest.restart(type);
-
default:
-
return jobsConfigTest.get();
-
}
-
}
大功告成,以上代码纯手打,参考了国内外一些大神的分享,就此告辞,后会有期!
参考1:篇幅太长不看系列
参考2: Dynamic Task Scheduling with Spring - MBcoder
参考3:Spring内置任务调度实现添加、取消、重置_蒋固金的博客-CSDN博客_scheduledtaskregistrar如何初始化
参考4:stackoverflow
参考5:插件codota 的代码提示
参考6:注解 @Scheduled配置方式的任务,如何重启?
重启Spring Scheduler的正确打开方式 - Night Field's Blog

 浙公网安备 33010602011771号