使用注解开发Spring
实际我们一般都用注解开发SpringMVC的代码
步骤一:新建一个module
步骤二:添加web框架
步骤三:完善web.xml
<?xml version="1.0" encoding="UTF-8"?>
<web-app xmlns="http://xmlns.jcp.org/xml/ns/javaee"
         xmlns:xsi="http://www.w3.org/2001/XMLSchema-instance"
         xsi:schemaLocation="http://xmlns.jcp.org/xml/ns/javaee http://xmlns.jcp.org/xml/ns/javaee/web-app_4_0.xsd"
         version="4.0">
    <servlet>

        <servlet-name>SpringMvc</servlet-name>
        <servlet-class>org.springframework.web.servlet.DispatcherServlet</servlet-class>

        <init-param>
            <param-name>contextConfigLocation</param-name>
            <param-value>classpath:springmvc-servlet.xml</param-value>
        </init-param>
        <load-on-startup>1</load-on-startup>

    </servlet>


    <servlet-mapping>
        <servlet-name>SpringMvc</servlet-name>
        <url-pattern>/</url-pattern>
    </servlet-mapping>
</web-app>
步骤四:写springmvc-servlet.xml
注意1:使用context 引入包实现注解
注意2:过滤静态资源文件,使用mvc标签
注意3:注册视图解析器
<?xml version="1.0" encoding="UTF-8"?>
<beans xmlns="http://www.springframework.org/schema/beans"
       xmlns:xsi="http://www.w3.org/2001/XMLSchema-instance"
       xmlns:context="http://www.springframework.org/schema/context"
       xmlns:mvc="http://www.springframework.org/schema/mvc"
       xsi:schemaLocation="http://www.springframework.org/schema/beans
       http://www.springframework.org/schema/beans/spring-beans.xsd
       http://www.springframework.org/schema/context
       http://www.springframework.org/schema/context/spring-context.xsd
       http://www.springframework.org/schema/mvc
       https://www.springframework.org/schema/mvc/spring-mvc.xsd">

    <context:component-scan base-package="com.chen.controller"/>
    <!--过滤一些静态资源,比如.txt .mp3,.mp4 .css .html等  下面这行配置就可以过滤掉-->
    <mvc:default-servlet-handler />
    <!--使得mvc注解生效使得处理引射器-->
    <mvc:annotation-driven/>

    <bean class="org.springframework.web.servlet.view.InternalResourceViewResolver"
          id="internalResourceViewResolver">
        <property name="prefix" value="/WEB-INF/jsp/"/>
        <property name="suffix" value=".jsp"/>
    </bean>
步骤五:在对应包下新建前台页面以及实现controller接口的实现类
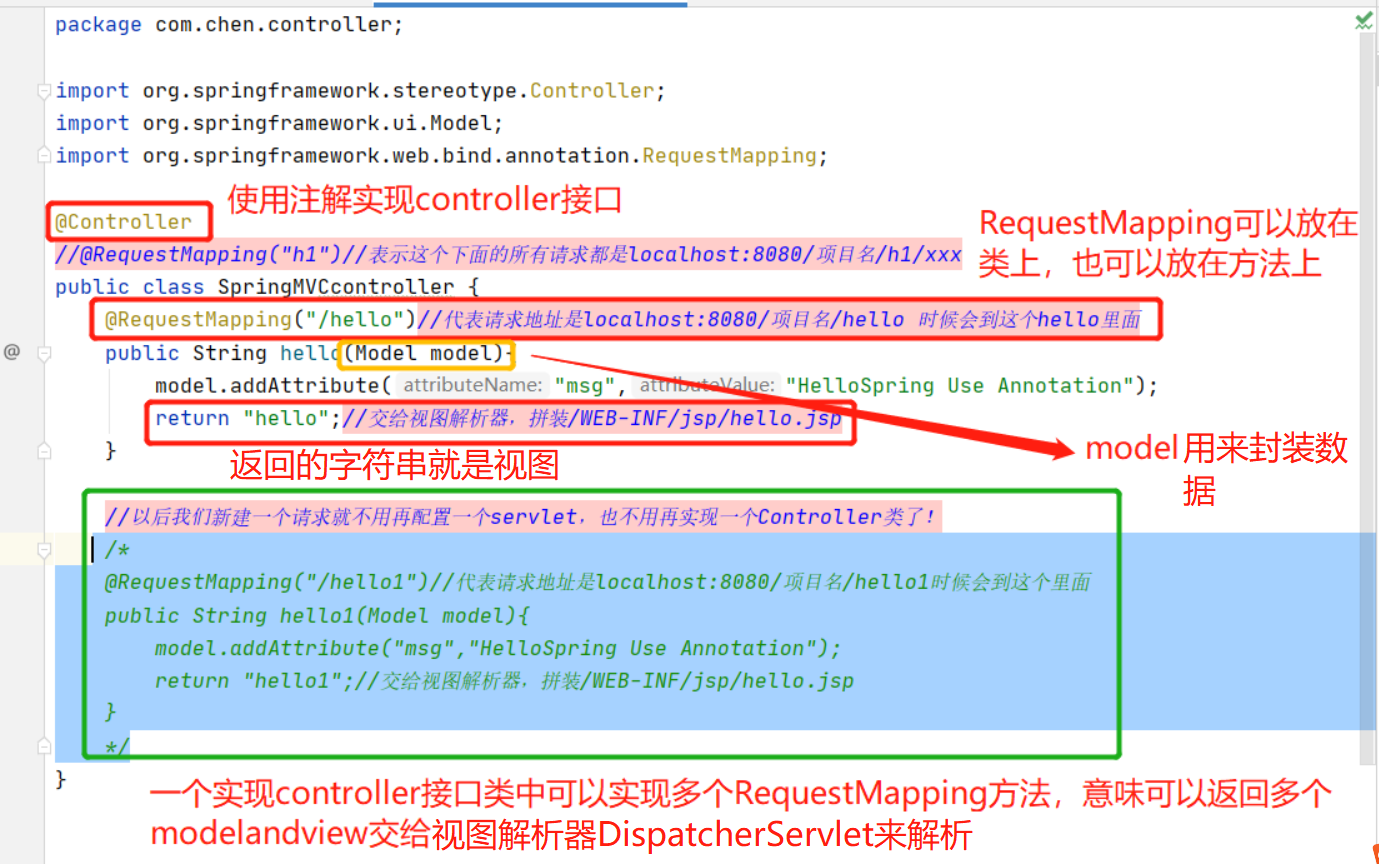
package com.chen.controller;

import org.springframework.stereotype.Controller;
import org.springframework.ui.Model;
import org.springframework.web.bind.annotation.RequestMapping;

@Controller
//@RequestMapping("h1")//表示这个下面的所有请求都是localhost:8080/项目名/h1/xxx                    多级路径会使用到
public class SpringMVCcontroller {
    @RequestMapping("/hello")//代表请求地址是localhost:8080/项目名/hello 时候会到这个hello里面
    public String hello(Model model){
        model.addAttribute("msg","HelloSpring Use Annotation");                  //model封装数据
        return "hello";//交给视图解析器,拼装/WEB-INF/jsp/hello.jsp                 //返回视图   view
    }

    //以后我们新建一个请求就不用再配置一个servlet,也不用再实现一个Controller类了!
    /*
    @RequestMapping("/hello1")//代表请求地址是localhost:8080/项目名/hello1时候会到这个里面
    public String hello1(Model model){
        model.addAttribute("msg","HelloSpring Use Annotation");
        return "hello1";//交给视图解析器,拼装/WEB-INF/jsp/hello1.jsp
    }
    */
}

 浙公网安备 33010602011771号