
Spring基础4——JdbcTemplate和声明式事务控制
Spring框架的JdbcTemplate是对JDK原生的JDBC做了封装,使用 JdbcTemplate 方便实现对数据库操作。
一、基础案例
1.1、不通过bean.xml文件加载DriverManagerDataSource.class(驱动类)和JDBCTemplate.class
- JdbcTemplate.class使用构造函数加载DriverManagerDataSource.class类型的对象,并访问mysql数据库
package xxx.xxx.jdbcTemplate;
import org.springframework.jdbc.core.JdbcTemplate;
import org.springframework.jdbc.datasource.DriverManagerDataSource;

public class JDBCTemplate {
   public static void main(String[] args) {
      DriverManagerDataSource driver = new DriverManagerDataSource();
      driver.setDriverClassName("com.mysql.jdbc.Driver");
      driver.setUrl("jdbc:mysql://localhost:3306/spring");
      driver.setUsername("root");
      driver.setPassword("root");

      JdbcTemplate template = new JdbcTemplate(driver);
      template.update("insert into account (name,money)values(?,?)","testJdbcTemplate",172.0);
   }
}
- JdbcTemplate.class使用set()函加载DriverManagerDataSource.class类型的对象,并访问mysql数据库
package xxx.xxx.jdbcTemplate;

import org.springframework.jdbc.core.JdbcTemplate;
import org.springframework.jdbc.datasource.DriverManagerDataSource;

public class JDBCTemplate {
   public static void main(String[] args) {
      DriverManagerDataSource driver = new DriverManagerDataSource();
      driver.setDriverClassName("com.mysql.jdbc.Driver");
      driver.setUrl("jdbc:mysql://localhost:3306/spring");
      driver.setUsername("root");
      driver.setPassword("root");

      JdbcTemplate template = new JdbcTemplate();
      template.setDataSource(driver);
      template.update("insert into account (name,money)values(?,?)","testJdbcTemplate",172.0);
   }
}
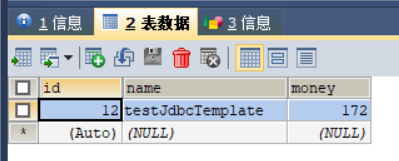
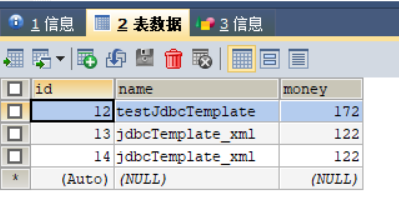
上述代码的执行结果,如下图所示(数据库的表结构定义和表中的数据):
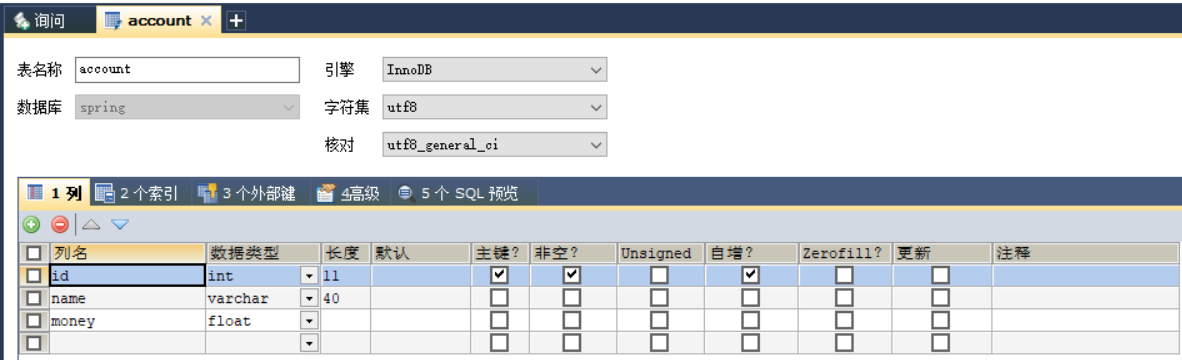
1.2、通过bean.xml文件加载DriverManagerDataSource.class(驱动类)和JdbcTemplate.class
- Maven的pom.xml文件
<?xml version="1.0" encoding="UTF-8"?>
<project xmlns="http://maven.apache.org/POM/4.0.0"
         xmlns:xsi="http://www.w3.org/2001/XMLSchema-instance"
         xsi:schemaLocation="http://maven.apache.org/POM/4.0.0 http://maven.apache.org/xsd/maven-4.0.0.xsd">
    <modelVersion>4.0.0</modelVersion>

    <groupId>xxx.xxx</groupId>
    <artifactId>Spring04_jdbcTemplate</artifactId>
    <version>1.0-SNAPSHOT</version>
    <build>
        <plugins>
            <plugin>
                <groupId>org.apache.maven.plugins</groupId>
                <artifactId>maven-compiler-plugin</artifactId>
                <configuration>
                    <source>6</source>
                    <target>6</target>
                </configuration>
            </plugin>
        </plugins>
    </build>
    <packaging>jar</packaging>

    <dependencies>
        <dependency>
            <groupId>org.springframework</groupId>
            <artifactId>spring-context</artifactId>
            <version>5.0.2.RELEASE</version>
        </dependency>

        <dependency>
            <groupId>org.springframework</groupId>
            <artifactId>spring-jdbc</artifactId>
            <version>5.0.2.RELEASE</version>
        </dependency>

        <dependency>
            <groupId>org.springframework</groupId>
            <artifactId>spring-tx</artifactId>
            <version>5.0.2.RELEASE</version>
        </dependency>

        <dependency>
            <groupId>mysql</groupId>
            <artifactId>mysql-connector-java</artifactId>
            <version>5.1.6</version>
        </dependency>
    </dependencies>

</project>
- Spring的bean.xml配置文件
<?xml version="1.0" encoding="UTF-8"?>
<beans xmlns="http://www.springframework.org/schema/beans"
       xmlns:xsi="http://www.w3.org/2001/XMLSchema-instance"
       xmlns:context="http://www.springframework.org/schema/context"
       xsi:schemaLocation="http://www.springframework.org/schema/beans
       http://www.springframework.org/schema/beans/spring-beans.xsd http://www.springframework.org/schema/context http://www.springframework.org/schema/context/spring-context.xsd">

    <bean id="jdbcTemplate" class="org.springframework.jdbc.core.JdbcTemplate">
        <constructor-arg name="dataSource" ref="driver"></constructor-arg>
    </bean>

    <bean id="driver" class="org.springframework.jdbc.datasource.DriverManagerDataSource">
        <property name="driverClassName" value="com.mysql.jdbc.Driver"></property>
        <property name="url" value="jdbc:mysql://localhost:3306/spring"></property>
        <property name="username" value="root"></property>
        <property name="password" value="root"></property>
    </bean>

</beans>
- 通过Spring的ClassPathXmlApplicationContext.class加载bean.xml并获取JdbcTemplate.class类型的对象
package .jdbcTemplate;

import org.springframework.context.support.ClassPathXmlApplicationContext;
import org.springframework.jdbc.core.JdbcTemplate;
import org.springframework.jdbc.datasource.DriverManagerDataSource;

public class JDBCTemplate2 {
    public static void main(String[] args) {
        ClassPathXmlApplicationContext ac = new ClassPathXmlApplicationContext("bean.xml");
        JdbcTemplate template =(JdbcTemplate) ac.getBean("jdbcTemplate");
        template.update("insert into account (name,money)values(?,?)","jdbcTemplate_xml",122.0);
    }
}
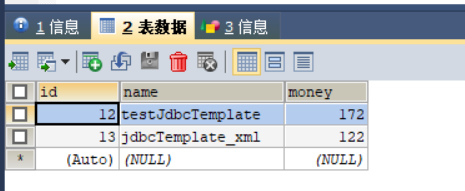
上述代码的执行结果,如下图所示(数据库的表结构定义和表中的数据):
二、Spring的JdbcTemplate在封装数据时,可以使用自定义的RowMapper.interface接口的实现类,来封装数据
- Maven的pom.xml文件
<?xml version="1.0" encoding="UTF-8"?>
<project xmlns="http://maven.apache.org/POM/4.0.0"
         xmlns:xsi="http://www.w3.org/2001/XMLSchema-instance"
         xsi:schemaLocation="http://maven.apache.org/POM/4.0.0 http://maven.apache.org/xsd/maven-4.0.0.xsd">
    <modelVersion>4.0.0</modelVersion>

    <groupId>xxx.xxx</groupId>
    <artifactId>Spring04_jdbcTemplate</artifactId>
    <version>1.0-SNAPSHOT</version>
    <build>
        <plugins>
            <plugin>
                <groupId>org.apache.maven.plugins</groupId>
                <artifactId>maven-compiler-plugin</artifactId>
                <configuration>
                    <source>6</source>
                    <target>6</target>
                </configuration>
            </plugin>
        </plugins>
    </build>
    <packaging>jar</packaging>

    <dependencies>
        <dependency>
            <groupId>org.springframework</groupId>
            <artifactId>spring-context</artifactId>
            <version>5.0.2.RELEASE</version>
        </dependency>

        <dependency>
            <groupId>org.springframework</groupId>
            <artifactId>spring-jdbc</artifactId>
            <version>5.0.2.RELEASE</version>
        </dependency>

        <dependency>
            <groupId>org.springframework</groupId>
            <artifactId>spring-tx</artifactId>
            <version>5.0.2.RELEASE</version>
        </dependency>

        <dependency>
            <groupId>mysql</groupId>
            <artifactId>mysql-connector-java</artifactId>
            <version>5.1.6</version>
        </dependency>
    </dependencies>

</project>
- Spring的bean.xml配置文件
<?xml version="1.0" encoding="UTF-8"?>
<beans xmlns="http://www.springframework.org/schema/beans"
       xmlns:xsi="http://www.w3.org/2001/XMLSchema-instance"
       xmlns:context="http://www.springframework.org/schema/context"
       xsi:schemaLocation="http://www.springframework.org/schema/beans
       http://www.springframework.org/schema/beans/spring-beans.xsd http://www.springframework.org/schema/context http://www.springframework.org/schema/context/spring-context.xsd">

    <bean id="jdbcTemplate" class="org.springframework.jdbc.core.JdbcTemplate">
        <constructor-arg name="dataSource" ref="driver"></constructor-arg>
    </bean>

    <bean id="driver" class="org.springframework.jdbc.datasource.DriverManagerDataSource">
        <property name="driverClassName" value="com.mysql.jdbc.Driver"></property>
        <property name="url" value="jdbc:mysql://localhost:3306/spring"></property>
        <property name="username" value="root"></property>
        <property name="password" value="root"></property>
    </bean>

</beans>
- 封装对象的实体类Account.class
package xxx.xxx.domain;

import java.io.Serializable;

/**
 * 账户的实体类
 */
public class Account implements Serializable {

    private Integer id;
    private String name;
    private Float money;

    public Integer getId() {
        return id;
    }

    public void setId(Integer id) {
        this.id = id;
    }

    public String getName() {
        return name;
    }

    public void setName(String name) {
        this.name = name;
    }

    public Float getMoney() {
        return money;
    }

    public void setMoney(Float money) {
        this.money = money;
    }

    @Override
    public String toString() {
        return "Account{" +
                "id=" + id +
                ", name='" + name + '\'' +
                ", money=" + money +
                '}';
    }
}
- 使用 RowMapper.interface接口的实现类来封装对象
package xxx.xxx.jdbcTemplate;

import xxx.xxx.domain.Account;
import org.springframework.context.support.ClassPathXmlApplicationContext;
import org.springframework.jdbc.core.BeanPropertyRowMapper;
import org.springframework.jdbc.core.JdbcTemplate;
import org.springframework.jdbc.core.RowMapper;
import java.sql.ResultSet;
import java.sql.SQLException;
import java.util.List;

public class JDBCTemplate3 {
   public static void main(String[] args) {
        ClassPathXmlApplicationContext ac = new ClassPathXmlApplicationContext("bean.xml");
        JdbcTemplate template =(JdbcTemplate) ac.getBean("jdbcTemplate");
        //保存方法
        template.update("insert into account (name,money)values(?,?)","jdbcTemplate_xml",122.0);
        //更新
        template.update("update account set name=?, money=? where id=?", "template_update",211.0,8);
        //删除
        template.update("delete from account where id=?",8 );
        //查询所有
        List<Account> selfRowMapper= template.query("select * from account", new AccountRowMapper());
        for (Account account : selfRowMapper) {
            System.out.println(account);
        }
   }
}
class AccountRowMapper implements RowMapper{
    //RowMapper.interface的实现类AccountRowMapper.class必须重写mapRow()函数,来封装数据,ResultSet对象可以获取每一行数据来进行封装。
   @Override
   public Object mapRow(ResultSet rs, int rowNum) throws SQLException {
      Account account = new Account();
      account.setId(rs.getInt("id"));
      account.setName(rs.getString("name"));
      account.setMoney(rs.getFloat("money"));
      return account;
   }
}
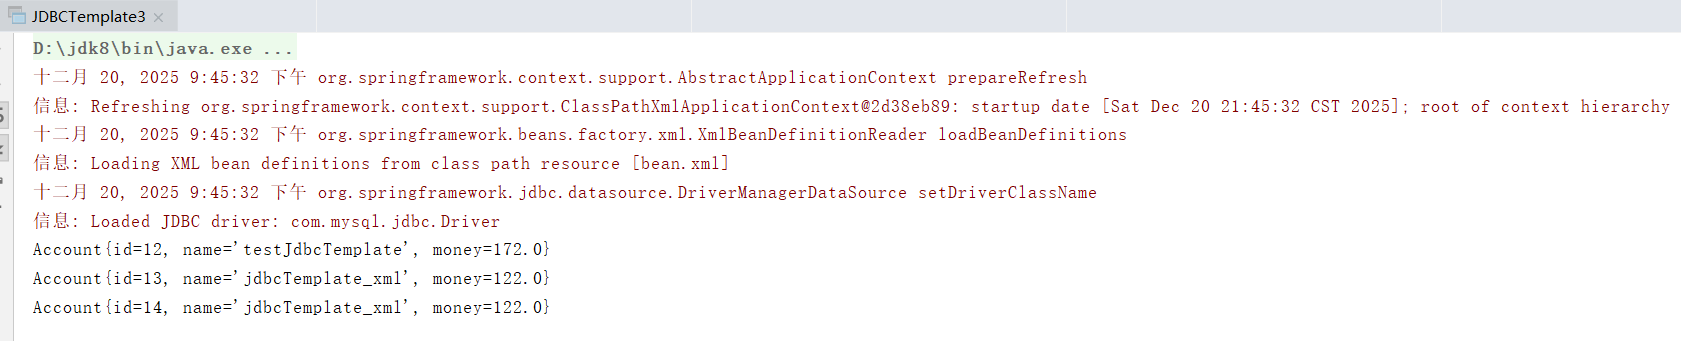
上述代码的执行结果,如下图所示(程序运行结果+数据库的表结构定义+表中的数据):
三、Spring的JdbcTemplate在封装数据时,也可以使用spirng中的org.springframework.jdbc.core.BeanPropertyRowMapper.class来封装数据
- Maven的pom.xml文件
同标题二、Spring的JdbcTemplate在封装数据时,可以使用自定义的RowMapper.interface接口的实现类,来封装数据 - Spring的bean.xml配置文件
同标题二、Spring的JdbcTemplate在封装数据时,可以使用自定义的RowMapper.interface接口的实现类,来封装数据 - 封装对象的实体类Account.class
同标题二、Spring的JdbcTemplate在封装数据时,可以使用自定义的RowMapper.interface接口的实现类,来封装数据 - 使用Spirng中的org.springframework.jdbc.core.BeanPropertyRowMapper.class来封装数据
package xxx.xxx.jdbcTemplate;

import xxx.xxx.domain.Account;
import org.springframework.context.support.ClassPathXmlApplicationContext;
import org.springframework.jdbc.core.BeanPropertyRowMapper;
import org.springframework.jdbc.core.JdbcTemplate;
import org.springframework.jdbc.core.RowMapper;
import java.sql.ResultSet;
import java.sql.SQLException;
import java.util.List;

public class JDBCTemplate3 {
   public static void main(String[] args) {
      ClassPathXmlApplicationContext ac = new ClassPathXmlApplicationContext("bean.xml");
      JdbcTemplate template =(JdbcTemplate) ac.getBean("jdbcTemplate");
        List<Account> accounts = template.query("select * from account", new BeanPropertyRowMapper<Account>(Account.class));
        for (Account account : accounts) {
            System.out.println(account);
        }

        //查询一个
        List<Account> accountList = template.query("select * from account where id = ?",new BeanPropertyRowMapper<Account>(Account.class),3);
        System.out.println(accountList.isEmpty()?"没有内容":accountList.get(0));

        //聚合函数查询,查询返回一行一列(但是不能使用group by子句)
        Long count = template.queryForObject("select count(*) from account where money>?", Long.class, 1);
        System.out.println(count);
   }
}
上述代码的执行结果,如下图所示(程序运行结果+数据库的表结构定义+表中的数据):
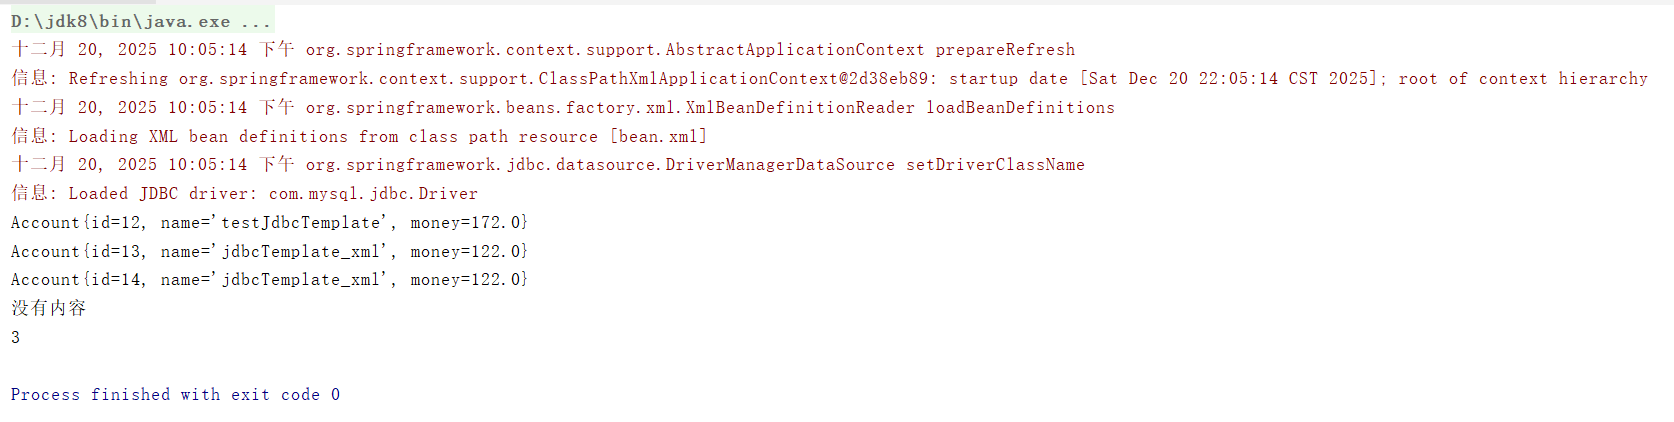
该原理和DbUtils中的BeanListHandler一样
四、可以对标题三中的代码进行优化
优化步骤如下:
①、创建JdbcTemplateSupport.class,在setDataSource()函数中生成该DataSource数据的JdbcTemplate对象;
②、为了确保JdbcTemplate类的对象一定存在,还可以设置setTemplate()函数,以确保数据,代码如下:
- Maven的pom.xml文件
同标题二、Spring的JdbcTemplate在封装数据时,可以使用自定义的RowMapper.interface接口的实现类,来封装数据 - Spring的bean.xml配置文件
<?xml version="1.0" encoding="UTF-8"?>
<beans xmlns="http://www.springframework.org/schema/beans"
       xmlns:xsi="http://www.w3.org/2001/XMLSchema-instance"
       xmlns:context="http://www.springframework.org/schema/context"
       xsi:schemaLocation="http://www.springframework.org/schema/beans
       http://www.springframework.org/schema/beans/spring-beans.xsd http://www.springframework.org/schema/context http://www.springframework.org/schema/context/spring-context.xsd">

    <bean id="accountDao" class="xxx.xxx.dao.impl.IAccountDaoImpl2">
        <property name="dataSource" ref="driver"></property>
        <property name="template" ref="jdbcTemplate"></property>
    </bean>

    <bean id="jdbcTemplate" class="org.springframework.jdbc.core.JdbcTemplate">
        <constructor-arg name="dataSource" ref="driver"></constructor-arg>
    </bean>

    <bean id="driver" class="org.springframework.jdbc.datasource.DriverManagerDataSource">
        <property name="driverClassName" value="com.mysql.jdbc.Driver"></property>
        <property name="url" value="jdbc:mysql://localhost:3306/spring"></property>
        <property name="username" value="root"></property>
        <property name="password" value="root"></property>
    </bean>
</beans>
-
封装对象的实体类Account.class
同标题二、Spring的JdbcTemplate在封装数据时,可以使用自定义的RowMapper.interface接口的实现类,来封装数据 -
JdbcTemplateSupport.class
package xxx.xxx.dao.impl;

import org.springframework.jdbc.core.JdbcTemplate;
import javax.sql.DataSource;

public class JdbcTemplateSupport {
    public JdbcTemplate template;

    public void setTemplate(JdbcTemplate template) {
       this.template = template;
    }

    public JdbcTemplate getJdbcTemplate(){
       return template;
    }

    public void setDataSource(DataSource dataSource){
       if (template == null){
          template = new JdbcTemplate(dataSource);
       }
    }
}
- dao层的接口和查询类(使用spirng中的org.springframework.jdbc.core.BeanPropertyRowMapper.class来封装数据)
package xxx.xxx.dao;

import xxx.xxx.domain.Account;

public interface IAccountDao {

    public Account findAccountById(Integer accountId);

    public Account findAccountByName(String accountName);

    public void updateAccount(Account account);
}
package xxx.xxx.dao.impl;

import xxx.xxx.dao.IAccountDao;
import xxx.xxx.domain.Account;
import org.springframework.jdbc.core.BeanPropertyRowMapper;
import java.util.List;

public class IAccountDaoImpl2 extends JdbcTemplateSupport implements IAccountDao{


   @Override
   public Account findAccountById(Integer accountId) {
      List<Account> accounts = super.getJdbcTemplate().query("select * from account where id = ?", new BeanPropertyRowMapper<Account>(Account.class), accountId);
      return accounts.isEmpty()?null:accounts.get(0);
   }

   @Override
   public Account findAccountByName(String accountName) {
      List<Account> accounts = super.getJdbcTemplate().query("select * from account where name=?", new BeanPropertyRowMapper<Account>(Account.class), accountName);
      if (accounts.isEmpty()){
         return null;
      }else if(accounts.size() > 1){
         throw new RuntimeException("查询结果不唯一");
      }
      return accounts.get(0);
   }

   @Override
   public void updateAccount(Account account) {
      super.getJdbcTemplate().update("update account set name=?,money=? where id=?",account.getName(),account.getMoney(),account.getId());
   }
}
- 测试上述优化代码
package xxx.xxx.jdbcTemplate;

import xxx.xxx.dao.impl.IAccountDaoImpl2;
import xxx.xxx.domain.Account;
import org.springframework.context.support.ClassPathXmlApplicationContext;

public class JDBCTemplate5 {
    public static void main(String[] args) {
        ClassPathXmlApplicationContext ac = new ClassPathXmlApplicationContext("bean.xml");
        IAccountDaoImpl2 accountDao = ac.getBean("accountDao", IAccountDaoImpl2.class);
        Account accountByName = accountDao.findAccountByName("aaa");
        System.out.println(accountByName);
        System.out.println("-------------");
        Account accountById = accountDao.findAccountById(1);
        System.out.println(accountById);
    }
}
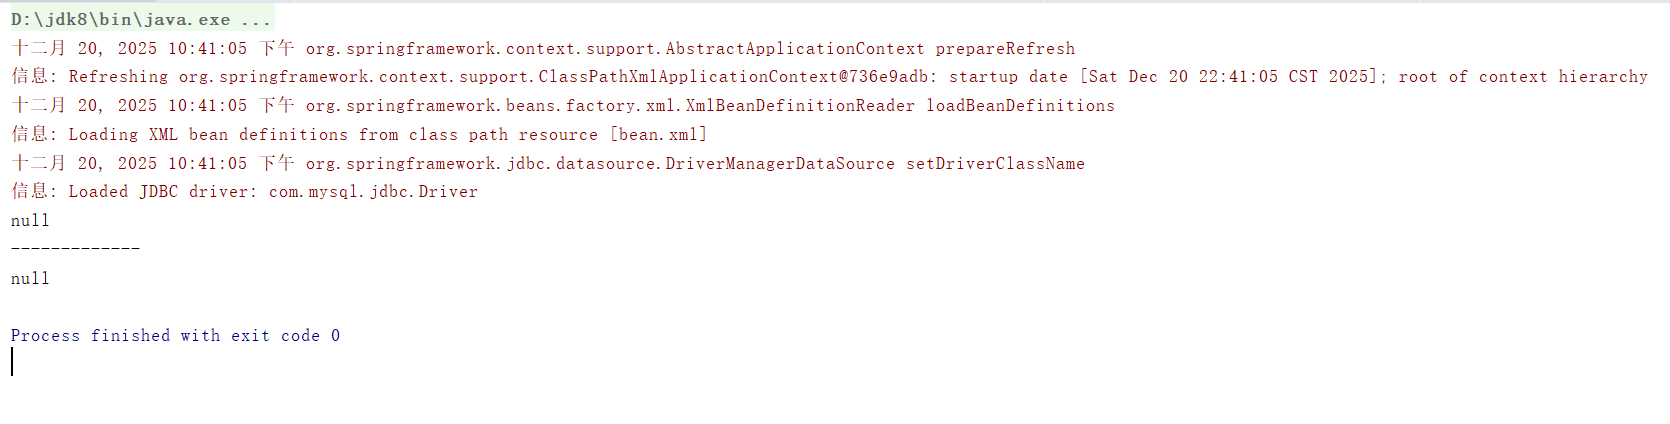
上述代码的执行结果,如下图所示(程序运行结果+数据库的表结构定义+表中的数据):
ps:上述代码中的JdbcTemplateSupport.class其实在spring中也有对应的实现
五、声明式事务控制
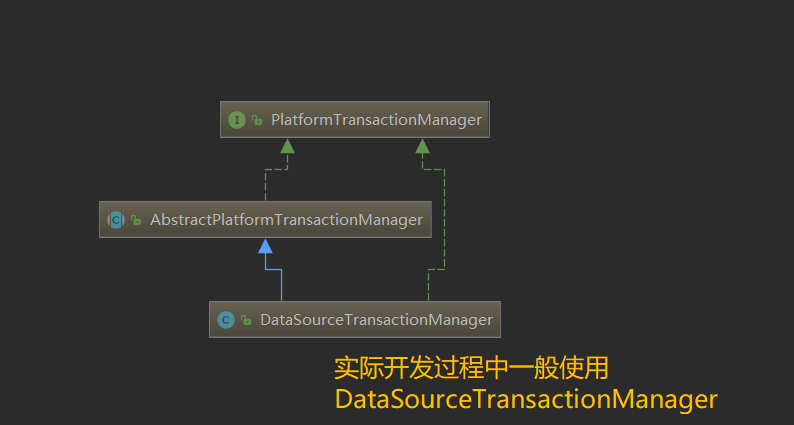
Spring中事务控制的API是PlatformTransactionManager(事务管理器),此接口是 Spring 的事务管理器,它里面提供了我们常用的操作事务的方法,包含以下3个具体操作:
①、获取事务状态信息
TransactionStatus getTransaction(TransactionDefinition definition)
②、提交事务
void commit(TransactionStatus status)
③、回滚事务
void rollback(TransactionStatus status)
在实际开发中,一般使用的是PlatformTransactionManager接口的实现类DataSourceTransactionManager.class,具体的UML关系图,如下所示:
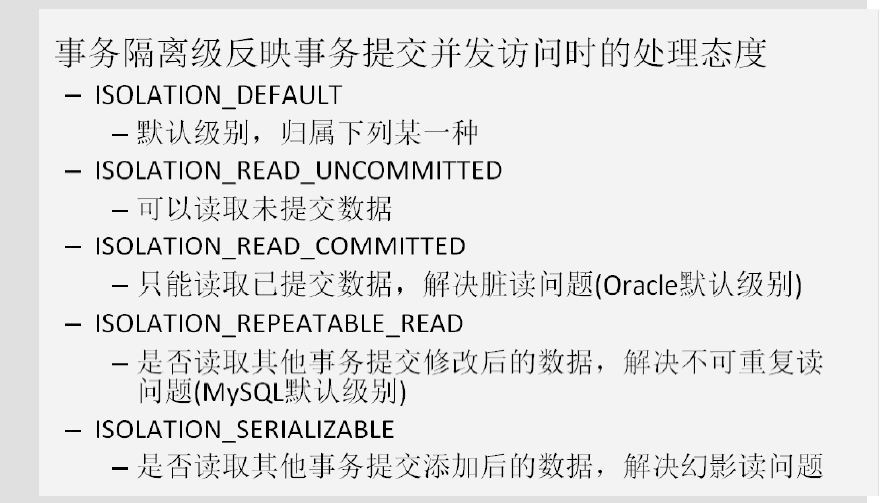
TransactionDefinition(定义事务的传播行为,隔离级别,超时时间等)隔离级别的字段,如下所示:
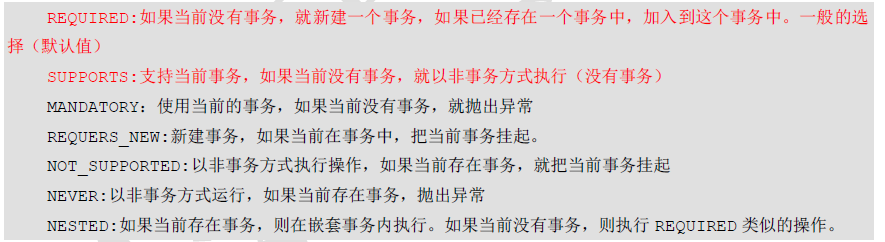
传播行为的字段,如下所示:
超时时间和是否为只读事务(参考源码中的TIMEOUT_DEFAULT字段和isReadOnly()函数,只表示有这个功能),如下代码所示:
int TIMEOUT_DEFAULT = -1;
boolean isReadOnly();
5.1、声明式事务控制的案例
-
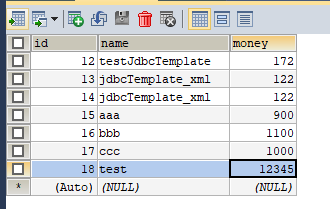
数据库表结构和表数据
![image]()
![image]()
-
编写实体类
package xxx.xxx.domain;

import java.io.Serializable;
/**
 * 账户的实体类
 */
public class Account implements Serializable {

    private Integer id;
    private String name;
    private Float money;

    //省略setter getter方法和toString方法
}
- 编写dao层的接口和实现类
package xxx.xxx.dao.impl;

import org.springframework.jdbc.core.JdbcTemplate;
import javax.sql.DataSource;

public class JdbcTemplateSupport {
    public JdbcTemplate template;

    public void setTemplate(JdbcTemplate template) {
       this.template = template;
    }

    public JdbcTemplate getJdbcTemplate(){
       return template;
    }

    public void setDataSource(DataSource dataSource){
       if (template == null){
          template = new JdbcTemplate(dataSource);
       }
    }
}
package xxx.xxx.dao;

import xxx.xxx.domain.Account;

public interface IAccountDao {

    public Account findAccountById(Integer accountId);

    public Account findAccountByName(String accountName);

    public void updateAccount(Account account);
}
package xxx.xxx.dao.impl;

import xxx.xxx.dao.IAccountDao;
import xxx.xxx.domain.Account;
import org.springframework.jdbc.core.BeanPropertyRowMapper;
import org.springframework.jdbc.core.support.JdbcDaoSupport;
import java.util.List;
/**
 * 账户的持久层实现类
 */
public class AccountDaoImpl extends JdbcDaoSupport implements IAccountDao {

    @Override
    public Account findAccountById(Integer accountId) {
        List<Account> accounts = super.getJdbcTemplate().query("select * from account where id = ?",new BeanPropertyRowMapper<Account>(Account.class),accountId);
        return accounts.isEmpty()?null:accounts.get(0);
    }

    @Override
    public Account findAccountByName(String accountName) {
        List<Account> accounts = super.getJdbcTemplate().query("select * from account where name = ?",new BeanPropertyRowMapper<Account>(Account.class),accountName);
        if(accounts.isEmpty()){
            return null;
        }
        if(accounts.size()>1){
            throw new RuntimeException("结果集不唯一");
        }
        return accounts.get(0);
    }

    @Override
    public void updateAccount(Account account) {
        super.getJdbcTemplate().update("update account set name=?,money=? where id=?",account.getName(),account.getMoney(),account.getId());
    }
}
- 编写service层的接口和实现类(省略接口文件的代码)
package xxx.xxx.service.impl;

import xxx.xxx.dao.IAccountDao;
import xxx.xxx.domain.Account;
import xxx.xxx.service.IAccountService;
/**
 * 账户的业务层实现类
 *
 * 事务控制应该都是在业务层
 */
public class AccountServiceImpl implements IAccountService{

    private IAccountDao accountDao;

    public void setAccountDao(IAccountDao accountDao) {
        this.accountDao = accountDao;
    }

    @Override
    public Account findAccountById(Integer accountId) {
        return accountDao.findAccountById(accountId);

    }

    @Override
    public void transfer(String sourceName, String targetName, Float money) {
        System.out.println("transfer....");
        //1.根据名称查询转出账户
        Account source = accountDao.findAccountByName(sourceName);
        //2.根据名称查询转入账户
        Account target = accountDao.findAccountByName(targetName);
        //3.转出账户减钱
        source.setMoney(source.getMoney()-money);
        //4.转入账户加钱
        target.setMoney(target.getMoney()+money);
        //5.更新转出账户
        accountDao.updateAccount(source);

        int i=1/0;

        //6.更新转入账户
        accountDao.updateAccount(target);
    }
}
- 编写Spring的bean.xml配置文件
<?xml version="1.0" encoding="UTF-8"?>
<beans xmlns="http://www.springframework.org/schema/beans"
       xmlns:xsi="http://www.w3.org/2001/XMLSchema-instance"
       xmlns:aop="http://www.springframework.org/schema/aop"
       xmlns:tx="http://www.springframework.org/schema/tx"
       xsi:schemaLocation="
        http://www.springframework.org/schema/beans
        http://www.springframework.org/schema/beans/spring-beans.xsd
        http://www.springframework.org/schema/tx
        http://www.springframework.org/schema/tx/spring-tx.xsd
        http://www.springframework.org/schema/aop
        http://www.springframework.org/schema/aop/spring-aop.xsd">

    <!-- 配置业务层-->
    <bean id="accountService" class="xxx.xxx.service.impl.AccountServiceImpl">
        <property name="accountDao" ref="accountDao"></property>
    </bean>

    <!-- 配置账户的持久层-->
    <bean id="accountDao" class="xxx.xxx.dao.impl.AccountDaoImpl">
        <property name="dataSource" ref="dataSource"></property>
    </bean>

    <!-- 配置数据源-->
    <bean id="dataSource" class="org.springframework.jdbc.datasource.DriverManagerDataSource">
        <property name="driverClassName" value="com.mysql.jdbc.Driver"></property>
        <property name="url" value="jdbc:mysql://localhost:3306/spring"></property>
        <property name="username" value="root"></property>
        <property name="password" value="root"></property>
    </bean>

    <!--配置事务管理器-->
    <bean id="transactionManager" class="org.springframework.jdbc.datasource.DataSourceTransactionManager">
        <property name="dataSource" ref="dataSource"></property>
    </bean>

    <!--配置事务通知,引用事务管理器-->
    <tx:advice id="txAdvice" transaction-manager="transactionManager">
        <tx:attributes>
            <!--指定事务通知的方法-->
            <tx:method name="transfer" isolation="REPEATABLE_READ" propagation="REQUIRED" read-only="false" ></tx:method>
        </tx:attributes>
    </tx:advice>

    <!--配置aop-->
    <aop:config>
        <!--配置切入点表达式-->
        <aop:pointcut id="pt1" expression="execution(* xxx.xxx.service.impl.AccountServiceImpl.*(..))"></aop:pointcut>
        <!--建立事务的通知和切入点表达式的关系-->
        <aop:advisor advice-ref="txAdvice" pointcut-ref="pt1"></aop:advisor>
    </aop:config>
</beans>
- Maven的pom.xml文件
<?xml version="1.0" encoding="UTF-8"?>
<project xmlns="http://maven.apache.org/POM/4.0.0"
         xmlns:xsi="http://www.w3.org/2001/XMLSchema-instance"
         xsi:schemaLocation="http://maven.apache.org/POM/4.0.0 http://maven.apache.org/xsd/maven-4.0.0.xsd">
    <modelVersion>4.0.0</modelVersion>

    <groupId>com.chelong</groupId>
    <artifactId>Spring04_SpirngTx</artifactId>
    <version>1.0-SNAPSHOT</version>
    <build>
        <plugins>
            <plugin>
                <groupId>org.apache.maven.plugins</groupId>
                <artifactId>maven-compiler-plugin</artifactId>
                <configuration>
                    <source>6</source>
                    <target>6</target>
                </configuration>
            </plugin>
        </plugins>
    </build>
    <packaging>jar</packaging>

    <dependencies>
        <dependency>
            <groupId>org.springframework</groupId>
            <artifactId>spring-context</artifactId>
            <version>5.0.2.RELEASE</version>
        </dependency>

        <dependency>
            <groupId>org.springframework</groupId>
            <artifactId>spring-jdbc</artifactId>
            <version>5.0.2.RELEASE</version>
        </dependency>

        <dependency>
            <groupId>org.springframework</groupId>
            <artifactId>spring-tx</artifactId>
            <version>5.0.2.RELEASE</version>
        </dependency>

        <dependency>
            <groupId>org.springframework</groupId>
            <artifactId>spring-test</artifactId>
            <version>5.0.2.RELEASE</version>
        </dependency>

        <dependency>
            <groupId>mysql</groupId>
            <artifactId>mysql-connector-java</artifactId>
            <version>5.1.6</version>
        </dependency>

        <dependency>
            <groupId>org.aspectj</groupId>
            <artifactId>aspectjweaver</artifactId>
            <version>1.8.7</version>
        </dependency>

        <dependency>
            <groupId>junit</groupId>
            <artifactId>junit</artifactId>
            <version>4.12</version>
        </dependency>
    </dependencies>

</project>
- 测试
package xxx.xxx.test;

import xxx.xxx.service.IAccountService;
import org.junit.Test;
import org.junit.runner.RunWith;
import org.springframework.beans.factory.annotation.Autowired;
import org.springframework.test.context.ContextConfiguration;
import org.springframework.test.context.junit4.SpringJUnit4ClassRunner;

@RunWith(SpringJUnit4ClassRunner.class)
@ContextConfiguration(locations = "classpath:bean.xml")
public class AccountServiceTest {

   @Autowired
   private IAccountService service;

   @Test
   public void testTransfer(){
      service.transfer("aaa","bbb" , 100.0f);
   }
}
测试结果:可以控制住事务,发生异常时事务进行了回滚。

 浙公网安备 33010602011771号