Django框架model实现数据库增删查改
1.创建Django工程
https://www.cnblogs.com/CK85/p/10159159.html
2.在model.py中配置生成表格的类对象。
from django.db import models

# Create your models here.


class Book(models.Model):
    name = models.CharField(max_length=20)
    price = models.FloatField()
    pub_date = models.DateField()
    author = models.CharField(max_length=32, null=False)

class Author(models.Model):
    name = models.CharField(max_length=32)
3.在Terminal中输入命令创建、生成表格。
E:\Django_ORM>python manage.py makemigrations

E:\Django_ORM>python manage.py migrate
4.在视图左边选择database可以将创建的数据库可视化。
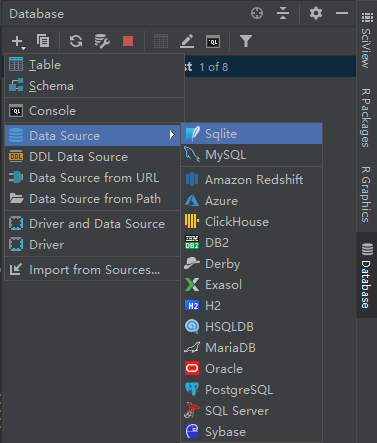

选择之后点击apply和ok就可以看见创建的表格。
5.添加主(index)界面
<!DOCTYPE html>
<html lang="en">
<head>
    <meta charset="UTF-8">
    <title>Title</title>
    <style>
        *{
            margin: 0;
            padding: 0;
        }
        .head{
            line-head: 40px;
            background-color: green;
            color: white;
            text-align: center;
        }

    </style>
</head>
<body>
<div class="outer">
    <div class="head">标题</div>
    <div class="content">
{#        <a href="/addbook/">添加书籍</a>#}

        <form action="/addbook/" method="Post">
            书名<input type="text" name="name">
            价格<input type="text" name="price">
            作者<input type="text" name="author">
            日期<input type="text" name="pub_date">
            <input type="submit" value="添加书籍">

        </form>
        <form action="/delete/" method="post">
            书名<input type="text" name="name">
            价格<input type="text" name="price">
            作者<input type="text" name="author">
            日期<input type="text" name="pub_date">
            <input type="submit" value="删除书籍">
        </form>
        <form action="/select/" method="post">
            书名<input type="text" name="name">
            价格<input type="text" name="price">
            作者<input type="text" name="author">
            日期<input type="text" name="pub_date">
            <input type="submit" value="筛选书籍">
        </form>
        <form action="/update/" method="post">
            书名<input type="text" name="name">
            价格<input type="text" name="price">
            作者<input type="text" name="author">
            日期<input type="text" name="pub_date">
            <input type="submit" value="更改书籍">
        </form>
{#        <a href="/delete/">删除书籍</a>#}
{#        <a href="/select/">查找书籍</a>#}
{#        <a href="/update/">更改书籍</a>#}
    </div>
</div>

<div class="queryResult">
    {% for book in book_list %}
    <div>
        <p>{{ book.name }} {{ book.author }} {{ book.price }}</p>
    </div>
    {% endfor %}
</div>


</body>
</html>
6.添加视图函数
from django.shortcuts import render, HttpResponse
from app01.models import *
from django.views.decorators.csrf import csrf_exempt
# Create your views here.


def index(request):

    return render(request, 'index.html')


@csrf_exempt
def addbook(request):

    book_dic = {}
    book = request.POST
    book_dic['name'] = book['name']
    book_dic['author'] = book['author']
    book_dic['pub_date'] = book['pub_date']
    book_dic['price'] = int(book['price'])

    print('----book_POST:', book_dic)

    Book.objects.create(**book_dic)

    return HttpResponse('添加成功!')


@csrf_exempt
def update(request):

    book_dic = {}
    book = request.POST
    book_dic['name'] = book['name']
    book_dic['author'] = book['author']
    book_dic['pub_date'] = book['pub_date']
    book_dic['price'] = int(book['price'])

    Book.objects.filter(**book_dic).update(price=999)

    return HttpResponse('修改成功!')


@csrf_exempt
def delete(request):

    book_dic = {}
    book = request.POST
    book_dic['name'] = book['name']
    book_dic['author'] = book['author']
    book_dic['pub_date'] = book['pub_date']
    book_dic['price'] = int(book['price'])

    Book.objects.filter(**book_dic).delete()
    return HttpResponse('删除成功!')


@csrf_exempt
def select(request):


    book = request.POST


    book_list = Book.objects.filter(name=book['name'])


    print('----------------->', book_list)
    return render(request, 'index.html', {'book_list': book_list})
6.1表记录的添加方法
1.新建实例对象进行添加
def addbook(request):
    b = Book(name='python', price=99 ,author='ck', pub_date='2017-12-12')
    b.save()
    # Book.objects.create(name='oldboylinux', price=99, author='oldboy', pub_date='2017-12-12')

    return HttpResponse('添加成功!')
2.直接创建(可以省略save步骤)
def addbook(request):
    # b = Book(name='python', price=99 ,author='ck', pub_date='2017-12-12')
    # b.save()
    Book.objects.create(name='oldboylinux', price=99, author='oldboy', pub_date='2017-12-12')

    return HttpResponse('添加成功!')
6.2表记录的查询方法
7.设置url分发
"""DJango_ORM URL Configuration

The `urlpatterns` list routes URLs to views. For more information please see:
    https://docs.djangoproject.com/en/2.1/topics/http/urls/
Examples:
Function views
    1. Add an import:  from my_app import views
    2. Add a URL to urlpatterns:  path('', views.home, name='home')
Class-based views
    1. Add an import:  from other_app.views import Home
    2. Add a URL to urlpatterns:  path('', Home.as_view(), name='home')
Including another URLconf
    1. Import the include() function: from django.urls import include, path
    2. Add a URL to urlpatterns:  path('blog/', include('blog.urls'))
"""
from django.contrib import admin
from django.urls import path
from app01 import views
urlpatterns = [
    path('admin/', admin.site.urls),
    path('index/', views.index),
    path('addbook/', views.addbook),
    path('update/', views.update),
    path('delete/', views.delete),
    path('select/', views.select),
]
8.
last.如果需要使用mysql作为数据库,需要在settings.py与app01中的__init__.py文件中设置。
在__init__.py文件中导入pymysql,使用pymsql进行数据库处理(python3)
import pymysql
pymysql.install_as_MySQLdb()
在settings.py中替换database配置:
DATABASES = {

    'default': {

        'ENGINE': 'django.db.backends.mysql',

        'NAME': 'Django_ORM',    #你的数据库名称

        'USER': 'root',   #你的数据库用户名

        'PASSWORD': '123', #你的数据库密码

        'HOST': '', #你的数据库主机,留空默认为localhost

        'PORT': '3306', #你的数据库端口

    }

}
9.在settings.py中加入LOGGING配置文件可以显示MYSQL的底层语句。
LOGGING = {
    'version': 1,
    'disable_existing_loggers': False,
    'handlers': {
        'console':{
            'level':'DEBUG',
            'class':'logging.StreamHandler',
        },
    },
    'loggers': {
        'django.db.backends': {
            'handlers': ['console'],
            'propagate': True,
            'level':'DEBUG',
        },
    }
}
10.如果遇到form表单使用Post方法没有办法提交时:
https://www.cnblogs.com/CK85/p/10164136.html


 浙公网安备 33010602011771号