laravel框架(完整上传到数据库,不提交图片)(以提交员工信息为例)
第一步:使用PHP终端创建一个名为blog的框架
composer create-project --prefer-dist laravel/laravel blog 7.x
创建好之后,在框架中找到resources目录下的views文件夹,在该文件夹中创建一个名为form.blade.php表单
<!doctype html>
<html lang="en">
<head>
    <meta charset="UTF-8">
    <meta name="viewport"
          content="width=device-width, user-scalable=no, initial-scale=1.0, maximum-scale=1.0, minimum-scale=1.0">
    <meta http-equiv="X-UA-Compatible" content="ie=edge">
    <title>员工信息</title>
    <!-- 最新版本的 Bootstrap 核心 CSS 文件 -->
    <link rel="stylesheet" href="https://stackpath.bootstrapcdn.com/bootstrap/3.4.1/css/bootstrap.min.css" integrity="sha384-HSMxcRTRxnN+Bdg0JdbxYKrThecOKuH5zCYotlSAcp1+c8xmyTe9GYg1l9a69psu" crossorigin="anonymous">

</head>
<body>
<form class="form-horizontal" enctype="multipart/form-data" method="post" action="add">
    @csrf
    <div class="form-group">
        <label for="inputEmail3" class="col-sm-2 control-label">员工姓名</label>
        <div class="col-sm-10">
            <input type="text" class="form-control" name="username" id="inputEmail3" placeholder="员工姓名">
        </div>
    </div>
    <div class="form-group">
        <label for="inputPassword3" class="col-sm-2 control-label">员工身份证号</label>
        <div class="col-sm-10">
            <input type="text" class="form-control" name="usercard" id="inputPassword3" placeholder="员工身份证号">
        </div>
    </div>

    <div class="form-group">
        <label for="inputPassword3" class="col-sm-2 control-label">员工手机号</label>
        <div class="col-sm-10">
            <input type="text" class="form-control" name="usertel" id="inputPassword3" placeholder="员工手机号">
        </div>
    </div>

    <div class="form-group">
        <div class="col-sm-offset-2 col-sm-10">
            <button type="submit" class="btn btn-default">添加</button>
        </div>
    </div>
</form>
</body>
</html>

@if($errors->any())
    @foreach($errors->all() as $value)
        <p>{{ $value }}</p>
    @endforeach
    @endif
该页面里的@csrf是为了不让页面出现419
下面这个是进行验证form表单里面的非空或者进行正则验证的时候,出现错误在表单下面提示错误
@if($errors->any())
    @foreach($errors->all() as $value)
        <p>{{ $value }}</p>
    @endforeach
    @endif
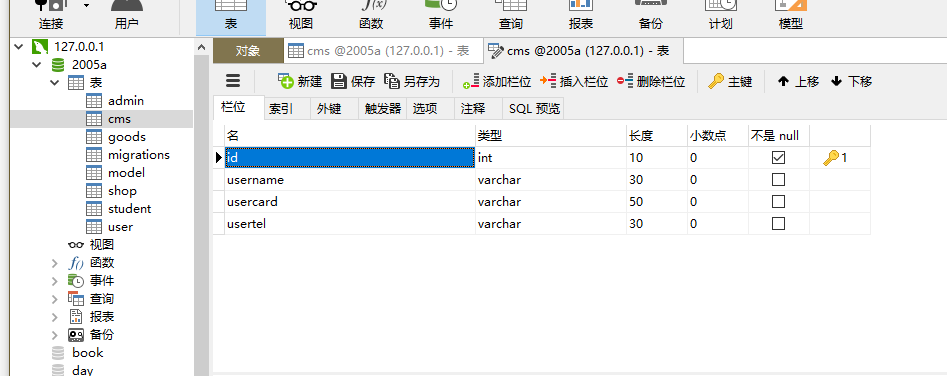
接下来在Navicat中创建一个名为2005a(举的例子)的数据库,并在该数据库内创建一个cms的表
下一步,找到.env这个文件,并把数据库名字由原来的laravel改成创建好的2005a,DB_PASSWORD=为默认的root
使用终端创建一个名为UserProfile.php的控制器,控制器存放在框架app目录下Http下Controllers文件夹内
php artisan make:controller UserProfile
使用终端创建一个名为UserModel.php的模型
php artisan make:model UserModel
在模型内连接到表
<?php

namespace App;

use Illuminate\Database\Eloquent\Model;

class UserModel extends Model
{
    //连接2005a数据库里的cms这个表
    public $table='cms';
}
控制器内创建方法,并在routes文件夹中的web.php中设置路由
<?php

namespace App\Http\Controllers;

use App\UserModel;
use Illuminate\Http\Request;

class UserProfile extends Controller
{
    //添加方法
    function add(Request $request){
        $request->validate([
            'username'=>'required',
            'usercard'=>'required',
            'usertel'=>'required'
        ],[
            'username.required'=>'员工姓名不能为空',
            'usercard.required'=>'员工身份证不能为空',
            'usertel.required'=>'员工手机号不能为空'
        ]);
        //接受数据
        $param=$request->input();
        unset($param['_token']);
        //调用模型
        $articel=new UserModel();
        //添加
        $res=$articel->insert($param);
        if ($res){
            return "<script>alert('添加成功');location.href='show'</script>";
        }
        return "<script>alert('失败');location.href='form'</script>";
    }
    function show(){
        $face= new UserModel();
        $data=$face->get();
        return view('show',['arr'=>$data]);
    }

    function index_del(Request $request){
        $id=$request->input('id');
        if (!is_numeric($id)){
            return '参数不正确';
        }
        $articel=new UserModel();
        $res=$articel->where('id',$id)->delete();
        if ($res){
            return "<script>alert('删除成功');location.href='show'</script>";
        }
        return redirect('show');
    }
}
下面是路由
<?php

use Illuminate\Support\Facades\Route;

/*
|--------------------------------------------------------------------------
| Web Routes
|--------------------------------------------------------------------------
|
| Here is where you can register web routes for your application. These
| routes are loaded by the RouteServiceProvider within a group which
| contains the "web" middleware group. Now create something great!
|
*/

Route::get('/', function () {
    return view('welcome');
});

Route::get('form',function (){
    return view('form');
});
Route::post('add','UserProfile@add');
Route::get('show','UserProfile@show');
Route::get('delect','UserProfile@index_del');
还有一个展示的页面,和form.blade.php文件在同一个文件夹内,创建一个名为show.blade.php展示页面文件
<!doctype html>
<html lang="en">
<head>
    <meta charset="UTF-8">
    <meta name="viewport"
          content="width=device-width, user-scalable=no, initial-scale=1.0, maximum-scale=1.0, minimum-scale=1.0">
    <meta http-equiv="X-UA-Compatible" content="ie=edge">
    <title>Document</title>
</head>
<body>
<table border="1">
    <tr>
        <td>id</td>
        <td>员工姓名</td>
        <td>员工身份证</td>
        <td>员工手机号</td>
        <td>操作</td>
    </tr>
    @foreach($arr as $value)
        <tr>
            <td>{{ $value['id'] }}</td>
            <td>{{ $value['username'] }}</td>
            <td>{{ $value['usercard'] }}</td>
            <td>{{ $value['usertel'] }}</td>
            <td>
                <a href="delect?id={{ $value['id'] }}">删除</a>
            </td>
        </tr>
    @endforeach
</table>
</body>
</html>

 浙公网安备 33010602011771号