IDEA搭建SpringMVC简单接口框架(Maven项目)
源码路径:https://github.com/winn-hu/interface
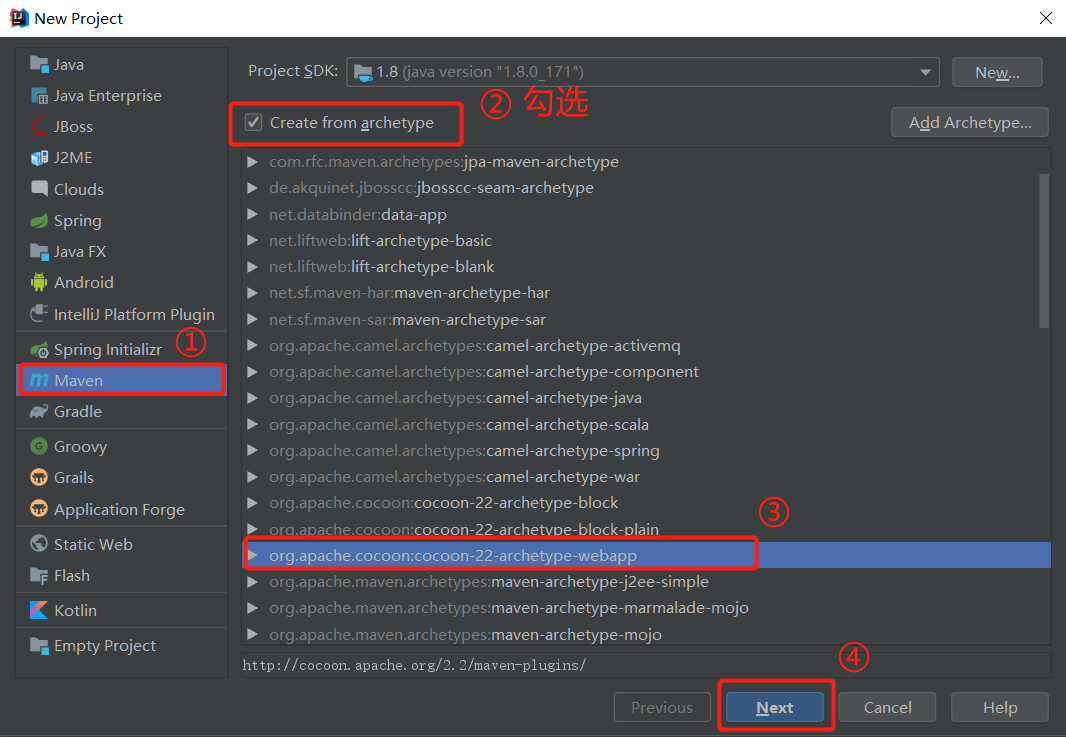
1, 新建项目,选择Maven,如图一次选择,最后点击Next
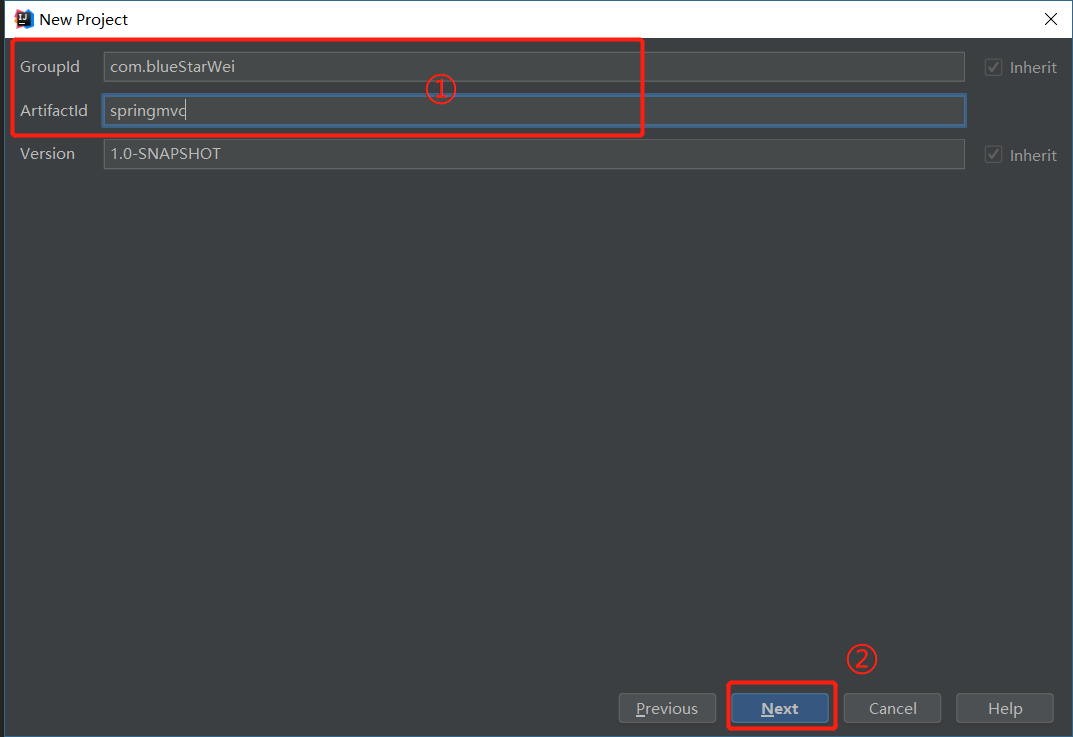
2, 输入GroupId和ArtifactId,点击Next
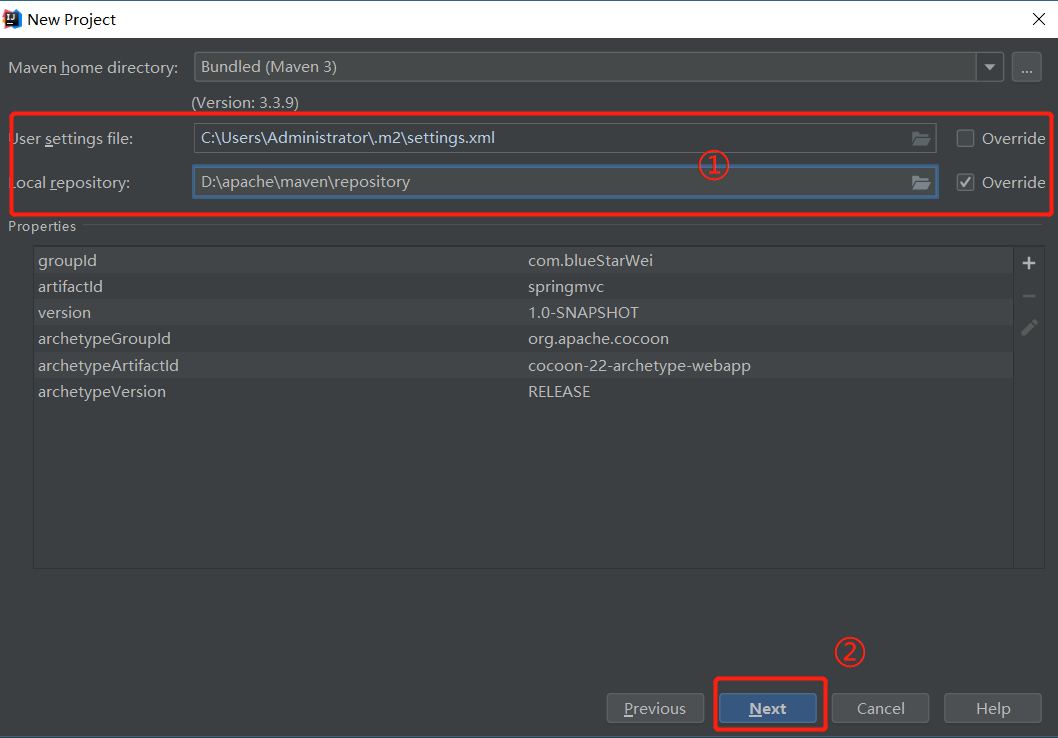
3,根据需要选择自定义maven配置,点击Next。(①可以直接跳过)
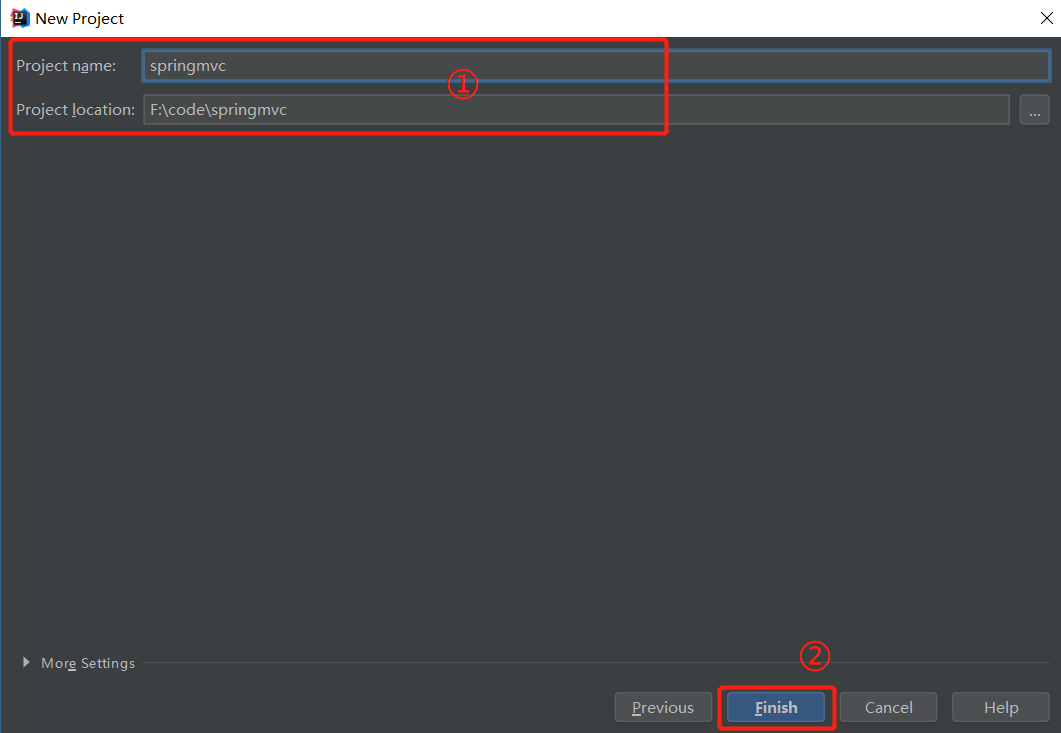
4,根据需要修改项目名称(一般不用修改),点击Finish。(①可以直接跳过)
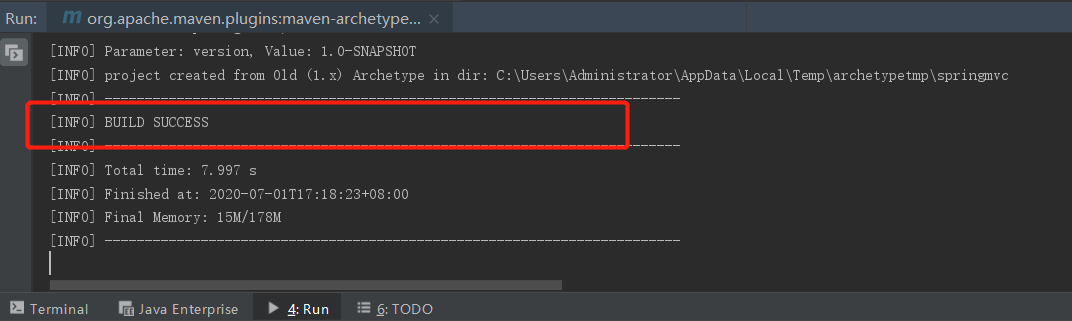
5,当控制台输出BUILD SUCCESS后,项目创建成功。
6,修改pom.xml,添加依赖包
<dependencies>
  <dependency>
    <groupId>org.springframework</groupId>
    <artifactId>spring-webmvc</artifactId>
    <version>4.3.5.RELEASE</version>
  </dependency>
</dependencies>
7,创建index.jsp【用于启动项目项目时,默认展示页面】

8,创建接口类(Controller)
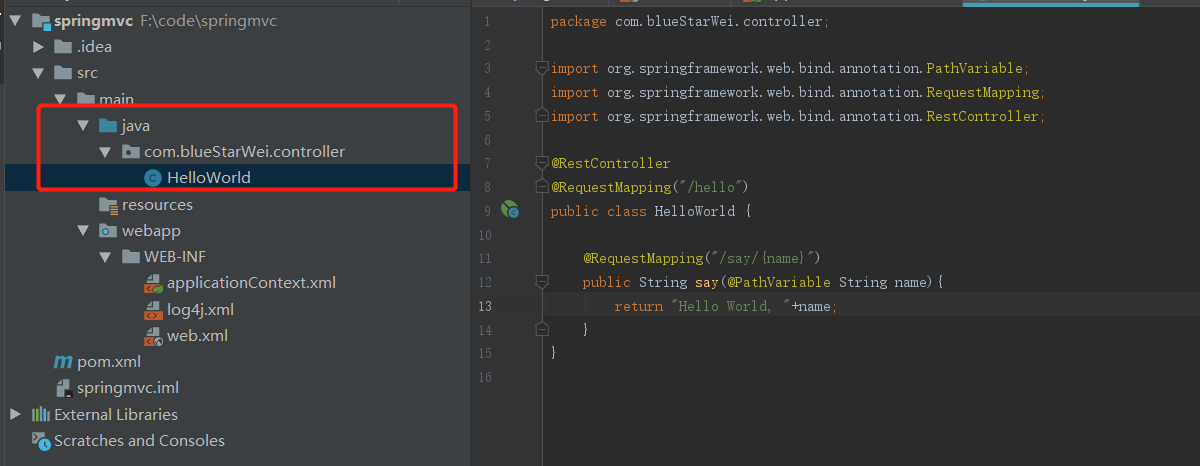
package com.blueStarWei.controller;


import org.springframework.web.bind.annotation.PathVariable;
import org.springframework.web.bind.annotation.RequestMapping;
import org.springframework.web.bind.annotation.RestController;


@RestController
@RequestMapping("/hello")
public class HelloWorld {


    @RequestMapping("/say/{name}")
    public String say(@PathVariable String name){
        return "Hello World, "+name;
    }
}
9,配置applicationContext.xml
<?xml version="1.0" encoding="UTF-8"?>
<beans xmlns="http://www.springframework.org/schema/beans"
       xmlns:xsi="http://www.w3.org/2001/XMLSchema-instance"
       xmlns:context="http://www.springframework.org/schema/context"
       xsi:schemaLocation="http://www.springframework.org/schema/beans http://www.springframework.org/schema/beans/spring-beans-2.0.xsd
                           http://www.springframework.org/schema/context http://www.springframework.org/schema/context/spring-context.xsd">


  <context:component-scan base-package="com.blueStarWei.*" />


  <bean id="viewResolver"
        class="org.springframework.web.servlet.view.InternalResourceViewResolver">
    <property name="prefix" value="/WEB-INF/jsp/" />
    <property name="suffix" value=".jsp"/>
  </bean>


</beans>
10,配置web.xml
<?xml version="1.0" encoding="UTF-8"?>
<web-app version="2.4"
         xmlns="http://java.sun.com/xml/ns/j2ee"
         xmlns:xsi="http://www.w3.org/2001/XMLSchema-instance"
         xsi:schemaLocation="http://java.sun.com/xml/ns/j2ee http://java.sun.com/xml/ns/j2ee/web-app_2_4.xsd">


  <!--  DispatcherServlet默认使用WebApplicationContext作为上下文,
      Spring默认配置文件为“/WEB-INF/[servlet名字]-servlet.xml”
   -->
  <servlet>
    <servlet-name>springmvc</servlet-name>
    <servlet-class>org.springframework.web.servlet.DispatcherServlet</servlet-class>
    <load-on-startup>1</load-on-startup>
  </servlet>
  <servlet-mapping>
    <servlet-name>springmvc</servlet-name>
    <url-pattern>/</url-pattern>
  </servlet-mapping>

</web-app>
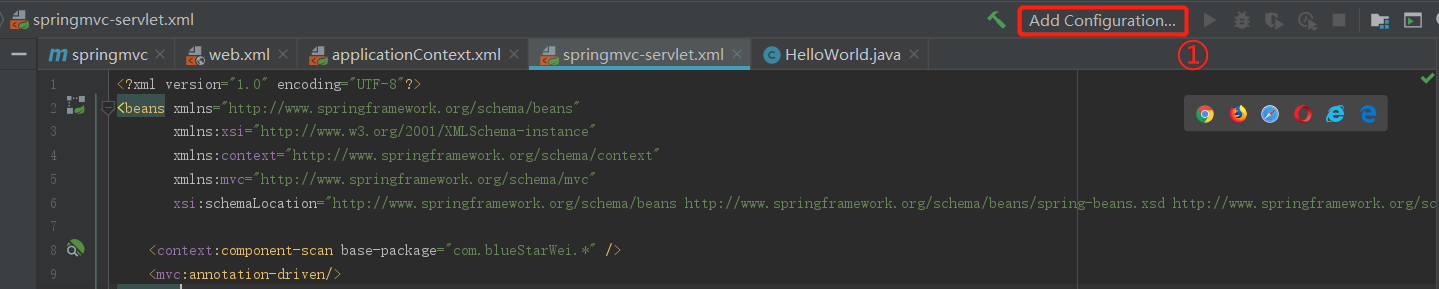
11,创建springmvc-servlet.xml
<?xml version="1.0" encoding="UTF-8"?>
<beans xmlns="http://www.springframework.org/schema/beans"
       xmlns:xsi="http://www.w3.org/2001/XMLSchema-instance"
       xmlns:context="http://www.springframework.org/schema/context"
       xmlns:mvc="http://www.springframework.org/schema/mvc"
       xsi:schemaLocation="http://www.springframework.org/schema/beans http://www.springframework.org/schema/beans/spring-beans.xsd http://www.springframework.org/schema/context http://www.springframework.org/schema/context/spring-context.xsd http://www.springframework.org/schema/mvc http://www.springframework.org/schema/mvc/spring-mvc.xsd">


    <context:component-scan base-package="com.blueStarWei.*" />
    <mvc:annotation-driven/>
</beans>
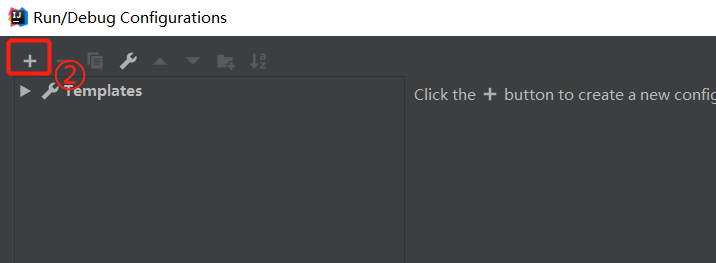
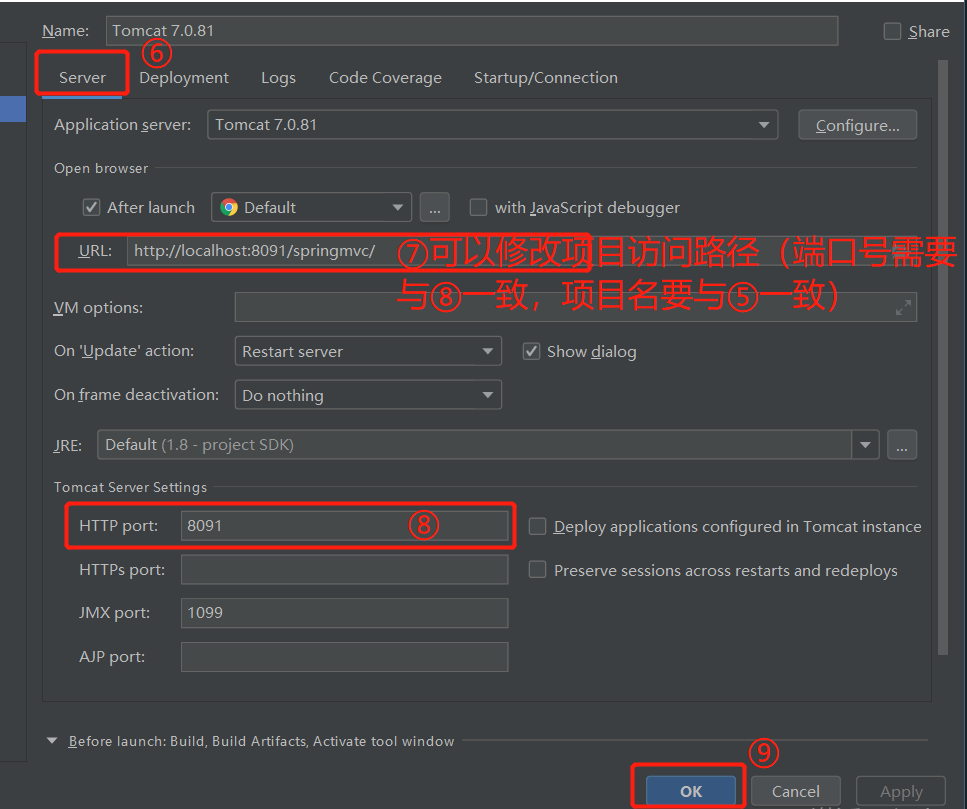
12, 配置tomcat.(⑦和⑧可以跳过)


13,项目配置完成,可以启动服务器,(使用浏览器活postman等)进行访问。
更多内容,请访问:http://www.cnblogs.com/BlueStarWei

 浙公网安备 33010602011771号