[AWS] Launch the VPC Wizard
Let's learn how to create your custom VPC. From the VPC Dashboard, click the Launch VPC Wizard. It is a two-step process, as mentioned below.
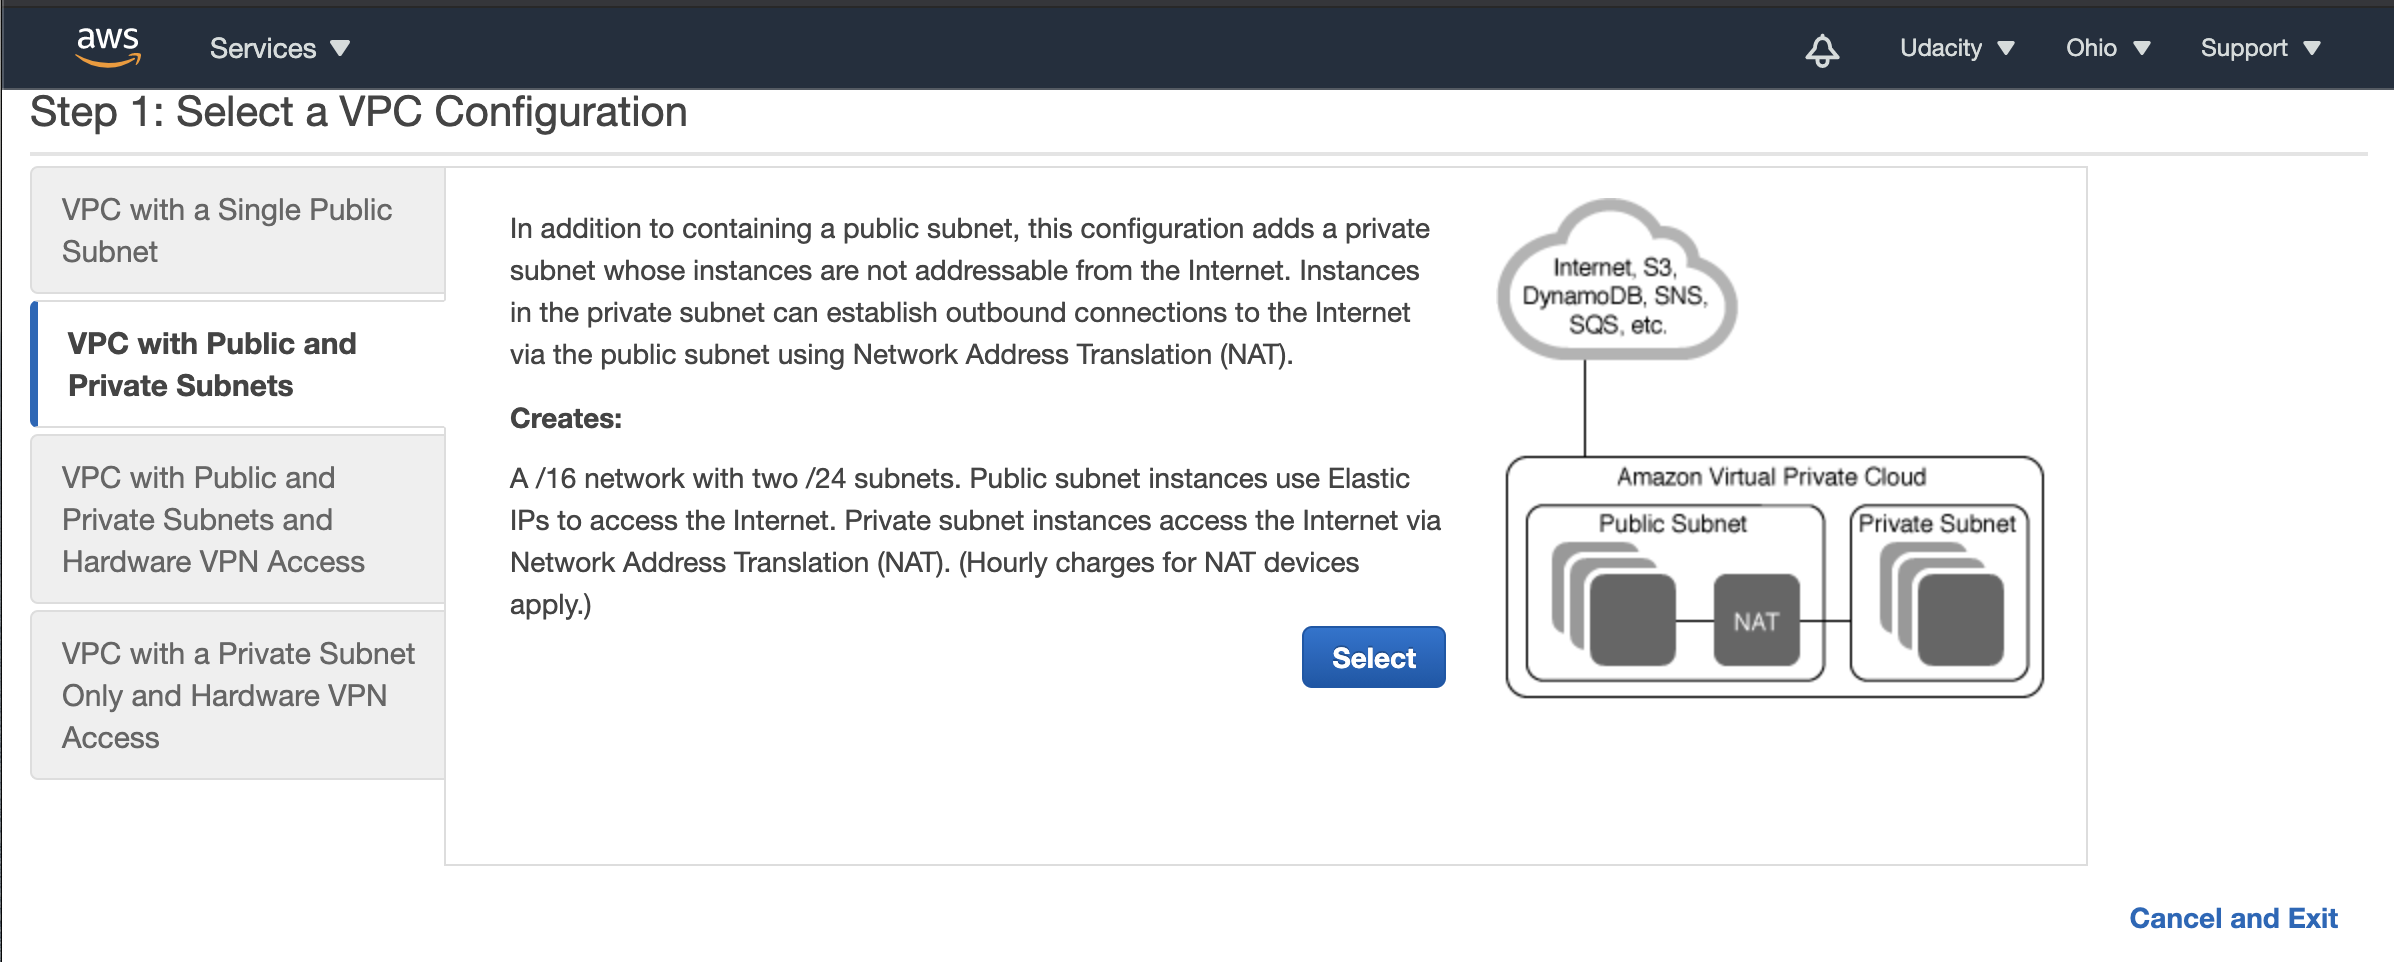
Snapshot 1. Launch the VPC Wizard, and select one of the pre-defined network structure.
Step 1: Network Structure
Select the Network Structure from the options below:
- VPC with a Single Public Subnet
- VPC with Public and Private Subnets
- VPC with Public and Private Subnets and Hardware VPN Access
- VPC with a Private Subnet Only and Hardware VPN Access
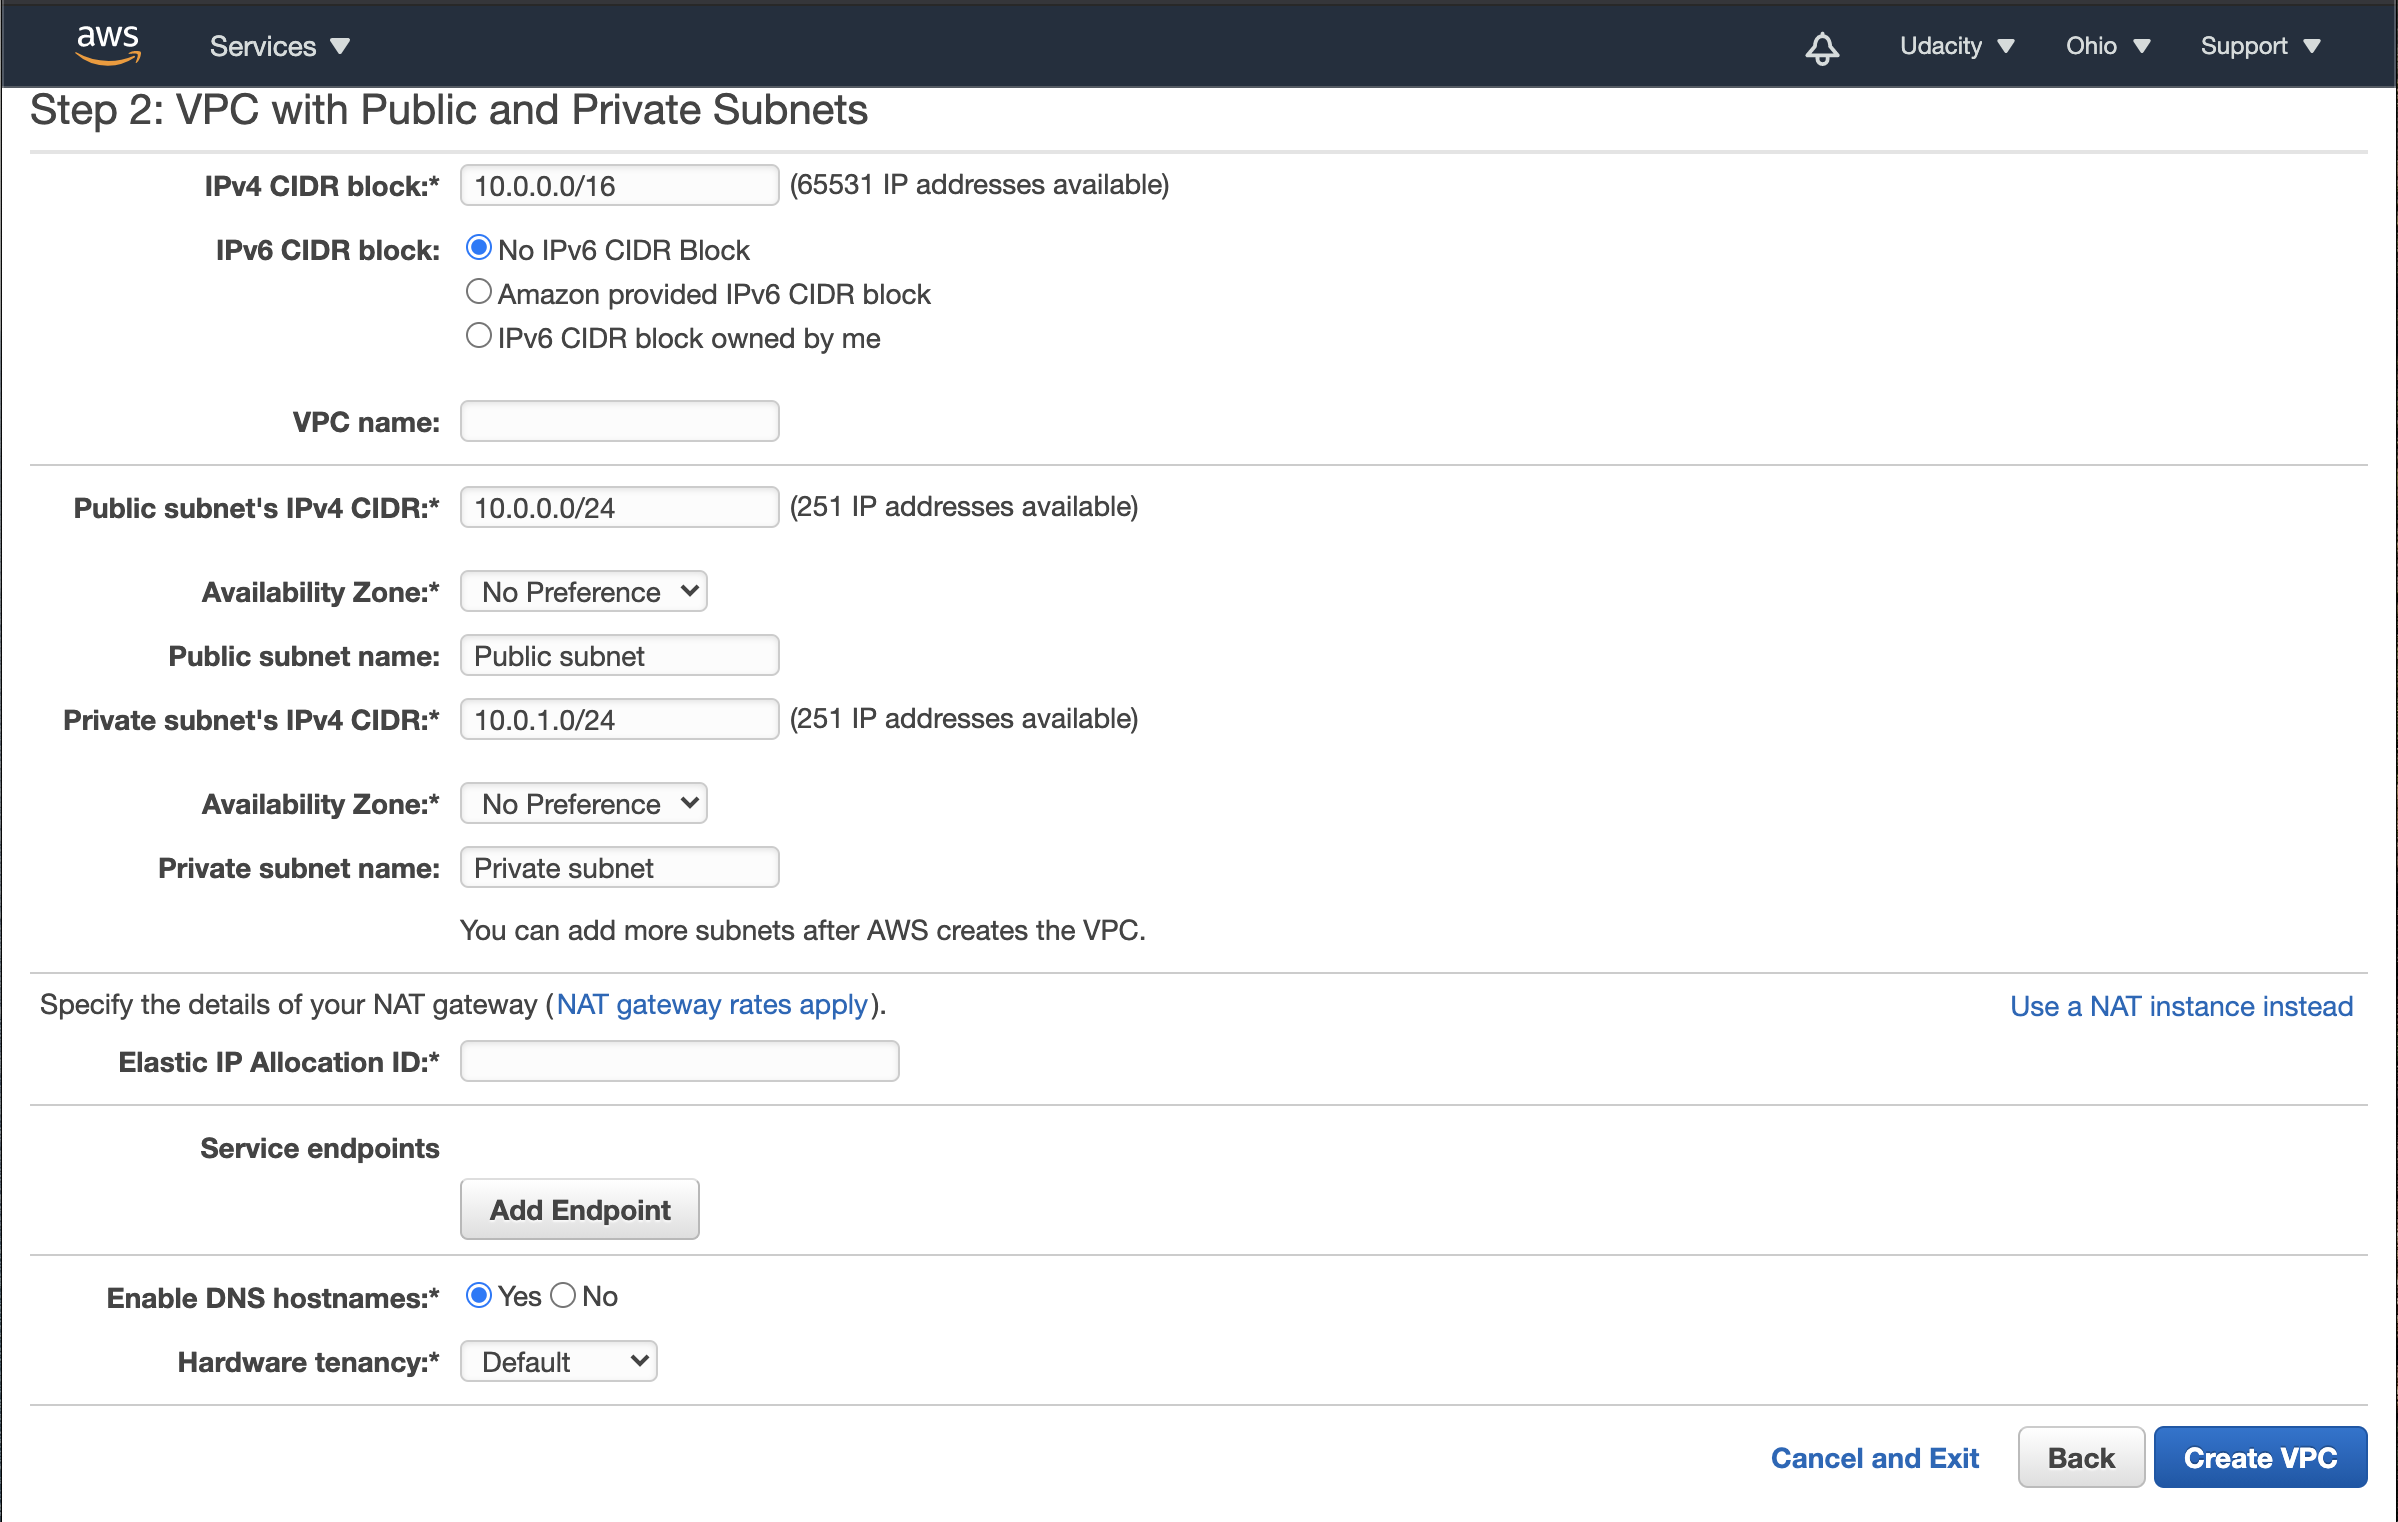
Snapshot 2. Specify the VPC configuration
Step 2: Specify the VPC configuration
The VPC configuration includes:
-
The IP address in the VPC follows a classless inter-domain routing (CIDR) block of IP addresses. You will have to specify the IPv4/IPv6 CIDR block to be allocated to the VPC. In the snapshot above, it uses an IPv4
10.0.0.0/16block, which allocates2^(32-16) = 65,536IP addresses. A few IP addresses are reserved, so you get65531IP addresses for further allocation. -
You will have to specify the range of IP address from the allocated CIDR block for each subnet. In the example above, the public subnet has been allotted the
10.0.0.0/24range, which comprises2^(32-24) = 256IP addresses. But, again a few IP addresses are reserved, so you get 251 available for resources in that subnet.
- Similarly, for the private subnet in the snapshot above, you will get 251 IP addresses.
- Specify the AZ for each subnet, NAT gateway or elastic IP allocation ID, and the service endpoints that will allow you to privately connect your VPC to supported AWS services.

 浙公网安备 33010602011771号