
Material卡片式布局+下拉刷新+完整代码
一、Material卡片式布局
1》添加库依赖
    compile 'com.android.support:recyclerview-v7:24.2.1'
    compile 'com.android.support:cardview-v7:24.2.1'
    compile 'com.github.bumptech.glide:glide:3.7.0'
2》在Activity_mian.xml中
<?xml version="1.0" encoding="utf-8"?>
<android.support.v4.widget.DrawerLayout
    xmlns:android="http://schemas.android.com/apk/res/android"
    xmlns:app="http://schemas.android.com/apk/res-auto"
    android:id="@+id/draw_lay"
    android:layout_width="match_parent"
    android:layout_height="match_parent">
    <android.support.design.widget.CoordinatorLayout
        android:layout_width="match_parent"
        android:layout_height="match_parent"
        >
        ......

        <android.support.v7.widget.RecyclerView
            android:id="@+id/recycler_view"
            android:layout_width="match_parent"
            android:layout_height="match_parent"
            app:layout_behavior="@string/appbar_scrolling_view_behavior"/>


    .......
    </android.support.design.widget.CoordinatorLayout>
    ......

</android.support.v4.widget.DrawerLayout>
3》建立一个实体类
package com.example.myapplication;

/**
 * Created by 海绵宝宝 on 2019/3/30.
 */

public class Fruit {
    private String name;
    private int imageId;
    public Fruit(String name,int imageId){
        this.name=name;
        this.imageId=imageId;
    }

    public String getName() {
        return name;
    }

    public int getImageId() {
        return imageId;
    }
}
4》为RecycleView提供一个布局,在layout下建立一个fruit_item.xml
<?xml version="1.0" encoding="utf-8"?>
<android.support.v7.widget.CardView
    xmlns:android="http://schemas.android.com/apk/res/android"
    xmlns:app="http://schemas.android.com/apk/res-auto"
    android:layout_width="match_parent"
    android:layout_height="wrap_content"
    android:layout_margin="5dp"
    app:cardCornerRadius="4dp">


<LinearLayout
    android:orientation="vertical" android:layout_width="match_parent"
    android:layout_height="wrap_content">
    <ImageView
        android:id="@+id/fruitIma"
        android:layout_width="match_parent"
        android:layout_height="100dp"
        android:scaleType="centerCrop"/><!--scaleType设置图片按照比例填满Imageview-->
    <TextView
        android:id="@+id/fruitName"
        android:layout_width="wrap_content"
        android:layout_height="wrap_content"
        android:layout_gravity="center_horizontal"
        android:layout_margin="5dp"
        android:textSize="16sp"/>
</LinearLayout>
</android.support.v7.widget.CardView>
5》为RecycleView建立一个适配器
package com.example.myapplication;

import android.content.Context;
import android.support.v7.widget.CardView;
import android.support.v7.widget.RecyclerView;
import android.view.LayoutInflater;
import android.view.TextureView;
import android.view.View;
import android.view.ViewGroup;
import android.widget.ImageView;
import android.widget.TextView;

import com.bumptech.glide.Glide;

import java.util.List;

/**
 * Created by 海绵宝宝 on 2019/3/30.
 */

public class FruitAdapter extends RecyclerView.Adapter<FruitAdapter.ViewHolder> {
    private Context mContext;
    private List<Fruit> mFruitList;
    static class ViewHolder extends RecyclerView.ViewHolder{
        CardView cardView;
        ImageView fruitImage;
        TextView fruitName;

        public ViewHolder(View itemView) {
            super(itemView);
            cardView=(CardView) itemView;
            fruitImage=(ImageView)itemView.findViewById(R.id.fruitIma);
            fruitName=(TextView)itemView.findViewById(R.id.fruitName);
        }
    }
    public FruitAdapter(List<Fruit>fruitList){
        mFruitList=fruitList;
    }

    @Override
    public ViewHolder onCreateViewHolder(ViewGroup parent, int viewType) {
        if(mContext==null){
            mContext=parent.getContext();
        }
        View view= LayoutInflater.from(mContext).inflate(R.layout.fruit_item,parent,false);
        return new ViewHolder(view);
    }

    @Override
    public void onBindViewHolder(ViewHolder holder, int position) {
        Fruit fruit=mFruitList.get(position);
        holder.fruitName.setText(fruit.getName());
        Glide.with(mContext).load(fruit.getImageId()).into(holder.fruitImage);
    }
    @Override
    public int getItemCount(){
        return mFruitList.size();
    }

}
6》修改mainActivity.java
package com.example.myapplication;


        import android.support.annotation.NonNull;
        import android.support.design.widget.NavigationView;
        import android.support.design.widget.Snackbar;
        import android.support.v4.view.GravityCompat;
        import android.support.v4.widget.DrawerLayout;
        import android.support.v7.app.ActionBar;
        import android.support.v7.app.AppCompatActivity;
        import android.os.Bundle;
        import android.support.v7.widget.GridLayoutManager;
        import android.support.v7.widget.RecyclerView;
        import android.support.v7.widget.Toolbar;
        import android.view.Menu;
        import android.view.MenuItem;
        import android.view.View;
        import android.widget.Toast;
        import android.support.design.widget.FloatingActionButton;

        import java.util.ArrayList;
        import java.util.List;
        import java.util.Random;

public class MainActivity extends AppCompatActivity {
    private DrawerLayout mDrawer;
    private Fruit[] fruits={
            new Fruit("水果1",R.drawable.a1),new Fruit("水果2",R.drawable.a2),
            new Fruit("水果3",R.drawable.a3),new Fruit("水果4",R.drawable.a4),
            new Fruit("水果5",R.drawable.a5),new Fruit("水果6",R.drawable.a6),
            new Fruit("水果7",R.drawable.a7),new Fruit("水果8",R.drawable.a8),
            new Fruit("水果9",R.drawable.a9),new Fruit("水果10",R.drawable.a10),
            new Fruit("水果11",R.drawable.a11),new Fruit("水果12",R.drawable.a12),
            new Fruit("水果13",R.drawable.a13),new Fruit("水果14",R.drawable.a14),
            new Fruit("水果15",R.drawable.a15),new Fruit("水果16",R.drawable.a16)
    };
    private List<Fruit>fruitList=new ArrayList<>();
    private FruitAdapter adapter;
    @Override
    protected void onCreate(Bundle savedInstanceState) {
        super.onCreate(savedInstanceState);
        setContentView(R.layout.activity_main);
       .......//图片显示
        ininFruits();
        RecyclerView recyclerView=(RecyclerView)findViewById(R.id.recycler_view);
        GridLayoutManager layoutManager=new GridLayoutManager(this,2);
        recyclerView.setLayoutManager(layoutManager);
        adapter=new FruitAdapter(fruitList);
        recyclerView.setAdapter(adapter);
    }
   ......private  void ininFruits(){
        fruitList.clear();
        for(int i=0;i<50;i++){
            Random random=new Random();
            int index=random.nextInt(fruits.length);
            fruitList.add(fruits[index]);
        }
    }
}
7》这样写完后RecycleView会挡住ToolBar,这是使用APPBarLayout
在activity_main.xml中
 <android.support.design.widget.AppBarLayout
            android:layout_width="match_parent"
            android:layout_height="wrap_content">
        <android.support.v7.widget.Toolbar
            android:id="@+id/toolBar"
            android:layout_width="match_parent"
            android:layout_height="?attr/actionBarSize"
            android:background="?attr/colorPrimary"
            android:theme="@style/ThemeOverlay.AppCompat.Dark.ActionBar"
            app:popupTheme="@style/ThemeOverlay.AppCompat.Light"
            app:layout_scrollFlags="scroll|enterAlways|snap"
            /><!--scroll向上动时隐藏|enterAlways向下滑动时一起|snap在隐藏一部分是自动选择隐藏或者显示-->
        </android.support.design.widget.AppBarLayout>
        <android.support.v7.widget.RecyclerView
            android:id="@+id/recycler_view"
            android:layout_width="match_parent"
            android:layout_height="match_parent"
            app:layout_behavior="@string/appbar_scrolling_view_behavior"/>   <!--防止RecycleView挡住ToolBar-->
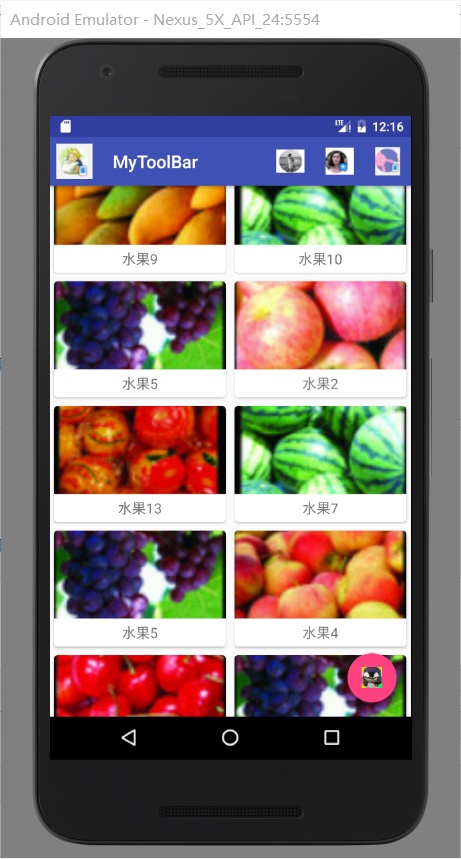
8》结果如下
二、下拉刷新
SwipeRefreshLayout是用于下拉刷新的核心类,将支持下拉刷新的控件放入其中就可以让这个控件实现下拉刷新,下面我们让RecycleView实现下拉刷新
在xml文件中用SwipeRefreshLayout包裹RecycleView
<android.support.v4.widget.SwipeRefreshLayout
         android:id="@+id/refresh"
         android:layout_width="match_parent"
         android:layout_height="match_parent">
        <android.support.v7.widget.RecyclerView
            android:id="@+id/recycler_view"
            android:layout_width="match_parent"
            android:layout_height="match_parent"
            app:layout_behavior="@string/appbar_scrolling_view_behavior"/>   <!--防止RecycleView挡住ToolBar-->
     </android.support.v4.widget.SwipeRefreshLayout>
在MainActivity.java中
private SwipeRefreshLayout swipeRefreshLayout;

......
protected void onCreate(Bundle savedInstanceState) {
        super.onCreate(savedInstanceState);
        setContentView(R.layout.activity_main);
.......
        //下拉刷新
        swipeRefreshLayout=(SwipeRefreshLayout)findViewById(R.id.refresh);//得到控件
        swipeRefreshLayout.setColorSchemeResources(R.color.colorPrimary);//设置颜色
        swipeRefreshLayout.setOnRefreshListener(new SwipeRefreshLayout.OnRefreshListener(){//设置下拉监听器
            @Override
            public void onRefresh() {
                refreshFruit();
            }
        });
    }
    private  void refreshFruit(){
        new Thread(new Runnable() {
            @Override
            public void run() {
                try{
                    Thread.sleep(2000);//由于本地刷新极快所以将线程暂停两秒
                }catch (Exception e)
                {

                }
                runOnUiThread(new Runnable() {//切回到主线程
                    @Override
                    public void run() {
                        ininFruits();
                        adapter.notifyDataSetChanged();//通知数据发生变化
                        swipeRefreshLayout.setRefreshing(false);//刷新结束
                    }
                });
            }
        }).start();
    }
三、完整代码
从ToolBar(导航条)到DrawerLayout(滑动菜单)到Navigation(更优化的滑动菜单)FloatingActionButton(浮动按钮)到CardView(卡片式布局)到SwipRefershLayout(下拉刷新)
百度云连接:https://pan.baidu.com/s/17TrLqgdZ1uzhht2hT9_vSw
密码:j9zq

 浙公网安备 33010602011771号