
第一章 基于Ubuntu16.04安装bochs
一、安装
基于 ubuntu16.04 进行安装:
gcc version 5.4.0 20160609 (Ubuntu 5.4.0-6ubuntu1~16.04.12)
gcc version 5.4.0 20160609 (Ubuntu 5.4.0-6ubuntu1~16.04.12)
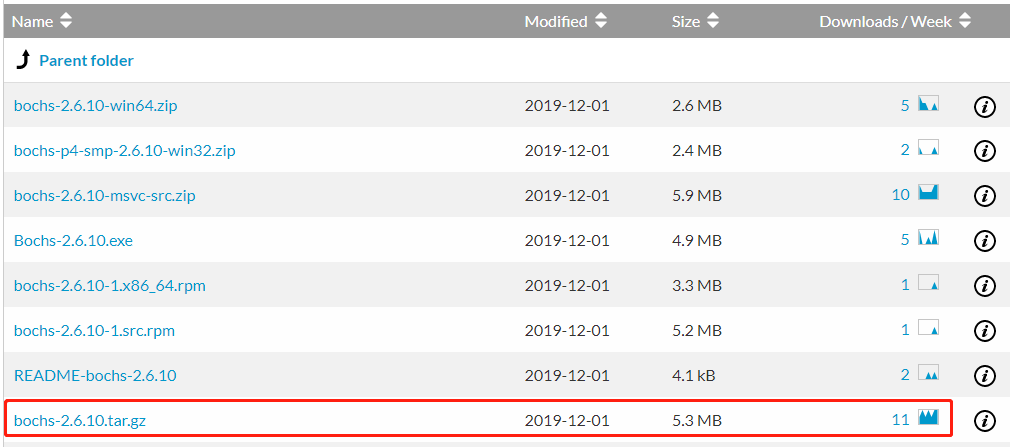
1.官方下载地址,选择对应的版本进行下载,下载2.6.10版本(bochs-2.6.10.tar.gz)。
2.解压压缩包
$ tar -zxvf bochs-2.6.10.tar.gz
3.编译、安装(configure、 make、 make install)
// 1.安装依赖库
$ sudo apt-get install build-essential
$ sudo apt-get install xorg-dev
$ sudo apt-get install bison
$ sudo apt-get install libgtk2.0-dev
$ sudo apt-get install g++


// 2.configure (--prefix后面跟的是我自定义路径)
$ ./configure \
--prefix=/data/bochs \
--enable-debugger \
--enable-disasm \
--enable-iodebug \
--enable-x86-debugger \
--with-x \
--with-x11 \
LDFLAGS='-pthread' \
LIBS='-lX11'

// 3.编译、安装
$ sudo make && make install

// 4.切换到安装目录,运行
$ ./bin/bochs
========================================================================
                       Bochs x86 Emulator 2.6.10
              Built from SVN snapshot on December 1, 2019
                  Compiled on Dec  1 2022 at 13:42:35
========================================================================
00000000000i[      ] BXSHARE not set. using compile time default '/data/bochs/share/bochs'
------------------------------
Bochs Configuration: Main Menu
------------------------------

This is the Bochs Configuration Interface, where you can describe the
machine that you want to simulate.  Bochs has already searched for a
configuration file (typically called bochsrc.txt) and loaded it if it
could be found.  When you are satisfied with the configuration, go
ahead and start the simulation.

You can also start bochs with the -q option to skip these menus.

1. Restore factory default configuration
2. Read options from...
3. Edit options
4. Save options to...
5. Restore the Bochs state from...
6. Begin simulation
7. Quit now

Please choose one: [2] 7
00000000000i[SIM   ] quit_sim called with exit code 1

// 至此,无错误信息,bochs安装成功
4.设置环境变量
$ vim /etc/profile
添加 export PATH=$PATH:/data/bochs/bin
$ source /etc/profile
二、安装nasm
下载链接,下载 nasm-2.15.04.tar.gz
$ tar -zxvf nasm-2.15.04.tar.gz
$ cd nasm-2.15.04
$ ./configure
$ make && make install
$ nasm --version
NASM version 2.15.04 compiled on Dec  5 2022
三、bximage生成一个硬盘
$ bximage
========================================================================
                                bximage
  Disk Image Creation / Conversion / Resize and Commit Tool for Bochs
         $Id: bximage.cc 13481 2018-03-30 21:04:04Z vruppert $
========================================================================

1. Create new floppy or hard disk image
2. Convert hard disk image to other format (mode)
3. Resize hard disk image
4. Commit 'undoable' redolog to base image
5. Disk image info

0. Quit

Please choose one [0] 1

Create image

Do you want to create a floppy disk image or a hard disk image?
Please type hd or fd. [hd] hd

What kind of image should I create?
Please type flat, sparse, growing, vpc or vmware4. [flat] flat

Choose the size of hard disk sectors.
Please type 512, 1024 or 4096. [512] 512

Enter the hard disk size in megabytes, between 10 and 8257535
[10] 80

What should be the name of the image?
[c.img] c.img

Creating hard disk image 'c.img' with CHS=162/16/63 (sector size = 512)

The following line should appear in your bochsrc:
  ata0-master: type=disk, path="c.img", mode=flat
四、验证
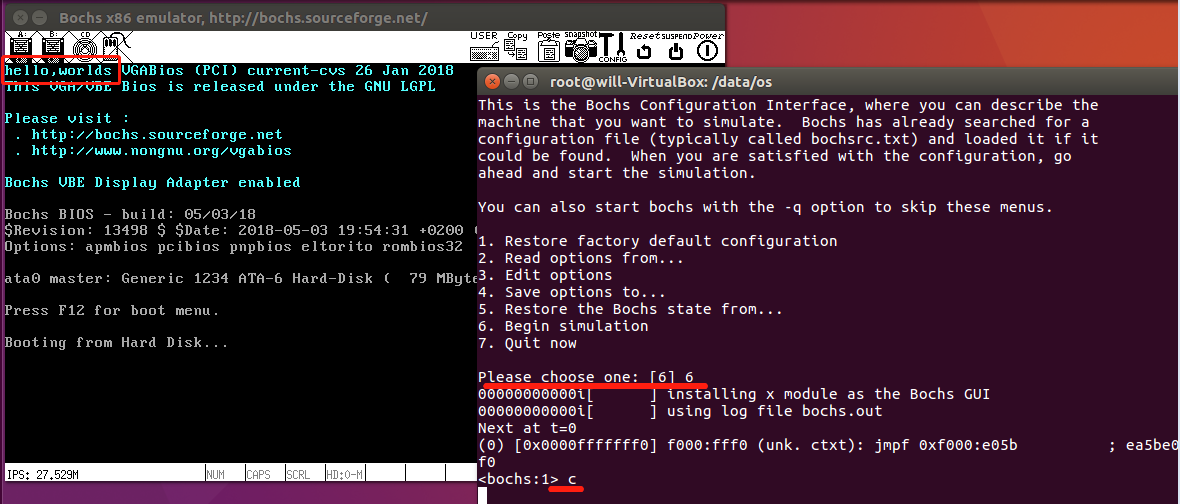
1.编写开机打印hello world的汇编程序(boot.asm)。
mov ax, 0xb800
mov ds, ax

mov byte [0x00],'h'
mov byte [0x02],'e'
mov byte [0x04],'l'
mov byte [0x06],'l'
mov byte [0x08],'o'
mov byte [0x0a],','
mov byte [0x0c],'w'
mov byte [0x0e],'o'
mov byte [0x10],'r'
mov byte [0x12],'l'
mov byte [0x14],'d'
jmp $

times 510-($-$$) db 0
db 0x55,0xaa
使用NASM编译器,编译输出二进制机器码(boot.bin)
$ nasm -f bin boot.asm -o boot.bin
2.使用dd写硬盘
$ // boot.bin 换成编译后对应的机器码文件目录
$ dd if=boot.bin of=c.img bs=512 count=1 conv=notrunc
1+0 records in
1+0 records out
512 bytes (512 B) copied, 5.6586e-05 s, 9.0 MB/s
3.修改bochs配置文件
在安装目录下有配置文件的模板文件: /data/bochs/share/doc/bochs/bochsrc-sample.txt 可供参考,得到如下配置信息,保存为bochsrc.disk即可,.disk表示从硬盘启动,也可自定义文件名和后缀名,后期启动Bochs时输入该配置文件名即可。
# Bochs启动配置文件(bochs的安装目录/data/bochs)
# 1.Bochs在运行中可使用的内存,设为32MB
megs: 32
# 2.设置对应真实机器的BIOS和VGA BIOS; 须为绝对路径,Bochs不识相对路径
romimage: file=/data/bochs/share/bochs/BIOS-bochs-latest
vgaromimage: file=/data/bochs/share/bochs/VGABIOS-lgpl-latest
# 3.选择启动盘符为硬件启动
boot: disk
# 4.日志输出
log: bochs.out
# 5.关闭鼠标,打开键盘
mouse: enabled=0
keyboard: keymap=/data/bochs/share/bochs/keymaps/x11-pc-us.map
# 6.硬盘设置
ata0-master: type=disk, path="c.img", mode=flat, cylinders=162, heads=16, spt=63
4.启动botchs,验证
$ bochs -f bochsrc.disk
========================================================================
                       Bochs x86 Emulator 2.6.10
              Built from SVN snapshot on December 1, 2019
                  Compiled on Dec  1 2022 at 13:42:35
========================================================================
00000000000i[      ] BXSHARE not set. using compile time default '/data/bochs/share/bochs'
00000000000i[      ] reading configuration from bochsrc.disk
------------------------------
Bochs Configuration: Main Menu
------------------------------

This is the Bochs Configuration Interface, where you can describe the
machine that you want to simulate.  Bochs has already searched for a
configuration file (typically called bochsrc.txt) and loaded it if it
could be found.  When you are satisfied with the configuration, go
ahead and start the simulation.

You can also start bochs with the -q option to skip these menus.

1. Restore factory default configuration
2. Read options from...
3. Edit options
4. Save options to...
5. Restore the Bochs state from...
6. Begin simulation
7. Quit now

Please choose one: [6] 6
00000000000i[      ] installing x module as the Bochs GUI
00000000000i[      ] using log file bochs.out
========================================================================
Event type: PANIC
Device: [GUI   ]
Message: Cannot connect to X display

A PANIC has occurred.  Do you want to:
  cont       - continue execution
  alwayscont - continue execution, and don't ask again.
               This affects only PANIC events from device [GUI   ]
  die        - stop execution now
  abort      - dump core
  debug      - continue and return to bochs debugger
Choose one of the actions above: [die] die
========================================================================
Bochs is exiting with the following message:
[GUI   ] Cannot connect to X display
========================================================================
(0).[0] [0x000000000000] 0000:0000 (unk. ctxt): add byte ptr ds:[bx+si], al ; 0000
没有图像界面导致,所以建议还是用Windows或者带图形界面Ubuntu进行安装。
更换为带桌面的Ubuntu重新安装,运行的结果:
五、bochs常用的调试命令
1.跳转
单步跳转
s:遇到循环,则进入;该命令在单步执行向显存写数据时,显存会刷新,但屏幕显示不会刷新;
n:遇到循环,则跳过;该命令在单步执行向显存写数据时,显存会刷新,屏幕显示也会刷新;
指定步数跳转
s num
指定位置跳转
b address:设置断点address
c:持续执行直到遇到断点
2.查看
寄存器查看
r:查看通用寄存器
creg:查看控制寄存器
sreg:查看段寄存器
info eflags:查看标志寄存器
内存查看
x address:仅查看一个双字的内容(线性地址)
x/n address:查看n个双字的内容(线性地址)
xp address:仅查看一个双字的内容(物理地址)
xp/n address:查看n个双字的内容(物理地址)
xp/nxb address:以16进制形式查看n个bit的内容(物理地址)
u address_start address_end:以指令为单位,查看机器码对应的汇编码
u/nums:从当前位置开始反汇编nums条指令
u/nums 物理地址:从物理地址开始反汇编nums条指令
堆栈查看
print-stack
其它查看
info b:查看断点
info gdt:查看全局描述符
info idt:查看中断描述符
info ldt:查看局部描述符
info tss:查看任务状态段
help
3.退出
q
quit
exit

 浙公网安备 33010602011771号