
2023年8月23日
Windows对象、本次存储、综合案例
1.通过延迟函数在5s后关闭广告的案例
-
延迟函数和间歇函数的区别在于:延迟函数只会执行一次,每次调用都会创建新的定时器
-
可以通过下面的代码清除延迟函数,清除部分的代码会先于延迟函数执行
let timer = setTimeout(回调函数,等待的毫秒数);
clearTimeout(timer);
<p class="test" >我是一段广告,将于五秒后关闭</p>
<script>
  const test = document.querySelector('.test');
    let timer = setTimeout(function(){
    test.style.display = 'none';
  }, 5000);
  // 调用下面的函数,就会清除延迟函数
  clearTimeout(timer);
</script>
2.可以通过 JS 实现页面跳转
<script>
  // 打印当前文件的 URL 地址
  console.log(location.href);
  // 采用 JS 的方式跳转到目标地址
  location.href = 'https://www.baidu.com/';
</script>
3.用户可以通过点击直接跳转,或者在倒计时之后完成跳转的案例
<!DOCTYPE html>
<html>
    <head>
        <style>
            .container {
                border: 1px  solid black;
                width: 120px;
                height: 120px;
                background-color: gold;
                margin: 0 auto;
                text-align: center;
                line-height: 120px;
            }
        </style>
    </head>
    <body>
        <div class="container">
            <a href="https://www.baidu.com/">点击跳转</a>
            <p class="context">X秒后自动跳转</p>
        </div>
        <script>
            const context = document.querySelector('.context');
            // 添加延迟函数
            let timer = setTimeout(function(){
                location.href = 'https://www.baidu.com';
            }, 5000);
        </script>
    </body>
</html>
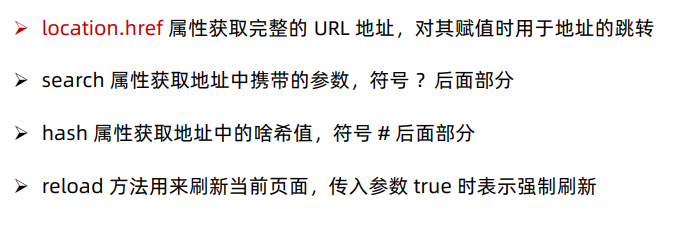
4.location 比较常用的几个方法
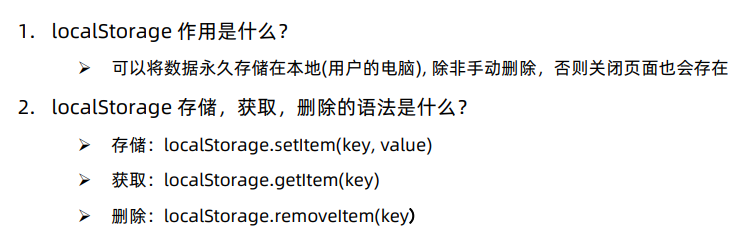
5.本地存储分为两种类型 localStorage 和 sessionStorage
对于 sessionStorage 的用法和 localStorage 的用法相同,只是它的生命周期与浏览器浏览框生命周期相同,然而 local 的那个会将数据存储到本地
6.对于本地存储是不能存储复杂数据的,可以借助JSON来完成
<script>
  // 本地存储
  const goods = {
    name: '小米10',
    price: 1999
  };
  // 存储的是对象
  localStorage.setItem('goods', goods);
  // 将复杂数据转换成 json 串就可以存储到本地
  localStorage.setItem('goodsJson', JSON.stringify(goods));

  // 取出的是 JSON 串
  const text = localStorage.getItem('goodsJson');
  // 将 JSON 串 又转为了对象
  const obj = JSON.parse(text);
  console.log('text: ' + text);
  console.log('obj: ' + obj);
</script>
7.学生信息管理的综合案例,看似简单,实际涉及了很多功能点
<!DOCTYPE html>
<html lang="en">

<head>
  <meta charset="UTF-8" />
  <meta name="viewport" content="width=device-width, initial-scale=1.0" />
  <meta http-equiv="X-UA-Compatible" content="ie=edge" />
  <title>学生信息管理</title>
  <link rel="stylesheet" href="index.css" />
</head>

<body>
  <h1>新增学员</h1>
  <form class="info" autocomplete="off">
    姓名:<input type="text" class="uname" name="uname" />
    年龄:<input type="text" class="age" name="age" />
    性别:
    <select name="gender" class="gender">
      <option value="男">男</option>
      <option value="女">女</option>
    </select>
    薪资:<input type="text" class="salary" name="salary" />
    就业城市:<select name="city" class="city">
      <option value="北京">北京</option>
      <option value="上海">上海</option>
      <option value="广州">广州</option>
      <option value="深圳">深圳</option>
      <option value="长春">长春</option>
    </select>
    <button class="add">录入</button>
  </form>

  <h1>就业榜</h1>
  <table>
    <thead>
      <tr>
        <th>学号</th>
        <th>姓名</th>
        <th>年龄</th>
        <th>性别</th>
        <th>薪资</th>
        <th>就业城市</th>
        <th>操作</th>
      </tr>
    </thead>
    <tbody>
    </tbody>
  </table>
  <script>
    // 1.首先去读取本地存储的数据
    const data = localStorage.getItem('student-data');
    // 2.如果有数据就拿去渲染页面,如果没有就去创建一个空数组
    const arr = data ? JSON.parse(data) : [];
    // 3.渲染模块函数
    const tbody = document.querySelector('tbody');
    function render(){
        // 遍历数组,有几个元素就生成几个 tr
        const trArr = arr.map(function(item, i){
            return `
                <tr>
                    <td>${item.stuId}</td>
                    <td>${item.uname}</td>
                    <td>${item.age}</td>
                    <td>${item.gender}</td>
                    <td>${item.salary}</td>
                    <td>${item.city}</td>
                    <td>
                        <a href="javascript:" data-id=${i}>删除</a>
                    </td>
                </tr>
            `;
        });
        tbody.innerHTML = trArr.join('');
    }
    render();

    // 4.录入模块
    const info = document.querySelector('.info');
    // 获取表单中所有带有 name 属性的元素
    const items = info.querySelectorAll('[name]');
    info.addEventListener('submit', function(e){
        // 阻止默认的提交行为
        e.preventDefault();
        // 声明空对象
        const obj = {};
        obj.stuId = arr.length ? arr[arr.length - 1].stuId + 1 : 1;
        for(let i = 0; i < items.length; i++){
            const item = items[i];
            if(items[i].value === ''){
                return alert('输入内容不能为空');
            }
            obj[item.name] = item.value;
        }
        // 追加给数组
        arr.push(obj);
        // 把数组 arr 存储到本地存储里面
        localStorage.setItem('student-data', JSON.stringify(arr));
        // 渲染页面
        render();
        // 重置表单
        this.reset();
    });

    // 5.删除模块
    tbody.addEventListener('click', function(e){
        if(e.target.tagName === 'A'){
            // 删除对应数据
            arr.splice(e.target.dataset.id, 1);
            // 写入本地存储
            localStorage.setItem('student-data', JSON.stringify(arr));
            // 重新渲染
            render();
        }
    });
  </script>
</body>
</html>
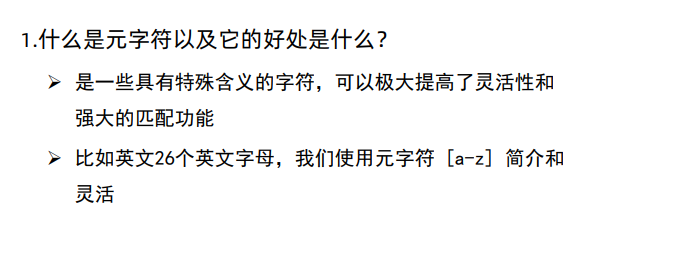
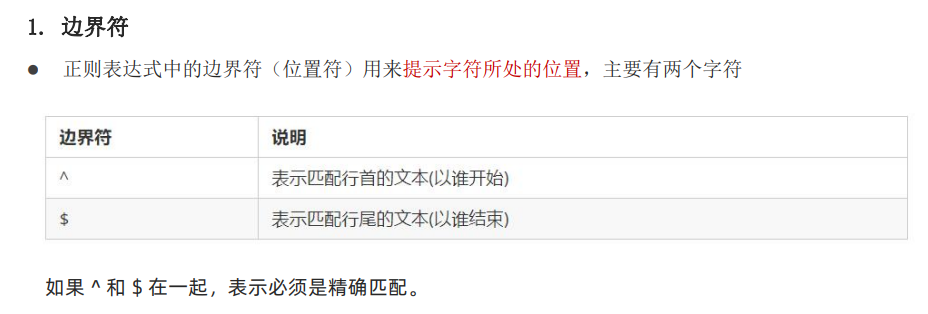
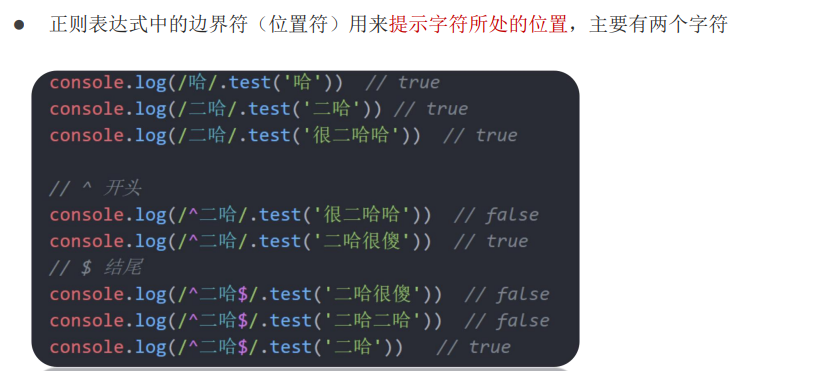
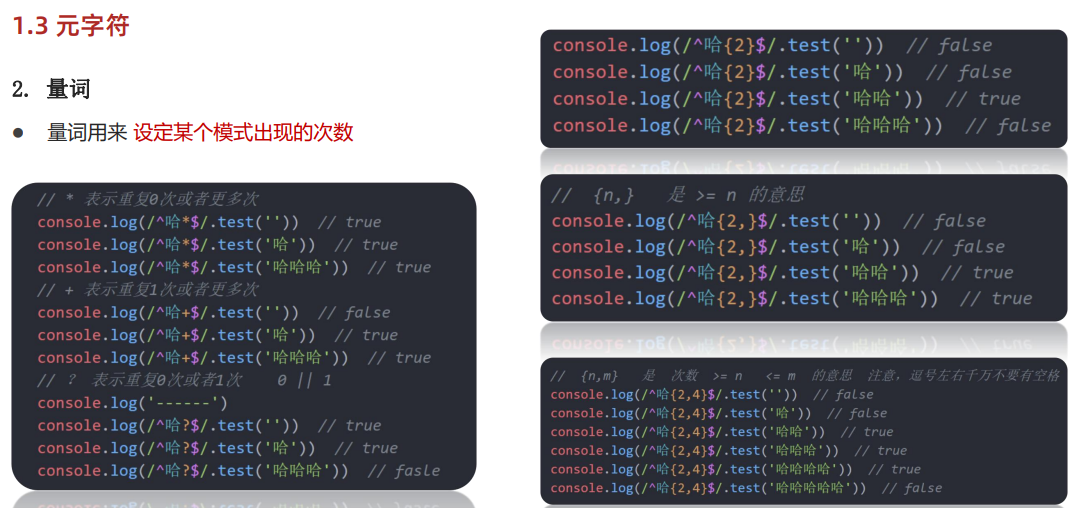
正则表达式
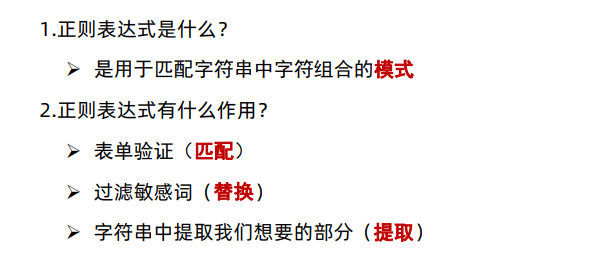
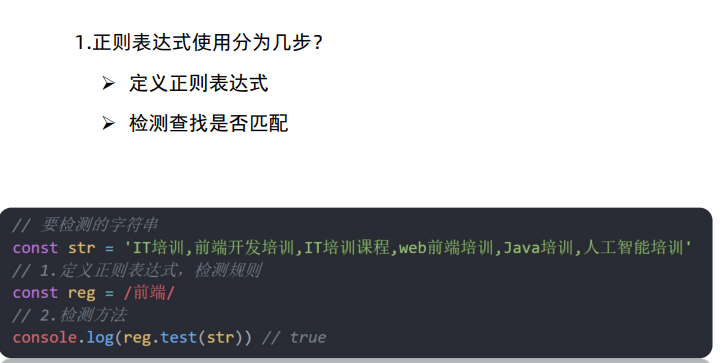
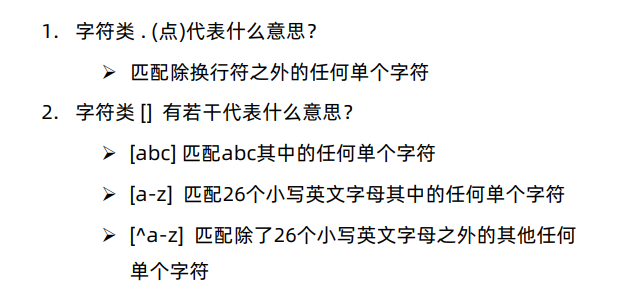
1.首先介绍一些基础知识点


2.下面是一个用户名验证案例

<!DOCTYPE html>
<html lang="en">
<head>
    <meta charset="UTF-8">
    <meta http-equiv="X-UA-Compatible" content="IE=edge">
    <meta name="viewport" content="width=device-width, initial-scale=1.0">
    <title>Document</title>
    <style>
        span {
            display: inline-block;
            width: 250px;
            height: 30px;
            vertical-align: middle;
            line-height: 30px;
            padding-left: 15px;
        }

        .error {
            color: red;
            background: url(error1.png) no-repeat left center;
        }

        .right {
            color: green;
            background: url(right.png) no-repeat left center;
        }
    </style>
</head>
<body>
    <input type="text">
    <span></span>
    <script>
        // 1.准备正则
        const reg = /^[a-zA-Z0-9-_]{6,16}$/;
        // 获取要检验的输入框
        const input = document.querySelector('input');
        // 通过下一个兄弟节点拿到我们的 span
        const span = input.nextElementSibling;
        // 当输入框失去焦点时就检测是否符合规范
        input.addEventListener('blur', function(){
            // 输入的内容和我们指定的表达式匹配
            if(reg.test(this.value)){
                span.innerHTML = '输入正确';
                span.className = 'right';
            }else{
                span.innerHTML = '请输入6~16位可由字母、数字、下划线组成的内容';
                span.className = 'error';
            }
        });
    </script>
</body>
</html>
3.一个只能输入中文的案例

因为这个和上面的案例基本类似,所以只给出正则表达式
/^[\u4e00-\u9fa5]{2,8}$/
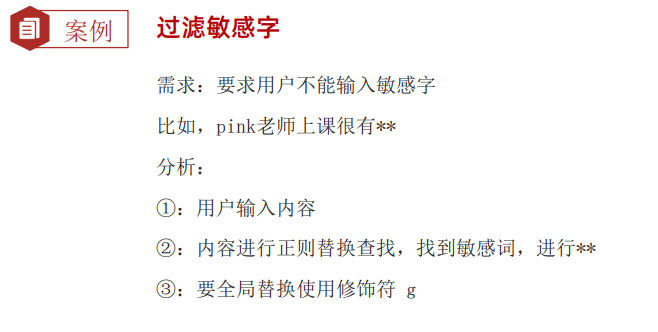
4.过滤敏感词案例
// input 是用来输入单行文本的,如果我们想输入多行文本就使用 textarea
<textarea name="" id="" cols="30" rows="10"></textarea>
<button>发布</button>
<div></div>
<script>
  // 输入文本的区域
  const tx = document.querySelector('textarea');
  const btn = document.querySelector('button');
  // 点击按钮后会将过滤后的文本内容发送到 div 区域
  const div = document.querySelector('div');

  btn.addEventListener('click', function(){
    div.innerHTML = tx.value.replace(/激情|基情/g, '**');
    tx.value = '';
  });
</script>

 浙公网安备 33010602011771号