
Linux-Redmine安装方法
Linux-Redmine安装方法 QQ群交流:585499566
一、环境准备
1,Linux系统:centos6.5
2,Redmine安装包:bitnami-redmine-3.4.6-0-linux-x64-installer.run
二、安装:
备注:使用图形界面安装比较好配置
1.安装步骤
注意:在没有特别说明步骤,就是操作“下一步”,无需改变安装项
1,创建一个目录,将安装包放进一个文件夹里,然后双击安装包,或者运行下面的命令:
./bitnami-redmine-3.4.6-0-linux-x64-installer.run
2,选择语言:中文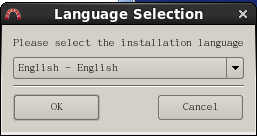
3,选择安装路径:建议放在一个文件夹里
4,填写超级用户信息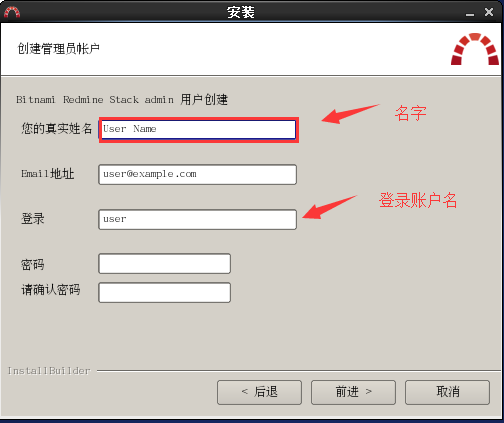
2.安装中出现的错误
一、glibc2.18 not fund:这是glibc也就是C库版本不到2.18,需要升级:
1,下载:http://ftp.gnu.org/gnu/glibc/glibc-2.18.tar.gz
选择报错中需要的版本:glibc-2.18.tar.gz
选择过最新版本,安装时候进行configure时候报错,所以就没有最新版本
2,运行以下命令安装:
[root@localhost soft]# tar -xf glibc-2.18.tar.gz
[root@localhost soft]# cd glibc-2.18
[root@localhost glibc-2.17]# mkdir build; cd build
[root@localhost build]# ../configure --prefix=/usr --disable-profile --enable-add-ons --with-headers=/usr/include --with-binutils=/usr/bin [root@localhost build]# make -j 8
[root@localhost build]# make install
[root@localhost soft]# strings /lib64/libc.so.6 | grep GLIBC
GLIBC_2.2.5
GLIBC_2.2.6
GLIBC_2.3
GLIBC_2.3.2
GLIBC_2.3.3
GLIBC_2.3.4
GLIBC_2.4
GLIBC_2.5
GLIBC_2.6
GLIBC_2.7
GLIBC_2.8
GLIBC_2.9
GLIBC_2.10
GLIBC_2.11
GLIBC_2.12
GLIBC_2.13
GLIBC_2.14
GLIBC_2.15
GLIBC_2.16
GLIBC_2.17
GLIBC_2.18
GLIBC_PRIVATE
3,检查部署成功后的glibc的版本为2.18:
[root@localhost soft]# ldd --version
ldd (GNU libc) 2.18
Copyright (C) 2013 Free Software Foundation, Inc.
This is free software; see the source for copying conditions. There is NO
warranty; not even for MERCHANTABILITY or FITNESS FOR A PARTICULAR PURPOSE.
由 Roland McGrath 和 Ulrich Drepper 编写。
二、Glibcxx3.4.18 not fund:这是glibcxx也就是C++库版本不到3.4.18,需要升级:
1,下载:
ftp://ftp.de.debian.org/debian/pool/main/g/gcc-8/libstdc++6_8.1.0-10_amd64.deb
选择报错中需要的版本:libstdc++6_8.1.0-10_amd64.deb 这是目前最新的版本
2,运行以下命令安装:
1),解压:
ar -x libstdc++6_8.1.0-10_amd64.deb
xz -d data.tar.xz
tar -xvf data.tar
2),安装:
删除:rm /usr/lib64/libstdc++.so.6
拷贝:cp usr/lib/x86_64-linux-gnu/libstdc++.so.6.0.25 /usr/lib64/
链接:ln /usr/lib64/libstdc++.so.6.0.25 /usr/lib64/libstdc++.so.6
3)检查:
[root@localhost soft]# strings /usr/lib64/libstdc++.so.6 |grep GLIBCXX
GLIBCXX_3.4
GLIBCXX_3.4.1
GLIBCXX_3.4.2
GLIBCXX_3.4.3
GLIBCXX_3.4.4
GLIBCXX_3.4.5
GLIBCXX_3.4.6
GLIBCXX_3.4.7
GLIBCXX_3.4.8
GLIBCXX_3.4.9
GLIBCXX_3.4.10
GLIBCXX_3.4.11
GLIBCXX_3.4.12
GLIBCXX_3.4.13
GLIBCXX_3.4.14
GLIBCXX_3.4.15
GLIBCXX_3.4.16
GLIBCXX_3.4.17
GLIBCXX_3.4.18
GLIBCXX_3.4.19
GLIBCXX_3.4.20
GLIBCXX_3.4.21
GLIBCXX_3.4.22
GLIBCXX_3.4.23
GLIBCXX_3.4.24
GLIBCXX_3.4.25
GLIBCXX_DEBUG_MESSAGE_LENGTH
三、Linux命令启动服务
1,打开linux下的命令行窗口,进入redmine的安装目录文件夹,发现文件“ctlscript.sh”,运行./ctlscript.sh,出现如下提示:
[root@localhost redmine-3.4.6-0]# ./ctlscript.sh
usage: ./ctlscript.sh help
./ctlscript.sh (start|stop|restart|status)
./ctlscript.sh (start|stop|restart|status) mysql
./ctlscript.sh (start|stop|restart|status) apache
./ctlscript.sh (start|stop|restart|status) subversion
help - this screen
start - start the service(s)
stop - stop the service(s)
restart - restart or start the service(s)
status - show the status of the service(s)
2,根据提示运行命令

 浙公网安备 33010602011771号