
Postfix+dovecot搭建简单邮箱服务器
实验环境:
(1)修改主机名:hostnamectl set-hostname mail.meilintong.com 退出,重新登陆
1.安装postfix
yum remove sendmail 注意sendmail是centos默认安装的,超级难用,放心删掉
(1)修改MTA(默认邮件传输代理)
第一行可以看到mta的状态。 例如:mat - status is manual.
(2)修改postfix服务的配置文件
myhostname = mail.meilintong.com #75行 定义主机名
mydomain = meilintong.com #83行 定义域名
myorigin = $mydomain #99行 定义组织域
inet_interfaces = all #116行 定义网络区域
inet_protocols = ipv4 #119行 定义协议 推荐用ipv4,如果支持ipv6可以使用all
mydestination = $myhostname, localhost.$mydomain, localhost, $mydomain #165行 取消注释

mynetworks = 127.0.0.0/8, 192.168.6.0/24 # 264行: 取消注释,指定内网和本地的IP地址范围
home_mailbox = Maildir/ # 419行: 取消注释,邮件保存目录
smtpd_banner = $myhostname ESMTP # 571行: 添加
# 添加到最后 # 规定邮件最大尺寸为10M message_size_limit = 10485760 # 规定收件箱最大容量为1G mailbox_size_limit = 1073741824 # SMTP认证 smtpd_sasl_type = dovecot smtpd_sasl_path = private/auth smtpd_sasl_auth_enable = yes smtpd_sasl_security_options = noanonymous smtpd_sasl_local_domain = $myhostname smtpd_recipient_restrictions = permit_mynetworks,permit_auth_destination,permit_sasl_authenticated,reject
2.安装dovecot
(1)修改主配置文件
protocols = imap pop3 lmtp 启用协议
(2)配置邮件格式与存储路径
vim /etc/dovecot/conf.d/10-mail.conf
mail_location = maildir:~/Maildir #24行,取消注释
(3)配置验证
vim /etc/dovecot/conf.d/10-auth.conf
disable_plaintext_auth = no 允许客户使用明文进行密码验证,这是由于Dovecot服务程序为了保证电子邮件系统安全而默认强制客户必须使用加密方式进行登陆,而当前由于咱们没有加密系统的支持,因此需要添加参数来允许客户的明文登陆行为。
(4)禁用ssl
vim /etc/dovecot/conf.d/10-ssl.conf
ssl = no
(5)启用日志
vim /etc/dovecot/conf.d/10-logging.conf
添加 info_log_path = /var/log/dovecot_info.log debug_log_path = /var/log/dovecot_debug.log
vim /etc/dovecot/conf.d/10-master.conf
# Postfix smtp验证 unix_listener /var/spool/postfix/private/auth { mode = 0666 user = postfix group = postfix }
3.测试postfix和dovecot
(1)测试postfix发送邮件
[root@mail ~]# telnet localhost smtp
telnet: connect to address ::1: Connection refused
354 End data with <CR><LF>.<CR><LF>
250 2.0.0 Ok: queued as 1DA35617631D
Connection closed by foreign host.
(2)测试dovecot
[root@mail ~]# telnet localhost 110
telnet: connect to address ::1: Connection refused
Return-Path: <test@meilintong.com>
Delivered-To: test@meilintong.com
Received: from localhost (localhost [IPv6:::1])
by mail.meilintong.com (Postfix) with ESMTP id 1B6176173654
for <test>; Tue, 27 Feb 2018 09:20:43 +0800 (CST)
Message-Id: <20180227012052.1B6176173654@mail.meilintong.com>
Date: Tue, 27 Feb 2018 09:20:43 +0800 (CST)
Connection closed by foreign host.
4.使用第三方邮件客户端foxmail来发送接收邮件
(1)刚才我们创建了test用户,现在再创建一个ming用户
(2)伪域名解析

修改宿主机的hosts文件 路径:C:\Windows\System32\drivers\etc

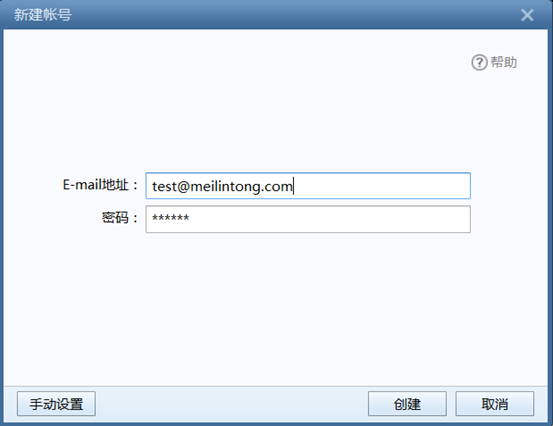
(3)使用foxmail登陆
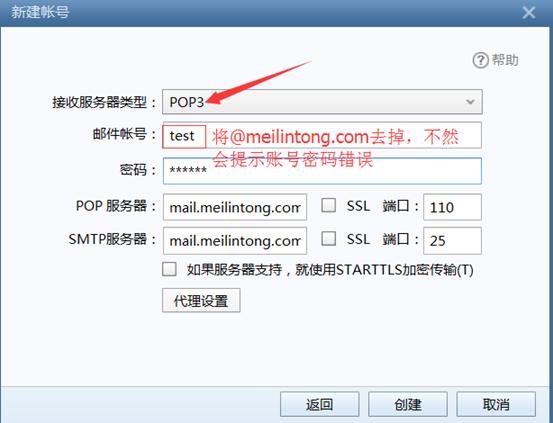
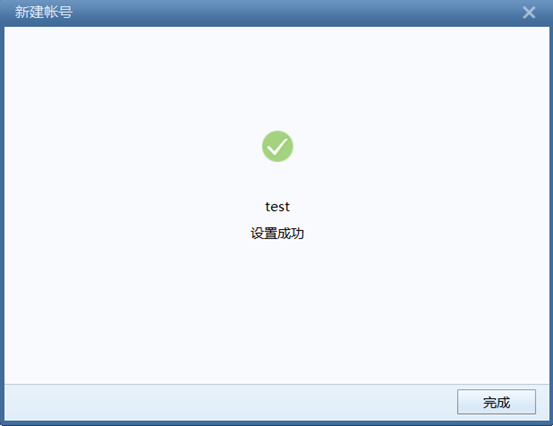
1.新建账号,注意:所有的账号后部分都是@meilintong.com,就是我们设置的域名,前部分是我们在搭建邮箱服务器中创建的用户,这个用户必须先建立,否则用foxmail新建账号失败

我们在添加一个账户ming@meilintong.com,注意ming这个用户,我们在邮箱服务器已经创建了

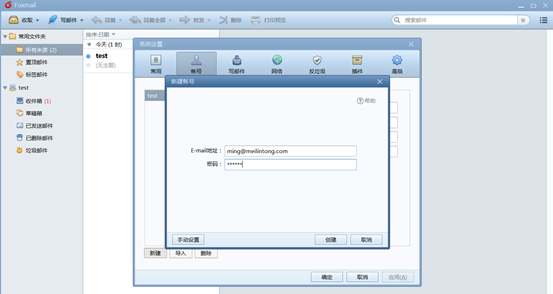


我们再看ming用户收到了没有,可以看到ming用户已经收到了test发送的邮件


 浙公网安备 33010602011771号