

[Android Pro] AndroidStudio IDE界面插件开发(进阶篇之Editor)
转载请注明出处:【huachao1001的专栏:http://blog.csdn.net/huachao1001/article/details/53885981】
我们开发AndroidStudio插件,绝大多数插件功能是用在编辑文本上面,让用户开发更便捷。这篇文章主要是介绍Editor部分,看完之后可以开发简单实用的插件啦!在看本文之前,请先确定已经看完《AndroidStudio插件开发(Hello World篇)》和《 AndroidStudio插件开发(进阶篇之Action机制)》。因为这两篇是基础,没有这些基础就无法继续往下读。
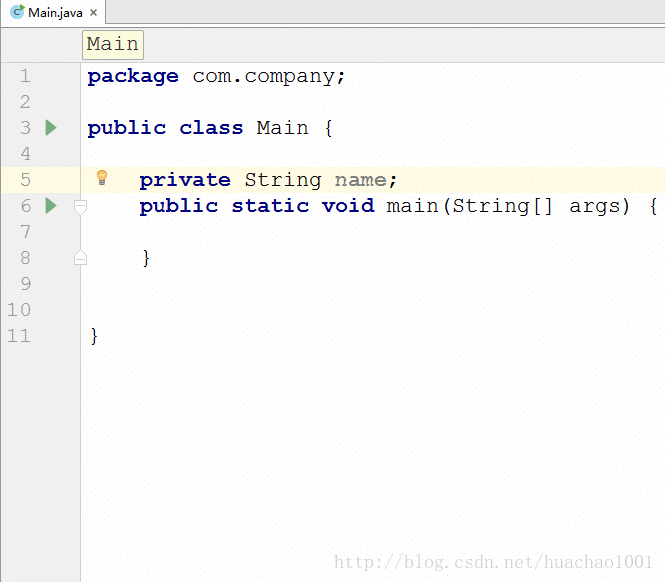
在本文的最后使用简单的代码实现简单的插件:自动生成Getter和Setter函数的插件。如下图所示,下图中,分别演示了通过点击和使用快捷键的方式触发Action。
1. 文本编辑
1.1 CaretModel和SelectionModel
为了能够更灵活地控制Editor,IDEA插件开发中将Editor细分为多个模型。在本文中只简单介绍CaretModel和SelectionModel,除了CaretModel和SelectionModel以外,还有如下几种模型:
- FoldingModel
- IndentsModel
- ScrollingModel
- ScrollingModel
- SoftWrapModel
获取Editor的CaretModel和SelectionModel对象方法如下:
@Override
public void actionPerformed(AnActionEvent e) {
    Editor editor = e.getData(PlatformDataKeys.EDITOR);
    if (editor == null)
        return;

    SelectionModel selectionModel = editor.getSelectionModel();
    CaretModel caretModel=editor.getCaretModel();
}
其他模型对象获取方式类似,通过Editor对象的相应函数即可得到。
1.1.1 CaretModel对象
CaretModel对象用于描述插入光标,通过CaretModel对象,可以实现如下功能:
- moveToOffset(int offset):将光标移动到指定位置(offset)
- getOffset():获取当前光标位置偏移量
- getCaretCount:获取光标数量(可能有多个位置有光标)
- void addCaretListener(CaretListener listener) ,void removeCaretListener(CaretListener listener):添加或移除光标监听器(CareListener)
- Caret addCaret(VisualPosition visualPosition):加入新的光标
- ……
1.1.2 SelectionModel对象
SelectionModel对象用于描述光标选中的文本段,通过SelectionModel对象可以实现如下功能:
- String getSelectedText() :获取选中部分字符串。
- int getSelectionEnd():获取选中文本段末尾偏移量
- int getSelectionStart():获取选中文本段起始位置偏移量
- void setSelection(int start, int end):设置选中,将staert到end部分设置为选中
- void removeSelection():将选中文本段删除
- void addSelectionListener(SelectionListener listener):添加监听器,用于监听光标选中变化。
- void selectLineAtCaret():将光标所在的行设置为选中。
- void selectWordAtCaret(boolean honorCamelWordsSettings):将光标所在的单词设置为选中。honorCamelWordsSettings表示是否驼峰命名分隔,如果为true,则大写字母为单词的边界
- ……
1.2 Document对象
与Editor中的其他对象一样,通过Editor对象的一个getter函数即可得到Document对象:
Document document = editor.getDocument();
Document对象用于描述文档文件,通过Document对象可以很方便的对Editor中的文件进行操作。可以做如下这些事情:
String getText()、String getText( TextRange range):获取Document对象对应的文件字符串。int getTextLength():获取文件长度。int getLineCount():获取文件的行数int getLineNumber(int offset):获取指定偏移量位置对应的行号offset取值为[0,getTextLength()-1]。int getLineStartOffset(int line):获取指定行的第一个字符在全文中的偏移量,行号的取值范围为:[0,getLineCount()-1]int getLineEndOffset(int line):获取指定行的最后一个字符在全文中的偏移量,行号的取值范围为:[0,getLineCount()-1]void insertString(int offset, CharSequence s):在指定偏移位置插入字符串void deleteString(int startOffset, int endOffset):删除[startOffset,endOffset]位置的字符串,如果文件为只读,则会抛异常。void replaceString(int startOffset, int endOffset, CharSequence s):替换[startOffset,endOffset]位置的字符串为svoid addDocumentListener( DocumentListener listener):添加Document监听器,在Document内容发生变化之前和变化之后都会回调相应函数。- ……
1.3 实现自动生成Getter和Setter函数的插件
有了上面的认识后,我们可以开始写个简单的Getter和Setter函数插件了。首先创建一个Action,名为GetterAndSetter,并在plugin.xml中注册。plugin.xml的<acitons>标签部分如下:
<actions>
    <action id="StudyEditor.GetterAndSetter" class="com.huachao.plugin.GetterAndSetter" text="Getter And Setter"
            description="生成Getter和Setter方法">
          <add-to-group group-id="EditorPopupMenu" anchor="first"/>
          <keyboard-shortcut keymap="$default" first-keystroke="ctrl alt G"/>
    </action>
</actions>
通过前面两篇文章的学习,我们知道,定义Action时需要重写actionPerformed和update函数。
@Override
public void actionPerformed(AnActionEvent e) {
    //获取Editor和Project对象
    Editor editor = e.getData(PlatformDataKeys.EDITOR);
    Project project = e.getData(PlatformDataKeys.PROJECT);
    if (editor == null||project==null)
        return;

    //获取SelectionModel和Document对象
    SelectionModel selectionModel = editor.getSelectionModel();
    Document document = editor.getDocument();

    //拿到选中部分字符串
    String selectedText = selectionModel.getSelectedText();

    //得到选中字符串的起始和结束位置
    int startOffset = selectionModel.getSelectionStart();
    int endOffset = selectionModel.getSelectionEnd();

    //得到最大插入字符串(即生成的Getter和Setter函数字符串)位置
    int maxOffset = document.getTextLength() - 1;

    //计算选中字符串所在的行号,并通过行号得到下一行的第一个字符的起始偏移量
    int curLineNumber = document.getLineNumber(endOffset);
    int nextLineStartOffset = document.getLineStartOffset(curLineNumber + 1);

    //计算字符串的插入位置
    int insertOffset = maxOffset > nextLineStartOffset ? nextLineStartOffset : maxOffset;

    //得到选中字符串在Java类中对应的字段的类型
    String type = getSelectedType(document, startOffset);

    //对文档进行操作部分代码,需要放入Runnable接口中实现,由IDEA在内部将其通过一个新线程执行
    Runnable runnable = new Runnable() {
        @Override
        public void run() {
            //genGetterAndSetter为生成getter和setter函数部分
            document.insertString(insertOffset, genGetterAndSetter(selectedText, type));
        }
    };

    //加入任务,由IDEA调度执行这个任务
    WriteCommandAction.runWriteCommandAction(project, runnable);

}

@Override
public void update(AnActionEvent e) {
    Editor editor = e.getData(PlatformDataKeys.EDITOR);
    SelectionModel selectionModel = editor.getSelectionModel();

    //如果没有字符串被选中,那么无需显示该Action
    e.getPresentation().setVisible(editor != null && selectionModel.hasSelection());
}
剩下的还有获取选中字段的类型和生成Getter、Setter函数两个部分,两个函数如下:
private String getSelectedType(Document document, int startOffset) {

    String text = document.getText().substring(0, startOffset).trim();
    int startIndex = text.lastIndexOf(' ');

    return text.substring(startIndex + 1);
}

private String genGetterAndSetter(String field, String type) {
  if (field == null || (field = field.trim()).equals(""))
      return "";
  String upperField = field;
  char first = field.charAt(0);
  if (first <= 'z' && first >= 'a') {
      upperField = String.valueOf(first).toUpperCase() + field.substring(1);
  }
  String getter = "\tpublic TYPE getUpperField(){ \n\t\treturn this.FIELD;\n\t}";
  String setter = "\tpublic void setUpperField(TYPE FIELD){\n\t\tthis.FIELD=FIELD;\n\t}";

  String myGetter = getter.replaceAll("TYPE", type).replaceAll("UpperField", upperField).replaceAll("FIELD", field);
  String mySetter = setter.replaceAll("TYPE", type).replaceAll("UpperField", upperField).replaceAll("FIELD", field);

  return "\n"+myGetter + "\n" + mySetter + "\n";
}
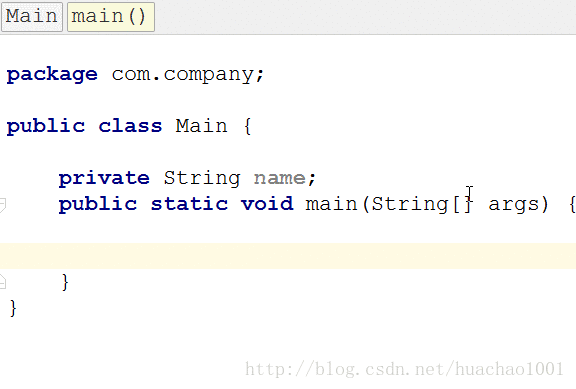
运行后如下:
注意:在对Document进行修改时,需要实现Runnable接口并将修改部分代码写入run函数中,最后通过 WriteCommandAction的runWriteCommandAction函数执行。
2. Editor的坐标系统:位置和偏移量
前面小节我们知道,通过CaretModel对象我们可以获取当前光标位置。但在Editor中位置分为两种,一种是逻辑位置,对应LogicalPosition类;另一种是视觉位置,对应VisualPosition类。
LogicalPosition与VisualPosition的区别通过如下图很显然能区分开来。
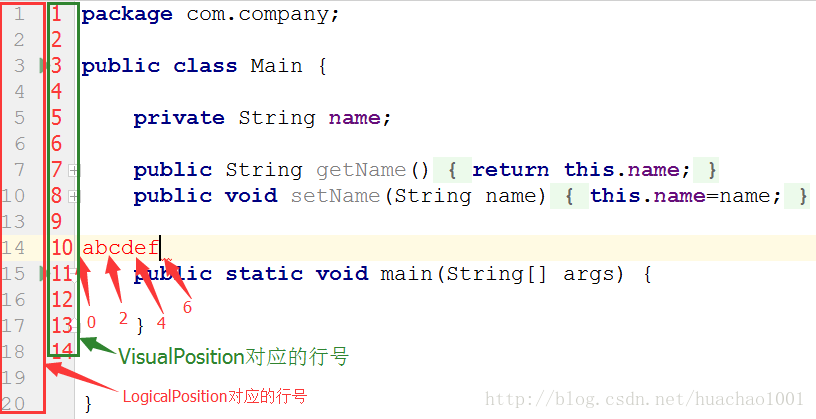
上如中,光标的坐标为:
LogicalPosition:(13,6)
VisualPosition:(9,6)
注意,行号和列号都是从0开始。
另外,获取LogicalPosition和VisualPosition方法如下:
@Override
public void actionPerformed(AnActionEvent e) {
    //获取Editor和Project对象
    Editor editor = e.getData(PlatformDataKeys.EDITOR);
    Project project = e.getData(PlatformDataKeys.PROJECT);
    if (editor == null || project == null)
        return;
    CaretModel caretModel = editor.getCaretModel();
    LogicalPosition logicalPosition = caretModel.getLogicalPosition();
    VisualPosition visualPosition = caretModel.getVisualPosition();

    System.out.println(logicalPosition + "," + visualPosition);
}
3. Editor中的按键事件
为了监听按键时间,专门提供了TypedActionHandler类,我们只需继承TypedActionHandler,并重写execute函数即可。注意,只能监听可打印字符对应的按键。
package com.huachao.plugin;

import com.intellij.openapi.actionSystem.DataContext;
import com.intellij.openapi.editor.Editor;
import com.intellij.openapi.editor.actionSystem.TypedActionHandler;
import org.jetbrains.annotations.NotNull;

/**
 * Created by huachao on 2016/12/26.
 */
public class MyTypedActionHandler implements TypedActionHandler {
    @Override
    public void execute(@NotNull Editor editor, char c, @NotNull DataContext dataContext) {
        System.out.println(c);
    }
}
TypedAction专门处理按键相关操作,定义了TypedActionHandler后,接下来就是将自定义的TypedActionHandler加入到TypedAction中。如何获取TypedAction对象呢?具体如下:
final EditorActionManager actionManager = EditorActionManager.getInstance();
final TypedAction typedAction = actionManager.getTypedAction();
typedAction.setupHandler(new MyTypedActionHandler());
上述代码即可将自定义的按键处理器成功加入,现在有个问题是,上面这段代码应该放入到哪里呢?之前我们都是重写AnAction的actionPerformed和update函数就行,能不能将上面这段代码放入到actionPerformed中呢?显然这是可以的,但是这样的话就得先点击当前Action后才能使MyTypedActionHandler被加入,并且每点击一次,就会创建新的MyTypedActionHandler并将原先的替换。我们可以把上面这段代码加入到Action的构造函数中,或者是在Action中创建static块。
注意:只能设置一个监听,如果自定义了按键监听,而不做其他处理的话,会使得原先IDEA中的按键监听无法处理,导致无法正常在输入框中输入。
为了能更充分理解TypedActionHandler,我们实现一个简单功能的插件:在输入字符的同时,在文档的开头也插入同样的字符。
首先定义TypedActionHandler:
package com.huachao.plugin;

import com.intellij.openapi.actionSystem.DataContext;
import com.intellij.openapi.editor.CaretModel;
import com.intellij.openapi.editor.Document;
import com.intellij.openapi.editor.Editor;
import com.intellij.openapi.editor.LogicalPosition;
import com.intellij.openapi.editor.actionSystem.TypedActionHandler;
import org.jetbrains.annotations.NotNull;

/**
 * Created by huachao on 2016/12/26.
 */
public class MyTypedActionHandler implements TypedActionHandler {
    private TypedActionHandler oldHandler;
    private boolean isBegin = true;
    private int caretLine = 0;

    @Override
    public void execute(@NotNull Editor editor, char c, @NotNull DataContext dataContext) {
        if (oldHandler != null)
            oldHandler.execute(editor, c, dataContext);

        Document document = editor.getDocument();
        CaretModel caretModel = editor.getCaretModel();
        int caretOffset = caretModel.getOffset();
        int line = document.getLineNumber(caretOffset);
        if (isBegin) {
            document.insertString(document.getLineStartOffset(line), String.valueOf(c) + "\n");
            caretLine = line + 1;
            isBegin = false;
        } else {
            if (line != caretLine) {
                isBegin = true;
                execute(editor, c, dataContext);
            } else {
                document.insertString(document.getLineEndOffset(line - 1), String.valueOf(c));
            }
        }
        System.out.println(caretLine + "," + line);

    }

    public void setOldHandler(TypedActionHandler oldHandler) {
        this.oldHandler = oldHandler;
    }
}


将我们定义的TypedActionHandler设置进去,只需实现一个简单Action。
```java
package com.huachao.plugin;

import com.intellij.openapi.actionSystem.AnAction;
import com.intellij.openapi.actionSystem.AnActionEvent;
import com.intellij.openapi.editor.actionSystem.EditorActionManager;
import com.intellij.openapi.editor.actionSystem.TypedAction;
import com.intellij.openapi.editor.actionSystem.TypedActionHandler;

/**
 * Created by huachao on 2016/12/26.
 */
public class InsertCharAction extends AnAction {
    public InsertCharAction() {
        final EditorActionManager actionManager = EditorActionManager.getInstance();
        final TypedAction typedAction = actionManager.getTypedAction();
        MyTypedActionHandler handler = new MyTypedActionHandler();
        //将自定义的TypedActionHandler设置进去后,
        //返回旧的TypedActionHandler,即IDEA自身的TypedActionHandler
        TypedActionHandler oldHandler = typedAction.setupHandler(handler);
        handler.setOldHandler(oldHandler);
    }

    @Override
    public void actionPerformed(AnActionEvent e) {

    }
}
运行结果如下:
参考资料
Document类源码:点击这里
官方文档:http://www.jetbrains.org/intellij/sdk/docs/tutorials/editor_basics.html

 浙公网安备 33010602011771号