
haproxy+tomcat实现负载均衡以及session共享(linux centos7环境)
一、安装HAProxy
1.进入home目录,下载最新haproxy安装包。
cd /home
wget http://haproxy.1wt.eu/download/1.4/src/haproxy-1.4.24.tar.gz
2.解压:
tar -zxvf haproxy-1.4.24.tar.gz
重命名为haproxy
mv haproxy-1.4.24.tar.gz haproxy
创建目录/usr/local/haproxy
mkdir /usr/local/haproxy
3.安装
cd haproxy
make TARGET=linux26 PREFIX=/usr/local/haproxy
make install PREFIX=/usr/local/haproxy
cd /usr/local/haproxy
mkdir /usr/local/haproxy/conf
cp /home/haproxy/examples/haproxy.cfg /home/haproxy/haproxy/conf/
4.修改配置
vi /usr/local/haproxy/conf/haproxy.cfg
如图:
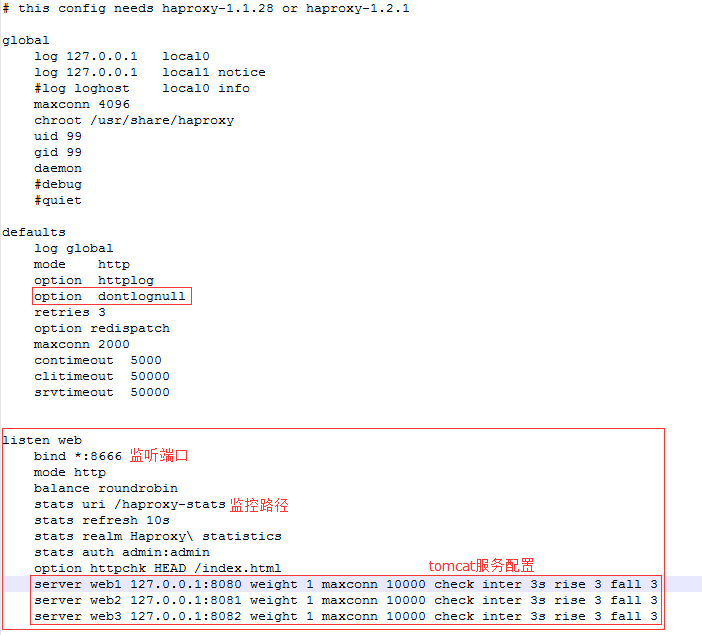
内容:
# this config needs haproxy-1.1.28 or haproxy-1.2.1

global
    log 127.0.0.1    local0
    log 127.0.0.1    local1 notice
    #log loghost    local0 info
    maxconn 4096
    chroot /usr/share/haproxy
    uid 99
    gid 99
    daemon
    #debug
    #quiet

defaults
    log    global
    mode    http
    option    httplog
    option    dontlognull
    retries    3
    option redispatch
    maxconn    2000
    contimeout    5000
    clitimeout    50000
    srvtimeout    50000


listen web
    bind *:8666
    mode http
    balance roundrobin
    stats uri /haproxy-stats
    stats refresh 10s
    stats realm Haproxy\ statistics
    stats auth admin:admin
    option httpchk HEAD /index.html
    server web1 127.0.0.1:8080 weight 1 maxconn 10000 check inter 3s rise 3 fall 3
    server web2 127.0.0.1:8081 weight 1 maxconn 10000 check inter 3s rise 3 fall 3
    server web3 127.0.0.1:8082 weight 1 maxconn 10000 check inter 3s rise 3 fall 3
二、tomcat服务的集群和session共享参考:
nginx+tomcat实现负载均衡以及session共享(linux centos7环境)(第二点)
三、3个tomcat配置完成并启动好以后,启动haproxy
./usr/local/haproxy/sbin/haproxy -f /usr/local/haproxy/conf/haproxy.cfg
关闭haproxy命令为:
killall haproxy

 浙公网安备 33010602011771号