


SrpingBoot入门到入坟02-HelloWorld的细节和初始自动配置
关于SpringBoot的第一个HelloWorld的一些细节:
1.父项目
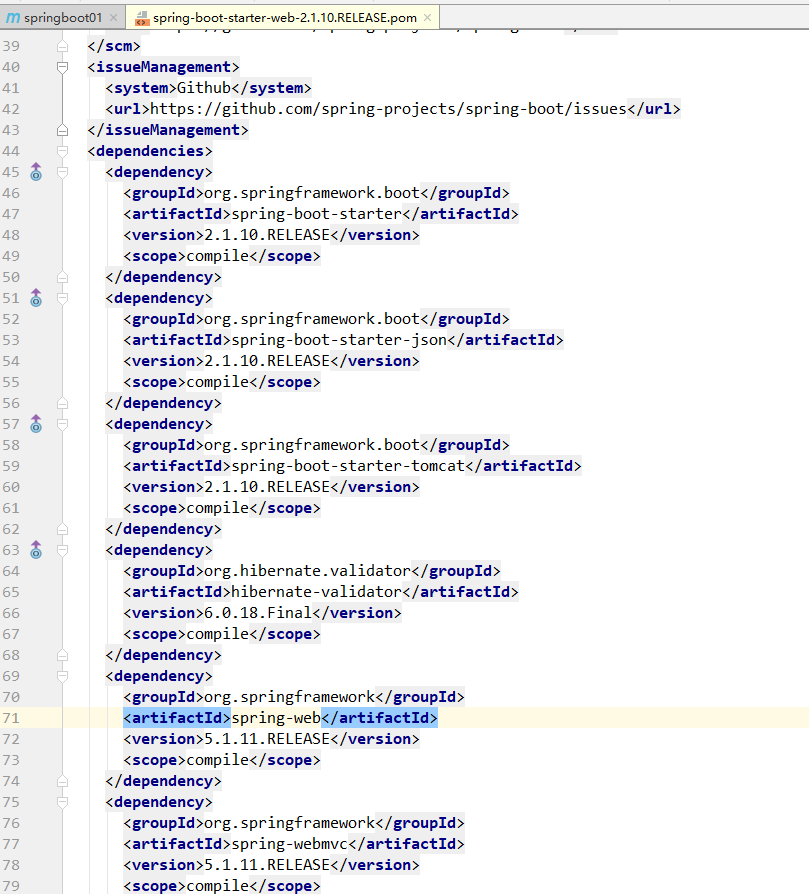
首先查看项目中的pom.xml文件
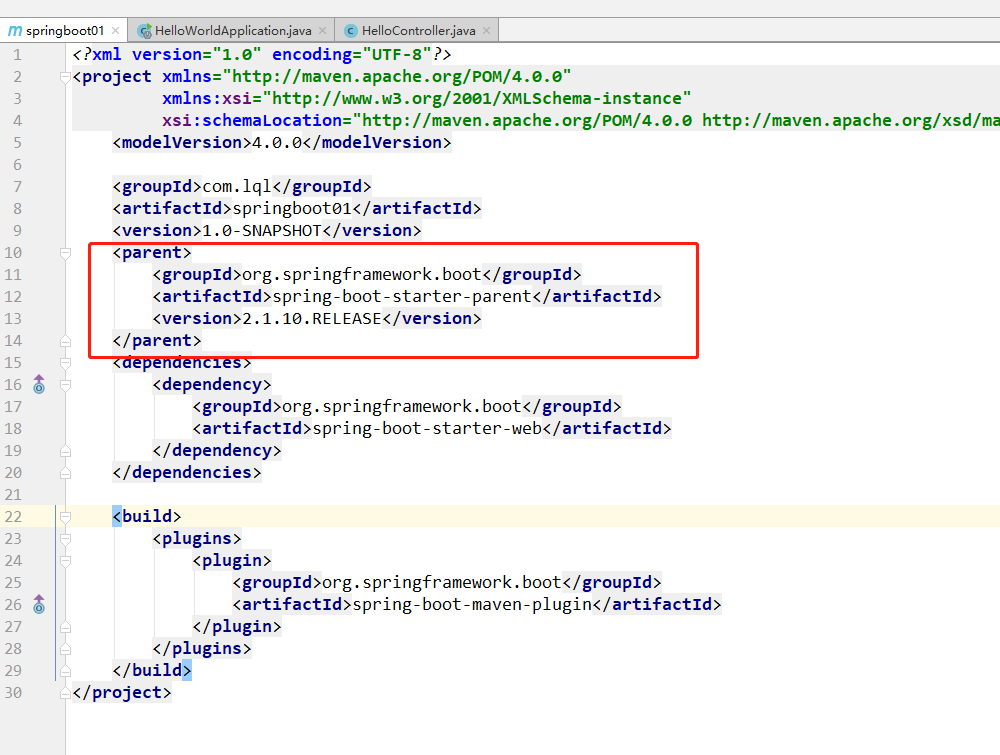
文件中有个父项目,点进去则:
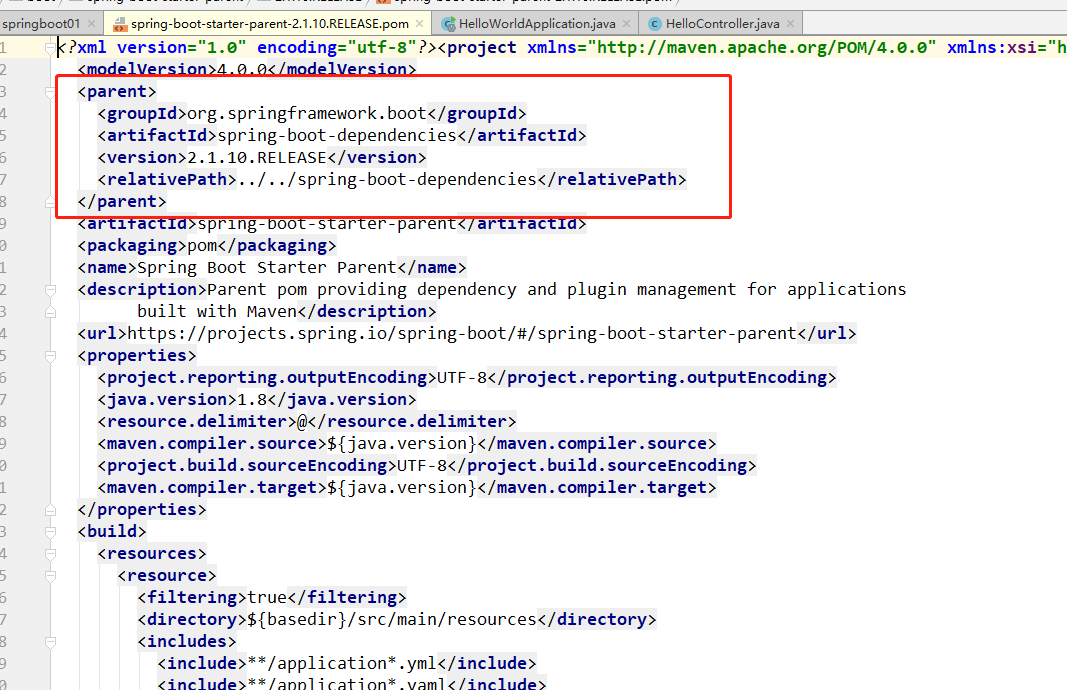
它里面也有一个父项目,再点进去:
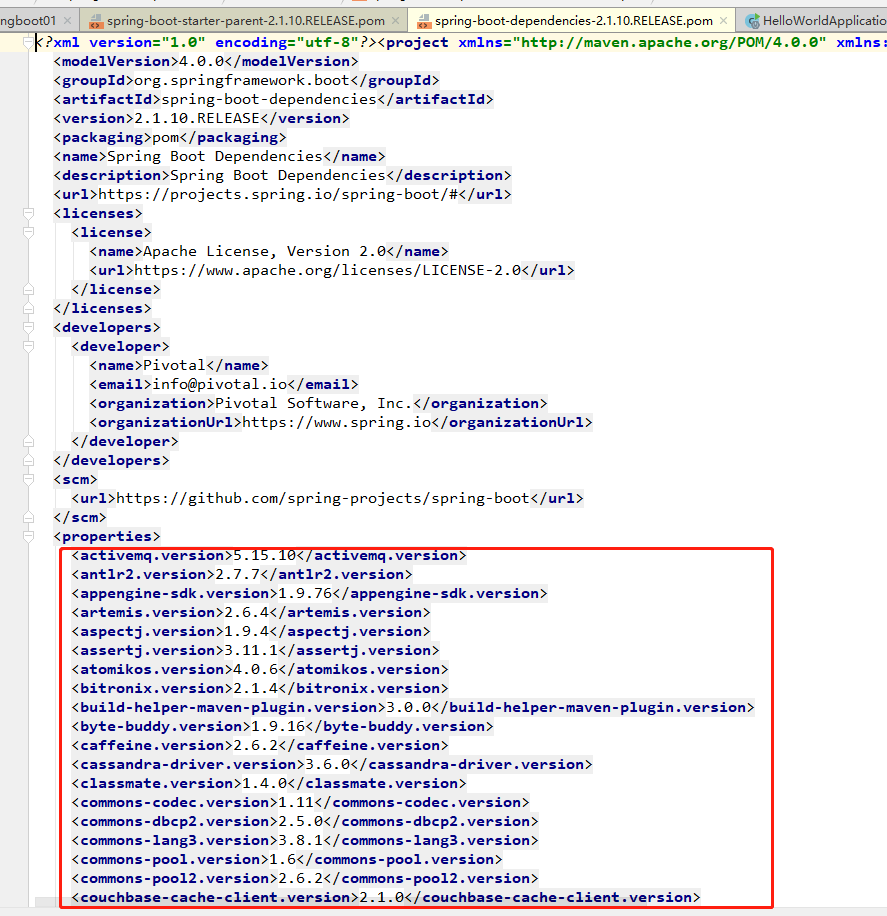
可以发现有很多的依赖版本,其实它来真正管理SpringBoot应用里面的所有依赖版本,也称为SpringBoot的版本仲裁中心。也就是我们以后导入依赖是不需要写版本了(如果没有在该管理中的依赖,则还是需要声明版本号的)。
2.导入的依赖:
在之前的HelloWorld中的pom.xml还有我们自己导入的一个依赖:
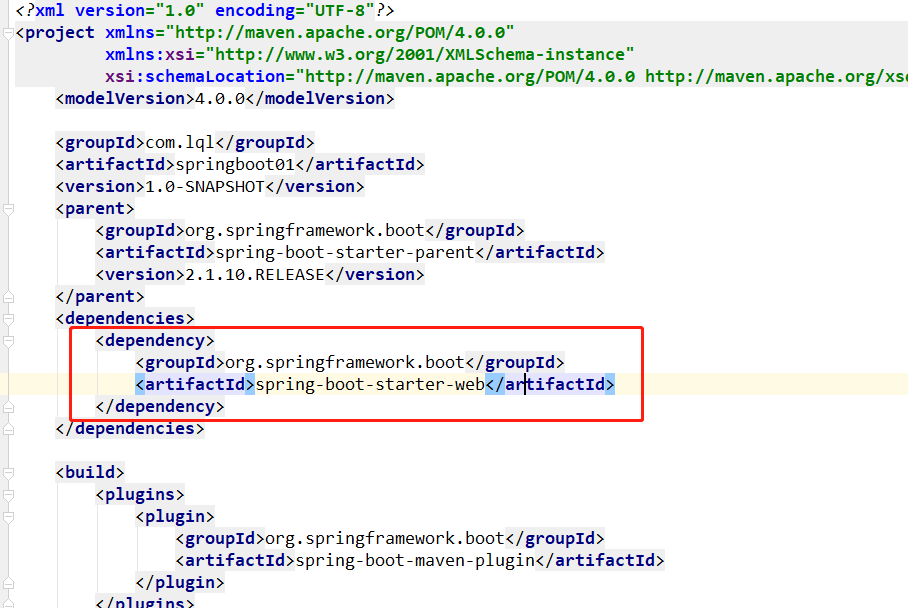
可以看出我们导入了“spring-boot-starter-web”的依赖,不妨将这些拆开来看:分别为“spring-boot-starter”和“web”;那什么叫“spring-boot-starter”呢?其实就是springboot的场景启动器;点进去可以看到:
它里面也导入了很多依赖;所以spring-boot-starter-web的作用就是:帮我们导入web模块正常运行所依赖的组件。而在SpringBoot中,还有很多启动器:

一句话总结:SpringBoot将所有的功能场景都抽取出来,做成一个个的starter(启动器);只需要在项目中引入这些starter相关场景的所有依赖都会被导入进来,需要什么功能就导入什么场景的启动器。
3.主程序类
 1 package com.lql;
 2
 3 import org.springframework.boot.SpringApplication;
 4 import org.springframework.boot.autoconfigure.SpringBootApplication;
 5
 6 /**
 7  * @author: lql
 8  * @date: 2019.11.15
 9  * Description: 启动类
10  */
11 @SpringBootApplication
12 public class HelloWorldApplication {
13
14     public static void main(String[] args) {
15
16         SpringApplication.run(HelloWorldApplication.class,args);
17     }
18 }
主程序类中有个核心注解:@SpringBootApplication:翻译过来就是springboot程序,将这个注解标识在某个类上就说明是SpringBoot的主配置类,SpringBoot就应该运行这个类的Main()来启动SpringBoot应用。那么这个注解到底什么呢?打开这个注解可以发现它是个组合注解:
 1 @Target({ElementType.TYPE})
 2 @Retention(RetentionPolicy.RUNTIME)
 3 @Documented
 4 @Inherited
 5 @SpringBootConfiguration
 6 @EnableAutoConfiguration
 7 @ComponentScan(
 8     excludeFilters = {@Filter(
 9     type = FilterType.CUSTOM,
10     classes = {TypeExcludeFilter.class}
11 ), @Filter(
12     type = FilterType.CUSTOM,
13     classes = {AutoConfigurationExcludeFilter.class}
14 )}
15 )
16 public @interface SpringBootApplication {
第一个注解:@SpringBootConfiguration:springboot的配置类:标注在某个类上,表示这是一个Spring Boot的配置类,而点进SpringBootConfiguration则能看到:@Configuration;
1 @Target({ElementType.TYPE})
2 @Retention(RetentionPolicy.RUNTIME)
3 @Documented
4 @Configuration
5 public @interface SpringBootConfiguration {
6 }
而@Configuration是配置类上使用的注解,作用就是将配置类===配置文件。当再次点进去其实发现它就是个组件:
1 @Target({ElementType.TYPE})
2 @Retention(RetentionPolicy.RUNTIME)
3 @Documented
4 @Component
5 public @interface Configuration {
第二个注解:@EnableAutoConfiguration:开启自动配置功能;以前需要配置的东西现在由SpringBoot帮我们自动配置。该注解就是告诉SpringBoot开启自动配置功能,这样自动配置才能生效。点开这个注解:
1 @AutoConfigurationPackage
2 @Import({AutoConfigurationImportSelector.class})
3 public @interface EnableAutoConfiguration {
它里面有个@AutoConfigurationPackage注解:自动配置包;在点进去则:
1 @Import({Registrar.class})
2 public @interface AutoConfigurationPackage {
3 }
它是用@Import({Registrar.class})来完成的功能;Import是Spring的底层注解,作用就是给容器中导入一个组件。点进后面的.class;在程序中打断点然后启动主程序类:
![]()

上图则表示:将标识@SpringBootApplication的类所在包及下面所有子包里面的所有组件扫描到Spring容器,上图拿到的包是“com.lql”,所以我们刚开始定义的Controller也能被扫描进来,以为是其子包:

在@EnableAutoConfiguration中还有一个注解:@Import({AutoConfigurationImportSelector.class});刚才也说了Import是给容器导入组件的,导入的的组件是“AutoConfigurationImportSelector”:导入哪些组件的选择器。
进入AutoConfigurationImportSelector加个断点debug启动:
![]()

  意思就是说会给容器导入非常多的自动配置类(xxxAutoConfiguration);这些自动配置类就是给容器中导入这个场景需要的所有组件,并配置好。具体细节以后再说,有了自动配置类,免去了我们手动编写配置和注入功能组件的工作。
其实就是SpringBoot在启动的时候从类路径下的META-INF/spring.factories中获取EnableAutoConfiguration指定的值,将这些值作为自动配置类导入到容器中,所在的jar都在"spring-boot-autoconfigure-2.1.10.RELEASE.jar"里;
![]()


 浙公网安备 33010602011771号