

使用 Bitbucket Pipelines 持续交付托管项目
简介
Bitbucket Pipelines 是Atlassian公司为Bitbucket Cloud产品添加的一个新功能, 它为托管在Bitbucket上的项目提供了一个良好的持续集成/交付的服务。
目录
   简介
   前提
   例子
      Demo项目介绍
      配置
      工作流程
      Overview
   参考
前提
申请 Bitbucket 账号
Java 8
Gradle 2.6
Git
例子
Demo
准备一个小项目以便于更好的展示,用Vert.x创建一个简单的Restful web service, 另外再添加一个integration test,这里用的是rest-assured library,在我其它多篇文章都有介绍这个第三方库,专业做Restful API test, 大家可以参考。
项目结构如下图

##转载注明出处:http://www.cnblogs.com/wade-xu/p/6480319.html
App.java
 1 package com.wadeshop.tutorial;
 2
 3 import java.time.LocalDateTime;
 4
 5 import io.vertx.core.Vertx;
 6 import io.vertx.core.http.HttpServer;
 7
 8 public class App {
 9     private HttpServer listen;
10
11     public static void main(String[] args) {
12         new App().run();
13
14     }
15
16     public void run() {
17         listen = Vertx.vertx().createHttpServer()
18                 .requestHandler(req -> req.response().putHeader("content-type", "application/json").end("{\"message\":\"" + LocalDateTime.now() + "\"}")).listen(8080, handler -> {
19                     if (handler.succeeded()) {
20                         System.out.println("server is running: http://localhost:8080/");
21                     } else {
22                         System.err.println("server startup failed trying to listen on port 8080");
23                     }
24                 });
25     }
26
27     public void shutdown() {
28         if (listen != null)
29             listen.close();
30     }
31
32 }
AppIntegrationTest.java
package integration;

import static io.restassured.RestAssured.given;
import static org.hamcrest.Matchers.notNullValue;

import org.junit.After;
import org.junit.Before;
import org.junit.Test;

import com.wadeshop.tutorial.App;

import io.restassured.http.ContentType;

public class AppIntegrationTest {
    App app = new App();

    @Before
    public void setup() {
        app.run();
    }

    @After
    public void teardown() {
        app.shutdown();
    }

    @Test
    public void shouldReturnValidDate() throws Exception {
        given().contentType(ContentType.JSON).when().get("http://localhost:8080/").then().body("message", notNullValue());
    }
}
此外,项目使用Gradle 作为Build 工具

[sts] -----------------------------------------------------
[sts] Starting Gradle build for the following tasks:
[sts]      :cleanEclipse
[sts]      :eclipse
[sts] -----------------------------------------------------
:cleanEclipseClasspath
:cleanEclipseJdt
:cleanEclipseProject
:cleanEclipse
:eclipseClasspath
:eclipseJdt
:eclipseProject
:eclipse

BUILD SUCCESSFUL

Total time: 1.345 secs
[sts] -----------------------------------------------------
[sts] Build finished succesfully!
[sts] Time taken: 0 min, 1 sec
[sts] -----------------------------------------------------
配置
A. 在Bitbucket 建repository, put your project to bucket
-
Step 1: Switch to your repository's directory
cd /path/to/your/repo -
Step 2: Connect your existing repository to Bitbucket
git remote add origin https://xxx/xxx.git
B. 激活 Bitbucket Pipelines

接下来选择Java - Gradle 作为Template
配置yml 文件如下
bitbucket-pipelines.yml
# using gradle as build tool ..
image: qlik/gradle

pipelines:
  default:
    - step:
        script:
          - gradle --version
          - gradle test
注意 image: qlik/gradle 是一个安装了Java和Gradle的Docker镜像文件, 来自于DockerHub。
##转载注明出处:http://www.cnblogs.com/wade-xu/p/6480319.html
Bitbucket Pipelines 的工作流程:
每当项目里有commit 被push 的时候, Pipelines会做如下步骤:
- 创建一个安装并配置了Java和Gradle的环境
- Check out 项目
- 解决依赖
- 运行测试
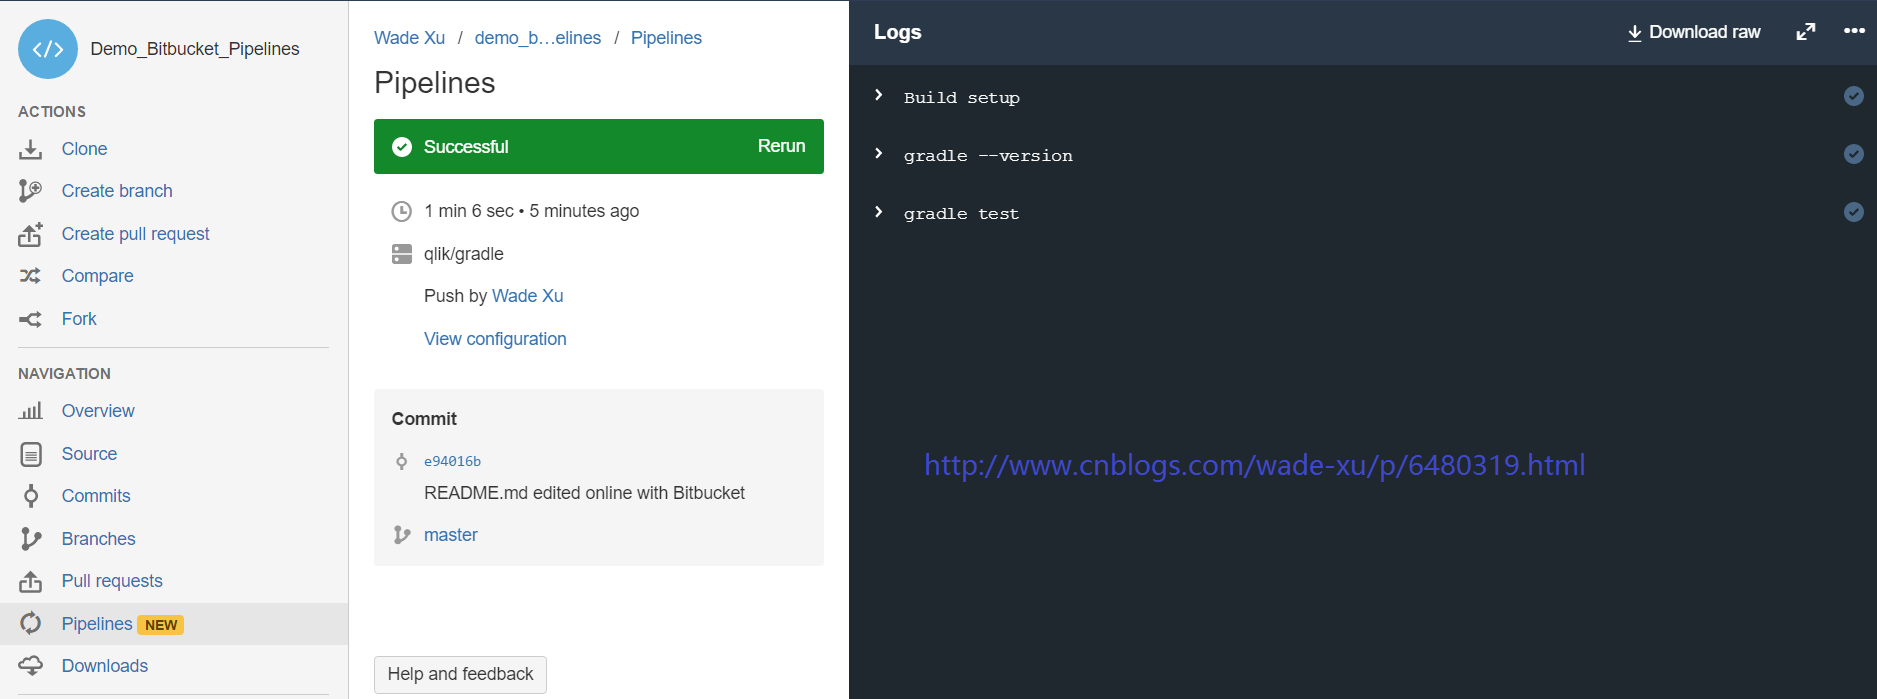
Bitbucket Pipelines Overview
随便提交一个啥,然后看看结果, Successful了

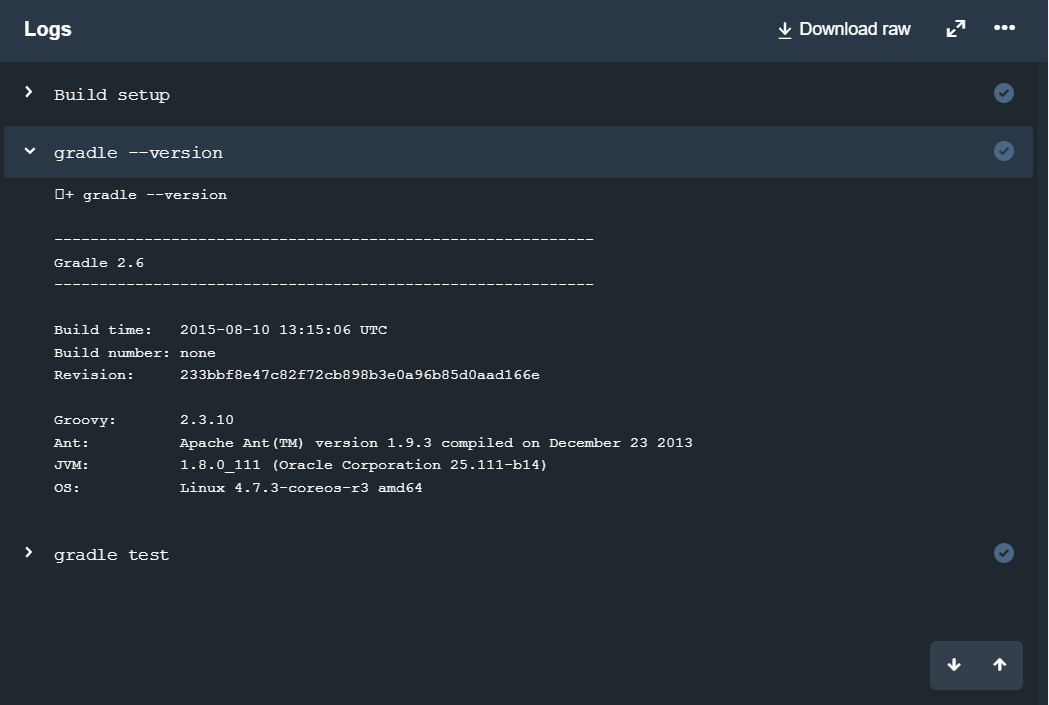
点击看详细结果
##转载注明出处:http://www.cnblogs.com/wade-xu/p/6480319.html
接下来 故意把Test 断言改错 让case failed

Pipelines 也Failed了

详细Log


参考
- Bitbucket Pipelines (Beta) Documentation
- Pipelines Acitvation Tutorial
- Overview of current limitations of the Pipelines Feauture
- DockerHub: qlik/gradle – Docker image providing Java and Gradle
- Docker Website

 浙公网安备 33010602011771号