
ASP.NET Core 3.x 入门(六)Blazor
此入门教程是记录下方参考资料视频的学习过程
开发工具:Visual Studio 2019
参考资料:https://www.bilibili.com/video/BV1c441167KQ
API文档:https://docs.microsoft.com/zh-cn/dotnet/api/?view=aspnetcore-3.1
目录
Blazor 简介
MVC
- Controller
- Model
- View
MVC 的 View 使用 Razor ,但浏览器看不懂 C# 代码,所以 View 是在服务器端渲染的,服务端是把渲染后的结果发给浏览器,与服务器端 API 进行交互操作
SPA(Single Page Application)
- Controller
- Model
- Static Html 、Js 、Css
Controller 和 Model 与 MVC 差不多,但服务器端没有 C# 写的 View ,而是把 Static Html、Js、Css 原封不动的发送给浏览器(客户端),浏览器通常由 JavaScript 进行与服务器端 API 的交互操作,服务器传输纯数据给客户端
Blazor SPA
- Controller
- Model
与 SPA 类似,但是服务器端只有 COntroller 和 Model ,主要差别在于客户端,传统 SPA 只支持 JavaScript 进行前后端的交互操作,而 Blazor SPA 可以让我们使用 C# 写客户端的代码,并且在浏览器里执行,与服务器端进行交互操作
Blazor
- 基于 Component 的编程模型
Blazor 宿主模型
- 客户端
- 服务器端
客户端宿主模式
Server:Components 使用 C# 编写,使用 Assemblies/DLLs 的形式发送给客户端浏览器,将 Assemblies/DLLs 传送给客户端时,还会传送一种特制的 mono
Browser:浏览器就可以使用 JavaScript 进行交互操作
Mono
- 也是一个开源的 .NET Framework
- 它可以解释 IL(intermediate language 中间语言)
- 代码的 IL 是包含在 .NET 的 Assembly 里面,Assembly 也就是 DLL ,这个 DLL 会发送给浏览器
- 浏览器之所以可以执行 mono ,是因为它接收到的 mono 版本是使用一种类似汇编(Assembly)的低级语言编写的。而浏览器可以理解这种语言,它就是 WebAssembly
- 然后,Mono 就会把你的 Assembly 里面的代码(包含着 Components)解析成为 WebAssembly。这样就可以在浏览器里面运行了
客户端托管模型具有以下几个优点
- 没有 .NET 服务器端依赖项。应用在下载到客户端之后完全正常运行
- 完全利用客户端资源和功能
- 工作从服务器卸载到客户端
- 不需要 ASP.NET Core Web 服务器来托管应用程序。无服务器部署方案可能(例如,通过 CDN 提供应用)
客户端托管有缺点
- 应用程序限制为浏览器的功能
- 需要支持的客户端硬件和软件(例如,WebAssembly支持)
- 下载大小较大(mono、DLL等),应用需要较长时间才能加载
- .NET 运行时和工具支持不太成熟。例如,.NET Standard 支持和调试中存在限制
服务器端宿主模型
Server:Components 使用 C# 在服务器编写, 在服务器端进行渲染,在服务器端转化为 html。渲染之后的 Components 通过 SignalR 发送给浏览器端
Browser:UI 的更新、事件处理、JavaScript 的交互操作都是通过 SignalR 连接服务器端进行处理,服务器端对这些 Components 进行重新渲染,并把更新后的 UI 等发送给浏览器端,来回使用的是同一个 SignalR 连接
服务器端托管模型具有以下几个优点
- 下载大小明显小于客户端应用,且应用加载速度更快(没有 mono、DLL等,只发送 UI 的话,数据量更小)
- 应用充分利用服务器功能,包括使用任何与 .NET Core 兼容的 API
- 服务器上的 .NET Core 用于运行应用程序,因此现有的 .NET 工具(如调试)可按预期方式工作
- 支持瘦客户端。例如,服务器端应用程序适用于不支持 WebAssembly 浏览器和资源限制的设备
- 应用程序的 .NET/C# 代码库(包括应用程序的组件代码)不会提供给客户端
服务器端托管有缺点
- 通常存在较高的延迟。每个用户交互都涉及网络跃点
- 无脱机支持。如果客户端连接失败,应用将停止工作
- 对于包含多个用户的应用而言,可伸缩性(可扩展性、弹性)非常困难。服务器必须管理多个客户端连接并处理客户端状态
- 为应用提供服务需要 ASP.NET Core 服务器。不可能的无服务器部署方案(例如,通过 CDN 为应用提供服务)
Blazor 项目模板讲解
Blazor 宿主模型
- 客户端
- 服务器端
ASP.NET Core 3.0 只正式支持服务端的宿主模型,客户端还是预览模式(已经正式支持)
但是两者的 Components 写法是一样的,所以可以直接切换使用,代码几乎不用改
创建项目
创建 Blazor App ,我的命名是 My_Blazor_Program
选择 Blazor Server
模板解析
可以先运行一下项目
自带模板,浏览器 F12 在 Network 视图也能看到一个 Pending 状态的 blazor 的连接,使用 websocket
再看 Startup 类
public void ConfigureServices(IServiceCollection services)
{
    //添加 RazorPages 来渲染 razor 页面
    services.AddRazorPages();

    //添加服务器端的 Blazor
    services.AddServerSideBlazor();

    services.AddSingleton<WeatherForecastService>();
}
public void Configure(IApplicationBuilder app, IWebHostEnvironment env)
{
    if (env.IsDevelopment())
    {
        app.UseDeveloperExceptionPage();
    }
    else
    {
        app.UseExceptionHandler("/Error");
        app.UseHsts();
    }

    app.UseHttpsRedirection();
    app.UseStaticFiles();

    app.UseRouting();

    app.UseEndpoints(endpoints =>
    {
        // BlazorHub 其实就是 SignalR 的 Hub
        endpoints.MapBlazorHub();
        //项目启动就会访问 Pages/_Host.cshtml 页面
        endpoints.MapFallbackToPage("/_Host");
    });
}
再看 Pages/_Host.cshtml
<script src="_framework/blazor.server.js"></script>
就是这个 js 文件,包含 SignalR 的功能,通过这个文件的方法建立 SignalR 的连接
<app>
    <component type="typeof(App)" render-mode="ServerPrerendered" />
</app>
相当于整个 Web 应用的根元素,就是项目目录下的 App.razor
App.razor
<Router AppAssembly="@typeof(Program).Assembly">
    <Found Context="routeData">
        <RouteView RouteData="@routeData" DefaultLayout="@typeof(MainLayout)" />
    </Found>
    <NotFound>
        <LayoutView Layout="@typeof(MainLayout)">
            <p>Sorry, there's nothing at this address.</p>
        </LayoutView>
    </NotFound>
</Router>
这个文件就是路由
- 如果找到路由的地址就会走 Found 标签,RouteData 传递任意数量的参数,DefaultLayout 指定默认的布局,MainLayout.razor 在 Shared目录下
- 如果路由的地址没找到就会走 NotFound 标签
路由地址就是每个页面最上方的 @page
在 _Host.cshtml 中,app 标签应该会指向 Pages/Index.razor
通过浏览器 F12 工具,切换到 Network 视图,点击左侧的页面,并没有新的东西,说明没有新的 Http 请求发生,而是局部刷新,App 标签就是用来做这个的,通过请求的地址找到具体的页面,内容的传递都是通过 SignalR 进行的
再看 Pages/Counter.razor
@page "/counter"

<h1>Counter</h1>

<p>Current count: @currentCount</p>

<button class="btn btn-primary" @onclick="IncrementCount">Click me</button>

@code {
    private int currentCount = 0;

    private void IncrementCount()
    {
        currentCount++;
    }
}
@code 里是 C# 代码,可以直接在网页中引用,使用 @ 符号
再看 Pages/FetchData.razor
@code {
    private WeatherForecast[] forecasts;

    protected override async Task OnInitializedAsync()
    {
        forecasts = await ForecastService.GetForecastAsync(DateTime.Now);
    }
}
OnInitializedAsync() 使用的比较频繁,在页面第一次被初始化的时候执行,注意生命周期
Error.cshtml 在 Startup 里配置,在生产环境下显示
if (env.IsDevelopment())
{
    app.UseDeveloperExceptionPage();
}
else
{
    app.UseExceptionHandler("/Error");
    app.UseHsts();
}
项目目录下还有一个 _Imports.razor ,把所有页面都需要引用的东西放在这里就行了
Blazor 项目实例
还是实现之前 MVC 的例子
创建项目
选择 ASP.NET Core Web Application ,从头开始,不使用 Blazor 模板
我的命名是 My_ASP_NET_Core_Blazor_Program
选择空模板
将之前 MVC 项目的 wwwroot 、 Models 和 Services 目录复制进来,注意命名空间
js 可以不用,因为我们要用 C# 代替 js
Startup.cs
public class Startup
{
    public void ConfigureServices(IServiceCollection services)
    {
        services.AddRazorPages();
        services.AddServerSideBlazor();

        services.AddSingleton<IClock, ChinaClock>();
        services.AddSingleton<IDepartmentService, DepartmentService>();
        services.AddSingleton<IEmployeeService, EmployeeService>();
    }

    public void Configure(IApplicationBuilder app, IWebHostEnvironment env)
    {
        if (env.IsDevelopment())
        {
            app.UseDeveloperExceptionPage();
        }

        app.UseStaticFiles();

        app.UseRouting();

        app.UseEndpoints(endpoints =>
        {
            endpoints.MapBlazorHub();

            //初始页面 Pages/_Host.cshtml
            endpoints.MapFallbackToPage("/_Host");
        });
    }
}
Pages 目录下新建 Razor View ,命名 _Host.cshtml
@page "/"
@namespace My_ASP_NET_Core_Blazor_Program.Pages
@addTagHelper *,Microsoft.AspNetCore.Mvc.TagHelpers

<!DOCTYPE html>
<html lang="en">
<head>
    <meta charset="utf-8" />
    <meta name="viewport" content="width=device-width, initial-scale=1.0" />
    <title>My Blazor</title>
    <base href="~/" />
    <link rel="stylesheet" href="~/css/bootstrap.css" />
    <link rel="stylesheet" href="~/css/site.css" />
</head>
<body>
    <app>
        @(await Html.RenderComponentAsync<App>(RenderMode.ServerPrerendered))
    </app>

    <script src="_framework/blazor.server.js"></script>
</body>
</html>
_framework/blazor.server.js 是自带的,不用管
上述代码的 App 被标红,我们需要项目目录下新建 Razor Component ,命名 App.razor
用于路由
<Router AppAssembly="@typeof(Program).Assembly">
    <Found Context="routeData">
        <RouteView RouteData="@routeData" DefaultLayout="@typeof(MainLayout)" />
    </Found>
    <NotFound>
        <LayoutView Layout="@typeof(MainLayout)">
            <p>Sorry, there's nothing at this address.</p>
        </LayoutView>
    </NotFound>
</Router>
导入需要的库,项目目录下新建 Razor Component ,命名 _Imports.razor
@using System.Net.Http
@using Microsoft.AspNetCore.Components.Forms
@using Microsoft.AspNetCore.Components.Routing
@using Microsoft.AspNetCore.Components.Web
@using Microsoft.JSInterop
@using My_ASP_NET_Core_Blazor_Program.Shared
@using My_ASP_NET_Core_Blazor_Program.Models
@using My_ASP_NET_Core_Blazor_Program.Services
Shared 目录下新建 Razor Component ,命名 MainLayout.razor
@inherits Microsoft.AspNetCore.Components.LayoutComponentBase
@* 因为 Razor Component 会编译成一个类,所以可以继承 *@

<div class="container">
    <div class="row">
        <div class="col-md-2">
            <img asp-append-version="true" alt="Logos" src="~/images/logo.png" style="height:60px;" />
        </div>
        <div class="col-md-10">
            <span class="h3">My Blazor</span>
        </div>
    </div>
    <div class="row">
        <div class="col-md-12">
            @Body
        </div>
    </div>
</div>
Page 目录下新建 Razor Component ,命名 Index.razor
随便写点东西就可以去尝试运行了
@page "/"
<h1>Hello World</h1>
开始实现业务逻辑
Department 的业务逻辑
这里与 Razor Pages 很像,一个 Razor Component 就是一个类,也可以 this 调用
url 访问看的是 @page ,而不是文件夹和文件名
加粗的标签一般都是内置的 Component
在 Pages 目录下新建 Department 文件夹
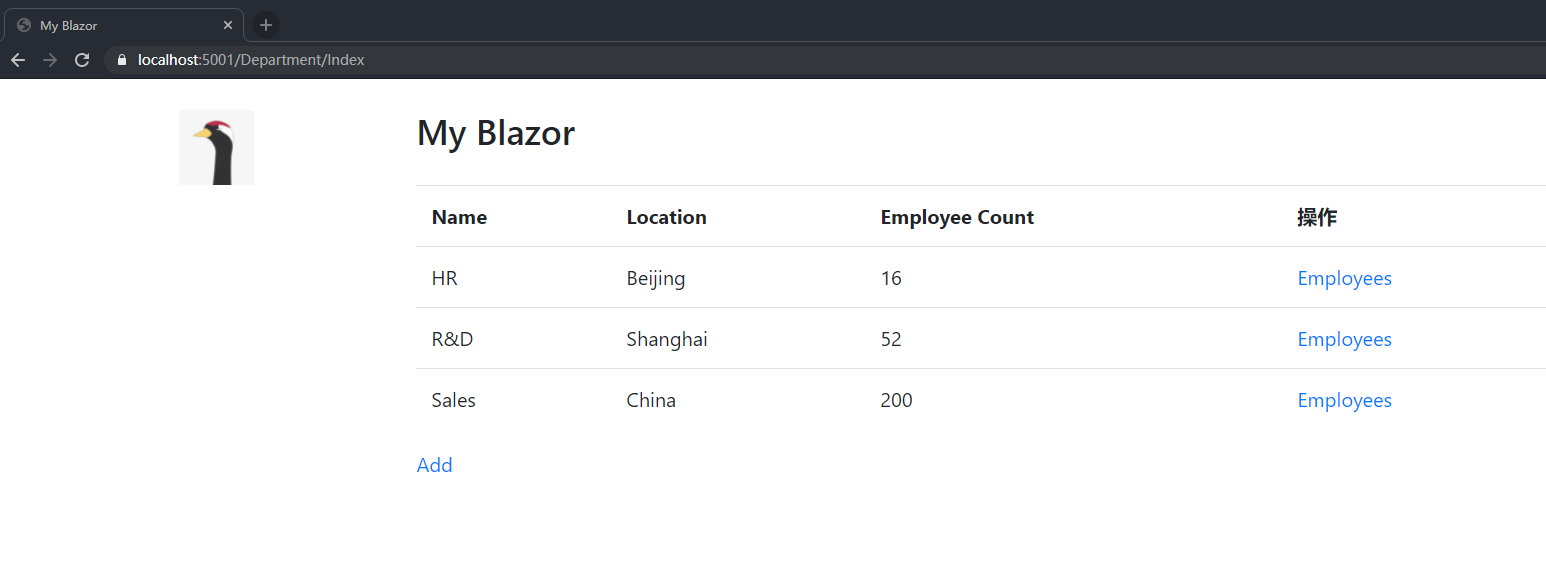
Pages/Department 目录下新建 Razor Component ,命名 Index.razor
Pages/Department/Index.razor
@page "/Deaprtment/Index"
@inject IDepartmentService departmentService

@if (null == this.departments)
{
    <p><em>加载中 …… </em></p>
}
else
{
    <div class="row">
        <div class="col-md-10 offset-md-2">
            <table class="table">
                <tr>
                    <th>Name</th>
                    <th>Location</th>
                    <th>Employee Count</th>
                    <th>操作</th>
                </tr>
                @foreach (var item in this.departments)
                {
                    <DepartmentItem Department="@item"></DepartmentItem>
                }
            </table>
        </div>
    </div>


    <div class="row">
        <div class="col-md-4 offset-md-2">
            <a href="/add-department">Add</a>
        </div>
    </div>

}

@code{
    IEnumerable<Department> departments;

    protected override async Task OnInitializedAsync()
    {
        this.departments = await departmentService.GetAll();
    }
}
DepartmentItem 标签会标红,以下方式解决
新建 Components 目录,该目录下再新建一个 Department 目录
Components/Department 目录下新建 Razor Component ,命名 DepartmentItem.razor
Components/Department/DepartmentItem.razor
<tr>
    <td>@this.Department.Name</td>
    <td>@this.Department.Location</td>
    <td>@this.Department.EmployeeCount</td>

    <td>
        <a href="/employee/@this.Department.Id">Employees</a>
    </td>
</tr>

@code{
    [Parameter]
    public Department Department { get; set; }
}
再去 _Imports.raozor 引用命名空间就可以了,也可以直接在页面引用,这样 DepartmentItem 标签就不会标红了,智能提示也有用了
@using My_ASP_NET_Core_Blazor_Program.Components.Department
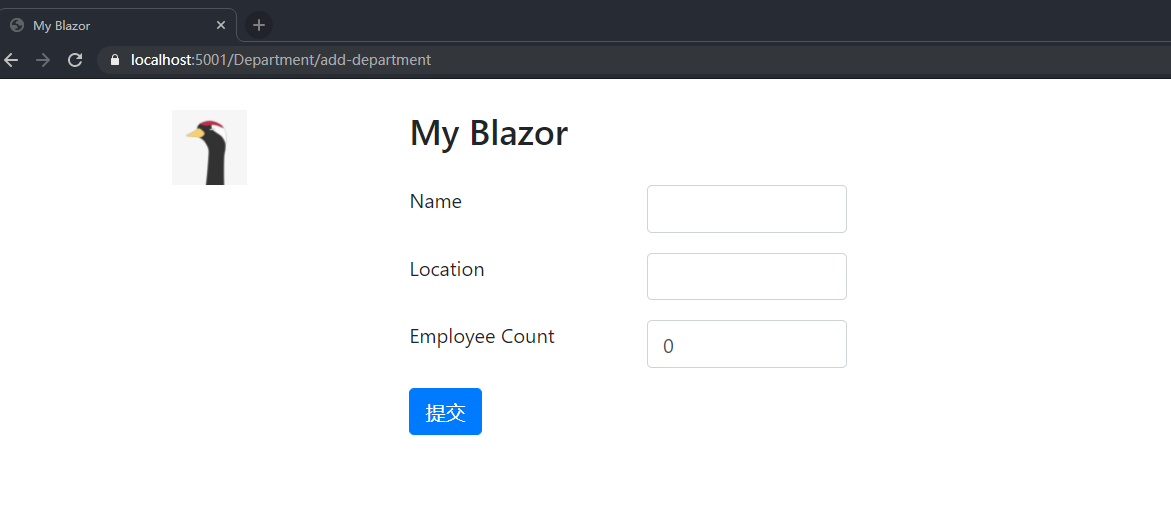
Pages/Department 目录下新建 Razor Component ,命名 AddDepartment.razor
Pages/Department/AddDepartment.razor
@page "/Department/add-department"
@inject IDepartmentService departmentService
@inject NavigationManager navigationManager

<EditForm Model="@this.department" OnValidSubmit="@this.HandleValidSubmit">
    <DataAnnotationsValidator />
    <ValidationSummary />
    <div class="row form-group">
        <div class="col-md-2 offset-md-2">
            <label for="name">Name</label>
        </div>
        <div class="col-md-2">
            <InputText id="name" class="form-control" @bind-Value="this.department.Name" />
        </div>
    </div>
    <div class="row form-group">
        <div class="col-md-2 offset-md-2">
            <label for="location">Location</label>
        </div>
        <div class="col-md-2">
            <InputText id="location" class="form-control" @bind-Value="this.department.Location" />
        </div>
    </div>
    <div class="row form-group">
        <div class="col-md-2 offset-md-2">
            <label for="employeeCount">Employee Count</label>
        </div>
        <div class="col-md-2">
            <InputNumber id="employeeCount" class="form-control" @bind-Value="this.department.EmployeeCount" />
        </div>
    </div>
    <div class="row">
        <div class="col-md-2 offset-md-2">
            <button type="submit" class="btn btn-primary">提交</button>
        </div>
    </div>
</EditForm>


@code{
    private Department department = new Department();

    private async Task HandleValidSubmit()
    {
        await this.departmentService.Add(department);

        this.navigationManager.NavigateTo("/Department/Index");
    }
}
别忘记引用命名空间
@using Microsoft.AspNetCore.Components
Employee 的业务逻辑
Pages 和 Components 目录都新建一个 Employee 文件夹
Pages/Employee/Index.razor ,也是一个 Razor Component
这个页面可能要写很多代码,所以我们分离页面和代码
在 Pages/Employee 目录下新建一个类 ,命名 EmployeeViewModel ,继承自 ComponentBase
public class EmployeeViewModel : ComponentBase
{
    [Parameter]
    public string DepartmentId { get; set; }

    public IEnumerable<Models.Employee> Employees { get; set; }

    [Inject]
    public IEmployeeService EmployeeService { get; set; }

    protected override async Task OnInitializedAsync()
    {
        this.Employees = await this.EmployeeService.GetByDepartmentId(int.Parse(this.DepartmentId));
    }
}
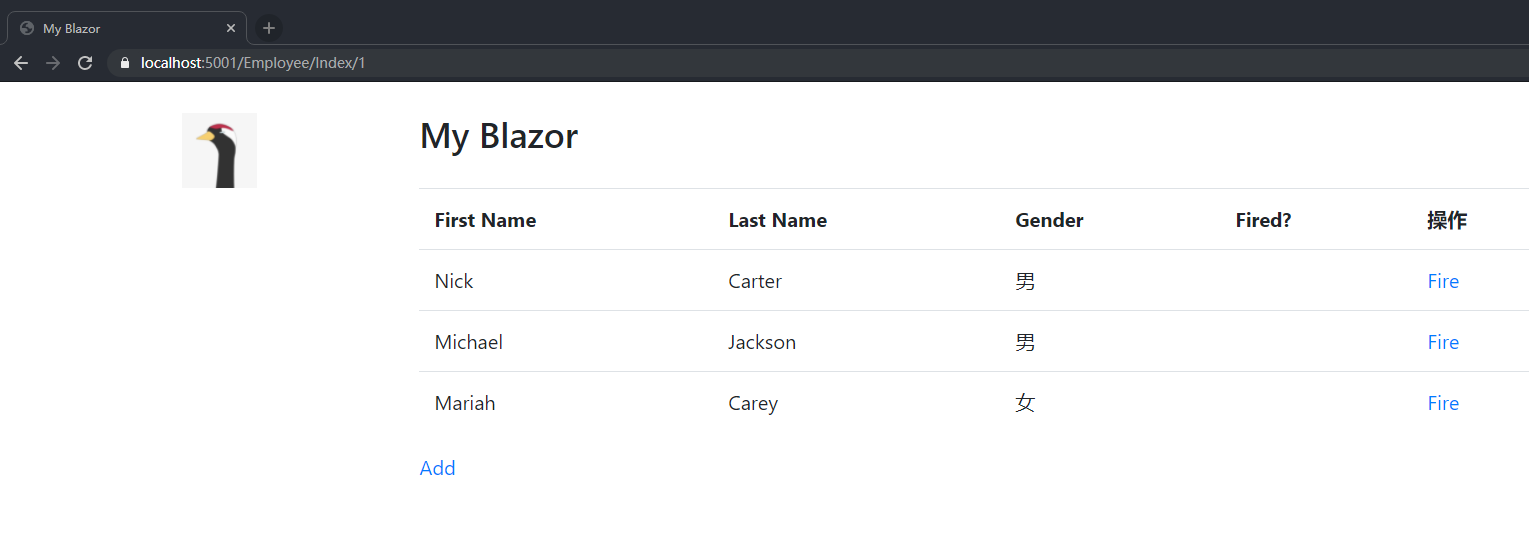
Pages/Employee/index.razor ,这个页面去继承 EmployeeViewModel
@page "/Employee/Index/{DepartmentId}"
@using My_ASP_NET_Core_Blazor_Program.Components.Employee
@inherits EmployeeViewModel

@if (null == this.Employees)
{
    <p><em>加载中……</em></p>
}
else
{
    <div class="row">
        <div class="col-md-10 offset-md-2">
            <table class="table">
                <tr>
                    <th>First Name</th>
                    <th>Last Name</th>
                    <th>Gender</th>
                    <th>Fired?</th>
                    <th>操作</th>
                </tr>
                @foreach (var item in this.Employees)
                {
                    <EmployeeItem Employee="@item"></EmployeeItem>
                }
            </table>
        </div>
    </div>

    <div class="row">
        <div class="col-md-4 offset-md-2">
            <a href="/Employee/add-employee/@this.DepartmentId">Add</a>
        </div>
    </div>
}
Components/Employee/EmployeeItem.Razor ,也是一个 Razor Component
@inject IEmployeeService employeeService

<tr>
    <td>@this.Employee.FirstName</td>
    <td>@this.Employee.LastName</td>
    <td>@this.Employee.Gender</td>
    <td>@(this.Employee.Fired?"是":"")</td>

    <td>
        @if (false == this.Employee.Fired)
        {
            <a href="javascript:void(0)" @onclick="HandleFire">Fire</a>
        }
    </td>
</tr>

@code{
    [Parameter]
    public Employee Employee { get; set; }

    private async Task HandleFire()
    {
        await this.employeeService.Fire(this.Employee.Id);
    }
}
添加 Employee
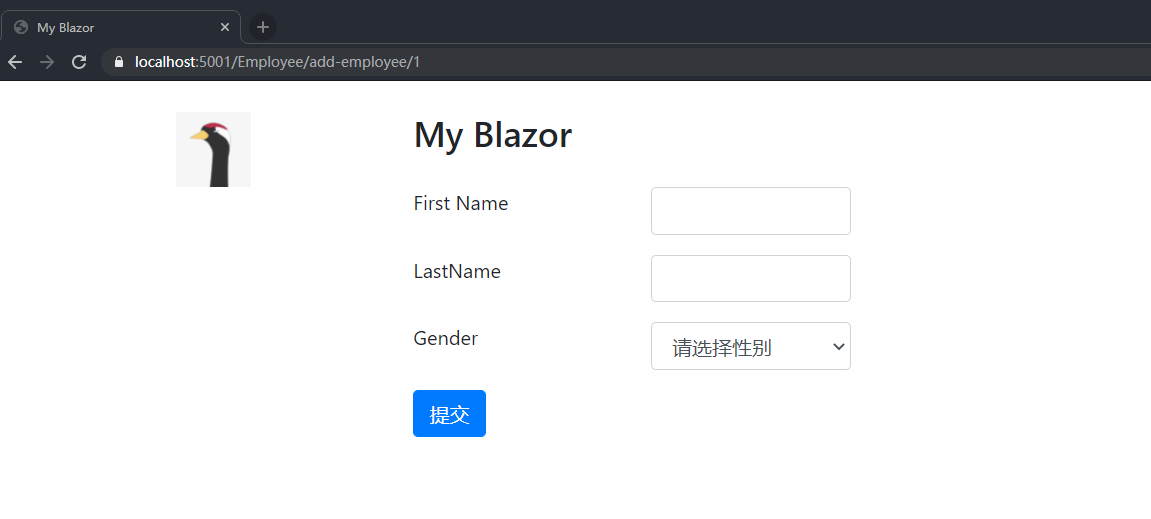
Pages/Employee/AddEmployee.razor ,也是一个 Razor Component
@page "/Employee/add-employee/{DepartmentId}"
@inject IEmployeeService employeeService
@inject NavigationManager navigationManager

<EditForm Model="@this.employee" OnValidSubmit="@this.HandleValidSubmit">
    <DataAnnotationsValidator />
    <ValidationSummary />
    <div class="row form-group">
        <div class="col-md-2 offset-md-2">
            <label for="firstName">First Name</label>
        </div>
        <div class="col-md-2">
            <InputText id="firstName" class="form-control" @bind-Value="this.employee.FirstName" />
        </div>
    </div>
    <div class="row form-group">
        <div class="col-md-2 offset-md-2">
            <label for="lastName">LastName</label>
        </div>
        <div class="col-md-2">
            <InputText id="lastName" class="form-control" @bind-Value="this.employee.LastName" />
        </div>
    </div>
    <div class="row form-group">
        <div class="col-md-2 offset-md-2">
            <label for="gender">Gender</label>
        </div>
        <div class="col-md-2">
            <select id="gender" class="form-control" @onchange="this.OnGenderSelected">
                <option selected hidden disabled>请选择性别</option>
                @foreach (var item in Enum.GetValues(typeof(Gender)).Cast<Gender>())
                {
                    <option value="@item">@item.ToString()</option>
                }
            </select>
        </div>
    </div>
    <div class="row">
        <div class="col-md-2 offset-md-2">
            <button type="submit" class="btn btn-primary">提交</button>
        </div>
    </div>
</EditForm>


@code{
    [Parameter]
    public string DepartmentId { get; set; }

    private Employee employee = new Employee();

    private async Task HandleValidSubmit()
    {
        this.employee.DepartmentId = int.Parse(this.DepartmentId);
        await this.employeeService.Add(employee);

        this.navigationManager.NavigateTo($"/Employee/Index/{this.DepartmentId}");
    }

    public async Task OnGenderSelected(ChangeEventArgs @event)
    {
        var gender = Enum.Parse(typeof(Gender), (string)@event.Value);
        this.employee.Gender = (Gender)gender;
    }

}
统计信息和加粗显示
因为可以直接写 C# 代码,逻辑简单,所以省略
效果图
效果和之前的几个项目都一样,就留几张简单的图了
补充
传入的参数在 C# 代码中用 [Parameter] 标注,Page 的参数与变量/属性名称要一致,也可以使用级联参数 [CascadingParameter(Name="")]
[Parameter] 还能用来标注 EventCallback<> 声明的属性,这样外部组件就可以注册这个事件了,也能通过事件传递参数过去
在 C# 代码中使用 [Inject] 进行依赖注入
a标签的 href="javascript:void(0)" 能保证链接的样式

 浙公网安备 33010602011771号