


day03_1spring3
事务管理的几种方式、spring整合Junit、spring整合web、ssh整合
一、事务管理的几种方式:
1.介绍前提我们需要导入:spring-tx-3.2.0.RELEASE.jar的包里面含有spring管理事务的一系列的接口和类
关于里面我要了解三个顶级接口:

① PlatformTransactionManager 平台事务管理器,spring要管理事务,必须使用事务管理器
进行事务配置时,必须配置事务管理器。
②TransactionDefinition:事务详情(事务定义、事务属性),spring用于确定事务具体详情,
例如:隔离级别、是否只读、超时时间 等
进行事务配置时,必须配置详情。spring将配置项封装到该对象实例。
③TransactionStatus:事务状态,spring用于记录当前事务运行状态。例如:是否有保存点,事务是否完成。
spring底层根据状态进行相应操作。
1.2 PlatformTransactionManager平台事务管理器
常见的平台事务管理器:

想使用这个两个事务管理器则分别需要导入相应的jar包:

DataSourceTransactionManager ,jdbc开发时事务管理器,采用JdbcTemplate
HibernateTransactionManager,hibernate开发时事务管理器,整合hibernate
关于这个接口的api详解
TransactionStatus getTransaction(TransactionDefinition definition) ,事务管理器 通过“事务详情”,获得“事务状态”,从而管理事务。
void commit(TransactionStatus status) 根据状态提交
void rollback(TransactionStatus status) 根据状态回滚
1.3 TransactionDefinition 事务的描述(或者叫做事务详情)
关于这个接口的api详解:
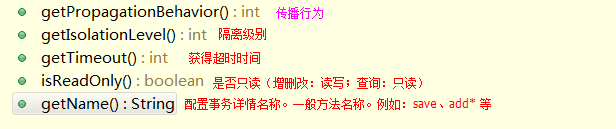
其中传播行为的种类的描述:
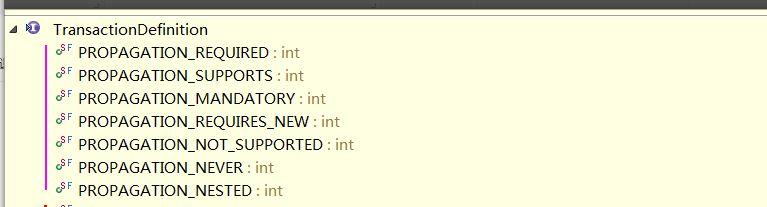
传播行为:在两个业务之间如何共享事务。
PROPAGATION_REQUIRED , required , 必须 【默认值】
支持当前事务,A如果有事务,B将使用该事务。
如果A没有事务,B将创建一个新的事务。
PROPAGATION_SUPPORTS ,supports ,支持
支持当前事务,A如果有事务,B将使用该事务。
如果A没有事务,B将以非事务执行。
PROPAGATION_MANDATORY,mandatory ,强制
支持当前事务,A如果有事务,B将使用该事务。
如果A没有事务,B将抛异常。
PROPAGATION_REQUIRES_NEW , requires_new ,必须新的
如果A有事务,将A的事务挂起,B创建一个新的事务
如果A没有事务,B创建一个新的事务
PROPAGATION_NOT_SUPPORTED ,not_supported ,不支持
如果A有事务,将A的事务挂起,B将以非事务执行
如果A没有事务,B将以非事务执行
PROPAGATION_NEVER ,never,从不
如果A有事务,B将抛异常
如果A没有事务,B将以非事务执行
PROPAGATION_NESTED ,nested ,嵌套
A和B底层采用保存点机制,形成嵌套事务。
掌握:PROPAGATION_REQUIRED、PROPAGATION_REQUIRES_NEW、PROPAGATION_NESTED
其中隔离级别进行描述:这里的隔离级别,和数据库中的隔离级别是一个意思

1.4 TransactionStatus事务的状态:
TransactionStatus接口是事务状态,描述了某一时间点上的事务的状态信息,包含6个操作,具体如下:
- void flush()刷新事务
- boolean hasSavepoint()获取是否存在保存点
- boolean isCompleted()获取事务是否完成
- boolean isNewTransaction获取是否是新事务
- bolean isRollbackOnly():获取是否回滚
- void setRollbackOnly()设置事务回滚
2.转账经典案例的编写:
前提我们需要导入:①spring的4+1的jar包,4个核心,一个依赖,数据源这里我们导入c3p0.jar包和它的依赖包mchange.jar包最后就是mysql驱动jar包。②创建表t_user 并创建相应的JavaBean数据模型。
①数据库的代码:


1 create database ee19_spring_day03;
2 use ee19_spring_day03;
3 create table account(
4   id int primary key auto_increment,
5   username varchar(50),
6   money int
7 );
8 insert into account(username,money) values('jack','10000');
9 insert into account(username,money) values('rose','10000');
②数据库对应JavaBean数据模型:
 1 public class User {
 2     private  Integer id;
 3     private  String username;
 4     private  Integer money;
 5     public Integer getId() {
 6         return id;
 7     }
 8     public void setId(Integer id) {
 9         this.id = id;
10     }
11     public String getUsername() {
12         return username;
13     }
14     public void setUsername(String username) {
15         this.username = username;
16     }
17     public Integer getMoney() {
18         return money;
19     }
20     public void setMoney(Integer money) {
21         this.money = money;
22     }
23     @Override
24     public String toString() {
25         return "User [id=" + id + ", username=" + username + ", money="
26                 + money + "]";
27     }
28
29
30 }
③service层代码
 1 public class AccountServiceImpl implements AccountService {
 2
 3     private AccountDao accountDao;
 4     public void setAccountDao(AccountDao accountDao) {
 5         this.accountDao = accountDao;
 6     }
 7     @Override
 8     public void transfer(String outer, String inner, Integer money) {
 9         accountDao.out(outer, money);
10         //断电
11 //        int i = 1/0;
12         accountDao.in(inner, money);
13     }
14
15 }
④dao层代码:
 1 public class AccountDaoImpl extends JdbcDaoSupport implements AccountDao {
 2
 3     @Override
 4     public void out(String outer, Integer money) {
 5         this.getJdbcTemplate().update("update account set money = money - ? where username = ?", money,outer);
 6     }
 7
 8     @Override
 9     public void in(String inner, Integer money) {
10         this.getJdbcTemplate().update("update account set money = money + ? where username = ?", money,inner);
11     }
12
13 }
⑤spring配置
 1  <?xml version="1.0" encoding="UTF-8"?>
 2 <beans xmlns="http://www.springframework.org/schema/beans"
 3        xmlns:xsi="http://www.w3.org/2001/XMLSchema-instance"
 4        xsi:schemaLocation="http://www.springframework.org/schema/beans
 5                           http://www.springframework.org/schema/beans/spring-beans.xsd
 6                               ">
 7
 8 <!-- 1 datasource -->
 9     <bean id="dataSource" class="com.mchange.v2.c3p0.ComboPooledDataSource">
10         <property name="driverClass" value="com.mysql.jdbc.Driver"></property>
11         <property name="jdbcUrl" value="jdbc:mysql://localhost:3306/ee19_spring_day03"></property>
12         <property name="user" value="root"></property>
13         <property name="password" value="1234"></property>
14     </bean>
15
16     <!-- 2 dao  -->
17     <bean id="accountDao" class="com.itheima.dao.impl.AccountDaoImpl">
18         <property name="dataSource" ref="dataSource"></property>
19     </bean>
20     <!-- 3 service -->
21     <bean id="accountService" class="com.itheima.service.impl.AccountServiceImpl">
22         <property name="accountDao" ref="accountDao"></property>
23     </bean>
测试代码如下:
 1 public class Test01 {
 2     @Test
 3     public void fun01(){
 4         String xmlPath="cn/itcast/b_transactionTemplate_TransactionProxyFactoryBean/applicationContext.xml";
 5         ApplicationContext applicationContext =new ClassPathXmlApplicationContext(xmlPath);//加载spring配置文件
 6
 7         UserSerivce  userSerivce=(UserSerivce) applicationContext.getBean("userService");
 8
 9         //手动去在spring里面配置事务(我们可以在转账的过程中出点异常来查看)
10         accountSerivce.convery("张三", "李四", 200);
11
12
13     }
14
15
16 }
上面的例子是没有添加事务的,如果发生转账异常时不能回滚数据容易出现问题!
2.1手动添加事务【了解】(上面部分代码是拷的笔记的如果出现问题还是以笔记为准)
前提:这里我们使用了context标签所以①需要添加命名空间(spring-framework-3.2.0.RELEASE\docs\spring-framework-reference\html\xsd-config.html找这个页面里面有所有的命名空间)②(以上面导入为基础还需要导入)手动添加spring的事务涉及到了事务所以导入spring-tx-3.2.0.RELEASE.jar这样才能使用事务模板
spring底层使用 TransactionTemplate 事务模板进行操作。
操作
1.service 需要获得 TransactionTemplate
2.spring 配置模板,并注入给service
3.模板需要注入事务管理器
4.配置事务管理器:DataSourceTransactionManager ,需要注入DataSource
所以我们将修改service层代码和spring配置即可:
修改代码如下:(我这里拷的是我自己敲的代码,因为笔记上面是UserService 和t_user 而我建的是AccountService和t_Account代码逻辑是一样的至此说明)
service层:
 1 public class AccountServiceImpl implements AccountSerivce{
 2
 3     private AccountDao dao;//提供set方法让spring注入
 4     public void setDao(AccountDao dao) {
 5             this.dao = dao;
 6         }
 7
 8     //我们手动的去配置事务,要知道spring里为我们提供了TransactionTemplate事务模板我们需要手动的去spring里去配置这个模板
 9     private TransactionTemplate transactionTemplate ;
10     public void setTransactionTemplate(TransactionTemplate transactionTemplate) {
11         this.transactionTemplate = transactionTemplate;
12     }
13
14     public void convery(final String outUser, final String inUser, final Integer money) {
15
16         transactionTemplate.execute(new TransactionCallbackWithoutResult() {
17
18             @Override
19             protected void doInTransactionWithoutResult(TransactionStatus arg0) {
20                 dao.outMoney(outUser, money);//扣钱
21                 int i=1/0;
22                 dao.inMoney(inUser, money);//收钱
23                 System.out.println("转账成功");
24             }
25         });
26
27
28
29
30
31     }
32
33
34     /*@Test
35     public void fun(){
36         AccountServiceImpl impl=new AccountServiceImpl();
37         impl.convery("张三", "李四", 100);
38
39     }*/
40 }
spring配置文件代码:
<?xml version="1.0" encoding="UTF-8"?>
<beans xmlns="http://www.springframework.org/schema/beans"
       xmlns:xsi="http://www.w3.org/2001/XMLSchema-instance"
       xmlns:context="http://www.springframework.org/schema/context"
       xsi:schemaLocation="http://www.springframework.org/schema/beans
                            http://www.springframework.org/schema/beans/spring-beans.xsd
                            http://www.springframework.org/schema/context
                            http://www.springframework.org/schema/context/spring-context.xsd">


<!-- 配置数据源 -->
<bean id="dataSource" class="com.mchange.v2.c3p0.ComboPooledDataSource" >

<property name="driverClass" value="com.mysql.jdbc.Driver"></property>
<property name="user" value="root"></property>
<property name="password" value="123"></property>
<property name="jdbcUrl" value="jdbc:mysql://localhost:3306/spring"></property>
</bean>

<!-- service层的实例配置 -->
<bean id="accountService" class="cn.itcast.a_transactionTemplate_shoudong.AccountServiceImpl">
<!-- 注入dao层的实例 -->
<property name="dao" ref="dao"></property>
<!-- 注入spring提供的事务模板 -->
<property name="transactionTemplate" ref="transactionTemplate"></property>
</bean>

<!-- 配置dao的实例 -->
<bean id="dao" class="cn.itcast.a_transactionTemplate_shoudong.AccountDao">
<!-- 注入数据源创建jdbcTemplate -->
<property name="dataSource" ref="dataSource"></property>
</bean>


<!-- 配置 TransactionTemplate的实例-->
<bean  id="transactionTemplate" class="org.springframework.transaction.support.TransactionTemplate">
<!-- spring里提到事务就一定要创建事务管理器,所以事务模板里需要注入一个事务管理器 -->
<property name="transactionManager" ref="txManager"></property>
</bean>


<!-- 创建事务管理器实例   DataSourceTransactionManager这个是关于JDBC的事务管理器
HibernateTransactionManager 这个是关于Hibernate的事务管理
事务管理依赖着数据源所以我们在事务管理里面还要注入数据源
-->
<bean id="txManager" class="org.springframework.jdbc.datasource.DataSourceTransactionManager">
<!-- 注入数据源 -->
<property name="dataSource" ref="dataSource"></property>
</bean>
</beans>
上面的修改的确解决了事务问题但是手动去添加事务比较麻烦不容易管理
2.2工厂bean生成代理【半自动】
spring提供 管理事务的代理工厂bean, TransactionProxyFactoryBean,不需要事务模板了所以Dao的代码需要修改
①.getBean() 获得代理对象
②.spring 配置一个代理
所以这个代理工厂就相当于是包装了我们的目标接口实现类的实例在里面包裹上了事务,我们spring中配置这个代理类的实例,将接口实现类类和事务管理器注入进去,还有就是事务详情也可以在里面配置。
创建工厂来得到处理事务的bean
和AOP有点像,需要接口+实现类+事务管理器(在spring里只要跟事务有关的都要事务管理器)+事务详情
所以修改后的spring配置文件如下:
 1 <?xml version="1.0" encoding="UTF-8"?>
 2 <beans xmlns="http://www.springframework.org/schema/beans"
 3        xmlns:xsi="http://www.w3.org/2001/XMLSchema-instance"
 4        xmlns:context="http://www.springframework.org/schema/context"
 5        xsi:schemaLocation="http://www.springframework.org/schema/beans
 6                             http://www.springframework.org/schema/beans/spring-beans.xsd
 7                             http://www.springframework.org/schema/context
 8                             http://www.springframework.org/schema/context/spring-context.xsd">
 9
10
11
12 <context:property-placeholder location="classpath:cn/itcast/b_transactionTemplate_TransactionProxyFactoryBean/jdbcInfo.properties "/>
13 <!-- 配置数据源 -->
14 <bean id="dataSource" class="com.mchange.v2.c3p0.ComboPooledDataSource" >
15
16 <property name="driverClass" value="${jdbc.ClassDriver}"></property>
17 <property name="user" value="${jdbc.User}"></property>
18 <property name="password" value="${jdbc.Password}"></property>
19 <property name="jdbcUrl" value="${jdbc.JdbcUrl}"></property>
20 </bean>
21
22 <!-- service层的实例配置 -->
23 <bean id="accountService" class="cn.itcast.b_transactionTemplate_TransactionProxyFactoryBean.AccountServiceImpl">
24 <!-- 注入dao层的实例 -->
25 <property name="dao" ref="dao"></property>
26 </bean>
27
28 <!-- 配置dao的实例 -->
29 <bean id="dao" class="cn.itcast.b_transactionTemplate_TransactionProxyFactoryBean.AccountDao">
30 <!-- 注入数据源创建jdbcTemplate -->
31 <property name="dataSource" ref="dataSource"></property>
32 </bean>
33
34 <!-- 创建工厂来得到处理事务的bean
35 和AOP有点像,需要接口+实现类+事务管理器(在spring里只要跟事务有关的都要事务管理器)+事务详情
36  -->
37 <bean id="proxyService" class="org.springframework.transaction.interceptor.TransactionProxyFactoryBean">
38 <property name="proxyInterfaces" value="cn.itcast.b_transactionTemplate_TransactionProxyFactoryBean.AccountSerivce"></property>
39 <property name="target" ref="accountService"></property>
40 <!-- 事务管理器 -->
41 <property name="transactionManager" ref="txManager"></property>
42 <!-- 事务详情 这个属性放在了properties里面-->
43 <property name="transactionAttributes" >
44 <props>
45 <!-- key表示方法 *表示所有方法
46 PROPAGATION_REQUIRED默认传播行为
47 ISOLATION_DEFAULT 默认隔离级别
48 readOnly只读
49 +Exception有异常任然提交
50 -Exception有异常不提交
51  -->
52 <prop key="convery">PROPAGATION_REQUIRED,ISOLATION_DEFAULT,+java.lang.ArithmeticException</prop>
53 </props>
54 </property>
55 </bean>
56
57
58 <!-- 创建事务管理器实例   DataSourceTransactionManager这个是关于JDBC的事务管理器
59 HibernateTransactionManager 这个是关于Hibernate的事务管理
60 事务管理依赖着数据源所以我们在事务管理里面还要注入数据源
61 -->
62 <bean id="txManager" class="org.springframework.jdbc.datasource.DataSourceTransactionManager">
63 <!-- 注入数据源 -->
64 <property name="dataSource" ref="dataSource"></property>
65 </bean>
66 </beans>
Dao层不需要事务模板类了来手动管理代码全部交给代理类来完成
 1 public class AccountServiceImpl implements AccountSerivce{
 2
 3     private AccountDao dao;//提供set方法让spring注入
 4     public void setDao(AccountDao dao) {
 5             this.dao = dao;
 6         }
 7
 8
 9     //我们使用工厂创建事务Bean来处理事务,这样的好处是所有的事务的逻辑处理都交给spring
10     public void convery( String outUser,  String inUser, Integer money) {
11
12                 dao.outMoney(outUser, money);//扣钱
13                 int i=1/0;
14                 dao.inMoney(inUser, money);//收钱
15                 System.out.println("转账成功");
16             }
17
18
19
20
21
22
23     }
测试代码:如下
 1 public class Test01 {
 2     @Test
 3     public void fun01(){
 4         String xmlPath="cn/itcast/b_transactionTemplate_TransactionProxyFactoryBean/applicationContext.xml";
 5         ApplicationContext applicationContext =new ClassPathXmlApplicationContext(xmlPath);//加载spring配置文件
 6         //得到代理事务的类这样才能在方法上加上事务相当于包装了一下
 7         AccountSerivce  accountSerivce=(AccountSerivce) applicationContext.getBean("proxyService");
 8
 9         //代理类里面已经在spring中处理好了事务
10         accountSerivce.convery("张三", "李四", 200);
11
12
13     }
14
15
16 }
上面的这个修改是把事务交给了工厂bean来生产代理事务的bean,这样比手动的去管理要方便很多,但是这样生成代理的方式不够灵活需要将每一个接口和实现类重复的去编写ProxyFactoryBean,既然是代理我们这里使用动态代理这样会更加减少代码量spring中的AOP编程底层就是动态代理,在spring的AOP编程有两种方式,一种是基于xml一种是基于注解,接下来我们将研究这两种动态代理处理事务的方式。
3、基于xml的AOP编程之事务管理(我们可以把事务定义在切面类里面这样就可以动态管理事务)
前提:以上面导入为基础还需要导入aop联盟规范,spring aop,aspect规范,spring aspect,这四个jar包,而且还需要导入命名空间aop和tx
关于代码我们只需要修改spring配置文件即可,将spring配置文件里面以aop编程添加事务
spring配置文件修改为:
 1 <?xml version="1.0" encoding="UTF-8"?>
 2 <beans xmlns="http://www.springframework.org/schema/beans"
 3        xmlns:xsi="http://www.w3.org/2001/XMLSchema-instance"
 4        xmlns:aop="http://www.springframework.org/schema/aop"
 5        xmlns:tx="http://www.springframework.org/schema/tx"
 6        xmlns:context="http://www.springframework.org/schema/context"
 7        xsi:schemaLocation="http://www.springframework.org/schema/beans
 8                             http://www.springframework.org/schema/beans/spring-beans.xsd
 9                             http://www.springframework.org/schema/context
10                             http://www.springframework.org/schema/context/spring-context.xsd
11                             http://www.springframework.org/schema/tx
12                             http://www.springframework.org/schema/tx/spring-tx.xsd
13                            http://www.springframework.org/schema/aop
14                            http://www.springframework.org/schema/aop/spring-aop.xsd">
15
16
17
18
19 <context:property-placeholder location="classpath:cn/itcast/c_transactionTemplate_Aop/jdbcInfo.properties"/>
20 <!-- 配置数据源 -->
21 <bean id="dataSource" class="com.mchange.v2.c3p0.ComboPooledDataSource" >
22
23 <property name="driverClass" value="${jdbc.ClassDriver}"></property>
24 <property name="user" value="${jdbc.User}"></property>
25 <property name="password" value="${jdbc.Password}"></property>
26 <property name="jdbcUrl" value="${jdbc.JdbcUrl}"></property>
27 </bean>
28
29 <!-- service层的实例配置 -->
30 <bean id="accountService" class="cn.itcast.c_transactionTemplate_Aop.AccountServiceImpl">
31 <!-- 注入dao层的实例 -->
32 <property name="dao" ref="dao"></property>
33 </bean>
34
35 <!-- 配置dao的实例 -->
36 <bean id="dao" class="cn.itcast.c_transactionTemplate_Aop.AccountDao">
37 <!-- 注入数据源创建jdbcTemplate -->
38 <property name="dataSource" ref="dataSource"></property>
39 </bean>
40
41
42 <!-- 创建事务管理器实例   DataSourceTransactionManager这个是关于JDBC的事务管理器
43 HibernateTransactionManager 这个是关于Hibernate的事务管理
44 事务管理依赖着数据源所以我们在事务管理里面还要注入数据源
45 -->
46 <bean id="txManager" class="org.springframework.jdbc.datasource.DataSourceTransactionManager">
47 <!-- 注入数据源 -->
48 <property name="dataSource" ref="dataSource"></property>
49 </bean>
50
51 <!--
52 4.2 事务详情(事务通知)  , 在aop筛选基础上,对ABC三个确定使用什么样的事务。例如:AC读写、B只读 等
53                     <tx:attributes> 用于配置事务详情(属性属性)
54                     <tx:method name=""/> 详情具体配置
55                     propagation 传播行为 , REQUIRED:必须;REQUIRES_NEW:必须是新的
56                     isolation 隔离级别 -->
57
58 <tx:advice id="txAdvice" transaction-manager="txManager">
59 <tx:attributes>
60 <tx:method name="convery" isolation="DEFAULT" propagation="REQUIRED"/>
61 </tx:attributes>
62 </tx:advice>
63
64 <!-- 进行AOP编程,将事务通知和切入点连接起来.目标类有ABCD(4个连接点),切入点表达式 确定增强的连接器,从而获得切入点:ABC  -->
65 <aop:config>
66 <aop:pointcut expression="execution(* cn.itcast.c_transactionTemplate_Aop.AccountServiceImpl.*(..))" id="myPointCut"/>
67 <aop:advisor advice-ref="txAdvice" pointcut-ref="myPointCut" />
68 </aop:config>
69 </beans>
4、基于注解的AOP编程之事务管理
这里的注解只是给方法或者类上加上注解来代替spring基于xml的的注解配置,只需要在spring配置文件中加入:<tx:annotation-driven transaction-manager="txManager" />这样就可以基于注解来管理事务
spring的部分代码如下
 1 <!-- 4 事务管理 -->
 2     <!-- 4.1 事务管理器 -->
 3     <bean id="txManager" class="org.springframework.jdbc.datasource.DataSourceTransactionManager">
 4         <property name="dataSource" ref="dataSource"></property>
 5     </bean>
 6     <!-- 4.2 将管理器交予spring
 7         * transaction-manager 配置事务管理器
 8         * proxy-target-class
 9             true : 底层强制使用cglib 代理
10     -->
11     <tx:annotation-driven transaction-manager="txManager"/><!--这样就可以把事务用注解来表示-->
这里我们展示service的代码,看看是如何来用注解来管理事务的
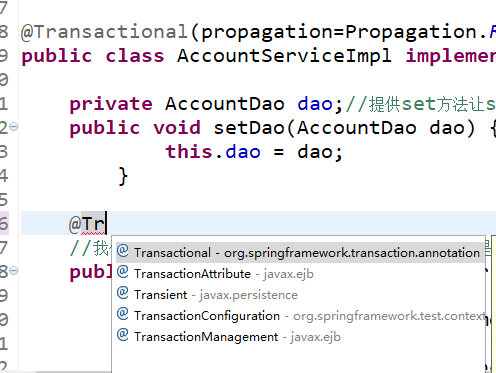
service层:如果在类上加上@Transactional注解就是将这个类所有的方法都加上事务,如果给一个方法上面加@Transactional表示只对这个方法开启事务
其中@Transactional(propagation=Propagation.REQUIRED,isolation=Isolation.DEFAULT)还可以在注解中加入参数值分别表示传播行为和隔离级别如果不给就会是默认值(默认值分别为REQUIRED,DEFAULT)
 1 @Transactional(propagation=Propagation.REQUIRED,isolation=Isolation.DEFAULT)
 2 public class AccountServiceImpl implements AccountSerivce{
 3
 4     private AccountDao dao;//提供set方法让spring注入
 5     public void setDao(AccountDao dao) {
 6             this.dao = dao;
 7         }
 8
 9
10     @Transactional//(表示给这个方法单独配置事务)我们使用工厂创建事务Bean来处理事务,这样的好处是所有的事务的逻辑处理都交给spring
11     public void convery( String outUser,  String inUser, Integer money) {
12
13                 dao.outMoney(outUser, money);//扣钱
14                 int i=1/0;//模仿断电后出现异常
15                 dao.inMoney(inUser, money);//收钱
16                 System.out.println("转账成功");
17             }
18
19     }
二、整合spring配置文件的加载和Junit的整合(注意这里整合就需要整合jar包!)
前提:导入jar包 我们为了测试方便引用的上面事务的例子,所以jar包在上面的基础上,还需要spring-test-3.2.0.RELEASE.jar。
我们一直都是用IOC的容器来加载配置文件,我们所用到的IOC容器分别是BeanFactory和ApplicationContext,我们可以将这个加载的步骤简化一下
整合到Junit里面去!
我们展示在测试页面中如何用Junit去加载配置文件的:可以看到我们的@Autowired注解将会自动去注入AccountSerivce这个实例,使用注解前需要扫描注解类,但是和junit整合不需要扫描
 1 @RunWith(SpringJUnit4ClassRunner.class)
 2 @ContextConfiguration(locations="classpath:cn/itcast/e_Junit/applicationContext.xml ")
 3 public class Test01 {
 4     @Autowired  //与junit整合,不需要在spring xml配置扫描
 5     private AccountSerivce accountSerivce;
 6     @Test
 7     public void fun01(){
 8         //因为这些代码都是重复代码,为了简化代码我们整合Junit通知spring加载配置文件
 9         /*String xmlPath="cn/itcast/d_transactionTemplate_annotation/applicationContext.xml";
10         ApplicationContext applicationContext =new ClassPathXmlApplicationContext(xmlPath);//加载spring配置文件
11         //得到代理事务的类这样才能在方法上加上事务相当于包装了一下
12         AccountSerivce accountSerivce=(AccountSerivce) applicationContext.getBean("accountService");*/
13
14
15
16         accountSerivce.convery("张三", "李四", 200);
17
18
19     }
20
21
22 }
三、整合spring配置文件的加载和web的整合(注意这里整合就需要整合jar包!)
上面我们整合了Junit用来加载spring配置文件,当我们做web项目时需要在第一时间去加载spring配置文件这样才能为每个实例都注入值,所以我们希望是在开启服务器时就会加载
而加载服务器会第一时间去加载web.xml,所以我们要在web.xml上动脑筋。
在学习javaweb时我们学习了三大组件,Servlet,Filter,Listener这三个组件都可以行!方式分别为:
servlet --> init(ServletConfig) --> 在web.xml上面配置<load-on-startup>2
filter --> init(FilterConfig) --> web.xml注册过滤器自动调用初始化
listener --> ServletContextListener --> servletContext对象监听在web.xml上进行配置
前提:在上面jar包的基础上,加入spring-web-3.2.0.RELEASE.jar
但是spring里面提供了一个监听器ContextLoaderListener加载文件的监听,然后在web.xml上面进行配置
<listener><listener-class>....
1.如果只配置监听器,默认加载xml位置:/WEB-INF/applicationContext.xml

2.确定配置文件位置,通过系统初始化参数
ServletContext 初始化参数 web.xml
<context-param>
<param-name>contextConfigLocation</param-name>
<param-value>classpath:applicationContext.xml</param-value>
</context-param>
web.xml配置文件的代码如下:
 1 <?xml version="1.0" encoding="UTF-8"?>
 2 <web-app version="2.5"
 3     xmlns="http://java.sun.com/xml/ns/javaee"
 4     xmlns:xsi="http://www.w3.org/2001/XMLSchema-instance"
 5     xsi:schemaLocation="http://java.sun.com/xml/ns/javaee
 6     http://java.sun.com/xml/ns/javaee/web-app_2_5.xsd">
 7
 8  <!-- 配置spring提供的监听器 -->
 9  <listener>
10  <listener-class>org.springframework.web.context.ContextLoaderListener</listener-class>
11  </listener>
12
13  <context-param>
14  <param-name>contextConfigLocation</param-name>
15  <param-value>classpath:cn/itcast/g_web_xml/applicationContext.xml</param-value>
16  </context-param>
17   <servlet>
18     <servlet-name>AccountServlet</servlet-name>
19     <servlet-class>cn.itcast.g_web_xml.AccountServlet</servlet-class>
20   </servlet>
21
22   <servlet-mapping>
23     <servlet-name>AccountServlet</servlet-name>
24     <url-pattern>/AccountServlet</url-pattern>
25   </servlet-mapping>
26
27   <welcome-file-list>
28     <welcome-file>index.jsp</welcome-file>
29   </welcome-file-list>
30 </web-app>
3.我们配置了之后就会在服务器启动时加载,但是如果想要获得这个spring配置文件的IOC容器的对象怎么办
想要获取IOC容器的实例方式有两种:
这里我们用AccountServlet来展示如何获得IOC容器对象:(其实我们可以直接将AccountServlet配置在spring里面然后将AccountService的实例注入进去)
AccountServlet代码如下:
 1 public class AccountServlet extends HttpServlet {
 2
 3     public void doGet(HttpServletRequest request, HttpServletResponse response)
 4             throws ServletException, IOException {
 5     response.setContentType("text/html;charset=UTF-8");
 6         //方式1:手动从作用域中获取
 7     //ApplicationContext applicationContext=    (ApplicationContext) this.getServletContext().getAttribute(WebApplicationContext.ROOT_WEB_APPLICATION_CONTEXT_ATTRIBUTE);
 8         //方式2:通过工具获取
 9     ApplicationContext applicationContext=WebApplicationContextUtils.getWebApplicationContext(this.getServletContext());
10
11     AccountSerivce accountSerivce=(AccountSerivce) applicationContext.getBean("accountService");
12     accountSerivce.convery("张三", "李四", 200);
13     response.getWriter().write("转账成功");
14     }
15
16     public void doPost(HttpServletRequest request, HttpServletResponse response)
17             throws ServletException, IOException {
18
19
20     }
21
22 }
四、ssh整合(struts、spring、hibernate的整合)
我们学习三大框架的版本分别为:struts:2.3.15.3、hibernate : 3.6.10、spring: 3.2.0
1.关于jar包的整合:
①.struts涉及的jar包有:
struts-2.3.15.3\apps\struts2-blank\WEB-INF\lib
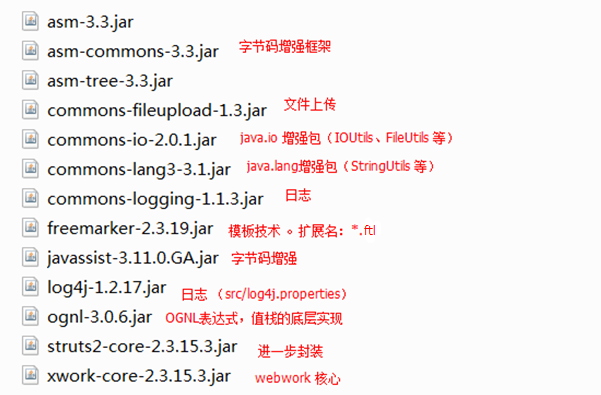
struts 整合spring:struts2-spring-plugin-2.3.15.3.jar
模板技术 ,一般用于页面静态化
freemarker:扩展名:*.ftl
velocity :扩展名 *.vm
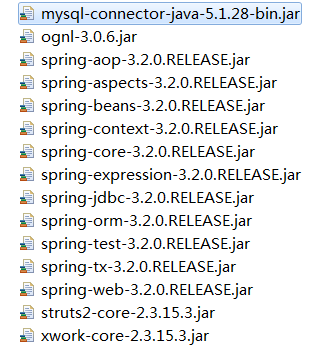
②.spring涉及的jar包有:
①基础:4+1 , beans、core、context、expression , commons-logging (struts已经导入)
②AOP:aop联盟、spring aop 、aspect规范、spring aspect
③ db:jdbc、tx
④测试:test
⑤web开发:spring web
⑥ 驱动:mysql
⑦连接池:c3p0
⑧ 整合hibernate:spring orm

③.关于hibernate涉及的jar包:
核心jar包hibernate3.jar
必须jar包在lib\required路径下:
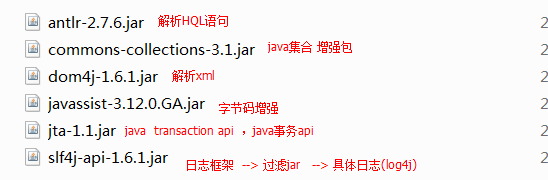
规范接口包:路径\lib\jpa jpa规范 (java persistent api 持久api),hibernate注解开发 @Entity @Id 等
整合log4j的jar包
导入 log4j...jar (struts已经导入)
整合(过渡):slf4j-log4j12-1.7.5.jar

二级缓存所需要的第三方jar包
核心:ehcache-1.5.0.jar
依赖:
backport-util-concurrent-2.1.jar
commons-logging (存在)
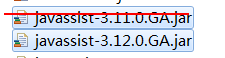
注意要删除重复jar包:
2. spring整合hibernate:有hibernate.cfg.xml

 浙公网安备 33010602011771号