一、spring JDBC
Spring框架对JDBC的简单封装。提供了一个JDBCTemplate对象简化JDBC的开发。
步骤:
1、 添加依赖
2、创建JdbcTemplate对象。依赖于数据源DataSource
* JdbcTemplate template = new JdbcTemplate(ds);
3、调用JdbcTemplate的方法来完成CRUD的操作
* update():执行DML语句。增、删、改语句。
* queryForMap():查询结果将结果集封装为map集合,将列名作为key,将值作为value 将这条记录封装为一个map集合。
注意:这个方法查询的结果集长度只能是1
* queryForList():查询结果将结果集封装为list集合。
注意:将每一条记录封装为一个Map集合,再将Map集合装载到List集合中
* query():查询结果,将结果封装为JavaBean对象。
query的参数:RowMapper
一般我们使用BeanPropertyRowMapper实现类。可以完成数据到JavaBean的自动封装
new BeanPropertyRowMapper<类型>(类型.class)
* queryForObject:查询结果,将结果封装为对象。
一般用于聚合函数的查询
二、Spring的JDBCTemplate入门
* 需求:
1)、修改1号数据的 salary 为 10000
2)、添加一条记录
3)、删除刚才添加的记录
4)、查询id为1的记录,将其封装为Map集合
5)、查询所有记录,将其封装为List
6)、查询所有记录,将其封装为Emp对象的List集合
7)、查询总记录数
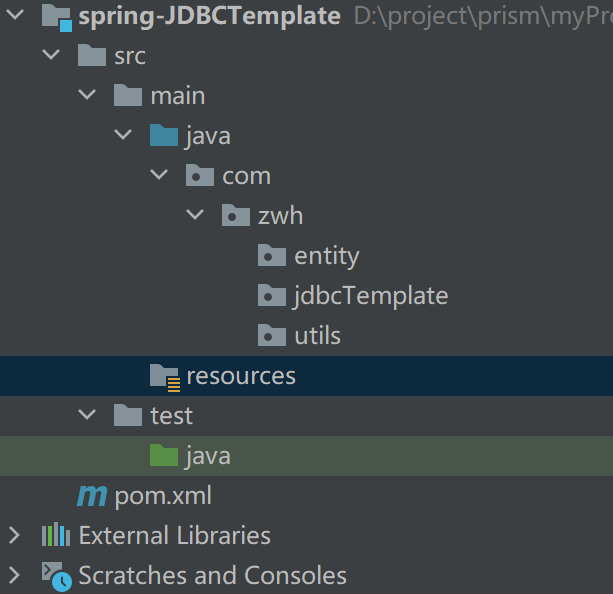
1、创建maven的Java工程
补齐目录后如下所示
2、添加依赖
<dependencies>
        <dependency>
            <groupId>org.springframework</groupId>
            <artifactId>spring-jdbc</artifactId>
            <version>4.2.5.RELEASE</version>
        </dependency>
        <dependency>
            <groupId>org.springframework</groupId>
            <artifactId>spring-tx</artifactId>
            <version>4.2.5.RELEASE</version>
        </dependency>
        <dependency>
            <groupId>org.springframework</groupId>
            <artifactId>spring-core</artifactId>
            <version>4.2.5.RELEASE</version>
        </dependency>
        <dependency>
            <groupId>org.springframework</groupId>
            <artifactId>spring-beans</artifactId>
            <version>4.2.5.RELEASE</version>
        </dependency>
        <!-- 连接到mysql -->
        <dependency>
            <groupId>mysql</groupId>
            <artifactId>mysql-connector-java</artifactId>
            <version>8.0.22</version>
        </dependency>
        <dependency>
            <groupId>com.alibaba</groupId>
            <artifactId>druid</artifactId>
            <version>1.2.1</version>
        </dependency>
        <dependency>
            <groupId>org.projectlombok</groupId>
            <artifactId>lombok</artifactId>
            <version>1.18.8</version>
        </dependency>
    </dependencies>
3、在resources目录下新建druid.properties文件
driverClassName=com.mysql.cj.jdbc.Driver
url=jdbc:mysql://localhost:3306/jdbcTemplate?useSSL=false&serverTimezone=UTC
username=root
password=123456
initialSize=5
maxActive=10
maxWait=3000
4、创建emp表
CREATE TABLE `emp`  (
  `id` int(0) NOT NULL AUTO_INCREMENT,
  `ename` varchar(20) CHARACTER SET utf8 COLLATE utf8_general_ci NULL DEFAULT NULL,
  `job_id` int(0) NULL DEFAULT NULL,
  `mgr` int(0) NULL DEFAULT NULL,
  `joindate` datetime(0) NULL DEFAULT NULL,
  `salary` double(10, 2) NULL DEFAULT NULL,
  `bonus` double(10, 2) NULL DEFAULT NULL,
  `dept_id` int(0) NULL DEFAULT NULL,
  PRIMARY KEY (`id`) USING BTREE
) ENGINE = InnoDB CHARACTER SET = utf8 COLLATE = utf8_general_ci ROW_FORMAT = Dynamic;
5、添加Druid连接池的工具类来获取连接
import com.alibaba.druid.pool.DruidDataSourceFactory;

import javax.sql.DataSource;
import java.io.IOException;
import java.sql.Connection;
import java.sql.ResultSet;
import java.sql.SQLException;
import java.sql.Statement;
import java.util.Properties;

/**
 * Druid连接池的工具类
 */
public class JDBCUtils {

    //1.定义成员变量 DataSource
    private static DataSource ds ;

    static{
        try {
            //1.加载配置文件
            Properties pro = new Properties();
            pro.load(JDBCUtils.class.getClassLoader().getResourceAsStream("druid.properties"));
            //2.获取DataSource
            ds = DruidDataSourceFactory.createDataSource(pro);
        } catch (IOException e) {
            e.printStackTrace();
        } catch (Exception e) {
            e.printStackTrace();
        }
    }

    /**
     * 获取连接
     */
    public static Connection getConnection() throws SQLException {
        return ds.getConnection();
    }

    /**
     * 释放资源
     */
    public static void close(Statement stmt,Connection conn){
       /* if(stmt != null){
            try {
                stmt.close();
            } catch (SQLException e) {
                e.printStackTrace();
            }
        }

        if(conn != null){
            try {
                conn.close();//归还连接
            } catch (SQLException e) {
                e.printStackTrace();
            }
        }*/

       close(null,stmt,conn);
    }


    public static void close(ResultSet rs , Statement stmt, Connection conn){


        if(rs != null){
            try {
                rs.close();
            } catch (SQLException e) {
                e.printStackTrace();
            }
        }


        if(stmt != null){
            try {
                stmt.close();
            } catch (SQLException e) {
                e.printStackTrace();
            }
        }

        if(conn != null){
            try {
                conn.close();//归还连接
            } catch (SQLException e) {
                e.printStackTrace();
            }
        }
    }

    /**
     * 获取连接池方法
     */

    public static DataSource getDataSource(){
        return  ds;
    }

}
测试能否获取连接
public class DruidDemo {
    public static void main(String[] args) throws Exception {
        //1.导入jar包
        //2.定义配置文件
        //3.加载配置文件
        Properties pro = new Properties();
        InputStream is = DruidDemo.class.getClassLoader().getResourceAsStream("druid.properties");
        pro.load(is);
        //4.获取连接池对象
        DataSource ds = DruidDataSourceFactory.createDataSource(pro);
        //5.获取连接
        Connection conn = ds.getConnection();
        System.out.println(conn);

    }
}
结果如下:
com.mysql.cj.jdbc.ConnectionImpl@77caeb3e
6、创建实体类
@Data
@Accessors(chain = true)
public class Emp {
    private Integer id;
    private String ename;
    private Integer job_id;
    private Integer mgr;
    private Date joindate;
    private Double salary;
    private Double bonus;
    private Integer dept_id;

}
7、新建测试类进行测试
1)、添加
public class JdbcTemplateDemo2 {
    //1. 获取JDBCTemplate对象
    private JdbcTemplate template = new JdbcTemplate(JDBCUtils.getDataSource());
    /**
     * 1. 添加一条记录
     */
    @Test
    public void test2(){
        String sql = "insert into emp(id,ename,dept_id) values(?,?,?)";
        int count = template.update(sql, 1015, "郭靖", 10);
        System.out.println(count);

    }
}
结果如下:

2)、修改
public class JdbcTemplateDemo2 {
    //1. 获取JDBCTemplate对象
    private JdbcTemplate template = new JdbcTemplate(JDBCUtils.getDataSource());
    /**
     * 1. 修改1015号数据的 salary 为 10000
     */
    @Test
    public void test1(){

        //2. 定义sql
        String sql = "update emp set salary = 10000 where id = 1015";
        //3. 执行sql
        int count = template.update(sql);
        System.out.println(count);
    }
}
结果如下:

3)、删除
public class JdbcTemplateDemo2 {
    //1. 获取JDBCTemplate对象
    private JdbcTemplate template = new JdbcTemplate(JDBCUtils.getDataSource());/**
     * 3.删除刚才添加的记录
     */
    @Test
    public void test3(){
        String sql = "delete from emp where id = ?";
        int count = template.update(sql, 1015);
        System.out.println(count);
    }
}
4)、查询
public class JdbcTemplateDemo2 {
    //1. 获取JDBCTemplate对象
    private JdbcTemplate template = new JdbcTemplate(JDBCUtils.getDataSource());

    /**
     * 4.查询id为1001的记录,将其封装为Map集合
     * 注意:这个方法查询的结果集长度只能是1
     */
    @Test
    public void test4(){
        String sql = "select * from emp where id = ?";
        Map<String, Object> map = template.queryForMap(sql, 1001);
        System.out.println(map);
        //{id=1001, ename=孙悟空, job_id=4, mgr=1004, joindate=2000-12-17, salary=10000.00, bonus=null, dept_id=20}

    }
}
结果如下:
{id=1001, ename=孙悟空, job_id=4, mgr=1004, joindate=2021-12-17 08:00:00.0, salary=10000.0, bonus=null, dept_id=20}
5)、查询所有记录,将其封装成List
public class JdbcTemplateDemo2 {
    //1. 获取JDBCTemplate对象
    private JdbcTemplate template = new JdbcTemplate(JDBCUtils.getDataSource());
    /**
     * 5. 查询所有记录,将其封装为List
     */
    @Test
    public void test5(){
        String sql = "select * from emp";
        List<Map<String, Object>> list = template.queryForList(sql);

        for (Map<String, Object> stringObjectMap : list) {
            System.out.println(stringObjectMap);
        }
    }
}
结果:
{id=1001, ename=孙悟空, job_id=4, mgr=1004, joindate=2021-12-17 08:00:00.0, salary=10000.0, bonus=null, dept_id=20}
{id=1015, ename=郭靖, job_id=null, mgr=null, joindate=null, salary=10000.0, bonus=null, dept_id=10}
6)、查询所有记录,将其封装为Emp对象的List集合
public class JdbcTemplateDemo2 {
    //1. 获取JDBCTemplate对象
    private JdbcTemplate template = new JdbcTemplate(JDBCUtils.getDataSource());
    /**
     * 6. 查询所有记录,将其封装为Emp对象的List集合
     */
    @Test
    public void test6(){
        String sql = "select * from emp";
        List<Emp> list = template.query(sql, new RowMapper<Emp>() {

            @Override
            public Emp mapRow(ResultSet rs, int i) throws SQLException {
                Emp emp = new Emp();
                int id = rs.getInt("id");
                String ename = rs.getString("ename");
                int job_id = rs.getInt("job_id");
                int mgr = rs.getInt("mgr");
                Date joindate = rs.getDate("joindate");
                double salary = rs.getDouble("salary");
                double bonus = rs.getDouble("bonus");
                int dept_id = rs.getInt("dept_id");

                emp.setId(id);
                emp.setEname(ename);
                emp.setJob_id(job_id);
                emp.setMgr(mgr);
                emp.setJoindate(joindate);
                emp.setSalary(salary);
                emp.setBonus(bonus);
                emp.setDept_id(dept_id);

                return emp;
            }
        });


        for (Emp emp : list) {
            System.out.println(emp);
        }
    }
}
结果如下:
Emp(id=1001, ename=孙悟空, job_id=4, mgr=1004, joindate=2021-12-17, salary=10000.0, bonus=0.0, dept_id=20)
Emp(id=1015, ename=郭靖, job_id=0, mgr=0, joindate=null, salary=10000.0, bonus=0.0, dept_id=10)
一般我们使用BeanPropertyRowMapper实现类。可以完成数据到JavaBean的自动封装
public class JdbcTemplateDemo2 {
    //1. 获取JDBCTemplate对象
    private JdbcTemplate template = new JdbcTemplate(JDBCUtils.getDataSource());

    @Test
    public void test6_2(){
        String sql = "select * from emp";
        List<Emp> list = template.query(sql, new BeanPropertyRowMapper<Emp>(Emp.class));
        for (Emp emp : list) {
            System.out.println(emp);
        }
    }
}
三、SpringBoot整合JDBCTemplate
1、创建一个maven的java工程

2、添加依赖
<parent>
        <groupId>org.springframework.boot</groupId>
        <artifactId>spring-boot-starter-parent</artifactId>
        <version>2.1.0.RELEASE</version>
    </parent>
    <properties>
        <maven.compiler.source>8</maven.compiler.source>
        <maven.compiler.target>8</maven.compiler.target>
    </properties>
    <dependencies>
        <dependency>
            <groupId>org.springframework.boot</groupId>
            <artifactId>spring-boot-starter-jdbc</artifactId>
        </dependency>
        <dependency>
            <groupId>mysql</groupId>
            <artifactId>mysql-connector-java</artifactId>
            <scope>runtime</scope>
        </dependency>
        <dependency>
            <groupId>org.projectlombok</groupId>
            <artifactId>lombok</artifactId>
            <version>1.18.8</version>
        </dependency>
        <!--测试的起步依赖-->
        <dependency>
            <groupId>org.springframework.boot</groupId>
            <artifactId>spring-boot-starter-test</artifactId>
            <scope>test</scope>
        </dependency>
    </dependencies>
3、在resources目录下添加application.properties
spring.datasource.url=jdbc:mysql://localhost:3306/jdbcTemplate?useSSL=false&serverTimezone=UTC
spring.datasource.username=root
spring.datasource.password=123456
spring.datasource.driver-class-name=com.mysql.cj.jdbc.Driver
4、创建emp表
CREATE TABLE `emp`  (
  `id` int(0) NOT NULL AUTO_INCREMENT,
  `ename` varchar(20) CHARACTER SET utf8 COLLATE utf8_general_ci NULL DEFAULT NULL,
  `job_id` int(0) NULL DEFAULT NULL,
  `mgr` int(0) NULL DEFAULT NULL,
  `joindate` datetime(0) NULL DEFAULT NULL,
  `salary` double(10, 2) NULL DEFAULT NULL,
  `bonus` double(10, 2) NULL DEFAULT NULL,
  `dept_id` int(0) NULL DEFAULT NULL,
  PRIMARY KEY (`id`) USING BTREE
) ENGINE = InnoDB CHARACTER SET = utf8 COLLATE = utf8_general_ci ROW_FORMAT = Dynamic;
5、创建Emp类
@Data
@Accessors(chain = true)
public class Emp {
    private Integer id;
    private String ename;
    private Integer job_id;
    private Integer mgr;
    private Date joindate;
    private Double salary;
    private Double bonus;
    private Integer dept_id;

}
6、创建启动类
@SpringBootApplication
public class MySpringBootApplication {
    public static void main(String[] args) {
        SpringApplication.run(MySpringBootApplication.class);
    }
}
7、创建启动类进行测试
注意:JdbcTemplate直接注入即可
@RunWith(SpringRunner.class)
@SpringBootTest(classes = MySpringBootApplication.class)
public class JdbcTemplateTest {
    @Resource
    private JdbcTemplate template;
    /**
     * 1. 添加一条记录
     */
    @Test
    public void test2(){
        String sql = "insert into emp(id,ename,dept_id) values(?,?,?)";
        int count = template.update(sql, 1015, "郭靖", 10);
        System.out.println(count);

    }
    /**
     * 1. 修改1015号数据的 salary 为 10000
     */
    @Test
    public void test1(){

        //2. 定义sql
        String sql = "update emp set salary = 10000 where id = 1015";
        //3. 执行sql
        int count = template.update(sql);
        System.out.println(count);
    }

    /**
     * 3.删除刚才添加的记录
     */
    @Test
    public void test3(){
        String sql = "delete from emp where id = ?";
        int count = template.update(sql, 1015);
        System.out.println(count);
    }

    /**
     * 4.查询id为1001的记录,将其封装为Map集合
     * 注意:这个方法查询的结果集长度只能是1
     */
    @Test
    public void test4(){
        String sql = "select * from emp where id = ?";
        Map<String, Object> map = template.queryForMap(sql, 1001);
        System.out.println(map);
        //{id=1001, ename=孙悟空, job_id=4, mgr=1004, joindate=2000-12-17, salary=10000.00, bonus=null, dept_id=20}

    }

    /**
     * 5. 查询所有记录,将其封装为List
     */
    @Test
    public void test5(){
        String sql = "select * from emp";
        List<Map<String, Object>> list = template.queryForList(sql);

        for (Map<String, Object> stringObjectMap : list) {
            System.out.println(stringObjectMap);
        }
    }
    /**
     * 6. 查询所有记录,将其封装为Emp对象的List集合
     */
    @Test
    public void test6(){
        String sql = "select * from emp";
        List<Emp> list = template.query(sql, new RowMapper<Emp>() {

            @Override
            public Emp mapRow(ResultSet rs, int i) throws SQLException {
                Emp emp = new Emp();
                int id = rs.getInt("id");
                String ename = rs.getString("ename");
                int job_id = rs.getInt("job_id");
                int mgr = rs.getInt("mgr");
                Date joindate = rs.getDate("joindate");
                double salary = rs.getDouble("salary");
                double bonus = rs.getDouble("bonus");
                int dept_id = rs.getInt("dept_id");

                emp.setId(id);
                emp.setEname(ename);
                emp.setJob_id(job_id);
                emp.setMgr(mgr);
                emp.setJoindate(joindate);
                emp.setSalary(salary);
                emp.setBonus(bonus);
                emp.setDept_id(dept_id);

                return emp;
            }
        });


        for (Emp emp : list) {
            System.out.println(emp);
        }
    }

    @Test
    public void test6_2(){
        String sql = "select * from emp";
        List<Emp> list = template.query(sql, new BeanPropertyRowMapper<Emp>(Emp.class));
        for (Emp emp : list) {
            System.out.println(emp);
        }
    }
}
最后项目的目录如下:
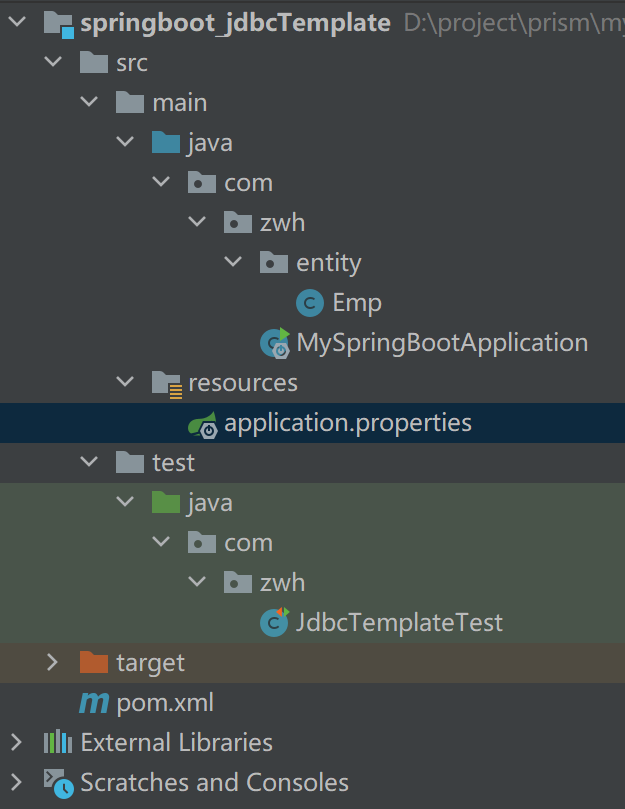
我们只需要在pom.xml中加入数据库依赖,再到application.properties中配置连接信息,不需要像Spring应用中创建JdbcTemplate的Bean,就可以直接注入使用。
在test里做的测试,test包结构要保持与项目包结构一致,springboot才能自动扫描到包。

 浙公网安备 33010602011771号