
2020 级课前测试试卷-电子商务大数据分析 爬取京东商品评论数据,基于hadoop实现数据分析以及数据可视化
前言:
本文参考诸多文章和视频,在下文中都有说明
以下操作只具有参考性,遇到问题欢迎留言讨论。
具体技术可能因为版本不同而操作不同。
数据采集:
要求Python 编写程序爬取京东手机评论数据,生成Json形式的数据文件。
具体代码:
jd_comment_crawler.py
# 导入自动化模块
import time
import json
from datetime import datetime

from DrissionPage import ChromiumPage
from DrissionPage.common import Actions

# 打开浏览器
dp = ChromiumPage()

# 实例化动作链对象
ac = Actions(dp)

# 访问网站
dp.get('https://item.jd.com/10087782648613.html')

# 等待页面加载
time.sleep(3)

# 监听数据
dp.listen.start('client.action')

# 点击加载全部评论
try:
    dp.ele('css:.all-btn .arrow').click()
    time.sleep(2)
except:
    print("无法点击加载全部评论按钮,尝试继续...")

# 存储所有评论数据
all_comments = []

# 添加连续失败计数器
consecutive_failures = 0

# 构建循环
for page in range(1, 2001):
    print(f'正在采集第{page}页的数据')

    # 等待数据包加载,添加超时处理
    try:
        r = dp.listen.wait(timeout=15)  # 设置15秒超时
        if r is None:
            print(f"第{page}页等待数据包超时")
            consecutive_failures += 1
            if consecutive_failures >= 3:
                print("连续3次等待数据包超时,结束采集")
                break
            continue
    except Exception as e:
        print(f"等待第{page}页数据包时出错: {e}")
        consecutive_failures += 1
        if consecutive_failures >= 3:
            print("连续3次等待数据包出错,结束采集")
            break
        continue

    # 获取响应数据
    try:
        json_data = r.response.body
    except Exception as e:
        print(f"获取第{page}页响应数据时出错: {e}")
        consecutive_failures += 1
        if consecutive_failures >= 3:
            print("连续3次获取响应数据出错,结束采集")
            break
        continue

    # 解析数据
    try:
        # 字典取值,提取评论信息所在列表
        comment_list = json_data['result']['floors'][2]['data']

        # for循环遍历,提取列表里面的元素
        for index in comment_list:
            """提取具体每条评论信息"""

            if 'commentInfo' in index:
                # 直接保存完整的commentInfo数据,不做任何处理
                all_comments.append(index['commentInfo'])
                print(f"采集到评论: {index['commentInfo']['userNickName']}")

        # 如果成功解析,重置连续失败计数器
        consecutive_failures = 0

    except Exception as e:
        print(f"解析第{page}页数据时出错: {e}")
        consecutive_failures += 1

        # 检查是否连续失败3次
        if consecutive_failures >= 3:
            print("连续3次解析数据失败,结束采集")
            break
        else:
            continue

    # 定位窗口标签并下滑
    try:
        tab = dp.ele('css:div._rateListContainer_1ygkr_45')
        tab.scroll.to_bottom()
        time.sleep(2)  # 等待加载
    except Exception as e:
        print(f"滚动加载失败: {e}")
        # 滚动失败不视为解析失败,不增加连续失败计数
        continue

# 保存原始数据到JSON文件,每行一个JSON对象
output_filename = f'jd_comments_raw_{datetime.now().strftime("%Y%m%d_%H%M%S")}.json'
try:
    with open(output_filename, 'w', encoding='utf-8') as f:
        for comment in all_comments:
            # 每行写入一个JSON对象
            json.dump(comment, f, ensure_ascii=False)
            f.write('\n')  # 换行
    print(f"原始数据已保存到 {output_filename},共采集 {len(all_comments)} 条评论")
except Exception as e:
    print(f"保存文件时出错: {e}")

# 关闭浏览器
dp.quit()
说明及可能遇到的问题:
- 我爬取的网页是https://item.jd.com/10087782648613.html 也可以爬取其他商品,爬取前要先登录京东账号。
- 默认状态下,程序会自动在系统内查找 Chrome 路径,如果电脑中没有安装Google Chrome浏览器,可以配置其他浏览器,具体参考:🌏 准备工作 | DrissionPage官网
from DrissionPage import ChromiumOptions path = r'D:\Chrome\Chrome.exe' # 请改为你电脑内Chrome可执行文件路径 ChromiumOptions().set_browser_path(path).save() - 当爬取到大约140页时,京东评论对话框中会提示已为您过滤一些没用的评论,我们就不向下爬取数据了,所以总共爬取了大概1400条评论。
- 数据采集阶段参考视频:Python爬取京东评论数据(2025,4月24日公开课录播,讲师:自游)_哔哩哔哩_bilibili
开发MR程序清洗电商评论数据数据清洗:
要求使用MapReduce,对大量的Json文件,进行清洗,以得到结构化的文本文件。
具体代码:
pom.xml
<?xml version="1.0" encoding="UTF-8"?>
<project xmlns="http://maven.apache.org/POM/4.0.0"
         xmlns:xsi="http://www.w3.org/2001/XMLSchema-instance"
         xsi:schemaLocation="http://maven.apache.org/POM/4.0.0 https://maven.apache.org/xsd/maven-4.0.0.xsd">
    <modelVersion>4.0.0</modelVersion>

    <groupId>com.example</groupId>
    <artifactId>pachong</artifactId>
    <version>1.0-SNAPSHOT</version>
    <name>pachong</name>
    <packaging>jar</packaging>

    <properties>
        <project.build.sourceEncoding>UTF-8</project.build.sourceEncoding>
        <maven.compiler.target>1.8</maven.compiler.target>
        <maven.compiler.source>1.8</maven.compiler.source>
        <junit.version>5.10.0</junit.version>
    </properties>

    <dependencies>
        <!-- 添加 JSON 依赖 -->
        <dependency>
            <groupId>org.json</groupId>
            <artifactId>json</artifactId>
            <version>20231013</version>
        </dependency>

        <dependency>
            <groupId>jakarta.servlet</groupId>
            <artifactId>jakarta.servlet-api</artifactId>
            <version>6.0.0</version>
            <scope>provided</scope>
        </dependency>
        <dependency>
            <groupId>org.slf4j</groupId>
            <artifactId>slf4j-log4j12</artifactId>
            <version>1.7.36</version>
        </dependency>

        <dependency>
            <groupId>org.apache.hive</groupId>
            <artifactId>hive-exec</artifactId>
            <version>3.1.3</version>
            <scope>provided</scope>
        </dependency>
        <dependency>
            <groupId>org.apache.hadoop</groupId>
            <artifactId>hadoop-common</artifactId>
            <version>3.3.4</version>
            <scope>provided</scope>
        </dependency>

        <dependency>
            <groupId>org.apache.hadoop</groupId>
            <artifactId>hadoop-client</artifactId>
            <version>3.3.4</version>
        </dependency>

        <dependency>
            <groupId>org.jsoup</groupId>
            <artifactId>jsoup</artifactId>
            <version>1.11.3</version>
        </dependency>
        <dependency>
            <groupId>org.apache.httpcomponents</groupId>
            <artifactId>httpmime</artifactId>
            <version>4.5.13</version>
        </dependency>
        <dependency>
            <groupId>org.apache.httpcomponents</groupId>
            <artifactId>httpclient</artifactId>
            <version>4.5.6</version>
        </dependency>
        <dependency>
            <groupId>commons-io</groupId>
            <artifactId>commons-io</artifactId>
            <version>2.17.0</version>
        </dependency>
        <dependency>
            <groupId>org.junit.jupiter</groupId>
            <artifactId>junit-jupiter-api</artifactId>
            <version>${junit.version}</version>
            <scope>test</scope>
        </dependency>
        <dependency>
            <groupId>org.junit.jupiter</groupId>
            <artifactId>junit-jupiter-engine</artifactId>
            <version>${junit.version}</version>
            <scope>test</scope>
        </dependency>
    </dependencies>
    <build>
        <plugins>
            <plugin>
                <groupId>org.apache.maven.plugins</groupId>
                <artifactId>maven-shade-plugin</artifactId>
                <version>3.5.0</version>
                <executions>
                    <execution>
                        <phase>package</phase>
                        <goals>
                            <goal>shade</goal>
                        </goals>
                        <configuration>
                            <createDependencyReducedPom>false</createDependencyReducedPom>
                            <filters>
                                <filter>
                                    <!-- 排除签名文件防止安全警告 -->
                                    <artifact>*:*</artifact>
                                    <excludes>
                                        <exclude>META-INF/*.SF</exclude>
                                        <exclude>META-INF/*.DSA</exclude>
                                        <exclude>META-INF/*.RSA</exclude>
                                    </excludes>
                                </filter>
                            </filters>
                            <artifactSet>
                                <!-- 排除 Hadoop/Hive 依赖 -->
                                <excludes>
                                    <exclude>org.apache.hadoop:*</exclude>
                                    <exclude>org.apache.hive:*</exclude>
                                </excludes>
                            </artifactSet>
                        </configuration>
                    </execution>
                </executions>
            </plugin>
        </plugins>
    </build>
</project>
CommentDataMapper
package my.mr;

import org.apache.hadoop.io.LongWritable;
import org.apache.hadoop.io.Text;
import org.apache.hadoop.mapreduce.Mapper;
import org.json.JSONArray;
import org.json.JSONObject;
import org.json.JSONException;

import java.io.IOException;

public class CommentDataMapper extends Mapper<LongWritable, Text, Text, Text> {

    private final Text outputKey = new Text();
    private final Text outputValue = new Text();

    @Override
    protected void map(LongWritable key, Text value, Context context)
            throws IOException, InterruptedException {

        try {
            String line = value.toString().trim();
            if (line.isEmpty()) {
                return;
            }

            // 解析JSON数据
            JSONObject jsonObj = new JSONObject(line);

            // 提取所需字段
            String userNickName = jsonObj.optString("userNickName", "");
            String commentId = jsonObj.optString("commentId", "");

            // 处理wareAttribute,提取颜色和型号
            String color = "";
            String model = "";
            if (jsonObj.has("wareAttribute")) {
                JSONArray wareAttributes = jsonObj.getJSONArray("wareAttribute");
                for (int i = 0; i < wareAttributes.length(); i++) {
                    JSONObject attr = wareAttributes.getJSONObject(i);
                    if (attr.has("颜色")) {
                        color = attr.getString("颜色");
                    }
                    if (attr.has("型号")) {
                        model = attr.getString("型号");
                    }
                }
            }

            // 提取其他字段
            JSONObject afterComment = jsonObj.optJSONObject("afterComment");
            String afterCommentStr = afterComment != null ? afterComment.toString() : "{}";
            String tagCommentContent = jsonObj.optString("tagCommentContent", "");
            String buyCount = jsonObj.optString("buyCount", "");
            String commentDate = jsonObj.optString("commentDate", "");
            String commentScore = jsonObj.optString("commentScore", "");
            String commentScoreText = jsonObj.optString("commentScoreText", "");
            String commentData = jsonObj.optString("commentData", "");
            String officerLevel = jsonObj.optString("officerLevel", "");

            // 清洗commentData,移除特殊字符和换行符
            commentData = cleanText(commentData);
            tagCommentContent = cleanText(tagCommentContent);

            // 构建输出值,使用制表符分隔
            String output = String.join("\t",
                    userNickName,
                    color,
                    model,
                    afterCommentStr,
                    tagCommentContent,
                    buyCount,
                    commentDate,
                    commentScore,
                    commentScoreText,
                    commentData,
                    officerLevel
            );

            // 设置输出键和值
            outputKey.set(commentId);
            outputValue.set(output);

            context.write(outputKey, outputValue);

        } catch (JSONException e) {
            // 记录解析错误的行
            context.getCounter("DATA_QUALITY", "JSON_PARSE_ERROR").increment(1);
        } catch (Exception e) {
            context.getCounter("DATA_QUALITY", "OTHER_ERROR").increment(1);
        }
    }

    /**
     * 清洗文本,移除特殊字符和换行符
     */
    private String cleanText(String text) {
        if (text == null || text.isEmpty()) {
            return "";
        }
        // 移除换行符、制表符等特殊字符,用空格替换
        return text.replaceAll("[\\r\\n\\t]", " ").trim();
    }
}
CommentDataReducer
package my.mr;

import org.apache.hadoop.io.Text;
import org.apache.hadoop.mapreduce.Reducer;

import java.io.IOException;

public class CommentDataReducer extends Reducer<Text, Text, Text, Text> {

    private final Text outputValue = new Text();

    @Override
    protected void reduce(Text key, Iterable<Text> values, Context context)
            throws IOException, InterruptedException {

        // 由于commentId是唯一的,每个键应该只有一个值
        for (Text value : values) {
            outputValue.set(value);
            context.write(key, outputValue);
        }
    }
}
CommentDataDriver
package my.mr;

import org.apache.hadoop.conf.Configuration;
import org.apache.hadoop.fs.Path;
import org.apache.hadoop.io.Text;
import org.apache.hadoop.mapreduce.Job;
import org.apache.hadoop.mapreduce.lib.input.FileInputFormat;
import org.apache.hadoop.mapreduce.lib.input.TextInputFormat;
import org.apache.hadoop.mapreduce.lib.output.FileOutputFormat;
import org.apache.hadoop.mapreduce.lib.output.TextOutputFormat;
import org.apache.hadoop.util.GenericOptionsParser;

public class CommentDataDriver {

    public static void main(String[] args) throws Exception {
        Configuration conf = new Configuration();

        String[] otherArgs = new GenericOptionsParser(conf, args).getRemainingArgs();
        if (otherArgs.length != 2) {
            System.err.println("Usage: CommentDataDriver <input> <output>");
            System.exit(2);
        }

        Job job = Job.getInstance(conf, "JD Comment Data Cleaning");
        job.setJarByClass(CommentDataDriver.class);

        // 设置Mapper和Reducer
        job.setMapperClass(CommentDataMapper.class);
        job.setReducerClass(CommentDataReducer.class);

        // 设置输出键值类型
        job.setOutputKeyClass(Text.class);
        job.setOutputValueClass(Text.class);

        // 设置输入输出格式
        job.setInputFormatClass(TextInputFormat.class);
        job.setOutputFormatClass(TextOutputFormat.class);

        // 设置输入输出路径
        FileInputFormat.addInputPath(job, new Path(otherArgs[0]));
        FileOutputFormat.setOutputPath(job, new Path(otherArgs[1]));

        // 设置Reducer数量
        job.setNumReduceTasks(1);

        System.exit(job.waitForCompletion(true) ? 0 : 1);
    }
}
将程序打包为jar包。
启动hadoop运行MR程序:
启动hadoop:
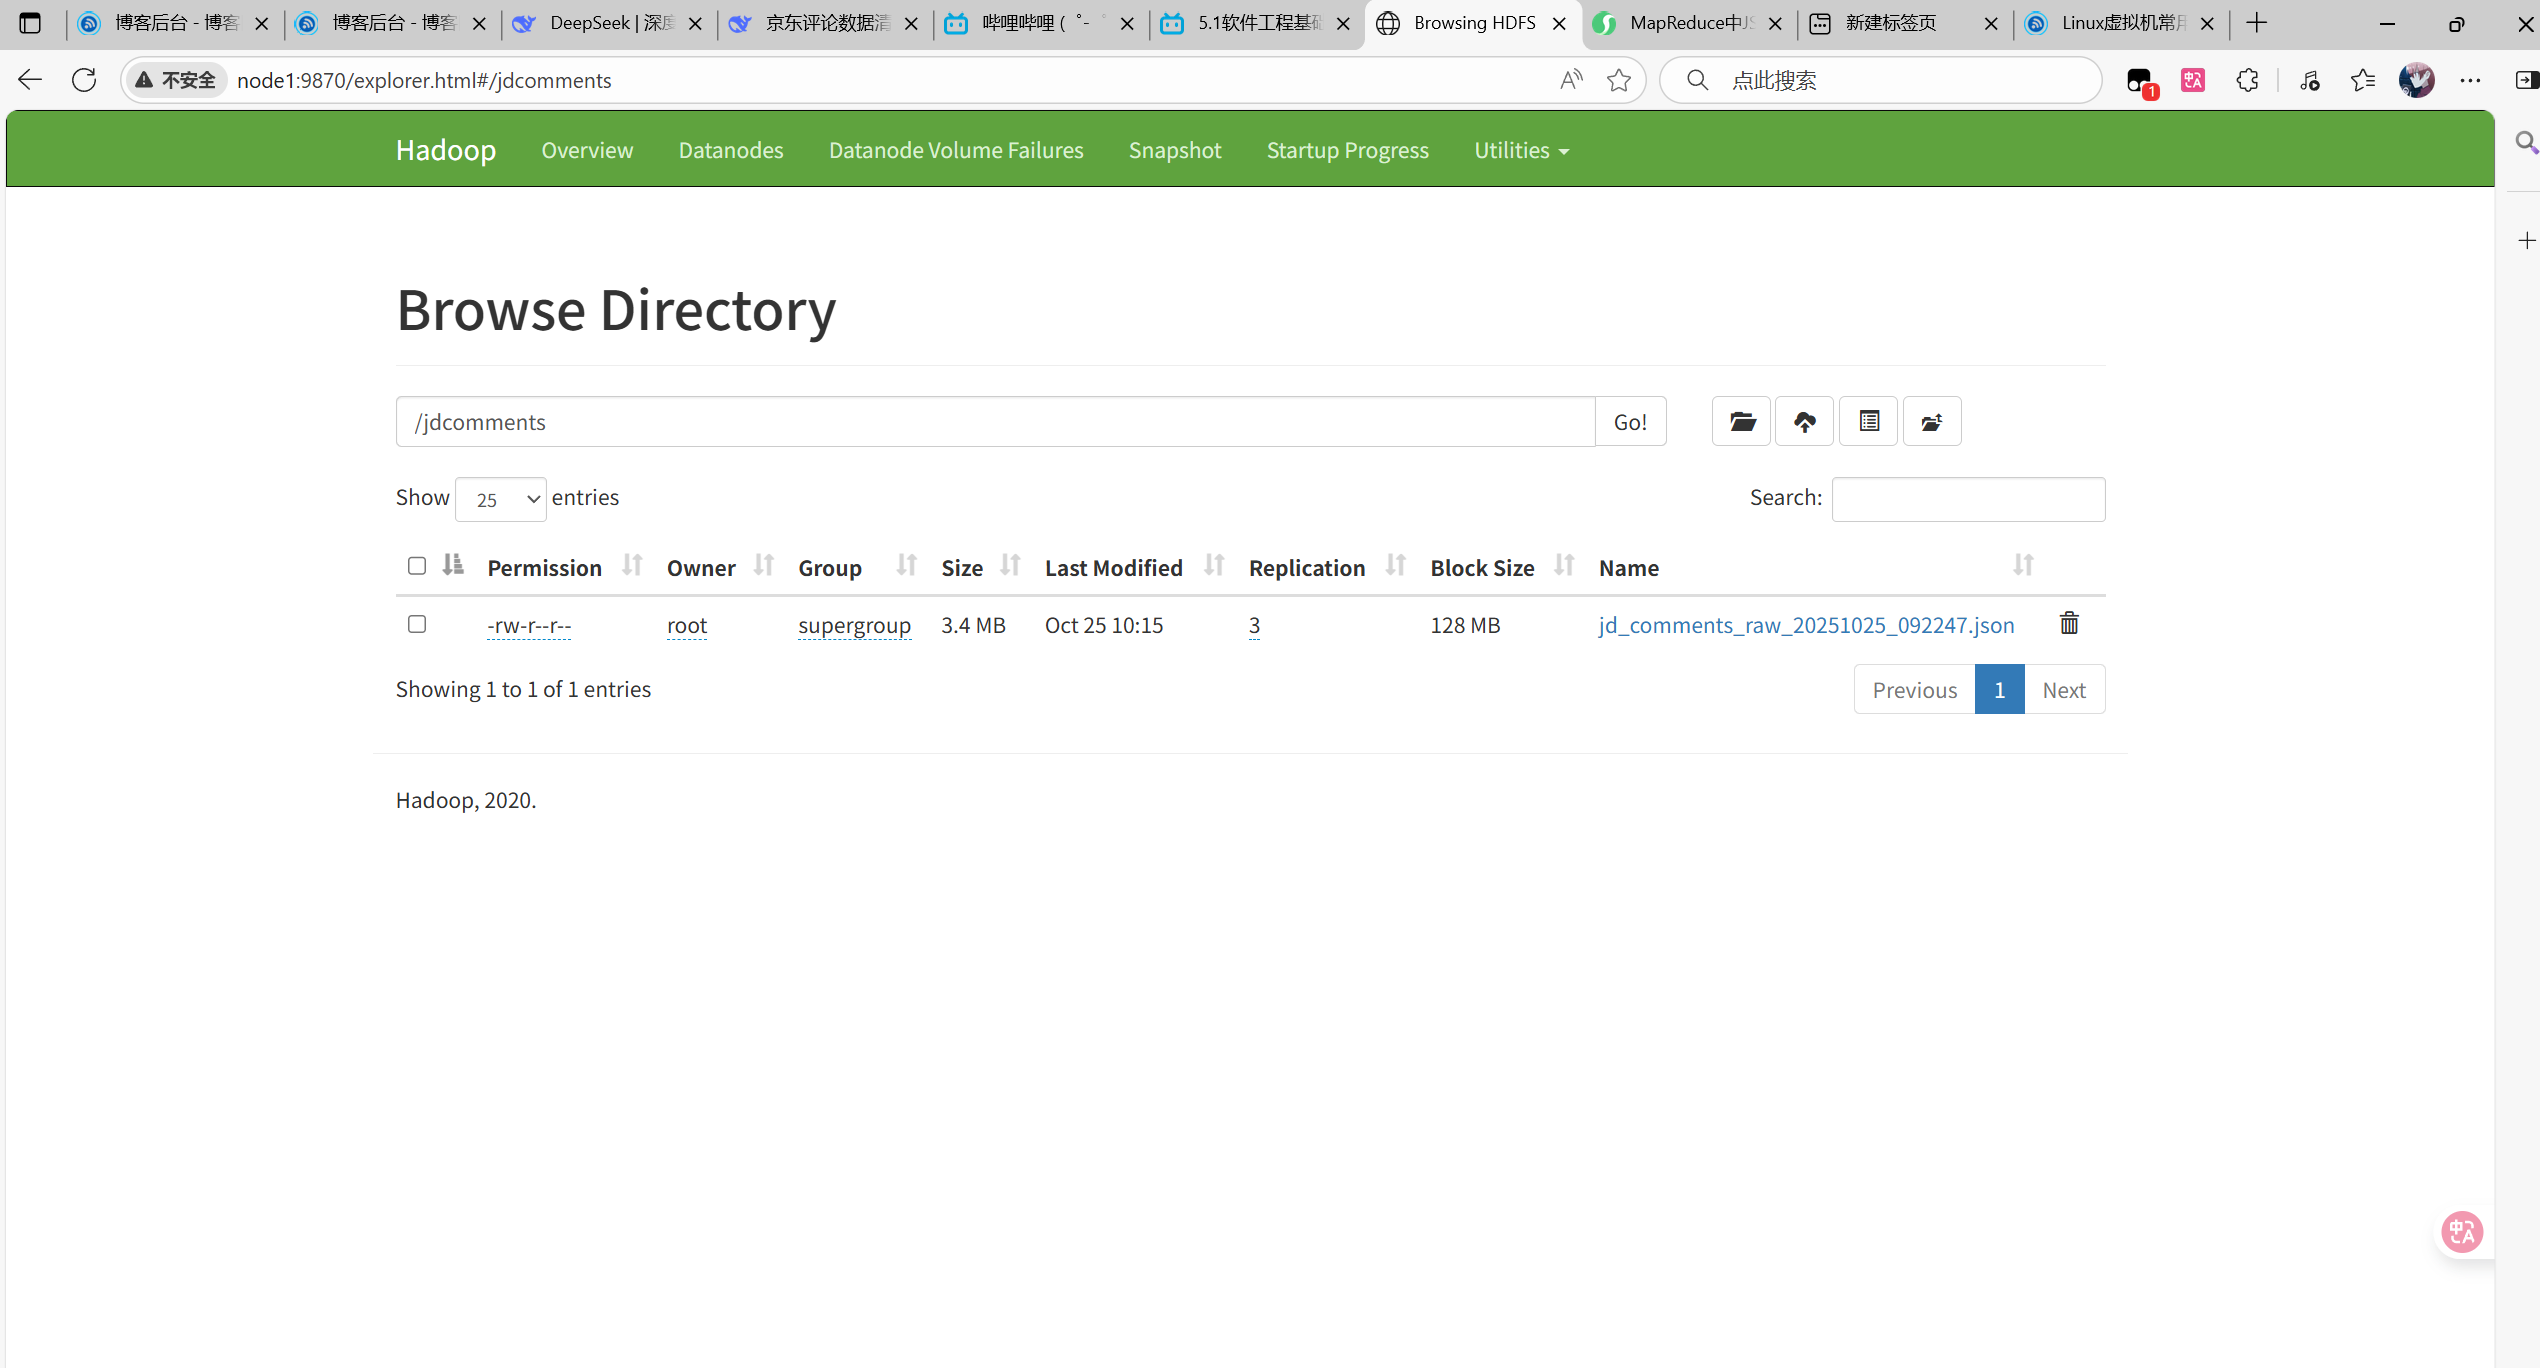
start-all.sh将第一步保存的json文件上传到HDFS中:
我是新建了一个文件夹叫jdcomments
将jar包上传到虚拟机的一个目录下:
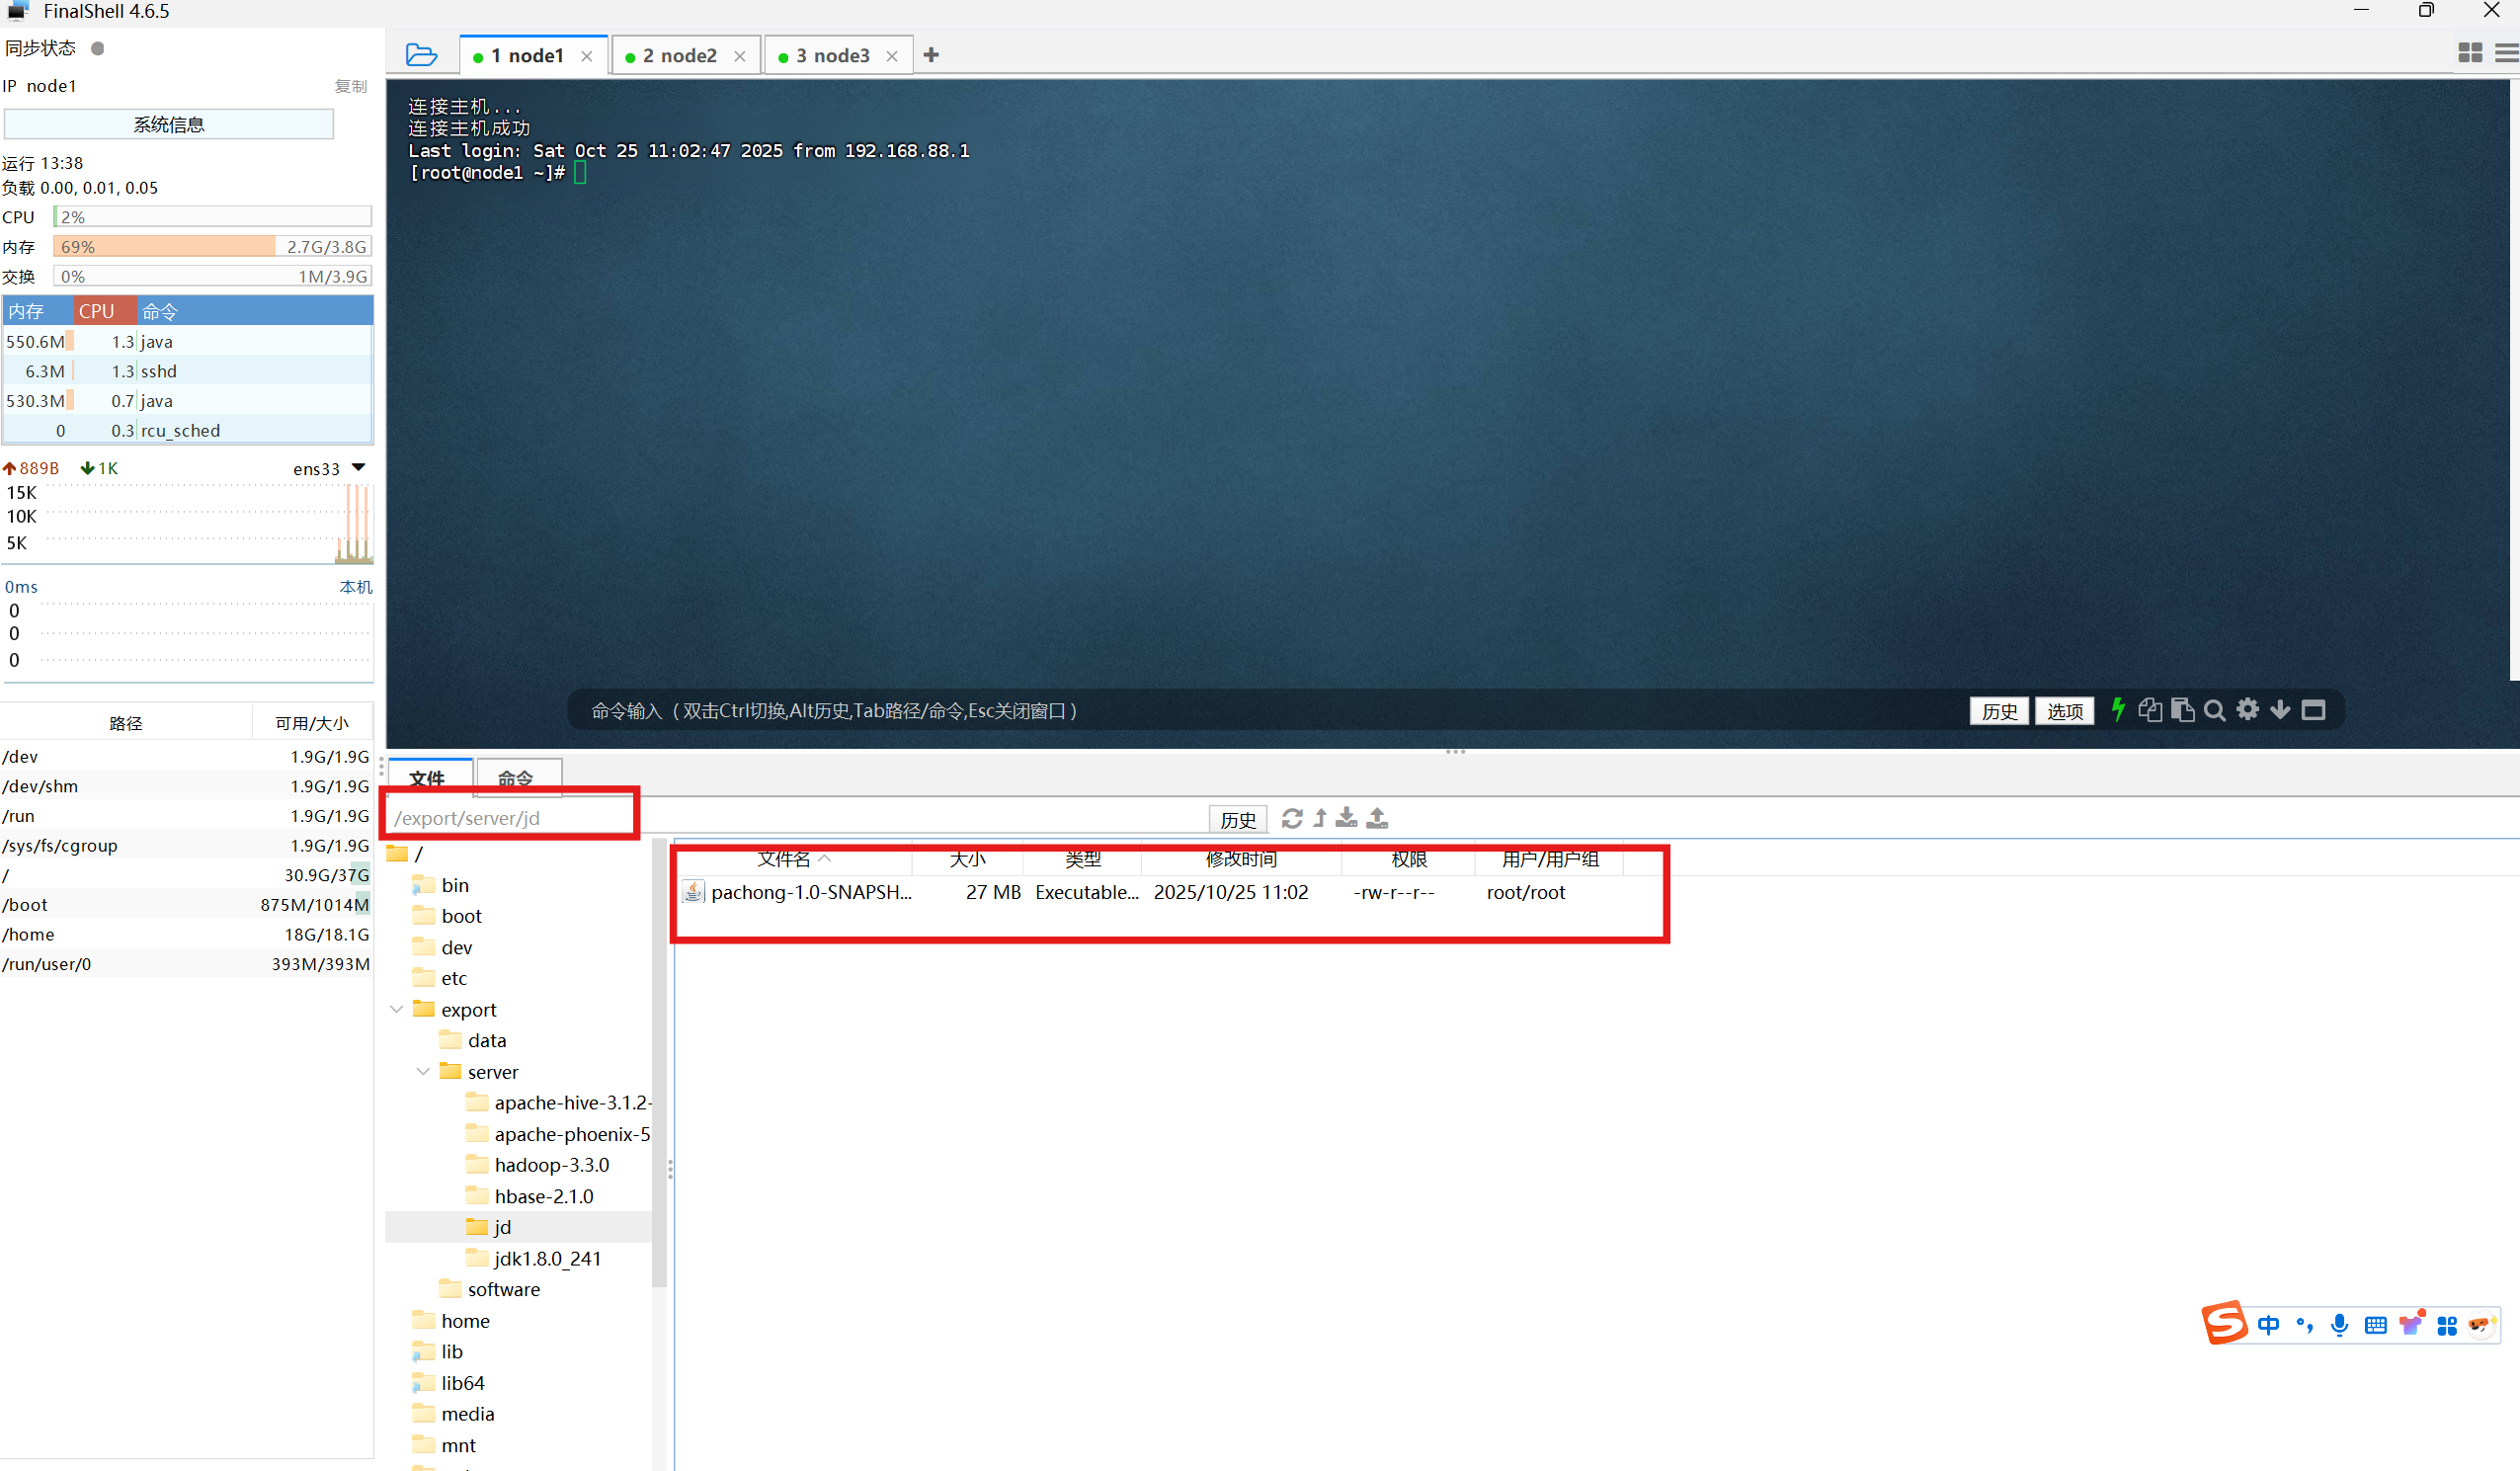
运行:
cd /export/server/jd
hadoop jar pachong-1.0-SNAPSHOT.jar my.mr.CommentDataDriver /jdcomments /jdcommentsoutput
//先进入jar包所在目录
//jdcomments为输入文件夹
//jdcommentsoutput为输出文件夹
//my.mr.CommentDataDriver为驱动程序
查看结果:
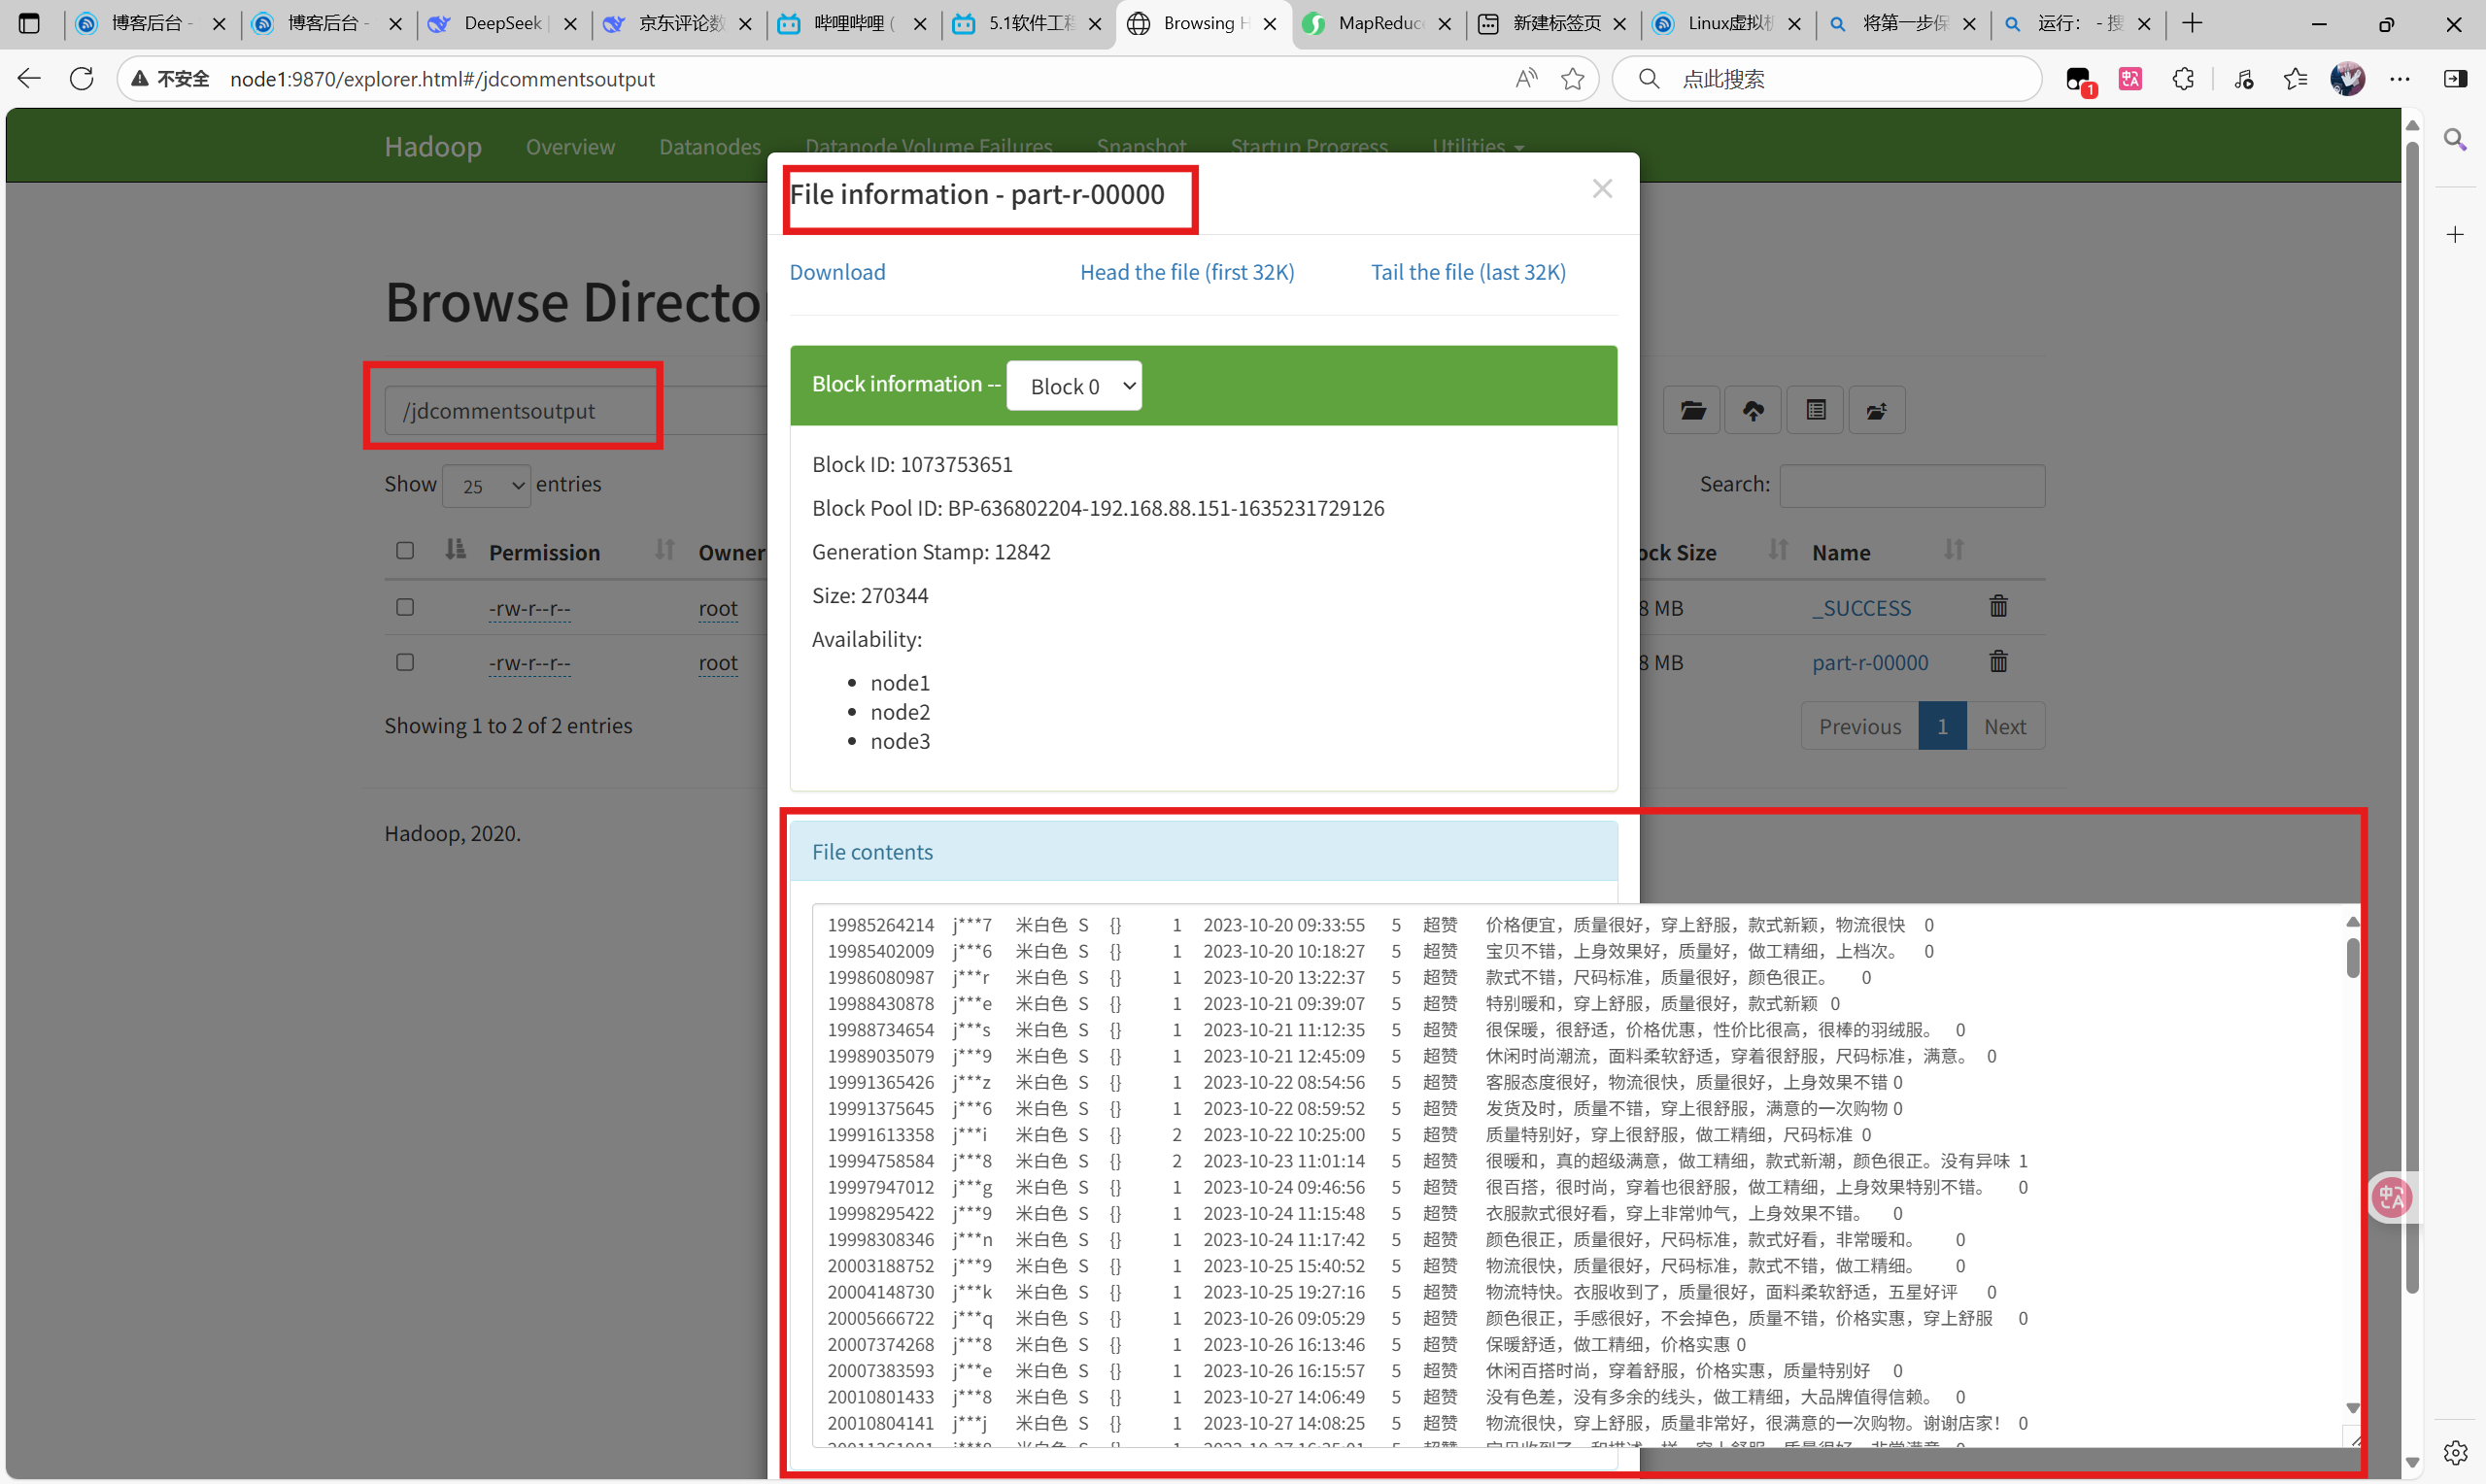
说明及可能遇到的问题:
- 注意你的hadoop版本是否和我的一致,以及pom.xml中hadoop的版本和虚拟机中hadoop版本,以及jdk版本不能太高。
- 文件目录不同,命令也有所不同,注意辨别。
- http://node1:9870/是HDFS的网页端,可以查看文件系统;http://node1:8088/是YARN的网页端,可以查看MR程序的运行日志。
数据加载:生成Hive用户评论数据:
(1)在HIVE中创建自己的数据库;
(2)并将手机评论数据导入用户评价表中。
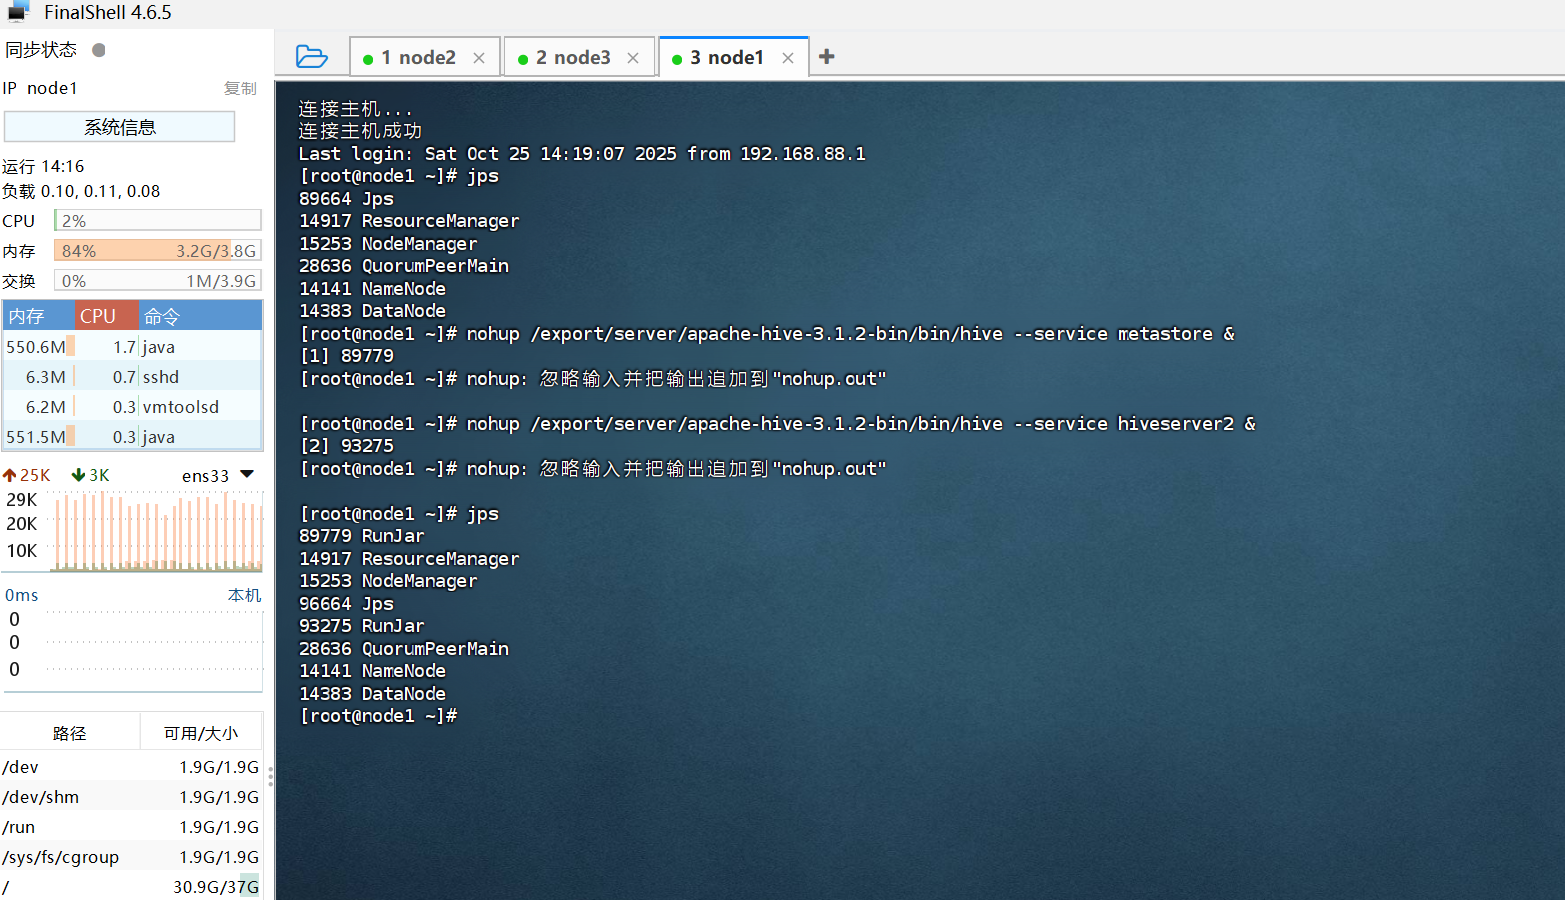
启动Hive集群环境:
nohup /export/servers/hive/bin/hive --service metastore &

nohup /export/servers/hive/bin/hive --service hiveserver2 &
启动Hive环境成功后会多两个RunJar
使用dataGrip连接hive数据库:
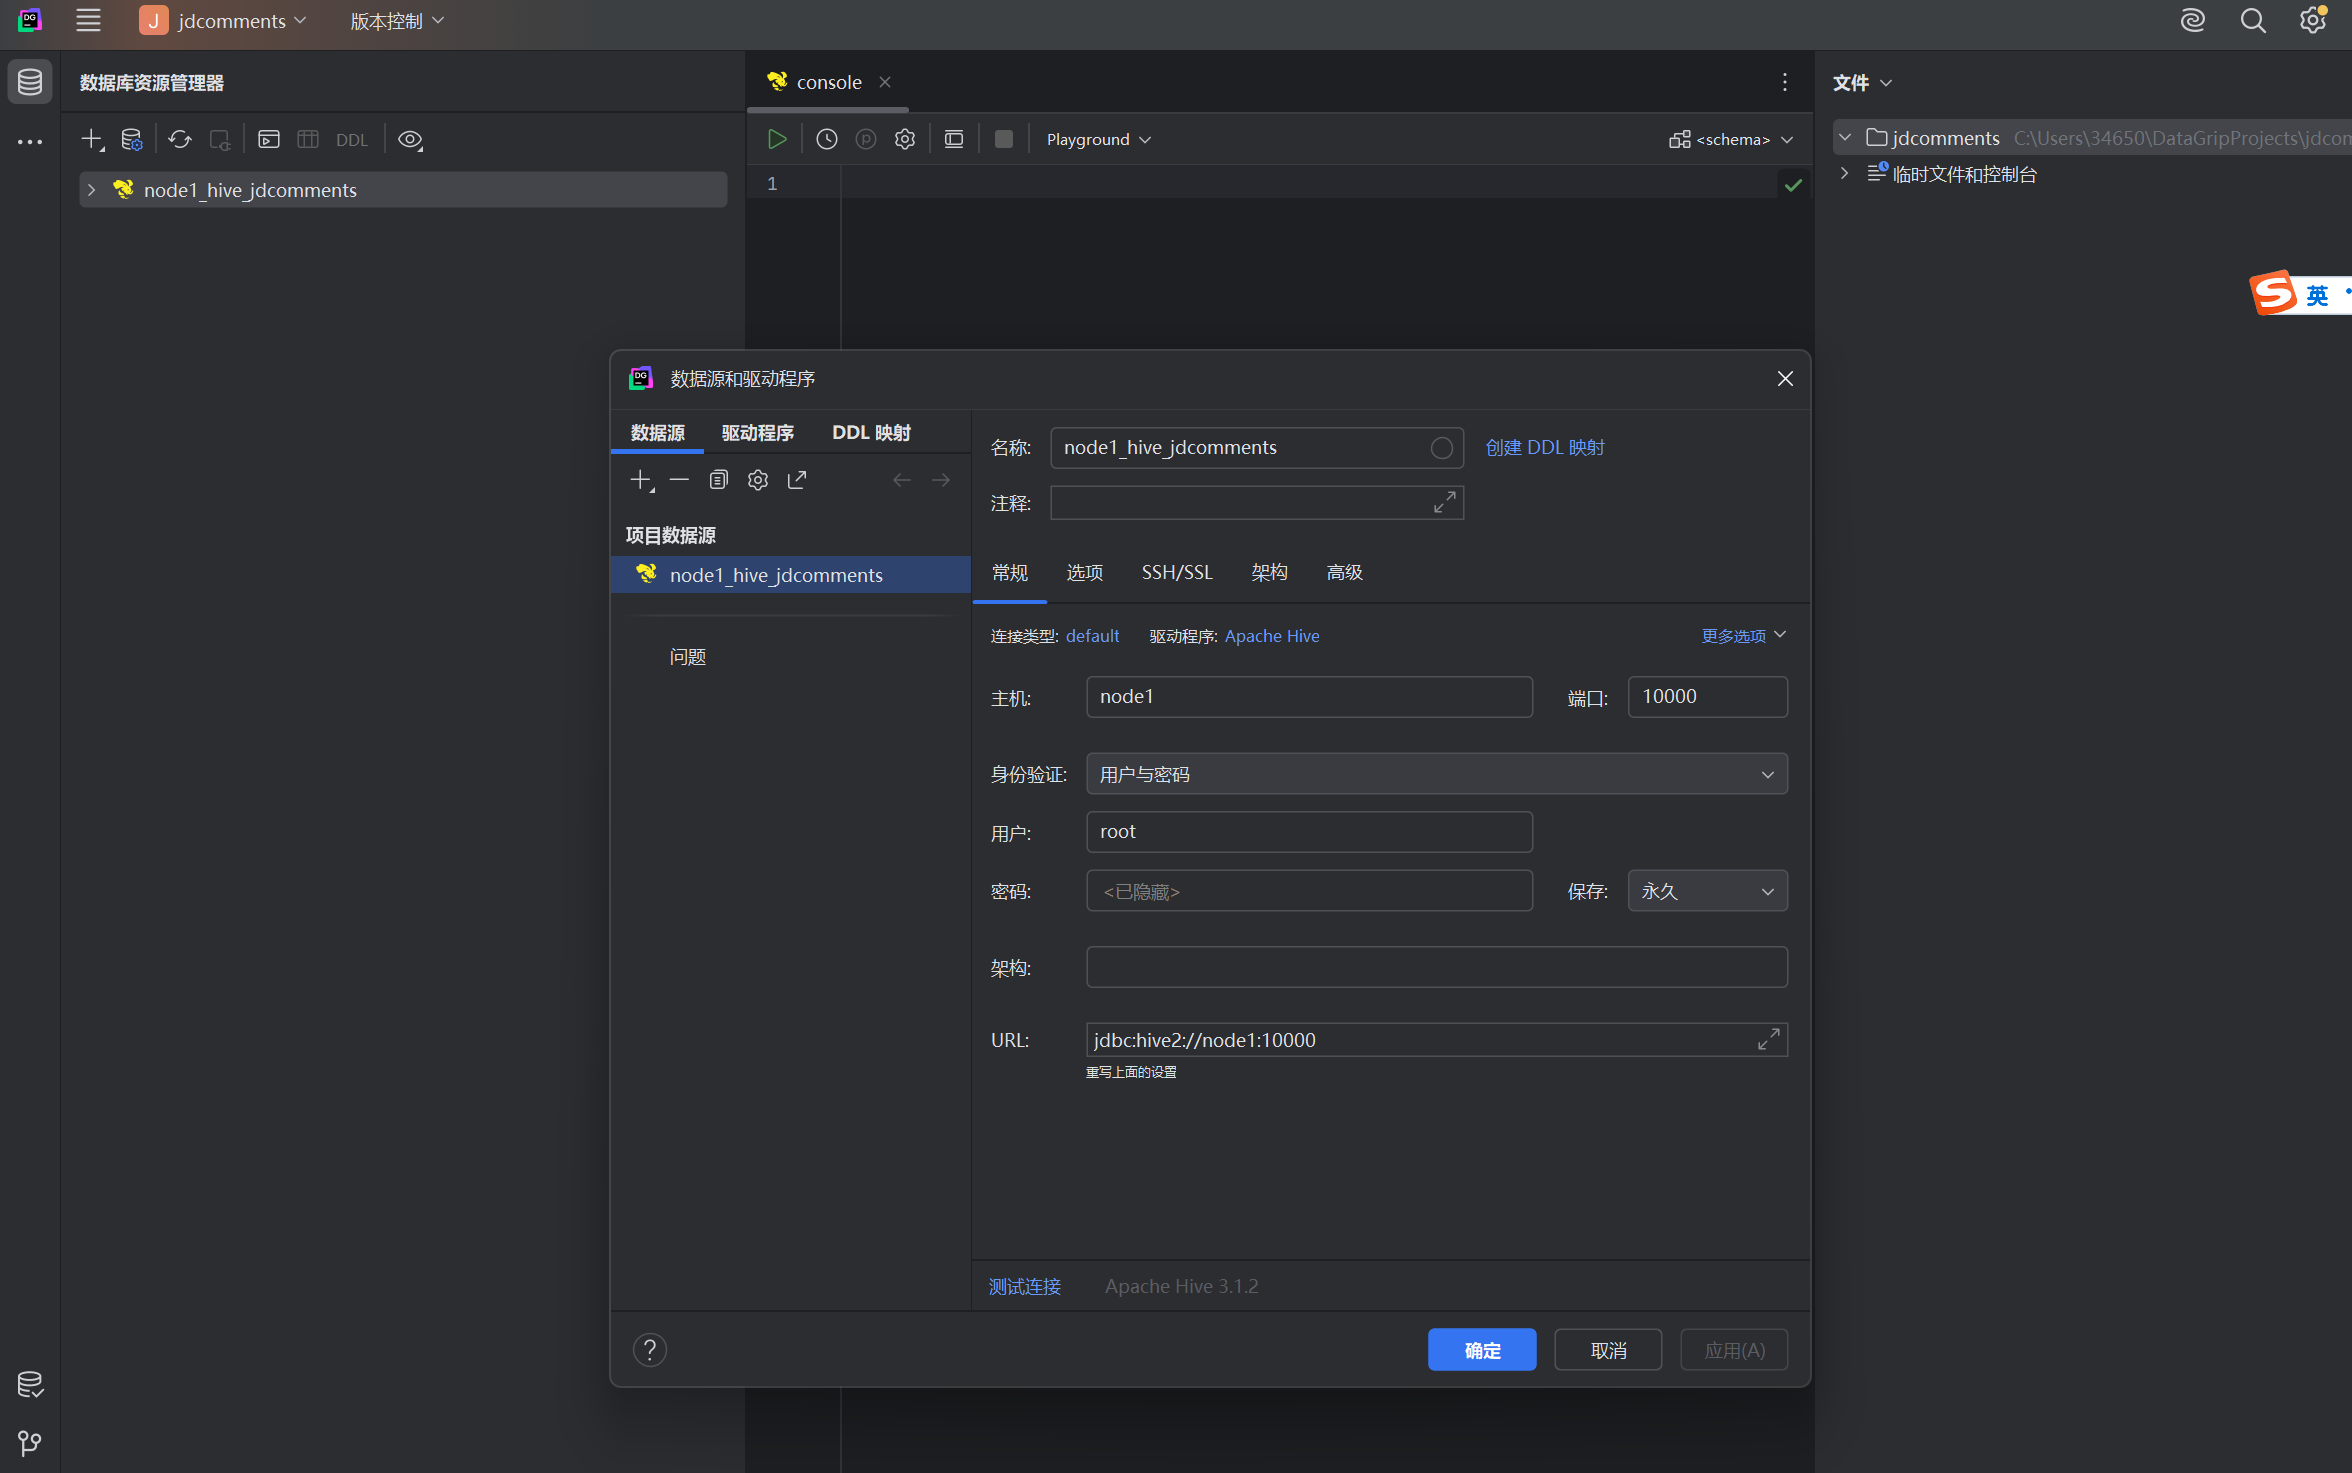
建库建表以及导入数据:
查看代码
-- 创建数据库
CREATE DATABASE IF NOT EXISTS jd_comment_db;
USE jd_comment_db;

-- 创建用户评价表
CREATE TABLE IF NOT EXISTS user_comments (
                                             comment_id STRING COMMENT '评论ID',
                                             user_nickname STRING COMMENT '用户昵称',
                                             color STRING COMMENT '商品颜色',
                                             model STRING COMMENT '商品型号',
                                             after_comment STRING COMMENT '追加评论',
                                             tag_comment_content STRING COMMENT '标签评论内容',
                                             buy_count INT COMMENT '购买数量',
                                             comment_date STRING COMMENT '评论时间',
                                             comment_score INT COMMENT '评论分数',
                                             comment_score_text STRING COMMENT '评分文本',
                                             comment_data STRING COMMENT '评论内容',
                                             officer_level INT COMMENT '会员等级'
)
    ROW FORMAT DELIMITED
        FIELDS TERMINATED BY '\t'
    STORED AS TEXTFILE;

-- 从 HDFS 导入数据到 Hive 表
LOAD DATA INPATH '/jdcommentsoutput/part-r-00000' INTO TABLE user_comments;

-- 查看前10条数据
SELECT * FROM user_comments LIMIT 10;

-- 查看数据统计
SELECT COUNT(*) AS total_comments FROM user_comments;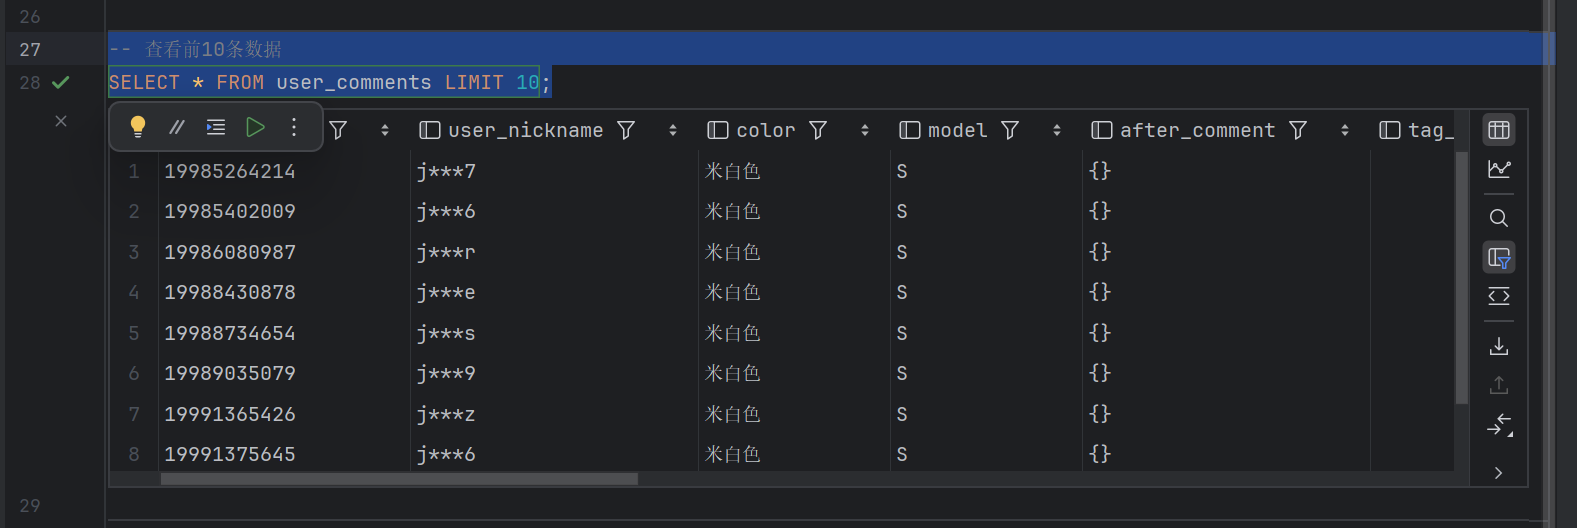
说明及可能遇到的问题:
- 首先还是目录不同命令也有所不同。
- 启动Hive集群时,敲完命令要敲两下回车
- dataGrip连接Hive数据库可参考13-Apache hive--DataGrip连接Hiveserver2_哔哩哔哩_bilibili
数据统计:生成Hive用户评论数据:
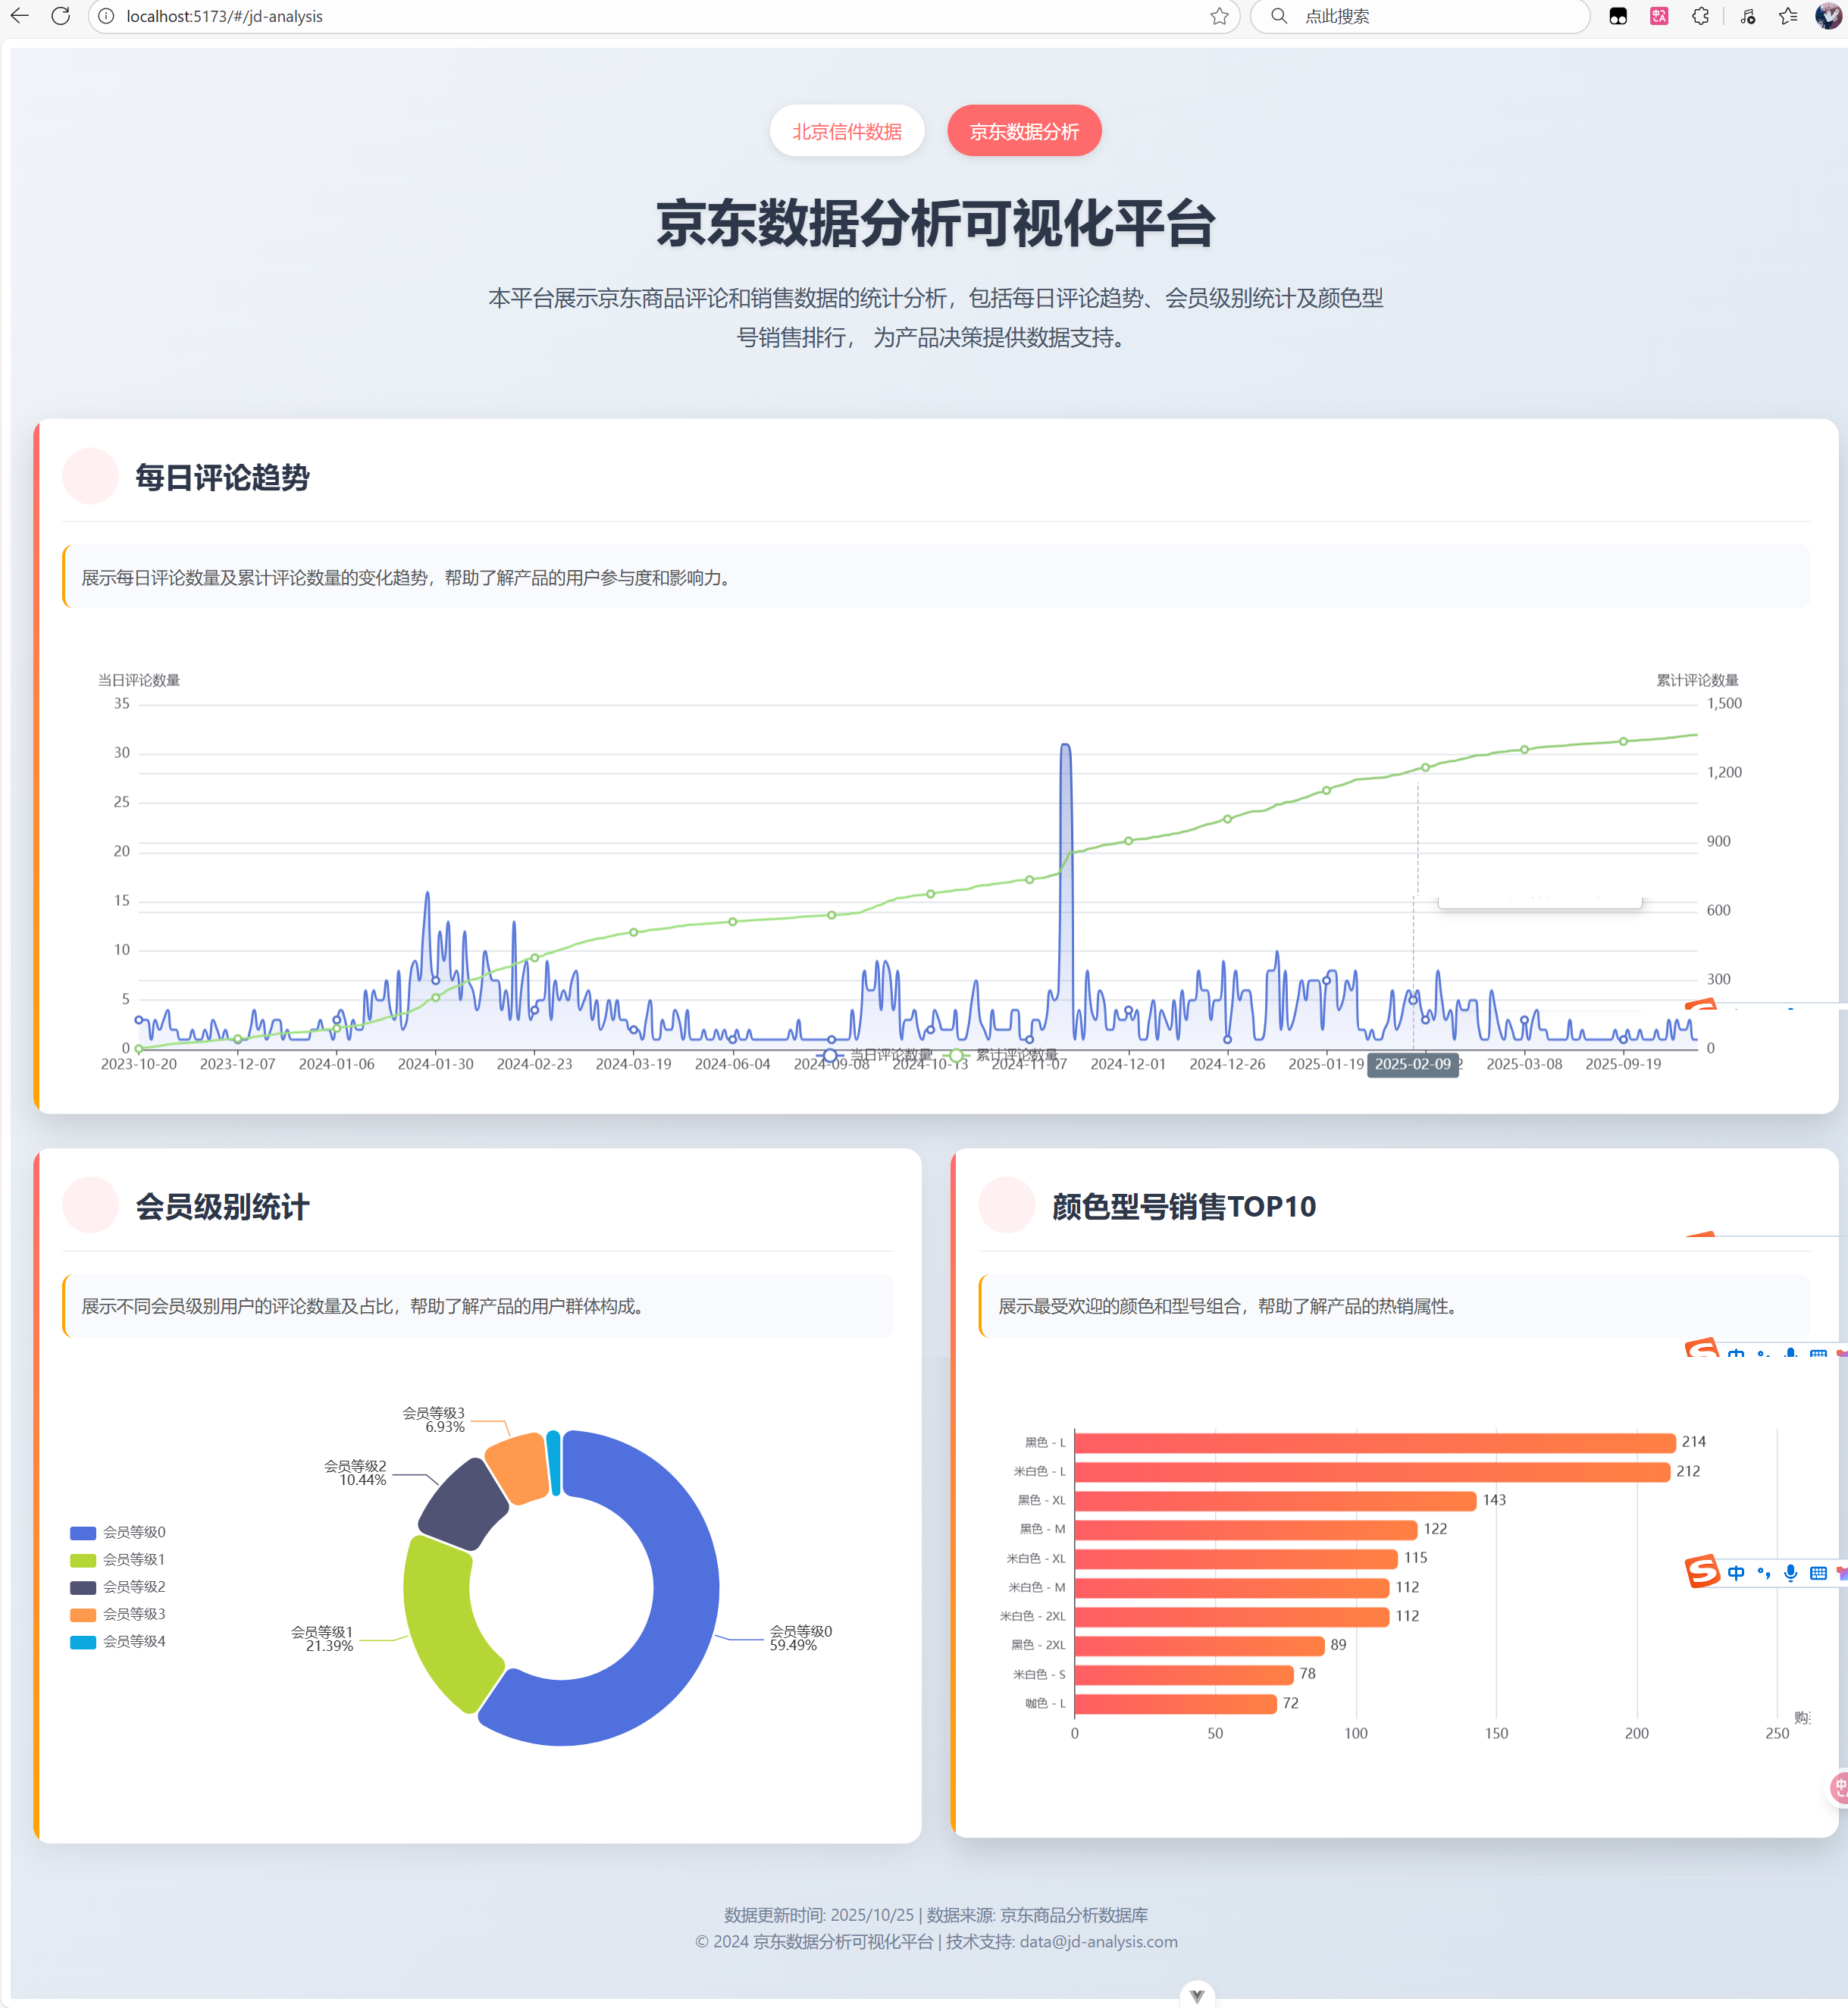
使用Hive对以下指标进行统计并可视化演示:
(1)用户评论周期(收到货后,一般多久进行评论)
(2)会员级别统计(判断购买此商品的用户级别)
(3)每天评论量(大体能反映出下单时间)
(4)自定义UDF,功能为:去掉评论时间的时分秒,只保留年月日
并进行可视化展示
简单统计:
由于爬取的数据中没有到货日期,所以第一个要求我们没办法做。所以我多写了一个按颜色和型号组合统计购买数量top10
查看代码
-- 1. 每日评论趋势数据表
CREATE TABLE daily_comment_trend AS
SELECT
    TO_DATE(FROM_UNIXTIME(UNIX_TIMESTAMP(comment_date, 'yyyy-MM-dd HH:mm:ss'))) AS comment_day,
    COUNT(*) AS comment_count,
    SUM(COUNT(*)) OVER (ORDER BY TO_DATE(FROM_UNIXTIME(UNIX_TIMESTAMP(comment_date, 'yyyy-MM-dd HH:mm:ss')))) AS cumulative_count
FROM user_comments
WHERE comment_date IS NOT NULL AND comment_date != ''
GROUP BY TO_DATE(FROM_UNIXTIME(UNIX_TIMESTAMP(comment_date, 'yyyy-MM-dd HH:mm:ss')))
ORDER BY comment_day;

-- 2. 会员级别统计数据表
CREATE TABLE officer_level_stats AS
SELECT
    officer_level,
    COUNT(*) AS comment_count,
    ROUND(COUNT(*) * 100.0 / (SELECT COUNT(*) FROM user_comments), 2) AS percentage
FROM user_comments
GROUP BY officer_level
ORDER BY officer_level;

-- 3. 颜色型号销售TOP10表
CREATE TABLE color_model_sales_top10 AS
SELECT
    color,
    model,
    SUM(buy_count) AS total_buys,
    COUNT(*) AS record_count
FROM user_comments
GROUP BY color, model
ORDER BY total_buys DESC
LIMIT 10;
UDF的使用:
UDF其实就是一个自定义函数
编写UDF程序:
DatePartUDF
package my.mr;

import org.apache.hadoop.hive.ql.exec.UDF;
import org.apache.hadoop.io.Text;
import java.text.SimpleDateFormat;
import java.util.Date;

/**
 * 自定义UDF:去除时间戳的时分秒,只保留年月日
 * 专门处理格式:yyyy-MM-dd HH:mm:ss
 */
public class DatePartUDF extends UDF {

    private final SimpleDateFormat inputFormat = new SimpleDateFormat("yyyy-MM-dd HH:mm:ss");
    private final SimpleDateFormat outputFormat = new SimpleDateFormat("yyyy-MM-dd");

    /**
     * 处理Text类型参数
     */
    public Text evaluate(Text datetimeText) {
        if (datetimeText == null) {
            return null;
        }

        return evaluate(datetimeText.toString());
    }

    /**
     * 处理String类型参数(主逻辑)
     */
    public Text evaluate(String datetimeStr) {
        if (datetimeStr == null || datetimeStr.trim().isEmpty()) {
            return null;
        }

        try {
            String trimmedStr = datetimeStr.trim();

            // 处理空字符串或无效数据
            if (trimmedStr.equals("") || trimmedStr.equals("NULL") || trimmedStr.equals("null")) {
                return null;
            }

            // 如果已经是日期格式(只有年月日),直接返回
            if (trimmedStr.matches("\\d{4}-\\d{2}-\\d{2}")) {
                return new Text(trimmedStr);
            }

            // 处理完整的时间戳格式:yyyy-MM-dd HH:mm:ss
            if (trimmedStr.matches("\\d{4}-\\d{2}-\\d{2} \\d{2}:\\d{2}:\\d{2}")) {
                Date date = inputFormat.parse(trimmedStr);
                String dateOnly = outputFormat.format(date);
                return new Text(dateOnly);
            }

            // 处理可能带毫秒的时间戳:yyyy-MM-dd HH:mm:ss.SSS
            if (trimmedStr.matches("\\d{4}-\\d{2}-\\d{2} \\d{2}:\\d{2}:\\d{2}\\.\\d+")) {
                String withoutMs = trimmedStr.substring(0, 19); // 去掉毫秒部分
                Date date = inputFormat.parse(withoutMs);
                String dateOnly = outputFormat.format(date);
                return new Text(dateOnly);
            }

            // 如果都不匹配,尝试直接截取前10个字符
            if (trimmedStr.length() >= 10) {
                String potentialDate = trimmedStr.substring(0, 10);
                if (potentialDate.matches("\\d{4}-\\d{2}-\\d{2}")) {
                    return new Text(potentialDate);
                }
            }

            return null;

        } catch (Exception e) {
            // 解析失败,返回null
            return null;
        }
    }
}
将代码打包为jar包上传到HDFS中

注册使用UDF:
-- UDF使用流程

-- 1. 注册UDF函数
ADD JAR hdfs:///udf/pachong-1.0-SNAPSHOT.jar;
CREATE TEMPORARY FUNCTION date_part  AS 'my.mr.DatePartUDF';

-- 2. 验证函数
SHOW FUNCTIONS LIKE 'date_part';
DESCRIBE FUNCTION date_part;

-- 3. 测试函数
SELECT
    comment_date AS original_date,
    date_part(comment_date) AS date_only
FROM user_comments
LIMIT 10;利用Sqoop进行数据迁移至Mysql数据库:
安装sqoop:
参考安装配置sqoop(超详细)_sqoop安装配置-CSDN博客
注意打开sqoop官网时,要开魔法(懂的都懂)。
在mysql中建库建表:
查看代码
-- 创建MySQL数据库
CREATE DATABASE IF NOT EXISTS jd_analysis_db;
USE jd_analysis_db;

-- 1. 每日评论趋势数据表
CREATE TABLE IF NOT EXISTS daily_comment_trend (
                                                   comment_day DATE NOT NULL COMMENT '评论日期',
                                                   comment_count INT NOT NULL COMMENT '当日评论数量',
                                                   cumulative_count BIGINT NOT NULL COMMENT '累计评论数量',
                                                   PRIMARY KEY (comment_day)
) ENGINE=InnoDB DEFAULT CHARSET=utf8mb4 COMMENT='每日评论趋势数据';

-- 2. 会员级别统计数据表
CREATE TABLE IF NOT EXISTS officer_level_stats (
                                                   officer_level INT NOT NULL COMMENT '会员等级',
                                                   comment_count INT NOT NULL COMMENT '评论数量',
                                                   percentage DECIMAL(5,2) NOT NULL COMMENT '占比百分比',
                                                   PRIMARY KEY (officer_level)
) ENGINE=InnoDB DEFAULT CHARSET=utf8mb4 COMMENT='会员级别统计';

-- 3. 颜色型号销售TOP10表
CREATE TABLE IF NOT EXISTS color_model_sales_top10 (
                                                       id INT AUTO_INCREMENT PRIMARY KEY COMMENT '主键ID',
                                                       color VARCHAR(50) NOT NULL COMMENT '商品颜色',
                                                       model VARCHAR(50) NOT NULL COMMENT '商品型号',
                                                       total_buys INT NOT NULL COMMENT '总购买数量',
                                                       record_count INT NOT NULL COMMENT '记录数量',
                                                       created_at TIMESTAMP DEFAULT CURRENT_TIMESTAMP COMMENT '创建时间',
                                                       UNIQUE KEY uniq_color_model (color, model)
) ENGINE=InnoDB DEFAULT CHARSET=utf8mb4 COMMENT='颜色型号销售TOP10';
执行命令将数据导入:
查看代码
# 1. 每日评论趋势数据表导出
sqoop export \
--connect "jdbc:mysql://node1:3306/jd_analysis_db?useUnicode=true&characterEncoding=UTF-8" \
--username root \
--password hadoop \
--table daily_comment_trend \
--export-dir /user/hive/warehouse/jd_comment_db.db/daily_comment_trend \
--input-fields-terminated-by '\001' \
--columns "comment_day,comment_count,cumulative_count" \
-- \
--direct

# 2. 会员级别统计数据表导出
sqoop export \
--connect "jdbc:mysql://node1:3306/jd_analysis_db?useUnicode=true&characterEncoding=UTF-8" \
--username root \
--password hadoop \
--table officer_level_stats \
--export-dir /user/hive/warehouse/jd_comment_db.db/officer_level_stats \
--input-fields-terminated-by '\001' \
--columns "officer_level,comment_count,percentage"

# 3. 颜色型号销售TOP10表导出
sqoop export \
--connect "jdbc:mysql://node1:3306/jd_analysis_db?useUnicode=true&characterEncoding=UTF-8" \
--username root \
--password hadoop \
--table color_model_sales_top10 \
--export-dir /user/hive/warehouse/jd_comment_db.db/color_model_sales_top10 \
--input-fields-terminated-by '\001' \
--columns "color,model,total_buys,record_count" \
--update-key color,model \
--update-mode allowinsert 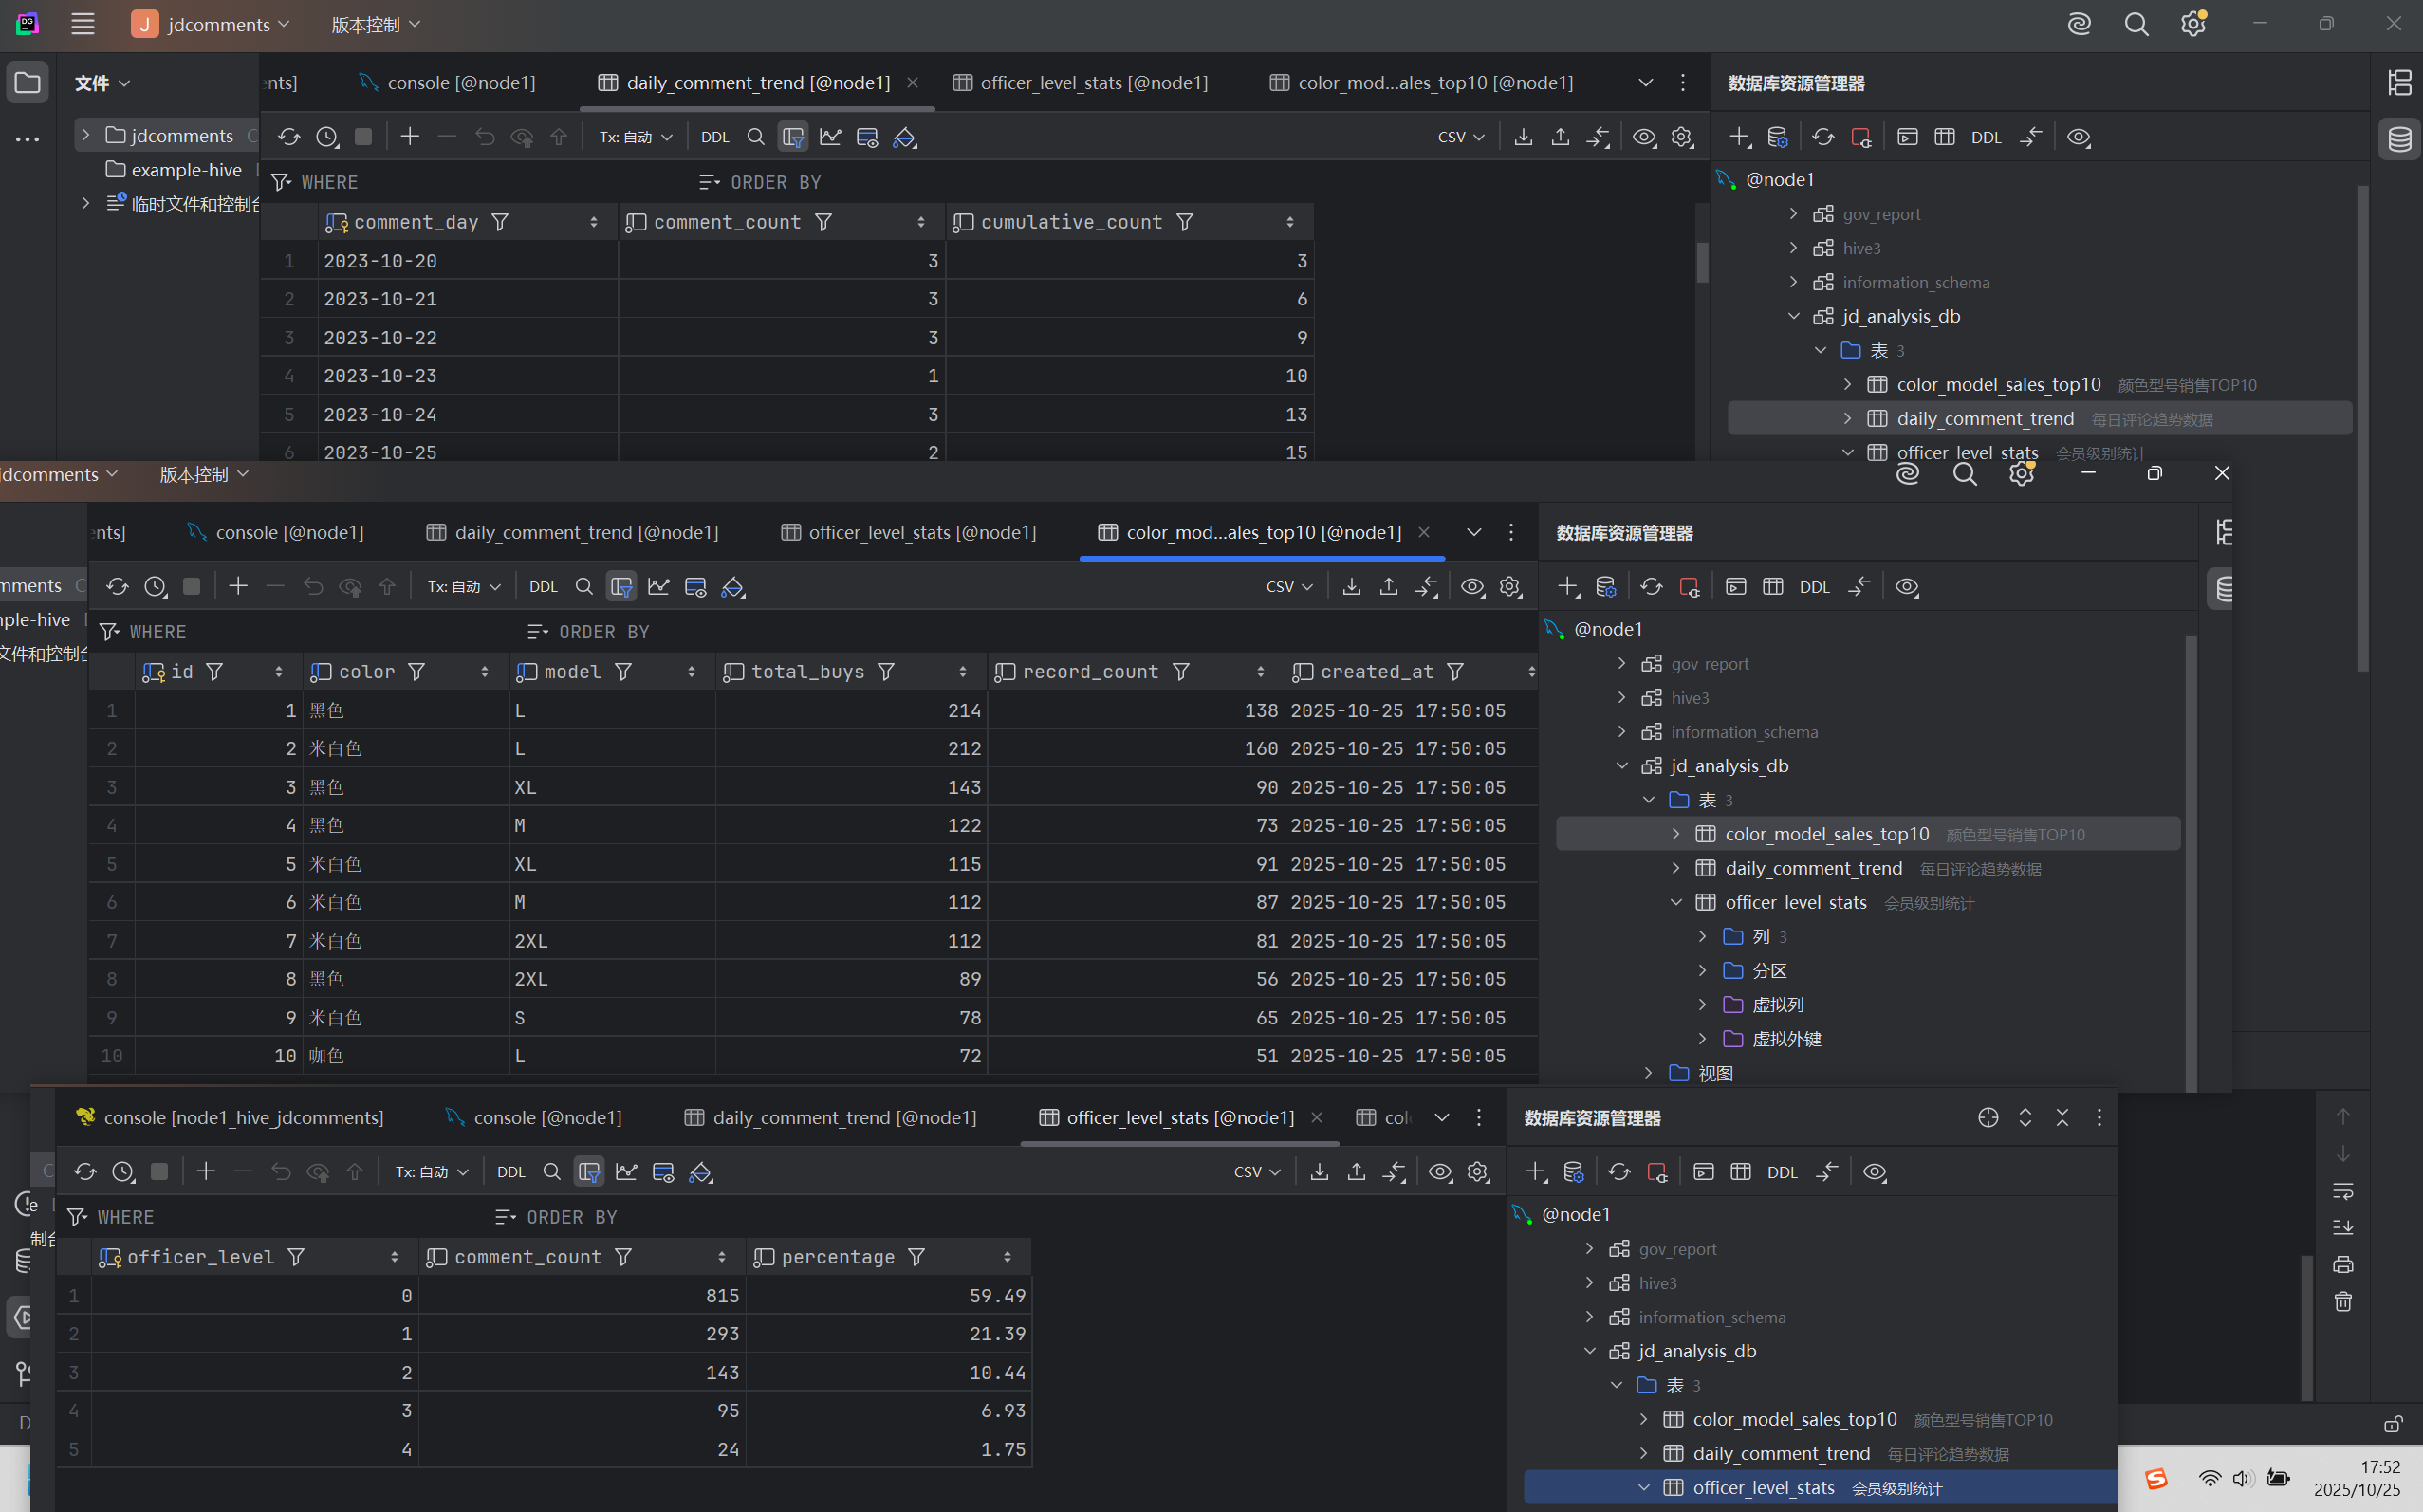
实现数据的可视化:
这部分有点简单,直接用springboot,JPA,vue,ECharts,axios连接数据库实现就好了。
直接上结果:
中文分词实现用户评价分析:
导出评论数据到HDFS:
将comment_data字段导入到HDFS的/user/hadoop/comment_data目录下。
INSERT OVERWRITE DIRECTORY '/user/hadoop/comment_data'
    ROW FORMAT DELIMITED
    FIELDS TERMINATED BY '\n'
SELECT comment_data
FROM user_comments
WHERE comment_data IS NOT NULL
  AND comment_data != '';
在虚拟机上安装python环境和jieba模块:
jieba官网:jieba · PyPI
//解压
tar -zxvf jieba-0.42.1.tar.gz
//安装
python setup.py install
编写python版的MR程序实现jieba分词:
mapper_word_segment.py
#!/usr/bin/env python
# -*- coding: utf-8 -*-

import sys
import jieba
import re

# 加载停用词 - 使用更健壮的方式
stop_words = set()
try:
    with open('stop_words.txt', 'r') as f:
        for line in f:
            word = line.strip().decode('utf-8')
            if word:
                stop_words.add(word)
    sys.stderr.write("Loaded {} stop words from file\n".format(len(stop_words)))
except Exception as e:
    sys.stderr.write("Error loading stop words: {}\n".format(str(e)))
    # 使用默认的停用词集合
    stop_words = {u'的', u'了', u'在', u'是', u'我', u'有', u'和', u'就', u'不', u'人'}
    sys.stderr.write("Using default stop words: {}\n".format(len(stop_words)))


def clean_text(text):
    """清理文本"""
    if not text:
        return u""
    # 使用unicode正则表达式模式
    text = re.sub(ur'[^\u4e00-\u9fa5]', u' ', text)
    return text.strip()


def segment_text(text):
    """分词函数"""
    if not text or len(text) < 2:
        return []

    # 清理文本
    text = clean_text(text)
    if not text:
        return []

    try:
        # 使用结巴分词
        words = jieba.cut(text)

        # 过滤条件:长度>1,不在停用词表中
        filtered_words = []
        for word in words:
            word = word.strip()
            if len(word) > 1 and word not in stop_words:
                filtered_words.append(word)

        return filtered_words
    except Exception as e:
        sys.stderr.write("Error in segment_text: {}\n".format(str(e)))
        return []


# 处理输入
try:
    line_count = 0
    for line in sys.stdin:
        line_count += 1
        # 解码输入
        line = line.strip().decode('utf-8')
        if not line:
            continue

        words = segment_text(line)
        for word in words:
            # 编码输出
            print('{}\t{}'.format(word.encode('utf-8'), 1))

        # 每处理100行输出一次进度
        if line_count % 100 == 0:
            sys.stderr.write("Processed {} lines\n".format(line_count))

        sys.stdout.flush()

except Exception as e:
    sys.stderr.write("Error processing input: {}\n".format(str(e)))
    sys.exit(1)

sys.stderr.write("Mapper completed successfully, processed {} lines total\n".format(line_count))
reducer_word_count.py
#!/usr/bin/env python
# -*- coding: utf-8 -*-

import sys


def main():
    current_word = None
    current_count = 0

    for line in sys.stdin:
        try:
            line = line.strip()
            if not line:
                continue

            # 解析输入
            parts = line.split('\t')
            if len(parts) != 2:
                continue

            word, count_str = parts

            try:
                count = int(count_str)
            except ValueError:
                continue

            # 如果当前词与上一个词相同,累加计数
            if current_word == word:
                current_count += count
            else:
                # 如果遇到新词,输出上一个词的计数
                if current_word is not None:
                    print("{}\t{}".format(current_word, current_count))
                    sys.stdout.flush()

                current_word = word
                current_count = count

        except Exception as e:
            # 继续处理下一行,不退出
            sys.stderr.write("Error processing line: {}\n".format(str(e)))
            continue

    # 输出最后一个词的计数
    if current_word is not None:
        print("{}\t{}".format(current_word, current_count))
        sys.stdout.flush()


if __name__ == "__main__":
    main()
sys.stderr.write("Reducer completed successfully\n")stop_words.txt参考汇集四大主流停词的中文停词库-7352个停词_哈工大停用词库-CSDN博客
运行MR程序:
hadoop jar $HADOOP_HOME/share/hadoop/tools/lib/hadoop-streaming-*.jar \
    -files mapper_word_segment.py,stop_words.txt,reducer_word_count.py \
    -input /user/hadoop/comment_data \
    -output /user/hadoop/word_segment_output \
    -mapper "python mapper_word_segment.py" \
    -reducer "python reducer_word_count.py" \
    -numReduceTasks 1
导入Hive:
-- 创建外部表,指向HDFS输出目录
CREATE EXTERNAL TABLE word_frequency (
                                         word STRING,
                                         frequency INT
)
    ROW FORMAT DELIMITED
        FIELDS TERMINATED BY '\t'
        LINES TERMINATED BY '\n'
    LOCATION '/user/hadoop/word_segment_output';
导出Hive,实现词云:
导出:
--导出数据到虚拟机上
INSERT OVERWRITE LOCAL DIRECTORY '/tmp/word_frequency'
    ROW FORMAT DELIMITED
    FIELDS TERMINATED BY '\t'
SELECT * FROM word_frequency ORDER BY frequency DESC;
编写python程序:
查看代码
import matplotlib.pyplot as plt
from wordcloud import WordCloud
import matplotlib.font_manager as fm
import numpy as np
from PIL import Image


def create_wordcloud_from_file(file_path, output_path='wordcloud.png',
                               width=800, height=600, background_color='white',
                               colormap='viridis', max_words=200):
    """
    从文本文件生成词云图

    参数:
    file_path: 输入文件路径
    output_path: 输出图片路径
    width: 图片宽度
    height: 图片高度
    background_color: 背景颜色
    colormap: 颜色方案
    max_words: 最大显示词语数量
    """

    try:
        # 读取文件数据
        word_freq = {}
        with open(file_path, 'r', encoding='utf-8') as file:
            for line in file:
                parts = line.strip().split('\t')
                if len(parts) >= 2:
                    word = parts[0].strip()
                    try:
                        frequency = int(parts[1].strip())
                        word_freq[word] = frequency
                    except ValueError:
                        print(f"跳过无效频率的行: {line}")

        if not word_freq:
            print("未找到有效数据")
            return

        print(f"成功读取 {len(word_freq)} 个词语")

        # 设置中文字体(重要!)
        # 方法1: 使用系统字体
        try:
            # 在Windows系统中
            font_path = 'C:/Windows/Fonts/simhei.ttf'  # 黑体
            # 或者使用: 'C:/Windows/Fonts/msyh.ttc'  # 微软雅黑
        except:
            # 在Linux/Mac系统中
            font_path = '/usr/share/fonts/truetype/droid/DroidSansFallbackFull.ttf'

        # 创建词云对象
        wordcloud = WordCloud(
            font_path=font_path,
            width=width,
            height=height,
            background_color=background_color,
            colormap=colormap,
            max_words=max_words,
            relative_scaling=0.5,
            random_state=42
        )

        # 生成词云
        wordcloud.generate_from_frequencies(word_freq)

        # 显示词云
        plt.figure(figsize=(12, 8))
        plt.imshow(wordcloud, interpolation='bilinear')
        plt.axis('off')
        plt.title('词云分析', fontsize=16, pad=20)

        # 保存图片
        plt.savefig(output_path, dpi=300, bbox_inches='tight',
                    facecolor=background_color, edgecolor='none')
        print(f"词云已保存到: {output_path}")

        # 显示图片
        plt.show()

        # 打印前10个高频词
        sorted_words = sorted(word_freq.items(), key=lambda x: x[1], reverse=True)
        print("\n前10个高频词:")
        for i, (word, freq) in enumerate(sorted_words[:10], 1):
            print(f"{i}. {word}: {freq}")

    except FileNotFoundError:
        print(f"文件未找到: {file_path}")
    except Exception as e:
        print(f"生成词云时出错: {e}")


def create_custom_shape_wordcloud(file_path, output_path='shape_wordcloud.png',
                                  shape_mask_path=None):
    """
    创建自定义形状的词云
    """
    try:
        # 读取数据
        word_freq = {}
        with open(file_path, 'r', encoding='utf-8') as file:
            for line in file:
                parts = line.strip().split('\t')
                if len(parts) >= 2:
                    word = parts[0].strip()
                    try:
                        frequency = int(parts[1].strip())
                        word_freq[word] = frequency
                    except ValueError:
                        continue

        # 设置字体
        font_path = 'C:/Windows/Fonts/simhei.ttf'

        # 如果有形状遮罩,使用它
        if shape_mask_path:
            try:
                mask = np.array(Image.open(shape_mask_path))
                wordcloud = WordCloud(
                    font_path=font_path,
                    mask=mask,
                    background_color='white',
                    colormap='plasma',
                    max_words=200
                )
            except:
                print("无法加载形状遮罩,使用默认矩形")
                wordcloud = WordCloud(
                    font_path=font_path,
                    width=800,
                    height=600,
                    background_color='white',
                    colormap='plasma',
                    max_words=200
                )
        else:
            wordcloud = WordCloud(
                font_path=font_path,
                width=800,
                height=600,
                background_color='white',
                colormap='plasma',
                max_words=200
            )

        # 生成词云
        wordcloud.generate_from_frequencies(word_freq)

        # 显示和保存
        plt.figure(figsize=(12, 10))
        plt.imshow(wordcloud, interpolation='bilinear')
        plt.axis('off')
        plt.savefig(output_path, dpi=300, bbox_inches='tight')
        plt.show()

        print(f"自定义形状词云已保存到: {output_path}")

    except Exception as e:
        print(f"创建自定义形状词云时出错: {e}")


# 使用示例
if __name__ == "__main__":
    # 基本用法
    print("正在生成基本词云...")
    create_wordcloud_from_file(
        file_path='000000_0',
        output_path='basic_wordcloud.png',
        background_color='white',
        colormap='viridis'
    )

    # 可以尝试不同的颜色方案
    print("\n正在生成彩色词云...")
    create_wordcloud_from_file(
        file_path='000000_0',
        output_path='colorful_wordcloud.png',
        background_color='black',
        colormap='Set2'
    )

    # 如果需要自定义形状的词云,取消下面的注释
    # create_custom_shape_wordcloud(
    #     file_path='000000_0',
    #     output_path='shape_wordcloud.png',
    #     shape_mask_path='your_mask_image.png'  # 提供形状图片路径
    # )
词云结果:

说明及可能遇到的问题:
- 本地电脑上的python可能与虚拟机上python的版本不同,以至于编写的代码有所不同。
- 关于第6个要求,我不确定是否是这个步骤来实现的。

 浙公网安备 33010602011771号