kendoUpload 上传控件
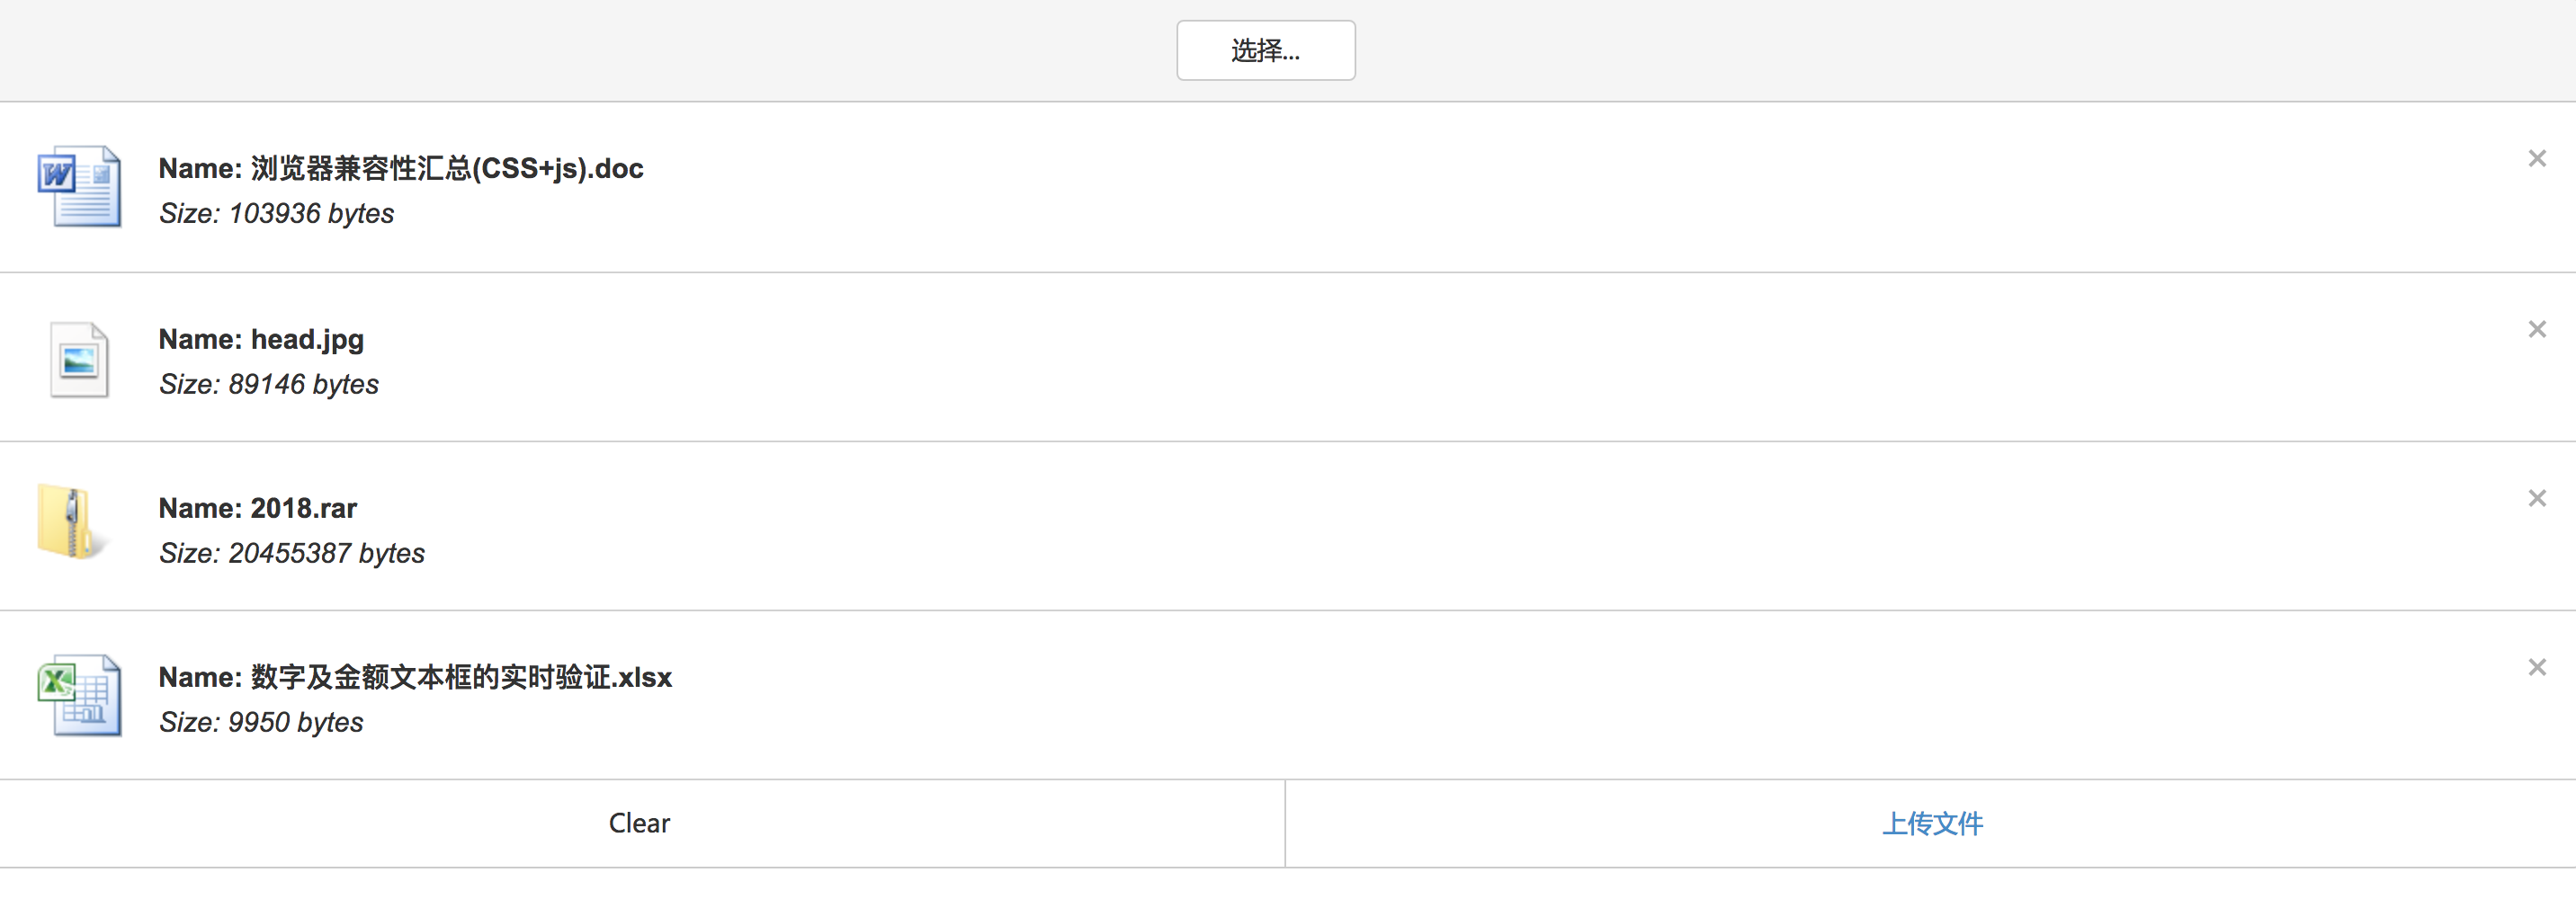
1.带模板的upload,可以根据上传文件类型的不同,来切换对应的icon图标
CSS代码:
.file-icon {
            display: inline-block;
            float: left;
            width: 48px;
            height: 48px;
            margin-left: 10px;
            margin-top: 13.5px;
        }

        .img-file { background-image: url('../../imgs/upload/jpg.png') }
        .doc-file { background-image: url("../../imgs/upload/doc.png") }
        .pdf-file { background-image: url("../../imgs/upload/pdf.png") }
        .xls-file { background-image: url("../../imgs/upload/xls.png") }
        .zip-file { background-image: url("../../imgs/upload/zip.png") }
        .default-file { background-image: url("../../imgs/upload/default.png") }

        #example .file-heading {
            font-family: Arial;
            font-size: 1.1em;
            display: inline-block;
            float: left;
            width: 60%;
            margin: 0 0 0 20px;
            height: 25px;
            -ms-text-overflow: ellipsis;
            -o-text-overflow: ellipsis;
            text-overflow: ellipsis;
            overflow:hidden;
            white-space:nowrap;
        }

        #example .file-name-heading {
            font-weight: bold;
            margin-top: 20px;
        }

            #example .file-size-heading {
            font-weight: normal;
            font-style: italic;
        }

        li.k-file div.file-wrapper {
            position: relative;
            height: 75px;
        }
        .k-upload div.k-dropzone{
            text-align: center;
        }
HTML代码:
   <div id="example">
        <div class="demo-section k-content">
            <input type="file" name="files" id="files" />
        </div>
    </div>
    <!-- 模板 -->
    <script id="fileTemplate" type="text/x-kendo-template">
        <span class='k-progress'></span>
        <div class='file-wrapper'>
            <span class='file-icon #=addExtensionClass(files[0].extension)#'></span>
            <h4 class='file-heading file-name-heading'>Name: #=name#</h4>
            <h4 class='file-heading file-size-heading'>Size: #=size# bytes</h4>
            <strong class="k-upload-status">
                <button type='button' class='k-upload-action'></button>
                <button type='button' class='k-upload-action'></button>
            </strong>
        </div>
    </script>
JavaScript代码:
        $("#files").kendoUpload({
                    multiple: true,
                    async: {
                        saveUrl: "save",
                        removeUrl: "remove",
                        autoUpload: false
                    },
                    select:function(e){
                        console.log("Select :: ",e.files);
                    },
                    template: kendo.template($('#fileTemplate').html())
                });
        function addExtensionClass(extension) {
            switch (extension) {
                case '.jpg':
                case '.img':
                case '.png':
                case '.gif':
                    return "img-file";
                case '.doc':
                case '.docx':
                    return "doc-file";
                case '.xls':
                case '.xlsx':
                    return "xls-file";
                case '.pdf':
                    return "pdf-file";
                case '.zip':
                case '.rar':
                    return "zip-file";
                default:
                    return "default-file";
            }
        }
效果图:
参考地址:https://demos.telerik.com/kendo-ui/upload/index
基本属性:
| directory | 是否允许选择文件夹,默认为false |
| directoryDrop | 是否允许删除文件夹,默认为false,设置后仅允许你删除要上传的文件夹,无法上传文件 |
| dropZone | 初始化,提供拖放文件上传 |
| enable | 是否禁用,默认true,如果要重新设置,使用enable() |
| multiple | 是否能选择多个文件,默认true,如果设为false,则每次只能选择一个文件 |
| showFileList | 是否要禁用文件列表,默认为true,如果要自定义UI,可以设置为false |
| template | 用于呈现文件列表中的文件模板 |
| files | 初始化的时候,在文件列表中呈现的文件,在设置了async时,该选项才可用,显示上传成功 |
| validation | 验证,包含三个参数。allowedExtensions(允许的文件类型)、maxFileSize(最大文件大小,以字节为单位)、minFileSize(最小文件大小) |
| async | 异步上传 |
| localization | 局部设置的(我没有用过) |
async:
| autoUpload | 是否立即上传,可选的值:true、false 默认为true |
| batch | 是否批量上传,可选的值:true、false 默认false |
| chunkSize | 设置文件的大小,只有当batch为false时,才可用 |
| concurrent | 是否批量上传,默认:false 只有当chunkSize设置时,该属性才能用 |
| autoRetryAfter | 在多少毫秒之后,重复上传失败的文件 |
| maxAutoRetries | 上传失败时,最大的尝试次数,设置了autoRetryAfter,才可用 |
| removeField | 提交表单域的名称removeUrl |
| removeUrl、saveUrl | 移除文件的URL地址 |
| removeVerb | 移除文件是,HTTP请求的方式(我理解的),默认:post |
| saveField | 提交表单域的名称saveUrl,默认是输入名称 |
| useArrayBuffer | 默认:false 默认情况下,文件作为文件数据上传。如果设置为true,使用fileReader将文件作为文件缓冲区读取,此缓冲区在请求正文中发送。fileReader消耗了浏览器的内存。如果用户上传大文件,可能会消耗客户端的所有可用内存,甚至可能上传失败。 |
| withCredentials | 默认为:true 控制是否为跨站点请求发送凭证 |
async: {
     saveUrl: "save",
     removeUrl: "remove",
     autoUpload: true
}

 浙公网安备 33010602011771号