
.Net Core3.1 MVC + EF Core+ AutoFac+LayUI+Sqlserver的框架搭建--------Quarz任务调度
说的QuarZ任务项目中经常会用到,比如执行一些定时程序和数据同步,QuarZ是一个很好的工具。我已经用QuarZ任务调度的时候都是做的控制台应用程序,然后发布成.exe,作为服务运行在服务器中,这次我打算一起集成的项目架构中,通过平台操作来启用和关闭某一个任务调度。
QuarZ通用类:
using Quartz;
using Quartz.Impl;
using System;
using System.Collections.Generic;
using System.Text;

namespace Core.Net.Common.Core.Net.Core.QuartZ.Helper
{
  public  class QuarzHelpers
    {
        public static async void StartAsync<T>(TimeSpan ts, string jobName, string triggerName, string groupName) where T : IJob
        {
            DateTimeOffset runTime = DateBuilder.EvenSecondDate(DateTime.Now);
            IJobDetail job = JobBuilder.Create<T>().WithIdentity(jobName, groupName).Build();
            ITrigger trigger = TriggerBuilder.Create().WithIdentity(triggerName, groupName).StartAt(runTime).WithSimpleSchedule(x => x.WithInterval(ts).RepeatForever()).Build();

            ISchedulerFactory factory = new StdSchedulerFactory();
            IScheduler scheduler = await factory.GetScheduler();
            await scheduler.ScheduleJob(job, trigger);
            await scheduler.Start();
        }

        public static async void StartAsync<T>(string cronExp, string jobName, string triggerName, string groupName) where T : IJob
        {
            DateTimeOffset runTime = DateBuilder.EvenSecondDate(DateTime.Now);
            IJobDetail job = JobBuilder.Create<T>().WithIdentity(jobName, groupName).Build();
            ITrigger trigger = TriggerBuilder.Create().WithIdentity(triggerName, groupName).WithCronSchedule(cronExp).StartAt(runTime).Build();
            ISchedulerFactory factory = new StdSchedulerFactory();

            IScheduler scheduler = await factory.GetScheduler();
            await scheduler.ScheduleJob(job, trigger);
            await scheduler.Start();
        }
        public static async void StopTask(string jobName, string groupName)
        {
            try
            {
                //首先创建一个作业调度池
                ISchedulerFactory schedf = new StdSchedulerFactory();
                IScheduler sched = await schedf.GetScheduler();
                await sched.PauseJob(new JobKey(jobName, groupName));
            }
            catch (Exception ex)
            {

            }

        }
        public static async void ReStartTask(string jobName, string groupName)
        {

            try
            {
                //首先创建一个作业调度池
                ISchedulerFactory schedf = new StdSchedulerFactory();
                IScheduler sched = await schedf.GetScheduler();

                await sched.ResumeJob(new JobKey(jobName, groupName));


            }
            catch (Exception ex)
            {

            }

        }

    }
}
web中我们要通过平台来添加,启用,关闭任务调度,还有我们要保证,平台挂掉重启后,已经在启动的任务在程序运行的时候跟着重启。
这里我建了两张表用来配置任务调度的。
任务配置表,
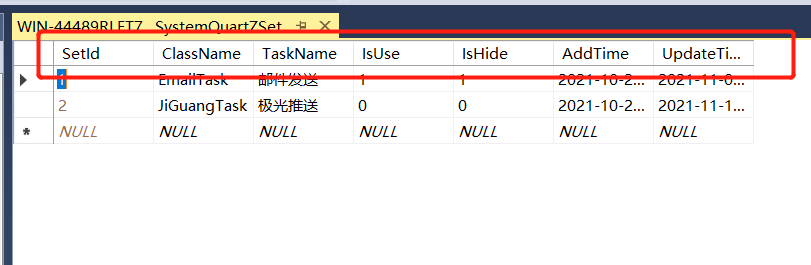
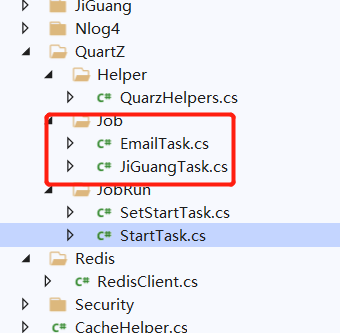
注意上面的TaskName字段,这个是程序中执行任务的类名,也就是我们需要一个任务,就建一个任务类:
任务表:
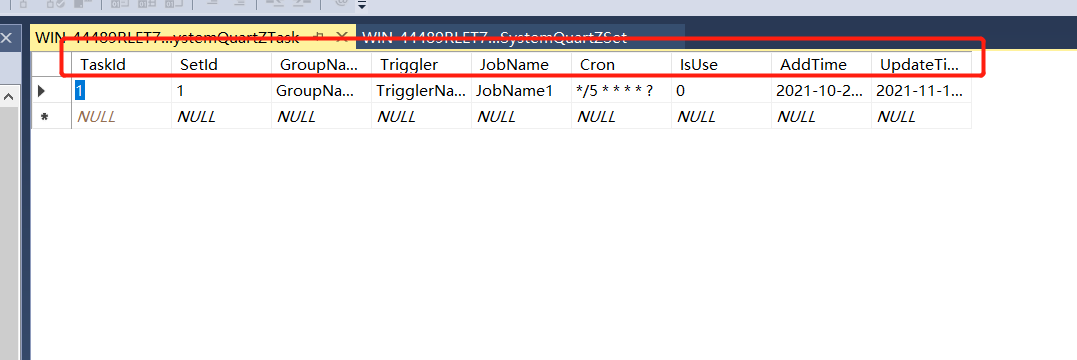
用户可以通过任务列表,添加和控制任务的启用和关闭。
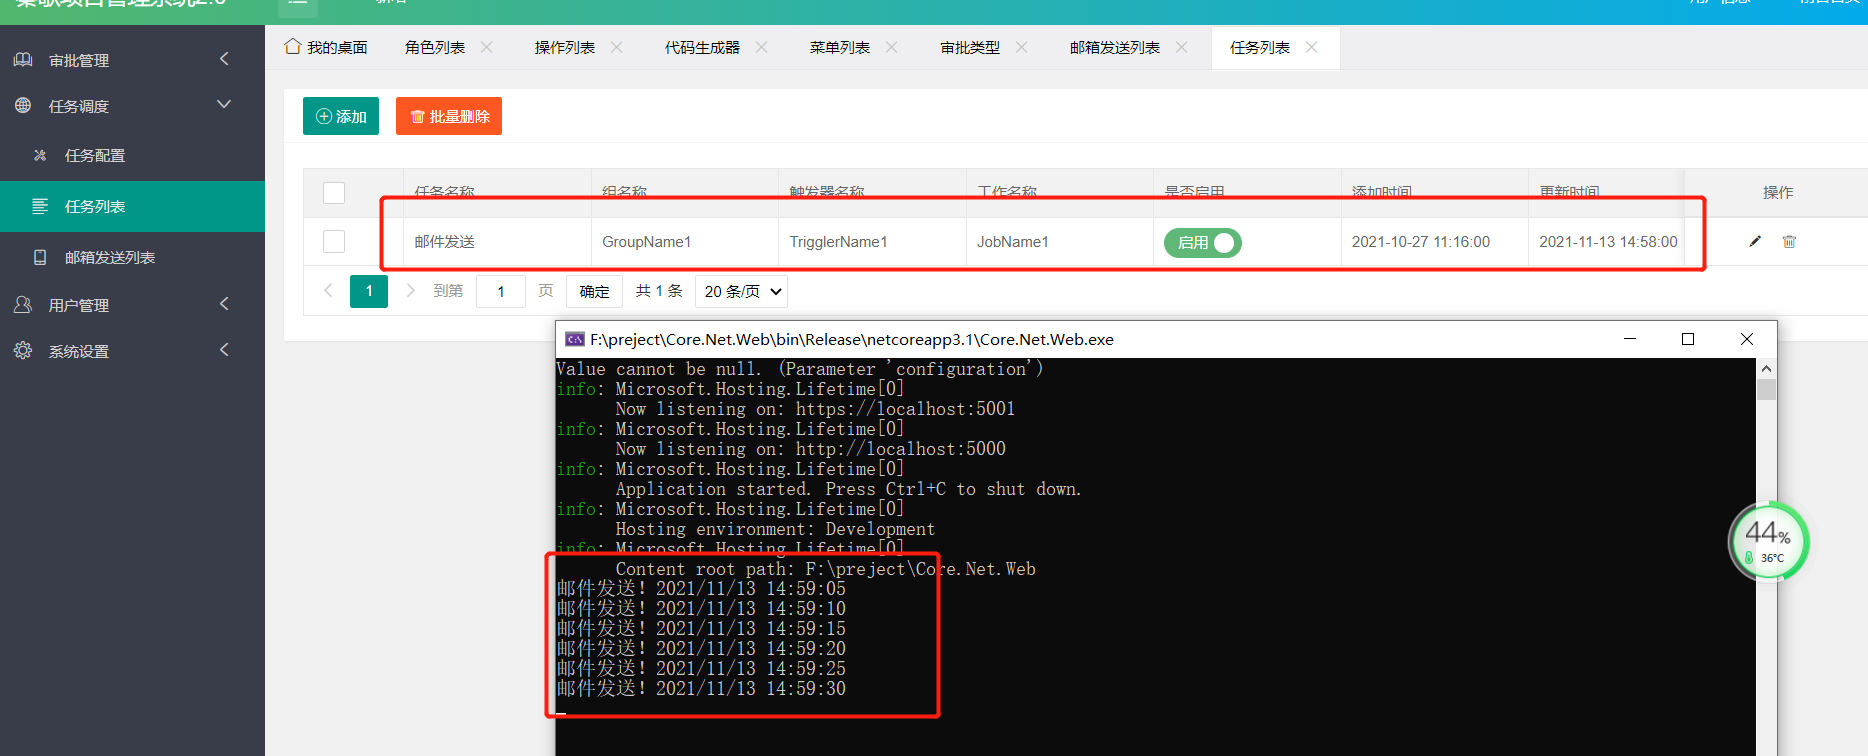
我们以邮件发送为例做一下测试:
首先邮件发送类,也就是任务执行的类:
using Quartz;
using System;
using System.Collections.Generic;
using System.Text;
using System.Threading.Tasks;

namespace Core.Net.Common.Core.Net.Core.QuartZ.Job
{
    public class EmailTask : IJob
    {
        public Task Execute(IJobExecutionContext context)
        {
            Console.WriteLine("邮件发送!"+DateTime.Now);
            return Task.CompletedTask;
        }
    }
}
然后就是启动任务的任务中心类:
using Core.Net.Common.Core.Net.Core.QuartZ.Helper;
using Core.Net.Common.Core.Net.Core.QuartZ.Job;
using System;
using System.Collections.Generic;
using System.Text;
using System.Threading.Tasks;

namespace Core.Net.Common.Core.Net.Core.QuartZ.JobRun
{
    public class SetStartTask
    {
        public static void SetStart(string className,string GroupName,string TriggleName,string JobName,string cron,int type)
        {

            switch (className)
            {
                case "EmailTask":  //这个就是任务执行类的类名,本来想通过反射,用字符串类名直接转换成类型,结果扎心了,用GetType转换后依然报错。
                        QuarzHelpers.StartAsync<EmailTask>(cron, JobName, TriggleName, GroupName);
                    break;
                case "JiGuangTask":
                        QuarzHelpers.StartAsync<JiGuangTask>(cron, JobName, TriggleName, GroupName);
                    break;
                default:
                    break;

            }

        }
    }
}
初始化已经启动的任务调度类:
using Core.Net.Common.Core.Net.Data;
using System.Collections.Generic;
using System.Data;
using System.Threading.Tasks;
using static Core.Net.Common.Core.Net.Core.JsonHelper;

namespace Core.Net.Common.Core.Net.Core.QuartZ.JobRun
{
    /// <summary>
    /// 当服务器在重启的时候,已经启动的任务,必须要初始化
    /// </summary>
    public  class StartTask
    {
        /// <summary>
        /// 初始化任务方法
        /// </summary>
        public void Start()
        {
            //获取已经启动的任务调度
            DataTable tasklist = SqlHelper.Query("SELECT  a.GroupName,a.Triggler,a.JobName,a.Cron ,b.ClassName  FROM CoreNetSystemQuartZTask a,CoreNetSystemQuartZSet b where a.SetId=b.SetId and a.IsUse=1");
            List<TaskModel> task = ModelConvertHelper<TaskModel>.ConvertToModel(tasklist);
            foreach (var item in task)
            {
                Task.Run(() =>
                {
                    SetStartTask.SetStart(item.ClassName, item.GroupName, item.Triggler, item.JobName, item.Cron, 1);
                });
            }
        }
    }
    public class TaskModel
    {
        public string GroupName { get; set; }
        public string Triggler { get; set; }
        public string JobName { get; set; }
        public string Cron { get; set; }
        public string ClassName { get; set; }
    }
}
然后就是在startup.cs类中注册
using Autofac;
using Core.Net.Common.Core.Net.Core.Cookies;
using Core.Net.Common.Core.Net.Core.Nlog4;
using Core.Net.Common.Core.Net.Core.QuartZ.JobRun;
using Core.Net.Common.Core.Net.Core.Redis;
using Core.Net.Common.Core.Net.Data;
using Core.Net.Common.Core.Net.Data.DBSql;
using Core.Net.Web.Common.VerificationCode;
using Microsoft.AspNetCore.Authentication.Cookies;
using Microsoft.AspNetCore.Builder;
using Microsoft.AspNetCore.Hosting;
using Microsoft.AspNetCore.Http;
using Microsoft.AspNetCore.Mvc;
using Microsoft.AspNetCore.Mvc.Controllers;
using Microsoft.EntityFrameworkCore;
using Microsoft.Extensions.Configuration;
using Microsoft.Extensions.DependencyInjection;
using Microsoft.Extensions.DependencyInjection.Extensions;
using Microsoft.Extensions.FileProviders;
using Microsoft.Extensions.Hosting;
using Microsoft.Extensions.Logging;
using System;
using System.IO;
using System.Linq;

namespace Core.Net.Web
{
    public class Startup
    {
        public Startup(IConfiguration configuration)
        {
            Configuration = configuration;
        }

        public IConfiguration Configuration { get; }

        // This method gets called by the runtime. Use this method to add services to the container.
        public void ConfigureServices(IServiceCollection services)
        {
            services.AddControllersWithViews();

            //1、EF设置字符串初始化模式

           //这个数据库连接的注册可能我前几篇的不一样,因为我后面把这个改成了数据库读写分离的模式了

            ReadDBContext.ReadDbConnStr= Configuration.GetConnectionString("ReadConnStr");
            WriteDBContext.WriteDbConnStr = Configuration.GetConnectionString("WriteConnStr");
            services.AddDbContext<ReadDBContext>(option => option.UseSqlServer(Configuration.GetConnectionString("ReadConnStr")))
                    .AddDbContext<WriteDBContext>(option => option.UseSqlServer(Configuration.GetConnectionString("WriteConnStr")));

            //服务配置中加入AutoFac控制器替换规则。
            services.Replace(ServiceDescriptor.Transient<IControllerActivator, ServiceBasedControllerActivator>());
            ////2、使用HttpContext需要注入
            services.AddDistributedMemoryCache();//启用session之前必须先添加内存
            // //services.AddSession();
            services.AddSession(options =>
            {
                options.Cookie.Name = ".AdventureWorks.Session";
                options.IdleTimeout = TimeSpan.FromSeconds(2000);//设置session的过期时间
                options.Cookie.HttpOnly = true;//设置在浏览器不能通过js获得该cookie的值
            });
            //配置authorrize
            services.AddAuthentication(b =>
            {
                b.DefaultAuthenticateScheme = CookieAuthenticationDefaults.AuthenticationScheme;
                b.DefaultChallengeScheme = CookieAuthenticationDefaults.AuthenticationScheme;
                b.DefaultSignInScheme = CookieAuthenticationDefaults.AuthenticationScheme;
            }).AddCookie(b => {
                //登陆地址
                b.LoginPath = "/login";
                //sid
                b.Cookie.Name = "My_SessionId";
                // b.Cookie.Domain = "shenniu.core.com";
                b.Cookie.Path = "/";
                b.Cookie.HttpOnly = true;
                //b.Cookie.Expiration = new TimeSpan(0, 0, 30);

                b.ExpireTimeSpan = new TimeSpan(2, 0, 0);
                        });
            services.AddSingleton<IHttpContextAccessor, HttpContextAccessor>();
            RedisClient.InitConnect(Configuration); //初始化redis
            services.AddSingleton<IQRCode,RaffQRCode>();//验证码注入
            LogHelper.Configure(); //Nlog4日志
            services.AddSingleton<StartTask>();//注册初始化任务调度类用来初始化任务
            services.AddMvc().AddRazorRuntimeCompilation();//注入修改页面时候,保存可以直接刷新

        }
        /// <summary>
        ///     Autofac规则配置
        /// </summary>
        /// <param name="builder"></param>
        public void ConfigureContainer(ContainerBuilder builder)
        {
            //获取所有控制器类型并使用属性注入
            var controllerBaseType = typeof(ControllerBase);
            builder.RegisterAssemblyTypes(typeof(Program).Assembly)
                .Where(t => controllerBaseType.IsAssignableFrom(t) && t != controllerBaseType)
                .PropertiesAutowired();

            builder.RegisterModule(new AutofacModuleRegister());

        }

        // This method gets called by the runtime. Use this method to configure the HTTP request pipeline.
        [Obsolete]
        public void Configure(IApplicationBuilder app, IWebHostEnvironment env, IHttpContextAccessor accessor, Microsoft.AspNetCore.Hosting.IApplicationLifetime lifetime, ILoggerFactory loggerFactory)
        {
            //注入当前HttpContext
            HttpContextHelper.Accessor = accessor;

            var quartz = app.ApplicationServices.GetRequiredService<StartTask>();//通过瞬时方式获取任务调度
            lifetime.ApplicationStarted.Register( quartz.Start);//执行初始化任务调度
            if (env.IsDevelopment())
            {
                app.UseDeveloperExceptionPage();
            }
            else
            {
                app.UseExceptionHandler("/Home/Error");
                // The default HSTS value is 30 days. You may want to change this for production scenarios, see https://aka.ms/aspnetcore-hsts.
                app.UseHsts();
            }
            app.UseSession();

            app.UseHttpsRedirection();
            app.UseStaticFiles();
            app.UseStaticFiles(new StaticFileOptions()
            {
                FileProvider = new PhysicalFileProvider(Path.Combine(Directory.GetCurrentDirectory(), @"UpFile")),
                RequestPath = new PathString("/UpFile"),
                ServeUnknownFileTypes = true
                //允许下载APK,用下面的方式必须把所有JSON都放进去
                //ContentTypeProvider = new FileExtensionContentTypeProvider(new Dictionary<string, string>{
                // { ".apk","application/vnd.android.package-archive"},{ ".nupkg","application/zip"}
                //})
            });
            app.UseCookiePolicy();
            app.UseRouting();
            app.UseAuthentication();
            app.UseAuthorization();
            app.UseEndpoints(endpoints =>
            {
                endpoints.MapControllerRoute(
                    name: "MyArea",
                    pattern: "{area:exists}/{controller=Home}/{action=Index}/{id?}");

                endpoints.MapControllerRoute(
                    name: "default",
                    pattern: "{area=SystemManager}/{controller=Login}/{action=Index}/{id?}");
            });

        }
    }

}
效果:
.Net Core

 浙公网安备 33010602011771号