
第十三周周总结
2020.05.16
本周完成了视频中截取帧图篇,并识别图片中车牌号的功能。
识别基本思路:先是车牌提取,识别图中车牌位置并保存车牌图片(流程:高斯去噪、灰度处理、sobel边缘检测、自适应阈值处理、闭运算、中值滤波去除噪点、轮廓绘制、遍历所有轮廓,去除车牌(车牌 宽>2倍高、为了识别准确,只识别靠近摄像头的车牌号,远处车牌号太不清楚,选择y>500,x<1250、轮廓宽<100 并且>50))
# 导入所需模块
import cv2
from matplotlib import pyplot as plt


def cp_tiqu(name):
    # 加载图片
    rawImage = cv2.imread(name)
    # plt_show0('yuantu',rawImage)

    # 高斯去噪
    image = cv2.GaussianBlur(rawImage, (3, 3), 0)
    # 预览效果
    # plt_show0('GaussianBlur',image)
    # 灰度处理
    gray_image = cv2.cvtColor(image, cv2.COLOR_RGB2GRAY)
    plt_show('COLOR_RGB2GRAY', gray_image)

    # sobel算子边缘检测(做了一个y方向的检测)
    Sobel_x = cv2.Sobel(gray_image, cv2.CV_16S, 1, 0)
    # Sobel_y = cv2.Sobel(image, cv2.CV_16S, 0, 1)
    absX = cv2.convertScaleAbs(Sobel_x)  # 转回uint8
    # absY = cv2.convertScaleAbs(Sobel_y)
    # dst = cv2.addWeighted(absX, 0.5, absY, 0.5, 0)
    image = absX
    plt_show('Sobel bianyuan', image)

    # 自适应阈值处理
    ret, image = cv2.threshold(image, 0, 255, cv2.THRESH_OTSU)
    plt_show('threshold yuzhi', image)

    # 闭运算,是白色部分练成整体
    kernelX = cv2.getStructuringElement(cv2.MORPH_RECT, (3, 3))
    print(kernelX)
    image = cv2.morphologyEx(image, cv2.MORPH_CLOSE, kernelX, iterations=2)
    plt_show('biyunsuan', image)
    # 去除一些小的白点
    kernelX = cv2.getStructuringElement(cv2.MORPH_RECT, (20, 1))
    kernelY = cv2.getStructuringElement(cv2.MORPH_RECT, (1, 19))
    '''


    # 膨胀,腐蚀
    image = cv2.dilate(image, kernelX)
    image = cv2.erode(image, kernelX)
    # 腐蚀,膨胀
    image = cv2.erode(image, kernelY)
    image = cv2.dilate(image, kernelY)

    plt_show('pengzhangfushi',image)
    '''
    # 中值滤波去除噪点
    image = cv2.medianBlur(image, 15)
    plt_show('chu zao', image)

    # 轮廓检测
    # cv2.RETR_EXTERNAL表示只检测外轮廓
    # cv2.CHAIN_APPROX_SIMPLE压缩水平方向,垂直方向,对角线方向的元素,只保留该方向的终点坐标,例如一个矩形轮廓只需4个点来保存轮廓信息
    contours, hierarchy = cv2.findContours(image, cv2.RETR_EXTERNAL, cv2.CHAIN_APPROX_SIMPLE)
    # 绘制轮廓
    image1 = rawImage.copy()
    cv2.drawContours(image1, contours, -1, (0, 255, 0), 5)
    plt_show0('lunkuo', image1)

    # 筛选出车牌位置的轮廓
    # 这里我只做了一个车牌的长宽比在3:1到4:1之间这样一个判断
    num = 1
    for item in contours:

        # cv2.boundingRect用一个最小的矩形,把找到的形状包起来
        rect = cv2.boundingRect(item)
        x = rect[0]
        y = rect[1]
        weight = rect[2]
        height = rect[3]
        # 440mm×140mm
        # if (weight > (height * 3)) and (weight < (height * 4)) and y > 500:
        if (weight > (height * 2)) and y > 500 and x < 1250 and weight < 100 and weight > 50:
            image = rawImage[y:y + height, x:x + weight]
            #         cv_show('image',image)
            # 图像保存

            image_name = 'car' + str(num) + '.jpg'
            print(image_name)
            plt_show0('save', image)
            cv2.imwrite(image_name, image)
            num += 1

if __name__ == '__main__':

    cp_tiqu("120.jpg")
原图:
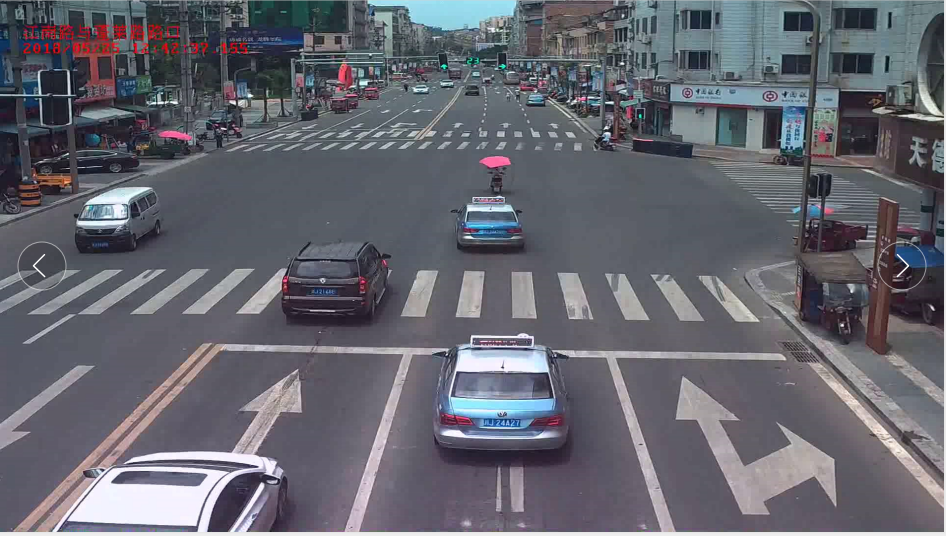
获取车牌图片信息:


第二步:将车牌图篇分割为一个个字符图片
思路:高斯去噪、灰度处理、自适应阈值、计算二值、轮廓绘制、筛选各个字符位置的轮廓
# 导入所需模块
import cv2
from matplotlib import pyplot as plt

def zifu_tiqu(name):
    # 加载图片
    rawImage = cv2.imread(name)
    plt_show0('yuantu', rawImage)

    # 高斯去噪
    image = cv2.GaussianBlur(rawImage, (3, 3), 0)
    # 预览效果
    plt_show0('GaussianBlur', image)

    # 灰度处理
    gray_image = cv2.cvtColor(image, cv2.COLOR_RGB2GRAY)
    plt_show('gray image', gray_image)

    # 自适应阈值处理
    ret, image = cv2.threshold(gray_image, 0, 255, cv2.THRESH_OTSU)
    plt_show('yuzhi', image)

    # 计算二值图像黑白点的个数,处理绿牌照问题,让车牌号码始终为白色
    area_white = 0
    area_black = 0
    height, width = image.shape
    print(image.shape)
    for i in range(height):
        for j in range(width):
            if image[i, j] == 255:
                area_white += 1
            else:
                area_black += 1
    #if area_white > area_black:
       # ret, image = cv2.threshold(gray_image, 0, 255, cv2.THRESH_OTSU | cv2.THRESH_BINARY_INV)
        #plt_show('erzhi', image)

    kernel = cv2.getStructuringElement(cv2.MORPH_RECT, (1, 1))
   contours, hierarchy = cv2.findContours(image, cv2.RETR_EXTERNAL, cv2.CHAIN_APPROX_SIMPLE)
    # 绘制轮廓
    image1 = rawImage.copy()
    cv2.drawContours(image1, contours, -1, (0, 255, 0), 1)
    plt_show0('lun kuo', image1)

    # 筛选出各个字符的位置的轮廓
    words = []
    for item in contours:
        # cv2.boundingRect用一个最小的矩形,把找到的形状包起来
        word = []
        rect = cv2.boundingRect(item)
        x = rect[0]
        y = rect[1]
        weight = rect[2]
        height = rect[3]
        word.append(x)
        word.append(y)
        word.append(weight)
        word.append(height)
        words.append(word)

    words = sorted(words, key=lambda s: s[0], reverse=False)

    print(words)
    i = 0
    for word in words:
        if (word[3] > (word[2])) and (word[3] < (word[2] * 5)):
            i = i + 1
            image = rawImage[word[1]:word[1] + word[3], word[0]:word[0] + word[2]]
            plt_show0('single', image)
            print('test2_' + str(i) + '.jpg')
            cv2.imwrite('chepai/test2_' + str(i) + '.jpg', image

 浙公网安备 33010602011771号