深度学习中的数据增强技术(二)
上篇文章介绍了深度学习中数据增强技术的应用,及部分TensorFlow实现代码。废话不说了,这篇接着介绍:
TensorFlow实现图片数据增强
注:类似的方法放在了代码中注释的部分,实际调试时可以分别打开运行
③图像色彩调整
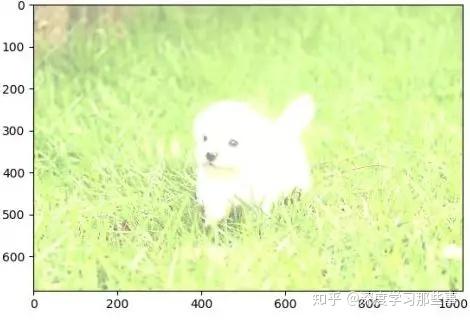
import  matplotlib.pyplot as plt
import tensorflow as tf

# 读取图片
image_data = tf.gfile.FastGFile("data/dog3.jpg", 'br').read()
# 4中调整图片大小的方法,实际应用中可以根据需求组合调整
with tf.Session() as sess:
   img_data = tf.image.decode_jpeg(image_data)
   plt.imshow(img_data.eval())
   plt.show()

   # 将图片数据转换成实数类型
   img_data = tf.image.convert_image_dtype(img_data, dtype=tf.float32)
   # 亮度
   # adjusted = tf.image.adjust_brightness(img_data,0.5)
   # adjusted = tf.clip_by_value(adjusted, 0.0, 1.0)

   # adjusted = tf.image.adjust_brightness(img_data, -0.5)
   # adjusted = tf.clip_by_value(adjusted, 0.0, 1.0)

   # adjusted = tf.image.random_brightness(img_data,0.5)

   # 对比度
   # adjusted = tf.image.adjust_contrast(img_data,0.5)
   # adjusted = tf.image.adjust_contrast(img_data, 5)
   # adjusted = tf.image.random_contrast(img_data,0.1,5)
   # 色相
   # adjusted = tf.image.adjust_hue(img_data,0.3)
   # adjusted = tf.image.adjust_hue(img_data, 0.1)
   # adjusted = tf.image.adjust_hue(img_data, 0.9)
   # adjusted = tf.image.adjust_hue(img_data, 0.6)
   # adjusted = tf.image.random_hue(img_data,0.5)
   # 饱和度
   adjusted = tf.image.adjust_saturation(img_data,-5)
   # adjusted = tf.image.adjust_saturation(img_data, 5)
   # adjusted = tf.image.random_saturation(img_data,2,5)
   # 图像标准化 均值为0 方差变为1
   # adjusted = tf.image.per_image_standardization(img_data)
   plt.imshow(adjusted.eval())
   plt.show()
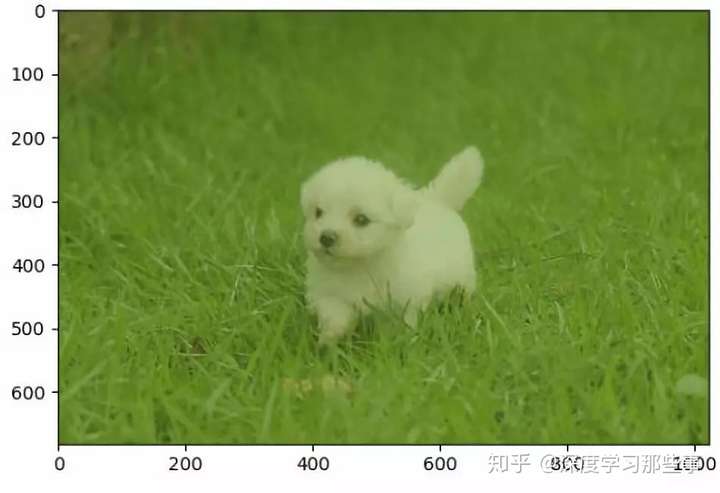
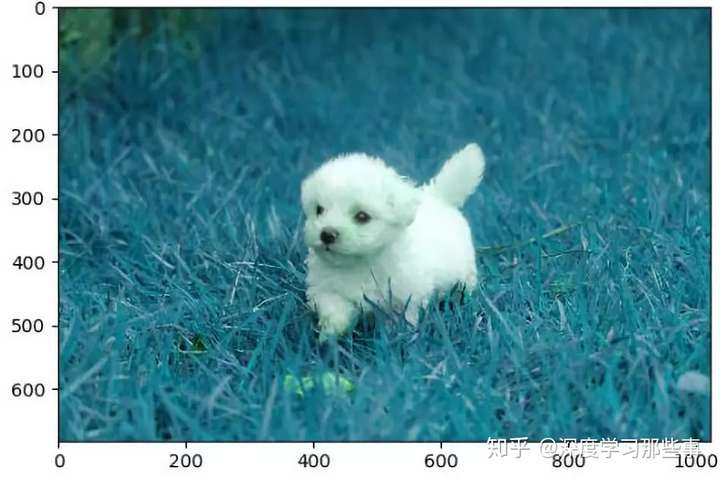
图片效果
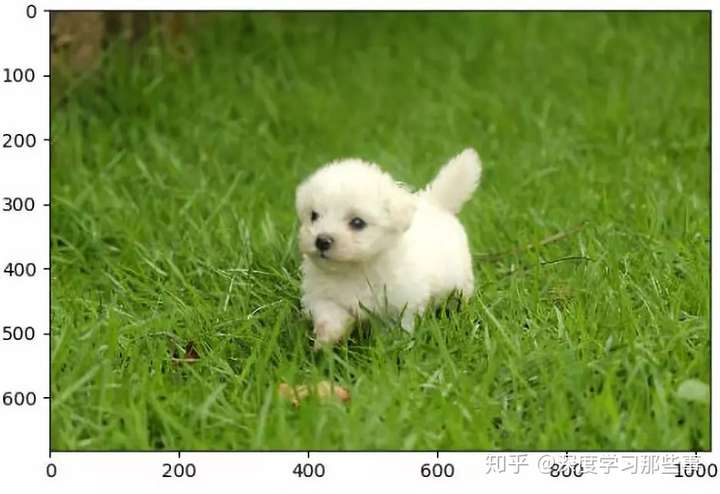
原图:
处理后:

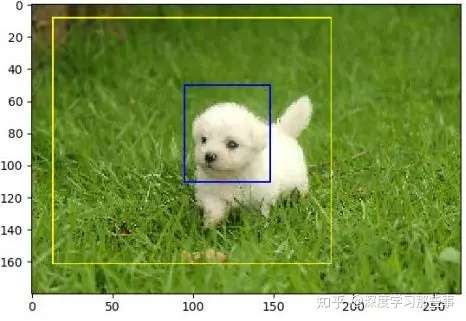
④标注、裁剪
import  matplotlib.pyplot as plt
import tensorflow as tf

# 读取图片
image_data = tf.gfile.FastGFile("data/dog3.jpg", 'br').read()
#
with tf.Session() as sess:
   img_data = tf.image.decode_jpeg(image_data)
   plt.imshow(img_data.eval())
   plt.show()

   # 将图片数据转换成实数类型
   img_data = tf.image.convert_image_dtype(img_data, dtype=tf.float32)
   # 将图片缩小一些,这样可视化能让标注框更加清楚
   img_data = tf.image.resize_images(img_data,[180,267],method=1)
   batched = tf.expand_dims(tf.image.convert_image_dtype(img_data,tf.float32),0)
   boxes = tf.constant([[[0.05,0.05,0.9,0.7],[0.28,0.36,0.62,0.56]]])
   result = tf.image.draw_bounding_boxes(batched,boxes=boxes)
   plt.imshow(result[0].eval())
   plt.show()
   # print(result)
   # 随机截取图片
   begin,size,bbox_for_draw =tf.image.sample_distorted_bounding_box(tf.shape(img_data),bounding_boxes=boxes,min_object_covered=0.4)
   batched = tf.expand_dims(tf.image.convert_image_dtype(img_data,tf.float32),0)
   image_with_box = tf.image.draw_bounding_boxes(batched,bbox_for_draw)
   distored_image = tf.slice(img_data,begin,size=size)
   plt.imshow(distored_image.eval())
   plt.show()
图片效果

关注公众号“从机器学习到深度学习那些事”获取更多最新资料
代码整合总结
import tensorflow as tf
import numpy as np
import matplotlib.pyplot as plt

'''
给定一张图片,随机调整图像的色彩。因为调整亮度、对比度、饱和度和色相的顺序会影响最后得到的结果,所以可以定义多种不同的顺序。
具体使用哪一种顺序可以在训练数据预处理时随机的选择一种。这样可以进一步降低无关因素对模型的影响
'''
def distort_color(image, color_ordering=0):
   if color_ordering == 0:
       image = tf.image.random_brightness(image, max_delta=32. / 255)
       image = tf.image.random_saturation(image, lower=0.5, upper=1.5)
       image = tf.image.random_hue(image, max_delta=0.2)
       image = tf.image.random_contrast(image, lower=0.5, upper=1.5)
   elif color_ordering == 1:
       image = tf.image.random_saturation(image, lower=0.5, upper=1.5)
       image = tf.image.random_brightness(image, max_delta=32. / 255)
       image = tf.image.random_contrast(image, lower=0.5, upper=1.5)
       image = tf.image.random_hue(image, max_delta=0.2)
   elif color_ordering == 2:
       image = tf.image.random_saturation(image, lower=0.5, upper=1.5)
       image = tf.image.random_contrast(image, lower=0.5, upper=1.5)
       image = tf.image.random_hue(image, max_delta=0.2)
       image = tf.image.random_brightness(image, max_delta=32. / 255)
       # 还可以添加其他的排列
   else:
       image = tf.image.random_contrast(image, lower=0.5, upper=1.5)
       image = tf.image.random_brightness(image, max_delta=32. / 255)
       image = tf.image.random_hue(image, max_delta=0.2)
       image = tf.image.random_saturation(image, lower=0.5, upper=1.5)
   return tf.clip_by_value(image, 0.0, 1.0)


def preprocess_for_train(image, height, width, bbox):
   # 如果没有提供标准框,则认为整个图像就是需要关注的部分
   if bbox is None:
       bbox = tf.constant([0.0, 0.0, 1.0, 1.0], dtype=tf.float32, shape=[1, 1, 4])
   # 转换图像张量的类型:
   if image.dtype != tf.float32:
       image = tf.image.convert_image_dtype(image, dtype=tf.float32)
   # 随机截取图像,减少需要关注的物体大小对图像识别算法的影响
   # 为图像生成一个随机distorted的边框,Generate a single randomly distorted bounding box for an image
   bbox_begin, bbox_size, _ = tf.image.sample_distorted_bounding_box(tf.shape(image), bounding_boxes=bbox,min_object_covered=0.4)
   distorted_image = tf.slice(image, bbox_begin, bbox_size)

   # 将随机截取的图像调整为神经网络输入层的大小。大小调整的算法是随机选择的。
   distorted_image = tf.image.resize_images(distorted_image, [height, width], method=np.random.randint(4))
   # 随机左右翻转图像
   distorted_image = tf.image.random_flip_left_right(distorted_image)
   # 使用一种随机的顺序处理图像的色彩
   distorted_image = distort_color(distorted_image, np.random.randint(2))
   return distorted_image

image_raw_data = tf.gfile.FastGFile("./data/dog1.jpg", 'br').read()

with tf.Session() as sess:
   image_data = tf.image.decode_jpeg(image_raw_data)
   bboxes = tf.constant([[[0.05, 0.05, 0.9, 0.7], [0.35, 0.47, 0.5, 0.56]]])

   # 运行6次获得6中不同的图片,展示出来
   for i in range(6):
       result = preprocess_for_train(image_data, 299, 299, bboxes)
       plt.imshow(result.eval())
       plt.show()
参考资料
21个项目玩转深度学习
TensorFlow实战Google深度学习框架

-----------------------------------------^_^学习是成功之母^_^-----------------------------------------

 浙公网安备 33010602011771号