.Net Core with 微服务 - Consul 配置中心
上一次我们介绍了Elastic APM组件。这一次我们继续介绍微服务相关组件配置中心的使用方法。本来打算介绍下携程开源的重型配置中心框架 apollo 但是体系实在是太过于庞大,还是让我爱不起来。因为前面我们已经介绍了使用Consul 做为服务注册发现的组件,那么干脆继续使用 Consul 来作为配置中心吧。Consul 除了服务注册发现功能,还有个 Key/Value 存储的功能,我们把本地的 appsettings.json 文件的内容搬到 Key/Value 上就可以实现配置中心了。
把服务的配置迁移至 Consul#
让我们来改造一下前面系列文章里的 member_center 项目,把配置文件都迁移到 consul 上面去。
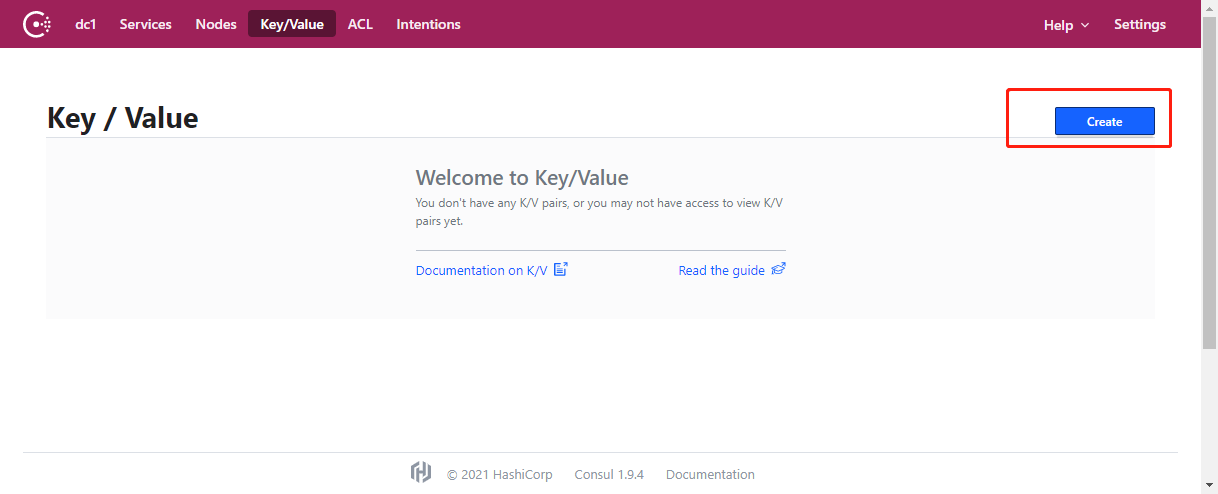
在 consul 控制台点击 “Key/Value” 菜单,点击 “create” 按钮新建一个 Key/Value 对象。
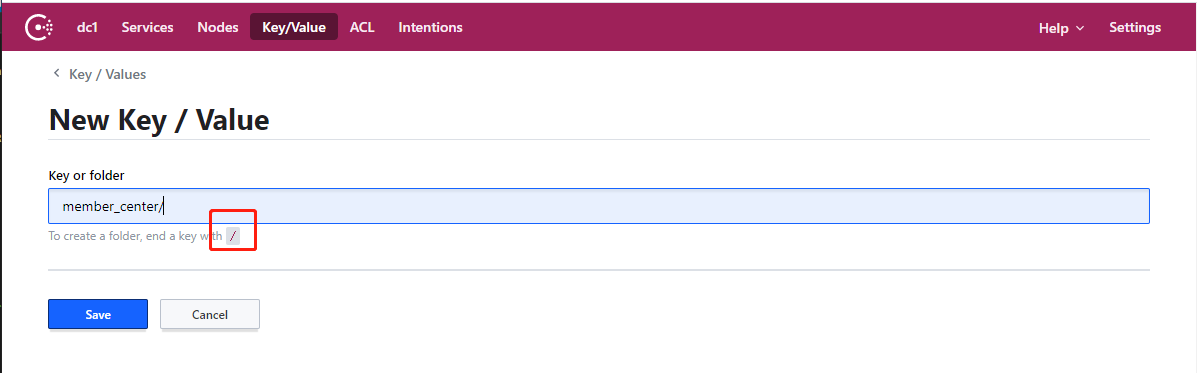
Key/Value 支持按文件夹分类,当我们的 Key 以 / 结尾的时候,consul 会认为这是一个文件夹。
我们在这里输入 “member_center/” 在创建文件夹。

在创建的文件夹目录下继续点击 “create” 按钮。
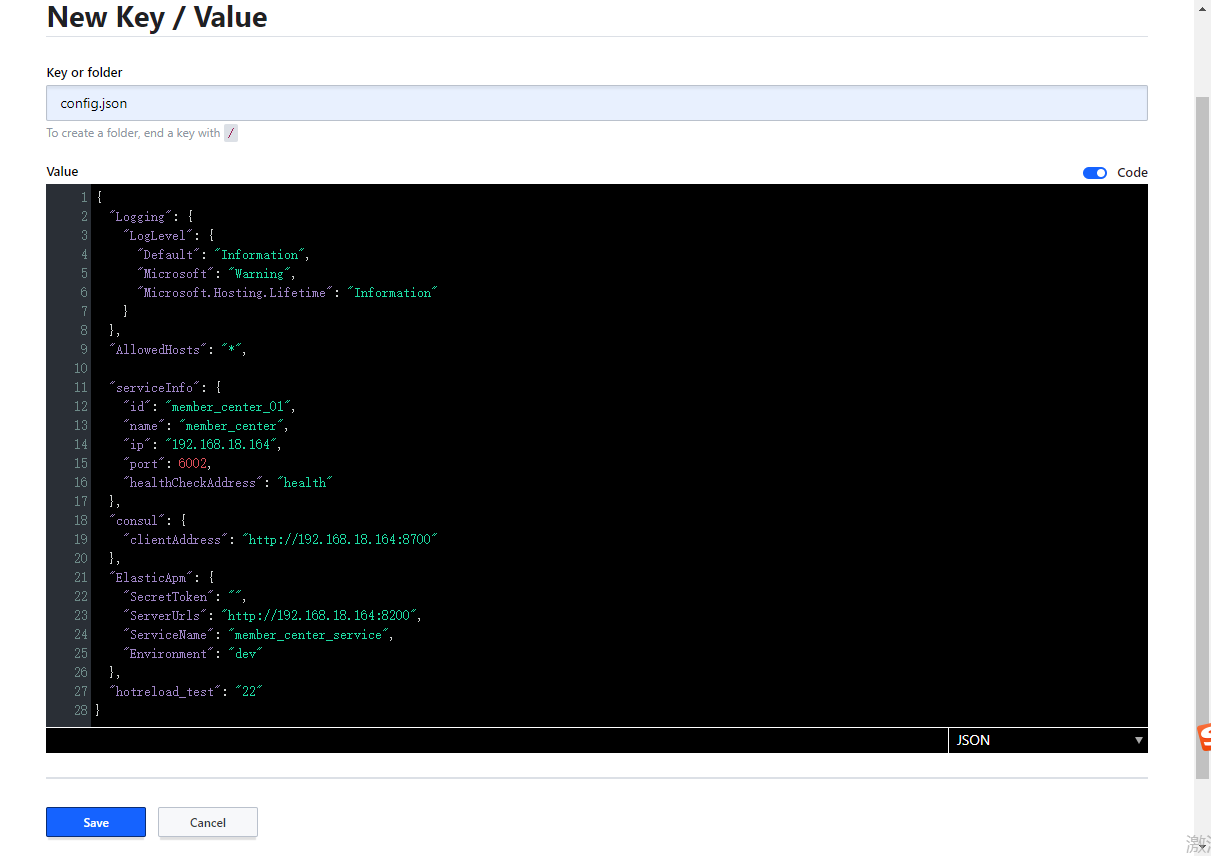
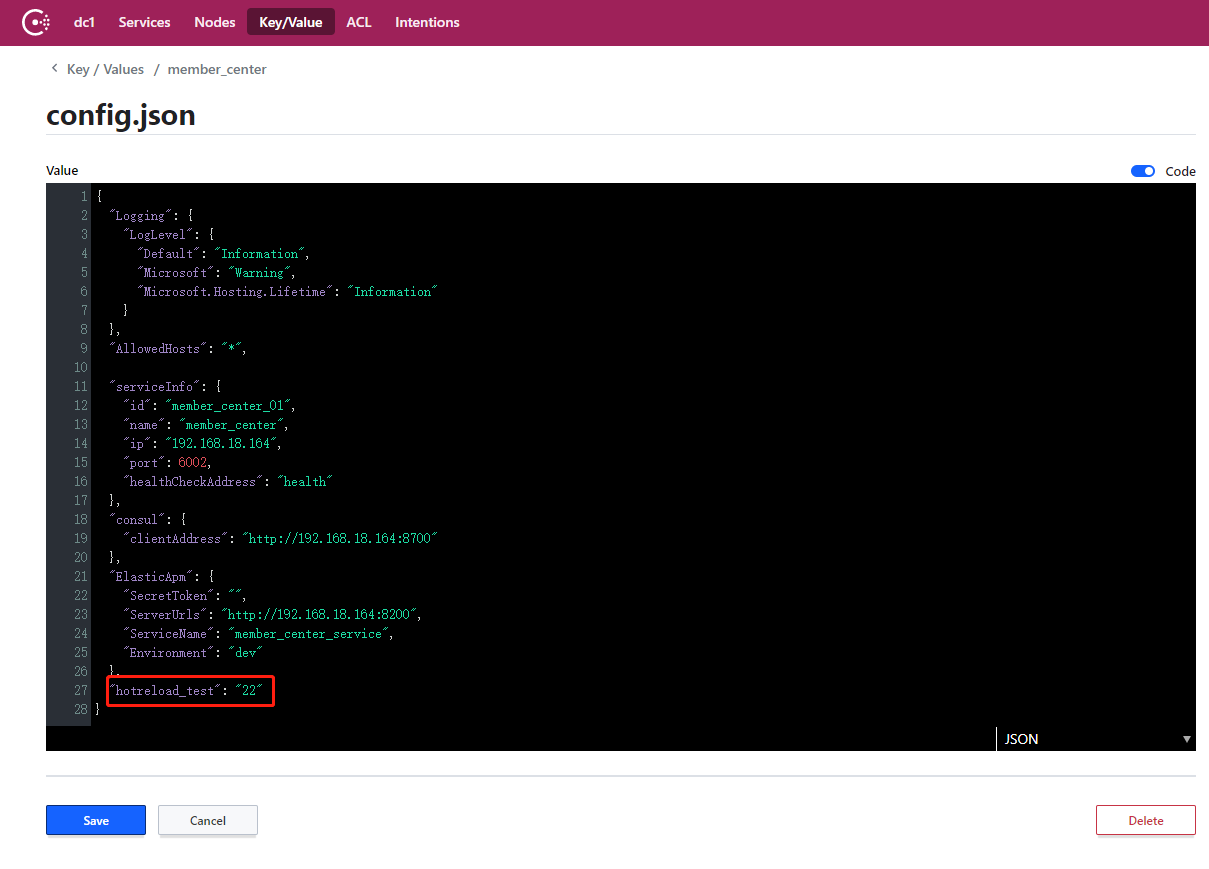
在 key 文本框里输入 “confing.json” 。
在 Value 文本框内把原来 appsettings.json 文件的全部内容复制粘贴进去。
{
  "consul_server": "http://192.168.18.164:8500"
}
把原来 appsettings.json 文件的内容全部删除,只输入一行 consul_server 的配置,用来指示 consul 服务的地址。
Install-Package Winton.Extensions.Configuration.Consul
在 member_center 项目上通过nuget安装 Winton.Extensions.Configuration.Consul 这个组件。
public static IHostBuilder CreateHostBuilder(string[] args) =>
Host.CreateDefaultBuilder(args)
.ConfigureWebHostDefaults(webBuilder =>
{
webBuilder.ConfigureAppConfiguration((ctx,cfg)=> {
var localconfig = new ConfigurationBuilder()
.SetBasePath(Directory.GetCurrentDirectory())
.AddJsonFile("appsettings.json").AddEnvironmentVariables().Build();
var consul_server = localconfig["consul_server"];
cfg.<span class="hljs-title class_">AddConsul</span>(<span class="hljs-string">"member_center/config.json"</span>,<span class="hljs-function"><span class="hljs-params">op</span>=></span> {
op.<span class="hljs-property">ConsulConfigurationOptions</span> = <span class="hljs-function"><span class="hljs-params">cco</span> =></span>
{
cco.<span class="hljs-property">Address</span> = <span class="hljs-keyword">new</span> <span class="hljs-title class_">Uri</span>(consul_server);
};
op.<span class="hljs-property">ReloadOnChange</span> = <span class="hljs-literal">true</span>;
});
});
webBuilder.<span class="hljs-title class_">ConfigureKestrel</span>(<span class="hljs-function"><span class="hljs-params">options</span> =></span>
{
options.<span class="hljs-title class_">ListenAnyIP</span>(<span class="hljs-number">6002</span>);
});
webBuilder.<span class="hljs-property">UseStartup</span><<span class="hljs-title class_">Startup</span>>();
});
在 program 文件的 CreateHostBuilder 方法内配置使用 Consul 做为配置的提供源。首先从本地读取 consul_server 的地址。通过 AddConsul 方法指示需要从 consul 读取的配置文件的路径。完成以上操作后我们的服务已经可以读取到 Consul 存储的配置了。
   [ApiController]
    [Route("[controller]")]
    public class ConsulController : ControllerBase
    {
        IConfiguration _configuration;
        public ConsulController(IConfiguration configuration)
        {
            _configuration = configuration;
        }
    [<span class="hljs-meta">HttpGet(<span class="hljs-string">"getConfig"</span>)</span>]
    <span class="hljs-function"><span class="hljs-keyword">public</span> <span class="hljs-built_in">string</span> <span class="hljs-title">GetConfig</span>(<span class="hljs-params"><span class="hljs-built_in">string</span> key</span>)</span>
    {
        <span class="hljs-keyword">return</span> _configuration[key];
    }
}
我们新建一个GetConfig方法来演示下能否读取到配置。
直接在 Controller 构造函数注入 IConfiguration 来读取配置,这跟我们普通本地配置的读取方式完全一致。
http://localhost:6002/consul/getconfig?key=hotreload_test
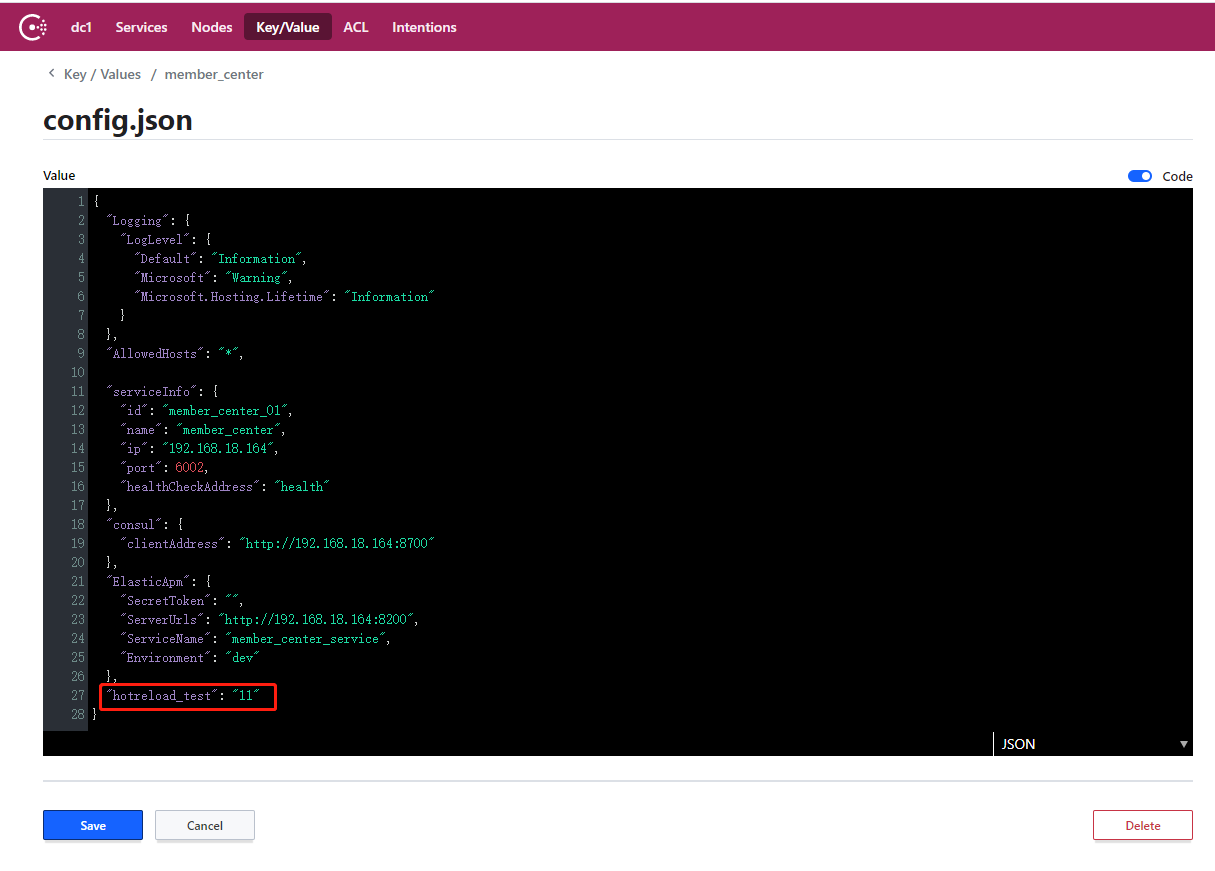

在浏览器上访问一下这个action对应的url,并且指定一个key=hotreload_test,可以看到输出的结果跟我们在 consul 上配置的值是一致的。
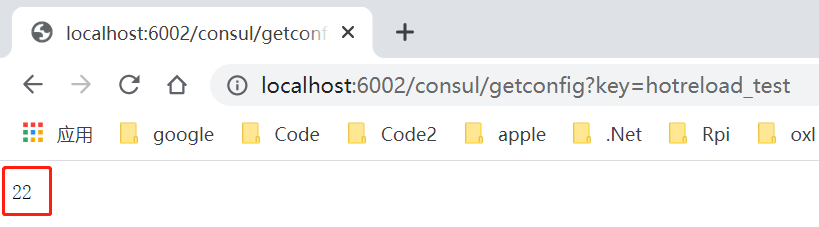
修改一下 consul 上面的配置值,重新读取一下这个配置,可以看到新的值已经被读取到了,证明我们的热更新也可以运行了。
把 Ocelot 网关的配置迁移至 Consul#
上面我们演示了如何把普通服务的配置迁移至 consul,下面演示下如何把 Ocelot 的配置迁移到 Consul 上。
Ocelot 网站其实也就是一个 webapi 项目,本质上跟上面的服务没啥区别。我们根据上面的演示,其实可以很容易的把 Ocelot 项目的配置迁移到 Consul 上。那么为什么需要单独说一下 Ocelot 网关的迁移呢?
本来 Ocelot 的路由配置需要把下游服务的地址跟端口在配置文件里写死,那样的话,我们的 Consul 服务注册发现就没有意义了,我们的下游服务都是可能动态变化的。所以我们需要让 Ocelot 结合 Consul 的服务注册发现功能来把下游服务器的配置动态化。这就导致 Ocelot 项目跟 Consul 的融合会比一般的服务复杂一点。
Install-Package Ocelot.Provider.Consul
首先我们在项目上使用 nuget 安装 Ocelot.Provider.Consul 这个组件。
{
  "consul_server": "http://192.168.18.164:8500"
}
同样我们需要在本地的 appsettings.json 文件内指定 consul_server 的地址。再把 routes.json 文件的内容全部迁移至 consul 的 key/value 上去,这个不在赘述。
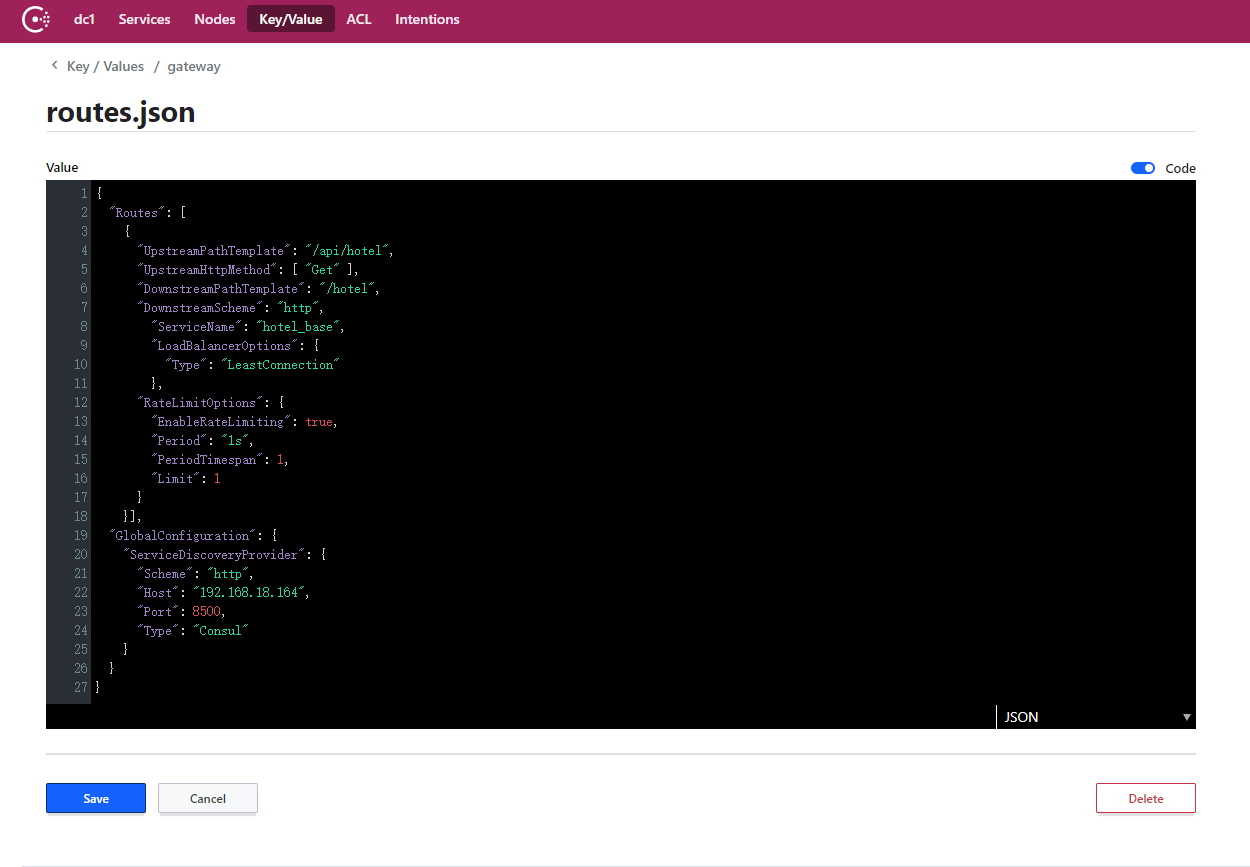
注意,这里不是简单的复制粘贴 routes.json 文件的内容。
我们需要把原来的 DownstreamHostAndPorts 配置全部删掉,替换成服务名,并且指定负载均衡的算法。
"ServierName" : "hotel_base",
"LoadBalanceOptions": {
    "Type": "LeastConnection"
}
在 "GlobalConfiguration" 节点指定 "ServiceDiscoveryProvider":
"ServiceDiscoveryProvider": {
    "Scheme": "http",
    "Host": "192.168.18.164",
    "Prot": 8500,
    "Type": "Consul"
}
ServiceDiscoveryProvider 节点指示了使用 Consul 做为服务发现的组件及Consul服务的基本信息。
public static void Main(string[] args)
{
new WebHostBuilder()
.UseKestrel()
.UseContentRoot(Directory.GetCurrentDirectory())
.ConfigureAppConfiguration((hostingContext, config) =>
{
var localconfig = new ConfigurationBuilder()
.SetBasePath(Directory.GetCurrentDirectory())
.AddJsonFile("appsettings.json").AddEnvironmentVariables().Build();
var consul_server = localconfig["consul_server"];
config.<span class="hljs-title class_">AddConsul</span>(<span class="hljs-string">"gateway/routes.json"</span>, <span class="hljs-function"><span class="hljs-params">op</span> =></span> {
op.<span class="hljs-property">ConsulConfigurationOptions</span> = <span class="hljs-function"><span class="hljs-params">cco</span> =></span>
{
cco.<span class="hljs-property">Address</span> = <span class="hljs-keyword">new</span> <span class="hljs-title class_">Uri</span>(consul_server);
};
op.<span class="hljs-property">ReloadOnChange</span> = <span class="hljs-literal">true</span>;
});
config.<span class="hljs-title class_">AddEnvironmentVariables</span>();
})
.<span class="hljs-title class_">ConfigureServices</span>(<span class="hljs-function"><span class="hljs-params">s</span> =></span> {
s.<span class="hljs-title class_">AddOcelot</span>()
.<span class="hljs-title class_">AddConsul</span>()
.<span class="hljs-property">AddTransientDefinedAggregator</span><<span class="hljs-title class_">HotelDetailInfoForMobileAggregator</span>>();
})
.<span class="hljs-title class_">ConfigureLogging</span>(<span class="hljs-function">(<span class="hljs-params">hostingContext, logging</span>) =></span>
{
logging.<span class="hljs-title class_">AddConsole</span>();
})
.<span class="hljs-title class_">UseIISIntegration</span>()
.<span class="hljs-title class_">Configure</span>(<span class="hljs-function"><span class="hljs-params">app</span> =></span>
{
app.<span class="hljs-title class_">UseOcelot</span>().<span class="hljs-title class_">Wait</span>();
})
.<span class="hljs-title class_">Build</span>()
.<span class="hljs-title class_">Run</span>();
}
我们改造一下 program 文件的 main 方法,在ConfigureAppConfiguration的配置方法内首先获取 consul_server 的地址。通过AddConsul方法指示获取配置文件的地址。
以上跟服务的配置迁移都是一致的,除了以上操作使用 Consul 作为 ServiceDiscoveryProvider 还需要在 ConfigureServices 方法的配置函数内指定 consul 相关的依赖注入。
   s.AddOcelot()
    .AddConsul()

我们运行起来所有的服务跟网关项目,访问一下 /api/hotel 这个路由,可以看到请求被正确的转发到了对应的服务上了。
总结#
以上我们演示了如何把服务的配置迁移到 Consul 的 Key/Value 对象上并且实现了配置的读取及热更新。演示了 Ocelot 网关的路由配置如何迁移到 Consul 的 Key/Value 对象上并且不再写死下游服务的配置信息,而是使用 Consul 的服务发现能力动态获取下游服务的配置信息。通过以上演示我们可以发现整个过程还是非常简单易用的,虽然 Consul 做为配置中心功能相对于 apollo 等功能还不够强大,比如没有版本管理,用户权限,审计等功能,但是对于一些小的微服务项目也已经足够了。如果你的微服务体系中使用了 Consul 做为服务注册发现的组件,那么可以直接使用 Consul 来做为配置中心,这样在能够获得基本的配置中心能力同时也省去了再部署一套单独的配置中心的繁琐操作。
广告时间#
如果你觉得 Consul 的配置中心功能过于简单,那么还可以试试由本人开源的 AgileConfig 轻量级配置中心项目。它部署简单,使用简单,支持配置管理,热更新,版本管理,基本的用户权限管理等功能,欢迎试用。
项目地址: https://github.com/OnePieceSpace/AgileConfig 。
演示项目地址#
https://github.com/OnePieceSpace/myhotel_microservice
相关文章#
NET Core with 微服务 - 什么是微服务
.Net Core with 微服务 - 架构图
.Net Core with 微服务 - Ocelot 网关
.Net Core with 微服务 - Consul 注册中心
.Net Core with 微服务 - Seq 日志聚合
.Net Core with 微服务 - Elastic APM

 浙公网安备 33010602011771号