Angular之数据绑定(六)
插值表达式
语法:{{ title }}。其中title是变量。
app.component.ts文件内容如下:
import { Component } from '@angular/core';

@Component({
  selector: 'app-root',
  template: '<div title="{{ title }}">{{ title }}--{{ name }} {{ 1 + 1 }}</div>',
  styleUrls: ['./app.component.css']
})
export class AppComponent {
  title = '插值表达式';
  name = "一切皆往事";
}
属性绑定
语法:[href]='href1'。其中href1是变量。
app.component.ts文件内容如下:
import { Component } from '@angular/core';
@Component({
selector: 'app-root',
// template: '<div title="{{ title }}">{{ title }}--{{ name }} {{ 1 + 1 }}</div>',
template: `
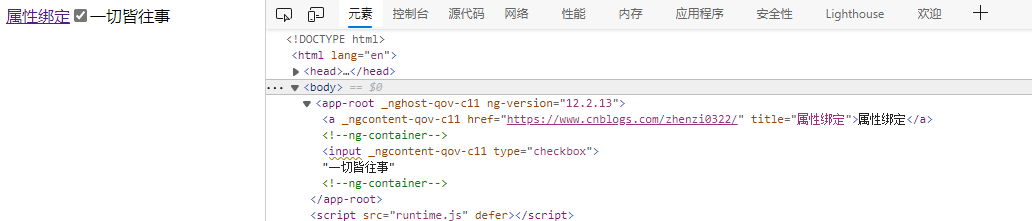
<ng-container><a [href]="href1" [title]="title">属性绑定</a></ng-container>
<ng-container><input type="checkbox" [checked]="is_checked" />一切皆往事</ng-container>
`,
styleUrls: ['./app.component.css']
})
export class AppComponent {
title = "属性绑定";
href1 = 'https://www.cnblogs.com/zhenzi0322/';
is_checked = true; // 选中复选框
}
效果图如下:
事件绑定
请法:(click)='fun1()'。其中fun1()对应的是方法。
app.component.ts文件内容如下:
import { Component } from '@angular/core';

@Component({
  selector: 'app-root',
  template: `
  <ng-container>
    <button (click)="fun1()" (mouseenter)="fun2()">点击事件</button>
  </ng-container>
  <ng-container>
    <a [href]='href' (click)="fun3($event)">点击获取事件对象</a>
  </ng-container>
  `,
  styleUrls: ['./app.component.css']
})
export class AppComponent {
  title = "事件绑定";
  href = 'https://www.cnblogs.com/zhenzi0322/';

  // 点击事件
  fun1(){
    console.log('点击了事件');
  }

  // 鼠标移上来的事件
  fun2(){
    console.log('鼠标移上来了');
  }

  // 事件对象的处理
  fun3(event: any){
    console.log(event);
    // 阻止浏览器的默认行为,防止其跳转
    event.preventDefault();
    console.log('当前的href', this.href);
  }
}
效果图如下:

双向数据绑定
语法:[(ngModel)]='username'。其中username是变量。双向数据绑定是基于表单的。
第一步
从@angular/forms服务中导入FormsModule。
app.module.ts文件内容如下:
import { NgModule } from '@angular/core';
import { BrowserModule } from '@angular/platform-browser';
// 1. 导入表单模块,实现双向数据绑定
import { FormsModule} from '@angular/forms';

import { AppComponent } from './app.component';

@NgModule({
  declarations: [
    AppComponent
  ],
  imports: [
    BrowserModule,
    FormsModule // 2. 导入,这样可以给其他组件使用
  ],
  providers: [],
  bootstrap: [AppComponent]
})
export class AppModule { }
第二步
然后在组件中使用[(ngModel)]进行双向数据绑定。
app.component.ts文件内容如下:
import { Component } from '@angular/core';

@Component({
  selector: 'app-root',
  template: `
  <ng-container>
    输入:<input type="text" [(ngModel)]="username"> 获取的数据:{{ username }}
  </ng-container>
  `,
  styleUrls: ['./app.component.css']
})
export class AppComponent {
  title = '双向数据绑定';
  username = "一切皆往事";
}
效果图如下:


 浙公网安备 33010602011771号