


springboot整合rabbitMQ
1、首先要在服务器上安装rabbitmQ服务,安装的教程网上很多
https://www.cnblogs.com/saryli/p/9149455.html这个安装教程不错,跟着做就行,一定要注意erlang的版本和rabbitmq的版本要对应,不然会安装出错,版本对应问题在rabbitmq官网有描述
2、在springboot项目的pmo.xml添加依赖
  <dependency>
            <groupId>org.springframework.boot</groupId>
            <artifactId>spring-boot-starter-amqp</artifactId>
        </dependency>
3、在spplication.properties文件添加有关rabbitmq的连接信息
spring.application.name=Spring-boot-rabbitmq
spring.rabbitmq.host=192.168.2.194
spring.rabbitmq.port=5672
spring.rabbitmq.username=swtm
spring.rabbitmq.password=swtm
spring.rabbitmq.virtual-host=/
4、创建MQConfig rabbitMQ的交换机和队列的配置
package com.spring.first.rabbitmq;


import org.springframework.amqp.core.*;
import org.springframework.context.annotation.Bean;
import org.springframework.context.annotation.Configuration;

@Configuration
public class MQConfig {
    /*
    * Topic模式 一个生产者可以对应多个消费者,但是同一个元素只能被消费一次
    * 一条消息可以发送给多个queue
    * */

    @Bean
    public Queue topicQueue1(){
        return new Queue("topicqueue1",true);
    }
    @Bean
    public  Queue topicQueue2(){
        return new Queue("topicqueue2",true);
    }

    @Bean
    public  Queue directQueue3(){
        return new Queue("directqueue3",true);
    }
    @Bean
    public TopicExchange topicExchange(){
        return  new TopicExchange("topicExChange");
    }
    @Bean
    public Binding topicBinding1(){
        return BindingBuilder.bind(topicQueue1()).to(topicExchange()).with("topic.key1");
    }

    @Bean
    public Binding topicBinding2(){
        return BindingBuilder.bind(topicQueue2()).to(topicExchange()).with("topic.#");
    }


    /*
    * dirct模式 一个生产者对应一个消费者
    *
    * */

    @Bean
    DirectExchange directExchange(){
        return new DirectExchange("directExChange");
    }

    @Bean
    public Binding directBinding(){
        return BindingBuilder.bind(directQueue3()).to(directExchange()).with("direct.key1");
    }

}
5、创建rabbitmq的生产者 MQSender
package com.spring.first.rabbitmq;


import org.springframework.amqp.core.AmqpTemplate;
import org.springframework.beans.factory.annotation.Autowired;
import org.springframework.stereotype.Service;

import java.util.Date;

@Service
public class MQSender {

    @Autowired
    AmqpTemplate amqpTemplate;


    public void sendTopic(String sendmessage){

        amqpTemplate.convertAndSend("topicExChange","topic.key1",sendmessage);
        System.out.println("sender1:"+sendmessage);
    }

    public  void  sendDirect(String sendmessage){
    amqpTemplate.convertAndSend("directExChange","direct.key1",sendmessage);
     System.out.println("sender2:"+sendmessage);
 } }
6、创建rabbitmq的消费者MQReceiver
package com.spring.first.rabbitmq;


import org.springframework.amqp.rabbit.annotation.RabbitListener;
import org.springframework.stereotype.Service;

@Service
public class MQReceiver {


    @RabbitListener(queues = "topicqueue1")
    public void receiveTopic1(String message){
        System.out.println("消费者2号消费topic1接收到消息:"+message);

    }

    @RabbitListener(queues = "topicqueue1")
    public void receiveTopic2(String message){
        System.out.println("消费者1号消费topicqueue1收到消息:"+message);

    }


    @RabbitListener(queues = "topicqueue2")
    public void receiveTopic3(String message){
        System.out.println("消费者4号消费topicqueue2收到消息:"+message);

    }


    @RabbitListener(queues = "directqueue3")
    public void receiveDirect1(String message){
        System.out.println("消费者接3收到消息:"+message);

    }


}
7、通过controller去调用sender
package com.spring.first.controller;


import com.spring.first.rabbitmq.MQSender;
import org.springframework.beans.factory.annotation.Autowired;
import org.springframework.web.bind.annotation.PostMapping;
import org.springframework.web.bind.annotation.RestController;

@RestController
public class TestMQController {

    @Autowired
    private MQSender mqSender;

    @PostMapping("/testmq")
    public void testmq() throws InterruptedException {
        int x=0;
        while (x<10){
            mqSender.sendTopic("消息提醒"+x);
            x++;
        }

    }

    @PostMapping("/testmq2")
    public void testmq2(){
        int x=0;
        while (x<100){
mqSender.sendDirect("这是第"+x+"条消息");
    x++;
} } }
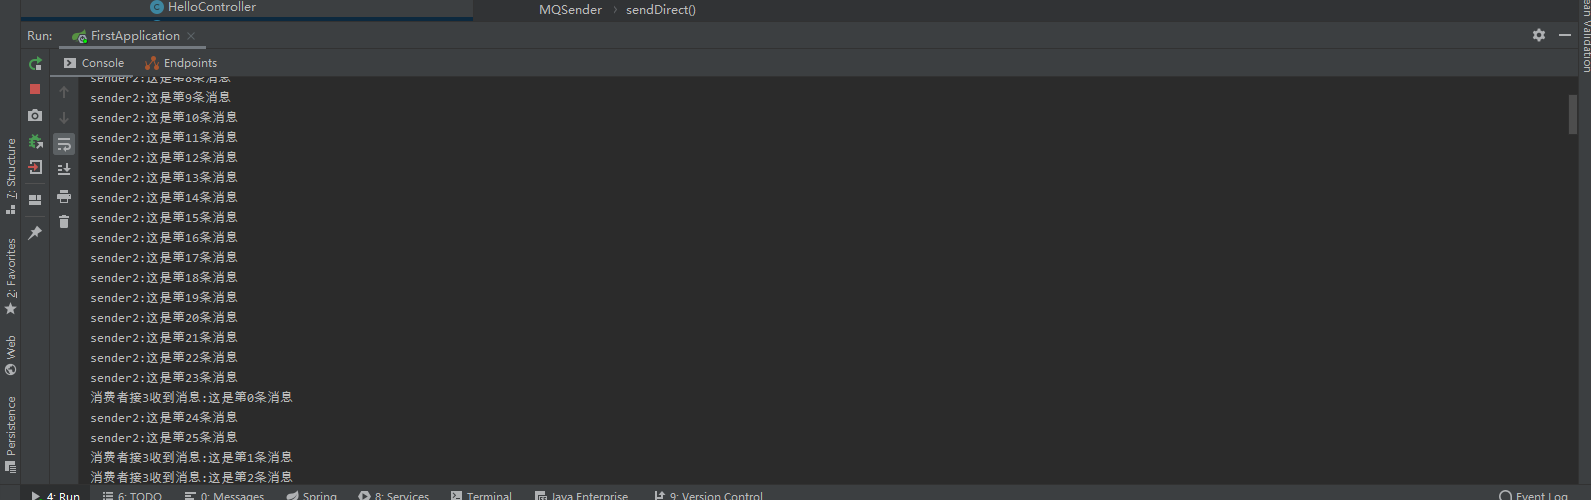
访问testmq2的接口,结果如图
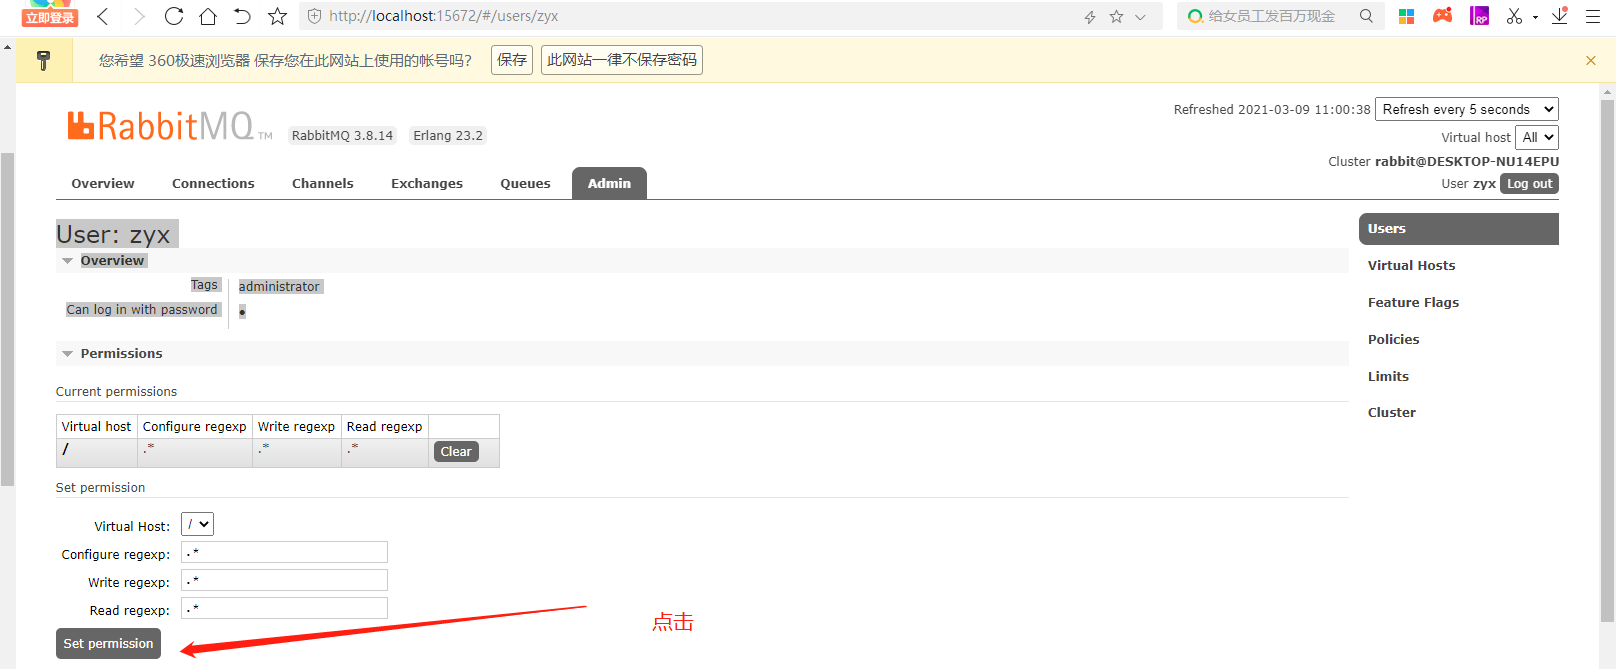
注意:如果连接配置各方面没有问题但是还是连不上rabbitmq,有可能是用户没有设置can access virtual hosts,在可视化操作界面,重新设置一下即可


 浙公网安备 33010602011771号