
马哥教育--第十五周
1、PAM和google模块实现ssh双因子安全验证。
手机APP下载authenticator软件
dnf -y install google-authenticator
sed -i '1a\auth required pam_google_authenticator.so' /etc/pam.d/sshd
sed -i 's/.*ChallengeResponseAuthentication.*/ChallengeResponseAuthentication yes/' /etc/ssh/sshd_config
[root@localhost ~]# google-authenticator
Do you want authentication tokens to be time-based (y/n) y
Warning: pasting the following URL into your browser exposes the OTP secret to Google:
https://www.google.com/chart?chs=200x200&chld=M|0&cht=qr&chl=otpauth://totp/root@localhost.localdomain%3Fsecret%3DKPQCK3PQENTZROXURZV2PKJCN4%26issuer%3Dlocalhost.localdomain
Failed to use libqrencode to show QR code visually for scanning.
Consider typing the OTP secret into your app manually.
Your new secret key is: KPQCK3PQENTZROXURZV2PKJCN4 #使用这个key 在手机APP上绑定主机
Enter code from app (-1 to skip): 334326
Code confirmed
Your emergency scratch codes are:
56120840
99624622
76453889
21532161
97441613
Do you want me to update your "/root/.google_authenticator" file? (y/n) y
Do you want to disallow multiple uses of the same authentication
token? This restricts you to one login about every 30s, but it increases
your chances to notice or even prevent man-in-the-middle attacks (y/n) y
By default, a new token is generated every 30 seconds by the mobile app.
In order to compensate for possible time-skew between the client and the server,
we allow an extra token before and after the current time. This allows for a
time skew of up to 30 seconds between authentication server and client. If you
experience problems with poor time synchronization, you can increase the window
from its default size of 3 permitted codes (one previous code, the current
code, the next code) to 17 permitted codes (the 8 previous codes, the current
code, and the 8 next codes). This will permit for a time skew of up to 4 minutes
between client and server.
Do you want to do so? (y/n) y
If the computer that you are logging into isn't hardened against brute-force
login attempts, you can enable rate-limiting for the authentication module.
By default, this limits attackers to no more than 3 login attempts every 30s.
Do you want to enable rate-limiting? (y/n) y
再次使用ssh登录时会先要求输入goole 验证器得随机码,再输入root密码
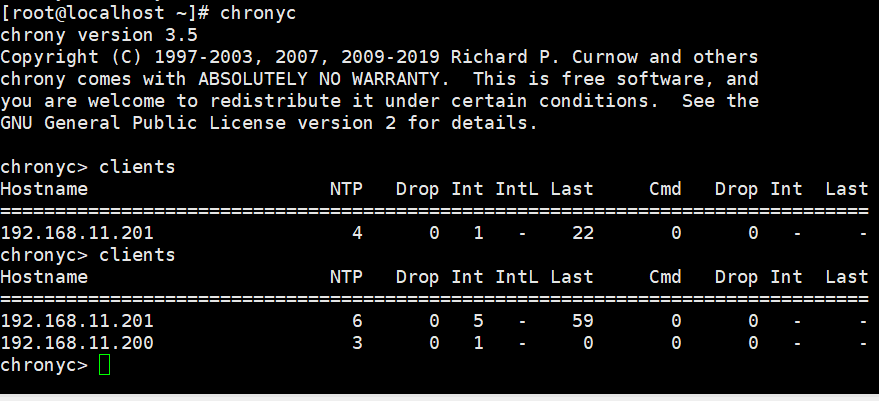
2、使用chrony实现内网时间同步(一台node1从外网同步时间,其余机器从node1同步时间)。
node1:
dnf -y install chrony
vim /etc/chrony.conf
pool 2.centos.pool.ntp.org iburst #指定时间同步服务器(从那台服务器同步时间)
allow 192.168.11.0/24 #允许那些服务器向本服务器同步时间
systemctl restart chronyd
其余机器:
dnf -y install chrony
vim /etc/chrony.conf
pool 192.168.11.8 iburst
systemctl restart chronyd
验证:node1:
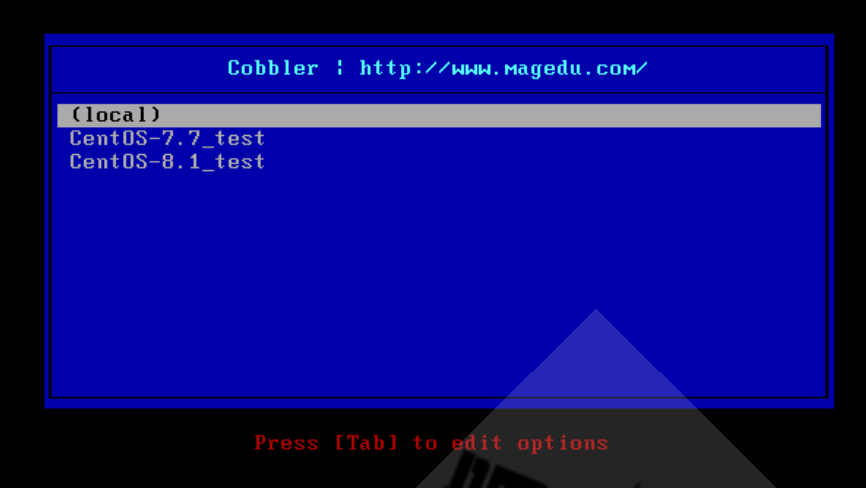
3、利用cobbler实现系统自动化安装。
[1].安装cobbler (cobbler基于epel源)
yum install cobbler dhcp -y
[2].启动服务
systemctl enable --now cobblerd httpd tftp
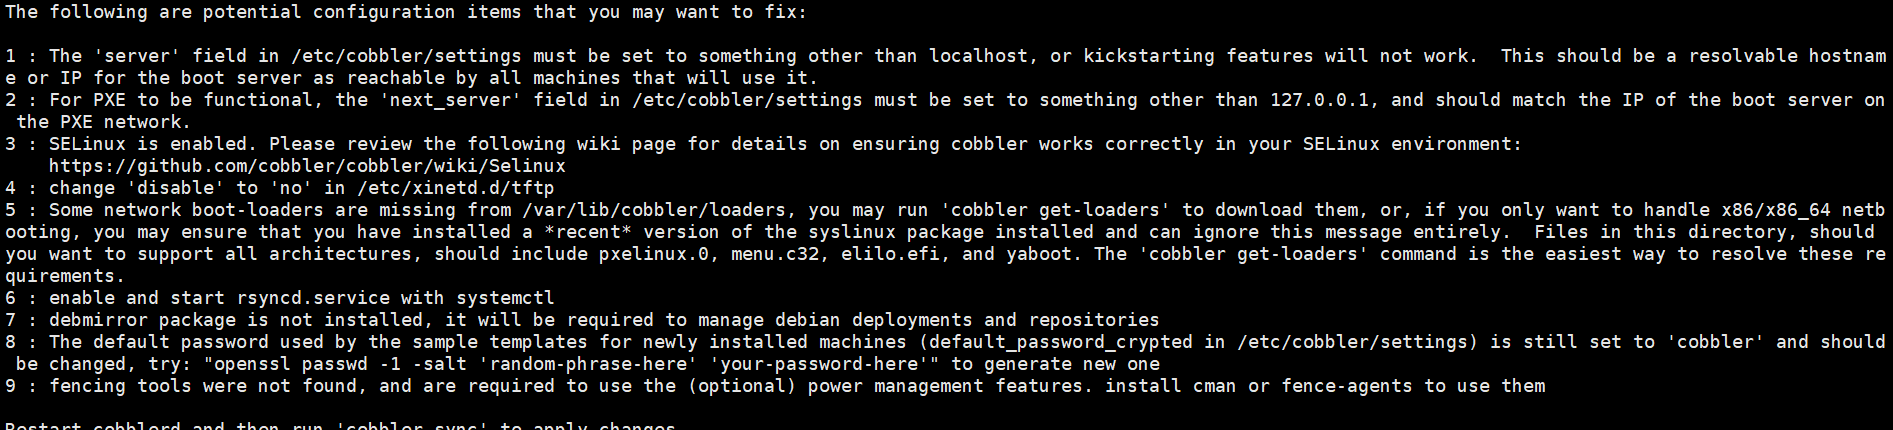
[3]cobbler check
[4]生成安装好后的root密码,默认密码为cobbler
openssl passwd -1 “666666”
$1$7VrAzJDX$3s2vGL4uo0V/SGR5.ZrVT/
vim /etc/cobbler/settings
default_password_crypted: "$1$7VrAzJDX$3s2vGL4uo0V/SGR5.ZrVT/"
[5]修改server,next_server,dhcp配置
vim /etc/cobbler/settings
server: 192.168.11.7
next_server: 192.168.11.7
manager_dhcp:1
systemctl restart cobbler
[6]启动dhcp服务
因为由cobbler管理dhcp,所以修改cobbler的dhcp模板文件可以生成dhcp的配置文件
vim /etc/cobbler/dhcp.template
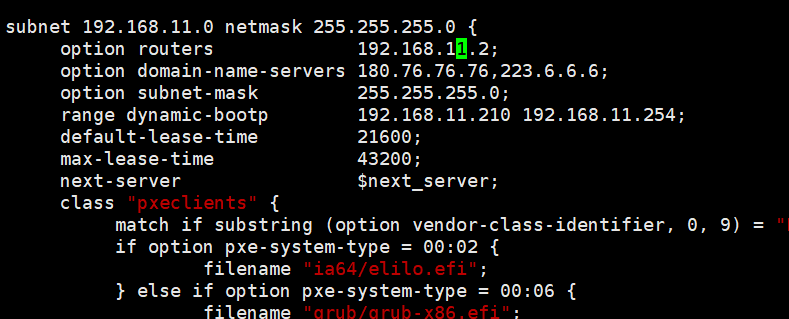
cobbler sync
systemctl enable --now dhcp
[7]下载启动相关文件
cobbler get-loaders
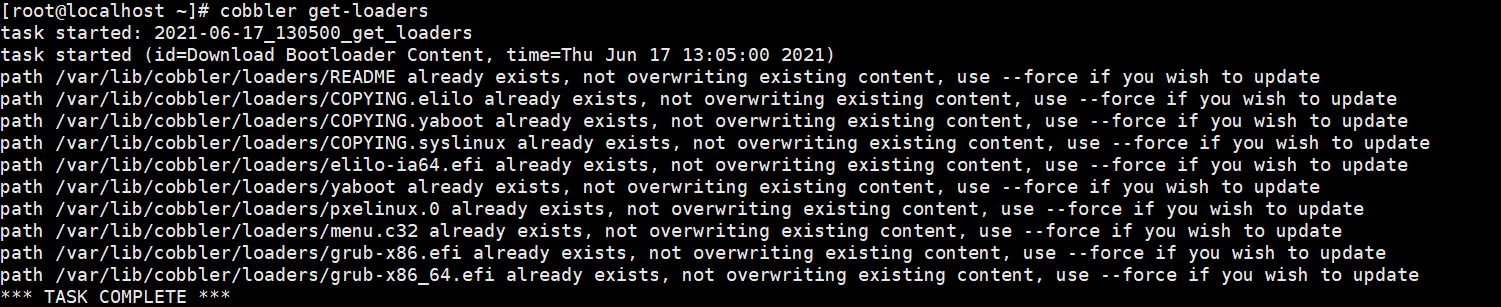
完成后

[8]修改菜单的标题
vim /etc/cobbler/pxe/pxedefalut.template

cobbler sync
[9]导入CentOS系统的安装文件,生成相应的YUM源
添加光驱,同时插入cenots7,centos8光盘
echo "- - -" > /sys/class/scsi_host/host1/scan
echo "- - -" > /sys/class/scsi_host/host2/scan
echo "- - -" > /sys/class/scsi_host/host0/scan
挂载光盘
mkdir /mnt/{centos7,centos8}
mount /dev/sr0 /mnt/centos7
mount /dev/sr1 /mnt/centos8
导入系统文件:
cobbler import --name=centos-7.7-x86_64 --path=/mnt/centos7 --arch=x86_64
cobbler import --name=centos-8.2-x86_64 --path=/mnt/centos7 --arch=x86_64
导入后会默认生成最小化安装的安装菜单:
cobbler distro list
centos-7.7-x86_64
centos-8.2-x86_64
[10]准备kickstart文件,并关联安装菜单
vim /var/lib/cobbler/kickstarts/centos7.cfg
install
xconfig --startxonboot
keyboard --vckeymap=us --xlayouts='us'
rootpw --iscrypted $1$bpNEv8S5$lK.CjNkf.YCpFPHskSNiN0
url --url=$tree
lang en_US
auth --useshadow --passalgo=sha512
text
firstboot --enable
selinux --disabled
skipx
services --disabled="chronyd"
ignoredisk --only-use=sda
firewall --disabled
network --bootproto=dhcp --device=eth0
network --hostname=centos7.magedu.org
reboot
timezone Asia/Shanghai --nontp
bootloader --append="net.ifnames=0" --location=mbr --boot-drive=sda
zerombr
#autopart --type=lvm
clearpart --all --initlabel
part swap --fstype="swap" --ondisk=sda --size=3072
part / --fstype="xfs" --ondisk=sda --size=51200
part /boot --fstype="xfs" --ondisk=sda --size=1024
part /data --fstype="xfs" --ondisk=sda --size=30720
%post
useradd wang
%end
%packages
@core
%end
cobbler profile add --name=CentOS-7.7_test --distro=CentOS-7.7- x86_64 --kickstart=/var/lib/cobbler/kickstarts/centos7.cfg
[11]测试

 浙公网安备 33010602011771号