B18-openstack高可用Glance集成Ceph
1. 配置glance-api.conf
# 在运行glance-api服务的节点修改glance-api.conf文件,含3个控制节点,以controller01节点为例
# 以下只列出涉及glance集成ceph的section
# 在运行glance-api服务的节点修改glance-api.conf文件,含3个控制节点,以controller01节点为例
# 以下只列出涉及glance集成ceph的section
[root@controller01 ~]# vim /etc/glance/glance-api.conf
# 打开copy-on-write功能
[DEFAULT]
show_image_direct_url = True

# 变更默认使用的本地文件存储为ceph rbd存储;
# 注意红色字体部分前后一致
[glance_store]
#stores = file,http
#default_store = file
#filesystem_store_datadir = /var/lib/glance/images/
stores = rbd
default_store = rbd
rbd_store_chunk_size = 8
rbd_store_pool = images
rbd_store_user = glance
rbd_store_ceph_conf = /etc/ceph/ceph.conf

# 变更配置文件,重启服务
[root@controller01 ~]# systemctl restart openstack-glance-api.service
[root@controller01 ~]# systemctl restart openstack-glance-registry.service
上传镜像测试
[root@controller01 ~]# openstack image create "test" --file cirros-0.4.0-x86_64-disk.img --disk-format qcow2 --container-format bare --public

检测:
[root@compute01 ceph]# rbd ls images
6afa5744-6de6-4864-904e-55d9e8142ed4
3. 定义pool类型
# images启用后,ceph集群状态变为:HEALTH_WARN
[root@compute01 ceph]# ceph -s
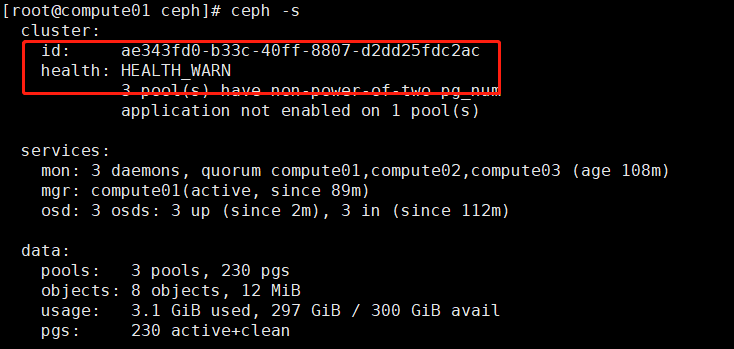
# 使用”ceph health detail”,能给出解决办法;
# 未定义pool池类型,可定义为'cephfs', 'rbd', 'rgw'等
[root@compute01 ceph]# ceph health detail
# 同时解决volumes与vms两个pool的问题
[root@compute01 ceph]# ceph osd pool application enable images rbd
enabled application 'rbd' on pool 'images'
[root@compute01 ceph]# ceph osd pool application enable volumes rbd
enabled application 'rbd' on pool 'volumes'
[root@compute01 ceph]# ceph osd pool application enable vms rbd
enabled application 'rbd' on pool 'vms'
查看:
[root@compute01 ceph]# ceph health detail
HEALTH_WARN 3 pool(s) have non-power-of-two pg_num
POOL_PG_NUM_NOT_POWER_OF_TWO 3 pool(s) have non-power-of-two pg_num
pool 'volumes' pg_num 100 is not a power of two
pool 'vms' pg_num 100 is not a power of two
pool 'images' pg_num 30 is not a power of two
[root@compute01 ceph]# ceph osd pool application get images
[root@compute01 ceph]# ceph osd pool application get volumes
[root@compute01 ceph]# ceph osd pool application get vms
发现还是没有解决:
使用下列方法:
[root@compute01 ceph]# ceph mon dump
dumped monmap epoch 2
epoch 2
fsid ae343fd0-b33c-40ff-8807-d2dd25fdc2ac
last_changed 2020-06-16 10:37:49.534961
created 2020-06-16 10:37:26.076923
min_mon_release 14 (nautilus)
0: [v2:10.100.214.205:3300/0,v1:10.100.214.205:6789/0] mon.compute01
1: [v2:10.100.214.206:3300/0,v1:10.100.214.206:6789/0] mon.compute02
2: [v2:10.100.214.207:3300/0,v1:10.100.214.207:6789/0] mon.compute03
重启mon
二十.Cinder集成Ceph
1. 配置cinder.conf
# cinder利用插件式结构,支持同时使用多种后端存储;
# 在cinder-volume所在节点设置cinder.conf中设置相应的ceph rbd驱动即可;
# 含3个计算(存储)节点,以compute01节点为例;
加入下列配置:
[ceph]
volume_driver = cinder.volume.drivers.rbd.RBDDriver
rbd_pool = volumes
rbd_ceph_conf = /etc/ceph/ceph.conf
rbd_flatten_volume_from_snapshot = false
rbd_max_clone_depth = 5
rbd_store_chunk_size = 4
rados_connect_timeout = -1
glance_api_version = 2
rbd_user = cinder
rbd_secret_uuid = 40333768-948a-4572-abe0-716762154a1e
volume_backend_name = ceph
重新启动服务:
[root@compute01 ceph]# systemctl restart openstack-cinder-volume
[root@compute02 ceph]# systemctl restart openstack-cinder-volume
[root@compute03 ceph]# systemctl restart openstack-cinder-volume
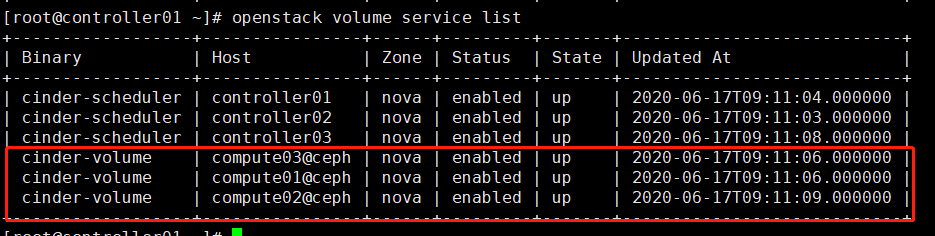
2. 验证
# 查看cinder服务状态,cinder-volume集成ceph后,状态”up”;
# 或:cinder service-list
3. 生成volume
# 在控制节点为cinder的ceph后端存储创建对应的type,在配置多存储后端时可区分类型;
# 可通过“cinder type-list”查看
[root@controller01 ~]# cinder type-create ceph

# 为ceph type设置扩展规格,键值” volume_backend_name”,value值”ceph”
[root@controller01 ~]# cinder type-key ceph set volume_backend_name=ceph
[root@controller01 ~]# cinder extra-specs-list

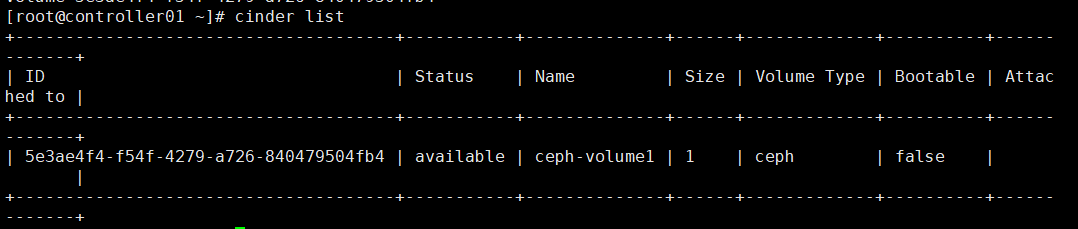
2)生成volume
[root@controller01 ~]# cinder create --volume-type ceph --name ceph-volume1 1

# 检查生成的volume;
# 或:cinder list
# 检查ceph集群的volumes pool
[root@controller01 ~]# rbd ls volumes
volume-5e3ae4f4-f54f-4279-a726-840479504fb4

 浙公网安备 33010602011771号