

shell编程5之捕获
信号捕获
什么是信号?
信号是Linux系统提供的一种通知机制,是给进程发信号,每个进程都有pid号,提供一种机制,对于一个正在运行的进程给它发信号,干扰它的运行,比如说发-9信号直接把它干死,发暂停信号让它暂停住,还可以发hup信号默认让它关闭(hub信号内部可以做一些定制操作,实现平滑重启)。
在Linux系统中,信号是一种强大的进程间通信机制,它允许操作系统或其他进程向特定的进程发送异步通知。这些信号可以改变进程的行为,或者在某些情况下终止进程的运行。每个进程在系统中都有一个唯一的进程ID(PID),信号通过这个PID来发送到目标进程。

信号可以分为多种类型,每种类型有其特定的用途和默认行为。例如,信号9(SIGKILL)是一个强有力的信号,它会强制终止接收信号的进程,通常用于在紧急情况下杀死不响应的进程。相比之下,暂停信号(SIGSTOP)则用于暂时停止进程的执行,使其进入暂停状态,直到接收到继续执行的信号(如SIGCONT)。

另一个有趣的信号是SIGHUP,它在很多程序中有着特殊的用途。通常情况下,当一个进程接收到SIGHUP信号时,它会默认终止。然而,许多守护进程(daemon)被设计为在接收到SIGHUP信号时重新读取配置文件,然后继续运行,从而实现平滑重启而不中断服务。这种机制使得系统管理员可以在不中断服务的情况下更新配置信息。

总的来说,信号是Linux系统中一个非常重要的功能,它们提供了一种灵活的方式来控制和监控进程的行为,使得系统能够更加稳定和高效地运行。通过合理地使用信号,系统管理员可以更好地管理系统资源,并确保应用程序的稳定运行。
如何用信号?
站在使用者来说,给进程发信号影响它的进程。
站在进程的角度(程序的开发者),收到什么样的信号做什么样的处理,这个就叫做捕获信号。捕获信号有个前提,-9这种强制杀死的信号不能被程序捕获并且不能被加以定制化处理。
从使用者的角度来看,向进程发送信号会直接影响该进程的运行状态和行为。
而站在进程的角度,也就是程序的开发者这边,当进程接收到特定的信号时,会根据信号的类型执行相应的处理操作,这一过程被称为捕获信号。
捕获信号是进程间通信的一种重要机制,它使得程序能够响应外部事件并作出相应的反应。
然而,需要注意的是,像-9信号这样的强制杀死信号是不能被程序捕获的,也无法进行定制化的处理。这种信号一旦发出,进程将会被立即终止,无法进行任何其他的操作。这是为了确保系统的稳定性和安全性,防止恶意程序或出现问题的进程无法被停止。


[root@localhost ~]# ps aux
USER        PID %CPU %MEM    VSZ   RSS TTY      STAT START   TIME COMMAND
root          1  0.0  0.6 193552  6708 ?        Ss   6月23   0:02 /usr/lib/systemd/systemd --switched-root
root          2  0.0  0.0      0     0 ?        S    6月23   0:00 [kthreadd]
root          4  0.0  0.0      0     0 ?        S<   6月23   0:00 [kworker/0:0H]
root          6  0.0  0.0      0     0 ?        S    6月23   0:00 [ksoftirqd/0]
root          7  0.0  0.0      0     0 ?        S    6月23   0:00 [migration/0]
root          8  0.0  0.0      0     0 ?        S    6月23   0:00 [rcu_bh]
root          9  0.0  0.0      0     0 ?        S    6月23   0:20 [rcu_sched]
root         10  0.0  0.0      0     0 ?        S<   6月23   0:00 [lru-add-drain]
root         11  0.0  0.0      0     0 ?        S    6月23   0:01 [watchdog/0]
root         12  0.0  0.0      0     0 ?        S    6月23   0:01 [watchdog/1]
root         13  0.0  0.0      0     0 ?        S    6月23   0:00 [migration/1]
root         14  0.0  0.0      0     0 ?        S    6月23   0:00 [ksoftirqd/1]
root         15  0.0  0.0      0     0 ?        S    6月23   0:08 [kworker/1:0]
root         16  0.0  0.0      0     0 ?        S<   6月23   0:00 [kworker/1:0H]
root         17  0.0  0.0      0     0 ?        S    6月23   0:02 [watchdog/2]
root         18  0.0  0.0      0     0 ?        S    6月23   0:00 [migration/2]
root         19  0.0  0.0      0     0 ?        S    6月23   0:03 [ksoftirqd/2]
root         21  0.0  0.0      0     0 ?        S<   6月23   0:00 [kworker/2:0H]
root         22  0.0  0.0      0     0 ?        S    6月23   0:02 [watchdog/3]
root         23  0.0  0.0      0     0 ?        S    6月23   0:00 [migration/3]
root         24  0.0  0.0      0     0 ?        S    6月23   0:00 [ksoftirqd/3]
root         26  0.0  0.0      0     0 ?        S<   6月23   0:00 [kworker/3:0H]
root         28  0.0  0.0      0     0 ?        S    6月23   0:00 [kdevtmpfs]
root         29  0.0  0.0      0     0 ?        S<   6月23   0:00 [netns]
root         30  0.0  0.0      0     0 ?        S    6月23   0:00 [khungtaskd]
root         31  0.0  0.0      0     0 ?        S<   6月23   0:00 [writeback]
root         32  0.0  0.0      0     0 ?        S<   6月23   0:00 [kintegrityd]
root         33  0.0  0.0      0     0 ?        S<   6月23   0:00 [bioset]
root         34  0.0  0.0      0     0 ?        S<   6月23   0:00 [bioset]
root         35  0.0  0.0      0     0 ?        S<   6月23   0:00 [bioset]
root         36  0.0  0.0      0     0 ?        S<   6月23   0:00 [kblockd]
root         37  0.0  0.0      0     0 ?        S<   6月23   0:00 [md]
root         38  0.0  0.0      0     0 ?        S<   6月23   0:00 [edac-poller]
root         39  0.0  0.0      0     0 ?        S<   6月23   0:00 [watchdogd]
root         40  0.0  0.0      0     0 ?        S    6月23   0:42 [kworker/2:1]
root         46  0.0  0.0      0     0 ?        S    6月23   0:00 [kswapd0]
root         47  0.0  0.0      0     0 ?        SN   6月23   0:00 [ksmd]
root         48  0.0  0.0      0     0 ?        SN   6月23   0:02 [khugepaged]
root         49  0.0  0.0      0     0 ?        S<   6月23   0:00 [crypto]
root         57  0.0  0.0      0     0 ?        S<   6月23   0:00 [kthrotld]
root         59  0.0  0.0      0     0 ?        S<   6月23   0:00 [kmpath_rdacd]
root         60  0.0  0.0      0     0 ?        S<   6月23   0:00 [kaluad]
root         62  0.0  0.0      0     0 ?        S<   6月23   0:00 [kpsmoused]
root         64  0.0  0.0      0     0 ?        S<   6月23   0:00 [ipv6_addrconf]
root         77  0.0  0.0      0     0 ?        S<   6月23   0:00 [deferwq]
root        114  0.0  0.0      0     0 ?        S    6月23   0:00 [kauditd]
root        253  0.0  0.0      0     0 ?        S<   6月23   0:00 [nfit]
root        256  0.0  0.0      0     0 ?        S<   6月23   0:00 [mpt_poll_0]
root        265  0.0  0.0      0     0 ?        S<   6月23   0:00 [mpt/0]
root        268  0.0  0.0      0     0 ?        S<   6月23   0:00 [ata_sff]
root        270  0.0  0.0      0     0 ?        S    6月23   0:00 [scsi_eh_0]
root        271  0.0  0.0      0     0 ?        S<   6月23   0:00 [scsi_tmf_0]
root        274  0.0  0.0      0     0 ?        S    6月23   0:00 [scsi_eh_1]
root        275  0.0  0.0      0     0 ?        S<   6月23   0:00 [scsi_tmf_1]
root        276  0.0  0.0      0     0 ?        S    6月23   0:00 [scsi_eh_2]
root        277  0.0  0.0      0     0 ?        S<   6月23   0:00 [scsi_tmf_2]
root        280  0.0  0.0      0     0 ?        S    6月23   0:00 [irq/16-vmwgfx]
root        281  0.0  0.0      0     0 ?        S<   6月23   0:00 [ttm_swap]
root        308  0.0  0.0      0     0 ?        S<   6月23   0:00 [bioset]
root        309  0.0  0.0      0     0 ?        S<   6月23   0:00 [xfsalloc]
root        310  0.0  0.0      0     0 ?        S<   6月23   0:00 [xfs_mru_cache]
root        311  0.0  0.0      0     0 ?        S<   6月23   0:00 [xfs-buf/sda3]
root        312  0.0  0.0      0     0 ?        S<   6月23   0:00 [xfs-data/sda3]
root        313  0.0  0.0      0     0 ?        S<   6月23   0:00 [xfs-conv/sda3]
root        314  0.0  0.0      0     0 ?        S<   6月23   0:00 [xfs-cil/sda3]
root        315  0.0  0.0      0     0 ?        S<   6月23   0:00 [xfs-reclaim/sda]
root        316  0.0  0.0      0     0 ?        S<   6月23   0:00 [xfs-log/sda3]
root        317  0.0  0.0      0     0 ?        S<   6月23   0:00 [xfs-eofblocks/s]
root        318  0.0  0.0      0     0 ?        S    6月23   2:55 [xfsaild/sda3]
root        319  0.0  0.0      0     0 ?        S<   6月23   0:00 [kworker/3:1H]
root        320  0.0  0.0      0     0 ?        S<   6月23   0:00 [kworker/2:1H]
root        399  0.0  0.3  37088  3372 ?        Ss   6月23   0:00 /usr/lib/systemd/systemd-journald
root        424  0.0  0.4  47992  4568 ?        Ss   6月23   0:01 /usr/lib/systemd/systemd-udevd
root        495  0.0  0.0      0     0 ?        S<   6月23   0:00 [xfs-buf/sda1]
root        505  0.0  0.0      0     0 ?        S<   6月23   0:00 [xfs-data/sda1]
root        506  0.0  0.0      0     0 ?        S<   6月23   0:00 [xfs-conv/sda1]
root        507  0.0  0.0      0     0 ?        S<   6月23   0:00 [xfs-cil/sda1]
root        512  0.0  0.0      0     0 ?        S<   6月23   0:00 [xfs-reclaim/sda]
root        516  0.0  0.0      0     0 ?        S<   6月23   0:00 [xfs-log/sda1]
root        518  0.0  0.0      0     0 ?        S<   6月23   0:00 [xfs-eofblocks/s]
root        519  0.0  0.0      0     0 ?        S    6月23   0:00 [xfsaild/sda1]
root        552  0.0  0.0  55532   864 ?        S<sl 6月23   0:00 /sbin/auditd
root        574  0.0  0.1  26484  1792 ?        Ss   6月23   0:00 /usr/lib/systemd/systemd-logind
polkitd     575  0.0  1.0 613004 10912 ?        Ssl  6月23   0:00 /usr/lib/polkit-1/polkitd --no-debug
dbus        576  0.0  0.2  66448  2596 ?        Ssl  6月23   0:00 /usr/bin/dbus-daemon --system --address=
root        580  0.0  0.1  21688  1324 ?        Ss   6月23   0:13 /usr/sbin/irqbalance --foreground
root        584  0.0  0.5 168304  5172 ?        Ss   6月23   0:00 /usr/bin/VGAuthService -s
root        585  0.1  0.4 338696  4860 ?        Ssl  6月23   6:15 /usr/bin/vmtoolsd
chrony      590  0.0  0.2 120408  2124 ?        S    6月23   0:01 /usr/sbin/chronyd
root        594  0.0  0.1 126384  1672 ?        Ss   6月23   0:00 /usr/sbin/crond -n
root        601  0.0  0.2  96572  2464 ?        Ss   6月23   0:00 login -- root
root        611  0.0  2.9 359012 29744 ?        Ssl  6月23   0:00 /usr/bin/python2 -Es /usr/sbin/firewalld
root        651  0.0  1.1 552652 11272 ?        Ssl  6月23   0:18 /usr/sbin/NetworkManager --no-daemon
root        731  0.0  0.0      0     0 ?        S<   6月23   0:01 [kworker/0:1H]
root        958  0.0  0.4 112900  4336 ?        Ss   6月23   0:00 /usr/sbin/sshd -D
root        959  0.0  0.5 214432  5212 ?        Ssl  6月23   0:23 /usr/sbin/rsyslogd -n
root        960  0.0  1.9 574284 19476 ?        Ssl  6月23   0:43 /usr/bin/python2 -Es /usr/sbin/tuned -l
root       1115  0.0  0.2  89708  2196 ?        Ss   6月23   0:02 /usr/libexec/postfix/master -w
postfix    1124  0.0  0.4  89880  4096 ?        S    6月23   0:00 qmgr -l -t unix -u
root       1230  0.0  0.2 115540  2088 tty1     Ss+  6月23   0:00 -bash
root       1277  0.0  0.0      0     0 ?        S<   6月23   0:00 [kworker/1:1H]
root       4734  0.0  0.1  46156  1152 ?        Ss   6月23   0:00 nginx: master process /usr/local/nginx/s
nobody     4735  0.0  0.1  46604  1904 ?        S    6月23   0:00 nginx: worker process
root      12713  0.0  0.0      0     0 ?        R    6月25   0:51 [kworker/1:2]
root      13565  0.0  0.0      0     0 ?        S    06:06   0:00 [kworker/2:2]
root      13660  0.0  0.0      0     0 ?        S    08:23   0:00 [kworker/u256:1]
root      13682  0.0  0.0      0     0 ?        S    08:57   0:00 [kworker/u256:2]
root      13896  0.0  0.0      0     0 ?        S    13:17   0:00 [kworker/0:0]
root      13913  0.0  0.0      0     0 ?        S    13:47   0:00 [kworker/0:2]
root      13914  0.0  0.0      0     0 ?        S    13:50   0:00 [kworker/3:1]
root      13915  0.0  0.0      0     0 ?        S    13:52   0:00 [kworker/0:1]
root      13918  0.0  0.0      0     0 ?        S    14:00   0:00 [kworker/3:0]
postfix   13934  0.0  0.4  89812  4076 ?        S    14:04   0:00 pickup -l -t unix -u
root      13935  0.0  0.0      0     0 ?        S    14:06   0:00 [kworker/3:2]
root      13940  2.0  0.5 158904  5592 ?        Ds   14:15   0:00 sshd: root@pts/0
root      13944  0.0  0.2 115544  2024 pts/0    Ss   14:15   0:00 -bash
root      13961  0.0  0.1 155448  1864 pts/0    R+   14:15   0:00 ps aux
捕获
捕获信号的语法:
trap command signal [signal ...]
比如:trap命令 引号引起来是捕获到信号后要做什么事 后面再写信号的名字。
trap "echo 已经识别中断信号:Ctrl+c" INT
当我进程接收到INT信号,我就做引号里面的事:打印。
当然捕获到以后可以什么事也不做:
trap "" INT
也可以空格隔开捕获多个信号
trap "" INT TSIP HUP QUIT
expect
expect自动交互基本语法:
ssh的密钥登录
具体用法:
先安装
[root@localhost ~]# yum install expect -y
写脚本:
vi ecpect1.sh
脚本开头行:
#!/usr/bin/expect
给执行权限并带着路径运行脚本:
chmod +x ecpect1.sh
./ecpect1.sh
语法:
关键字:spawn expect send
spawn:提交命令
expect:捕获交互的关键字,支持模糊匹配
send:帮我们自动填充要手动输入的那些内容的。
#!/usr/bin/expect

spwan root@127.0.0.1

expect "connecting"
send "yes\n"

expect "password"
send "1\n"

expect eof
expect自动交互进阶
第一次交互完之后,就会把指纹信息添加到/root/.ssh/known_hosts文件里面去,等到下次再发起ssh命令连接的时候就不要再输yes了。
-1 是永不超时
set timeout -1

超时时间30秒
set timeout 30
优化下
#!/usr/bin/expect
set timeout 30
spwan root@127.0.0.1

expect {
    "connecting" {send "yes\n";exp_continue}
    "password" {send "1\n"}
}

expect "\#"
send "ls\r"

expect "\#"
send "exit\n"

expect eof
interact关键字:停在交互的环节。
#!/usr/bin/expect
set timeout 30
spwan root@127.0.0.1

expect {
    "connecting" {send "yes\n";exp_continue}
    "password" {send "1\n"}
}

interact
expect参数及结合shell
expect定义变量
set ip ""
set user ""
set password ""
spwan $root@$ip
expect {
"connecting" {send "yes\n";exp_continue}
"password" {send "$password\n"}
}
interact
通过命令行来接收参数
#!/bin/bash
user=$1
ip=$2
pass=$3
expect << EOF

spawn $user@$ip
expect {
    "connecting" {send "yes\n";exp_continue}
    "password" {send "$pass\n"}
}
expect {
    "\#" {send "ls\r"}
}
expect eof

EOF
expect脚本实战:批量处理制作密钥登录
第一步:生成密钥对,把公钥拷贝给目标主机
ssh-keygen

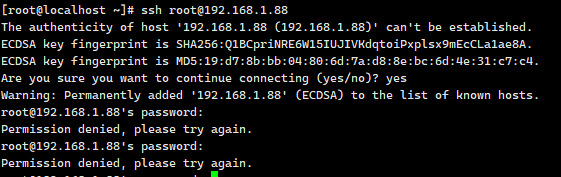
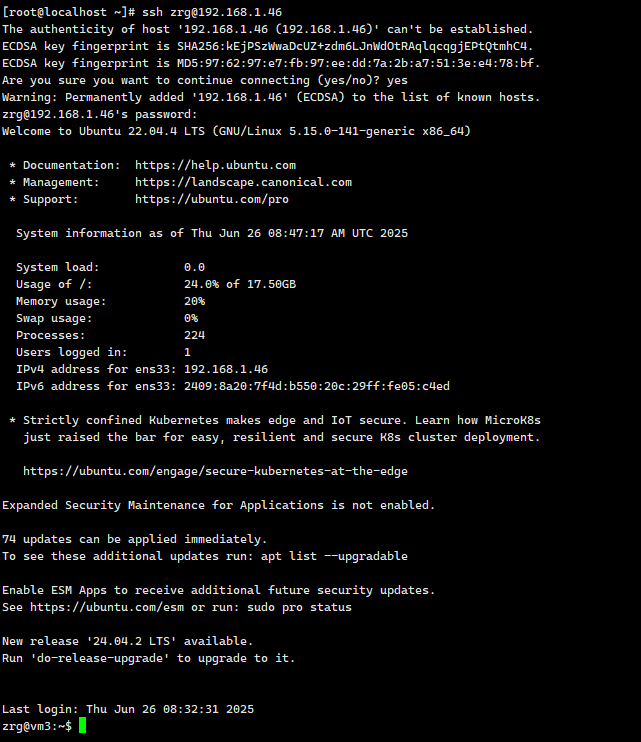
#!/bin/bash
#遍历


for ip in 192.168.1.46 192.168.1.88
do
expect << EOF

    spawn ssh-copy-id -i root@$ip
    expect {
        "yes/no" {send "yes\n";exp_continue}
        "password" {send "1\n"}
    }
    expect eof

EOF
done
从文件中读取
#!/bin/bash
#遍历
for user_info in `cat host_info.txt`
do
    user=$user_info |awk -F":" '{print $1}'
    ip=$user_info |awk -F":" '{print $3}'
    pass=$user_info |awk -F":" '{print $2}'
    echo $user $pass $ip
expect << EOF

    spawn ssh-copy-id -i $user@$ip
    expect {
        "yes/no" {send "yes\n";exp_continue}
        "password" {send "$pass\n"}
    }
    expect eof

EOF
done
rm -rf /root/.ssh/*
grep
grep命令种类介绍
grep:在文件中全局查找指定的正则表达式,并打印所有包含该表达式的行
egrep:扩展的egrep,支持更多的正则表达式元字符。等同于grep -E,代表的意思就是支持扩展正则表达式。
fgrep:固定grep(fixed grep),有时也被称作快速(fast grep),意味着它只处理固定字符串即按字面解释所有的字符,而不是正常表达式,而grep与egrep是支持正则表达式的,现在很多系统中fgrep已经被grep -F替代,二者的功能完全一样。
grep命令基本格式
先定位后操作
grep [选项] PATTERN 文件1 文件2...
grep "date$" yday.sh
特点:把匹配成功的那一整行内容打印出来。
[root@localhost scripts]# cat yday.sh
#!/bin/bash -
#定义一个叫作yday()函数
yday() {
    #显示一天前的系统如期和时间
    date --date='1 day ago'
}
#调用函数yday()
yday

[root@localhost scripts]# grep "date" yday.sh
    date --date='1 day ago'
也支持管道符号
[root@localhost scripts]# ps aux |grep nginx
root       4734  0.0  0.1  46156  1152 ?        Ss   6月23   0:00 nginx: master process /usr/local/nginx/sbin/nginx
nobody     4735  0.0  0.1  46604  1904 ?        S    6月23   0:00 nginx: worker process
root      14300  0.0  0.0 112824   988 pts/0    S+   17:29   0:00 grep --color=auto nginx
[root@localhost scripts]# echo $?
0
[root@localhost scripts]# ps aux |grep '[n]ginx'
root       4734  0.0  0.1  46156  1152 ?        Ss   6月23   0:00 nginx: master process /usr/local/nginx/sbin/nginx
nobody     4735  0.0  0.1  46604  1904 ?        S    6月23   0:00 nginx: worker process
[root@localhost scripts]# echo $?
0
grep命令常用选项
grep -n 'root' /etc/passwd
过滤完后带着行号。

grep -o 'root' /etc/passwd
只展示匹配的结果

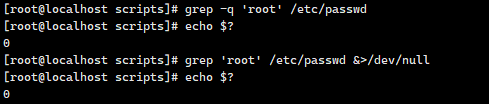
安静输出:
[root@localhost scripts]# grep -q 'root' /etc/passwd
等同于:
[root@localhost scripts]# grep 'root' /etc/passwd &>/dev/null
忽略大小写
[root@localhost scripts]# grep -i 'root' /etc/passwd
把匹配成功的行,可以指定匹配成功的行后几行展示出来
[root@localhost scripts]# grep -n -A 2 'root' /etc/passwd

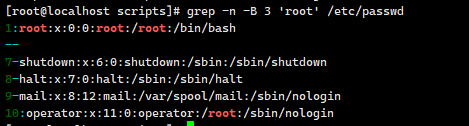
把匹配成功行的前几行展示出来
[root@localhost scripts]# grep -n -B 3 'root' /etc/passwd
把匹配成功行的上下几行展示出来
[root@localhost scripts]# grep -n -C 2 'root' /etc/passwd

统计匹配成功的个数
[root@localhost scripts]# grep -c 'root' /etc/passwd

反向匹配
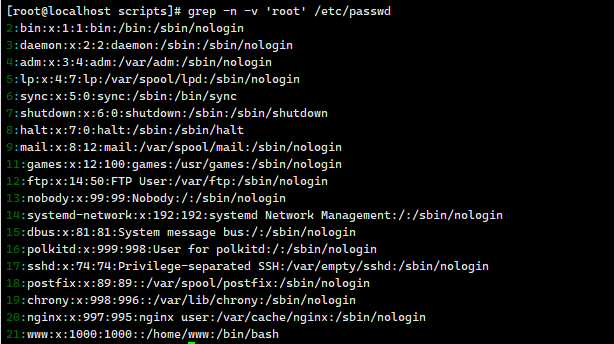
[root@localhost scripts]# grep -v 'root' /etc/passwd
[root@localhost scripts]# ps aux |grep "nginx" |grep -v "grep"
root       4734  0.0  0.1  46156  1152 ?        Ss   6月23   0:00 nginx: master process /usr/local/nginx/sbin/nginx
nobody     4735  0.0  0.1  46604  1904 ?        S    6月23   0:00 nginx: worker process
[root@localhost scripts]# echo $?
0
关掉nginx
[root@localhost scripts]# which nginx
/usr/sbin/nginx
[root@localhost scripts]# /usr/local/nginx/sbin/nginx -s stop
[root@localhost scripts]# ps aux |grep "nginx" |grep -v "grep"
[root@localhost scripts]# echo $?
1
支持扩展正则表达式,等同于egrep
递归的找 -r
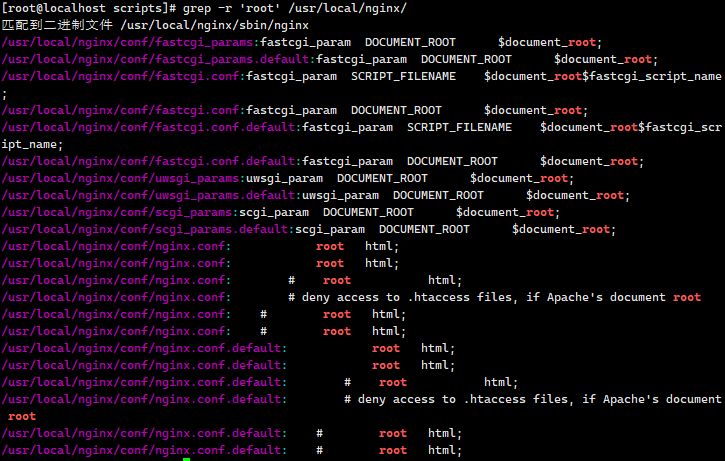
[root@localhost scripts]# grep -r 'root' /usr/local/nginx/
只展示文件名:
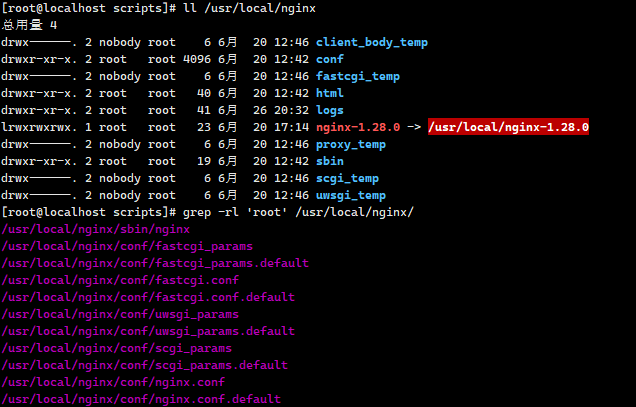
[root@localhost scripts]# grep -rl 'root' /usr/local/nginx/
[root@localhost scripts]# netstat -an |grep -w "80"

界定单词的三种方式:
[root@localhost scripts]# netstat -an |grep -w "80"
tcp        0      0 0.0.0.0:80              0.0.0.0:*               LISTEN
[root@localhost scripts]# netstat -an |grep "\<80\>"
tcp        0      0 0.0.0.0:80              0.0.0.0:*               LISTEN
[root@localhost scripts]# netstat -an |grep "\b80\b"
tcp        0      0 0.0.0.0:80              0.0.0.0:*               LISTEN
正则表达式
正则表达式匹配原理
正则表达式就是用一堆普通字符以及特殊字符组成的一个规则。
拿着这个规则去匹配符合这个规则的字符串。
shell元字符是被shell解释执行的。
以grep命令为例,不带特殊字符
ps aux |grep "nginx" |grep -v "grep"
grep命令带着规则一行一行的去匹配内容,从左往右,一个一个字符匹配,第一个字符匹配成功就以第一个字符为起始点继续匹配第二个字符,如果第二个字符没匹配成功,则以往后退一位从下一位开始对,以此依次,如果匹配成功一次,就往后退一位开始进行匹配。
正则表达式匹配原理:
  正则表达式匹配原理可以理解为一种强大的字符串处理工具。它由普通字符和特殊字符共同组成,形成一种模式或规则,用来在文本中识别和匹配特定的字符串。这种模式能够描述一类字符串的共性,从而实现对文本的搜索、替换等操作。
  在 Shell 脚本中,元字符扮演着重要角色,它们是被 Shell 解释执行的特殊字符。
  比如,在使用 grep 命令时,我们可以利用正则表达式的规则来搜索文本。
  例如,命令 ps aux | grep "nginx" | grep -v "grep" 的作用是在进程列表中查找包含 "nginx" 的行,同时排除那些包含 "grep" 的行。
  具体来说,grep 命令会按照指定的正则表达式规则逐行匹配文本内容。匹配过程从左到右进行,对每一个字符逐一比对。如果第一个字符匹配成功,那么会以该字符为起点继续匹配下一个字符。如果下一个字符没有匹配成功,那么匹配指针会后退一位,从下一个字符重新开始匹配。这个过程会不断重复,直到整个字符串都被匹配完毕或者出现匹配失败的情况。如果在某一位置匹配成功,那么匹配指针会后退一位,从下一个字符开始继续进行匹配,以确保所有可能的匹配结果都被找到。

通过这种细致的字符比对和后退机制,正则表达式能够在复杂的文本中精确地找到符合规则的字符串,实现高效、灵活的文本处理。正则表达式的广泛应用使得它在数据处理、文本编辑、系统管理等领域成为不可或缺的工具。
特殊符号.
.代表:除了换行符以外的任意单个字符。
grep 'a.c' f.txt
特殊符号^
^代表:以什么开头,从开头开始匹配
[root@localhost scripts]# grep '^root' /etc/passwd
root:x:0:0:root:/root:/bin/bash
特殊字符$
$代表:以什么结尾,从末尾开始匹配
[root@localhost scripts]# grep 'bash$' /etc/passwd
root:x:0:0:root:/root:/bin/bash
www:x:1000:1000::/home/www:/bin/bash
特殊符号*
*代表:它左边的那一个字符出现0次或者无穷次。
-P 'ab*?' 非贪婪,吃离自己最近的那个b。
特殊符号搭配.*
.*代表:任意字符
<a href="//q.cnblogs.com/u/zhangrenguo/" class="link_question">博问主页</a>
-P -o 'href=".*?"'
特殊符号[ ]
[ ]代表:匹配一个字符,可以指定范围。
[0-9]
[a-z]
[A-Z]
[a-zA-Z]
[ac-]
[24]
[a-zA-Z]*
特殊符号搭配[^ ]
[^ ]代表:取反的意思
[^0-9]
特殊符号搭配^[ ]
^[ ]代表:以什么开头的意思
^[a-zA-Z]*
联合使用:开头是非数字,收尾是任意两个字符,一共是3个字符。
^[^0-9]..$
如果就想匹配换行符:
-Pzo 'pyt\nhon
扩展正则的符号:用egrep或者grep -E
特殊符号?
?代表:它左边的那个字符出现0次或一次。
grep -E 'ab?' 1.txt
特殊符号+
+代表:左边的字符出现至少一次到无穷次。
特殊符号{ }
{ }代表:可以指定出现的次数,{ }里可以用逗号隔开,代表最低出现几次,最高出现几次,也是贪婪匹配。
特殊符号()
()代表:包含起来的意思。
grep -E '(love)able\1er' 1.txt
特殊符号|
|代表:或者的意思。
文本处理三剑客:sed、grep、awk
先定位后命令
用正则定位,sed需要加-r才能用扩展正则,awk需要加--posix,才能用扩展正则。
sed '//p'
awk '//{print $1}'
高效编写正则表达式

 浙公网安备 33010602011771号