

shell编程3-循环控制
脚本实战
nginx管理脚本
源码安装 NGINX
预先安装编译安装依赖的库
yum -y install gcc gcc-c++ autoconf automake make
yum -y install zlib zlib-devel openssl openssl-devel pcre pcre-devel

或者
LANG=C yum -y groupinstall "Development tools"
去官网找包(稳定版)下载
[root@localhost ~]# wget https://nginx.org/download/nginx-1.28.0.tar.gz
1、解压缩
[root@localhost ~]# tar xf nginx-1.28.0.tar.gz
2、进到解压目录进行编译安装
[root@localhost ~]# cd nginx-1.28.0
#定制安装信息,指定安装目录
./configure --prefix=/usr/local/nginx_1.28.0
#或者 ./configure --prefix=/usr/local/nginx --with-http_stub_status_module --with-http_ssl_module --with-stream --with-http_gzip_static_module --with-http_sub_module
#1、--prefix 指定安装的目录,/usr/local/nginx 是安装目录
#2、带ssl stub_status模块 添加stream模块 –with-stream,这样就能传输tcp协议了
#3、http_stub_status_module 状态监控
#4、http_ssl_module 配置https
#5、stream 配置tcp得转发
#6、http_gzip_static_module 压缩
#7、http_sub_module 替换请求
3、编译
make -j 2 #并发2个任务去编译
4、安装
make install
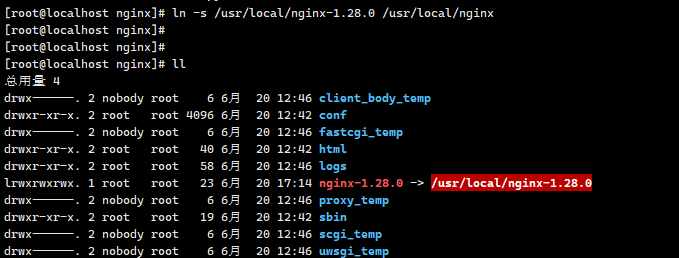
# 将程序设定一个软连接,便于后续的升级
[root@localhost nginx]# ln -s /usr/local/nginx-1.28.0 /usr/local/nginx
注意:现在百分之90,能用上的软件,都提供了rpm包. --->使用户可以使用yum直接安装使用.
补充:连接多个命令组成一条大命令
分号:左边命令运行完毕,无论成功与否,都会执行左边的命令。
make j 2;make install
&&:左边命令运行成功之后才能执行右边的命令
make j 2 && make install
常用命令:
yum install net-tools -y
netstat -an |grep 80
/usr/local/nginx/sbin/nginx
ps aux |grep nginx
pkill -9 nginx
/usr/local/nginx/sbin/nginx -s stop
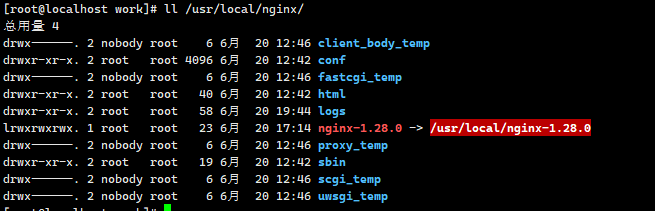
ll /usr/local/nginx/conf/
/usr/local/nginx/sbin/nginx -s reload
[root@localhost scripts]# netstat -an |grep ":80\b"
nginx_manager.sh脚本要实现哪些功能:start|stop|reload|restart|status


#!/bin/bash -

#如果给脚本指定的命令行参数的数目小于1 ,则显示脚本的使用方法信
if [ $# -ne 1 ]; then
    echo "Usage: $0 start|stop|reload|restart|status"
    exit 1
fi

args=$1

function f1() {
    if [ $? -eq 0 ];then
        echo "nginx $args 成功"
    else
         echo "nginx $args 失败"
    fi
}


#if [ "$1" = "start"  ]; then
#   pass
#elif [ "$1" = "stop" ]; then
#    pass
#elif [ "$1" = "restart" ]; then
#    pass
#elif [ "$1" = "staus" ]; then
#    pass
#
#fi

case $1 in
    start)
        #判断如果已经是启动状态,只打印提示信息,nginx已经启动了,否则运行启动命令,并判断启动命令是否>运行成功。
        netstat -an |grep ":80\b" &>/dev/null
        if [ $? -eq 0 ];then
            echo "nginx原本已经启动了"
        else
            /usr/local/nginx/sbin/nginx &>/dev/null
            #if [ $? -eq 0 ];then
            #    echo "nginx 启动成功"
            #else
            #    echo "nginx 启动失败"
            #fi
            f1

        fi
        ;;
    stop)
        #判断如果已经是关系状态,只打印提示信息,nginx已经关闭了,否则运行关闭命令,并判断关闭命令是否>运行成功。
        /usr/local/nginx/sbin/nginx -s stop &>/dev/null
            #if [ $? -eq 0 ];then
            #    echo "nginx 关闭成功"
            #else
            #    echo "nginx 关闭失败"
            #fi
         f1

        ;;
    reload)
        /usr/local/nginx/sbin/nginx &>/dev/null
        f1
        ;;
    restart)
        #先关闭 再启动 并判断是否重启成功 先判断如果是已经启动就直接关闭再启动
        netstat -an |grep ":80\b" &>/dev/null
        if [ $? -eq 0 ];then
            /usr/local/nginx/sbin/nginx -s stop &>/dev/null

        fi
        sleep 3
        #再启动
        /usr/local/nginx/sbin/nginx &>/dev/null
        #判断是否重启成功
        f1
        ;;
    status)
        /usr/local/nginx/sbin/nginx &>/dev/null
        ;;
    *)
        echo "Usage: $0 start|stop|reload|restart|status"
        ;;

esac
两种条件循环
循环就是重复做一件事情
while循环和until循环
while循环语法:
while 条件为真
do
    代码块
done
until循环语法:
until 条件为假
do
    代码块
done
区别是while的条件为真的时候,才会运行一次代码块,运行完一次之后会回过头来再判断一次条件是否为真,如果为真再执行一次代码块,再回头进行判断条件是否为真,直到条件为假也就停了。
而until是条件为假的时候它才执行代码块。
while循环脚本:
#!/bin/bash -

i=0
#while true

while [ $i -lt 6 ]
do
    echo $i
    let i++
done
#!/bin/bash -
i=0
until [ $i -eq 5 ]
do
    echo $i
    let i++
done
#!/bin/bash -

i=0
#while true

#while (( i < 6 ))
#do
#    echo $i
#    let i++
#done


until (( i > 5  ))
do
    echo $i
    let i++
done
break和continue
循环体内会用到的两个关键字
break:终止本层循环,意味着本层循环整体结束。
continue:继续的意思,终止本次循环,直接进入下一次。
continue与continue同一级别的代码永远运行不到。
循环体的最后一步代码也不能是continue。
#!/bin/bash -

i=1

while [ $i -lt 6 ]
do
    if [ $i -eq 3 ]; then
        let i++
        continue
    fi
    echo $i
    let i++
done
#!/bin/bash -

i=1

while [ $i -lt 6 ]
do
    if [ $i -eq 3 ]; then
        let i++
        break
    fi
    echo $i
    let i++
done
写一个跳板机程序:具体要求:
1、执行脚本就输出主机信息
1、backup 1.1.1.11
2、web01 1.1.1.12
3、db01 192.168.1.32
4、web02 1.1.1.34
2、用户输入编号则自动ssh连接到目标主机
#!/bin/bash -

#执行脚本就输出主机信息
#cat << EOF
#1、backup 1.1.1.11
#2、web01 1.1.1.12
#3、db01 192.168.1.32
#4、web02 1.1.1.34
#EOF

#声明一个整型变量
declare -i num
#显示提示输入一个数值的信息,然后将用户的输入促驽变量count中
read -p "Enter an num: " num

while true
do
cat << EOF
1、backup 1.1.1.11
2、web01 1.1.1.12
3、db01 192.168.1.32
4、web02 1.1.1.34
EOF

        case $num in
        1)
            echo "backup 1.1.1.11"
            ;;
        2)
            echo "web01 1.1.1.12"
            ;;
        3)
            ssh root@ "192.168.1.32"
            ;;
        4)
            echo "web02 1.1.1.34"
            ;;
        quit)
            break
            ;;
        *)
            echo "输入编码错误"
            ;;
        esac
done

echo "跳板机结束"
优化思路:
定制化配置---->写一个配置文件
[root@localhost ~]# mkdir /work
[root@localhost work]# cp /scripts/3.sh /work/
自己建一个配置文件目录
[root@localhost work]# mkdir conf
[root@localhost work]# vim conf/jump.conf
0、backup 1.1.1.11
1、web01 1.1.1.12
2、db01 192.168.1.32
3、web02 1.1.1.34
jump脚本内容:
#!/bin/bash -

ip_array=(`cat ./conf/jump.conf |awk '{print $NF}'`)

while true
do
    cat ./conf/jump.conf
    read -p "Enter an num: " num
    case $num in
        1)
            echo $(ip_array[$num])
            ;;
        1)
            echo $(ip_array[$num])
            ;;
        2)
            ssh root@$(ip_array[$num])
            ;;
        3)
            echo $(ip_array[$num])
            ;;
        quit)
            break
            ;;
        *)
            echo "输入编码错误"
            ;;
        esac
done

echo "跳板机结束"
登录认证脚本:
#!/bin/bash -
username="zrg"
psaaword="123"

failed=0
while true
do

    read -p "Enter a username: " inp_user
    read -p "Enter a password: " inp_pwd

    if [[ "$inp_user" = "$username" && "$inp_pwd" = "$psaaword" ]];then
        echo -e "\nLogin successful."
        #认证成功之后可以做后续的事
        break
    else
        echo -e "\n用户名或密码错误。"
        let failed++
    if [ $failed -eq 3 ]; then
        echo "输出的次数太多了,退出"
        break
    fi
    fi
    echo ""输出的次数:$failed
done
[root@localhost scripts]# curl -I https://www.dongchedi.com/
[root@localhost scripts]# curl -I https://www.dongchedi.com/
HTTP/1.1 200 OK
Server: Tengine
Content-Type: text/html; charset=utf-8
Content-Length: 188250
Connection: keep-alive
Date: Sat, 21 Jun 2025 14:20:37 GMT
Vary: Accept-Encoding
X-Tt-Logid: 202506212220372CE4E3C7AC3544EAF60B
x-cache: HIT
Cache-Control: private, max-age=180
Server-Timing: inner; dur=37,tt_agw; dur=22
Set-Cookie: ttwid=1%7Ca8LljL9MCxiIgF5T7uMDe7FrTpFSOBNTkSkqs2WLjZA%7C1750515637%7Ced42b760aef87eec9b5237acb41a9aeb9a0044a8681d8a18d888609b15061775; Domain=.dongchedi.com; Path=/; Expires=Sun, 21 Jun 2026 14:20:37 GMT; HttpOnly
Set-Cookie: tt_webid=7518407331690382910; path=/; expires=Sun, 21 Jun 2026 14:20:37 GMT
Set-Cookie: tt_web_version=new; path=/; expires=Thu, 18 Dec 2025 14:20:37 GMT
Set-Cookie: is_dev=false; path=/
Set-Cookie: is_boe=false; path=/
x-tt-trace-host: 015683e821c8935e16e5ea9e507caf685b15919fcf8cb768b20560ddc58b2cf1feaccf1862c62490c8567214018dcb885e1cd9a77bedf40dd27569aad2a2e5628e9cbb6f046041ebe8c848e7f40018ab637a9c8af85de51d67ad4296f53164ec38a8ea751cb05900f15caa7b93f52e4392cf5b2ff536148f0b45450e2b3bdbb8c1b90f2c17b1a270ccc9a636ff2a076989
x-tt-trace-tag: id=03;cdn-cache=miss;type=dyn
x-tt-trace-id: 00-2506212220372CE4E3C7AC3544EAF60B-391828254BCE957D-00
server-timing: cdn-cache;desc=MISS,edge;dur=0,origin;dur=101
Via: dynamic16.cn820[101,0]
Timing-Allow-Origin: *
EagleId: df6ff52417505156376173512e
不带任何前缀实现脚本调用:
把脚本路径写到PATH。
[root@localhost scripts]# vi /etc/profile
PATH=$PATH:/work:/scripts
export PATH
立即生效:
[root@localhost scripts]# source /etc/profile
或者软连接到已经存在于环境变量PATH的目录
迭代循环
for循环
语法
for 变量名 in 取值列表
do
    循环体
done
for ((初始值;条件;步长))
do
    循环体
done
展示:
for x in 111 112 113 113
do
    echo $x
done
命令的结果也可以当做
for x in `ls /scripts/`
do
    echo $x
done
c语言风格:
for ((i=0;i<=3;i++))
do
    echo $i
done
等同于:
i=0
while ((i<=3))
do
    echo $i
    ((i++))
done
控制循环次数
for x in {1..3}
do
    echo hello
    echo world
    echo !
done
shell风格的for常用in列表格式
for i in 1 2 3
for i in {1,2,3}
for i in {1..9}
for i in {9..1}
for i in {a..z}
for i in {A..Z}
for i in {X..Z}
for i in $(命令)  # 例如:for i in $(head -10 /etc/passwd);do echo $i|cut -d: -f1,2;done
for i in $(find ...)
注意:命令的结果得是空格隔开的或者是换行符隔开的都行。
for循环的continue和break
continue:默认退出本次循环。
break:默认退出本层循环。
for ((i=1;i<=;i++))
do
    if [ $i -eq 3 ]; then
        continue
    fi
    echo $i
done
得到某个网段的所有IP地址
for i in {1..254}
do
    ip_addr=192.168.1.$i
    echo $ip_addrdone
ping -c1 ip_addr &>/dev/null
select
自动生成编号和read。
语法:
#!/bin/bash -
#PS3='请输入选择的编号:'
select month in Jan Feb mar Apr May Jun Jul Aug Sept Oct Nov Dec quit
do
    if [ "$month" == "quit" ]; then
        break
    else
        echo "$month"
    fi
done
~
1) Jan       3) mar    5) May    7) Jul     9) Sept  11) Nov   13) quit
2) Feb       4) Apr    6) Jun    8) Aug    10) Oct      12) Dec
#? f

#? 5
May
#?
1) Jan       3) mar    5) May    7) Jul     9) Sept  11) Nov   13) quit
2) Feb       4) Apr    6) Jun    8) Aug    10) Oct      12) Dec
#? 8
Aug
#? 13

 浙公网安备 33010602011771号