
WP7的控件开发入门(三)
关于作图部分我想说的是完全可以通过Blend工具,简单的实现,几乎不用自己直面代码,但是为了控件部分知识的全面性,我还是强忍着学习了这一部分,并做了记录如下:
绘图控件
InkPresenter 控件
<InkPresenter
Height="518"
HorizontalAlignment="Left"
Margin="28,40,0,0"
Name="inkPresenter1"
VerticalAlignment="Top"
Width="390"
Background="White"
MouseMove="inkPresenter1_MouseMove"
LostMouseCapture="inkPresenter1_LostMouseCapture"
MouseLeftButtonDown="inkPresenter1_MouseLeftButtonDown"
/>
代码实现
先定义 Stroke NewStroke;
private void inkPresenter1_MouseMove(object sender, MouseEventArgs e)
{
if(NewStroke != null)
{
NewStroke.StylusPoints.Add(e.StylusDevice.GetStylusPoints(inkPresenter1));
}
}
private void inkPresenter1_LostMouseCapture(object sender, MouseEventArgs e)
{
NewStroke = null;
}
private void inkPresenter1_MouseLeftButtonDown(object sender, MouseButtonEventArgs e)
{
inkPresenter1.CaptureMouse();
StylusPointCollection point = new StylusPointCollection();
point.Add(e.StylusDevice.GetStylusPoints(inkPresenter1));
NewStroke = new Stroke();
inkPresenter1.Strokes.Add(NewStroke);
}
Path控件以及它众多的子效果
<Path Height="150"
HorizontalAlignment="Left"
Margin="5,5,0,0"
Name="path1"
Stroke="Red"
StrokeThickness="5"
VerticalAlignment="Top"
Width="200"
Fill="Blue">
<Path.Data>
<EllipseGeometry Center="100,100"
RadiusX="80"
RadiusY="40">
</EllipseGeometry>
</Path.Data>
</Path>
绘制圆形
<Path VerticalAlignment="Top"
HorizontalAlignment="Left"
Margin="10,10,0,0"
Height="300"
Width="400"
Stroke="Red"
StrokeThickness="2"
Fill="Green">
<Path.Data>
<GeometryGroup FillRule="EvenOdd">
<EllipseGeometry Center="180,120"
RadiusX="140"
RadiusY="80"/>
<RectangleGeometry Rect="50,150,300,100"
/>
</GeometryGroup>
</Path.Data>
</Path>
绘制两个图片重叠的效果
<Path Height="400"
Width="400"
VerticalAlignment="Top"
HorizontalAlignment="Left"
Margin="1,1,0,0"
Stroke="Yellow"
StrokeThickness="3"
Data="M 10,40 L 200,40 V 100 H 40 S 60,200,200,200"
>
</Path>
绘制线条
Ellipse控件与Rectangle控件那个简单的就不多说了,记得矩形控件的圆角效果
<Ellipse Height="100"
HorizontalAlignment="Left"
Margin="88,69,0,0"
Name="ellipse1"
Stroke="Red"
StrokeThickness="1"
VerticalAlignment="Top"
Width="200"
Fill="Green"/>
<Rectangle Height="110"
HorizontalAlignment="Left"
Margin="88,0,0,95"
Name="rectangle1"
Stroke="Red"
StrokeThickness="1"
VerticalAlignment="Bottom"
Width="237"
RadiusX ="20"
RadiusY="20"
Fill="Blue"/>
Line控件画直线
<Line Width="300"
Height="300"
VerticalAlignment="Top"
HorizontalAlignment="Left"
Margin="20,20,0,0"
X1="30" Y1="30"
X2="250" Y2="250"
Stroke="Yellow"
StrokeThickness="10"
/>
Polygon 多边形控件,指定点后是封闭的
<Polygon Width="200"
Height="200"
VerticalAlignment="Top"
HorizontalAlignment="Left"
Margin="3,3,0,0"
Points="3,3 180,10 150,100"
Stroke="Yellow"
StrokeThickness="10"
/>
Polyline控件是折线,把点连接起来,不封闭
<Polyline Width="200"
Height="200"
VerticalAlignment="Top"
HorizontalAlignment="Left"
Margin="30,300,0,0"
Points="40,30 180,30 100,190"
Stroke="Yellow"
StrokeThickness="10"
/>
Glyphs 该控件用于加载字库改变字体
<Glyphs HorizontalAlignment="Left"
VerticalAlignment="Top"
Margin="3,3,0,0"
Width="400"
Height="400"
FontUri="cuti.ttf"
OriginX="1"
OriginY="200"
Fill="Green"
FontRenderingEmSize="100"
UnicodeString="hello world">
</Glyphs>
OriginX="1"
OriginY="200"这两个值,所定位的点,指的是显示字的左下角那个点
-------------------以上都是绘图控件--------------------------------------
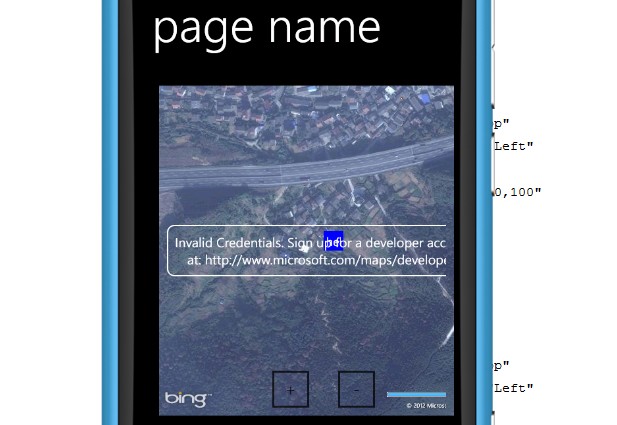
Map控件
<my:Map
Height="500"
HorizontalAlignment="Left"
VerticalAlignment="Top"
Margin="20,20,0,0"
Name="map1"
Width="500"
CredentialsProvider="hello world" //此处需要填写注册的账号,需要去bingmap官网注册获得一个key。
ScaleVisibility="Visible"
Center="30,120" //定位的中心点
ZoomBarVisibility="Visible"//显示缩放按钮
Mode="Aerial"//地图模式的选择,默认的是Road,显示道路,当先模式显示的是卫星地图
ZoomLevel="15"/> //缩放的比例
加载显示的时候显示点的标示
private void PhoneApplicationPage_Loaded(object sender, RoutedEventArgs e)
{
Pushpin pin = new Pushpin();
pin.Location = new System.Device.Location.GeoCoordinate(30,120);
pin.Width = 30;
pin.Height = 30;
pin.Content = "hello world";
pin.Background = new SolidColorBrush(Colors.Blue);
map1.Children.Add(pin);
}
在查找点上还可以显示地点的标志建筑的图片,设置具体的显示方式之类的额外实现在此就不在赘述了
自己模拟机上的样子,有点丑啊嘿嘿

 浙公网安备 33010602011771号