
Spring之IOC容器加载初始化的方式
引言
我们知道IOC容器时Spring的核心,可是如果我们要依赖IOC容器对我们的Bean进行管理,那么我们就需要告诉IOC容易他需要管理哪些Bean而且这些Bean有什么要求,这些工作就是通过通过配置文件告诉Spring 的IOC容器。在我们的完成这些配置文件以后,如果IOC容易要实现对这些Bean的管理,除了资源的定位还有一个很重要的一步就是完成IOC加载初始化,也就是配置文件的载入过程。完成IOC容器加载初始化的方式只要有三种,第一种就是通过File文件加载,第二种是通过Classpath(相对路径)加载,还有一种就是通过web引入的方式。我们分别做简单的 介绍。
文件加载:
在介绍通过文件方式加载之前我们首先写一些简单的测试案例
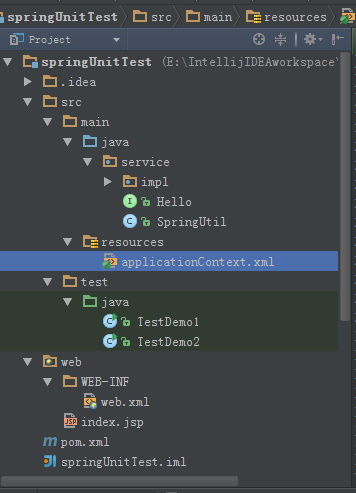
A:项目布局
B:测试主要用到的类和接口:
接口Hello.java
package service;


public interface Hello {

    public void sayHello();
    public void sayGoodbye();

}
接口实现:HelloImpl.java
package service.impl;

import service.Hello;


public class HelloImpl implements Hello {
    @Override
    public void sayHello() {
        System.out.println("This is  from the spring,I want to  say  Hello!!");
    }

    @Override
    public void sayGoodbye() {
        System.out.println("This is  from the spring ,I want to say Goodbye!!");
    }
}
C:spring相关配置文件(spring的默认配置文件位于WEB-INF文件夹中的applicationContext.xml)
<?xml version="1.0" encoding="UTF-8"?>
<beans xmlns="http://www.springframework.org/schema/beans"
       xmlns:xsi="http://www.w3.org/2001/XMLSchema-instance"
       xmlns:context="http://www.springframework.org/schema/context"
       xmlns:tx="http://www.springframework.org/schema/tx"
       xmlns:aop="http://www.springframework.org/schema/aop"
       xsi:schemaLocation="http://www.springframework.org/schema/beans
        http://www.springframework.org/schema/beans/spring-beans-3.2.xsd
        http://www.springframework.org/schema/context
        http://www.springframework.org/schema/context/spring-context-3.2.xsd
        http://www.springframework.org/schema/mvc
        http://www.springframework.org/schema/mvc/spring-mvc.xsd
        http://www.springframework.org/schema/tx http://www.springframework.org/schema/tx/spring-tx-3.2.xsd
        http://www.springframework.org/schema/aop http://www.springframework.org/schema/aop/spring-aop-3.2.xsd
         ">
    <bean id="hello" class="service.impl.HelloImpl"/>
    <bean id="springUtil" class="service.SpringUtil"/>
</beans>
D:通过FileSystemXmlApplicationContext加载
  /*FileSystemXmlApplicationContext加载方式*/
       FileSystemXmlApplicationContext fileSystemXmlApplicationContext = new FileSystemXmlApplicationContext("classpath:applicationContext.xml");
        Hello hello2 = (Hello) context.getBean("hello");
        hello2.sayHello();
        hello2.sayGoodbye();
E:通过FileSystemResource方式加载
        /*FileSystemResource加载方式*/
        BeanFactory factory2 = new XmlBeanFactory(new FileSystemResource("E:\\WorkSpace\\IntellijIDEAworkspace\\springFunctions\\ManvenSpringTest\\src\\main\\resources\\applicationContext.xml"));
        Hello  hello4= factory2.getBean("hello",Hello.class);
        hello4.sayHello();
        hello4.sayGoodbye();
F:(FileSystemXmlApplicationContext)其他说明
1.默认为项目工作路径 即项目的根目录
ApplicationContext appCt2 = new FileSystemXmlApplicationContext("src/main/resources/XXXXXX.xml");
2.前缀classpath:表示的是项目的classpath下相对路径
ApplicationContext appCt2 = new FileSystemXmlApplicationContext("classpath:XXXXxml");
3.使用前缀file 表示的是文件的绝对路径
ApplicationContext appCt2 = new FileSystemXmlApplicationContext("file:D:/XXXX.xml");
ApplicationContext appCt2 = new FileSystemXmlApplicationContext("D:/XXXX.xml");
4.可以同时加载多个文件
String[] xmlCfg = new String[] { "src/main/resources/XXXXX.xml","classpath:YYYY.xml"};
ApplicationContext appCt2 = new FileSystemXmlApplicationContext(xmlCfg);
5.使用通配符加载所有符合要求的文件
ApplicationContext appCt2 = new FileSystemXmlApplicationContext("classpath:*.xml");
ClassPath方式加载
A:所使用的文件如果上面一致
B:通过ClassPathXmlApplicationContext加载
  /*ClassPathXmlApplicationContext加载方式*/
        ClassPathXmlApplicationContext context  = new ClassPathXmlApplicationContext("classpath:applicationContext.xml");
        Hello hello = (Hello) context.getBean("hello");
        hello.sayHello();
        hello.sayGoodbye();
C:通过ClassPathResource方式加载
   /*ClassPathResource加载方式*/
      BeanFactory factory = new XmlBeanFactory(new ClassPathResource("applicationContext.xml"));
        Hello  hello3= factory.getBean("hello",Hello.class);
        hello3.sayHello();
        hello3.sayGoodbye();
D:其他说明
1.没有前缀:默认为项目的classpath下相对路径
ApplicationContext appCt = new ClassPathXmlApplicationContext("XXXX.xml");
2.前缀classpath:表示的是项目的classpath下相对路径
ApplicationContext appCt = new ClassPathXmlApplicationContext("classpath:YYYY.xml");
3.使用前缀file 表示的是文件的绝对路径
ApplicationContext appCt = new ClassPathXmlApplicationContext("file:D:/XXXX.xml");
4.可以同时加载多个文件
String[] xmlCfg = new String[] { "classpath:XXX.xml","YYYY.xml"};
ApplicationContext appCt = new ClassPathXmlApplicationContext(xmlCfg);
5.使用通配符加载所有符合要求的文件
ApplicationContext appCt = new ClassPathXmlApplicationContext("*.xml");
WEb方式加载
A:这个需要通过配置ContextLoaderListener
   <!--  指定Spring Bean的配置文件所在目录。默认配置在WEB-INF目录下 -->
    <context-param>
        <param-name>contextConfigLocation</param-name>
        <param-value>classpath*:/applicationContext.xml</param-value>
    </context-param>
    <listener>
     <listener-class>org.springframework.web.context.ContextLoaderListener</listener-class>
    </listener>
B:这样就可以将IOC容器加载到环境中了。
执行结果
代码:TestDemo1.java
import org.springframework.beans.factory.BeanFactory;
import org.springframework.beans.factory.xml.XmlBeanFactory;
import org.springframework.context.support.ClassPathXmlApplicationContext;
import org.springframework.context.support.FileSystemXmlApplicationContext;
import org.springframework.core.io.ClassPathResource;
import org.springframework.core.io.FileSystemResource;

import service.Hello;


public class TestDemo1 {

    public static void main(String []args){
        System.out.println("ClassPathXmlApplicationContext");
        /*ClassPathXmlApplicationContext加载方式*/
        ClassPathXmlApplicationContext context  = new ClassPathXmlApplicationContext("classpath:applicationContext.xml");
        Hello hello = (Hello) context.getBean("hello");
        hello.sayHello();
        hello.sayGoodbye();
        System.out.println("ClassPathResource");
        /*ClassPathResource加载方式*/
        BeanFactory factory = new XmlBeanFactory(new ClassPathResource("applicationContext.xml"));
        Hello  hello3= factory.getBean("hello",Hello.class);
        hello3.sayHello();
        hello3.sayGoodbye();
        System.out.println("FileSystemXmlApplicationContext");
        /*FileSystemXmlApplicationContext加载方式*/
       FileSystemXmlApplicationContext fileSystemXmlApplicationContext = new FileSystemXmlApplicationContext("classpath:applicationContext.xml");
        Hello hello2 = (Hello) fileSystemXmlApplicationContext.getBean("hello");
        hello2.sayHello();
        hello2.sayGoodbye();
        System.out.println("FileSystemResource");
        /*FileSystemResource加载方式*/
        BeanFactory factory2 = new XmlBeanFactory(
                new FileSystemResource("E:\\WorkSpace\\IntellijIDEAworkspace\\springFunctions\\ManvenSpringTest\\src\\main\\resources\\applicationContext.xml"));
        Hello  hello4= factory2.getBean("hello",Hello.class);
        hello4.sayHello();
        hello4.sayGoodbye();

    }
}
运行结果:

其他:
上面的测试用例都是采用最原来的凡是来实现的,这样对于做项目来说就是不专业的也是效率低下的。Spring自己提供了单元测试的相关支持,通过这个我们可以极大地优化我们的测试用例,下篇文章做个总结和说明。

 浙公网安备 33010602011771号