


kafka集群安装
服务规划
关闭防火墙、selinux
地址
| 主机名 | IP地址 |
| node1 | 10.0.0.31 |
| node2 | 10.0.0.32 |
| node3 | 10.0.0.33 |
安装Java环境
Kafka 是使用 Java 开发的应用程序 ,在安装 Zookeeper 和 Kafka 之前,需要先安装 Java 环境
1 # mkdir -p /data/{module,softwares} && cd /data/softwares
 2 # tar xfz jdk-8u201-linux-x64.tar.gz -C /data/module
 3 # cd /data/module && ln -sv jdk1.8.0_201/ jdk
 4 ‘jdk’ -> ‘jdk1.8.0_201/’
 5
 6 # 配置环境变量
 7 # vim /etc/profile
 8 export JAVA_HOME=/data/module/jdk
 9 export PATH=$PATH:$JAVA_HOME/bin
10
11 # . /etc/profile
安装zookeeper
 1 # cd /data/softwares && tar xfz apache-zookeeper-3.5.5-bin.tar.gz -C /data/module
 2 # cd /data/module/ && ln -sv apache-zookeeper-3.5.5-bin/ zookeeper && cd zookeeper
 3
 4
 5 #由于zookeeper的环境变量脚本指定了堆内存配置文件,所以需要自己创建zookeeper的堆内存配置文件,位置:$ZOOKEEPER/bin/zkEnv.sh
 6
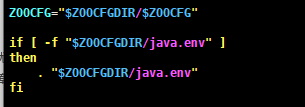
 7 # vim java.env
 8 #!/bin/bash
 9 # @author :zhanghao
10 # blog:http://www.cnblogs.com/zh-dream
11 # EMAIL:416805766@qq.com
12
13 # 指定JDK的安装路径
14 export JAVA_HOME=/data/module/jdk
15
16 # 指定zookeeper的heap内存大小,机器为4G的话可以设为3G
17 export JVMFLAGS="-Xms1G -Xmx1G $JVMFLAGS"
创建zookeeper的配置文件zoo.cfg
 1 # 滴答时间,默认是2000毫秒,即2秒。它是zookeeper最小的时间单位
 2 tickTime=2000
 3
 4 #表示用于在从节点与主节点之间建立初始化连接的时间上限
 5 initLimit=10
 6
 7 #表示允许从节点与主节点处于不同步状态的时间上限,和initLimit一样,都是tickTime的倍数
 8 syncLimit=5
 9
10 # 事务提交日志目录
11 dataDir=/data/module/apache-zookeeper-3.5.5-bin/zkTxData
12 # 快照日志目录
13 dataLogDir=/data/module/apache-zookeeper-3.5.5-bin/zkSnapshot
14
15 # 客户端连接端口
16 clientPort=2181
17 # 限制连接到 ZooKeeper 的客户端的数量,此配置选项可以用来阻止某些类别的 Dos 攻击。
18 #maxClientCnxns=60
19 #
20 # Be sure to read the maintenance section of the
21 # administrator guide before turning on autopurge.
22 #
23 # http://zookeeper.apache.org/doc/current/zookeeperAdmin.html#sc_maintenance
24
25 # 指定了需要保留的文件数目。默认是保留3个。
26 #autopurge.snapRetainCount=3
27
28 # 3.4.0及之后版本,ZK提供了自动清理事务日志和快照文件的功能,这个参数指定了清理频率,单位是小时,需要配置一个1或>
29 更大的整数,默认是0,表示不开启自动清理功能。
30 #autopurge.purgeInterval=1
31
32 #服务器地址遵循 server.X=hostname:peerPort:leaderPort 格式,X为服务器的ID,它必须是一个整数,不过不一定要从 0 开始
33 ,也不要求是连续的;hostname服务器的机器名或 IP 地址;peerPort用于节点间通信的 TCP 端口;leaderPort用于首领选举的
34 TCP 端口。
35 server.1=node1:2888:3888
36 server.2=node2:2888:3888
37 server.3=node3:2888:3888
创建快照目录和提交日志目录
# mkdir zkSnapshot zkTxData
创建myid文件
1 # echo 1 > zkTxData/myid
编写zookeeper的启动脚本
# vi /usr/local/bin/zookeeper_manager.sh

#!/bin/bash

#判断用户是否传参
if [ $# -ne 1 ];then
    echo "无效参数,用法为: $0  {start|stop|restart|status}"
    exit
fi

#获取用户输入的命令
cmd=$1

#定义函数功能
function zookeeperManger(){
    case $cmd in
    start)
        echo "启动服务"
        remoteExecution start
        ;;
    stop)
        echo "停止服务"
        remoteExecution stop
        ;;
    restart)
        echo "重启服务"
        remoteExecution restart
        ;;
    status)
        echo "查看状态"
        remoteExecution status
        ;;
    *)
        echo "无效参数,用法为: $0  {start|stop|restart|status}"
        ;;
    esac
}


#定义执行的命令
function remoteExecution(){
    for (( i=1 ; i<=3 ; i++ )) ; do
            tput setaf 2
            echo ========== node${i} zkServer.sh  $1 ================
            tput setaf 9
            ssh node${i} "source /etc/profile ; zkServer.sh $1"
    done
}

#调用函数
zookeeperManger

# 添加权限
# chmod +x /usr/local/bin/zookeeper_manager.sh
配置免密登录
1 # ssh-keygen -t rsa -f /root/.ssh/id_rsa -P ""
2
# vim /etc/hosts
127.0.0.1 localhost localhost.localdomain localhost4 localhost4.localdomain4
::1 localhost localhost.localdomain localhost6 localhost6.localdomain6
10.0.0.31 node1
10.0.0.32 node2
10.0.0.33 node3
3 # yum install -y sshpass
4
5 # for i in node{1..3};do sshpass -p123456 ssh-copy-id -i /root/.ssh/id_rsa.pub "-o StrictHostKeyChecking=no" $i;done
将zookeeper二进制文件及环境变量拷贝至其他节点
1 # vim /etc/profile
2
3 export JAVA_HOME=/data/module/jdk
4 ZOOKEEPER=/data/module/zookeeper
5 PATH=$PATH:$ZOOKEEPER/bin:$JAVA_HOME/bin
安装ansible
 1 # yum install -y ansible
 2 # vim /etc/ansible/hosts
 3 [kafka]
 4 node[1:3]
 5
 6 # 创建日志目录和myid文件
 7
 8 # ansible node[2..3] -m file -a 'name=/data/module/ state=directory'
 9
10 # ansible kafka -m yum -a "name=rsync state=present"
11
12 # ansible node[2..3] -m synchronize -a "src=/data/module/apache-zookeeper-3.5.5-bin dest=/data/module/ perms=yes rsync_opts=--exclude=myid "
13
14 # ansible node[2..3] -m file -a "src=/data/module/apache-zookeeper-3.5.5-bin state=link dest=/data/module/zookeep
15 er"
16
17 # ansible node2 -m shell -a 'echo 2 > /data/module/zookeeper/zkTxData/myid'
18
19 # ansible node3 -m shell -a 'echo 3 > /data/module/zookeeper/zkTxData/myid'
20
21 # ansible node[2..3] -m shell -a "cat /data/module/zookeeper/zkTxData/myid"
22
23 # ansible node[2..3] -m synchronize -a "src=/etc/profile dest=/etc"
24
25 # ansible node[2..3] -m synchronize -a "src=/etc/hosts dest=/etc"
26
27 # ansible node[2..3] -m synchronize -a "src=/data/module/jdk1.8.0_201 dest=/data/module"
28
29 # ansible node[2..3] -m file -a "src=/data/module/jdk1.8.0_201 state=link dest=/data/module/jdk"
30
31 # ansible node[2..3] -m shell -a "source /etc/profile"
启动zookeeper并查看状态
1 # zookeeper_manager.sh start
2 # zookeeper_manager.sh status
搭建kafka集群
下载安装包(kafka_2.11-0.10.2.1前面的2.11是开发语言Scala的版本,后面的0.10.2.1才是kafka版本)
# yum install -y wget
# wget -P /data/softwares https://archive.apache.org/dist/kafka/0.10.2.1/kafka_2.11-0.10.2.1.tgz
解压
# tar zfx kafka_2.11-0.10.2.1.tgz -C /data/module/
添加环境变量
1 # vim /etc/profile
2 export JAVA_HOME=/data/module/jdk
3 ZOOKEEPER=/data/module/zookeeper
4 KAFKA_HOME=/data/module/kafka_2.11-0.10.2.1
5 PATH=$PATH:$JAVA_HOME/bin:$KAFKA_HOME/bin:$ZOOKEEPER/bin
修改kafka启动脚本
# vim /data/module/kafka_2.11-0.10.2.1/bin/kafka-server-start.sh

if [ "x$KAFKA_HEAP_OPTS" = "x" ]; then
    #默认的KAFKA的HEAP内存为1G,在实际生产环境中显然是不够的,这里将其配置为6G,如果full gc再将其扩大,但在实际生产环境中,这样配置如果你的虚拟机可用内存如果不足6G可能会直接抛出OOM异常
    #export KAFKA_HEAP_OPTS="-Xmx1G -Xms1G"
    export KAFKA_HEAP_OPTS="-Xmx6g -Xms6g -XX:MetaspaceSize=96m -XX:+UseG1GC -XX:MaxGCPauseMillis=20 -XX:InitiatingHeapOccupancyPercent=35 -XX:G1HeapRegionSize=16M -XX:MinMetaspaceFreeRatio=50 -XX:MaxMetaspaceFreeRatio=80"
fi
1.1 修改kafka的配置文件(server.properties)
 1 # egrep -v "^$|#" config/server.properties
 2 broker.id=1
 3 delete.topic.enable=true
 4 auto.create.topics.enable=false
 5 listeners=PLAINTEXT://10.0.0.31:9092
 6 port=9092
 7 host.name=node1
 8 num.network.threads=30
 9 num.io.threads=30
10 socket.send.buffer.bytes=5242880
11 socket.receive.buffer.bytes=5242880
12 socket.request.max.bytes=104857600
13 queued.max.requests=1000
14 log.dirs=/data/module/kafka_2.11-0.10.2.1/data/log1,/data/module/kafka_2.11-0.10.2.1/data/log2,/data/module/kafka_2.11-0.10.2.1/data/log3
15 num.partitions=20
16 num.recovery.threads.per.data.dir=30
17 default.replication.factor=2
18 message.max.bytes=104857600
19 log.retention.hours=168
20 log.segment.bytes=536870912
21 log.retention.check.interval.ms=600000
22 zookeeper.connect=node1:2181,node2:2181,node3:2181/kafka01
23 zookeeper.connection.timeout.ms=60000
24 zookeeper.session.timeout.ms=180000
25 max.request.size=104857600
26 fetch.message.max.bytes=104857600
27 replica.fetch.max.bytes=104857600
28 replica.fetch.wait.max.ms=2000
29 unclean.leader.election.enable=false
30 num.replica.fetchers=5
重要参数说明(绿色为至关重要的参数,黄色为根据实际业务需要设置)
  1 ############################# Server Basics #############################
  2
  3 # 每个 broker 都需要有一个标识符,使用 broker.id 来表示。它的默认值是 0,也可以被设置成其他任意整数。这个值在整个 Kafka 集群里必须是唯一的
  4
  5 broker.id=1
  6
  7 # Switch to enable topic deletion or not, default value is false
  8
  9 #此设置并不执行删除动作,仅仅是在zookeeper上标记该topic可以被删除而已,同时也提醒用户一定要提前打开delete.topic.enable开关,否则删除动作是不会执行的
 10
 11 delete.topic.enable=true
 12
 13 #是否允许自动创建topic,若是false,就需要通过命令创建topic,官方建议为false
 14
 15 auto.create.topics.enable=false
 16
 17 #默认情况下, Kafka 会在如下几种情形下自动创建主题 :
 18
 19 #(1)当一个生产者开始往主题写入消息时
 20
 21 #(2)当一个消费者开始从主题读取消息时
 22
 23 #(3)当任意一个客户端向主题发送元数据请求时
 24
 25 #根据 Kafka 协议,如果一个主题不先被创建,根本无法知道它是否已经存在
 26
 27 ############################# Socket Server Settings #############################
 28
 29 # The address the socket server listens on. It will get the value returned from
 30
 31 # java.net.InetAddress.getCanonicalHostName() if not configured.
 32
 33 #   FORMAT:
 34
 35 #     listeners = listener_name://host_name:port
 36
 37 #   EXAMPLE:
 38
 39 #     listeners = PLAINTEXT://your.host.name:9092
 40
 41 #listeners=PLAINTEXT://:9092
 42
 43 # Broker服务器侦听的地址列表。格式为:[协议]://[主机名]:[端口],[协议]://[主机名]:[端口],主要用于客户端连接broker
      不指定主机名时,表示绑定默认网卡,如果主机名是0.0.0.0,表示绑定所有网卡
 44 # Kafka支持的协议包括:PLAINTEXT、SSL、SASL_SSL

 45   # 内网使用,内外网提供服务的时候(例如云服务器和docker),需要进行如下配置:
 46  # listeners: INSIDE://172.17.0.10:9092,OUTSIDE://172.17.0.10:9094
 47   # advertised_listeners: INSIDE://172.17.0.10:9092,OUTSIDE://<公网 ip>:端口
 48   # kafka_listener_security_protocol_map: "INSIDE:SASL_PLAINTEXT,OUTSIDE:SASL_PLAINTEXT"
 49   # kafka_inter_broker_listener_name: "INSIDE"
 50   # advertised_listeners 监听器会注册在 zookeeper 中;
 51   # 当我们对 172.17.0.10:9092 请求建立连接,kafka 服务器会通过 zookeeper 中注册的监听器,找到 INSIDE 监听器,然后通过 listeners 中找到对应的 通讯 ip 和 端口;
 52  云上服务器一般都有多块网卡(内网网卡和公网网卡)用户可以设置该参数绑定公网 IP 供外部 clients 使用,然后配置上面的 listeners 来绑定私网 IP 供 broker间通信使用 。当然不设置该参数也是可以的,只是云上的机器很容易出现 clients 无法获取数据的问题,原因就是listeners 绑定的是默认网卡,而默认网卡通常都是绑定私网IP的
 53   # 同理,当我们对 <公网 ip>:端口 请求建立连接,kafka 服务器会通过 zookeeper 中注册的监听器,找到 OUTSIDE 监听器,然后通过 listeners 中找到对应的 通讯 ip 和 端口 172.17.0.10:9094;
 54  # 总结:advertised_listeners 是对外暴露的服务端口,真正建立连接用的是 listeners。
 55 # 如果listeners配置了,host.name和port可以不用配置
 56 listeners=PLAINTEXT://10.0.0.31:9092
 57
 58
 59 #broker server服务端口
 60
 61 port=9092
 62
 63 #broker的主机地址,若是设置了,那么会绑定到这个地址上,若是没有,会绑定到所有的接口上,并将其中之一发送到ZK,一般不设置
 64
 65 host.name=node1
 66
 67 # Hostname and port the broker will advertise to producers and consumers. If not set,
 68
 69 # it uses the value for "listeners" if configured.  Otherwise, it will use the value
 70
 71 # returned from java.net.InetAddress.getCanonicalHostName().
 72
 73 #kafka 0.9.x以后的版本新增了advertised.listeners配置,kafka 0.9.x以后的版本不要使用 advertised.host.name 和 advertised.host.port 已经deprecated.如果配置的话,它使用 "listeners" 的值。否则,它将使用从java.net.InetAddress.getCanonicalHostName()返回的值。
 74
 75 # 外网使用,以docker为例:
 76 # listeners: INSIDE://0.0.0.0:9092,OUTSIDE://0.0.0.0:9094
 77 # advertised_listeners: INSIDE://localhost:9092,OUTSIDE://<宿主机ip>:<宿主机暴露的端口>
 78 # kafka_listener_security_protocol_map: "INSIDE:SASL_PLAINTEXT,OUTSIDE:SASL_PLAINTEXT"
 79 # kafka_inter_broker_listener_name: "INSIDE"
 80
 81
 82 #advertised.listeners=PLAINTEXT://your.host.name:9092
 83
 84 # Maps listener names to security protocols, the default is for them to be the same. See the config documentation for more details
 85
 86 #将侦听器(listener)名称映射到安全协议,默认情况下它们是相同的。有关详细信息,请参阅配置文档
 87
 88 #listener.security.protocol.map=PLAINTEXT:PLAINTEXT,SSL:SSL,SASL_PLAINTEXT:SASL_PLAINTEXT,SASL_SSL:SASL_SSL
 89
 90 # The number of threads handling network requests
 91
 92 #处理网络请求的最大线程数 写物理核心数,broker启动时会创建多个线程处理来自其他broker和clients的请求,这里的处理指的是负责转发请求,broker会将接收到的请求转发到后面的处理线程中。在生产环境中,需要监控NetworkProcessorAvgldlePercent JMX指标 。如果该指标持续低于0.3 ,建议适当增加该参数的值
 93
 94 num.network.threads=30
 95
 96 # The number of threads doing disk I/O
 97
 98 #处理磁盘I/O的线程数 写物理核心数,监控同num.network.threads

 99
100 num.io.threads=30
101
102 # The send buffer (SO_SNDBUF) used by the socket server
103
104 #套接字服务器使用的发送缓冲区(SOYSNDBUF
105
106 socket.send.buffer.bytes=5242880
107
108 # The receive buffer (SO_RCVBUF) used by the socket server
109
110 #套接字服务器使用的接收缓冲区(SOYRCVBUF)
111
112 socket.receive.buffer.bytes=5242880
113
114 # The maximum size of a request that the socket server will accept (protection against OOM)
115
116 #套接字服务器将接受的请求的最大大小(对OOM的保护)
117
118 socket.request.max.bytes=104857600
119
120 #I/O线程等待队列中的最大的请求数,超过这个数量,network线程就不会再接收一个新的请求。应该是一种自我保护机制。
121
122 queued.max.requests=1000
123
124 ############################# Log Basics #############################
125
126 # A comma seperated list of directories under which to store log files
127
128 #日志存放目录,多个目录使用逗号分割,如果你有多块磁盘,建议配置成多个目录(挂载在不同磁盘上),多磁头同时写操作,从而达到I/O的效率的提升。如果指定了多个路径,那么 broker 会根据“最少使用”原则,把同一个分区的日志片段保存到同一个路径下。要注意, broker 会往拥有最少数目分区的路径新增分区,而不是往拥有最小磁盘空间的路径新增分区。
129
130 log.dirs=/data/module/kafka_2.11-0.10.2.1/data/log1,/data/module/kafka_2.11-0.10.2.1/data/log2,/data/module/kafka_2.11-0.10.2.1/data/log3
131
132 # The default number of log partitions per topic. More partitions allow greater
133
134 # parallelism for consumption, but this will also result in more files across
135
136 # the brokers.
137
138 # 每个topic的分区个数,主题的分区数只能增加,不能减少,所以要让一个主题的分区数少于num.partitions的值,只能手动创建该主题,若是在topic创建时候指定的话,会被topic创建时的指定参数覆盖
139
140 # 当有多个主题时,为了使分区分布到所有broker上,主题分区数需要大于broker数
141
142 num.partitions=20
143
144 # The number of threads per data directory to be used for log recovery at startup and flushing at shutdown.
145
146 # This value is recommended to be increased for installations with data dirs located in RAID array.
147 # Kafka会使用可配置线程池来处理日志片段:
148 # (1)服务器正常启动,用于打开每个分区的日志片段;
149 # (2)服务器崩愤后重启,用于检查和截短每个分区的日志片段:
150 # (3)服务器正常关闭,用于关闭日志片段。
151 # 在启动时恢复日志和关闭时持久化日志时每个数据目录的线程的数量,默认1。因为这些线程只是在服务器启动和关闭时会用到 ,所以完全可以设置大量的线程来达到并行操作的目的。特别是对于包含大量分区的服务器来说, 一旦发生崩溃,在进行恢复时使用并行操作可能会省下数小时的时间。设置此参数时需要注意,所配置的数字对应的是 log.dirs 指定的单个日志目录。 也就是说,如果 num.recovery.threads.per.data.dir 被设为 8 , 并且 log.dirs指定了 3 个路径,那么总共需要 24 个线程。
152
153 num.recovery.threads.per.data.dir=30
154
155 # 默认副本数
156
157 default.replication.factor=2
158
159 # 服务器接受单个消息的最大大小,即消息体的最大大小,单位是字节,
160 # 这个值是消息经过压缩后的值,这个参数需要与消费者客户端设置的fetch.message.max.bytes进行协调,如果消费者获取消息的值比这个值小,那么可能导致消费者被阻塞的情况,集群的broker设置replica.fetch.max.bytes同样遵循此原则
161
162 message.max.bytes=104857600
163
164 # 自动负载均衡,如果设为true,复制控制器会周期性的自动尝试,为所有的broker的每个partition平衡leadership,为更优先(preferred)的replica分配leadership。
165
166 # auto.leader.rebalance.enable=false
167
168 ############################# Log Flush Policy #############################
169
170 # Messages are immediately written to the filesystem but by default we only fsync() to sync
171
172 # the OS cache lazily. The following configurations control the flush of data to disk.
173
174 # There are a few important trade-offs here:
175
176 #    1. Durability: Unflushed data may be lost if you are not using replication.
177
178 #    2. Latency: Very large flush intervals may lead to latency spikes when the flush does occur as there will be a lot of data to flush.
179
180 #    3. Throughput: The flush is generally the most expensive operation, and a small flush interval may lead to exceessive seeks.
181
182 # The settings below allow one to configure the flush policy to flush data after a period of time or
183
184 # every N messages (or both). This can be done globally and overridden on a per-topic basis.
185
186 # The number of messages to accept before forcing a flush of data to disk
187
188 #在强制fsync一个partition的log文件之前暂存的消息数量。调低这个值会更频繁的sync数据到磁盘,影响性能。通常建议人家使用replication来确保持久性,而不是依靠单机上的fsync,但是这可以带来更多的可靠性,默认10000。
189
190 #log.flush.interval.messages=10000
191
192 # The maximum amount of time a message can sit in a log before we force a flush
193
194 #2次fsync调用之间最大的时间间隔,单位为ms。即使log.flush.interval.messages没有达到,只要这个时间到了也需要调用fsync。默认3000ms.
195
196 #log.flush.interval.ms=1000
197
198 ############################# Log Retention Policy #############################
199
200 # The following configurations control the disposal of log segments. The policy can
201
202 # be set to delete segments after a period of time, or after a given size has accumulated.
203
204 # A segment will be deleted whenever *either* of these criteria are met. Deletion always happens
205
206 # from the end of the log.
207
208 # The minimum age of a log file to be eligible for deletion due to age
209
210 # 日志保存时间 (hours|minutes|ms),默认为7天(168小时)。超过这个时间会根据policy处理数据。log.retention.bytes和log.retention.minutes无论哪个先达到都会触发
211
212 # 根据时间保留数据是通过检查磁盘上日志片段文件的最后修改时间来实现的,也就是最后一个消息的时间戳。如果使用管理工具在服务器之间移动分区,日志片段的修改时间就不准确了,时间误差可能导致这些分区过多的保留数据
213
214 log.retention.hours=168
215
216 # A size-based retention policy for logs. Segments are pruned from the log as long as the remaining
217
218 # segments don't drop below log.retention.bytes. Functions independently of log.retention.hours.
219
220 #日志数据存储的最大字节数。超过这个时间会根据policy处理数据,默认值-1,表示不会根据日志文件大小来删除日志,需要根据业务场景来设置。如果同时指定log.retention.bytes和log.retention.hours,那么只要有一个条件满足,消息就会被删除
221 #log.retention.bytes=1073741824
222
223 # The maximum size of a log segment file. When this size is reached a new log segment will be created.
224
225 #控制日志segment文件的大小,超出该大小则追加到一个新的日志segment文件中(-1表示没有限制),当日志片段达到log.segment.bytes时,当前日志片段会关闭,等待过期,一个新的日志片段将被打开,这个参数的值越小,就会频繁的关闭和分配新文件,降低磁盘的写入效率。
226
227 log.segment.bytes=536870912
228
229 # 当达到下面时间,会强制新建一个segment
230
231 #log.roll.hours = 24*7
232
233 # The interval at which log segments are checked to see if they can be deleted according
234
235 # to the retention policies
236
237 # 日志片段文件的检查周期,查看它们是否达到了删除策略的设置(log.retention.hours或log.retention.bytes)
238
239 log.retention.check.interval.ms=600000
240
241 #是否开启压缩
242
243 #log.cleaner.enable=false
244
245 #日志清理策略选择有:delete和compact主要针对过期数据的处理,或是日志文件达到限制的额度,会被 topic创建时的指定参数覆盖
246
247 #log.cleanup.policy=delete
248
249 # 日志压缩运行的线程数
250
251 #log.cleaner.threads=2
252
253 # 压缩的日志保留的最长时间
254
255 #log.cleaner.delete.retention.ms=3600000
256 # min.insync.replicas 改参数与producer端的acks参数配合使用。只有在acks=-1或all时,该参数才有意义。
此参数指定了broker端必须成功响应clients消息发送的最少副本数,推荐设置为分区副本数-1,例如,一个topic的分区副本数为3,那么设置该参数为2,可以容忍一台broker宕机不影响业务;如果设置为3,那么只要任意一台broker宕机,整个集群将无法提供服务。
257 ############################# Zookeeper #############################
258
259 # Zookeeper connection string (see zookeeper docs for details).
260
261 # This is a comma separated host:port pairs, each corresponding to a zk
262
263 # server. e.g. "127.0.0.1:3000,127.0.0.1:3001,127.0.0.1:3002".
264
265 # You can also append an optional chroot string to the urls to specify the
266
267 # root directory for all kafka znodes.
268
269 #1)保存broker的元数据通过这个参数指定zookeeper的地址,最好指定一组zookeeper的地址,防止某一个zk节点宕机
270
271 #2)默认Kafka会直接在ZooKeeper的根路径下创建znode,这样Kafka的ZooKeeper配置就会散落在根路径下面,最好自己定义路径,便于管理,
如果使用一套zookeeper管理多套kafka集群,就必须设置zookeeper的chroot,起到隔离效果,配置方法如下:
272
273 #  a. zookeeper.connect=master:2181,slave1:2181,slave2:2181/kafka
274
275 #  b. 如果指定的 chroot 路径不存在, broker 会在启动的时候创建它。
276 zookeeper.connect=node1:2181,node2:2181,node3:2181/kafka01
277
278
279 #ZooKeeper的最大超时时间,就是心跳的间隔,若是没有反映,那么认为已经死了,不易过大
280
281 zookeeper.session.timeout.ms=180000
282
283 # Timeout in ms for connecting to zookeeper
284
285 #指定多久消费者更新offset到zookeeper中。注意offset更新时基于time而不是每次获得的消息。一旦在更新zookeeper发生异常并重启,将可能拿到已拿到过的消息,连接zk的超时时间
286
287 zookeeper.connection.timeout.ms=6000
288
289 #请求的最大大小为字节,请求的最大字节数。这也是对最大记录尺寸的有效覆盖。注意:server具有自己对消息记录尺寸的覆盖,这些尺寸和这个设置不同。此项设置将会限制producer每次批量发送请求的数目,以防发出巨量的请求。
290
291 max.request.size=104857600
292
293 #每次fetch请求中,针对每次fetch消息的最大字节数。这些字节将会督导用于每个partition的内存中,因此,此设置将会控制consumer所使用的memory大小。这个fetch请求尺寸必须至少和server允许的最大消息尺寸相等,否则,producer可能发送的消息尺寸大于consumer所能消耗的尺寸
294
295 fetch.message.max.bytes=104857600
296
297 #ZooKeeper集群中leader和follower之间的同步时间,换句话说:一个ZK follower能落后leader多久。
298
299 #zookeeper.sync.time.ms=2000
300
301 ############################# Replica Basics #############################
302
303 # leader接收follower的"fetch请求"的超时时间,默认是10秒。
304
305 # replica.lag.time.max.ms=30000
306
307 # 如果relicas落后太多,将会认为此partition relicas已经失效。而一般情况下,因为网络延迟等原因,总会导致replicas中消息同步滞后。如果消息严重滞后,leader将认为此relicas网络延迟较大或者消息吞吐能力有限。在broker数量较少,或者网络不足的环境中,建议提高此值.follower落后于leader的最大message数,这个参数是broker全局的。设置太大 了,影响真正“落后”follower的移除;设置的太小了,导致follower的频繁进出。无法给定一个合适的replica.lag.max.messages的值,因此不推荐使用,据说新版本的Kafka移除了这个参数。
308
309 #replica.lag.max.messages=4000
310
311 # follower与leader之间的socket超时时间
312
313 #replica.socket.timeout.ms=30000
314
315 # follower每次fetch数据的最大尺寸
316
317 replica.fetch.max.bytes=104857600
318
319 # follower的fetch请求超时重发时间
320
321 replica.fetch.wait.max.ms=2000
322
323 # fetch的最小数据尺寸
324
325 #replica.fetch.min.bytes=1
326
327 #0.11.0.0版本开始unclean.leader.election.enable参数的默认值由原来的true改为false,如果ISR列表为空而且leader宕机了,不在ISR(IN-Sync Replica)列表中的replica,不会被提升为新的leader partition。kafka集群的持久化力大于可用性,如果ISR中没有其它的replica,会导致这个partition不能读写。
328
329 unclean.leader.election.enable=false
330
331 # follower中开启的fetcher线程数, 同步速度与系统负载均衡
332
333 num.replica.fetchers=5
334
335 # partition leader与replicas之间通讯时,socket的超时时间
336
337 #controller.socket.timeout.ms=30000
338
339 # partition leader与replicas数据同步时,消息的队列尺寸.
340
341 #controller.message.queue.size=10
342
343 #指定将使用哪个版本的 inter-broker 协议。 在所有经纪人升级到新版本之后,这通常会受到冲击。升级时要设置
344
345 #inter.broker.protocol.version=0.10.1
346
347 #指定broker将用于将消息添加到日志文件的消息格式版本。 该值应该是有效的ApiVersion。 一些例子是:0.8.2,0.9.0.0,0.10.0。 通过设置特定的消息格式版本,用户保证磁盘上的所有现有消息都小于或等于指定的版本。 不正确地设置这个值将导致使用旧版本的用户出错,因为他们将接收到他们不理解的格式的消息。
348
349 #log.message.format.version=0.10.1
向其他节点分发配置
 1 # ansible node[2..3] -m synchronize -a "src=/data/module/kafka_2.11-0.10.2.1 dest=/data/module/"
 2
 3 #  for i in node{2..3};do scp /etc/profile $i:/etc;done
 5
 6 # ansible node2 -m shell -a "sed -ri -e 's@\(broker.id=\).@broker.id=2@' -e 's@\(host.name=node\).@host.name=node2@' /data/module/kafka_2.11-0.10.2.1/config/server.properties"
 7
 8 # ansible node3 -m shell -a "sed -ri -e 's@\(broker.id=\).@broker.id=3@' -e 's@\(host.name=node\).@host.name=node3@' /data/module/kafka_2.11-0.10.2.1/config/server.properties"
 9
10 # ansible node[2..3] -m shell -a "source /etc/profile"
通过原生脚本启动服务
1 # kafka-server-start.sh -daemon /data/module/kafka_2.11-0.10.2.1/config/server.properties
查看启动情况
1 # jps
2 46647 Jps
3 22472 QuorumPeerMain
4 46381 Kafka
编写kafka启动脚本
 1 # vim /usr/local/bin/kafka-manager.sh
 2 #!/bin/bash
 3
 4 if [ $# -ne 1 ];then
 5   echo "无效参数,用法为:$0 {start|stop}"
 6   exit 1
 7 fi
 8
 9
10 cmd=$1
11
12 for (( i=1 ; i<=3 ; i++));do
13   tput setaf 2
14   echo ========= node${i} $cmd ===========
15   tput setaf 9
16   case $cmd in
17      start)
18      ssh node$i "source /etc/profile ; nohup kafka-server-start.sh -daemon /data/module/kafka_2.11-0.10.2.1/config/server.properties >/dev/null 2>&1 & "
20      echo node${i} "服务启动"
21      ;;
22      stop)
23      ssh node$i "source /etc/profile ; kafka-server-stop.sh "
24      echo node${i} "服务停止"
25      ;;
26      *)
27      echo "无效参数,用法为:$0 {start|stop}"
28      exit
29      ;;
30    esac
31 done
ansible执行jps报错
# ansible cdh -m shell -a 'jps'
node2 | FAILED | rc=127 >>
/bin/sh: jps: command not foundnon-zero return code

需要各节点做链接
# ln -sv /data/module/jdk/bin/jps  /usr/local/bin/jps
jmap命令报错
# jmap -heap 7429
Attaching to process ID 7429, please wait...
Error attaching to process: sun.jvm.hotspot.runtime.VMVersionMismatchException: Supported versions are 25.222-b10. Target VM is 25.201-b09
sun.jvm.hotspot.debugger.DebuggerException: sun.jvm.hotspot.runtime.VMVersionMismatchException: Supported versions are 25.222-b10. Target VM is 25.201-b09
    at sun.jvm.hotspot.HotSpotAgent.setupVM(HotSpotAgent.java:435)
    at sun.jvm.hotspot.HotSpotAgent.go(HotSpotAgent.java:305)

Caused by: sun.jvm.hotspot.runtime.VMVersionMismatchException: Supported versions are 25.222-b10. Target VM is 25.201-b09

解决(由于ivm虚拟机版本不匹配异常 )
查看虚拟机版本
# java -version
openjdk version "1.8.0_222"
OpenJDK Runtime Environment (build 1.8.0_222-b10)
OpenJDK 64-Bit Server VM (build 25.222-b10, mixed mode)

# ln -sv /data/module/jdk/bin/* /usr/local/bin/
验证集群安装
测试topic创建
 1 # 创建一个名为test-topic的主题,分区数 3,副本3
 2 # kafka-topics.sh --zookeeper node1:2181,node2:2181/kafka01 --create --topic test-topic --partitions 3 --replication-factor 3
 3 Created topic "test-topic".
 4
 5 # 通过topic列表查看所有已创建的主题
 6 # kafka-topics.sh --zookeeper node1:2181,node2:2181/kafka01 --list
 7 test-topic
 8
 9 #通过文件系统查看主题的创建(data目录下会出现3个log*目录,因为分区数为3)
10 # ll data/log*/
11 data/log1/:
12 total 16
13 -rw-r--r-- 1 root root   4 Feb 24 23:57 cleaner-offset-checkpoint
14 -rw-r--r-- 1 root root  54 Feb 24 08:29 meta.properties
15 -rw-r--r-- 1 root root  19 Feb 25 00:08 recovery-point-offset-checkpoint
16 -rw-r--r-- 1 root root  19 Feb 25 00:09 replication-offset-checkpoint
17 drwxr-xr-x 2 root root 110 Feb 25 00:07 test-topic-0
18
19
20 #查看主题的分区情况和副本
21 # kafka-topics.sh --zookeeper node1:2181,node2:2181/kafka01 --topic test-topic --describe
22 Topic:test-topic    PartitionCount:3    ReplicationFactor:3    Configs:
23     Topic: test-topic    Partition: 0    Leader: 3    Replicas: 3,1,2    Isr: 3,1,2
24     Topic: test-topic    Partition: 1    Leader: 1    Replicas: 1,2,3    Isr: 1,2,3
25     Topic: test-topic    Partition: 2    Leader: 2    Replicas: 2,3,1    Isr: 2,3,1
26
27 # 需要注意,指定zookeeper的地址最好不要写一个,防止恰好指定的zookeeper宕机导致报错
测试删除主题
 1 # kafka-topics.sh --zookeeper node1:2181,node2:2181/kafka01 --topic test-topic --delete
 2 Topic test-topic is marked for deletion.
 3 Note: This will have no impact if delete.topic.enable is not set to true.
 4
 5 # 根据输出提示可以看到这个topic被标记为“待删除”,是否真正删除此topic取决于broke 端参数 delete.topic.enable
 6
 7 # 由于搭建时设置的是true,因此kafka会将所有与此topic的信息全部删除,删除操作是一个异步过程,对用户完全透明,可以通过查询文件系统来验证是否已经被删除,也可以通过topic列表来验证:
 8 (1)通过topic列表验证
 9 # kafka-topics.sh --zookeeper node1:2181,node2:2181/kafka01 --list
10
11 (2)通过文件系统验证,会发现test-topic-NUM 目录消失,有时
12 # ll data/log1/
13 total 16
14 -rw-r--r-- 1 root root  4 Feb 24 23:57 cleaner-offset-checkpoint
15 -rw-r--r-- 1 root root 54 Feb 24 08:29 meta.properties
16 -rw-r--r-- 1 root root 19 Feb 24 23:56 recovery-point-offset-checkpoint
17 -rw-r--r-- 1 root root 19 Feb 24 23:57 replication-offset-checkpoint
主题删除不成功的解决办法
 1 1、原因
 2 # 在执行删除topic命令后发现文件系统里还有topic的分区目录,表示删除失败,原因应该是元数据找不到,或者分区数过多的原因导致,kafka只能一个个分区的删除,不能同时删除分区。
 3
 4 2、解决办法
 5 (1)停止应用
 6 (2)确保delete.topic.enable=true
 7 (3)执行删除命令
 8 # kafka-topics.sh --zookeeper node1:2181,node2:2181/kafka01 --topic test-topic --delete
 9
10 (4)删除zookeeper里此topic节点文件
11 [zk: localhost:2181(CONNECTED) 2] deleteall  /brokers/topics/test-topic
12 [zk: localhost:2181(CONNECTED) 3] deleteall /admin/delete_topics
13
14 (5)删除文件系统中的分区目录
15 (6)重启kafka和zookeeper
测试生产者和消费者
# 生产者产生消息
# kafka-console-producer.sh --broker-list node1:9092,node2:9092 --topic test-topic
hello world
ok

# 消费者获取消息
# kafka-console-consumer.sh --bootstrap-server node3:9092 --topic test-topic --from-beginning
hello world
ok

目前还可以使用旧版本的consumer,但以后的版本会取消
# kafka-console-consumer.sh --zookeeper node3:2181/kafka01 --topic test-topic --from-beginning
Using the ConsoleConsumer with old consumer is deprecated and will be removed in a future major release. Consider using the new consumer by passing [bootstrap-server] instead of [zookeeper].
hello world
ok
测试消息读取的顺序
 1 生产者多写一些数据
 2 # kafka-console-producer.sh --broker-list node1:9092,node2:9092 --topic test-topic
 3 hello world
 4 ok
 5 fdsafds
 6 fdasfsd
 7 gfd
 8 1
 9 2
10 3
11 4
12 5
13
14 消费者读取消息(消费者获取的消息的输出是按照partition显示的,请看下文)
15 # kafka-console-consumer.sh --bootstrap-server node3:9092 --topic test-topic --from-beginning
16 hello world
17 fdasfsd
18 2
19 5
20 fdsafds
21 1
22 4
23 ok
24 gfd
25 3
26
27 # 可以看到在没有指定partition的情况下消息的获取是无序的
28
29 测试一下指定分区后消费者获取消息的顺序是否会改变
30
31 # kafka-console-consumer.sh --bootstrap-server node3:9092 --topic test-topic --from-beginning --partition 0
32 fdsafds
33 1
34 4
35 adsf
36 3
37 6
38 9
39
40 # kafka-console-consumer.sh --bootstrap-server node3:9092 --topic test-topic --from-beginning --partition 1
41 ok
42 gfd
43 3
44 2
45 5
46 8
47
48 # kafka-console-consumer.sh --bootstrap-server node3:9092 --topic test-topic --from-beginning --partition 2
49 hello world
50 fdasfsd
51 2
52 5
53 1
54 4
55 7
56 10
57
58 生产者再次写入一些消息
59 [root@node1 kafka_2.11-0.10.2.1]# kafka-console-producer.sh --broker-list node1:9092,node2:9092 --topic test-topic
60 abc
61 bcd
62 def
63 efg
64
65 再次查看消费者
66 # kafka-console-consumer.sh --bootstrap-server node3:9092 --topic test-topic --from-beginning --partition 0
67 fdsafds
68 1
69 4
70 adsf
71 3
72 6
73 9
74 bcd
75
76 # kafka-console-consumer.sh --bootstrap-server node3:9092 --topic test-topic om-beginning --partition 1
77 ok
78 gfd
79 3
80 2
81 5
82 8
83 abc
84 efg
85
86 # kafka-console-consumer.sh --bootstrap-server node3:9092 --topic test-topic om-beginning --partition 2
87 hello world
88 fdasfsd
89 2
90 5
91 1
92 4
93 7
94 10
95 def
生产者消费者性能测试
除了基本的 console-producer 和 console-consumer 脚本可以用于测试简单的消息发送与接收, Kafka 还提供了性能吞吐量测试脚本 katka-producer-perf-test.sh 和kafka-consumer-perf-test.sh
katka-producer-perf-test.sh可以计算出 producer 在一段时间内的吞吐量和平均延时
kafka-producer-perf-test.sh脚本参数说明:
--topic:   指定消息将被写入的主题名
--num-records:  总共需要发送的消息数量
--record-size:   每个记录的字节数,producer性能和此参数有很大关系
--throughput:   每秒发送的记录数
--producer.config:   通过producer的配置文件发送记录
--producer-props:   发送端配置,本实例指定了kafka的broker-list
--payload-file:
acks:   生产者要求领导者在确认请求完成之前已收到的确认数。这控制了发送记录的持久性
 1 # kafka-producer-perf-test.sh --topic test-topic --num-records 1000000 --record-size 1000 --throughput 20000 --producer-props bootstrap.servers=node1:9092,node2:9092 acks=-1
 2 19066 records sent, 3810.2 records/sec (3.63 MB/sec), 2468.1 ms avg latency, 4061.0 max latency.
 3 40050 records sent, 8008.4 records/sec (7.64 MB/sec), 4263.6 ms avg latency, 5231.0 max latency.
 4 30885 records sent, 6177.0 records/sec (5.89 MB/sec), 4696.4 ms avg latency, 5656.0 max latency.
 5 26265 records sent, 5247.8 records/sec (5.00 MB/sec), 4875.4 ms avg latency, 6077.0 max latency.
 6 25860 records sent, 4440.2 records/sec (4.23 MB/sec), 6092.4 ms avg latency, 7503.0 max latency.
 7 22620 records sent, 4521.3 records/sec (4.31 MB/sec), 7170.3 ms avg latency, 8894.0 max latency.
 8 29445 records sent, 5867.9 records/sec (5.60 MB/sec), 6331.8 ms avg latency, 9095.0 max latency.
 9 29115 records sent, 5823.0 records/sec (5.55 MB/sec), 4791.1 ms avg latency, 7077.0 max latency.
10 37380 records sent, 7476.0 records/sec (7.13 MB/sec), 4514.6 ms avg latency, 6776.0 max latency.
11 17880 records sent, 3363.4 records/sec (3.21 MB/sec), 4809.6 ms avg latency, 8179.0 max latency.
12 8460 records sent, 1587.8 records/sec (1.51 MB/sec), 8411.8 ms avg latency, 11955.0 max latency.
13 1000000 records sent, 5393.132385 records/sec (5.14 MB/sec), 5616.41 ms avg latency, 21749.00 ms max latency, 5368 ms 50th, 14628 ms 95th, 18592 ms 99th, 21605 ms 99.9th.
14
15 # 可以看到我这台测试机的平均吞吐量是5.14 MB/秒,即带宽为41Mb/s左右,平均每秒能发送5393条消息,平均延迟是5.62秒,最大延迟是21.75秒,发送95%的消息需要14.63秒,发送99%的消息需要18.59秒,99.9%的消息需要21.61秒。本例的带宽和千兆网卡比差的远,还可以优化producer
使用kafka-consumer-perf-test.sh测试消费者吞吐量
 1 脚本参数说明:
 2 --batch-size <Integer: size>  单一批次写入的消息量,默认200
 3 --broker-list <String: host>  新版本consumer使用的broker list
 4 --compression-codec <Integer: supported codec: NoCompressionCodec as 0, GZIPCompressionCodec as 1,SnappyCompressionCodec as 2,LZ4CompressionCodec as 3>   消费数据时使用的压缩算法,默认为0,即不使用压缩,1为gzip压缩(压缩比大),2为Snappy压缩(速度最快,压缩比小),3为LZ4压缩(性能居中)
 5
 6 --consumer.config <String: config file>  通过consumer配置文件进行消费
 7
 8 --date-format <String: date format>  消费的起止时间输出格式,默认yyyy-MM-dd HH:mm:ss:SSS
 9
10 --fetch-size <Integer: size>   对broker单个请求的获取的消息数,默认1048576
11
12 --from-latest   对于一个新的消费者,从最新的偏移量开始获取消息好过从起始偏移量获取
13
14 --group <String: gid>  消费者组ID,默认perf-consumer-33557
15
16 --hide-header  输出时隐藏消费状态头信息,只显示测试结果
17
18 --message-size <Integer: size>    每条消息的字节数,默认100Bytes
19
20 --messages <Long: count>  消费的消息总数
21
22 --new-consumer  是否使用新版consumer,默认使用
23
24 --num-fetch-threads <Integer: count>  从broker获取消息的线程数,默认1个
25
26 --reporting-interval <Integer: interval_ms>  打印测试报告的周期,默认5000ms
27
28 --show-detailed-stats  打印状态信息,与reporting-interval参数联用
29
30 --threads <Integer: count>  处理测试消息使用的线程数,默认10个
31
32 --topic <String: topic>   指定消费的主题名称
33
34 --zookeeper <String: urls>  旧版本consumer使用此参数,新版本将废弃
# kafka-consumer-perf-test.sh  --broker-list node1:9092,node2:9092 --messages 1000000 --message-size 2000 --threads 3 --topic test-topic
start.time, end.time, data.consumed.in.MB, MB.sec, data.consumed.in.nMsg, nMsg.sec
2020-02-25 05:46:50:384, 2020-02-25 05:46:55:654, 953.8289, 180.9922, 1000187, 189788.8046

测试消费100万条消息consumer的吞吐量。在该环境中,consumer在5秒钟的时间内消费了950MB的消息,因此吞吐量大约是180MB/s
topic参数
每个topic都可以设置自己的参数,在实际使用中,使用broker端设置的通用日志留存时间很不方便,每个业务的topic可能有不同的留存策略。
1 常见的topic级别参数:
2       delete.retention.ms----每个 topic 可以设置自己的日志留存时间以覆盖全局默认值 。
3       max.message.bytes一一覆盖全局的message.max.bytes ,即为每个 topic 指定不同的最大消息尺寸 。
4       retention.bytes一一覆盖全局的 log.retention.bytes,每个 topic 设置不同的日志留存尺寸 。
GC回收器选择
使用Java 7的系统GC收集器的选择:

  (1)如果服务器的CPU资源非常充裕,建议使用CMS回收器,参数为:-XX:+UseCurrentMarkSweepGC
  (2)如果不充裕,使用并行回收器,即throughput collector。参数为:-XX:+UseParallelGC

使用Java 8的系统GC收集器的选择:使用G1垃圾回收器
JVM参数
Kafka主要使用的是操作的系统的Page Cache,不用为JVM分配太多内存。典型JVM参数如下:
-Xmx6g -Xms6g -XX:MetaspaceSize=96m -XX:+UseG1GC -XX:MaxGCPauseMillis=20 -XX:InitiatingHeapOccupancyPercent=35 \
-XX:+DisableExplicitGC \
-XX:G1HeapRegionSize=16M -XX:MinMetaspaceFreeRatio=50 -XX:MaxMetaspaceFreeRatio=80
操作系统参数
1、文件描述符
1 Kafka 会频繁地创建井修改文件系统中的文件,这包括消息的日志文件、索引文件及各种元数据管理文件等。因此如果一个 broker 上面有很多 topic 的分
2 区,那么这个 broker 势必就需要打开很多个文件一一大致数量约等于分区数 × (分区总大小/日志段大小〉 × 3。举一个例子,假设 broker 上保存了 50 个分区,每个分区平均尺寸是 10GB,每个日志段大小是 1GB,那么这个 broker 需要维护 1500 个左右的文件描述符。因此在实际使用场景中最好首先增大进程能够打开的最大文件描述符上限,
2、网络(socket缓冲区)
1、对分配给 socket 读写缓冲区的内存大小作出调整
    socket 读写缓冲区对应的参数分别是 net.core. wmem_default 和 net.core.rmem_default,kafka的默认参数是64KB,可以将其增加至128K。
    读写缓冲区最大值对应的参数分别net.core. wmem_max 和 net.core.rmem_max,可以设置为2MB。

2、调整TCP Socket缓冲区
    参数分别是 net.ipv4.tcp_wmem 和net.ipv4.tcp_rmem,这两个参数由三个整数组成。使用空格分隔,表示 最小值 默认值 最大值。最大值不能大于net.core. wmem_max 和 net.core.rmem_max的值。例如 net.ipv4.tcp_wmem 4KB 64KB 2MB。

3、其他网络参数
    net.ipv4.tcp_window_scaling 设为 1,启用TCP时间窗口扩展,可以提升客户端传输数据效率,传输的数据可以在服务器端缓冲。

    net.ipv4.tcp_max_syn_backlog 设为比默认值 1024 更大的值,应对并发。

    net.core.netdev_max_backlog 设为比默认值 1000 更大的值,可以应对网络流量爆发,允许更多的数据包排队等待内核处理。
3、虚拟内存
对于依赖吞吐量的应用,应避免内存交换,内存页和磁盘的交换严重影响性能。如果虚拟内存被交换到磁盘,说明系统没有多余内存可以分配给页面缓存。

防止内存交换的方式是不设置交换分区,swapoff,这会导致系统由于内存不足而杀死进程。显然不合适

参数调整:
1、vm.swapiness
不建议将参数值设置为0,之前的内核版本此参数值设置0的意思是“除非发生内存溢出,否则不要进行内存交换”。到Linux内核3.5-rc1后,这个值的意义变换为“在任何情况下都不要进行交换”,所以建议设置为1。

2、vm.dirty_background_ratio
调整内核对脏页的处理,可以通过减小此参数的值减少脏页数量。该值指的是系统内存的百分比,设置为5即可。不能设置为0,因为会使内核频繁刷新页面,降低内核的缓冲能力。


#通过设置 vm.dirty_ratio 参数可以增加被内核进程刷新到磁盘之前的脏页数量,合理值为60-80,有风险,包括未刷新磁盘操作的数量和同步刷新引起的长时间 I/O等待

这些参数的合理值,最好是在Kafka运行期间检查脏页数,可以通过/proc/vmstat文件查看当前脏页数量

# cat /proc/vmstat|egrep "dirty|writeback"
nr_dirty 0
nr_writeback 0
nr_writeback_temp 0
nr_dirty_threshold 196120
nr_dirty_background_threshold 65373
4、文件系统选择和优化
使用XFS文件系统,对挂载点的 noatime 参数进行合理的设
置。文件元数据包含 3 个时间戳:创建时间(ctime)、最后修改时间(mtime)以及最后访问时间(atime)。默认情况下,每次文件被读取后都会更新 atime,这会导致大量的磁盘写操作
Kafka服务器硬件选择
一、磁盘吞吐量
生产者客户端的性能直接受到kafka服务器的磁盘吞吐量影响。生产者产生的消息必须提交到服务器端进行保存,所以在发送消息后会等待至少有一个服务器确认消息已成功提交为止。因此磁盘的写入速度越快,生成消息的延迟越低。
磁盘类型的选择对吞吐量的影响:固态硬盘(SSD)和机械硬盘(HDD)的选择。固态硬盘的查找和访问速度都很快,性能最好,但是贵。机械硬盘便宜,单块硬盘容量也大,可以使用多块硬盘存放多个数据目录,或者做成RAID提升性能。
二、磁盘容量
需要多大的磁盘容量取决于需要保留的消息数量。比如,服务器每天接收到1TB的消息,有两个副本,并且日志保留规则为7天,那么至少需要14TB的存储空间。而且还要为其他文件提供至少 10% 的额外空间,那么也就是需要16TB。如果压缩比设置的0.5,那么磁盘的容量应该至少为8TB。除此之外,还需要提供缓冲区,用于应付消息流量的增长和波动。
在决定扩展 Kafka 集群规模时,存储容量是一个需要考虑的因素。通过让主题拥有多个分区, 集群的总流量可以被均衡到整个集群,而且如果单个 broker 无战支撑全部容量,可以让其他 broker 提供可用的容量。 存储容量的选择同时受到集群复制策略的影响
三、内存
磁盘性能影响生产者 ,而内存影响消费者 。 消费者一般从分区尾部读取消息,在这种情况下,消费者读取的消息会直接存放在系统的页面缓存里,这比从磁盘上重新读取要快得多 。
运行 Kafka 的 JVM 不需要太大的内存,剩余的系统内存可以用作页面缓存,或者用来缓存正在使用中 的日志片段。这也就是为什么不建议把 Kafka 同其他重要的应用程序部署
在一起的原因,它们需要共享页面缓存,最终会降低 Kafka 消费者的性能 。 例如一台内存16G的服务器,broker设置的堆内存为6G,那么文件系统的Page Cache的大小为10G。
除以上这些考量之外,用户还需要把 page cache 大小与实际线上环境中设置的日志段大小相比较。假设单个日志段文件大小设置为10GB,那么你至少应该给予 page cache 10GB 以上的内存空间 。这样,待消费的消息有很大概率会保存在页缓存中,故 consumer 能够直接命中页缓存而无须执行缓慢的磁盘 1/0 读操作。
内存规划建议:
- 尽量分配更多的内存给操作系统的 page cache 。
- 不要为 broker 设置过大的堆内存,最好不超过 6GB 。
- page cache 大小至少要大于一个日志段的大小。
四、网络
网络吞吐量决定了 Kafka 能够处理的最大数据流量。它和磁盘存储是制约 Kafka 扩展规模的主要因素。 Kafka 支持多个消费者,造成流入和流出的网络流量不平衡,如果网络接口出现饱和,那么集群的复制出现延时就在所难免,
从而让集群不堪一击。
举例说明如何规划带宽资源和broker数量的确定
假设用户使用的是1Gb/s的网络(千兆网),每天的业务目标是用1小时处理1TB的消息,那么需要用到多少broker?网络带宽是1Gb/s,即每秒传输1Gb的数据,假设机器值供Kafka使用(也不应该和其他应用一起部署在同一服务器上),且为kafka分配的带宽资源为70%-----考虑到机器上还有其他的进程使用网络且网卡通常不能用满 ,超过一定阈值可能出现网络丢包,也就是单台Kafka的broker带宽为1Gb/s * 0.7 ≈ 710Mb/s,这是Kafka可以使用的最高带宽,但不是一直就用这么多,万一突发流量,会容易把网卡“打满”,需要在70%的基础上,再取1/3(保守数字),即710Mb/s / 3 ≈ 240Mb/s,如果要在 1小时内处理 1TB 的业务消息,即每秒需要处理 292MB左右的数据,也就是每秒 2336Mb 数据,那么至少需要 2336/240 ≈ 10 台 broker 机器。若副本数是 2,那么这个数字还需要再翻 l 倍,即 20 台 broker 机器。
对于带宽资源规划,应尽量避免使用跨机房网络,或者跨度更大的网络环境。在这种环境下请求的延迟很高。
五、CPU
Kafka对CPU的要求不高,因为Kafka不属于计算密集型(CPU-bound)的系统,因此对于CPU只需要记住:追求多核心而不是高频。
例外是clients为了优化网络和磁盘空间,会对消息进行压缩。Broker端需要对消息进行批量解压,设置偏移量,然后重新批量压缩,再保存到磁盘上。
六、基本的线上环境配置
- CPU 24核心
- 内存 32GB
- 磁盘 1TB 7200转 SAS盘两块
- 带宽 1Gb/s
- ulimit -n 1000000
- Socket Buffer 至少64KB(针对跨机房网络)
posted on 2020-02-25 00:54 hopeless-dream 阅读(554) 评论(0) 收藏 举报

 浙公网安备 33010602011771号