Spring框架知识梳理(一) IOC
1 写在前面
Spring框架是在大一的时候学习的,但是经过几个项目下来发现自己只不过会用某些常用的东西,对于Spring家族,虽然现在大都使用Spring Boot开发,但是我发现Spring框架的思想自己并未领会到,也导致了后来的学习有不少疑惑,因此在大二的时候我决定重新梳理一下这些东西,我相信这比学习新的东西更加值得。
温故而知新可以为师矣 ------------《论语》
2 Spring的架构

-
Spring由20多个模块组成,它们可以分为数据访问/集成、Web、面向切面编程、应用服务器设备管理、消息发送、核心容器和测试。
-
Spring的核心是IOC和AOP,之后本文会从IOC和AOP的角度分别梳理。
3 IOC
我们为什么要使用框架呢?自己手动写代码也是可以完成的,从我们使用框架的感受上来看,使用框架会使得我们的开发效率提高并且使我们的项目更加易于维护,那么框架又是如何做到的呢,他在提高我们开发效率的过程中他关注的核心问题是什么呢?
我认为框架解决的问题是如何降低代码耦合度,只有高内聚低耦合的代码才易于维护,易于维护的代码自然开发效率也高、Spring根据代码的功能特点,将降低耦合度的方式分为了两类:IOC与AOP。
什么是IOC呢?IOC的中文名称是控制反转,我的理解是这样的,过去我们写代码,当某个类需要用到另一个类的时候(或者解释为如果没有另一个类参与,该类就无法完成自己的功能),需要在类的内部自行创建一个对象,这样这两个类就产生了依赖的关系,也就是说两个类耦合在了一起,传统的方式是我们自己new一个对象,而IOC的思想是这样的,将对象的创建,生命周期管理的权限从类本身或者说是开发者的手中转移到第三方手中,这个第三方也就是我们的IOC容器,IOC容器中存放着我们需要的对象,然后根据配置文件或者注解在代码运行时注入到代码中,而我们需要关注的只有接口而没有实际的对象和类了。
IOC只是一种思想,具体的实现由IOC容器来实现,而由IOC容器管理的对象称为bean。
4 IOC容器
-
编写配置文件
spring的配置文件是一个xml文件,一般我们习惯将其命名为
applicationContext.xml首先我们来写一个类
@Getter
@Setter
@AllArgsConstructor
@NoArgsConstructor
public class Student {
    private Integer id;
    private String name;
    private Integer age;
}
我们在配置文件中配置bean
<?xml version="1.0" encoding="UTF-8"?> <beans xmlns="http://www.springframework.org/schema/beans" xmlns:xsi="http://www.w3.org/2001/XMLSchema-instance" xsi:schemaLocation="http://www.springframework.org/schema/beans http://www.springframework.org/schema/beans/spring-beans.xsd"> <bean id="student" class="model.Student"/> </beans> -
获取ioc容器
接口
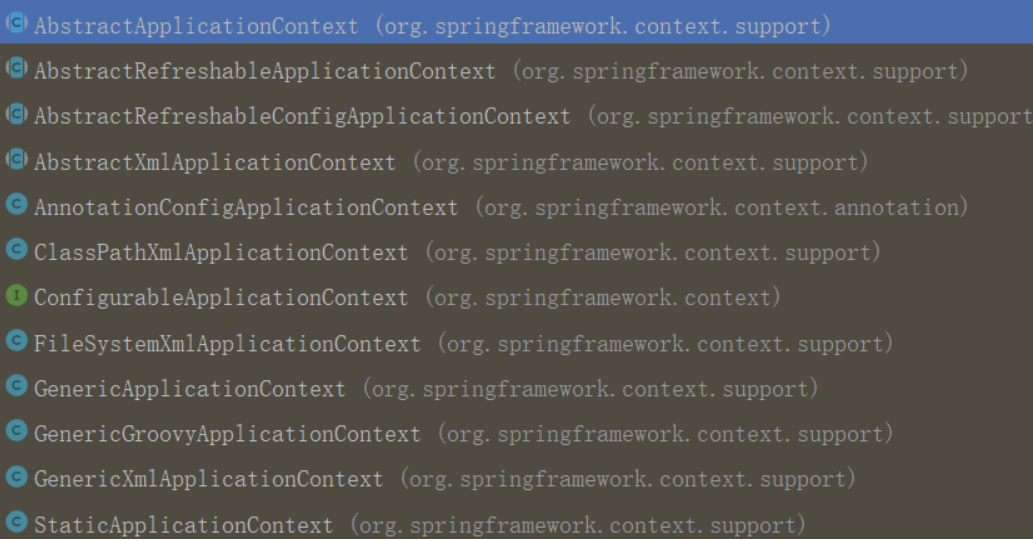
org.springframework.context.ApplicationContext代表了着IOC容器。public class Test01 { @Test public void test(){ ApplicationContext applicationContext= new ClassPathXmlApplicationContext("applicationContext.xml"); } }这里的applicationContext就是一个表示IOC容器的类,这里通过实现类
ClassPathXmlApplicationContext来生成的,ApplicationContext还有许多实现类,以及实现类的子类,这些类都可以当做IOC容器来使用。
-
从容器中获取对象
在之前的bean标签中有一个属性为id,这个id就是用来定位这个bean的值。
public class Test01 {
    @Test
    public void test(){
        ApplicationContext applicationContext=
            new ClassPathXmlApplicationContext("applicationContext.xml");
        Student student= (Student) applicationContext.getBean("student");
        System.out.println(student);
    }
}
5 Bean的装配
Bean的装配,即Bean对象的创建。容器根据代码要求创建Bean对象后再传递给代码的过程,称为Bean的装配。
Bean的装配可以理解为将对象加入容器的过程,Spring为我们提供了多种方式
-
默认方式
默认情况下,容器会调用Bean类的无参构造器,创建空值的实例对象。
-
动态工厂
很多时候对象不是直接生成的,而需要通过工厂对象生产,我们有两种思路解决这个问题。
-
将工厂方法作为普通Bean使用
<?xml version="1.0" encoding="UTF-8"?>
<beans xmlns="http://www.springframework.org/schema/beans"
       xmlns:xsi="http://www.w3.org/2001/XMLSchema-instance"
       xsi:schemaLocation="http://www.springframework.org/schema/beans
        http://www.springframework.org/schema/beans/spring-beans.xsd">
    <!-- 配置动态工厂bean-->
    <bean id="studentFactory" class="model.StudentFcatory"/>
</beans>
然后通过ioc容器获取工厂bean,最后通过工厂bean获取对象。这种方法需要一个中间过程,所以并不好。
-
利用Spring的动态工厂Bean
- 先配置工厂bean,然后配置实例bean,这个时候不配置class属性,因为他不是直接通过类new出来的。
<?xml version="1.0" encoding="UTF-8"?>
<beans xmlns="http://www.springframework.org/schema/beans"
       xmlns:xsi="http://www.w3.org/2001/XMLSchema-instance"
       xsi:schemaLocation="http://www.springframework.org/schema/beans
        http://www.springframework.org/schema/beans/spring-beans.xsd">
    <!--工厂bean -->
    <bean id="studnetFactory" class="model.StudentFcatory"/>
    <!-- studnet bean-->
    <bean id="student"  factory-bean="studnetFactory" factory-method="getStudent"/>
</beans>
-
-
静态工厂
- 设置该bean相关的类以及方法
<?xml version="1.0" encoding="UTF-8"?> <beans xmlns="http://www.springframework.org/schema/beans" xmlns:xsi="http://www.w3.org/2001/XMLSchema-instance" xsi:schemaLocation="http://www.springframework.org/schema/beans http://www.springframework.org/schema/beans/spring-beans.xsd"> <bean id="student" class="model.StudentFcatory" factory-method="getStudent"/> </beans> -
作用域
-
当通过Spring容器创建一个Bean实例时,不仅可以完成Bean的实例化,还可以通过scope属性,为Bean指定特定的作用域。Spring支持5种作用域
- singleton:单态模式。即在整个Spring容器中,使用singleton定义的Bean将是单例的,只有一个实例。默认为单态的。
- prototype:原型模式。即每次使用getBean方法获取的同一个bean的实例都是一个新的实例
- request:对于每次HTTP请求,都将会产生一个不同的Bean实例。
- session:对于每个不同的HTTP session,都将产生一个不同的Bean实例。
- global session:每个全局的HTTP session对应一个Bean实例。
-
示例
<?xml version="1.0" encoding="UTF-8"?>
<beans xmlns="http://www.springframework.org/schema/beans"
       xmlns:xsi="http://www.w3.org/2001/XMLSchema-instance"
       xsi:schemaLocation="http://www.springframework.org/schema/beans
        http://www.springframework.org/schema/beans/spring-beans.xsd">
    <bean id="student"  class="model.StudentFcatory" factory-method="getStudent" scope="singleton"/>
</beans>
-
-
Bean后处理器
Bean后处理器是一种特殊的Bean,容器中所有的Bean在初始化时,均会自动执行该类的两个方法。由于该Bean是由其它Bean自动调用执行,不是程序员手工调用,故此Bean无须id属性。
Bean后处理器实现了
org.springframework.beans.factory.config.BeanPostProcessorpublic class MyBeanPostProcessor implements BeanPostProcessor { public Object postProcessBeforeInitialization(Object o, String s) throws BeansException { System.out.println("postProcessBeforeInitialization"); return o;//必须返回bean } public Object postProcessAfterInitialization(Object o, String s) throws BeansException { System.out.println("postProcessAfterInitialization"); return o;//必须返回bean } }Bean后处理器也是一个bean所以也要由IOC容器管理。
<?xml version="1.0" encoding="UTF-8"?> <beans xmlns="http://www.springframework.org/schema/beans" xmlns:xsi="http://www.w3.org/2001/XMLSchema-instance" xsi:schemaLocation="http://www.springframework.org/schema/beans http://www.springframework.org/schema/beans/spring-beans.xsd"> <bean id="student" class="model.Student"/> <bean class="model.MyBeanPostProcessor"/> </beans> -
Bean的始末
在配置bean标签时候,,还有两个属性可以配置,他们分别是
init-method和destory-method<?xml version="1.0" encoding="UTF-8"?> <beans xmlns="http://www.springframework.org/schema/beans" xmlns:xsi="http://www.w3.org/2001/XMLSchema-instance" xsi:schemaLocation="http://www.springframework.org/schema/beans http://www.springframework.org/schema/beans/spring-beans.xsd"> <bean id="student" class="model.Student" scope="singleton" init-method="initMethod" destroy-method="destoryMethod"/> </beans>- init-method
- bean初始化时候调用
- destory-method
- 容器销毁后,bean被销毁后被调用
- init-method
-
Bean的生命周期
- 调用无参构造器,创建实例对象。
- 调用参数的setter,为属性注入值。
- 若Bean实现了BeanNameAware接口,则会执行接口方法setBeanName(String beanId),使Bean类可以获取其在容器中的id名称。
- 若Bean实现了BeanFactoryAware接口,则执行接口方法setBeanFactory(BeanFactory factory),使Bean类可以获取到BeanFactory对象。
- 若定义并注册了Bean后处理器BeanPostProcessor,则执行接口方法postProcessBeforeInitialization()。
- 若Bean实现了InitializingBean 接口,则执行接口方法afterPropertiesSet ()。该方法在Bean的所有属性的set方法执行完毕后执行,是Bean初始化结束的标志,即Bean实例化结束。
- 若设置了init-method方法,则执行。
- 若定义并注册了Bean后处理器BeanPostProcessor,则执行接口方法postProcessAfterInitialization()。
- 执行业务方法。
- 若Bean实现了DisposableBean接口,则执行接口方法destroy()。
- 若设置了destroy-method方法,则执行。
- 从上面的步骤可以知道,为了管理和获取bean的整个生命周期,需要额外实现其他接口。
6.基于配置文件的注入
Bean实例在调用无参构造器创建了空值对象后,就要对Bean对象的属性进行初始化。初始化是由容器自动完成的,称为注入。根据注入方式的不同,常用的有两类:设值注入、构造注入。
-
设值注入
设值注入是指,通过setter方法传入被调用者的实例。这种注入方式简单、直观,因而在Spring的依赖注入中大量使用。
<?xml version="1.0" encoding="UTF-8"?> <beans xmlns="http://www.springframework.org/schema/beans" xmlns:xsi="http://www.w3.org/2001/XMLSchema-instance" xsi:schemaLocation="http://www.springframework.org/schema/beans http://www.springframework.org/schema/beans/spring-beans.xsd"> <bean id="student" class="model.Student"> <property name="age" value="18"/> <property name="id" value="1"/> <property name="name" value="zhangsan"/> </bean> </beans> -
构造注入
构造注入是指,在构造调用者实例的同时,完成被调用者的实例化。即,使用构造器设置依赖关系。
<?xml version="1.0" encoding="UTF-8"?> <beans xmlns="http://www.springframework.org/schema/beans" xmlns:xsi="http://www.w3.org/2001/XMLSchema-instance" xsi:schemaLocation="http://www.springframework.org/schema/beans http://www.springframework.org/schema/beans/spring-beans.xsd"> <bean id="student" class="model.Student"> <constructor-arg name="age" value="18"/> <constructor-arg name="id" value="1"/> <constructor-arg name="name" value="zhangsan"/> </bean> </beans> -
命名空间注入
-
p命名空间
对于set注入需要使用p命名空间,但是先要在配置文件中引入
xmlns:p="http://www.springframework.org/schema/p"<?xml version="1.0" encoding="UTF-8"?> <beans xmlns="http://www.springframework.org/schema/beans" xmlns:xsi="http://www.w3.org/2001/XMLSchema-instance" xmlns:p="http://www.springframework.org/schema/p" xsi:schemaLocation="http://www.springframework.org/schema/beans http://www.springframework.org/schema/beans/spring-beans.xsd"> <bean id="student" class="model.Student" p:id="1" p:age="18" p:name="zhangsan"/> </beans> -
c命名空间
对于构造注入需要使用c命名空间,但是先要在配置文件中引入
xmlns:c="http://www.springframework.org/schema/c"<?xml version="1.0" encoding="UTF-8"?> <beans xmlns="http://www.springframework.org/schema/beans" xmlns:xsi="http://www.w3.org/2001/XMLSchema-instance" xmlns:c="http://www.springframework.org/schema/c" xsi:schemaLocation="http://www.springframework.org/schema/beans http://www.springframework.org/schema/beans/spring-beans.xsd"> <bean id="student" class="model.Student" c:id="1" c:age="18" c:name="zhangsan"/> </beans>
-
-
集合属性注入
- 数组
- List
- Set
- Map
- Properties
<?xml version="1.0" encoding="UTF-8"?> <beans xmlns="http://www.springframework.org/schema/beans" xmlns:xsi="http://www.w3.org/2001/XMLSchema-instance" xmlns:c="http://www.springframework.org/schema/c" xsi:schemaLocation="http://www.springframework.org/schema/beans http://www.springframework.org/schema/beans/spring-beans.xsd"> <bean id="student" class="model.Student" c:id="1" c:age="18" c:name="zhangsan"/> <bean class="model.MyBeanPostProcessor"/> <bean class="model.Test"> <property name="arrs"> <array> <value>1</value> <value>2</value> <value>3</value> </array> </property> <property name="list"> <list> <value>1</value> <value>2</value> <value>3</value> </list> </property> <property name="map"> <map> <entry key="1" value="a"/> <entry key="2" value="b"/> </map> </property> <property name="properties"> <props> <prop key="1">a</prop> <prop key="2">b</prop> </props> </property> </bean> </beans> -
域属性自动注入
-
byName
当配置文件中被调用者Bean的id值与代码中调用者Bean类的属性名相同时,可使用byName方式,让容器自动将被调用者Bean注入给调用者Bean。容器是通过调用者的Bean类的属性名与配置文件的被调用者bean的id进行比较而实现自动注入的。
<?xml version="1.0" encoding="UTF-8"?> <beans xmlns="http://www.springframework.org/schema/beans" xmlns:xsi="http://www.w3.org/2001/XMLSchema-instance" xmlns:p="http://www.springframework.org/schema/p" xsi:schemaLocation="http://www.springframework.org/schema/beans http://www.springframework.org/schema/beans/spring-beans.xsd"> <bean id="school" class="model.School" p:id="1" p:name="csust" /> <bean class="model.Student" autowire="byName"> <property name="id" value="1"/> <property name="name" value="zhangsan"/> <property name="age" value="18"/> </bean> </beans> -
byType
使用byType方式自动注入,要求:配置文件中被调用者bean的class属性指定的类,要与代码中调用者Bean类的某域属性类型同源。即要么相同,要么有is-a关系(子类,或是实现类)。但这样的同源的被调用bean只能有一个。多于一个,容器就不知该匹配哪一个了。
<?xml version="1.0" encoding="UTF-8"?>
<beans xmlns="http://www.springframework.org/schema/beans"
       xmlns:xsi="http://www.w3.org/2001/XMLSchema-instance"
       xmlns:p="http://www.springframework.org/schema/p"
       xsi:schemaLocation="http://www.springframework.org/schema/beans
        http://www.springframework.org/schema/beans/spring-beans.xsd">
    <bean class="model.School" p:id="1" p:name="csust" />
    <bean class="model.Student" autowire="byType">
        <property name="id" value="1"/>
        <property name="name" value="zhangsan"/>
        <property name="age" value="18"/>
    </bean>
</beans>
-
-
SPEL注入
SPEL,Spring Expression Language,即Spring EL表达式语言。即,在Spring配置文件中为Bean的属性注入值时,可直接使用SPEL表达式计算的结果。SPEL表达式以#开头,后跟一对大括号。
-
内部Bean注入
若不希望代码直接访问某个bean,即,在代码中通过getBean方法获取该Bean实例, 则可将该Bean的定义放入调用者bean定义的内部。
<?xml version="1.0" encoding="UTF-8"?> <beans xmlns="http://www.springframework.org/schema/beans" xmlns:xsi="http://www.w3.org/2001/XMLSchema-instance" xsi:schemaLocation="http://www.springframework.org/schema/beans http://www.springframework.org/schema/beans/spring-beans.xsd"> <bean class="model.Student"> <property name="id" value="1"/> <property name="name" value="zhangsan"/> <property name="school"> <bean class="model.School"> <property name="id" value="1"/> <property name="name" value="csust"/> </bean> </property> </bean> </beans> -
同类抽象Bean注入
当若干Bean实例同属于一个类,且这些实例的属性值又有相同值时,可以使用抽象Bean,以简化配置文件。
抽象Bean是用于让其它bean继承的。这个bean在Bean类中是不能通过getBean方法获取的。设置abstract属性为true来指明该bean为抽象bean, 默认值为false。 不过,该bean不为抽象bean时,也可被继承。 只不过,在应用中,用于被继承的bean一般为抽象bean。<?xml version="1.0" encoding="UTF-8"?> <beans xmlns="http://www.springframework.org/schema/beans" xmlns:xsi="http://www.w3.org/2001/XMLSchema-instance" xsi:schemaLocation="http://www.springframework.org/schema/beans http://www.springframework.org/schema/beans/spring-beans.xsd"> <bean id="student" class="model.Student" abstract="true"> <property name="id" value="1"/> <property name="name" value="csust"/> </bean> <bean class="model.Student" parent="student"> <property name="id" value="1"/> <property name="name" value="zhangsan"/> </bean> <bean class="model.Student" parent="student"> <property name="id" value="2"/> <property name="name" value="lisi"/> </bean> </beans> -
异类抽象Bean注入
当若干不同的类对象具有相同的属性,且其值也相同时,可使用异类抽象Bean
<?xml version="1.0" encoding="UTF-8"?> <beans xmlns="http://www.springframework.org/schema/beans" xmlns:xsi="http://www.w3.org/2001/XMLSchema-instance" xsi:schemaLocation="http://www.springframework.org/schema/beans http://www.springframework.org/schema/beans/spring-beans.xsd"> <bean id="teacher" class="model.Teacher"> <property name="school"> <bean class="model.School"> <property name="id" value="1"/> <property name="name" value="2"/> </bean> </property> </bean> <bean id="student" class="model.Student" parent="teacher"> <property name="id" value="1"/> <property name="name" value="zhangsan"/> <property name="age" value="18"/> </bean> </beans> -
为应用指定多个bean配置文件
在实际应用里,随着应用规模的增加,系统中Bean数量也大量增加,导致配置文件变得非常庞大、臃肿。为了避免这种情况的产生,提高配置文件的可读性与可维护性,可以将Spring配置文件分解成多个配置文件。
<?xml version="1.0" encoding="UTF-8"?>
<beans xmlns="http://www.springframework.org/schema/beans"
       xmlns:xsi="http://www.w3.org/2001/XMLSchema-instance"
       xsi:schemaLocation="http://www.springframework.org/schema/beans
        http://www.springframework.org/schema/beans/spring-beans.xsd">
    <import resource="classpath:bean1.xml"/>
    <import resource="classpath:bean2.xml"/>
</beans>
7. 基于注解的DI
对于DI使用注解,将不再需要在Spring配置文件中声明Bean实例。Spring中使用注解,需要在原有Spring运行环境基础上再做一些改变,完成以下三个步骤。
-
导入AOP的Jar包。因为注解的后台实现用到了AOP编程。
-
更换配置文件头,即添加相应的约束。
-
需要在Spring配置文件中配置组件扫描器,用于在指定的基本包中扫描注解。
<?xml version="1.0" encoding="UTF-8"?>
<beans xmlns="http://www.springframework.org/schema/beans"
       xmlns:xsi="http://www.w3.org/2001/XMLSchema-instance"
       xmlns:context="http://www.springframework.org/schema/context" xsi:schemaLocation="
        http://www.springframework.org/schema/beans http://www.springframework.org/schema/beans/spring-beans.xsd
        http://www.springframework.org/schema/context http://www.springframework.org/schema/context/spring-context.xsd"> <!-- bean definitions here -->
        <context:component-scan base-package="model"/>
</beans>
-
定义Bean
- @Component
- @Repository 用于对DAO实现类进行注解
- @Service 用于对Service实现类进行注解
- @Controller 用于对Controller实现类进行注解
上面四个注解是等价的,也就是说作用一样,只是语义不一样,对于不同的场景,尽量区别使用。
这些注解的value属性表示的是bean的id
@Component @Setter public class School { private int id; private String name; } -
Bean的作用域
需要在类上使用注解@Scope,其value属性用于指定作用域。默认为singleton。
-
基本数据类型属性注入
需要在属性上使用注解@Value,该注解的value属性用于指定要注入的值
-
按类型注入域属性
- @Autowired
- @Autowired有一个属性required,默认值为true,表示当匹配失败后,会终止程序运行。若将其值设置为false,则匹配失败,将被忽略,未匹配的属性值为null。
-
按名称注入域属性
- @Qualifier的value属性可以指定自动装配的bean的id
-
域属性注解@Resource
Spring提供了对JSR-250规范中定义@Resource标准注解的支持。@Resource注解既可以按名称匹配Bean,也可以按类型匹配Bean。使用该注解,要求JDK必须是6及以上版本。
- 按照类型
- 不指定属性
- 按照名称
- 指定name属性
- 按照类型
-
Bean的生命始末
- @PostConstruct
- @PreDestroy
-
使用JavaConfig进行配置
JavaConfig,是在Spring 3.0开始从一个独立的项目并入到Spring中的。JavaConfig可以看成一个用于完成Bean装配的Spring配置文件,即Spring容器,只不过该容器不是XML文件,而是由程序员使用Java自己编写的Java类。
- 对于一个POJO类,在类上使用@Configuration注解,将会使当前类作为一个Spring的容器来使用,用于完成Bean的创建。
- 在该JavaConfig的方法上使用@Bean,将会使一个普通方法所返回的结果变为指定名称的Bean实例。
- 在JavaConfig中,也可以完成域属性的自动注入。
-
使用JUnit4测试Spring
- 导入
spring-test.RELEASE.jar - 定义组件扫描器
- 添加注解
- @RunWith(SpringJUnit4ClassRunner.class):用于指定运行环境
- @ContextConfiguration(locations=“”):用于指定配置文件位置
- 导入
-
同时使用注解和配置文件
注解的好处是,配置方便,直观。但其弊端也显而易见:以硬编码的方式写入到了Java代码中,其修改是需要重新编译代码的。
XML配置方式的最大好处是,对其所做修改,无需编译代码,只需重启服务器即可将新的配置加载。
若注解与XML同用,XML的优先级要高于注解。这样做的好处是,需要对某个Bean做修改,只需修改配置文件即可。当然,此时,Bean类要有setter或构造器。

 浙公网安备 33010602011771号