


RHEL 6.5----Varnish缓存服务器
| 主机名 | IP | 服务 |
| master | 192.168.30.130 | varnish |
| slave | 192.168.30.131 | httpd |
| WebServer | 192.168.30.132 |
官网:
http://www.varnish-cache.org/releases/index.html
软件包官方下载地址:
https://packagecloud.io/varnishcache/varnish41?page=1
https://packagecloud.io/varnishcache/varnish41
官方安装说明:
https://packagecloud.io/varnishcache/varnish41/install#bash-rpm
https://packagecloud.io/varnishcache/varnish60/install#manual-rpm
GitHub地址:
https://github.com/varnishcache/varnish-cache
软件包库:
https://github.com/varnishcache/pkg-varnish-cache
准备安装文件
安装epel-release(官方给出的epel源地址是fedora:https://fedoraproject.org/wiki/EPEL,我使用的是中科大的)
[root@master ~]# wget http://mirrors.ustc.edu.cn/epel/epel-release-latest-6.noarch.rpm
[root@master ~]# rpm -ivh epel-release-latest-6.noarch.rpm
或者直接
[root@master ~]# rpm -ivh http://mirrors.ustc.edu.cn/epel/epel-release-latest-6.noarch.rpm
Retrieving http://mirrors.ustc.edu.cn/epel/epel-release-latest-6.noarch.rpm
warning: /var/tmp/rpm-tmp.TB6RfW: Header V3 RSA/SHA256 Signature, key ID 0608b895: NOKEY
Preparing...                ########################################### [100%]
   1:epel-release           ########################################### [100%]
[root@master ~]# ls /etc/yum.repos.d/ | grep epel
epel.repo
epel-testing.repo
准备varnish的yum源
[root@master ~]# curl -s https://packagecloud.io/install/repositories/varnishcache/varnish41/script.rpm.sh | sh    //这个脚本会去检测一些依赖,没有回自动安装,前提是配置好YUM源
Detected operating system as redhatenterpriseserver/6.
Checking for curl...
Detected curl...
Downloading repository file: https://packagecloud.io/install/repositories/varnishcache/varnish41/config_file.repo?os=redhatenterpriseserver&dist=6&source=script
done.
Installing pygpgme to verify GPG signatures...
Loaded plugins: product-id, refresh-packagekit, security, subscription-manager
This system is not registered to Red Hat Subscription Management. You can use subscription-manager to register.
epel/metalink                                               | 5.1 kB     00:00
epel                                                        | 4.7 kB     00:00
epel/primary_db                                             | 6.0 MB     00:02
rhel-source                                                 | 3.9 kB     00:00 ...
rhel-source/primary_db                                      | 3.1 MB     00:00 ...
https://packagecloud.io/varnishcache/varnish41/el/6/SRPMS/repodata/repomd.xml: [Errno 14] PYCURL ERROR 7 - "Failed to connect to 2600:1fa0:c040:111:34db:182c::: Network is unreachable"
Trying other mirror.
Error: Cannot retrieve repository metadata (repomd.xml) for repository: varnishcache_varnish41-source. Please verify its path and try again
Installing yum-utils...
Loaded plugins: product-id, refresh-packagekit, security, subscription-manager
This system is not registered to Red Hat Subscription Management. You can use subscription-manager to register.
varnishcache_varnish41-source/signature                     |  836 B     00:00
Retrieving key from https://packagecloud.io/varnishcache/varnish41/gpgkey
Importing GPG key 0xCBF5C49E:
 Userid: "https://packagecloud.io/varnishcache/varnish41 (https://packagecloud.io/docs#gpg_signing) <support@packagecloud.io>"
 From  : https://packagecloud.io/varnishcache/varnish41/gpgkey
varnishcache_varnish41-source/signature                     | 1.0 kB     00:00 ...
varnishcache_varnish41-source/primary                       | 2.3 kB     00:00
varnishcache_varnish41-source                                                15/15
Setting up Install Process
Package yum-utils-1.1.30-14.el6.noarch already installed and latest version
Nothing to do
Generating yum cache for varnishcache_varnish41...
This system is not registered to Red Hat Subscription Management. You can use subscription-manager to register.
Importing GPG key 0xCBF5C49E:
 Userid: "https://packagecloud.io/varnishcache/varnish41 (https://packagecloud.io/docs#gpg_signing) <support@packagecloud.io>"
 From  : https://packagecloud.io/varnishcache/varnish41/gpgkey

The repository is setup! You can now install packages.
[root@master ~]# ls /etc/yum.repos.d/ | grep varnish
varnishcache_varnish41.repo
[root@master ~]# cat /etc/yum.repos.d/varnishcache_varnish41.repo
[varnishcache_varnish41]
name=varnishcache_varnish41
baseurl=https://packagecloud.io/varnishcache/varnish41/el/6/$basearch
repo_gpgcheck=1
gpgcheck=0
enabled=1
gpgkey=https://packagecloud.io/varnishcache/varnish41/gpgkey
sslverify=1
sslcacert=/etc/pki/tls/certs/ca-bundle.crt
metadata_expire=300

[varnishcache_varnish41-source]
name=varnishcache_varnish41-source
baseurl=https://packagecloud.io/varnishcache/varnish41/el/6/SRPMS
repo_gpgcheck=1
gpgcheck=0
enabled=1
gpgkey=https://packagecloud.io/varnishcache/varnish41/gpgkey
sslverify=1
sslcacert=/etc/pki/tls/certs/ca-bundle.crt
metadata_expire=300
安装varnish
[root@master ~]# yum install -y varnish   //国外的网站可能会有些慢,依个人网络环境不同,可能有时会因为连接超时而失败,这时候只能去一个一个下载,然后使用rpm一个一个安装
[root@master ~]# varnish    //安装完成后的一些命令
varnishadm varnishlog varnishstat
varnishd varnishncsa varnishtest
varnishhist varnish_reload_vcl varnishtop
[root@master ~]# varnishd -V    //查看varnish的版本号
varnishd (varnish-4.1.10 revision 1d090c5a08f41c36562644bafcce9d3cb85d824f)
Copyright (c) 2006 Verdens Gang AS
Copyright (c) 2006-2015 Varnish Software AS
配置文件位置
[root@master ~]# ls /etc/sysconfig/varnish
/etc/sysconfig/varnish    //主配置文件

[root@master ~]# ls /etc/varnish/default.vcl
/etc/varnish/default.vcl   //VCL配置文件
修改内容
[root@master ~]# cp /etc/varnish/default.vcl{,.bak}
[root@master ~]# vim /etc/varnish/default.vcl

backend default {
    .host = "192.168.30.131";
    .port = "80";
}
..........

sub vcl_deliver {
    # Happens when we have all the pieces we need, and are about to send the
    # response to the client.
    #
    # You can do accounting or modifying the final object here.
    if (obj.hits > 0) {
        set resp.http.X-Cache = "HIT from sishen cache";
}
    else {
        set resp.http.X-Cache = "MISS from sishen cache";
}
    return (deliver);
}
[root@master ~]# cp /etc/sysconfig/varnish{,.bak}
[root@master ~]# vim /etc/sysconfig/varnish
.....
37 VARNISH_LISTEN_PORT=80
.....
重启varnish
[root@master ~]# service varnish restart
在slave上部署web服务器,进行测试
[root@slave ~]# yum install -y httpd
[root@slave ~]# echo "<h1>This is a varnish test page\! </h1>" > /var/www/html/index.html
重启httpd
[root@slave ~]# service  httpd restart
在物理机上使用Firefox直接访问slave,验证slave是否正常:
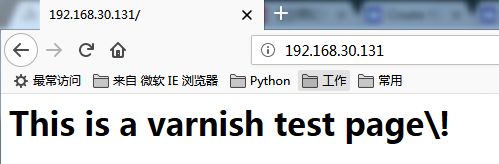
ok,没问题。
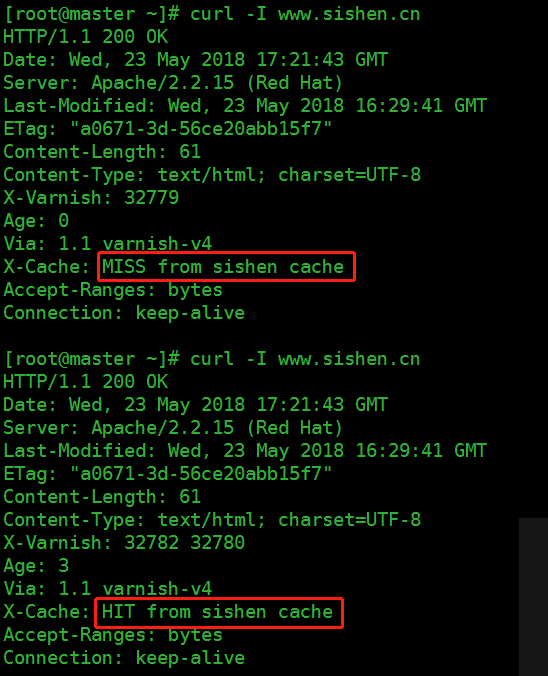
测试varnish:
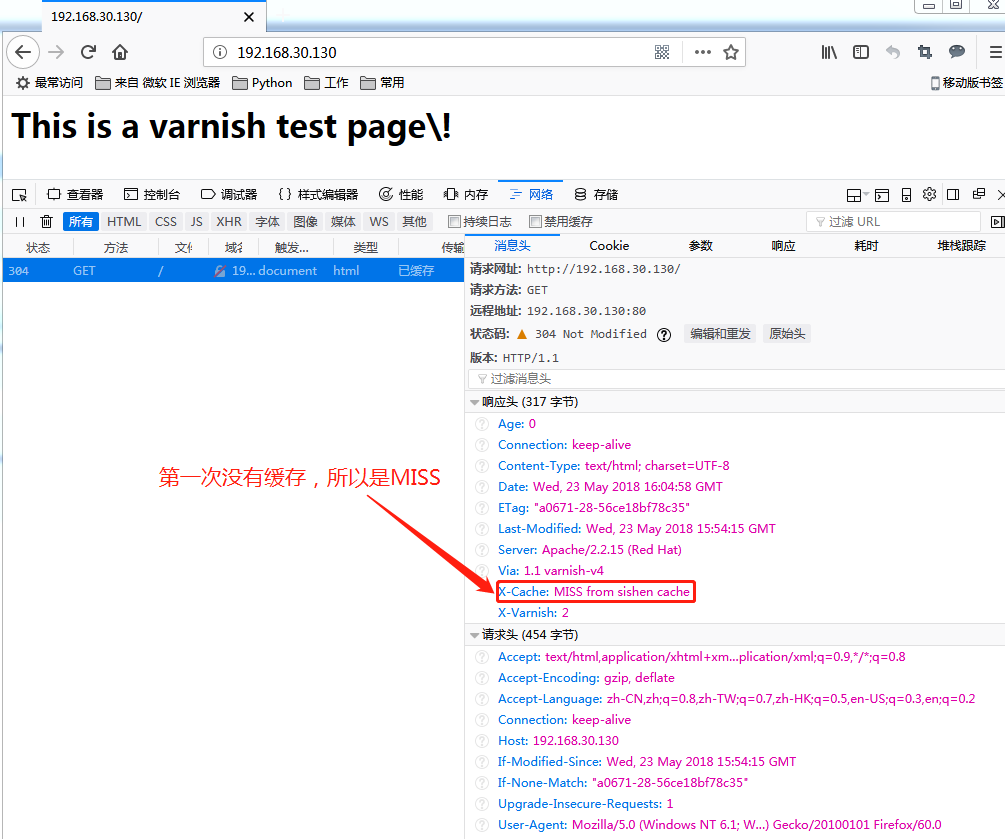
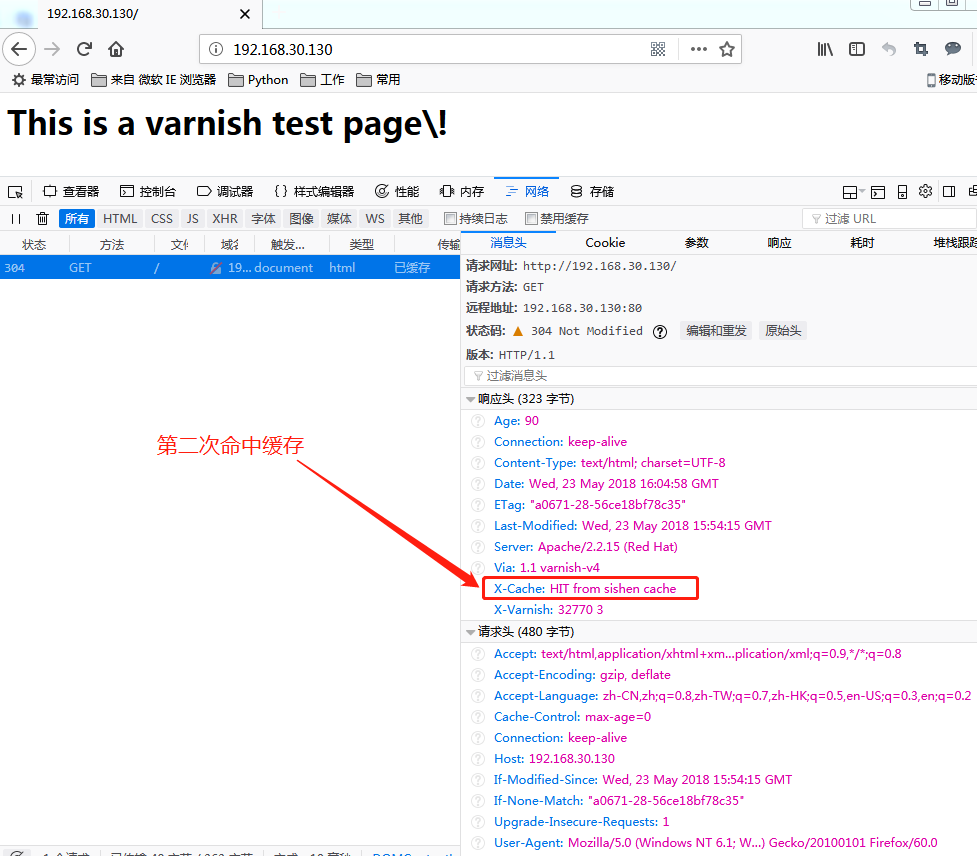
刷新再次查看
Linux终端查看
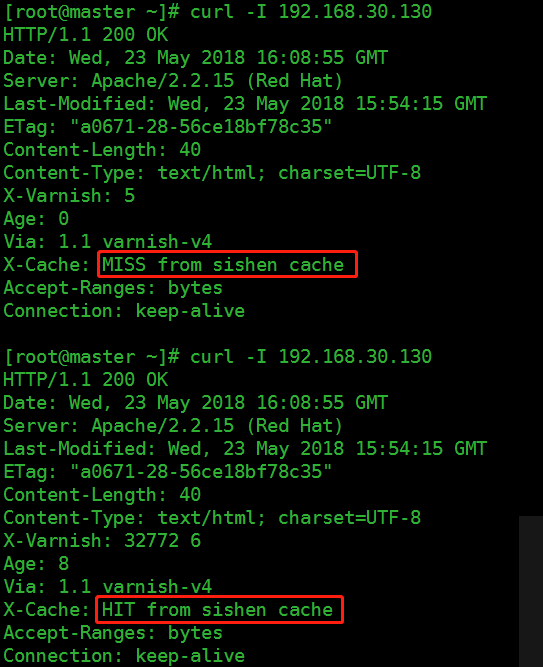
这里如果缓存总是没有命中,需要修改httpd.conf文件,将KeepAlive的原值"off"修改为"on",重启httpd服务再次测试。
使用varnish缓存不同的域名网站,配置第二台web服务器:
[root@WebServer ~]# yum install -y httpd
[root@WebServer ~]# echo "<h1>#######This is the WebServer 192.168.30.132########</h1>" > /var/www/html/index.html
[root@WebServer ~]# service  httpd restart
Stopping httpd:                                            [  OK  ]
Starting httpd:                                            [  OK  ]
修改varnish配置文件
[root@master ~]# vim /etc/varnish/default.vcl
backend www {
    .host = "192.168.30.132";
    .port = "80";
}
backend xueji {
    .host = "192.168.30.131";
    .port = "80";
}

sub vcl_recv {
    # Happens before we check if we have this in cache already.
    #
    # Typically you clean up the request here, removing cookies you don't need,
    # rewriting the request, etc.
    if (req.http.host ~ "^(www.)?sishen.cn") {
        set req.http.host = "www.sishen.cn";
        set req.backend_hint = www;
        }
    elif (req.http.host ~ "^xueji.sishen.cn") {
        set req.backend_hint = xueji;
        }
    else {
        return (synth(999,"Sorry,The Page Not Found"));
        }
}

sub vcl_deliver {
    # Happens when we have all the pieces we need, and are about to send the
    # response to the client.
    #
    # You can do accounting or modifying the final object here.
    if (obj.hits > 0) {
        set resp.http.X-Cache = "HIT from sishen cache";}
    else {
        set resp.http.X-Cache = "MISS from sishen cache";}
    return (deliver);
}
重载配置文件
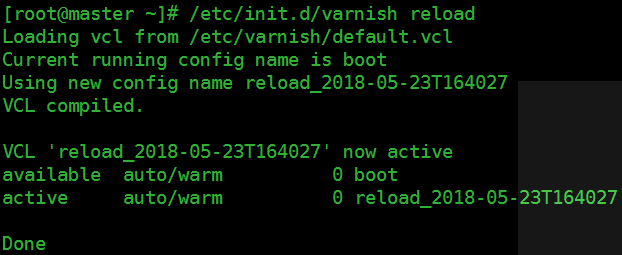
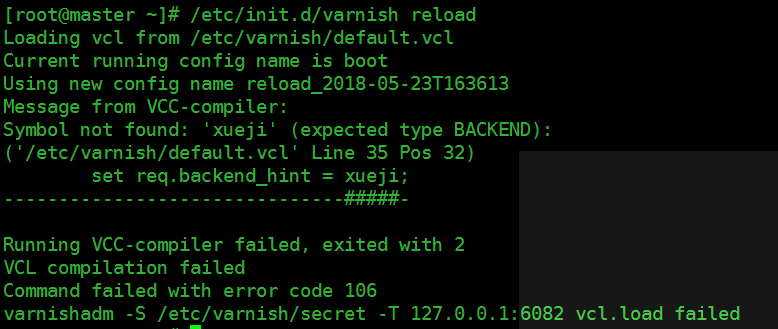
!!!注意:
varnish修改完配置文件后,使用reload方式更方便,如果配置文件有错误,可以直接指出错在哪里(具体到哪一行的那个字段)
在varnish上修改hosts文件
[root@master ~]# vim /etc/hosts
127.0.0.1   localhost localhost.localdomain localhost4 localhost4.localdomain4
::1         localhost localhost.localdomain localhost6 localhost6.localdomain6
192.168.30.130 master
192.168.30.132 www.sishen.cn
192.168.30.131 xueji.sishen.cn
访问测试
使用物理机测试域名的话需要在C:\Windows\System32\drivers\etc\hosts文件末尾添加
192.168.30.130        xueji.sishen.cn
192.168.30.130        www.sishen.cn
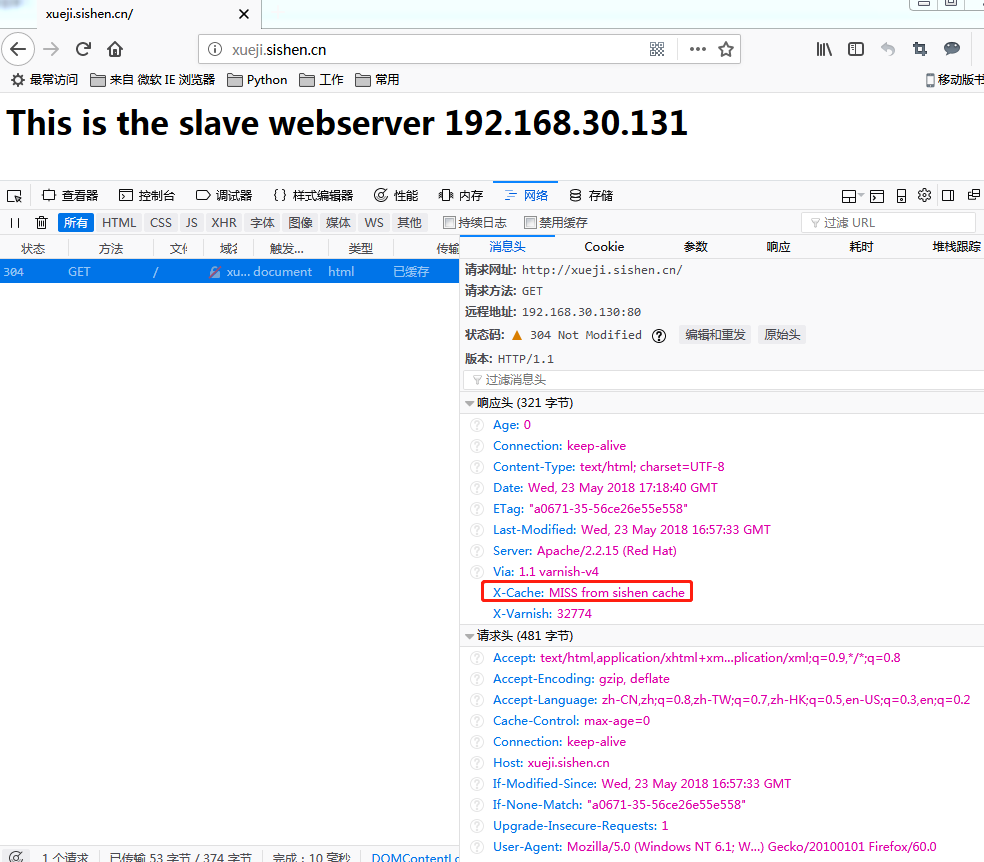
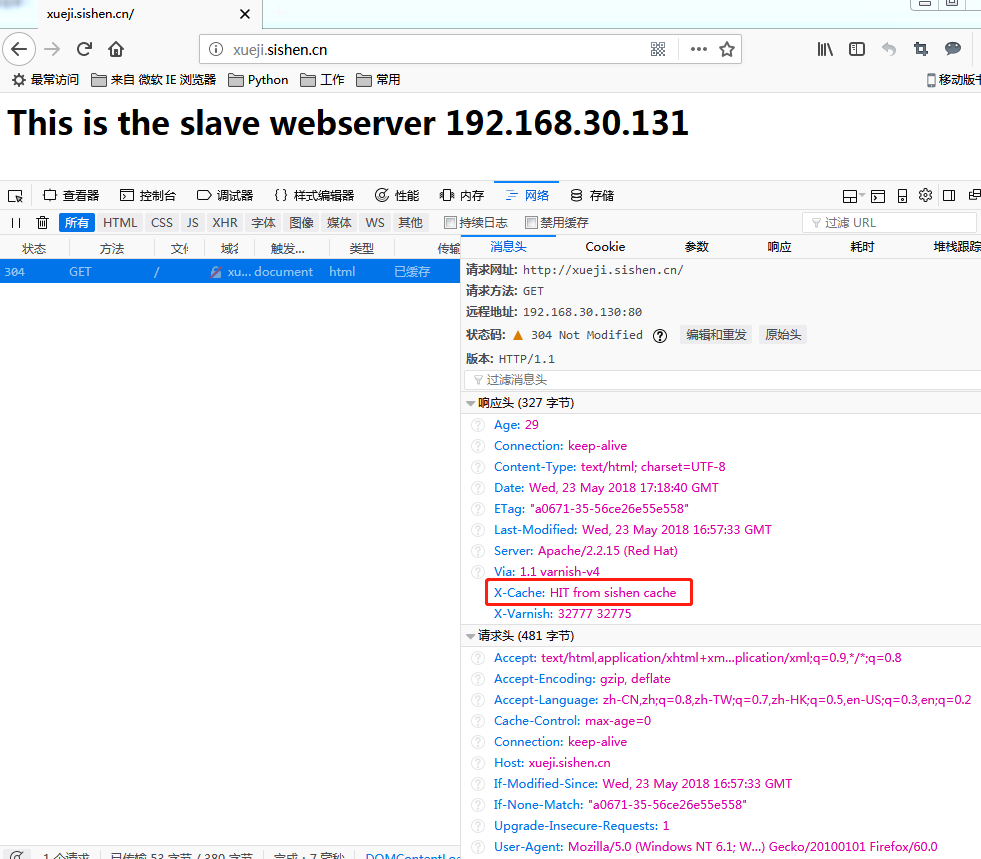
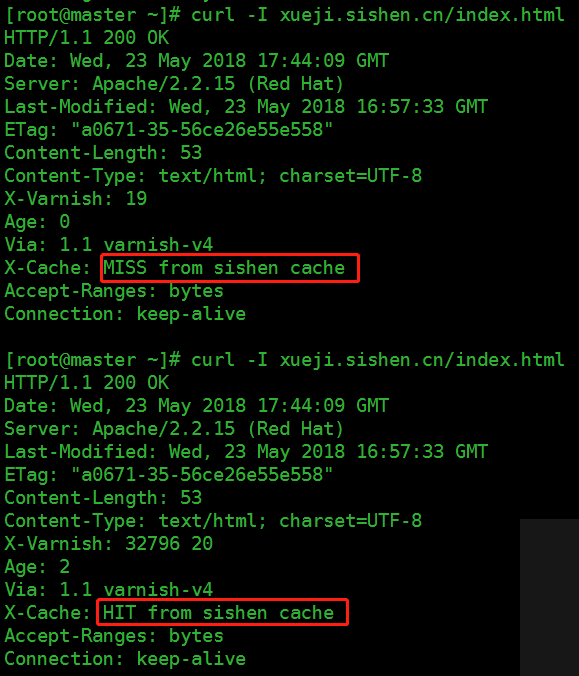
linux终端测试
检测域名准确性

结果与上述default.vcl中的定义相同,即结果解析正确。
测试varnish的错误页面,直接IP访问
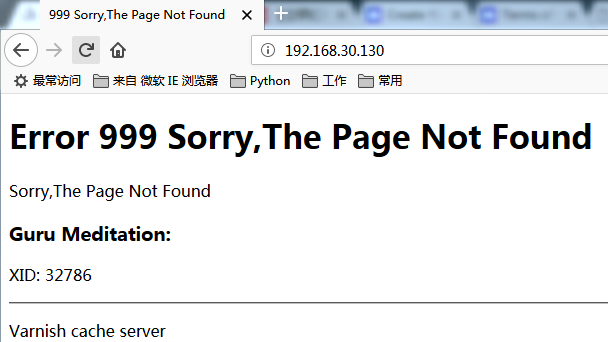
如果在default.vcl中不指定错误页面,结果会是怎样呢?
[root@master ~]# vim /etc/varnish/default.vcl

sub vcl_recv {
    # Happens before we check if we have this in cache already.
    #
    # Typically you clean up the request here, removing cookies you don't need,
    # rewriting the request, etc.
    if (req.http.host ~ "^(www.)?sishen.cn") {
        set req.http.host = "www.sishen.cn";
        set req.backend_hint = www;
        }
    elif (req.http.host ~ "^xueji.sishen.cn") {
        set req.backend_hint = xueji;
        }
#    else {
#       return (synth(999,"Sorry,The Page Not Found"));
#       }
}
[root@master ~]# /etc/init.d/varnish reload
Loading vcl from /etc/varnish/default.vcl
Current running config name is reload_2018-05-23T172134
Using new config name reload_2018-05-23T173503
VCL compiled.
VCL 'reload_2018-05-23T173503' now active
available auto/cold 0 boot
available auto/cold 0 reload_2018-05-23T170836
available auto/cold 0 reload_2018-05-23T171224
available auto/warm 0 reload_2018-05-23T172134
active auto/warm 0 reload_2018-05-23T173503
Done

结果显示,如果没有制定错误页面,会访问到default.vcl中backend定义的第一个域名对应的页面。
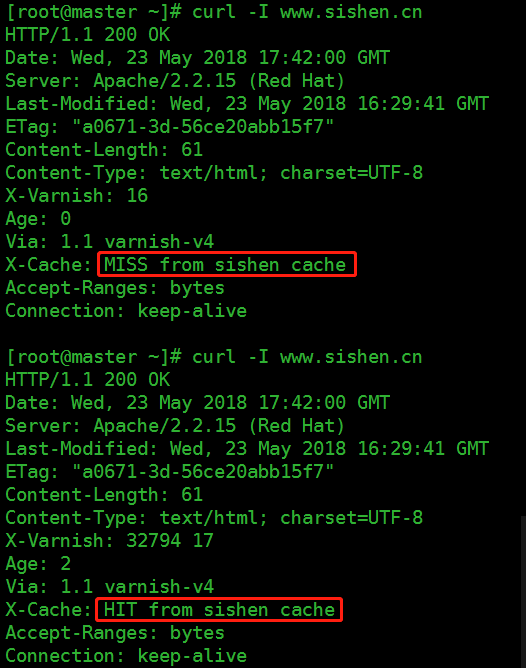
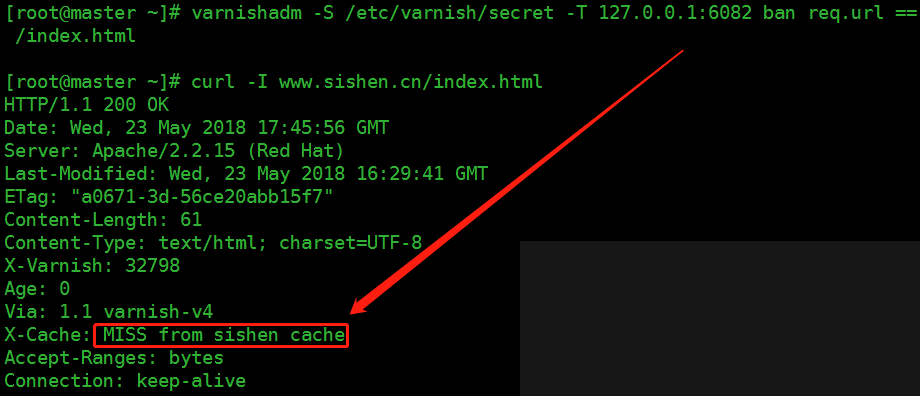
varnish的缓存清理
需要注意的是curl -I www.sishen.cn与curl -I www.sishen.cn/index.html是两种访问方式
上述操作删除的是单个页面,删除所有页面使用通配符 .*$,删除一个目录使用 /admin/*

== 符合条件的 != 不符合条件的 ~ 正则匹配 !~ 非正则匹配
值得注意的是 == 、!= 、~、!~后面必须有空格


 浙公网安备 33010602011771号