
windows从源码编译openssl1.1.1(vs2019、vs2017)
最近在vs2019上配置openssl,能查到的博客要么是不全要么就是年代久远了,索性自己写一个。
准备工作(前提,电脑上有vs2017或2019):
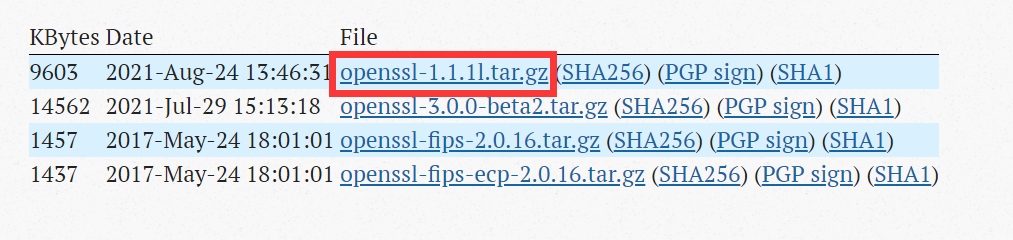
1.openssl源码,网址:https://www.openssl.org/source/
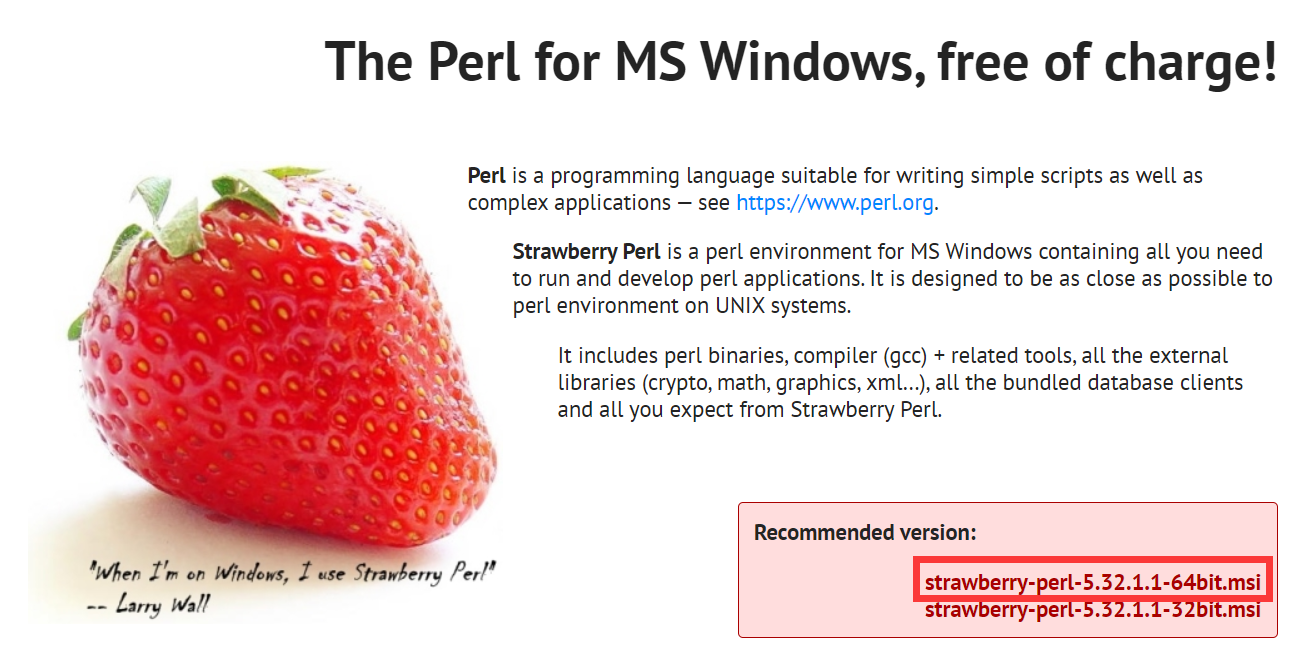
2.安装Strawberry Perl,网址:https://strawberryperl.com/ (我选择了64位)
3.安装NASM,网址:https://www.nasm.us/pub/nasm/releasebuilds/2.14.02/win64/
4.两者安装后,添加Perl和NASM到环境变量中(这里我加到了用户变量里)

======================================进入正题========================================
1.在你要安装的目录下创建三个文件夹(DLL放置动态链接库,Lib放置静态)

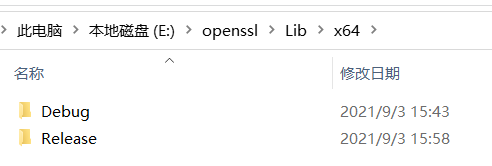
2.在DLL和Lib文件夹下分别创建x86和x64文件夹,再在里面创建Debug和Release文件夹


3.openssl的编译开始
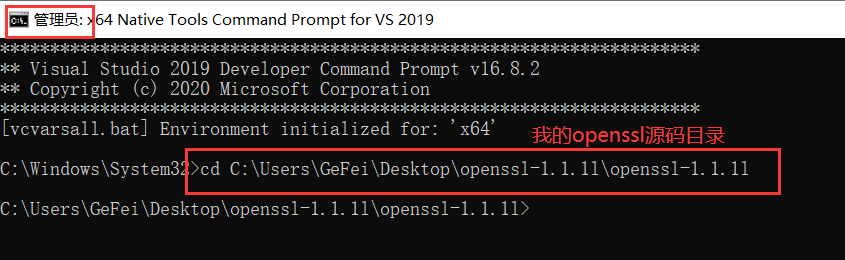
当编译64位的时候使用X64 Native Tools Command Prompt for VS 2019
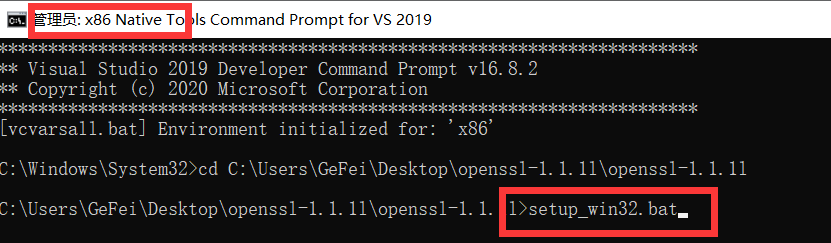
当编译32位的时候使用X86 Native Tools Command Prompt for VS 2019
一定不能搞混!!!并且打开的时候要右键,使用!!!管理员身份!!!打开

4.执行编译(以编译64位动态链接库为例)【【【【后面有批量编译的方法】】】】
以管理员身份打开X64 Native Tools Command Prompt for VS 2019,切换到之前下载好的openssl源码目录
然后执行如下的代码:
#第一步
perl Configure VC-WIN64A --prefix=E:\openssl\Lib\x64\Release(改为你的x64Release目录) --openssldir=E:\openssl\SSL
#perl Configure VC-WIN64A --debug --prefix=E:\openssl\Lib\x64\Debug(改为你的x64Debug目录) --openssldir=E:\openssl\SSL(改为你的SSL目录) #debug版的
#第二步
nmake
#第三步
nmake test
#第四步
nmake install
#第五步
nmake clean
在编译其余的部分时候,只需要替换第一步中的语句即可,第二到第五步语句不变,记得将下面语句中的路径改成自己的,不要选错编译的tool了
动态:
perl Configure VC-WIN32 --debug --prefix=E:\openssl\Lib\x32\Debug --openssldir=E:\openssl\SSL
perl Configure VC-WIN32 --prefix=E:\openssl\Lib\x32\Release --openssldir=E:\openssl\SSL
perl Configure VC-WIN64A --debug --prefix=E:\openssl\Lib\x64\Debug --openssldir=E:\openssl\SSL
perl Configure VC-WIN64A --prefix=E:\openssl\Lib\x64\Release --openssldir=E:\openssl\SSL
静态:
perl Configure VC-WIN32 --debug --prefix=E:\openssl\Lib\x32\Debug --openssldir=E:\openssl\SSL no-shared
perl Configure VC-WIN32 --prefix=E:\openssl\Lib\x32\Release --openssldir=E:\openssl\SSL no-shared
perl Configure VC-WIN64A --debug --prefix=E:\openssl\Lib\x64\Debug --openssldir=E:\openssl\SSL no-shared
perl Configure VC-WIN64A --prefix=E:\openssl\Lib\x64\Release --openssldir=E:\openssl\SSL no-shared
批量处理方式
如果觉得一条条指令执行起来麻烦的话,可以自己创建bat文件,记得把x64和x86的分开
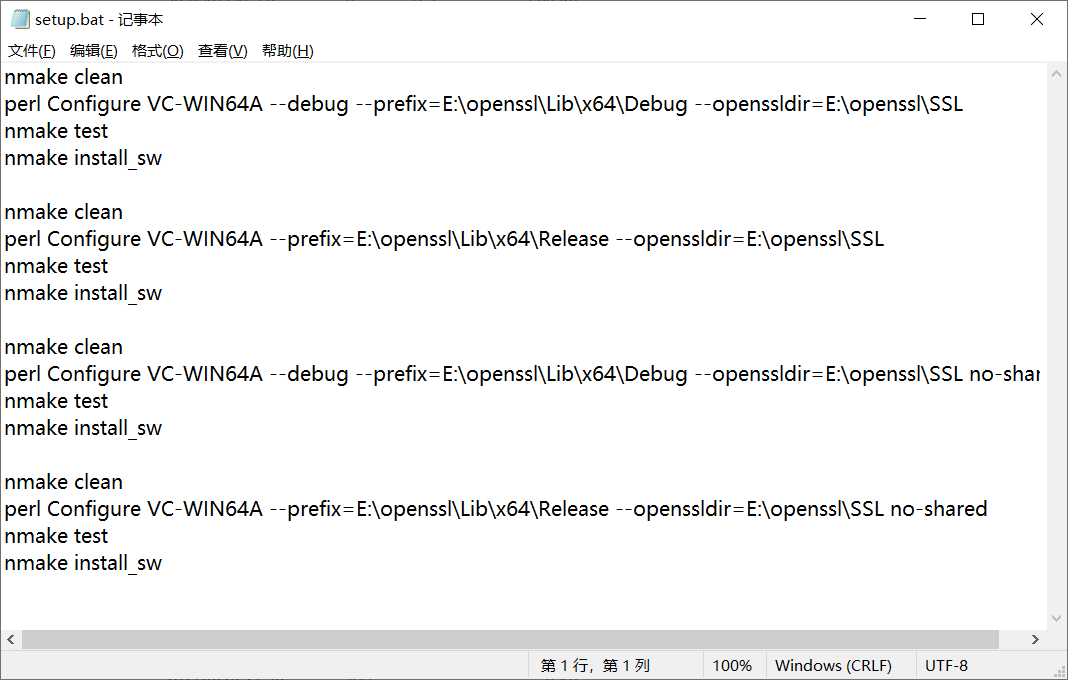

切换到源码目录下直接执行(64位的用x64编译,32位的用x86编译)

然后就慢慢等待编辑完成就可以啦,记得执行完一个bat再执行另一个嗷~
参考资料:
https://www.youtube.com/watch?v=PMHEoBkxYaQ(有梯子的建议看看这个,很详细的视频)
https://www.codenong.com/cs109745506/

 浙公网安备 33010602011771号