.net core 身份认证 证书认证(一)
生成证书 利用 PwoerShell 一定要管理员身份运行
证书生成
参考
PowerShell:在 Windows 中创建并导出自签名证书-腾讯云开发者社区-腾讯云 (tencent.com)
在 ASP.NET Core 中配置证书身份验证 | Microsoft Learn
生成语句
- 书的主题名称(也就是 DNS 名称)设置为 "mylab.wang.io"。
- 证书的有效期是从当前日期开始的 10 年。
- "KeySpec" 参数设置为 "KeyExchange",表示这个证书可以用于密钥交换。
- "KeyExportPolicy" 参数设置为 "Exportable",表示证书的私钥是可导出的。
cert CurrentUser 为 当前用户生成
cert LocalMachine 为 本地计算机
下面 是为个人计算机 生成的
名称为 localhost7029

生成的指纹为 4C8F47849396E076CFC91ABCD33FB9E097724EB6


New-SelfSignedCertificate -DnsName "localhost7029", "localhost7029" -CertStoreLocation "cert:\LocalMachine\My" -NotAfter (Get-Date).AddYears(20) -FriendlyName "localhost7029" -KeyUsageProperty All -KeyUsage CertSign, CRLSign, DigitalSignature

$mypwd = ConvertTo-SecureString -String "1234" -Force -AsPlainText

Get-ChildItem -Path cert:\localMachine\My\4C8F47849396E076CFC91ABCD33FB9E097724EB6 | Export-PfxCertificate -FilePath C:\git\localhost7029.pfx -Password $mypwd

Export-Certificate -Cert cert:\localMachine\My\4C8F47849396E076CFC91ABCD33FB9E097724EB6  -FilePath  C:\git\localhost7029.crt
下面是为 当前用户生成
New-SelfSignedCertificate -DnsName "localhost7029", "localhost7029" -CertStoreLocation "cert:\CurrentUser\My" -NotAfter (Get-Date).AddYears(20) -FriendlyName "localhost7029" -KeyUsageProperty All -KeyUsage CertSign, CRLSign, DigitalSignature

$mypwd = ConvertTo-SecureString -String "1234" -Force -AsPlainText

Get-ChildItem -Path cert:\CurrentUser\My\773575C2221A99FC8FD6DBA737674357C9ED5BDE | Export-PfxCertificate -FilePath  D:\微软练习\RazorPagesMovie\TestCertificate\CurrentUserlocalhost7029.pfx  -Password $mypwd

Export-Certificate -Cert cert:\CurrentUser\My\773575C2221A99FC8FD6DBA737674357C9ED5BDE  -FilePath  D:\微软练习\RazorPagesMovie\TestCertificate\CurrentUserlocalhost7029.crt

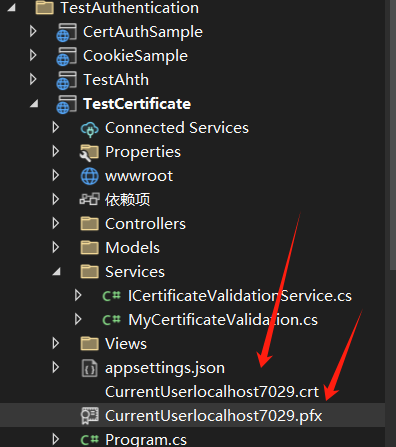
查看项目 文件 证书已经导出到项目文件中了

导入到 收信人的根证书颁发机构

查看证书状态

导出的证书
重点 证书 导入成功后需要设置 始终复制


选择证书 之后 站点可以查看

下面 是 控制台 如何 打开的 快捷方式
打开 win+R
mmc
点击 打开文件 选择 添加/删除单元 选择 个人 查看 刚刚创建的 证书 localhost7029

现在 他还不受信

将刚刚导出的 证书 导入 到 授信根证书

导入成功了
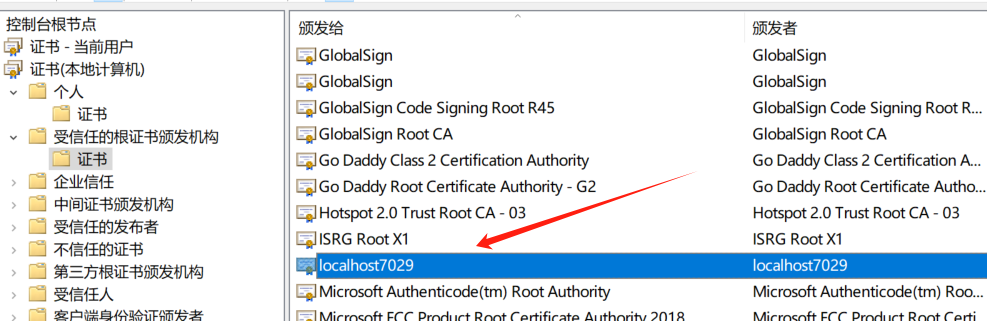
查看证书 状态

下面就是代码
nuget 下载 Microsoft.AspNetCore.Authentication.Certificate
配置 Kestrel 启动 必须有证书
//配置 KestrelServer 服务
builder.Services.Configure<KestrelServerOptions>(options =>
{
    options.ConfigureHttpsDefaults(options =>
    {
        //必须 有证书
        options.ClientCertificateMode = ClientCertificateMode.RequireCertificate;
        //加载证书
        string certificatePath = Path.Combine(AppDomain.CurrentDomain.BaseDirectory, "CurrentUserlocalhost7029.pfx");
        options.ServerCertificate = new X509Certificate2(certificatePath,"1234");

    });
});
//添加 身份验证证书
builder.Services.AddAuthentication(CertificateAuthenticationDefaults.AuthenticationScheme).AddCertificate(options =>
    {
        //配置 允许的证书类型 为所有
        options.AllowedCertificateTypes = CertificateTypes.All;
    }
);
管道处理 需要增加 身份认证中间件
app.UseAuthentication();


 浙公网安备 33010602011771号