四、Kubernetes 调度资源
四、Kubernetes 调度资源
1、无状态应用管理 Deployment
1.1 Deployment基础概念及使用场景
Deployment是k8s的无状态资源调度器,可以使用声明式的方式描述应用的期望状态,之后由Deployment控制器自动将当前状态改变为期望状态。
- Deployment通过RS管理Pod,同时提供了如下的能力:
- 声明式创建和更新
- 自动化部署和回滚
- 一键式缩容
- 自动灾难修复
- 更高级的更新方式
Deployment一般用于部署公司的无状态服务,这个也是最常用的控制器,因为企业内部限制都是以微服务为主,而微服务实现无状态化也是最佳实践,可以利用Deployment的高级功能做到无缝迁移、自动扩容缩容、自动灾难恢复、一键回滚等功能。
- Java
- Go
- Vue
- PHP等业务容器
- 其它任何无状态服务
1.2 创建 Deployment
# 生成一个 Deployment 的 Yaml:
kubectl create deploy nginx --replicas=3 --image=crpi-q1nb2n896zwtcdts.cn-beijing.personal.cr.aliyuncs.com/ywb01/nginx:stable --dry-run=client -oyaml > deploy.yaml

[root@k8s-master01 ~]# cat deploy.yaml
apiVersion: apps/v1
kind: Deployment
metadata:
  creationTimestamp: null
  labels:
    app: nginx
  name: nginx
spec:
  replicas: 3
  selector:
    matchLabels:
      app: nginx
  strategy: {}
  template:
    metadata:
      creationTimestamp: null
      labels:
        app: nginx
    spec:
      containers:
      - image: crpi-q1nb2n896zwtcdts.cn-beijing.personal.cr.aliyuncs.com/ywb01/nginx:stable
        name: nginx
        resources: {}
status: {}
示例解析:
- nginx:Deployment的名称;
- replicas: 创建Pod的副本数;
- selector:定义Deployment如何找到要管理的Pod,与template的label(标签)对应,apiVersion为apps/v1必须指定该字段;
- template字段包含以下字段:
- app: nginx使用label(标签)标记Pod;
- spec:表示Pod运行一个名字为nginx的容器;
- image:运行此Pod使用的镜像;
- Port:容器用于发送和接收流量的端口
# 使用 kubectl create 创建此 Deployment:
[root@k8s-master01 ~]# kubectl create -f deploy.yaml

# 使用 kubectl get 或者 kubectl describe 查看此 Deployment 的状态:
[root@k8s-master01 ~]# kubectl get po
NAME                     READY   STATUS    RESTARTS   AGE
nginx-67bfb68c7d-85dg2   1/1     Running   0          18s
nginx-67bfb68c7d-fqzp4   1/1     Running   0          18s
nginx-67bfb68c7d-t6zcc   1/1     Running   0          18s
- NAME:集群中Deployment的名称;
- READY:Pod就绪个数和总副本数;
- UP-TO-DATE:显示已达到期望状态的被更新的副本数;
- AVAILABLE:显示用户可以使用的应用程序副本数,当前为0,说明目前还没有达到期望的Pod;
- AGE:显示应用程序运行的时间。
# 可以使用 rollout 命令查看整个 Deployment 创建的状态:
[root@k8s-master01 ~]# kubectl rollout status deploy nginx
deployment "nginx" successfully rolled out

# 当 rollout 结束时,再次查看此 Deployment,可以看到 AVAILABLE 的数量和 yaml 文件中定义的 replicas 相同:
[root@k8s-master01 ~]# kubectl get deploy
NAME    READY   UP-TO-DATE   AVAILABLE   AGE
nginx   3/3     3            3           46s

# 查看此 Deployment 当前对应的 ReplicaSet:
[root@k8s-master01 ~]# kubectl get rs -l app=nginx
NAME               DESIRED   CURRENT   READY   AGE
nginx-67bfb68c7d   3         3         3       71s
- DESIRED:应用程序副本数;
- CURRENT:当前正在运行的副本数;
- READY:有多少副本是正常的
当 Deployment 有过更新,对应的 RS 可能不止一个,可以通过-o yaml 获取当前对应的 RS
是哪个,其余的 RS 为保留的历史版本,用于回滚等操作。
查看此 Deployment 创建的 Pod,可以看到 Pod 的 hash 值 5c689d88bb 和上述 Deployment 对
应的 ReplicaSet 的 hash 值一致:
[root@k8s-master01 ~]# kubectl get po --show-labels
NAME                     READY   STATUS    RESTARTS   AGE   LABELS
nginx-67bfb68c7d-85dg2   1/1     Running   0          87s   app=nginx,pod-template-hash=67bfb68c7d
nginx-67bfb68c7d-fqzp4   1/1     Running   0          87s   app=nginx,pod-template-hash=67bfb68c7d
nginx-67bfb68c7d-t6zcc   1/1     Running   0          87s   app=nginx,pod-template-hash=67bfb68c7d
1.3 更新 Deployment
注意:当且仅当 Deployment 的 Pod 模板(即.spec.template)更改时,才会触发 Deployment 更新,例如更改内存、CPU 配置或者容器的 image。
# 假如更新 Nginx Pod 的 image 使用 nginx:latest,并使用--record 记录当前更改的参数,后期回滚时可以查看到对应的信息:
[root@k8s-master01 ~]# kubectl set image deployment nginx nginx=crpi-q1nb2n896zwtcdts.cn-beijing.personal.cr.aliyuncs.com/ywb01/nginx:1.15 --record


# 同样可以使用 kubectl rollout status 查看更新过程:
[root@k8s-master01 ~]# kubectl rollout status deploy nginx
Waiting for deployment "nginx" rollout to finish: 1 old replicas are pending termination...
Waiting for deployment "nginx" rollout to finish: 1 old replicas are pending termination...
deployment "nginx" successfully rolled out


# 可以看出更新过程为新旧交替更新,首先新建一个 Pod,当 Pod 状态为 Running 时,删除一个旧的 Pod,同时再创建一个新的 Pod。当触发一个更新后,会有新的 ReplicaSet 产生,旧的 ReplicaSet 会被保存,查看此时 ReplicaSet,可以从 AGE 或 READY 看出来新旧 ReplicaSet:
[root@k8s-master01 ~]# kubectl get rs
NAME               DESIRED   CURRENT   READY   AGE
nginx-5f58c9c676   3         3         3       74s
nginx-67bfb68c7d   0         0         0       3m38s


# 通过 describe 查看 Deployment 的详细信息:
[root@k8s-master01 ~]# kubectl describe deploy nginx
....
Events:
  Type    Reason             Age   From                   Message
  ----    ------             ----  ----                   -------
  Normal  ScalingReplicaSet  4m5s  deployment-controller  Scaled up replica set nginx-67bfb68c7d from 0 to 3
  Normal  ScalingReplicaSet  101s  deployment-controller  Scaled up replica set nginx-5f58c9c676 from 0 to 1
  Normal  ScalingReplicaSet  99s   deployment-controller  Scaled down replica set nginx-67bfb68c7d from 3 to 2
  Normal  ScalingReplicaSet  99s   deployment-controller  Scaled up replica set nginx-5f58c9c676 from 1 to 2
  Normal  ScalingReplicaSet  97s   deployment-controller  Scaled down replica set nginx-67bfb68c7d from 2 to 1
  Normal  ScalingReplicaSet  97s   deployment-controller  Scaled up replica set nginx-5f58c9c676 from 2 to 3
  Normal  ScalingReplicaSet  95s   deployment-controller  Scaled down replica set nginx-67bfb68c7d from 1 to 0
# 当然也可以使用 edit 命令直接编辑 Deployment,效果相同:
[root@k8s-master01 ~]# kubectl edit deployment nginx

# 修改成2个pod
[root@k8s-master01 ~]# kubectl get po
NAME                     READY   STATUS    RESTARTS   AGE
nginx-5f58c9c676-n7hzm   1/1     Running   0          4m34s
nginx-5f58c9c676-qd2ks   1/1     Running   0          4m32s
1.4 回滚 Deployment
# 当更新了版本不稳定或配置不合理时,可以对其进行回滚操作,假设我们又进行了几次更新
(此处以更新镜像版本触发更新,更改配置效果类似):
[root@k8s-master01 ~]# kubectl set image deployment nginx nginx=crpi-q1nb2n896zwtcdts.cn-beijing.personal.cr.aliyuncs.com/ywb01/slow:latest --record

[root@k8s-master01 ~]# kubectl set image deployment nginx nginx=crpi-q1nb2n896zwtcdts.cn-beijing.personal.cr.aliyuncs.com/ywb01/redis:7.2.5 --record
# 使用 kubectl rollout history 查看更新历史:
[root@k8s-master01 ~]# kubectl rollout history deploy nginx
deployment.apps/nginx
REVISION  CHANGE-CAUSE
1         <none>
2         kubectl set image deployment nginx nginx=crpi-q1nb2n896zwtcdts.cn-beijing.personal.cr.aliyuncs.com/ywb01/nginx:1.15 --record=true
3         kubectl set image deployment nginx nginx=crpi-q1nb2n896zwtcdts.cn-beijing.personal.cr.aliyuncs.com/ywb01/slow:latest --record=true
4         kubectl set image deployment nginx nginx=crpi-q1nb2n896zwtcdts.cn-beijing.personal.cr.aliyuncs.com/ywb01/redis:7.2.5 --record=true

# 查看 Deployment 某次更新的详细信息,使用--revision 指定某次更新版本号:
# kubectl rollout history deploy nginx --revision=2
# 如果只需要回滚到上一个稳定版本,使用 kubectl rollout undo 即可:
[root@k8s-master01 ~]# kubectl rollout undo deploy nginx
deployment.apps/nginx rolled back

# 查看更新历史
[root@k8s-master01 ~]# kubectl rollout history deploy nginx
deployment.apps/nginx
REVISION  CHANGE-CAUSE
1         <none>
2         kubectl set image deployment nginx nginx=crpi-q1nb2n896zwtcdts.cn-beijing.personal.cr.aliyuncs.com/ywb01/nginx:1.15 --record=true
4         kubectl set image deployment nginx nginx=crpi-q1nb2n896zwtcdts.cn-beijing.personal.cr.aliyuncs.com/ywb01/redis:7.2.5 --record=true
5         kubectl set image deployment nginx nginx=crpi-q1nb2n896zwtcdts.cn-beijing.personal.cr.aliyuncs.com/ywb01/slow:latest --record=true

# 回滚到了上一个版本(回滚之前是版本四)生成了一个版本五,上一个版本三消失了
# 回滚到指定版本
[root@k8s-master01 ~]# kubectl rollout undo deploy nginx --to-revision=2
deployment.apps/nginx rolled back

[root@k8s-master01 ~]# kubectl rollout history deploy nginx
deployment.apps/nginx
REVISION  CHANGE-CAUSE
1         <none>
4         kubectl set image deployment nginx nginx=crpi-q1nb2n896zwtcdts.cn-beijing.personal.cr.aliyuncs.com/ywb01/redis:7.2.5 --record=true
5         kubectl set image deployment nginx nginx=crpi-q1nb2n896zwtcdts.cn-beijing.personal.cr.aliyuncs.com/ywb01/slow:latest --record=true
6         kubectl set image deployment nginx nginx=crpi-q1nb2n896zwtcdts.cn-beijing.personal.cr.aliyuncs.com/ywb01/nginx:1.15 --record=true

# 版本二消失了,生成了版本六
1.5 暂停和恢复 Deployment 更新
上述演示的均为更改某一处的配置,更改后立即触发更新,大多数情况下可能需要针对一个资源文件更改多处地方,而并不需要多次触发更新,此时可以使用 Deployment 暂停功能,临时禁用更新操作,对 Deployment 进行多次修改后在进行更新。
# 使用 kubectl rollout pause 命令即可暂停 Deployment 更新:
[root@k8s-master01 ~]# kubectl rollout pause deploy nginx

# 然后对 Deployment 进行相关更新操作,比如先更新镜像,然后对其资源进行限制(如果使用的是 kubectl edit 命令,可以直接进行多次修改,无需暂停更新,kubectl set 命令一般会集成在CICD 流水线中):
[root@k8s-master01 ~]# kubectl set image deploy nginx nginx=crpi-q1nb2n896zwtcdts.cn-beijing.personal.cr.aliyuncs.com/ywb01/nginx:stable --record=true

[root@k8s-master01 ~]# kubectl set resources deployment nginx -c=nginx --limits=cpu=200m,memory=512Mi
# 通过 rollout history 可以看到没有新的更新
[root@k8s-master01 ~]# kubectl rollout history deploy nginx
deployment.apps/nginx
REVISION  CHANGE-CAUSE
4         kubectl set image deployment nginx nginx=crpi-q1nb2n896zwtcdts.cn-beijing.personal.cr.aliyuncs.com/ywb01/redis:7.2.5 --record=true
5         kubectl set image deployment nginx nginx=crpi-q1nb2n896zwtcdts.cn-beijing.personal.cr.aliyuncs.com/ywb01/slow:latest --record=true
6         kubectl set image deployment nginx nginx=crpi-q1nb2n896zwtcdts.cn-beijing.personal.cr.aliyuncs.com/ywb01/nginx:1.15 --record=true
7         kubectl set image deploy nginx nginx=crpi-q1nb2n896zwtcdts.cn-beijing.personal.cr.aliyuncs.com/ywb01/nginx:stable --record=true

# 检查pod是否有更新
[root@k8s-master01 ~]# kubectl get po
NAME                     READY   STATUS    RESTARTS   AGE
nginx-5f58c9c676-w6dt7   1/1     Running   0          41m
nginx-5f58c9c676-wxzjv   1/1     Running   0          41m

# 检查rs是否有更新
[root@k8s-master01 ~]# kubectl get rs
NAME               DESIRED   CURRENT   READY   AGE
nginx-5f58c9c676   2         2         2       51m
....
# 进行完最后一处配置更改后,使用 kubectl rollout resume 恢复 Deployment 更新:
[root@k8s-master01 ~]# kubectl rollout resume deploy nginx

# 可以查看到恢复更新的 Deployment 创建了一个新的 RS(ReplicaSet 缩写):
[root@k8s-master01 ~]# kubectl get po
NAME                    READY   STATUS    RESTARTS   AGE
nginx-588b94db6-62465   1/1     Running   0          6s
nginx-588b94db6-bq84w   1/1     Running   0          8s

[root@k8s-master01 ~]# kubectl get rs
NAME               DESIRED   CURRENT   READY   AGE
nginx-588b94db6    2         2         2       11s
1.6 历史版本清理策略
在默认情况下,revision 保留 10 个旧的 ReplicaSet,其余的将在后台进行垃圾回收,可以在.spec.revisionHistoryLimit 设置保留 ReplicaSet 的个数。当设置为 0 时,不保留历史记录。
1.7 扩容 Deployment
# 使用 kubectl scale 动态调整 Pod 的副本数,比如增加 Pod 为 5 个
[root@k8s-master01 ~]# kubectl scale deploy nginx --replicas=5

# 查看 Pod,此时 Pod 已经变成了 5 个:
[root@k8s-master01 ~]# kubectl get po
NAME                    READY   STATUS    RESTARTS   AGE
nginx-588b94db6-62465   1/1     Running   0          111s
nginx-588b94db6-bq84w   1/1     Running   0          113s
nginx-588b94db6-f2fql   1/1     Running   0          3s
nginx-588b94db6-fw6sh   1/1     Running   0          3s
nginx-588b94db6-nzt5m   1/1     Running   0          3s
# 如果缩容也是这个命令,把数量改小就行
[root@k8s-master01 ~]# kubectl scale deploy nginx --replicas=3

# 查看 Pod,此时 Pod 已经变成了 3 个:
[root@k8s-master01 ~]# kubectl get po
NAME                    READY   STATUS    RESTARTS   AGE
nginx-588b94db6-62465   1/1     Running   0          4m11s
nginx-588b94db6-bq84w   1/1     Running   0          4m13s
nginx-588b94db6-nzt5m   1/1     Running   0          2m23s
1.8 Deployment 更新策略
- Recreate:重建,先删掉所有旧的 Pod 再创建新的 Pod(不推荐使用)
- RollingUpdate:滚动更新,先创建新的 Pod,在删除旧的 Pod,RollingUpdate 可以指定 maxUnavailable 和 maxSurge 定制化更新策略
- .spec.strategy.rollingUpdate.maxUnavailable:指定在回滚更新时最大不可用的Pod 数量,可选字段,默认为 25%,可以设置为数字或百分比,如果 maxSurge 为0,则该值不能为 0;
- .spec.strategy.rollingUpdate.maxSurge 可以超过期望值的最大Pod数,可选字段,默认为 25%,可以设置成数字或百分比,如果 maxUnavailable 为 0,则该值不能为 0。
# 为了更好的演示把pod扩容到10个
[root@k8s-master01 ~]# kubectl scale deploy nginx --replicas=10

# 把deploy倒成yaml文件
[root@k8s-master01 ~]# kubectl get deploy nginx -o yaml > deploy.yaml

# 删除一些不必要到配置以及加入检查方式
[root@k8s-master01 ~]# vim deploy.yaml
[root@k8s-master01 ~]# cat deploy.yaml
apiVersion: apps/v1
kind: Deployment
metadata:
  annotations:
    deployment.kubernetes.io/revision: "8"
    kubernetes.io/change-cause: kubectl set image deploy nginx nginx=crpi-q1nb2n896zwtcdts.cn-beijing.personal.cr.aliyuncs.com/ywb01/nginx:stable
      --record=true
  creationTimestamp: "2025-06-11T00:46:20Z"
  generation: 14
  labels:
    app: nginx
  name: nginx
  namespace: default
  resourceVersion: "101030"
  uid: c983eb96-ac4b-4f72-9af7-5feabd972598
spec:
  progressDeadlineSeconds: 600
  replicas: 10
  revisionHistoryLimit: 10
  selector:
    matchLabels:
      app: nginx
  strategy:
    rollingUpdate:
      maxSurge: 20%             # 最大期望值20%(增加20%)
      maxUnavailable: 20%       # 最大不可用20%(删除20%)
    type: RollingUpdate
  template:
    metadata:
      creationTimestamp: null
      labels:
        app: nginx
    spec:
      containers:
      - image: crpi-q1nb2n896zwtcdts.cn-beijing.personal.cr.aliyuncs.com/ywb01/nginx:stable
        imagePullPolicy: IfNotPresent
        name: nginx
        readinessProbe:
          tcpSocket:
            port: 80
          initialDelaySeconds: 10
          timeoutSeconds: 2
          periodSeconds: 5
          successThreshold: 1
          failureThreshold: 2
        livenessProbe:
          tcpSocket:
            port: 80
          initialDelaySeconds: 10
          timeoutSeconds: 2
          periodSeconds: 5
          successThreshold: 1
          failureThreshold: 2
        resources:
          limits:
            cpu: 200m
            memory: 512Mi
        terminationMessagePath: /dev/termination-log
        terminationMessagePolicy: File
      dnsPolicy: ClusterFirst
      restartPolicy: Always
      schedulerName: default-scheduler
      securityContext: {}
      terminationGracePeriodSeconds: 30
# 更新配置
[root@k8s-master01 ~]# kubectl replace -f deploy.yaml
deployment.apps/nginx replaced

# 查看pod更新情况
[root@k8s-master01 ~]# kubectl get po
NAME                    READY   STATUS              RESTARTS   AGE
nginx-588b94db6-28vcv   1/1     Running             0          9m6s
nginx-588b94db6-62465   1/1     Running             0          46m
nginx-588b94db6-bq84w   1/1     Running             0          46m
nginx-588b94db6-l6hpm   1/1     Running             0          9m6s
nginx-588b94db6-nzt5m   1/1     Running             0          44m
nginx-588b94db6-pwcj6   1/1     Running             0          9m6s
nginx-588b94db6-r8nnc   1/1     Running             0          9m6s
nginx-588b94db6-rpdtz   1/1     Running             0          9m6s
nginx-7f4cfbf7d-dvbdt   0/1     ContainerCreating   0          2s
nginx-7f4cfbf7d-fm5r7   0/1     Pending             0          1s
nginx-7f4cfbf7d-mdv7n   0/1     Pending             0          1s
nginx-7f4cfbf7d-x5928   0/1     ContainerCreating   0          2s

# 解析
    rollingUpdate:
      maxSurge: 20%             # 最大期望值20%(增加20%)
      maxUnavailable: 20%       # 最大不可用20%(删除20%)

# 1、目前一共10个pod
# 2、maxUnavailable: 20%,就是说我一次性可以删除 10*20%=2 个pod
# 3、maxSurge: 20%,就是说我一次性可以建立 10*20% + (maxUnavailable删除的)10*20% = 4个pod
# 4、所以第一次更新就是8个旧pod(删除2个),最大可建立 + 最大不可用 = 目前更新的pod
1.9 使用 Deployment 部署前端服务
# Docker 启动命令:
docker run -d -p 10080:80 crpi-q1nb2n896zwtcdts.cn-beijing.personal.cr.aliyuncs.com/ywb01/vue:v1
# 生成一个yaml文件
[root@k8s-master01 ~]# vim vue.yaml
[root@k8s-master01 ~]# cat vue.yaml
apiVersion: apps/v1
kind: Deployment
metadata:
  creationTimestamp: null
  labels:
    app: vue
  name: vue
spec:
  replicas: 2
  selector:
    matchLabels:
      app: vue
  strategy: {}
  template:
    metadata:
      creationTimestamp: null
      labels:
        app: vue
    spec:
      containers:
      - image: crpi-q1nb2n896zwtcdts.cn-beijing.personal.cr.aliyuncs.com/ywb01/vue:v1
        name: vue
        readinessProbe:
          tcpSocket:
            port: 80
          initialDelaySeconds: 10
          timeoutSeconds: 2
          periodSeconds: 5
          successThreshold: 1
          failureThreshold: 2
        livenessProbe:
          tcpSocket:
            port: 80
          initialDelaySeconds: 10
          timeoutSeconds: 2
          periodSeconds: 5
          successThreshold: 1
          failureThreshold: 2
        resources:
          limits:
            cpu: 200m
            memory: 512Mi
        resources: {}
status: {}

# 创建前端服务
[root@k8s-master01 ~]# kubectl create -f vue.yaml

# 查看pod
[root@k8s-master01 ~]# kubectl get po
NAME                   READY   STATUS    RESTARTS   AGE
vue-75769f4d64-f8zz2   1/1     Running   0          29s
vue-75769f4d64-s94mn   1/1     Running   0          29s

# 查看部署节点IP
[root@k8s-master01 ~]# kubectl get po vue-75769f4d64-f8zz2 -owide
NAME                   READY   STATUS    RESTARTS   AGE     IP               NODE         NOMINATED NODE   READINESS GATES
vue-75769f4d64-f8zz2   1/1     Running   0          7m51s   192.168.58.255   k8s-node02   <none>           <none>

# 验证服务是否成功启动
[root@k8s-master01 ~]# curl 192.168.58.255:80
<!DOCTYPE html><html><head><meta charset=utf-8><title>vue-project</title><link href=/static/css/app.30790115300ab27614ce176899523b62.css rel=stylesheet></head><body><h1>Vue Project For DevOps</h1><a href=https://edu.51cto.com/lecturer/11062970.html>人生苦短,我学k8s</h2><script type=text/javascript src=/static/js/manifest.2ae2e69a05c33dfc65f8.js></script><script type=text/javascript src=/static/js/vendor.b38abd1e8f82054d7d19.js></script><script type=text/javascript src=/static/js/app.b22ce679862c47a75225.js></script></body></html>
1.10 使用 Deployment 部署 Go 语言服务
# Docker 启动命令:
docker run -d -p 18080:8080 crpi-q1nb2n896zwtcdts.cn-beijing.personal.cr.aliyuncs.com/ywb01/go:v1
# 生成一个yaml文件
[root@k8s-master01 ~]# vim go.yaml
[root@k8s-master01 ~]# cat go.yaml
apiVersion: apps/v1
kind: Deployment
metadata:
  creationTimestamp: null
  labels:
    app: go
  name: go
spec:
  replicas: 2
  selector:
    matchLabels:
      app: go
  strategy: {}
  template:
    metadata:
      creationTimestamp: null
      labels:
        app: go
    spec:
      containers:
      - image: crpi-q1nb2n896zwtcdts.cn-beijing.personal.cr.aliyuncs.com/ywb01/go:v1
        name: go
        readinessProbe:
          tcpSocket:
            port: 8080
          initialDelaySeconds: 10
          timeoutSeconds: 2
          periodSeconds: 5
          successThreshold: 1
          failureThreshold: 2
        livenessProbe:
          tcpSocket:
            port: 8080
          initialDelaySeconds: 10
          timeoutSeconds: 2
          periodSeconds: 5
          successThreshold: 1
          failureThreshold: 2
        resources:
          limits:
            cpu: 200m
            memory: 512Mi
        resources: {}
status: {}

# 创建前端服务
[root@k8s-master01 ~]# kubectl create -f go.yaml

# 查看pod
[root@k8s-master01 ~]# kubectl get po
NAME                  READY   STATUS    RESTARTS   AGE
go-595c968884-whk86   1/1     Running   0          21s
go-595c968884-wnhzn   1/1     Running   0          21s

# 查看部署节点IP
[root@k8s-master01 ~]# kubectl get po go-595c968884-whk86 -owide
NAME                  READY   STATUS    RESTARTS   AGE   IP               NODE         NOMINATED NODE   READINESS GATES
go-595c968884-whk86   1/1     Running   0          65s   192.168.85.226   k8s-node01   <none>           <none>

# 验证服务是否成功启动
[root@k8s-master01 ~]# curl 192.168.85.226:8080
<!DOCTYPE html>
<html lang="en">
	<head>
		<meta http-equiv="Content-Type" content="text/html; charset=UTF-8">
		<title>Not Found</title>
		<style type="text/css">
....
1.11 使用 Deployment 部署 Java 服务
# Docker 启动命令:
docker run -d -p 18761:8761 crpi-q1nb2n896zwtcdts.cn-beijing.personal.cr.aliyuncs.com/ywb01/java:v1

# 可选环境变量:
JAVA_TOOL_OPTIONS:-XX:+HeapDumpOnOutOfMemoryError -XX:HeapDumpPath=/tmp -Xms512m -Xmx512m -Xss256K -Djava.security.egd=file:/dev/./urandom -Dfile.encoding=UTF-8
SPRING_PROFILES_ACTIVE:prod
# 生成一个yaml文件
[root@k8s-master01 ~]# vim java.yaml
[root@k8s-master01 ~]# cat java.yaml
apiVersion: apps/v1
kind: Deployment
metadata:
  creationTimestamp: null
  labels:
    app: java
  name: java
spec:
  replicas: 2
  selector:
    matchLabels:
      app: java
  strategy: {}
  template:
    metadata:
      creationTimestamp: null
      labels:
        app: java
    spec:
      containers:
      - image: crpi-q1nb2n896zwtcdts.cn-beijing.personal.cr.aliyuncs.com/ywb01/java:v1
        name: java
        env:
          - name: JAVA_TOOL_OPTIONS
            value: -XX:+HeapDumpOnOutOfMemoryError -XX:HeapDumpPath=/tmp -Xms512m -Xmx512m -Xss256K -Djava.security.egd=file:/dev/./urandom -Dfile.encoding=UTF-8
          - name: SPRING_PROFILES_ACTIVE
            value: prod
        startupProbe:
          tcpSocket:
            port: 8761
          initialDelaySeconds: 10
          timeoutSeconds: 2
          periodSeconds: 5
          successThreshold: 1
          failureThreshold: 5
        readinessProbe:
          tcpSocket:
            port: 8761
          initialDelaySeconds: 10
          timeoutSeconds: 2
          periodSeconds: 5
          successThreshold: 1
          failureThreshold: 2
        livenessProbe:
          tcpSocket:
            port: 8761
          initialDelaySeconds: 10
          timeoutSeconds: 2
          periodSeconds: 5
          successThreshold: 1
          failureThreshold: 2
        resources:
          limits:
            cpu: 200m
            memory: 512Mi
        resources: {}
status: {}

# 创建前端服务
[root@k8s-master01 ~]# kubectl create -f java.yaml

# 查看pod
[root@k8s-master01 ~]# kubectl get po
NAME                    READY   STATUS    RESTARTS   AGE
java-695d6857b8-tq9pd   1/1     Running   0          27s
java-695d6857b8-wpzmp   1/1     Running   0          27s

# 查看部署节点IP
[root@k8s-master01 ~]# kubectl get po java-695d6857b8-tq9pd -owide
NAME                    READY   STATUS    RESTARTS   AGE   IP               NODE         NOMINATED NODE   READINESS GATES
java-695d6857b8-tq9pd   1/1     Running   0          46s   192.168.85.239   k8s-node01   <none>           <none>

# 验证服务是否成功启动
[root@k8s-master01 ~]# curl 192.168.85.239:8761
<!doctype html>
<!--[if lt IE 7]>      <html class="no-js lt-ie9 lt-ie8 lt-ie7"> <![endif]-->
<!--[if IE 7]>         <html class="no-js lt-ie9 lt-ie8"> <![endif]-->
<!--[if IE 8]>         <html class="no-js lt-ie9"> <![endif]-->
<!--[if gt IE 8]><!--> <html class="no-js"> <!--<![endif]-->
  <head>
    <base href="/">
    <meta charset="utf-8">
    <meta http-equiv="X-UA-Compatible" content="IE=edge">
....
2、有状态应用管理 StatefulSet
2.1 StatefulSet基础概念及使用场景
StatefulSet(有状态集,缩写为sts)是k8s的有状态资源调度器,可以使用声明式的方式描述应用的期望状态,之后由 StatefulSet 控制器自动且有序的将当前状态改编为期望状态,常用于部署有状态的且需要有序启动的应用程序,比如MySQL、ZooKeeper集群等。
StatefulSet 基于 Headless Service给每个实例创建一个唯一且固定的标识,之后各实例之间可以通过该标识符进行通信。
StatefulSet常用于有如下需求的场景
- 需要稳定的独一无二的网络标识符;
- 需要稳定的持久化数据;
- 需要有序的、优雅的部署和扩展;
- 需要有序的自动滚动更新
2.2 定义一个 StatefulSet 资源文件
# 创建一个模版
[root@k8s-master01 ~]# kubectl create service clusterip nginx --tcp=80:80 --clusterip="None" --dry-run=client -oyaml > sts.yaml

[root@k8s-master01 ~]# kubectl create deploy nginx --replicas=2 --image=crpi-q1nb2n896zwtcdts.cn-beijing.personal.cr.aliyuncs.com/ywb01/nginx:stable --dry-run=client -oyaml >> sts.yaml

# 定义一个 StatefulSet 资源文件
[root@k8s-master01 ~]# vim sts.yaml
[root@k8s-master01 ~]# cat sts.yaml
apiVersion: v1
kind: Service
metadata:
  labels:
    app: nginx
  name: nginx
spec:
  clusterIP: None
  ports:
  - name: web
    port: 80
  selector:
    app: nginx
---
apiVersion: apps/v1
kind: StatefulSet
metadata:
  name: web
spec:
  serviceName: "nginx"
  replicas: 2
  selector:
    matchLabels:
      app: nginx
  template:
    metadata:
      labels:
        app: nginx
    spec:
      containers:
      - image: crpi-q1nb2n896zwtcdts.cn-beijing.personal.cr.aliyuncs.com/ywb01/nginx:stable
        name: nginx
        ports:
        - containerPort: 80
          name: web
其中:
kind: Service定义了一个名字为Nginx的Headless Service,创建的Service格式为nginx0.nginx.default.svc.cluster.local,其他的类似,因为没有指定Namespace(命名空间),所以默认部署在default;
当 StatefulSet 控制器创建 Pod 时,它会添加一个标签statefulset.kubernetes.io/pod-name,该标签的值为 Pod 的名称,用于匹配 Service。
# 创建 StatefulSet
[root@k8s-master01 ~]# kubectl create -f sts.yaml

# 查看pod创建过程(一个创建完毕才会创建下一个)
[root@k8s-master01 ~]# kubectl get po
NAME    READY   STATUS              RESTARTS   AGE
web-0   0/1     ContainerCreating   0          1s
[root@k8s-master01 ~]# kubectl get po
NAME    READY   STATUS              RESTARTS   AGE
web-0   1/1     Running             0          2s
web-1   0/1     ContainerCreating   0          1s
[root@k8s-master01 ~]# kubectl get po
NAME    READY   STATUS    RESTARTS   AGE
web-0   1/1     Running   0          3s
web-1   1/1     Running   0          2s

[root@k8s-master01 ~]# kubectl get sts
NAME   READY   AGE
web    2/2     12s

[root@k8s-master01 ~]# kubectl get svc nginx
NAME    TYPE        CLUSTER-IP   EXTERNAL-IP   PORT(S)   AGE
nginx   ClusterIP   None         <none>        80/TCP    40s
2.3 StatefulSet 扩容和缩容
和 Deployment 类似,可以通过更新 replicas 字段扩容/缩容 StatefulSet,也可以使用 kubectl scale、kubectl edit 和 kubectl patch 来扩容/缩容一个 StatefulSet。
# 扩容,将上述创建的 sts 副本增加到 5 个:
[root@k8s-master01 ~]# kubectl scale sts web --replicas=5

# 可使用以下命令动态查看(同样一个创建完毕才会创建下一个)
[root@k8s-master01 ~]# kubectl get po -w -l app=nginx
NAME    READY   STATUS    RESTARTS   AGE
web-0   1/1     Running   0          6m14s
web-1   1/1     Running   0          6m12s
web-2   0/1     Pending   0          0s
web-2   0/1     Pending   0          0s
web-2   0/1     ContainerCreating   0          0s
web-2   0/1     ContainerCreating   0          1s
web-2   1/1     Running             0          2s
web-3   0/1     Pending             0          0s
web-3   0/1     Pending             0          0s
web-3   0/1     ContainerCreating   0          0s
web-3   0/1     ContainerCreating   0          1s
web-3   1/1     Running             0          2s
web-4   0/1     Pending             0          0s
web-4   0/1     Pending             0          0s
web-4   0/1     Pending             0          1s
web-4   0/1     ContainerCreating   0          2s
web-4   1/1     Running             0          2s

# 查看扩容后 Pod 的状态:
[root@k8s-master01 ~]# kubectl get po
NAME    READY   STATUS    RESTARTS   AGE
web-0   1/1     Running   0          7m1s
web-1   1/1     Running   0          6m59s
web-2   1/1     Running   0          43s
web-3   1/1     Running   0          41s
web-4   1/1     Running   0          39s
# 缩容,将上述创建的 sts 副本缩容到 3 个:
[root@k8s-master01 ~]# kubectl scale sts web --replicas=3

# 可使用以下命令动态查看(是从编号最大的开始,同样是删除完一个才会删除下一个。但是平时我们并不建议缩容)
[root@k8s-master01 ~]# kubectl get po -w -l app=nginx
NAME    READY   STATUS    RESTARTS   AGE
web-0   1/1     Running   0          9m29s
web-1   1/1     Running   0          9m27s
web-2   1/1     Running   0          3m11s
web-3   1/1     Running   0          3m9s
web-4   1/1     Running   0          3m7s
web-4   1/1     Terminating   0          3m33s
web-4   1/1     Terminating   0          3m33s
web-4   0/1     Completed     0          3m34s
web-4   0/1     Completed     0          3m34s
web-4   0/1     Completed     0          3m34s
web-3   1/1     Terminating   0          3m36s
web-3   1/1     Terminating   0          3m37s
web-3   0/1     Completed     0          3m37s
web-3   0/1     Completed     0          3m38s
web-3   0/1     Completed     0          3m38s

# 查看扩容后 Pod 的状态:
[root@k8s-master01 ~]# kubectl get po
NAME    READY   STATUS    RESTARTS   AGE
web-0   1/1     Running   0          11m
web-1   1/1     Running   0          11m
web-2   1/1     Running   0          4m47s
2.4 StatefulSet 更新策略
- On Delete 策略:(手动删除后重建,1.7 之前的版本的默认策略)更新策略当我们选修改 StatefulSet的
.spec.template字段时,StatefulSet 控制器不会自动更新 Pod,必须手动删除 Pod 才能使控制器创建新的 Pod。- RollingUpdate 策略:(滚动更新,默认)更新策略会自动更新一个 StatefulSet 中所有的 Pod,采用与序号索引相反(倒序)的顺序进行滚动更新。
# 查看更新策略:
[root@k8s-master01 ~]# kubectl get sts web -o yaml | grep "updateStrategy" -A1
  updateStrategy:
    rollingUpdate:

# 然后改变容器的镜像触发滚动更新:
[root@k8s-master01 ~]# kubectl set image sts web nginx=crpi-q1nb2n896zwtcdts.cn-beijing.personal.cr.aliyuncs.com/ywb01/nginx:1.15

# 在更新过程中可以使用 kubectl rollout status sts/<name> 来查看滚动更新的状态:
[root@k8s-master01 ~]# kubectl rollout status sts/web
Waiting for 1 pods to be ready...
Waiting for partitioned roll out to finish: 1 out of 3 new pods have been updated...
Waiting for 1 pods to be ready...
Waiting for 1 pods to be ready...
Waiting for 1 pods to be ready...
Waiting for partitioned roll out to finish: 2 out of 3 new pods have been updated...
Waiting for 1 pods to be ready...
Waiting for 1 pods to be ready...
Waiting for 1 pods to be ready...
partitioned roll out complete: 3 new pods have been updated...

# 查看更新后的image
[root@k8s-master01 ~]# kubectl get po -l app=nginx -oyaml|grep image:
    - image: crpi-q1nb2n896zwtcdts.cn-beijing.personal.cr.aliyuncs.com/ywb01/nginx:1.15
      image: crpi-q1nb2n896zwtcdts.cn-beijing.personal.cr.aliyuncs.com/ywb01/nginx:1.15
    - image: crpi-q1nb2n896zwtcdts.cn-beijing.personal.cr.aliyuncs.com/ywb01/nginx:1.15
      image: crpi-q1nb2n896zwtcdts.cn-beijing.personal.cr.aliyuncs.com/ywb01/nginx:1.15
    - image: crpi-q1nb2n896zwtcdts.cn-beijing.personal.cr.aliyuncs.com/ywb01/nginx:1.15
      image: crpi-q1nb2n896zwtcdts.cn-beijing.personal.cr.aliyuncs.com/ywb01/nginx:1.15
2.5 StatefulSet 分段更新
比如我们定义一个分区"partition":2(定义为代表只有序号大于等于 2 的才会更新),可以使
用 patch 或 edit 直接对 StatefulSet 进行设置:
# 修改partition
[root@k8s-master01 ~]# kubectl edit sts/web
[root@k8s-master01 ~]# kubectl get sts/web -oyaml|grep partition
      partition: 2

# 然后再次使用 patch 改变容器的镜像:
[root@k8s-master01 ~]# kubectl set image sts web nginx=crpi-q1nb2n896zwtcdts.cn-beijing.personal.cr.aliyuncs.com/ywb01/nginx:stable

# 查看更新后的image(将分区改为 2,此时会自动更新 web-2,但是不会更新 web-0 和 web-1)
[root@k8s-master01 ~]# kubectl get po -l app=nginx -oyaml|grep image:
    - image: crpi-q1nb2n896zwtcdts.cn-beijing.personal.cr.aliyuncs.com/ywb01/nginx:1.15
      image: crpi-q1nb2n896zwtcdts.cn-beijing.personal.cr.aliyuncs.com/ywb01/nginx:1.15
    - image: crpi-q1nb2n896zwtcdts.cn-beijing.personal.cr.aliyuncs.com/ywb01/nginx:1.15
      image: crpi-q1nb2n896zwtcdts.cn-beijing.personal.cr.aliyuncs.com/ywb01/nginx:1.15
    - image: crpi-q1nb2n896zwtcdts.cn-beijing.personal.cr.aliyuncs.com/ywb01/nginx:stable
      image: crpi-q1nb2n896zwtcdts.cn-beijing.personal.cr.aliyuncs.com/ywb01/nginx:stable
2.6 StatefulSet 回滚
# 列出所有修订版本
[root@k8s-master01 ~]# kubectl rollout history sts/web
statefulset.apps/web
REVISION  CHANGE-CAUSE
2         <none>
3         <none>

# 回滚到指定 revision
[root@k8s-master01 ~]# kubectl rollout undo sts/web --to-revision=2

# 查看
[root@k8s-master01 ~]# kubectl rollout history sts/web --revision=2
statefulset.apps/web with revision #2
Pod Template:
  Labels:	app=nginx
  Containers:
   nginx:
    Image:	crpi-q1nb2n896zwtcdts.cn-beijing.personal.cr.aliyuncs.com/ywb01/nginx:stable
    Port:	80/TCP
    Host Port:	0/TCP
    Environment:	<none>
    Mounts:	<none>
  Volumes:	<none>
  Node-Selectors:	<none>
  Tolerations:	<none>
# StatefulSet 的更新和回滚与 Deployment 类似,唯一的区别是历史版本在 ControllerRevision 中保存。
[root@k8s-master01 ~]# kubectl get ControllerRevision
NAME             CONTROLLER             REVISION   AGE
web-769f8cc94d   statefulset.apps/web   2          57m
web-f568844cd    statefulset.apps/web   3          30m
2.7 删除 StatefulSet
删除StatefulSet有两种方式,即级联删除和非级联删除。使用非级联方式删除 StatefulSet时,StatefulSet 的 Pod 不会被删除;使用级联删除时,StatefulSet 和它的 Pod 都会被删除。
# 非级联删除(了解):使用 kubectl delete sts xxx 删除 StatefulSet 时,只需提供--cascade=false 参数,就会采用非级联删除,此时删除 StatefulSet 不会删除它的 Pod:

# kubectl delete statefulset web --cascade=false


# 级联删除
# 省略--cascade=false 参数即为级联删除:

# kubectl delete statefulset web

# 也可以使用-f 指定创建 StatefulSet 和 Service 的 yaml 文件,直接删除 StatefulSet 和 Service(此文件将 StatefulSet 和 Service 写在了一起):

# kubectl delete -f sts-web.yaml
2.8 StatefulSet 并发 Pod 管理
- StatefulSet 可以通过.spec.podManagementPolicy 字段配置 Pod 的管理策略,目前支持如下的两种方式:
- OrderdReady:有序管理,默认方式。Pod 创建和更新按照正序和倒序进行操作,删除是同时删除。
- Parallel:并发管理,Pod 创建和删除同时并行启动和删除。
[root@k8s-master01 ~]# vim sts.yaml
[root@k8s-master01 ~]# cat sts.yaml
apiVersion: v1
kind: Service
metadata:
  labels:
    app: nginx
  name: nginx
spec:
  clusterIP: None
  ports:
  - name: web
    port: 80
  selector:
    app: nginx
---
apiVersion: apps/v1
kind: StatefulSet
metadata:
  name: web
spec:
  podManagementPolicy: Parallel     # 并发管理,Pod 创建和删除同时并行启动和删除
  serviceName: "nginx"
  replicas: 5                       # 为测试设置5个pod
  selector:
    matchLabels:
      app: nginx
  template:
    metadata:
      labels:
        app: nginx
    spec:
      containers:
      - image: crpi-q1nb2n896zwtcdts.cn-beijing.personal.cr.aliyuncs.com/ywb01/nginx:stable
        name: nginx
        ports:
        - containerPort: 80
          name: web
# 创建pod
[root@k8s-master01 ~]# kubectl create -f sts.yaml

# 检查pod建立情况
[root@k8s-master01 ~]# kubectl get po
NAME    READY   STATUS              RESTARTS   AGE
web-0   0/1     ContainerCreating   0          3s
web-1   0/1     ContainerCreating   0          3s
web-2   1/1     Running             0          3s
web-3   0/1     ContainerCreating   0          3s
web-4   0/1     ContainerCreating   0          3s
[root@k8s-master01 ~]# kubectl get po
NAME    READY   STATUS    RESTARTS   AGE
web-0   1/1     Running   0          5s
web-1   1/1     Running   0          5s
web-2   1/1     Running   0          5s
web-3   1/1     Running   0          5s
web-4   1/1     Running   0          5s
# 删除pod
[root@k8s-master01 ~]# kubectl delete -f sts.yaml

# 查看也是同时删除的
[root@k8s-master01 ~]# kubectl get po
NAME    READY   STATUS        RESTARTS   AGE
web-0   1/1     Terminating   0          2m45s
web-1   1/1     Terminating   0          2m45s
web-2   1/1     Terminating   0          2m45s
web-3   1/1     Terminating   0          2m45s
web-4   1/1     Terminating   0          2m45s

[root@k8s-master01 ~]# kubectl get po
No resources found in default namespace.
2.9 StatefulSet 内部通信
- StatefulSet 创建的 Pod 一般使用 Headless Service(无头服务)进行 Pod 之前的通信,和普
通的 Service 的区别在于 Headless Service 没有 ClusterIP,它使用的是 Endpoint 进行互相通信,Headless 一般的格式为:statefulSetName-{0..N-1}.serviceName.namespace.svc.cluster.local
- serviceName 为 Headless Service 的名字,创建 StatefulSet 时,必须指定 Headless Service名称;
- 0..N-1 为 Pod 所在的序号,从 0 开始到 N-1;
- statefulSetName 为 StatefulSet 的名字;
- namespace 为服务所在的命名空间;
- .cluster.local 为 Cluster Domain(集群域)
# 使用任意一个 Pod 即可通过唯一的网络标识符访问 StatefulSet 的节点
# 同一个 namespace 可以省略.namespace.svc.cluster.local
# kubectl exec -ti web-4 -- curl web-2.nginx

# 不同 Namespace 的访问,需要加上 Pod 所在的 Namespace
# ping web-2.nginx.default
2.10 使用 StatefulSet 部署 Eureka 集群
# 创建 Headless Service:
[root@k8s-master01 ~]# vim demo-eureka-sts.yaml
[root@k8s-master01 ~]# cat demo-eureka-sts.yaml
apiVersion: v1
kind: Service
metadata:
  labels:
    app: demo-eureka
  name: demo-eureka
spec:
  clusterIP: None
  ports:
  - name: eureka
    port: 8761
  selector:
    app: demo-eureka
# 创建 Eureka 的 StatefulSet:
[root@k8s-master01 ~]# vim demo-eureka.yaml
[root@k8s-master01 ~]# cat demo-eureka.yaml
apiVersion: apps/v1
kind: StatefulSet
metadata:
  name: eureka
spec:
  serviceName: "demo-eureka"
  replicas: 3
  selector:
    matchLabels:
      app: demo-eureka
  template:
    metadata:
      labels:
        app: demo-eureka
    spec:
      containers:
      - image: crpi-q1nb2n896zwtcdts.cn-beijing.personal.cr.aliyuncs.com/ywb01/demo-eureka:latest
        name: demo-eureka
        env:
         - name: SPRING_PROFILES_ACTIVE
           value: k8s
         - name: SERVER_PORT
           value: '8761'
         - name: EUREKA_SERVER_ADDRESS
           value: http://demo-eureka-0.demo-eureka:8761/eureka/,http://demo-eureka-1.demo-eureka:8761/eureka/,http://demo-eureka-2.demo-eureka:8761/eureka/
        ports:
        - containerPort: 8761
          name: eureka
# 创建 Headless Service(无法外网访问)
[root@k8s-master01 ~]# kubectl create -f demo-eureka-sts.yaml
[root@k8s-master01 ~]# kubectl get svc demo-eureka
NAME          TYPE        CLUSTER-IP   EXTERNAL-IP   PORT(S)    AGE
demo-eureka   ClusterIP   None         <none>        8761/TCP   36s

# 创建 Eureka 的 StatefulSet
[root@k8s-master01 ~]# kubectl create -f demo-eureka.yaml
[root@k8s-master01 ~]# kubectl get po
NAME       READY   STATUS    RESTARTS   AGE
eureka-0   1/1     Running   0          15s
eureka-1   1/1     Running   0          12s
eureka-2   1/1     Running   0          10s
如果想我们的服务可以通过外部访问
# 创建对外访问的 Service:
[root@k8s-master01 ~]# vim demo-eureka-np.yaml
[root@k8s-master01 ~]# cat demo-eureka-np.yaml
apiVersion: v1
kind: Service
metadata:
  labels:
    app: demo-eureka-np
  name: demo-eureka-np
spec:
  ports:
  - name: eureka
    port: 8761
  selector:
    app: demo-eureka
  type: NodePort

# 创建并查看 NodePort:
[root@k8s-master01 ~]# kubectl create -f demo-eureka-np.yaml

[root@k8s-master01 ~]# kubectl get svc demo-eureka-np
NAME             TYPE       CLUSTER-IP      EXTERNAL-IP   PORT(S)          AGE
demo-eureka-np   NodePort   10.105.245.86   <none>        8761:32024/TCP
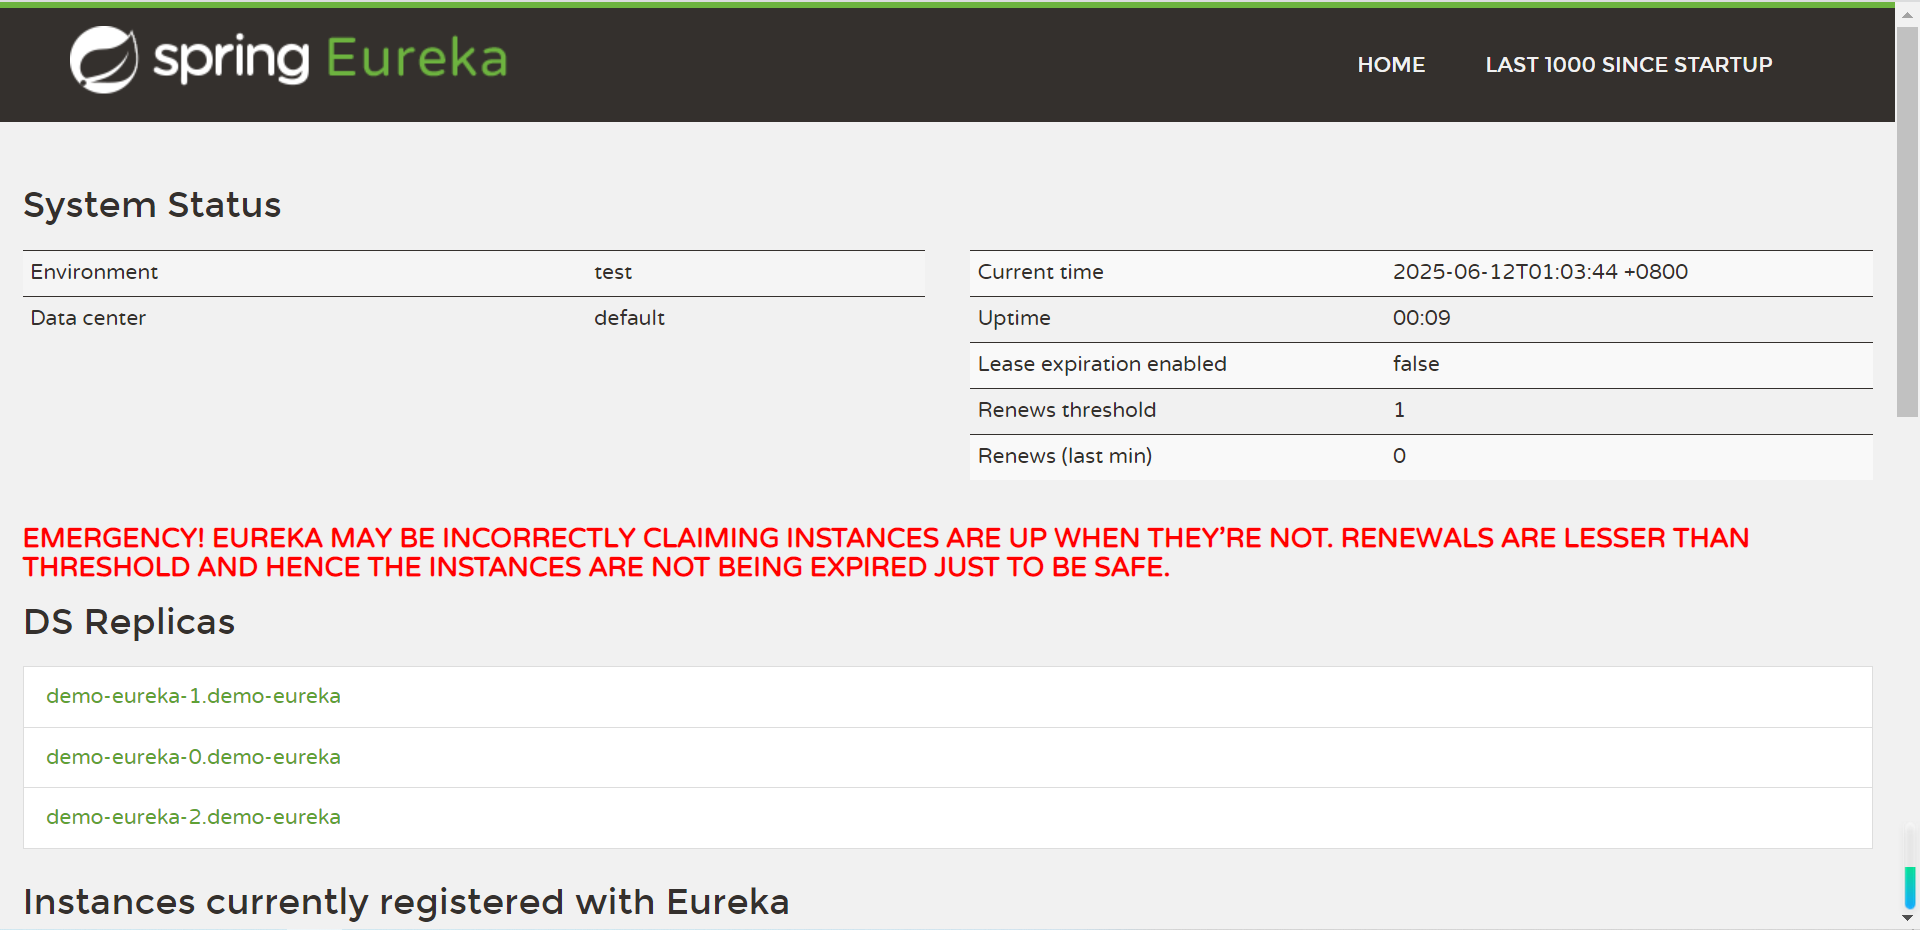
之后通过浏览器打开任意节点+32024 即可访问 Eureka 的集群:
3、守护进程集 DaemonSet
3.1 DaemonSet基础概念及使用场景
- DaemonSet(守护进程集)是k8s的守护进程集,与Deployment和StatefulSet区别是:前者会根据算法选择最优的节点去运行Pod,而DaemonSet会在符合匹配条件的节点上都部署一个Pod,如果没有其他限制条件,会在所有的节点上都会运行一个Pod。
- 同时当有新节点加入集群时,也会为它们新增一个Pod,当节点从集群中移除时,这些Pod也会被回收,删除DaemonSet将会删除它创建的所有Pod。
- DaemonSet通常会用于以下需求:
- 运行集群存储的进程,例如在每个节点上运行Glusterd、Geph等
- 在每个节点运行日志收集进程,例如Fluentd、Filebeat
- 在每个节点运行监控进程,比如Prometheus Node Exportter
- 其他任何需要在每个节点运行一个服务的需求
3.2 创建 DaemonSet
# 创建一个副本
[root@k8s-master01 ~]# kubectl create deploy nginx --image=crpi-q1nb2n896zwtcdts.cn-beijing.personal.cr.aliyuncs.com/ywb01/nginx:stable --dry-run=client -oyaml > nginx-ds.yaml

[root@k8s-master01 ~]# vim nginx-ds.yaml
[root@k8s-master01 ~]# cat nginx-ds.yaml
apiVersion: apps/v1
kind: DaemonSet
metadata:
  labels:
    app: nginx
  name: nginx
spec:
  selector:
    matchLabels:
      app: nginx
  template:
    metadata:
      labels:
        app: nginx
    spec:
      containers:
      - image: crpi-q1nb2n896zwtcdts.cn-beijing.personal.cr.aliyuncs.com/ywb01/nginx:stable
        name: nginx
        imagePullPolicy: IfNotPresent
- 必需字段
- 和其他所有 Kubernetes 配置一样,DaemonSet 需要 apiVersion、kind 和 metadata 字段,同时也需要一个.spec 配置段。
- Pod 模板
- .spec 唯一需要的字段是.spec.template。.spec.template 是一个 Pod 模板,它与 Pod 具有相同的配置方式,但它不具有 apiVersion 和 kind 字段。
- 除了 Pod 必需的字段外,在 DaemonSet 中的 Pod 模板必须指定合理的标签。
- Pod Selector
- .spec.selector 字段表示 Pod Selector,它与其他资源的.spec.selector 的作用相同。
- .spec.selector 表示一个对象,它由如下两个字段组成:
# 创建 DaemonSet
[root@k8s-master01 ~]# kubectl create -f nginx-ds.yaml

# 查看pod
[root@k8s-master01 ~]# kubectl get po
NAME          READY   STATUS    RESTARTS   AGE
nginx-n7mlr   1/1     Running   0          2m15s
nginx-vfx7k   1/1     Running   0          2m15s

# 查看节点(master没有是因为有污点)
[root@k8s-master01 ~]# kubectl get po -owide
NAME          READY   STATUS    RESTARTS   AGE     IP              NODE         NOMINATED NODE   READINESS GATES
nginx-n7mlr   1/1     Running   0          2m20s   172.16.58.236   k8s-node02   <none>           <none>
nginx-vfx7k   1/1     Running   0          2m20s   172.16.85.215   k8s-node01   <none>           <none>
3.3 DaemonSet 更新策略
[root@k8s-master01 ~]# kubectl set image ds/nginx nginx=crpi-q1nb2n896zwtcdts.cn-beijing.personal.cr.aliyuncs.com/ywb01/nginx:1.15 --record

[root@k8s-master01 ~]# kubectl get po
NAME          READY   STATUS    RESTARTS   AGE
nginx-6wmfp   1/1     Running   0          5s
nginx-b4xqq   1/1     Running   0          3s

# 查看更新的镜像版本
[root@k8s-master01 ~]# kubectl get po -l app=nginx -oyaml | grep image:
    - image: crpi-q1nb2n896zwtcdts.cn-beijing.personal.cr.aliyuncs.com/ywb01/nginx:1.15
      image: crpi-q1nb2n896zwtcdts.cn-beijing.personal.cr.aliyuncs.com/ywb01/nginx:1.15
    - image: crpi-q1nb2n896zwtcdts.cn-beijing.personal.cr.aliyuncs.com/ywb01/nginx:1.15
      image: crpi-q1nb2n896zwtcdts.cn-beijing.personal.cr.aliyuncs.com/ywb01/nginx:1.15
3.4 DaemonSet 回滚
# 列出所有修订版本
[root@k8s-master01 ~]# kubectl rollout history ds/nginx
daemonset.apps/nginx
REVISION  CHANGE-CAUSE
1         <none>
2         kubectl set image ds/nginx nginx=crpi-q1nb2n896zwtcdts.cn-beijing.personal.cr.aliyuncs.com/ywb01/nginx:1.15 --record=true

# 回退到指定版本
[root@k8s-master01 ~]# kubectl rollout undo ds/nginx --to-revision=1

# 查看pod
[root@k8s-master01 ~]# kubectl get po
NAME          READY   STATUS    RESTARTS   AGE
nginx-gx7pg   1/1     Running   0          7s
nginx-kq28x   1/1     Running   0          8s

# 查看更新的镜像版本
[root@k8s-master01 ~]# kubectl get po -l app=nginx -oyaml | grep image:
    - image: crpi-q1nb2n896zwtcdts.cn-beijing.personal.cr.aliyuncs.com/ywb01/nginx:stable
      image: crpi-q1nb2n896zwtcdts.cn-beijing.personal.cr.aliyuncs.com/ywb01/nginx:stable
    - image: crpi-q1nb2n896zwtcdts.cn-beijing.personal.cr.aliyuncs.com/ywb01/nginx:stable
      image: crpi-q1nb2n896zwtcdts.cn-beijing.personal.cr.aliyuncs.com/ywb01/nginx:stable
3.5 指定节点部署 Pod
如果指定了.spec.template.spec.nodeSelector,DaemonSet Controller 将在与 Node Selector(节点选择器)匹配的节点上创建 Pod,比如部署在磁盘类型为 ssd的节点上(需要提前给节点定义标签 Label):
[root@k8s-master01 ~]# cat nginx-ds.yaml
apiVersion: apps/v1
kind: DaemonSet
metadata:
  labels:
    app: nginx
  name: nginx
spec:
  selector:
    matchLabels:
      app: nginx
  template:
    metadata:
      labels:
        app: nginx
    spec:
      nodeSelector:
        gpu: "true"     # 添加一个gpu标签
      containers:
      - image: crpi-q1nb2n896zwtcdts.cn-beijing.personal.cr.aliyuncs.com/ywb01/nginx:stable
        name: nginx
        imagePullPolicy: IfNotPresent

# 更新yaml文件
[root@k8s-master01 ~]# kubectl replace -f nginx-ds.yaml

# 检查pod,发现所有的pod都被删除了,因为所有节点都不具备GPU
[root@k8s-master01 ~]# kubectl get po
No resources found in default namespace.
# 如果手动给node01加一个node01的标签会发生什么呢
# 如果想去掉标签:kubectl label node k8s-node01 gpu-
[root@k8s-master01 ~]# kubectl label node k8s-node01 gpu=true

# 检查pod,发现node01节点重新起了一个pod
[root@k8s-master01 ~]# kubectl get po
NAME          READY   STATUS    RESTARTS   AGE
nginx-fnbfg   1/1     Running   0          3s

 浙公网安备 33010602011771号