HMVue6.2【插槽】
1 初始项目
同HMVue6.1
npm install 或者 npm i 也行
npm audit fix
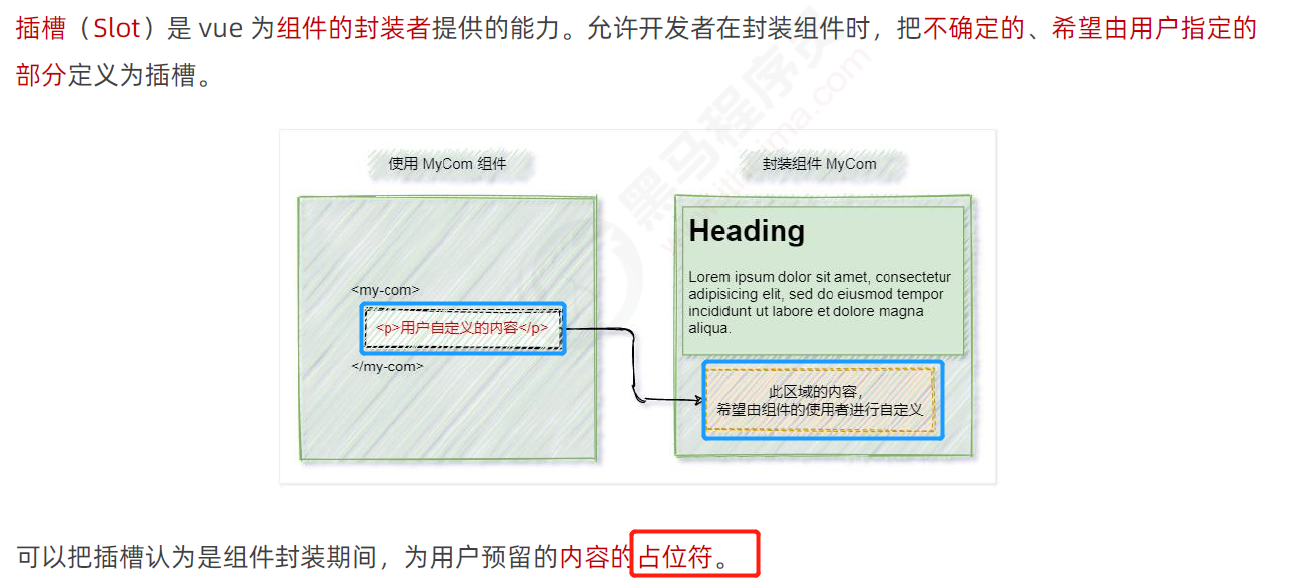
2 什么是插槽
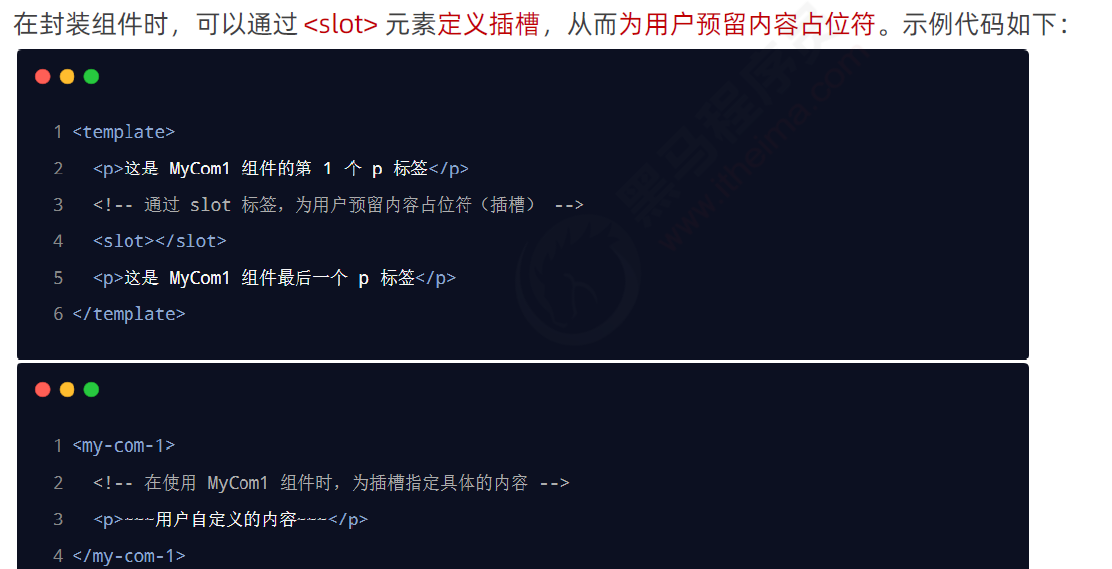
3 插槽的基础用法
3 v-slot指令(简写#)
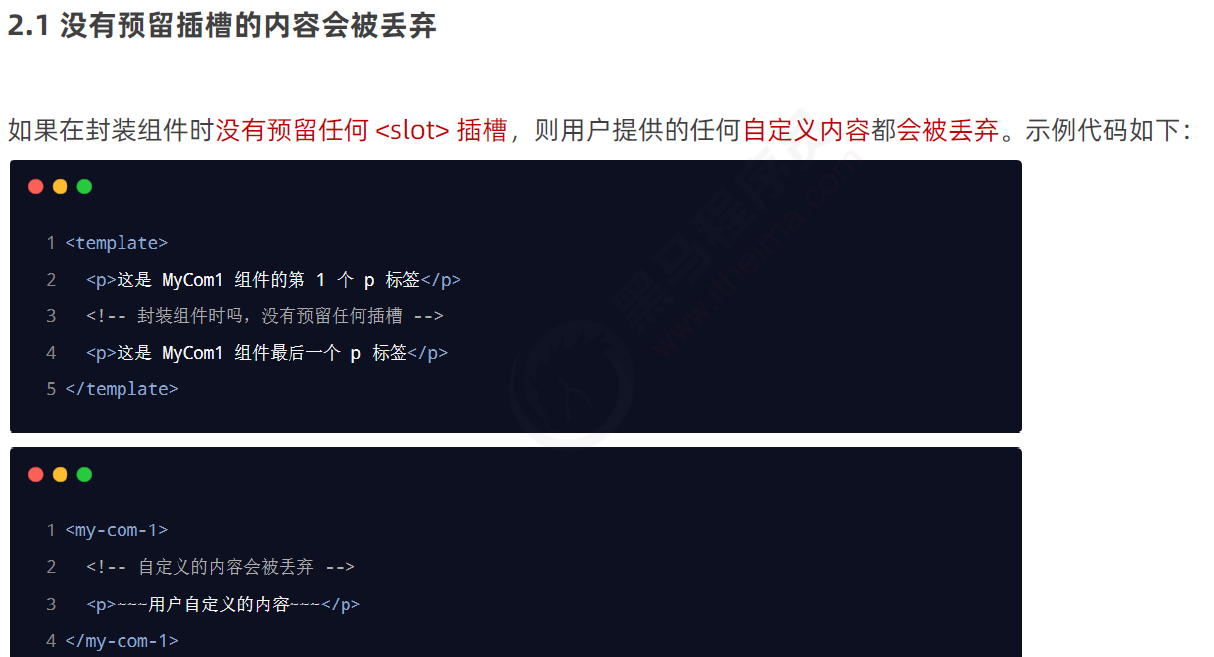
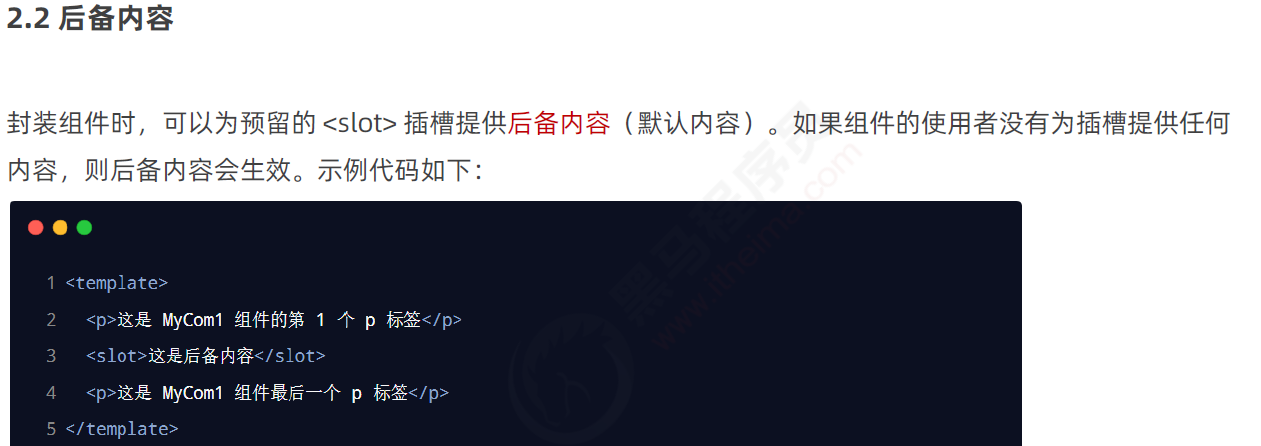
4 插槽的后备内容

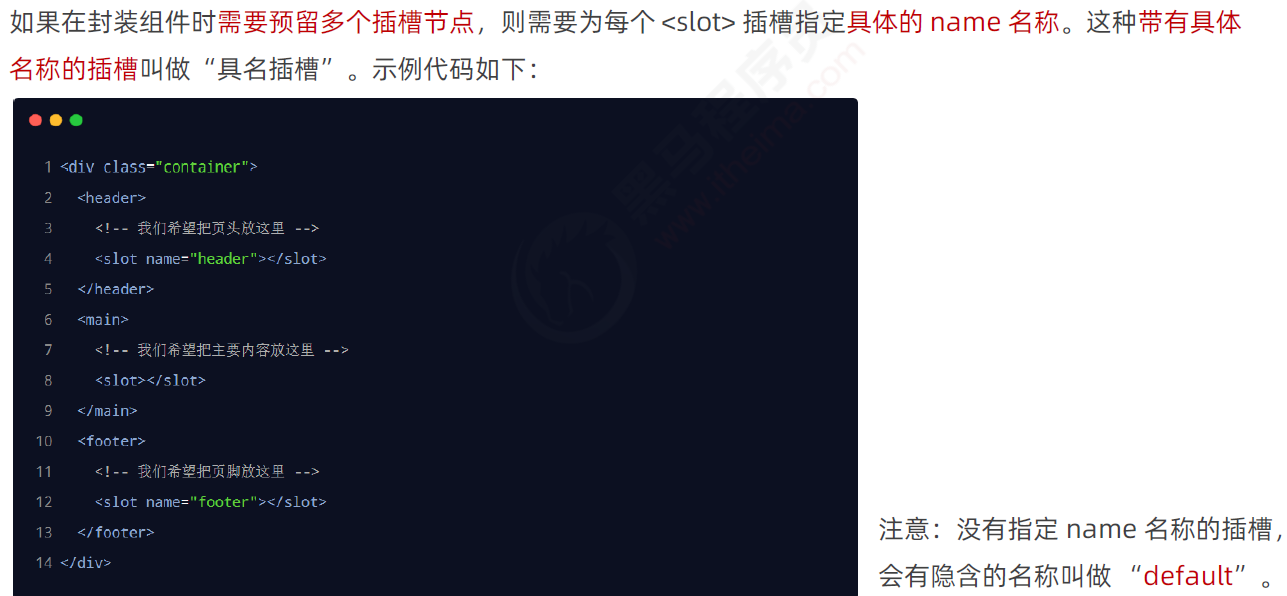
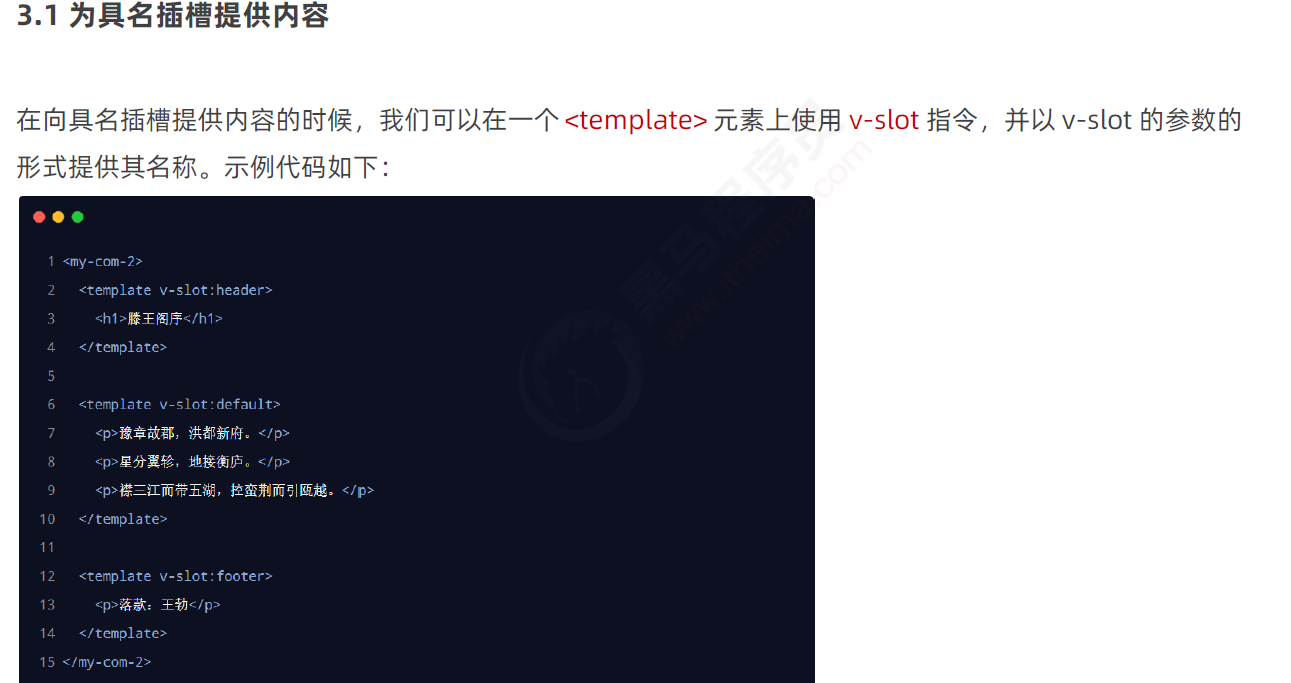
5 具名插槽
5-1 课件

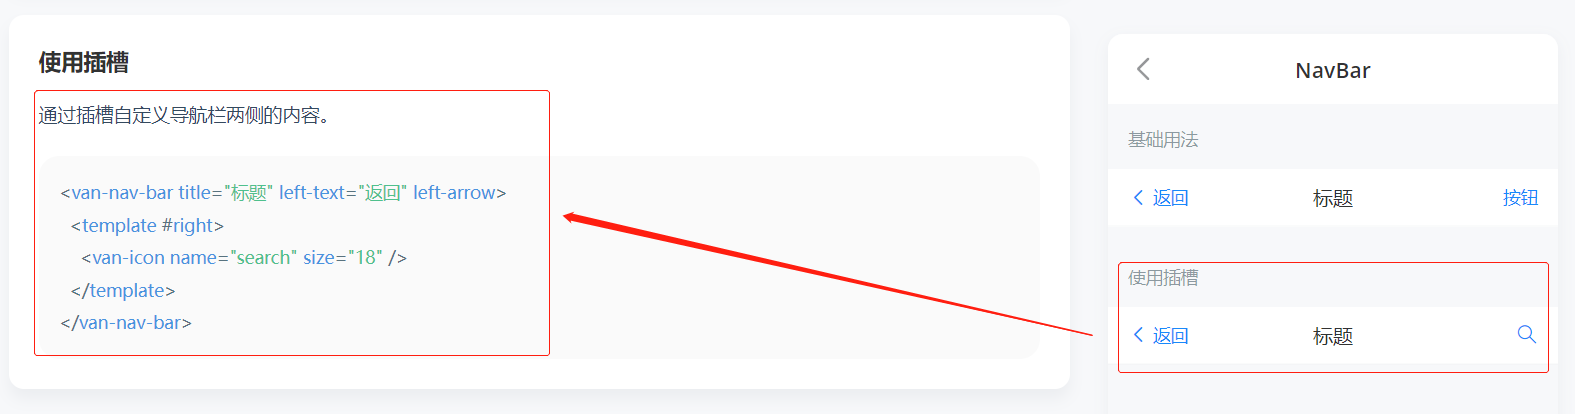
5-2 vant库插槽例子
具名插槽:自定义名字的插槽
匿名插槽:不带自定义名字,默认名字为default,或者自定义为default
Vant - 轻量、可靠的移动端组件库 (youzan.github.io)

5-3 具名插槽基本使用-例子

6 作用域插槽
6-1 课件

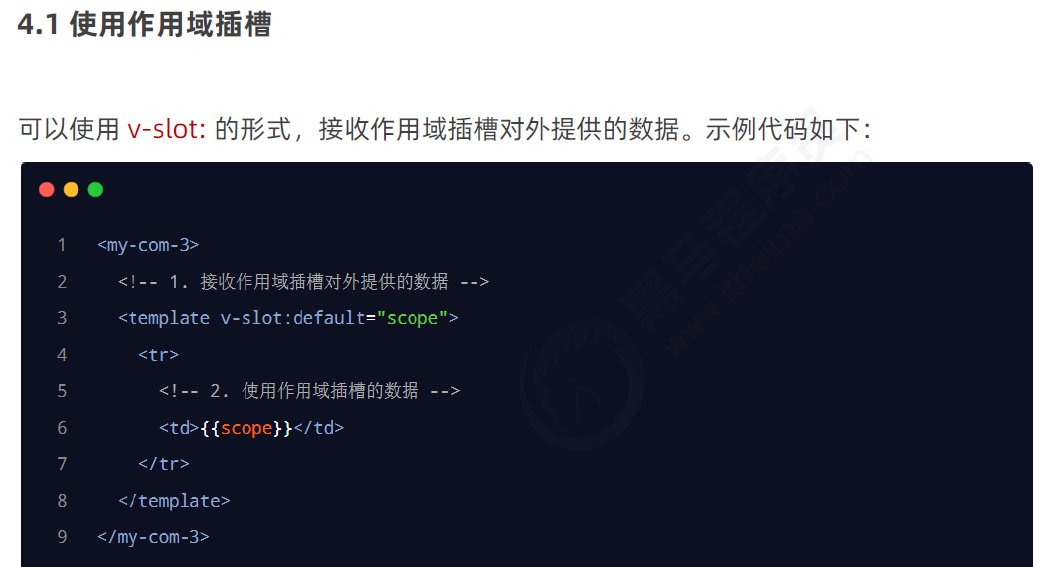
6-2 作用域插槽的基本使用
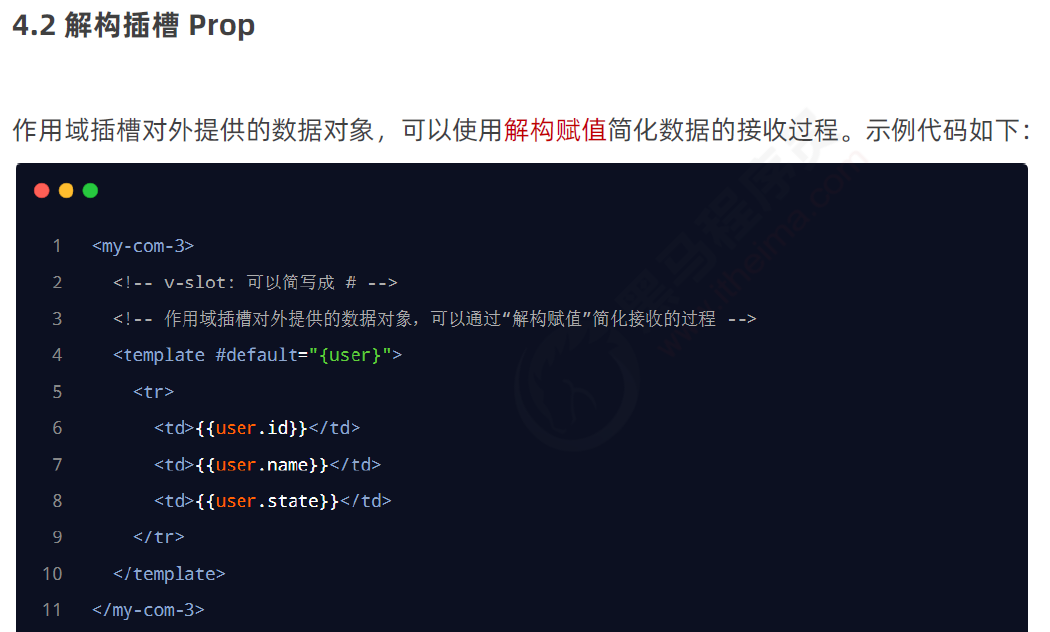
6-3 作用域插槽的解构赋值(解构插槽Prop)

7 源码


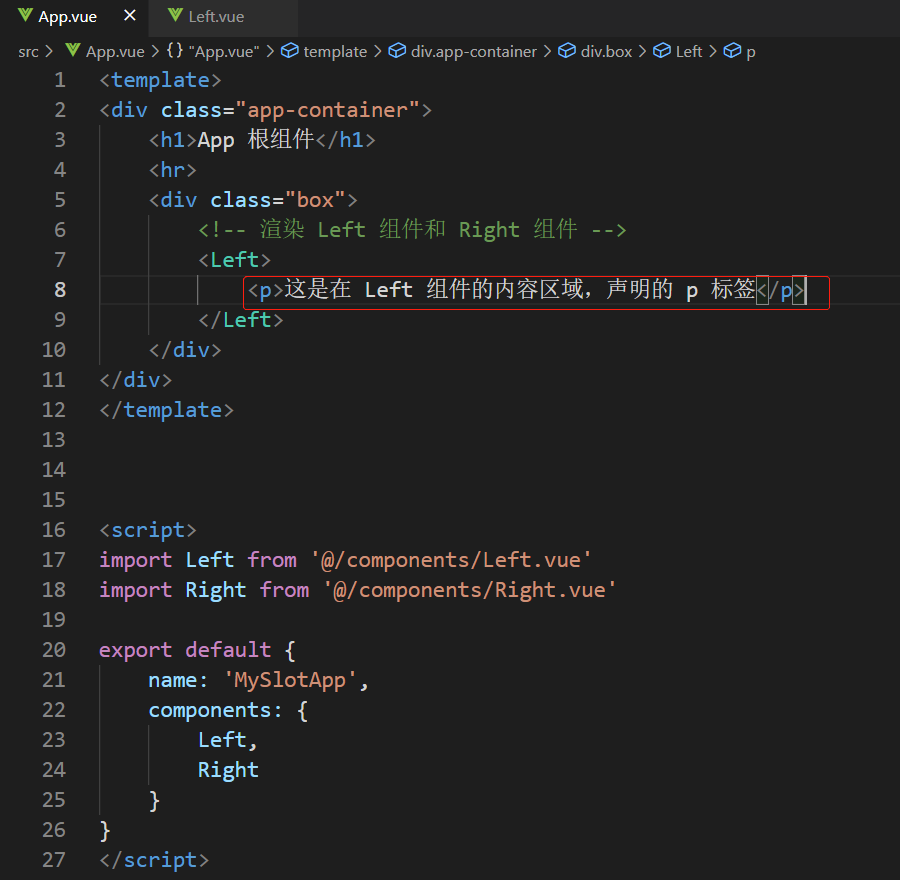
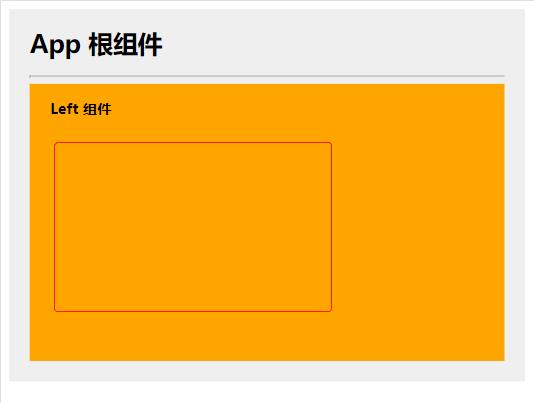
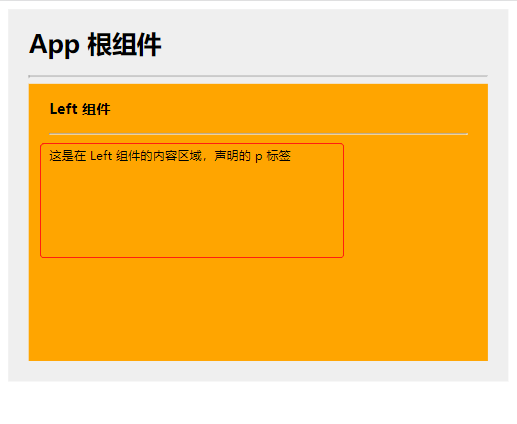
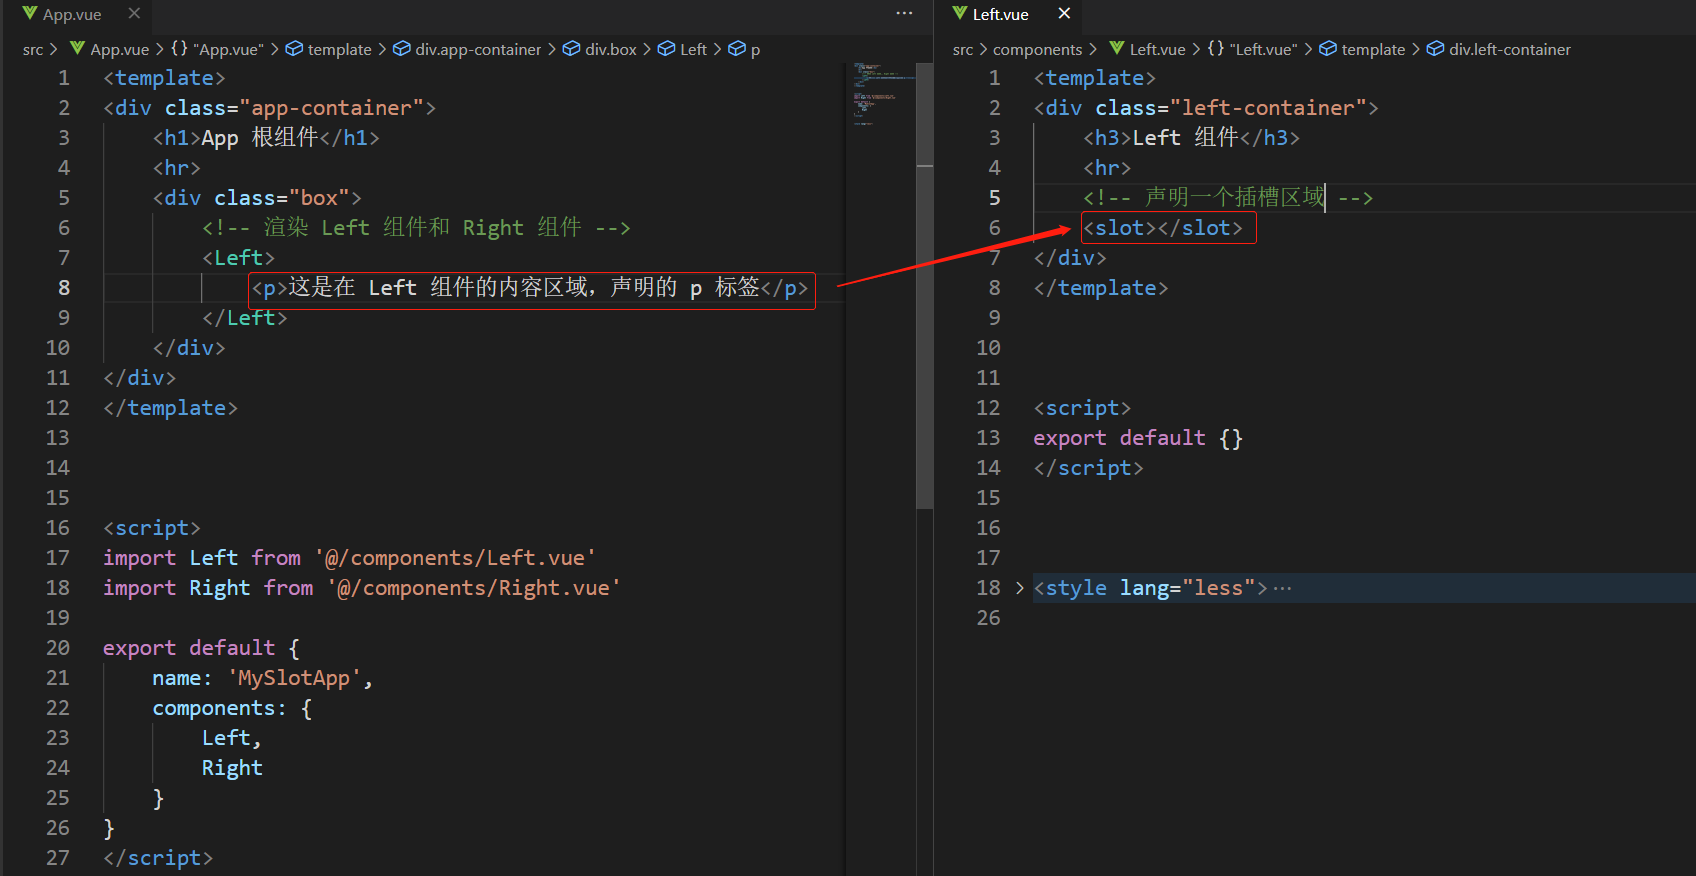
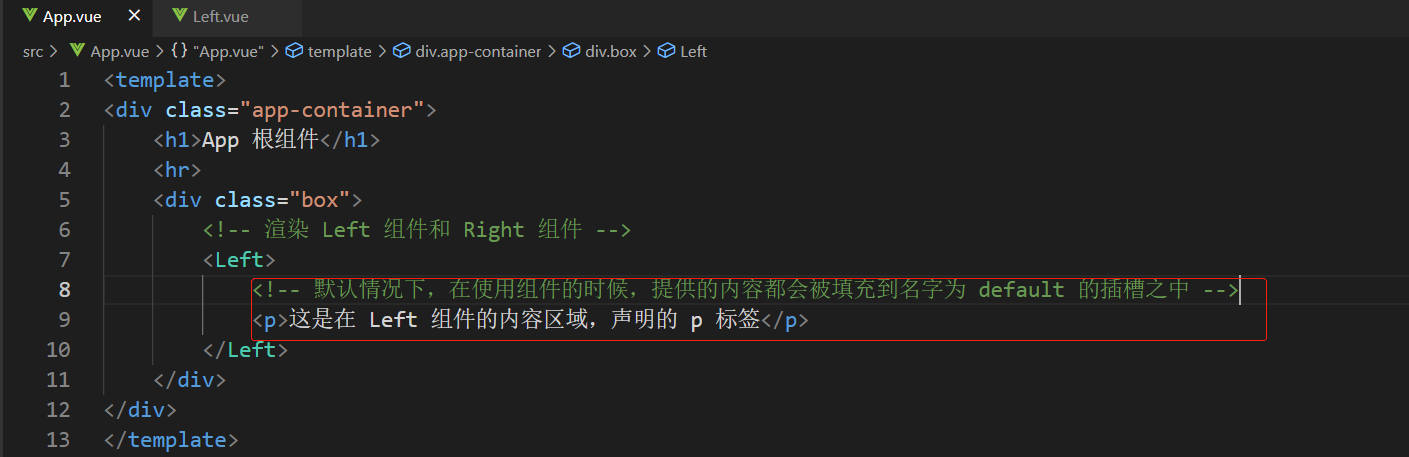
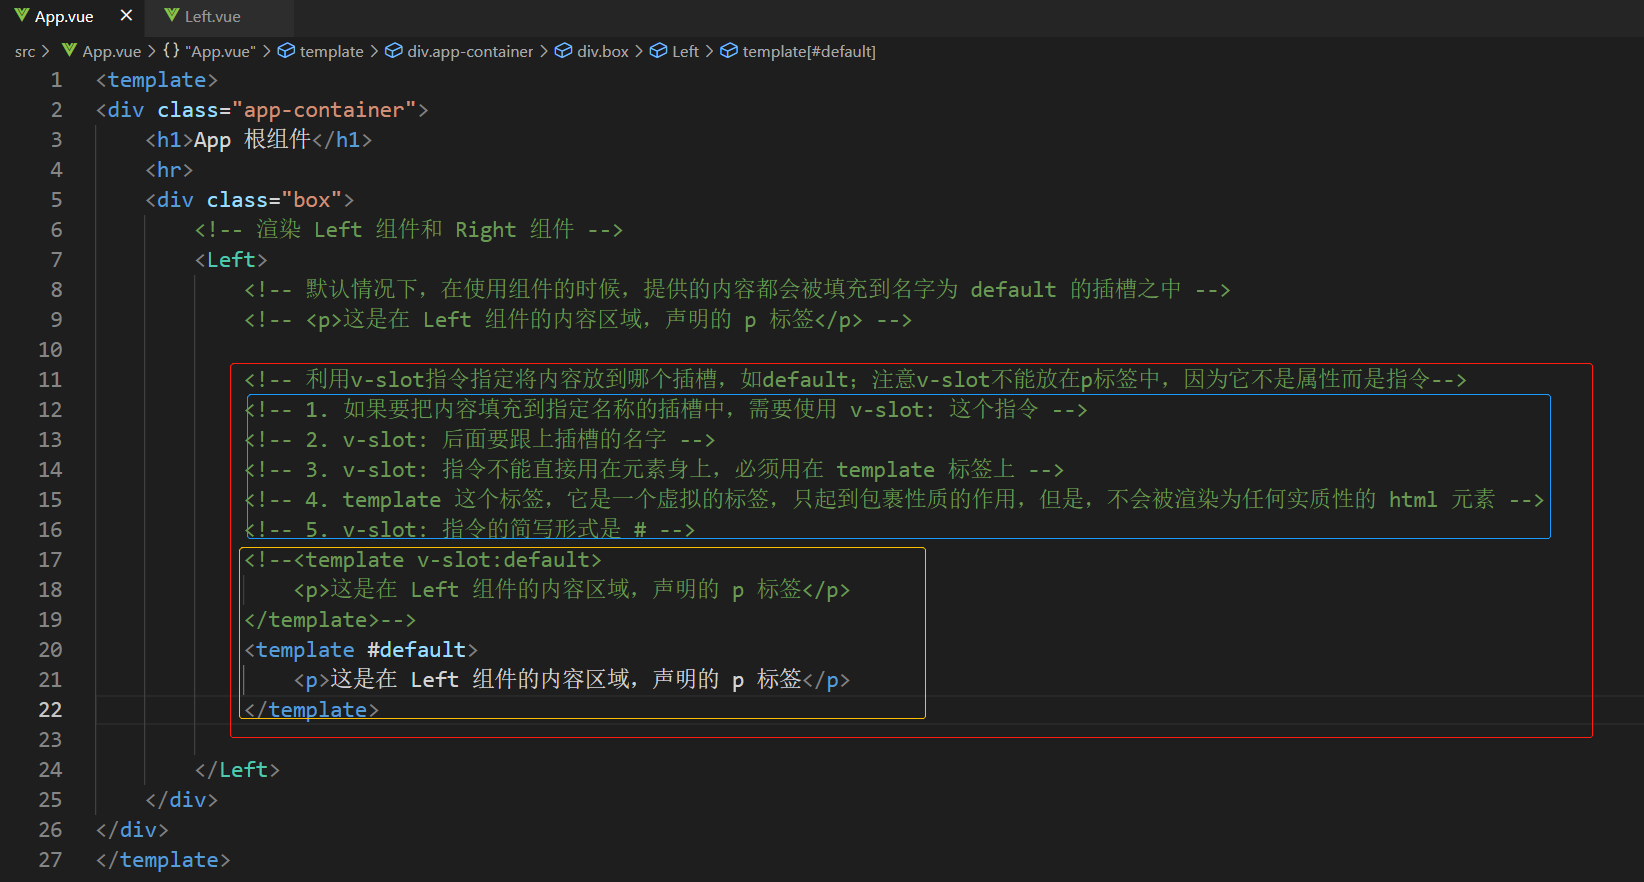
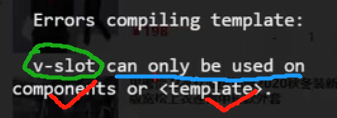
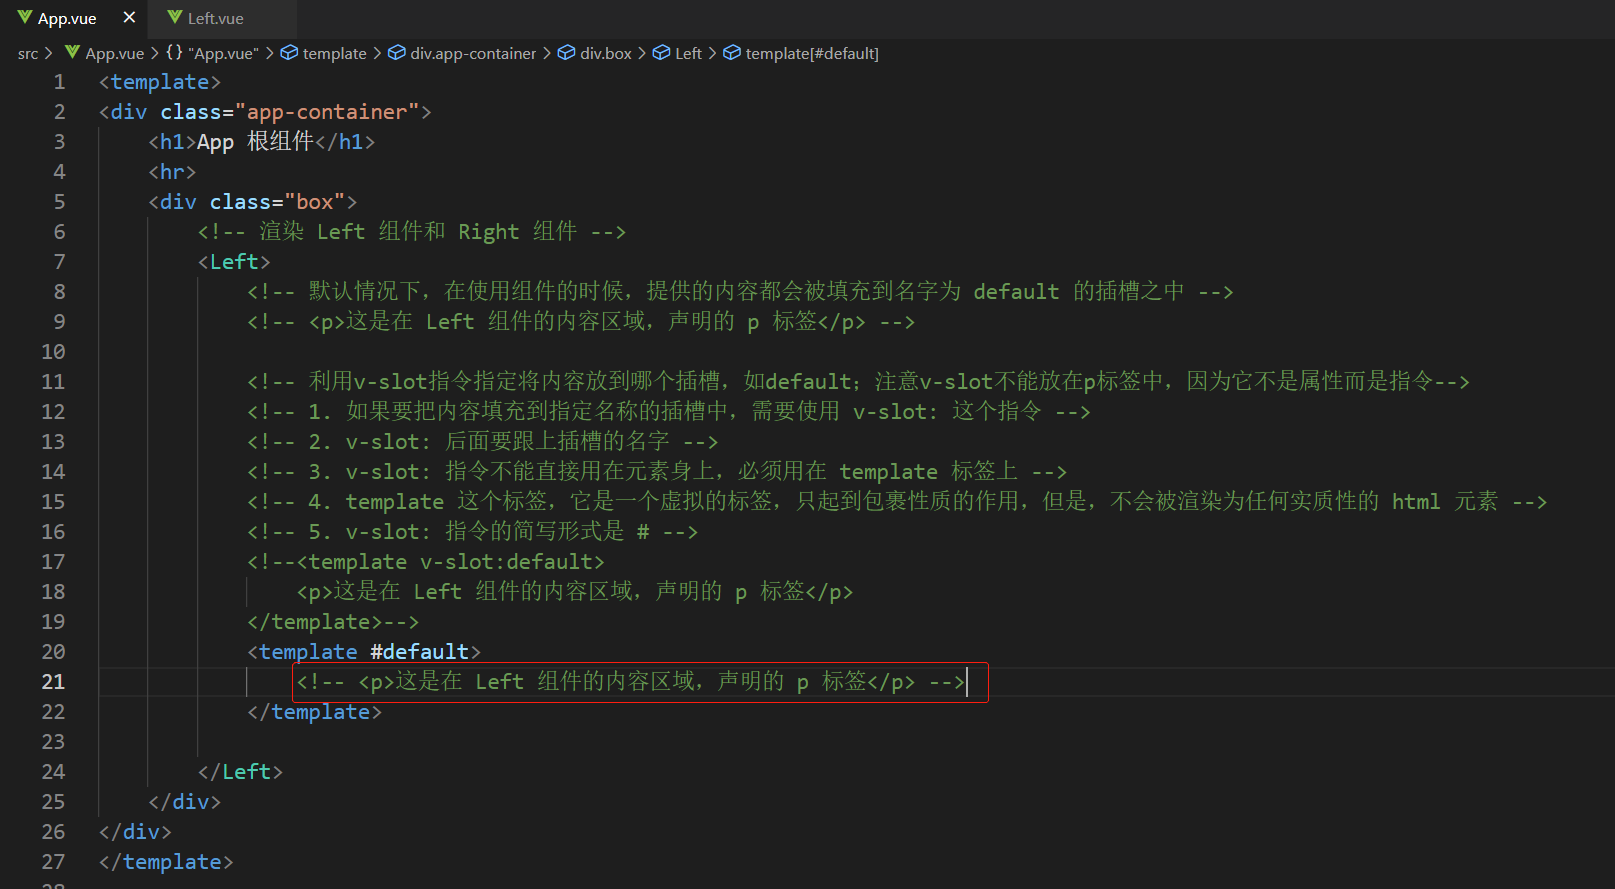
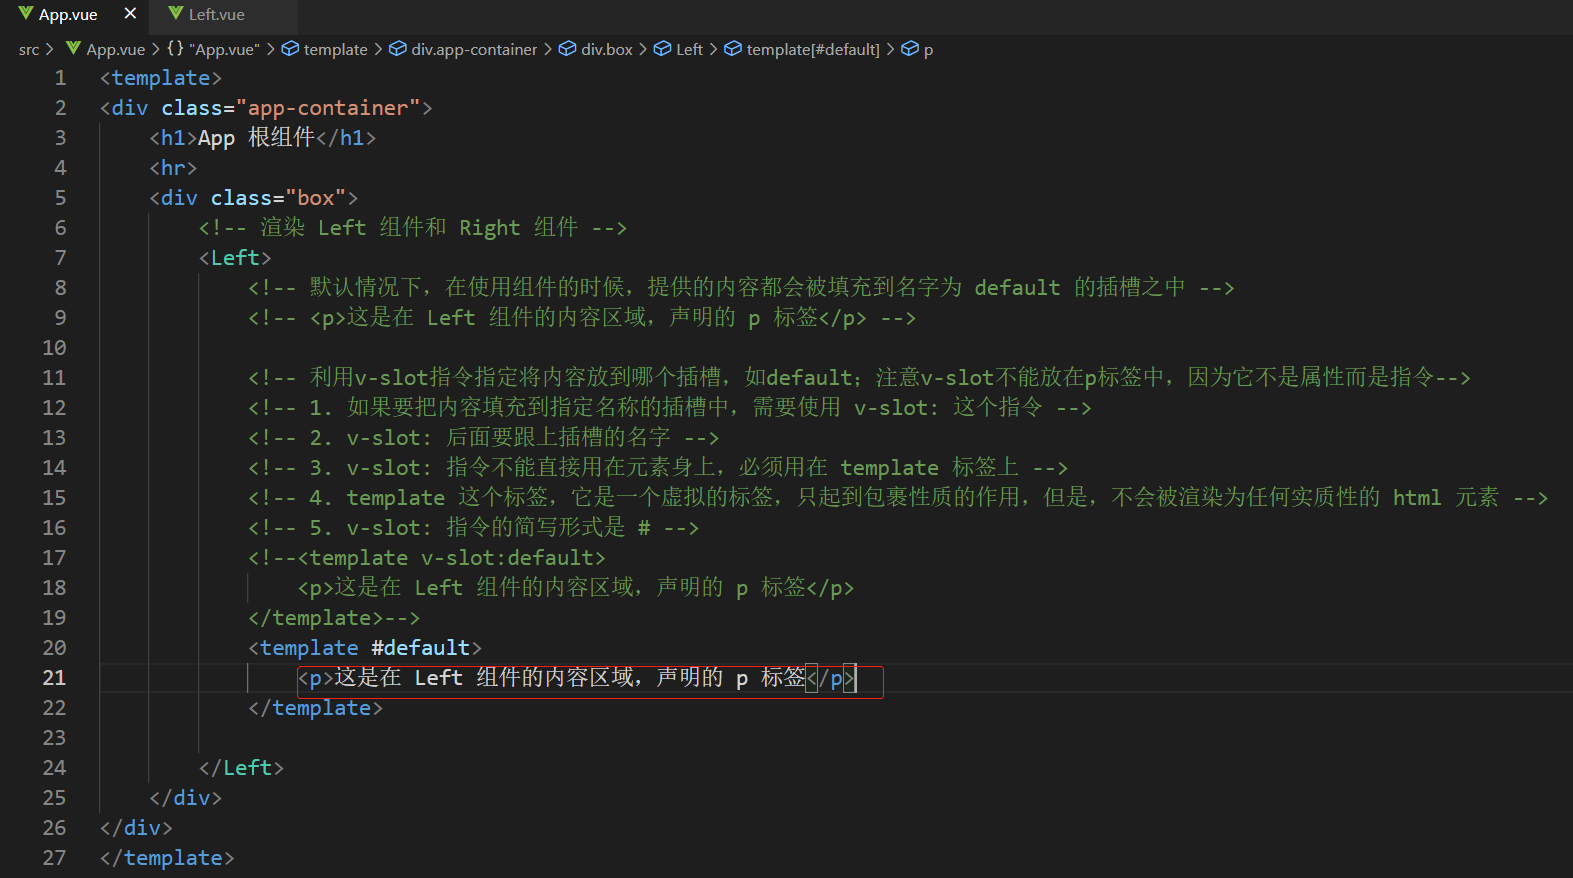
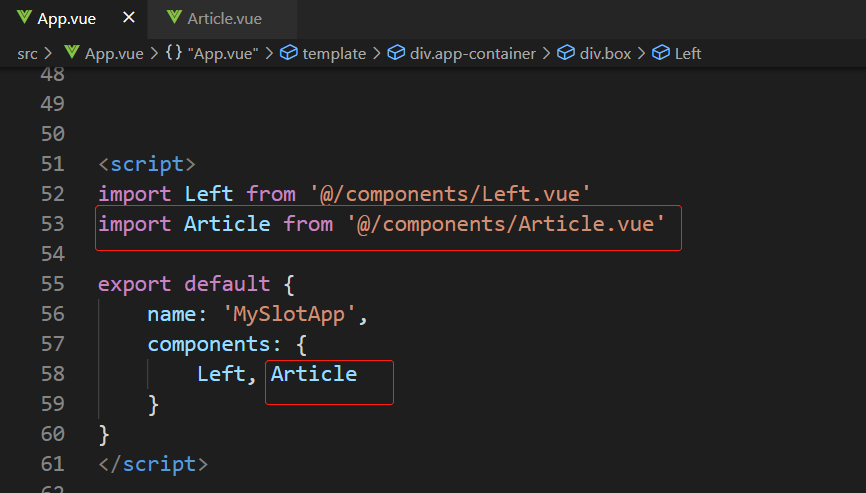
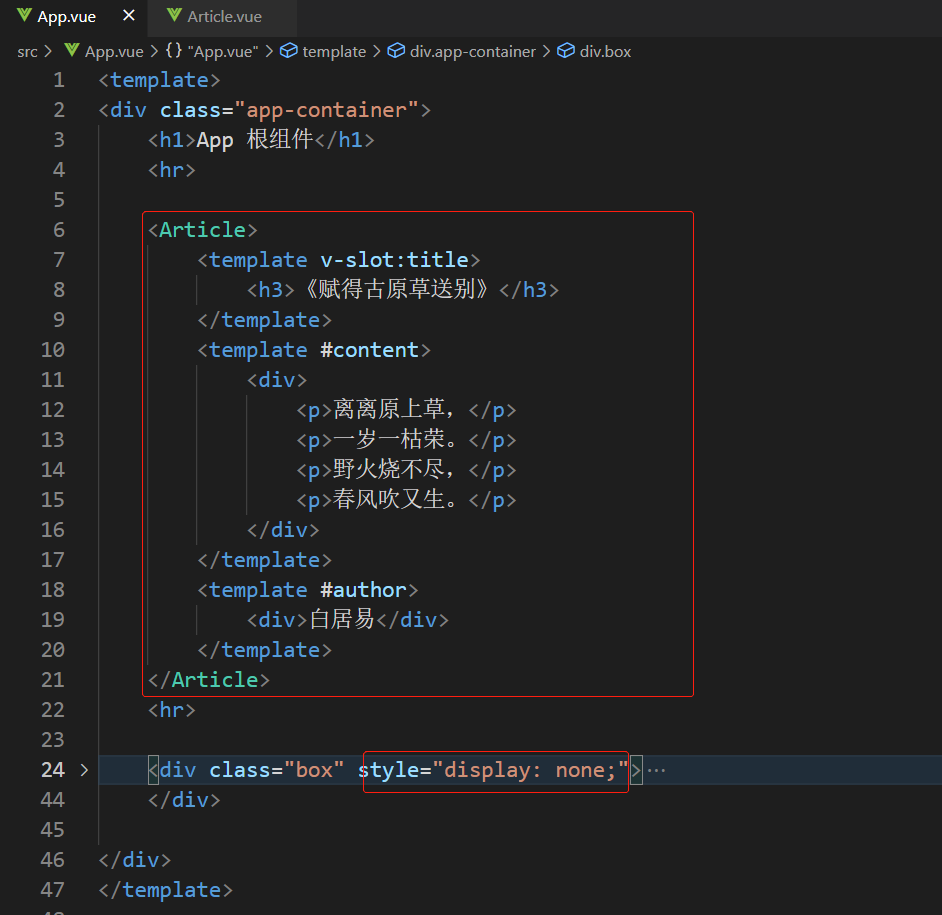
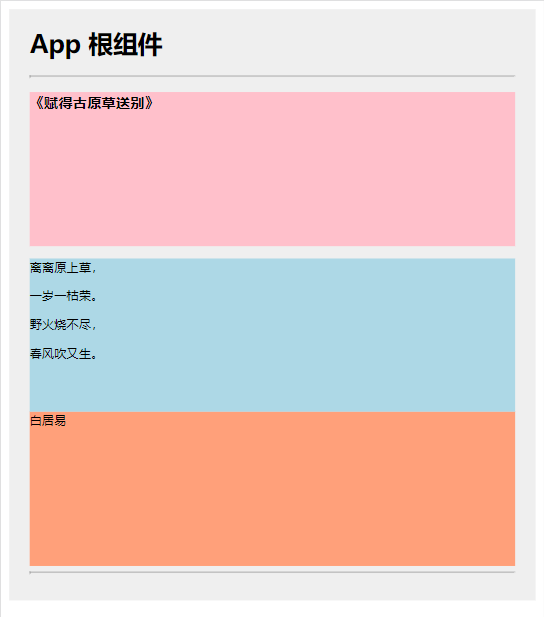
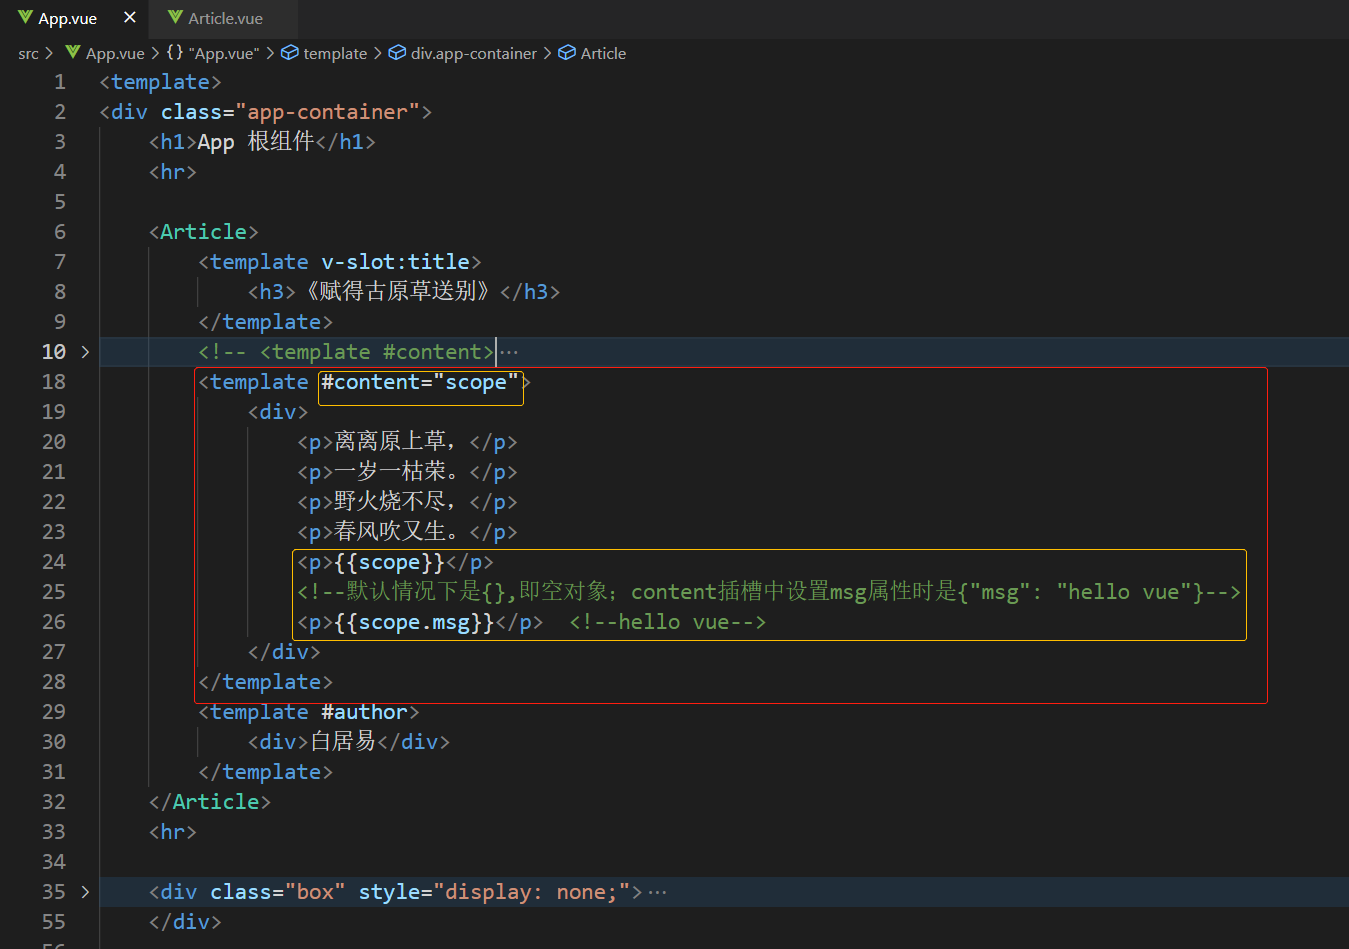
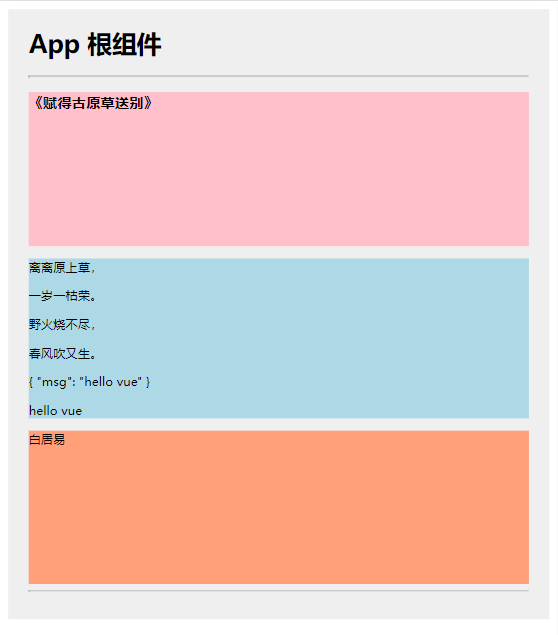
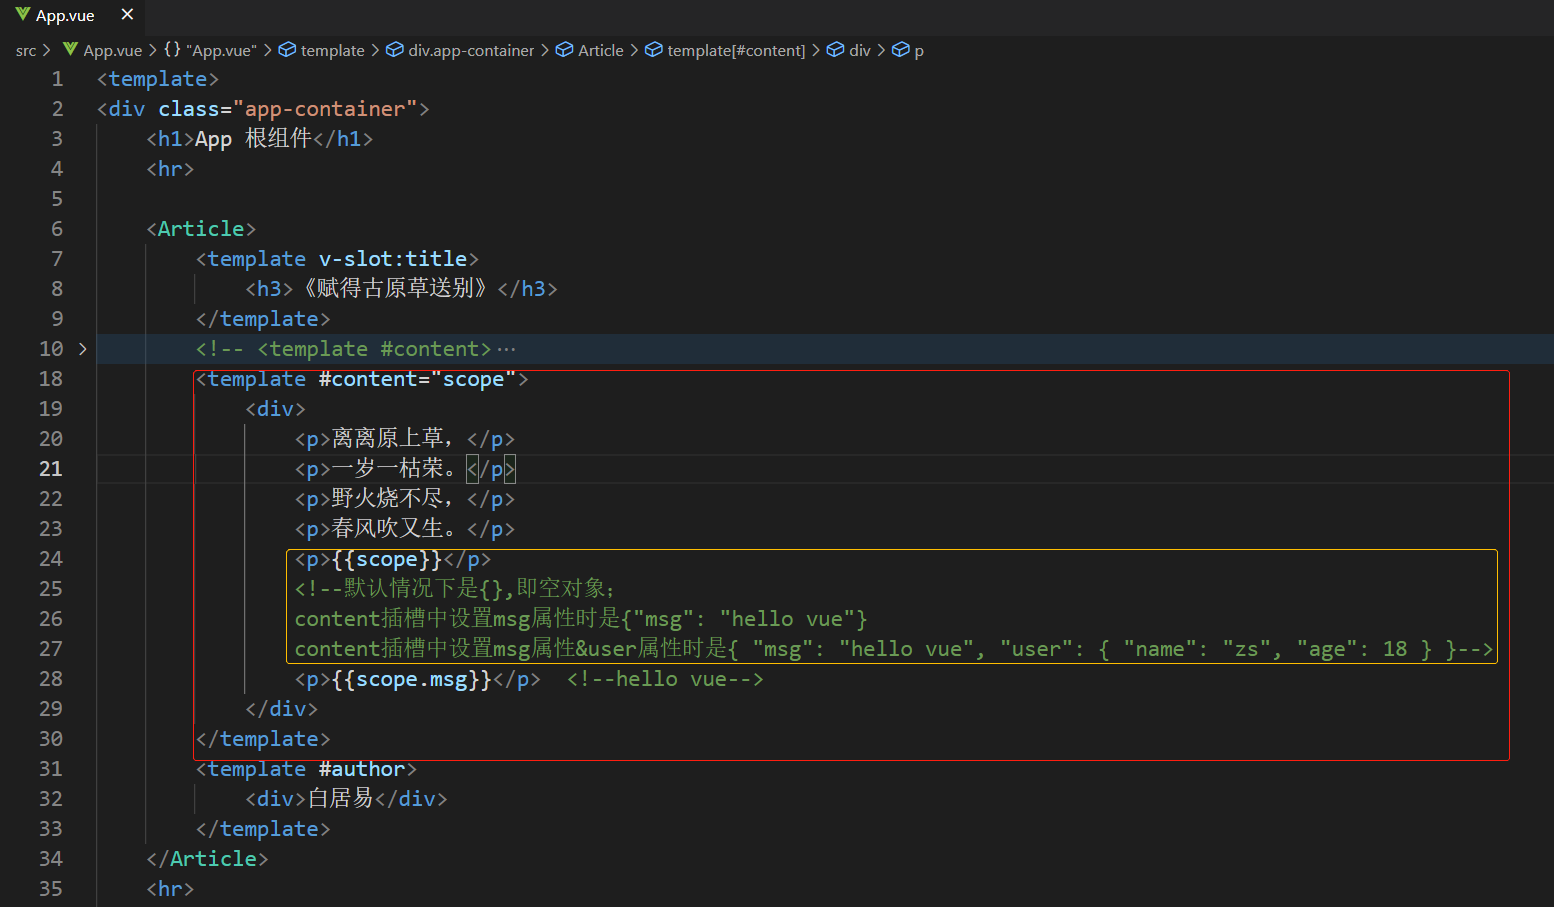
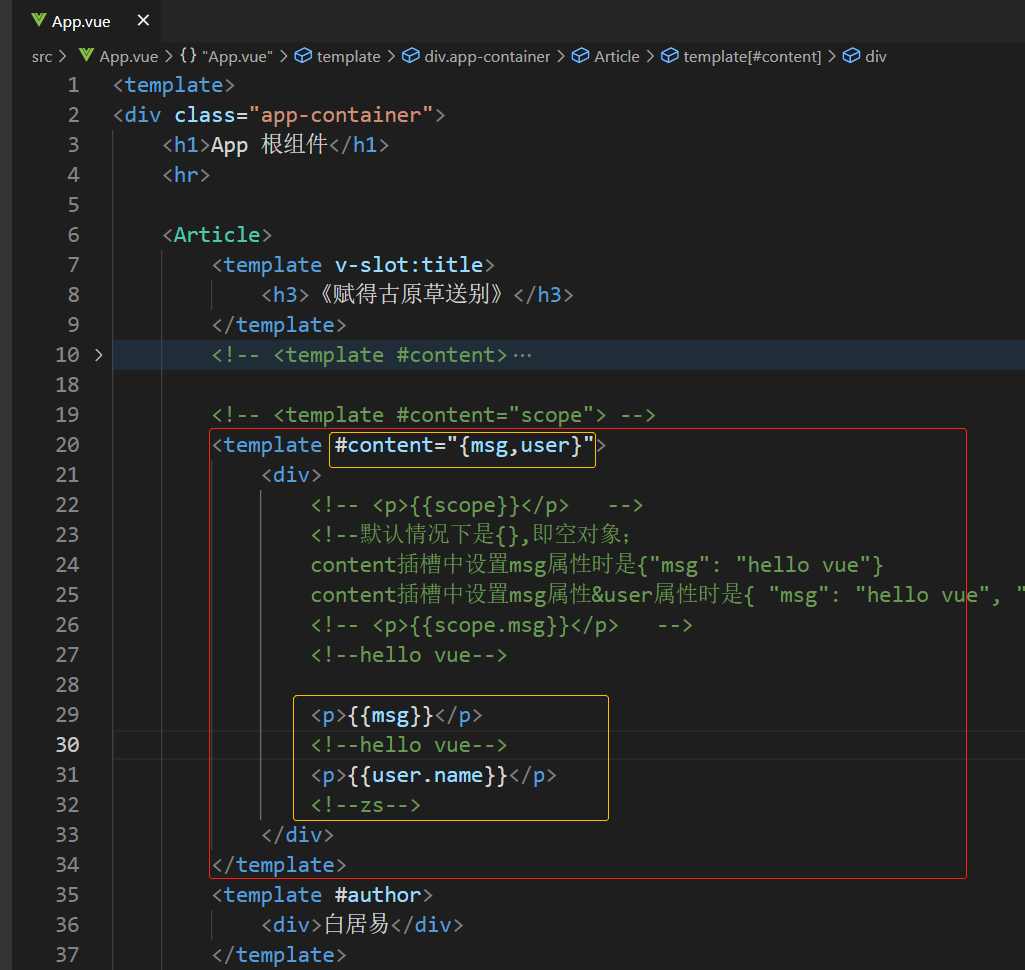
<template>
<div class="app-container">
    <h1>App 根组件</h1>
    <hr>

    <Article>
        <template v-slot:title>
            <h3>《赋得古原草送别》</h3>
        </template>
        <!-- <template #content>
            <div>
                <p>离离原上草,</p>
                <p>一岁一枯荣。</p>
                <p>野火烧不尽,</p>
                <p>春风吹又生。</p>
            </div>
        </template> -->

        <!-- <template #content="scope"> -->
        <template #content="{msg,user}">
            <div>
                <!-- <p>{{scope}}</p>   -->
                <!--默认情况下是{},即空对象;
                content插槽中设置msg属性时是{"msg": "hello vue"}
                content插槽中设置msg属性&user属性时是{ "msg": "hello vue", "user": { "name": "zs", "age": 18 } }-->
                <!-- <p>{{scope.msg}}</p>   -->
                <!--hello vue-->

                <p>{{msg}}</p>
                <!--hello vue-->
                <p>{{user.name}}</p>
                <!--zs-->
            </div>
        </template>
        <template #author>
            <div>白居易</div>
        </template>
    </Article>
    <hr>

    <div class="box" style="display: none;">
        <!-- 渲染 Left 组件和 Right 组件 -->
        <Left>
            <!-- 默认情况下,在使用组件的时候,提供的内容都会被填充到名字为 default 的插槽之中 -->
            <!-- <p>这是在 Left 组件的内容区域,声明的 p 标签</p> -->

            <!-- 利用v-slot指令指定将内容放到哪个插槽,如default;注意v-slot不能放在p标签中,因为它不是属性而是指令-->
            <!-- 1. 如果要把内容填充到指定名称的插槽中,需要使用 v-slot: 这个指令 -->
            <!-- 2. v-slot: 后面要跟上插槽的名字 -->
            <!-- 3. v-slot: 指令不能直接用在元素身上,必须用在 template 标签上 -->
            <!-- 4. template 这个标签,它是一个虚拟的标签,只起到包裹性质的作用,但是,不会被渲染为任何实质性的 html 元素 -->
            <!-- 5. v-slot: 指令的简写形式是 # -->
            <!--<template v-slot:default>
                <p>这是在 Left 组件的内容区域,声明的 p 标签</p>
            </template>-->
            <template #default>
                <p>这是在 Left 组件的内容区域,声明的 p 标签</p>
            </template>

        </Left>
    </div>

</div>
</template>


<script>
import Left from '@/components/Left.vue'
import Article from '@/components/Article.vue'

export default {
    name: 'MySlotApp',
    components: {
        Left, Article
    }
}
</script>


<style lang="less">
.app-container {
  padding: 1px 20px 20px;
  background-color: #efefef;
}
.box {
  display: flex;
}
</style>
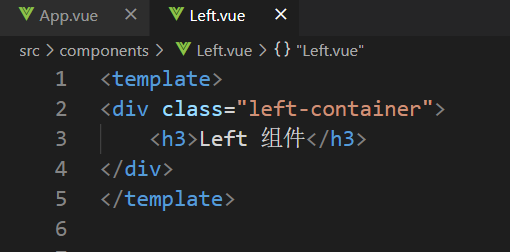
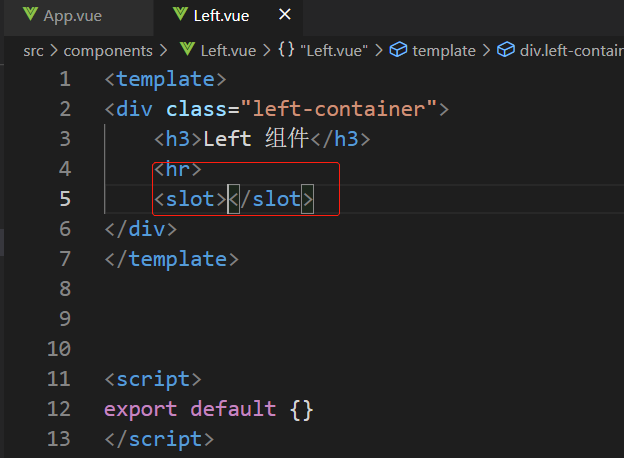
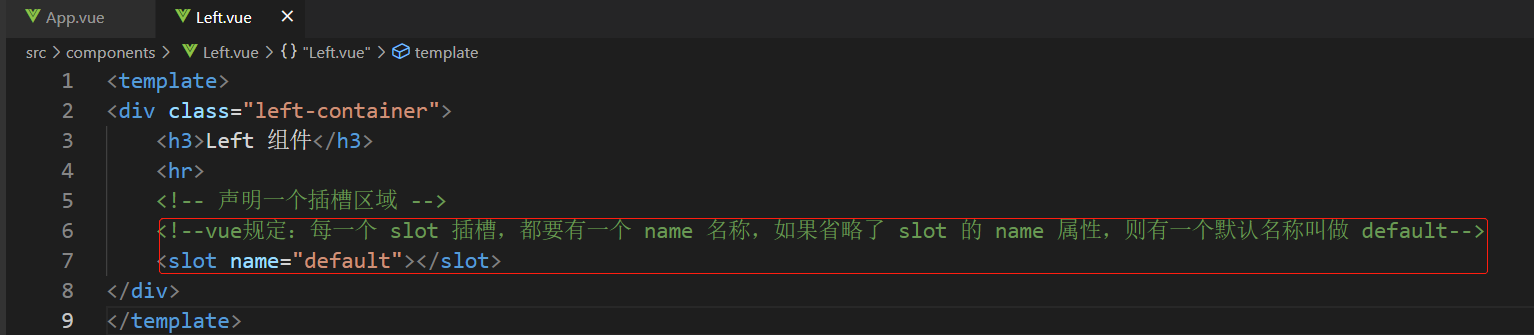
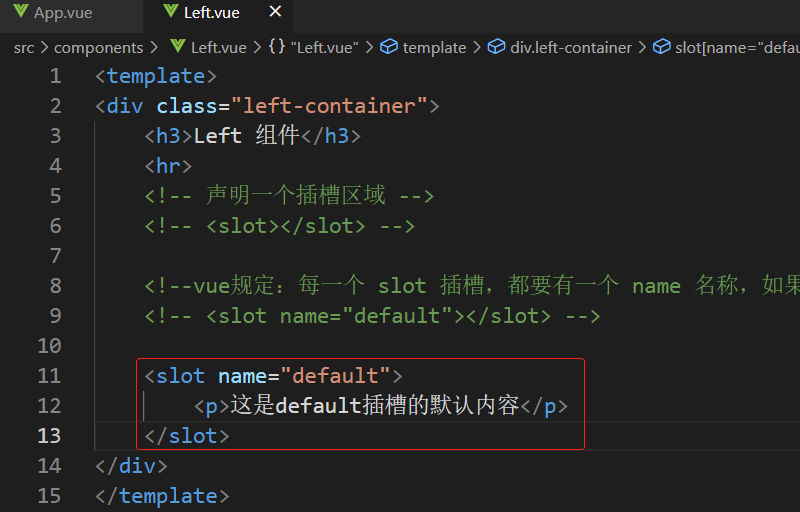
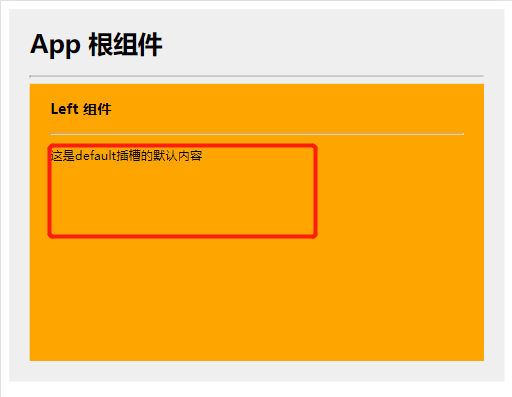
<template>
<div class="left-container">
    <h3>Left 组件</h3>
    <hr>
    <!-- 声明一个插槽区域 -->
    <!-- <slot></slot> -->

    <!--vue规定:每一个 slot 插槽,都要有一个 name 名称,如果省略了 slot 的 name 属性,则有一个默认名称叫做 default-->
    <!-- <slot name="default"></slot> -->

    <slot name="default">
        <p>这是default插槽的默认内容</p>
    </slot>
</div>
</template>


<script>
export default {}
</script>


<style lang="less">
.left-container {
  padding: 0 20px 20px;
  background-color: orange;
  min-height: 250px;
  flex: 1;
}
</style>
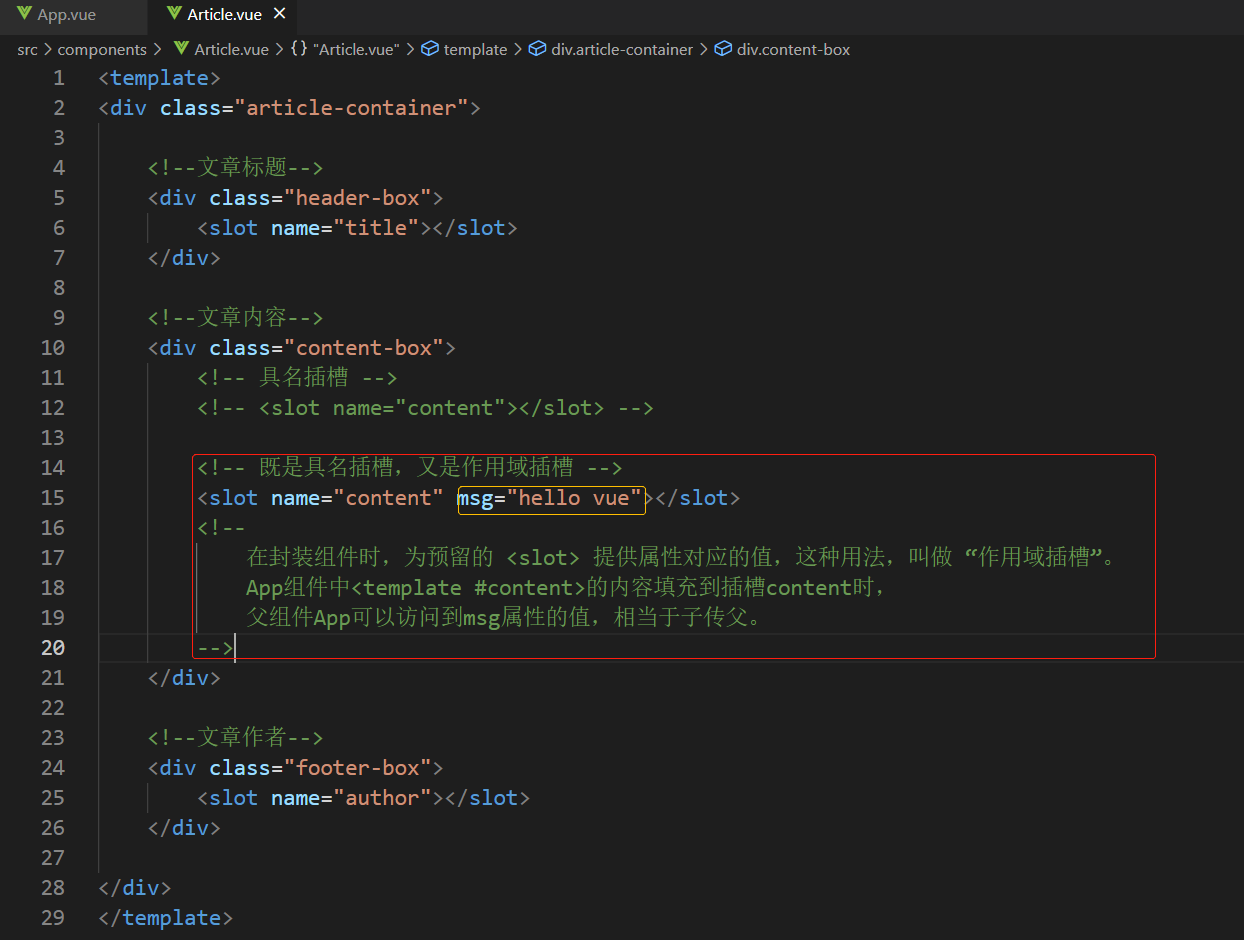
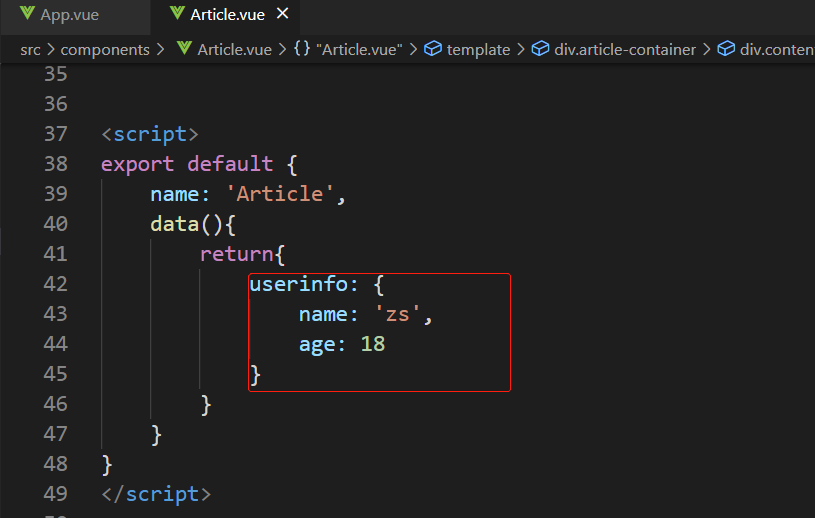
<template>
<div class="article-container">

    <!--文章标题-->
    <div class="header-box">
        <slot name="title"></slot>
    </div>

    <!--文章内容-->
    <div class="content-box">
        <!-- 具名插槽 -->
        <!-- <slot name="content"></slot> -->

        <!-- 既是具名插槽,又是作用域插槽 -->
        <slot name="content" msg="hello vue" :user="userinfo"></slot>
        <!--
            在封装组件时,为预留的 <slot> 提供属性对应的值,这种用法,叫做 “作用域插槽”。
            App组件中<template #content>的内容填充到插槽content时,
            父组件App可以访问到msg属性的值,相当于子传父。
            (1)msg="hello vue"
            (2):user="userinfo"
                msg & user都是在content插槽中自定义的属性
                前者直接赋值一个字符串,后者动态绑定本组件Article中的一个data
        -->
    </div>

    <!--文章作者-->
    <div class="footer-box">
        <slot name="author"></slot>
    </div>

</div>
</template>


<script>
export default {
    name: 'Article',
    data(){
        return{
            userinfo: {
                name: 'zs',
                age: 18
            }
        }
    }
}
</script>


<style lang="less" scoped>
.article-container {
    > div {
        min-height: 150px;
    }
    .header-box {
        background-color: pink;
    }
    .content-box {
        background-color: lightblue;
    }
    .footer-box {
        background-color: lightsalmon;
    }
}
</style>

 浙公网安备 33010602011771号