

chrome实用参数
1 --allow-outdated-plugins 不停用过期的插件。
2 --allow-running-insecure-content 默认情况下,https 页面不允许从 http 链接引用 javascript/css/plug-ins。添加这一参数会放行这些内容。
3 --allow-scripting-gallery 允许拓展脚本在官方应用中心生效。默认情况下,出于安全因素考虑这些脚本都会被阻止。
4 --disable-accelerated-video 停用 GPU 加速视频。
5 --disable-dart 停用 Dart。
6 --disable-desktop-notifications 禁用桌面通知,在 Windows 中桌面通知默认是启用的。
7 --disable-extensions 禁用拓展。
8 --disable-file-system 停用 FileSystem API。
9 --disable-preconnect 停用 TCP/IP 预连接。
10 --disable-remote-fonts 关闭远程字体支持。SVG 中字体不受此参数影响。
11 --disable-speech-input 停用语音输入。
12 --disable-web-security 不遵守同源策略。
13 --disk-cache-dir 将缓存设置在给定的路径。
14 --disk-cache-size 设置缓存大小上限,以字节为单位。
15 --dns-prefetch-disable 停用DNS预读。
16 --enable-print-preview 启用打印预览。
17 --extensions-update-frequency 设定拓展自动更新频率,以秒为单位。
18 --incognito 让浏览器直接以隐身模式启动。
19 --keep-alive-for-test 最后一个标签关闭后仍保持浏览器进程。(某种意义上可以提高热启动速度,不过你最好得有充足的内存)
20 --kiosk 启用kiosk模式。(一种类似于全屏的浏览模式)
21 --lang 使用指定的语言。
22 --no-displaying-insecure-content 默认情况下,https 页面允许从 http 链接引用图片/字体/框架。添加这一参数会阻止这些内容。
23 --no-first-run 跳过 Chromium 首次运行检查。
24 --no-referrers 不发送 Http-Referer 头。
25 --no-sandbox 彻底停用沙箱。
26 --no-startup-window 启动时不建立窗口。
27 --proxy-pac-url 使用给定 URL 的 pac 代理脚本。(也可以使用本地文件,如 --proxy-pac-url="file:\\\c:\proxy.pac")
28 --proxy-server 使用给定的代理服务器,这个参数只对 http 和 https 有效。(例如 --proxy-server=127.0.0.1:8087 )
29 --single-process 以单进程模式运行 Chromium。(启动时浏览器会给出不安全警告)
31 --user-agent 使用给定的 User-Agent 字符串

最常用参数:

30 --start-maximized 启动时最大化。

32.download.default_directory": download_dir  设置下载路径

33.directory_upgrade": True,

34.safebrowsing.enabled": True 是否提示安全警告


参数:--user-data-dir=UserDataDir
用途:自订使用者帐户资料夹(如:–user-data-dir="D:\temp\Chrome User Data")
参数:--process-per-tab
用途:每个分页使用单独进程
参数:--process-per-site
用途:每个站点使用单独进程
参数:--in-process-plugins
用途:插件不启用单独进程

参数:--disable-popup-blocking
用途:禁用弹出拦截
参数:--disable-javascript
用途:禁用JavaScript
参数:--disable-java
用途:禁用Java
参数:--disable-plugins
用途:禁用插件
参数:–disable-images
用途:禁用图像
参数:--omnibox-popup-count=”num”
用途:将网址列弹出的提示选单数量改为num个
参数:--enable-vertical-tabs
用途:调整chrome游览器标签存放在左边,非顶部
from selenium import webdriver
option = webdriver.ChromeOptions()

# 添加启动参数
option.add_argument()

# 添加扩展应用
option.add_extension()
option.add_encoded_extension()

# 添加实验性质的设置参数
option.add_experimental_option()

# 设置调试器地址
option.debugger_address()


常用配置参数:
from selenium import webdriver
option = webdriver.ChromeOptions()

# 添加UA
options.add_argument('user-agent="MQQBrowser/26 Mozilla/5.0 (Linux; U; Android 2.3.7; zh-cn; MB200 Build/GRJ22; CyanogenMod-7) AppleWebKit/533.1 (KHTML, like Gecko) Version/4.0 Mobile Safari/533.1"')

# 指定浏览器分辨率
options.add_argument('window-size=1920x3000')

# 谷歌文档提到需要加上这个属性来规避bug
chrome_options.add_argument('--disable-gpu')

 # 隐藏滚动条, 应对一些特殊页面
options.add_argument('--hide-scrollbars')

# 不加载图片, 提升速度
options.add_argument('blink-settings=imagesEnabled=false')

# 浏览器不提供可视化页面. linux下如果系统不支持可视化不加这条会启动失败
options.add_argument('--headless')

# 以最高权限运行
options.add_argument('--no-sandbox')

# 手动指定使用的浏览器位置
options.binary_location = r"C:\Program Files (x86)\Google\Chrome\Application\chrome.exe"

#添加crx插件
option.add_extension('d:\crx\AdBlock_v2.17.crx')

# 禁用JavaScript
option.add_argument("--disable-javascript")

# 设置开发者模式启动,该模式下webdriver属性为正常值
options.add_experimental_option('excludeSwitches', ['enable-automation'])

# 禁用浏览器弹窗
prefs = {
    'profile.default_content_setting_values' :  {
        'notifications' : 2
     }
}
options.add_experimental_option('prefs',prefs)


driver=webdriver.Chrome(chrome_options=chrome_options)


浏览器地址栏参数:
about:version - 显示当前版本
about:memory - 显示本机浏览器内存使用状况
about:plugins - 显示已安装插件
about:histograms - 显示历史记录
about:dns - 显示DNS状态
about:cache - 显示缓存页面
about:gpu -是否有硬件加速
chrome://extensions/ - 查看已经安装的扩展
一,chrome浏览器设置
from selenium import webdriver
# 浏览器选项
chrome_options = webdriver.ChromeOptions()
# 使用headless无界面浏览器模式
chrome_options.add_argument('--headless')
# 解决DevToolsActivePort文件不存在的报错
chrome_options.add_argument('--no-sandbox')
# 谷歌文档提到需要加上这个属性来规避bug
chrome_options.add_argument('--disable-gpu')
# 设置默认编码为utf-8
chrome_options.add_argument('lang=zh_CN.UTF-8')
# 隐藏滚动条, 应对一些特殊页面
chrome_options.add_argument('--hide-scrollbars')
# 禁止加载图片
chrome_options.add_argument('blink-settings=imagesEnabled=false')
# 指定浏览器分辨率
chrome_options.add_argument('window-size=1440x900')
# 设置默认请求头
chrome_options.add_argument('user-agent="Mozilla/5.0 (iPhone; CPU iPhone OS 9_1 like Mac OS X)AppleWebKit/601.1.46 (KHTML, like Gecko) Version/9.0 Mobile/13B143 Safari/601.1"')
# 设置代理
self.chrome_options.add_argument("--proxy-server=http://183.131.14.78:8118")   使用代理
desired_capabilities = chrome_options.to_capabilities()
desired_capabilities['proxy'] = {
    "httpProxy":PROXY,
    "ftpProxy":PROXY,
    "sslProxy":PROXY,
    "noProxy":None,
    "proxyType":"MANUAL",
    "class":"org.openqa.selenium.Proxy",
    "autodetect":False
}
# 启动浏览器,获取网页源代码
driver = webdriver.Chrome(options=chrome_options)
driver.get(url)
# 显示页面源码
html = driver.page_source
# 关闭当前页面
driver.close()
# 退出浏览器
driver.quit()
二,Firefox浏览器设置
from selenium import webdriver
# 浏览器选项
firefox_options = webdriver.FirefoxOptions()
# 使用headless无界面浏览器模式
firefox_options.add_argument('--headless')
# 解决DevToolsActivePort文件不存在的报错
chrome_options.add_argument('--no-sandbox')
# 谷歌文档提到需要加上这个属性来规避bug
firefox_options.add_argument('--disable-gpu')
# 设置默认编码为utf-8
firefox_options.add_argument('lang=zh_CN.UTF-8')
# 隐藏滚动条, 应对一些特殊页面
firefox_options.add_argument('--hide-scrollbars')
# 禁止加载图片
firefox_options.add_argument('blink-settings=imagesEnabled=false')
# 指定浏览器分辨率
firefox_options.add_argument('window-size=1440x900')
# driver.maximize_window()
# 设置默认请求头
firefox_options.add_argument('user-agent="Mozilla/5.0 (iPhone; CPU iPhone OS 9_1 like Mac OS X)AppleWebKit/601.1.46 (KHTML, like Gecko) Version/9.0 Mobile/13B143 Safari/601.1"')
# 设置代理
desired_capabilities = firefox_options.to_capabilities()
desired_capabilities['proxy'] = {
    "httpProxy":PROXY,
    "ftpProxy":PROXY,
    "sslProxy":PROXY,
    "noProxy":None,
    "proxyType":"MANUAL",
    "class":"org.openqa.selenium.Proxy",
    "autodetect":False
}
# 启动浏览器,获取网页源代码
driver = webdriver.Firefox(options=firefox_options)
driver.get(url)
# 显示页面源码
html = driver.page_source
# 关闭当前页面
driver.close()
# 退出浏览器
driver.quit()
三.undetected_chromedriver
undetected_chromedriver 可以防止浏览器特征被识别,并且可以根据浏览器版本自动下载驱动。
安装方式:
pip3.8 install undetected_chromedriver
简单使用
import ssl
import os
import undetected_chromedriver as uc   # pip3.8 install undetected_chromedriver
from selenium import webdriver


class Papunika(object):
    def __init__(self):
        self.xpath = ["BorlabsCookieBox", "mys-wrapper", "google-center-div", "abgc", "cbb"]
        self.main()

    def main(self):
        # 浏览器选项
        chrome_options = webdriver.ChromeOptions()
        # 使用headless无界面浏览器模式
        # chrome_options.add_argument('--headless')
        # 解决DevToolsActivePort文件不存在的报错
        chrome_options.add_argument('--no-sandbox')
        # 谷歌文档提到需要加上这个属性来规避bug
        chrome_options.add_argument('--disable-gpu')
        # 设置默认编码为utf-8
        chrome_options.add_argument('--lang=zh-CN')
        # 隐藏滚动条, 应对一些特殊页面
        chrome_options.add_argument('--hide-scrollbars')
        chrome_options.add_argument("--proxy-server=192.168.104.134:7890")
        # chrome_options.add_argument('–user-data-dir=C:/Users/cf.yu/AppData/Local/Google/Chrome/User Data')
        # chrome_options.add_argument('--profile-directory=Default')
        # 禁止加载图片
        chrome_options.add_argument('blink-settings=imagesEnabled=false')
        # 指定浏览器分辨率
        chrome_options.add_argument('--start-maximized')
        ssl._create_default_https_context = ssl._create_unverified_context

        uc.TARGET_VERSION = 99  # 指定chrome版本
        driver = uc.Chrome(options=chrome_options)
        driver.get('https://papunika.com/')
        for i in range(100000):
            number = input("")
            handles = driver.window_handles
            driver.switch_to.window(handles[-1])
            url = driver.current_url
            page = driver.page_source
            # print(page)
            print(url, save_path, handles)
            path = '/'.join(save_path.split("/")[:-1])
            self.save_file(save_path, page, path)

        driver.close()


    def save_file(self, file_name, page, path):
        if not os.path.exists(path):
            os.makedirs(path)
        with open(file_name, 'w', encoding='utf-8') as f:
            f.write(page)


if __name__ == "__main__":
    Papunika()
三.常用操作
四,部署
1 centos7无桌面环境部署
Xvfb(X virtual framebuffer)是一个虚拟显示服务器,不需要显示设备也能模拟运行图形界面
1.1 安装 Xvfb:
yum install -y xorg-x11-server-Xvfb bzip gtk3
1.2 启动虚拟桌面坏境,保持后台运行。
Xvfb :54321 -ac &

:54321是服务启动的端口号,可以任意设置,与下一步保持一致就行
1.3 配置环境变量
vim /etc/profile
export DISPLAY=:54321

source /etc/profile
端口号和上面一致,冒号不能漏
1.4 安装selenium
pip3.6 install selenium
2 安装chrome
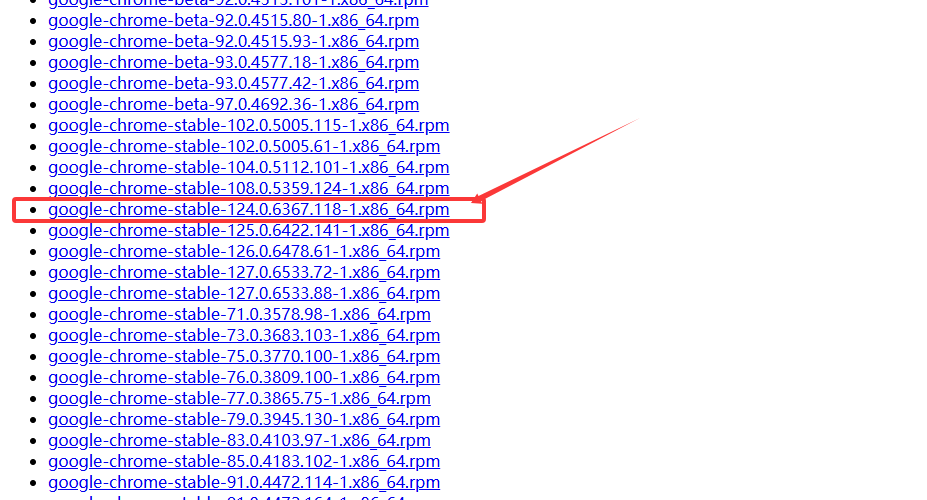
第一种
curl https://intoli.com/install-google-chrome.sh | bash   # 安装chrome 安装的是最新版本的chrome

rpm -qa|grep google-chrome    # 查看已安装的软件

rpm -e --noscripts google-chrome-stable   # 卸载以安装的chrome浏览器

第二种(推荐第二种安装)
安装相关依赖
yum -y install redhat-lsb* liberation-fonts vulkan libXss* libappindicator* libgbm

下载google-chrome 最新RPM安装包
wget https://dl.google.com/linux/direct/google-chrome-stable_current_x86_64.rpm

如果最新版的安装不能使用  http://dist.control.lth.se/public/CentOS-7/x86_64/google.x86_64/   下载低版本


安装google-chrome
rpm -ivh google-chrome-stable_current_x86_64.rpm

第三种(简单方便)
yum install https://dl.google.com/linux/direct/google-chrome-stable_current_x86_64.rpm

第四种
打开网站 http://dist.control.lth.se/public/CentOS-7/x86_64/google.x86_64/下载对应版本的rpm文件
 wget http://dist.control.lth.se/public/CentOS-7/x86_64/google.x86_64/google-chrome-stable-124.0.6367.118-1.x86_64.rpm
 yum install google-chrome-stable-124.0.6367.118-1.x86_64.rpm

查看google-chrome版本
google-chrome --version
http://dist.control.lth.se/public/CentOS-7/x86_64/google.x86_64/ 其他版本下载地址 centos7可以下载这个版本安装
2.1 测试chrome是否安装成功
google-chrome-stable --no-sandbox --headless --disable-gpu --screenshot https://www.suning.com/ # 在当前路径下生成一张截图。
2.2 下载最新版本的chromedriver
https://chromium.cypress.io/   最新浏览器驱动下载,需要FQ
https://registry.npmmirror.com/binary.html?path=chrome-for-testing/

https://sites.google.com/a/chromium.org/chromedriver/downloads
https://googlechromelabs.github.io/chrome-for-testing/
http://chromedriver.storage.googleapis.com/index.html

# 解压
unzip chromedriver_linux64.zip

# 测试
./chromedriver

# 加入环境变量
mv chromedriver /usr/bin/
chmod 777 /usr/bin/chromedriver

vim /etc/profile
export PATH="$PATH:/usr/local/chromedriver"
source /etc/profile

# 或者运行的时候指定路径
driver = webdriver.Chrome(chrome_options=chrome_options, executable_path='/root/yu/01-chromedriver/chromedriver')
2.3 安装chrome 报错
错误:Package: google-chrome-stable-79.0.3945.88-1.x86_64 (/google-chrome-stable_current_x86_64)
          Requires: libc.so.6(GLIBC_2.16)(64bit)
原因是glibc 版本过低  要升级  我升级到2.17
2.3.1 原先的系统glibc库的版本是2.12,需要升级到2.17版本。
下载地址: http://ftp.gnu.org/gnu/glibc/
2.3.2 安装部署
mkdir /root/glibc

cd /root/glibc

wget http://ftp.gnu.org/gnu/glibc/glibc-2.17.tar.gz

tar -xf glibc-2.17.tar.gz

cd glibc-2.17

mkdir build; cd build

../configure --prefix=/usr --disable-profile --enable-add-ons --with-headers=/usr/include --with-binutils=/usr/bin

make -j 8

make install

strings /lib64/libc.so.6 | grep GLIBC  # 查看glibc版本
2.4 启动程序测试
from selenium import webdriver
chrome_options = webdriver.ChromeOptions()
chrome_options.add_argument('--headless')
chrome_options.add_argument('--no-sandbox')
chrome_options.add_argument('--disable-gpu')
chrome_options.add_argument('window-size=1440x900')
b = webdriver.Chrome(executable_path='/root/bws/chromedriver', chrome_options=chrome_options)
b.get('http://www.baidu.com')
print(b.page_source)
b.quit()
3 安装firefox
yum -y install firefox  # 安装firefox浏览器

firefox --version   # 查看firefox浏览器版本

或者
cd /usr/local
wget https://ftp.mozilla.org/pub/firefox/releases/72.0b9/linux-x86_64/en-US/firefox-72.0b9.tar.bz2
tar -jxvf firefox-72.0b9.tar.bz2
ln -s /usr/local/firefox/firefox /usr/bin/firefox
rm -rf firefox-72.0b9.tar.bz2
3.2 下载最新版本的geckodriver
https://github.com/mozilla/geckodriver/releases
https://download-installer.cdn.mozilla.net/pub/firefox/releases/

# 解压
wget https://github.com/mozilla/geckodriver/releases/download/v0.26.0/geckodriver-v0.26.0-linux64.tar.gz
tar -zxvf geckodriver-v0.26.0-linux64.tar.gz

# 测试
./geckodriver

# 加入环境变量
mv chromedriver /usr/bin/

/etc/profile
export PATH="$PATH:/usr/local/geckodriver"
source /etc/profile

# 或者运行的时候指定路径
driver = webdriver.firefox(firefox_options=firefox_options, executable_path='/root/yu/01-geckodriver/geckodriver')
3.3 启动程序测试
from selenium import webdriver
b = webdriver.Firefox(executable_path='/root/yu/01-geckodriver/geckodriver')
b.get('http://www.baidu.com')
print(b.page_source)
b.quit()
3.4 标签添加属性
var leafArr = $('.leaflet-marker-icon'); leafArr.each(function(){$(this).attr('name',$(this).text())})
3.5 删除标签
document.querySelectorAll('.nk-gap-2, .code-block,#BorlabsCookieBoxWrap,#BorlabsCookieBox').forEach(node=>node.remove())
3.6 简单使用
import platform
import sys
import traceback

import urllib3
from DrissionPage import WebPage, ChromiumOptions
from loguru import logger

urllib3.disable_warnings()

logger.remove()


def console_format(record):
    colors = {"DEBUG": "light-blue", "INFO": "light-green", "WARNING": "light-yellow", "ERROR": "light-red", "CRITICAL": "bold white on red", }
    color = colors.get(record["level"].name, "white")
    format_str = f"<{color}>{{time:YYYY-MM-DD HH:mm:ss}}|{{file.name}}|{{level}}:{{line:<3}}|{{process.name:<5}}|{{thread.name}}|{{message}}</{color}>\n"
    formatted = format_str.format(**record)
    formatted = formatted.replace("{", "{{")
    formatted = formatted.replace("}", "}}")
    formatted = formatted.replace("<", "\\<")
    formatted = formatted.replace("\\</light-", "</light-")
    formatted = formatted.replace("\\<light-", "<light-")
    formatted = formatted.replace("SpawnProcess-", "P:")
    formatted = formatted.replace("ForkProcess-", "P:")
    formatted = formatted.replace("ThreadPoolExecutor-0_", "T:")
    formatted = formatted.replace("MainProcess", "P")
    formatted = formatted.replace("MainThread", "T")
    formatted = formatted.replace(".py", "")
    formatted = formatted.replace("DEBUG", "D")
    formatted = formatted.replace("INFO", "I")
    formatted = formatted.replace("WARNING", "W")
    formatted = formatted.replace("ERROR", "E")
    formatted = formatted.replace("CRITICAL", "C")
    return formatted


logger.add(sys.stderr, format=console_format, level="DEBUG")


def get_mdpi():
    proxies = {}
    try:
        co = ChromiumOptions()
        if platform.system().lower() == 'windows':
            co.set_argument('--headless=new')
            co.set_cache_path("E:\chrome_cache\cache")
            co.set_tmp_path(r"E:\chrome_cache\tmp")
            if proxies:
                co.set_argument('--proxy-server={}'.format(proxies.get("http", {})))
            co.set_paths(browser_path=r"C:\Program Files\Google\Chrome\Application\chrome.exe")
        elif platform.system().lower() == 'linux':
            co.set_argument('--headless=new')
            # logger.info(f"获取代理 {proxies}")
            if proxies:
                co.set_argument('--proxy-server={}'.format(proxies.get("http", {})))
            co.set_paths(browser_path=r"/usr/bin/google-chrome")
        # co.set_argument('--disable-javascript')  # 禁用 JavaScript
        # # 或者更可靠的方式(推荐):
        # co.set_argument('--disable-web-security')
        # co.set_argument('--disable-features=EnableJavascript')
        # co.set_argument('--disable-javascript-harmony')
        # co.set_argument('--disable-javascript-opera')
        # # 更推荐:通过 prefs 禁用 JS
        # co.set_pref('profile.managed_default_content_settings.javascript', 2)
        co.auto_port()
        co.incognito(True)
        co.set_argument('--no-sandbox')
        co.set_argument("--disable-gpu")
        co.set_user_agent(user_agent='Mozilla/5.0 (Windows NT 10.0; Win64; x64) AppleWebKit/537.36 (KHTML, like Gecko) Chrome/124.0.0.0 Safari/537.36')
        co.no_imgs(True).mute(True)  # 设置不加载图片、静音
        co.set_argument('--start-maximized')
        page = WebPage(chromium_options=co)
        page.get("https://www.baidu.com/", retry=3, interval=2, timeout=15)
        html = page.html
        logger.error(html)
        logger.error("百度请求成功")
    except Exception as e:
        traceback.print_exc()
        logger.error("百度请求失败")
    finally:
        page.close()


if __name__ == "__main__":
    get_mdpi()
