


Zabbix
Zabbix
PS:系统环境是CentOS 7.6
一、安装zabbix
1.1 apt安装
1.2 编译安装
1.2.1 下载源码包
https://www.zabbix.com/download_sources 下载地址
https://cdn.zabbix.com/zabbix/sources/stable/6.0/zabbix-6.0.30.tar.gz 6.0LTS版下载地址
[root@zabbix_server ~]# curl -O https://cdn.zabbix.com/zabbix/sources/stable/6.0/zabbix-6.0.30.tar.gz
  % Total    % Received % Xferd  Average Speed   Time    Time     Time  Current
                                 Dload  Upload   Total   Spent    Left  Speed
100 42.9M  100 42.9M    0     0  7920k      0  0:00:05  0:00:05 --:--:-- 9720k
[root@zabbix_server ~]# ll zabbix-6.0.30.tar.gz
-rw-r--r-- 1 root root 45039653 6月  11 16:34 zabbix-6.0.30.tar.gz
1.2.2 创建用户和组
[root@zabbix_server ~]# groupadd -g 1001 zabbix
[root@zabbix_server ~]# useradd  -u 1001 -g 1001 zabbix
[root@zabbix_server ~]# id zabbix
uid=1001(zabbix) gid=1001(zabbix) 组=1001(zabbix)
1.2.3 解压缩及解决依赖
1.解压缩
[root@zabbix_server ~]# mkdir /app
[root@zabbix_server ~]# tar -xvf zabbix-6.0.30.tar.gz -C /app
[root@zabbix_server ~]# ll /app
总用量 4
drwxr-xr-x 13 1000 1000 4096 5月  21 14:58 zabbix-6.0.30
2.安装依赖关系
[root@zabbix_server zabbix-6.0.30]# yum install gcc mysql-devel  libxml2-devel net-snmp-devel  libevent-devel  java-1.8.0-openjdk-devel libcurl-devel -y
1.2.4 编译zabbix
[root@zabbix_server zabbix-6.0.30]# ./configure --prefix=/app/zabbix_server --enable-server  --enable-agent  --with-mysql  --with-net-snmp --with-libcurl --with-libxml2 --enable-java
[root@zabbix_server zabbix-6.0.30]# make  install
1.2.5 准备数据库
#进入数据库创建账户并授权
mysql -uroot -p<password>
mysql> create database zabbix character set utf8mb4 collate utf8mb4_bin;
mysql> create user 'zabbix'@'localhost' identified by '<password>';
mysql> grant all privileges on zabbix.* to 'zabbix'@'localhost';
mysql> SET GLOBAL log_bin_trust_function_creators = 1;
mysql> quit;
1.2.6 导入初始数据库
- 将数据导入数据库。对于 Zabbix 代理数据库,只需
schema.sql导入(无需导入 images.sql 或 data.sql)
cd database/mysql
mysql -uzabbix -p<password> zabbix < schema.sql
# stop here if you are creating database for Zabbix proxy
mysql -uzabbix -p<password> zabbix < images.sql
mysql -uzabbix -p<password> zabbix < data.sql
log_bin_trust_function_creators可以在架构成功导入后禁用:
mysql -uroot -p<password>
mysql> SET GLOBAL log_bin_trust_function_creators = 0;
mysql> quit;
1.2.7 修改zabbix配置文件
[root@zabbix_server ~]# grep -Ev "#" /app/zabbix_server/etc/zabbix_server.conf | grep -Ev ^$
LogFile=/tmp/zabbix_server.log
DBHost=172.16.1.40
DBName=zabbix_server
DBUser=zabbix
DBPort=3306
Timeout=4
LogSlowQueries=3000
StatsAllowedIP=127.0.0.1
1.2.8 准备web组件
1.2.8.1 apache作为web前端服务
- 方便起见,这里直接通过 yum 安装 httpd 和 PHP。Zabbix 从 5.0 开始,要求 PHP 的版本不低于 7.2。但在 CentOS 7 中,yum 源中默认的是 PHP 5.4.16。所以,这里需要安装额外的 epel 和 webtatic 源。
[root@zabbix_server ~]# rpm -Uvh https://dl.fedoraproject.org/pub/epel/epel-release-latest-7.noarch.rpm
[root@zabbix_server ~]# rpm -Uvh https://mirror.webtatic.com/yum/el7/webtatic-release.rpm
[root@zabbix_server ~]# yum install httpd php72w-cli php72w-common php72w-gd php72w-ldap php72w-mbstring php72w-mysqlnd php72w-xml php72w-bcmath mod_php72w -y
- 拷贝zabbix提供的web文件至web服务家目录下
[root@zabbix_server ~]# mkdir /var/www/html/zabbix
[root@zabbix_server ~]# cp -r /app/zabbix-6.0.30/ui/* /var/www/html/zabbix
[root@zabbix_server ~]# chown -R apache.apche /var/www/html/
-
修改php配置文件
# vim /etc/php.ini
max_execution_time = 300
max_input_time = 300
memory_limit = 128M
post_max_size = 16M
upload_max_filesize = 2M
date.timezone = Asia/Shanghai
extension=bcmath
extension=xmlwriter
extension=xmlreader
extension=ldap
1.2.8.2 nginx作为web前端服务
-
修改nginx配置文件,在server模块中添加以下内容
location / {
        root   /usr/share/nginx/html;
        index  index.php index.html index.htm;
    }
 location ~ \.php$ {    #添加fastcgi转发
        root           /usr/share/nginx/html;
        fastcgi_pass   127.0.0.1:9000;
        fastcgi_index  index.php;
        fastcgi_param  SCRIPT_FILENAME  $document_root$fastcgi_script_name;
        include        fastcgi_params;
    }
修改php默认用户
[root@zabbix ~]# vim /etc/php-fpm.d/www.conf
user = nginx
group = nginx
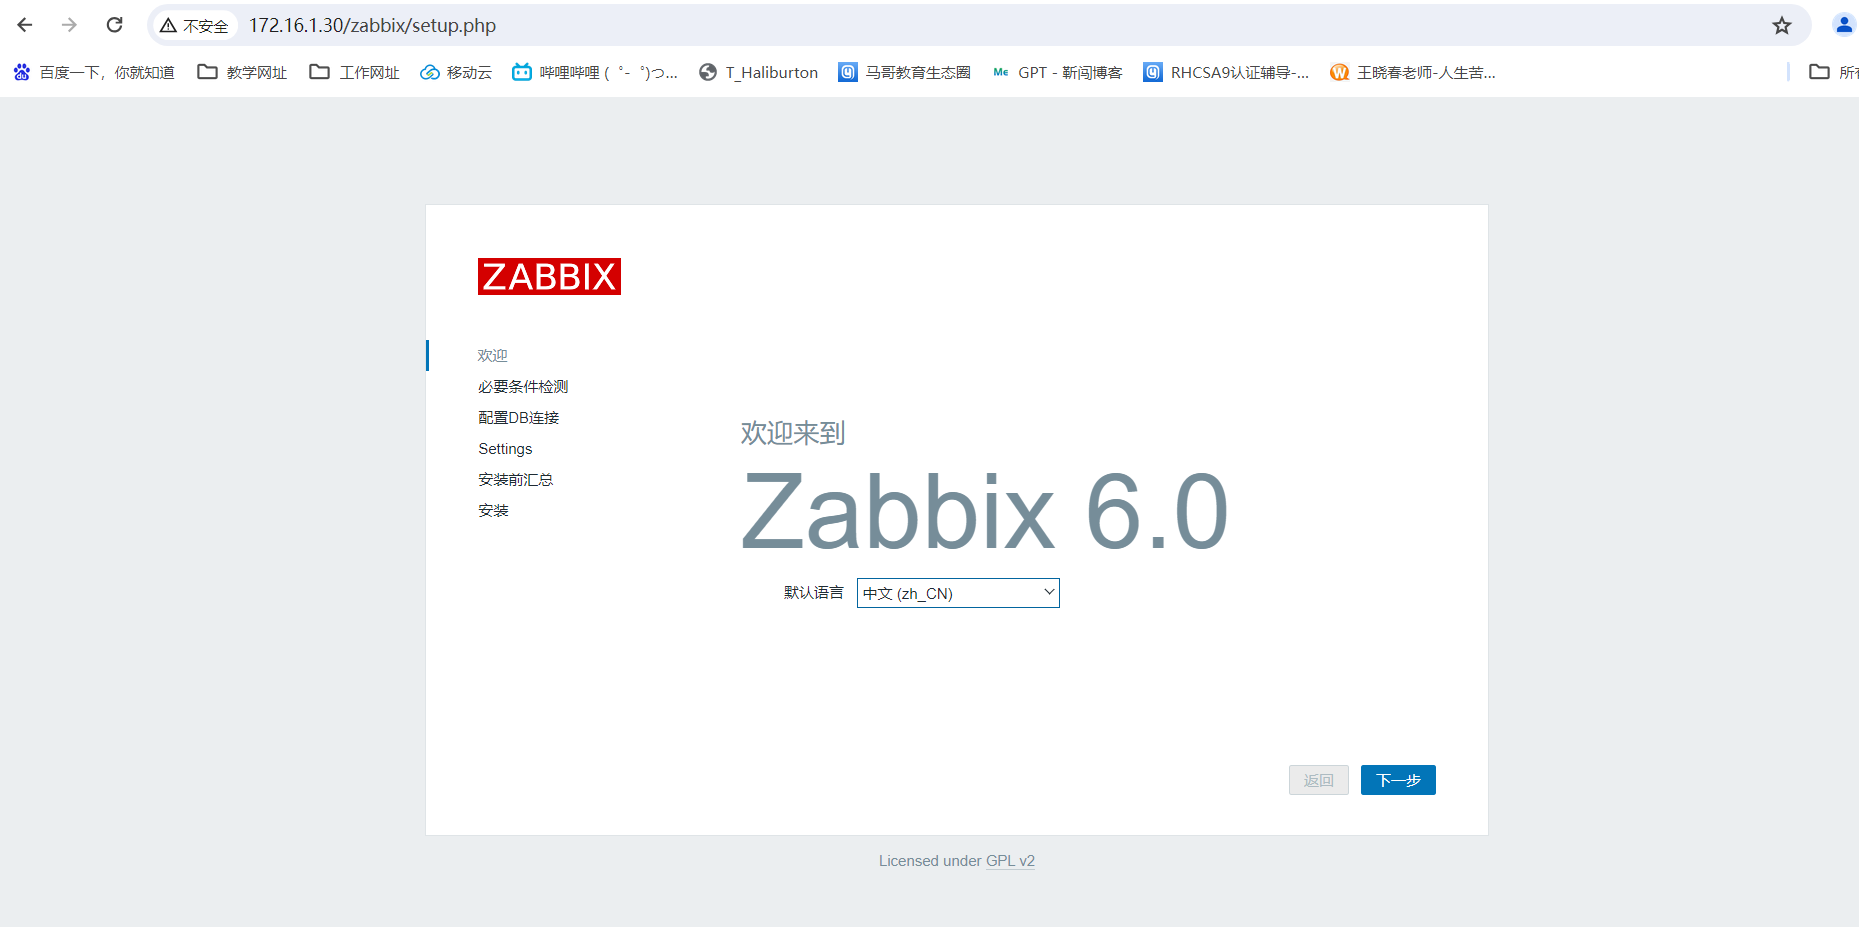
访问web页面进行初始配置
本文来自博客园,作者:原味玉米烙,转载请注明原文链接:https://www.cnblogs.com/yml2024/articles/18247932


 浙公网安备 33010602011771号