(转)libvirt和qemu编译安装
借鉴:https://www.cnblogs.com/grglym/p/8053553.html
借鉴:http://blog.chinaunix.net/uid-31410005-id-5771894.html
qemu与libvirt编译与安装
qemu与libvirt编译与安装
一 、qemu编译前准备
以下链接为的本次编译环境为前提继续进行。
1 | http://www.cnblogs.com/grglym/p/7891253.html |
1、安装必要依赖包
1 | sudo apt-get install libyajl-dev libglib2.0-dev |
二、下载qemu源码
1、qemu可以在官网链接中直接下载最新版本
1 | http://git.qemu-project.org/qemu.git |
2、从git上下载
1 | git clone git://git.qemu.org/qemu.git |
两种方式都可以下载qemu源码。本文利用git来下载。
三、编译安装qemu
1、qemu源码路径如图1所示:

图 1
因为默认的qemu安装路径是/usr/local/下,所以如果直接运行./configure指令来配置qemu对后续会带来不必要的麻烦。所以直接利用configure的配置指令prefix,使得qemu的安装路径重定向。
1 2 3 | ./configure --prefix=/usrmakemake install |
安装完成后,可在/usr/bin/目录下查看qemu的安装文件,部分如图2所示。
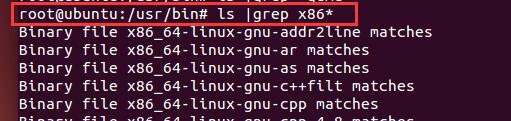
图 2
2、运行如下指令创建qcow2格式的文件供后续操作使用
1 | qemu-img create -f qcow2 test.img 10G |
四、libvirt编译安装
1、安装依赖包
1 2 | apt-get install -y libpciaccess-dev libxml2 libxml2-dev gnutls-bin libgnutls-dev apt-get install -y libdevmapper1.02.1 libdevmapper-dev libnl-dev |
2、下载
git方式:
1 | git clone git://libvirt.org/libvirt.git |
官网上下载:
1 | https://libvirt.org/sources/libvirt-3.2.0.tar.xz |
本文从官网上下载,需要解压。
1 2 | xz -d libvirt-3.2.0.tar.xztar xvf libvirt-3.2.0.tar |
3、编译安装
1 2 3 | ./autogen.sh --systemmakesudo make install |
autogen.sh的脚本命令中的system配置参数是根据自身系统的环境将相应的可执行程序安装到系统匹配的目录下。
4、安装验证,如图3所示
1 2 | which libvirtdwhich virsh |

图 3
1 | virsh list |
运行如上指令可能会出现如下错误,这是因为libvirtd服务没有起来
1 2 | error: failed to connect to the hypervisorFailed to connect socket to '/var/run/libvirt/libvirt-sock': No such file or directory |
解决办法
1 | /usr/sbin/libvirtd -d |
通过以下命令来查看qemu支持的客户机类型(如x86_64,i686等),如果没有将qemu编译安装到指定的/usr/目录下,没有<guest>标签的信息。图4为执行指令后的部分截图。
1 | virsh capabilities |

图 4
五、运行客户机
1、编写test.xml配置文件:
1 2 3 4 5 6 7 8 9 10 11 12 13 14 15 16 17 18 19 20 21 22 23 24 25 26 27 28 29 30 31 32 33 34 35 36 37 38 | <domain type='kvm'> //域类型kvm xen等 <name>linux</name>//虚拟机名字 linux <memory unit='KiB'>1048576</memory>//虚拟机的最大内存 <currentMemory unit='KiB'>1048576</currentMemory>//虚拟机当前的内存 <vcpu placement='static'>1</vcpu>//cpu个数:1 <os> <type arch='x86_64' machine='pc'>hvm</type>//hvm表示全虚拟化 <boot dev='hd'/>//启动项 <boot dev='cdrom'/>//启动项 </os> <features> <acpi/> <apic/> <pae/> </features> <clock offset='utc'/> <on_poweroff>destroy</on_poweroff> <on_reboot>restart</on_reboot> <on_crash>restart</on_crash><devices> <emulator>/usr/bin/qemu-system-x86_64</emulator> //新编译安装的qemu <disk type='file' device='disk'> <driver name='qemu' type='qcow2'/> <source file='/home/ruijie/Documents/test.img'/> <target dev='hda' bus='ide'/> </disk> <disk type='file' device='cdrom'> <source file='/home/ruijie/iso/ubuntu-14.04.5-desktop-amd64.iso'/> <target dev='hdb' bus='ide'/> </disk> <interface type='bridge'> <mac address='52:54:00:4f:1b:07'/> <source bridge='br0'/> </interface> <input type='mouse' bus='ps2'/> <graphics type='vnc' port='-1' autoport='yes' keymap='en-us'/></devices></domain> |
2、运行如下指令启动
1 2 | virsh define test.xmlvirsh start linux (需要提前建立br0网桥) |
3、在运行define可能出现如下错误
1 2 | error: Failed to start domain linuxerror: Failed to connect socket to '/var/run/libvirt/virtlogd-sock': Connection refused |
这是因为virtlogd这个日志服务没有启动,运行如下指令即可
1 | virtlogd -d |
4、通过vnc来连接客户机
1 | virsh vncdisplay linux |
通过如上指令来查看域的vnc端口号

图 5
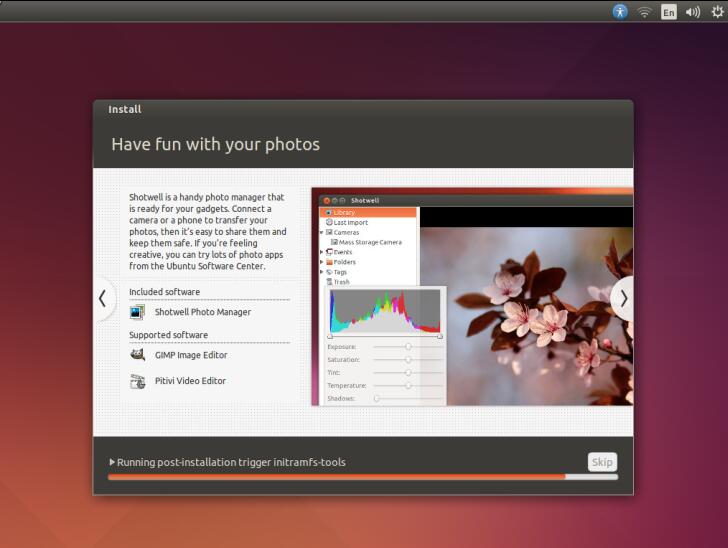
图 6


	</div>
	<div class="postDesc">posted @ <span id="post-date">2017-12-18 13:55</span> <a href="https://www.cnblogs.com/grglym/">gaoren</a> 阅读(<span id="post_view_count">664</span>) 评论(<span id="post_comment_count">0</span>)  <a href="https://i.cnblogs.com/EditPosts.aspx?postid=8053553" rel="nofollow">编辑</a> <a href="#" onclick="AddToWz(8053553);return false;">收藏</a></div>
</div>

 浙公网安备 33010602011771号