

Ansible工具集使用指南
作者:尹正杰
版权声明:原创作品,谢绝转载!否则将追究法律责任。
目录
一.ansible相关的工具概述
1.查看ansible相关的工具
[root@worker232 ~]# ll /usr/bin/ansible*
-rwxr-xr-x 1 root root  5916 Aug 12  2022 /usr/bin/ansible*
lrwxrwxrwx 1 root root     7 Aug 12  2022 /usr/bin/ansible-config -> ansible*
-rwxr-xr-x 1 root root 13398 Aug 12  2022 /usr/bin/ansible-connection*
lrwxrwxrwx 1 root root     7 Aug 12  2022 /usr/bin/ansible-console -> ansible*
lrwxrwxrwx 1 root root     7 Aug 12  2022 /usr/bin/ansible-doc -> ansible*
lrwxrwxrwx 1 root root     7 Aug 12  2022 /usr/bin/ansible-galaxy -> ansible*
lrwxrwxrwx 1 root root     7 Aug 12  2022 /usr/bin/ansible-inventory -> ansible*
lrwxrwxrwx 1 root root     7 Aug 12  2022 /usr/bin/ansible-playbook -> ansible*
lrwxrwxrwx 1 root root     7 Aug 12  2022 /usr/bin/ansible-pull -> ansible*
-rwxr-xr-x 1 root root  1475 Aug 12  2022 /usr/bin/ansible-test*
lrwxrwxrwx 1 root root     7 Aug 12  2022 /usr/bin/ansible-vault -> ansible*
[root@worker232 ~]#


相关工具说明:
	- /usr/bin/ansible
 		主程序,ad-hoc工作模式下执行单条命令。

 	- /usr/bin/ansible-config
 		配置管理工具。

 	- /usr/bin/ansible-connection
 		连接插件管理工具。

 	- /usr/bin/ansible-console
 		交互式命令行工具。

 	- /usr/bin/ansible-doc
 		帮助手册,查看帮助文档。

 	- /usr/bin/ansible-galaxy
 		线上role管理工具。

 	- /usr/bin/ansible-inventory
 		用特定格式显示所有远程主机列表。

 	- /usr/bin/ansible-playbook
 		playbook管理工具。

 	- /usr/bin/ansible-pull
		Playbook获取工具。

 	- /usr/bin/ansible-test
 		测试工具。

	- /usr/bin/ansible-vault
		文档加密工具。
2.本质上是一个Python脚本文件
	1.查看ansible工具
[root@worker232 ~]# file /usr/bin/ansible
/usr/bin/ansible: Python script, ASCII text executable
[root@worker232 ~]#


	2.查看ansible-test工具
[root@worker232 ~]# file /usr/bin/ansible-test
/usr/bin/ansible-test: Python script, ASCII text executable
[root@worker232 ~]#


	2.查看ansible-connection工具
[root@worker232 ~]# file /usr/bin/ansible-connection
/usr/bin/ansible-connection: Python script, ASCII text executable
[root@worker232 ~]#
二.ansible-doc工具使用指南
1 ansible-doc查看ansible文档
[root@worker232 ~]# ansible-doc --help
usage: ansible-doc [-h] [--version] [-v] [-M MODULE_PATH] [--playbook-dir BASEDIR]
                   [-t {become,cache,callback,cliconf,connection,httpapi,inventory,lookup,netconf,shell,vars,module,strategy,role,keyword}]
                   [-j] [-r ROLES_PATH] [-e ENTRY_POINT | -s | -F | -l | --metadata-dump]
                   [plugin ...]

plugin documentation tool

positional arguments:
  plugin                Plugin

options:
  --metadata-dump       **For internal testing only** Dump json metadata for all plugins.
  --playbook-dir BASEDIR
                        Since this tool does not use playbooks, use this as a substitute playbook directory.This sets the relative
                        path for many features including roles/ group_vars/ etc.
  --version             show program's version number, config file location, configured module search path, module location,
                        executable location and exit
  -F, --list_files      Show plugin names and their source files without summaries (implies --list). A supplied argument will be used
                        for filtering, can be a namespace or full collection name.
  -M MODULE_PATH, --module-path MODULE_PATH
                        prepend colon-separated path(s) to module library
                        (default=~/.ansible/plugins/modules:/usr/share/ansible/plugins/modules)
  -e ENTRY_POINT, --entry-point ENTRY_POINT
                        Select the entry point for role(s).
  -h, --help            show this help message and exit
  -j, --json            Change output into json format.
  -l, --list            List available plugins. A supplied argument will be used for filtering, can be a namespace or full collection
                        name.
  -r ROLES_PATH, --roles-path ROLES_PATH
                        The path to the directory containing your roles.
  -s, --snippet         Show playbook snippet for these plugin types: inventory, lookup, module
  -t {become,cache,callback,cliconf,connection,httpapi,inventory,lookup,netconf,shell,vars,module,strategy,role,keyword}, --type {become,cache,callback,cliconf,connection,httpapi,inventory,lookup,netconf,shell,vars,module,strategy,role,keyword}
                        Choose which plugin type (defaults to "module"). Available plugin types are : ('become', 'cache', 'callback',
                        'cliconf', 'connection', 'httpapi', 'inventory', 'lookup', 'netconf', 'shell', 'vars', 'module', 'strategy',
                        'role', 'keyword')
  -v, --verbose         verbose mode (-vvv for more, -vvvv to enable connection debugging)

See man pages for Ansible CLI options or website for tutorials https://docs.ansible.com
[root@worker232 ~]#
2.列出支持的模块列表
[root@worker232 ~]# ansible-doc -l | wc -l
69
[root@worker232 ~]#
[root@worker232 ~]# ansible-doc -l
add_host               Add a host (and alternatively a group) to the ansible-playbook in-memory inventory
apt                    Manages apt-packages
apt_key                Add or remove an apt key
apt_repository         Add and remove APT repositories
assemble               Assemble configuration files from fragments
assert                 Asserts given expressions are true
async_status           Obtain status of asynchronous task
blockinfile            Insert/update/remove a text block surrounded by marker lines
command                Execute commands on targets
copy                   Copy files to remote locations
cron                   Manage cron.d and crontab entries
debconf                Configure a .deb package
debug                  Print statements during execution
dnf                    Manages packages with the `dnf' package manager
dpkg_selections        Dpkg package selection selections
expect                 Executes a command and responds to prompts
fail                   Fail with custom message
fetch                  Fetch files from remote nodes
file                   Manage files and file properties
find                   Return a list of files based on specific criteria
gather_facts           Gathers facts about remote hosts
get_url                Downloads files from HTTP, HTTPS, or FTP to node
getent                 A wrapper to the unix getent utility
git                    Deploy software (or files) from git checkouts
group                  Add or remove groups
group_by               Create Ansible groups based on facts
hostname               Manage hostname
import_playbook        Import a playbook
import_role            Import a role into a play
import_tasks           Import a task list
include                Include a play or task list
include_role           Load and execute a role
include_tasks          Dynamically include a task list
include_vars           Load variables from files, dynamically within a task
iptables               Modify iptables rules
known_hosts            Add or remove a host from the `known_hosts' file
lineinfile             Manage lines in text files
meta                   Execute Ansible 'actions'
package                Generic OS package manager
package_facts          Package information as facts
pause                  Pause playbook execution
ping                   Try to connect to host, verify a usable python and return `pong' on success
pip                    Manages Python library dependencies
raw                    Executes a low-down and dirty command
reboot                 Reboot a machine
replace                Replace all instances of a particular string in a file using a back-referenced regular expression
rpm_key                Adds or removes a gpg key from the rpm db
script                 Runs a local script on a remote node after transferring it
service                Manage services
service_facts          Return service state information as fact data
set_fact               Set host variable(s) and fact(s)
set_stats              Define and display stats for the current ansible run
setup                  Gathers facts about remote hosts
shell                  Execute shell commands on targets
slurp                  Slurps a file from remote nodes
stat                   Retrieve file or file system status
subversion             Deploys a subversion repository
systemd                Manage systemd units
sysvinit               Manage SysV services
tempfile               Creates temporary files and directories
template               Template a file out to a target host
unarchive              Unpacks an archive after (optionally) copying it from the local machine
uri                    Interacts with webservices
user                   Manage user accounts
validate_argument_spec Validate role argument specs
wait_for               Waits for a condition before continuing
wait_for_connection    Waits until remote system is reachable/usable
yum                    Manages packages with the `yum' package manager
yum_repository         Add or remove YUM repositories
[root@worker232 ~]#


温馨提示:
	由于我们安装的是ansible-core,因此模块数量相对较少,仅有69个模块。
	但是如果你安装的ansible的话模块会更多,会有4600+模块。
	当然,如果你觉得69个模块不够用的话,后期我们会有章节详细讲解如何安装哟~

[root@worker232 ~]# dpkg -l ansible-core
Desired=Unknown/Install/Remove/Purge/Hold
| Status=Not/Inst/Conf-files/Unpacked/halF-conf/Half-inst/trig-aWait/Trig-pend
|/ Err?=(none)/Reinst-required (Status,Err: uppercase=bad)
||/ Name           Version           Architecture Description
+++-==============-=================-============-===============================================================
ii  ansible-core   2.12.0-1ubuntu0.1 all          Configuration management, deployment, and task execution system
[root@worker232 ~]#
[root@worker232 ~]#
[root@worker232 ~]# dpkg -l ansible
Desired=Unknown/Install/Remove/Purge/Hold
| Status=Not/Inst/Conf-files/Unpacked/halF-conf/Half-inst/trig-aWait/Trig-pend
|/ Err?=(none)/Reinst-required (Status,Err: uppercase=bad)
||/ Name           Version                          Architecture Description
+++-==============-================================-============-===============================================================
rc  ansible        2.10.7+merged+base+2.10.8+dfsg-1 all          Configuration management, deployment, and task execution system
[root@worker232 ~]#
3.过滤出指定模块
[root@worker232 ~]# ansible-doc -l | grep  shell
shell                  Execute shell commands on targets
[root@worker232 ~]#
4.列出指定类型模块
[root@worker232 ~]# ansible-doc -t shell -l
cmd        Windows Command Prompt
powershell Windows PowerShell
sh         POSIX shell (/bin/sh)
[root@worker232 ~]#
5.显示ping模块的帮助信息
	1.显示ping模块的帮助信息
[root@worker232 ~]# ansible-doc ping
> ANSIBLE.BUILTIN.PING    (/usr/lib/python3/dist-packages/ansible/modules/ping.py)

        A trivial test module, this module always returns `pong' on successful contact. It does not make sense in
        playbooks, but it is useful from `/usr/bin/ansible' to verify the ability to login and that a usable Python is
        configured. This is NOT ICMP ping, this is just a trivial test module that requires Python on the remote-node. For
        Windows targets, use the [ansible.windows.win_ping] module instead. For Network targets, use the
        [ansible.netcommon.net_ping] module instead.

ADDED IN: historical

OPTIONS (= is mandatory):

- data
        Data to return for the `ping' return value.
        If this parameter is set to `crash', the module will cause an exception.
        [Default: pong]
        type: str


ATTRIBUTES:

        check_mode:
          description: Can run in check_mode and return changed status prediction withought
            modifying target
          support: full
        diff_mode:
          description: Will return details on what has changed (or possibly needs changing
            in check_mode), when in diff mode
          support: none
        platform:
          description: Target OS/families that can be operated against
          platforms: posix
          support: N/A


SEE ALSO:
      * Module ansible.netcommon.net_ping
           The official documentation on the ansible.netcommon.net_ping module.
           https://docs.ansible.com/ansible-core/2.12/modules/ansible.netcommon.net_ping_module.html
      * Module ansible.windows.win_ping
           The official documentation on the ansible.windows.win_ping module.
           https://docs.ansible.com/ansible-core/2.12/modules/ansible.windows.win_ping_module.html


AUTHOR: Ansible Core Team, Michael DeHaan

EXAMPLES:

# Test we can logon to 'webservers' and execute python with json lib.
# ansible webservers -m ping

- name: Example from an Ansible Playbook
  ansible.builtin.ping:

- name: Induce an exception to see what happens
  ansible.builtin.ping:
    data: crash


RETURN VALUES:
- ping
        Value provided with the data parameter.

        returned: success
        sample: pong
        type: str
[root@worker232 ~]#


	2.以短格式输出
[root@worker232 ~]# ansible-doc ping -s
- name: Try to connect to host, verify a usable python and return `pong' on success
  ping:
      data:                  # Data to return for the `ping' return value. If this parameter is set to `crash', the module will cause an exception.
[root@worker232 ~]#


	3.以json格式输出
[root@worker232 ~]# ansible-doc ping -j
{
    "ping": {
        "doc": {
            "attributes": {
                "check_mode": {
                    "description": "Can run in check_mode and return changed status prediction withought modifying target",
                    "support": "full"
                },
                "diff_mode": {
                    "description": "Will return details on what has changed (or possibly needs changing in check_mode), when in diff mode",
                    "support": "none"
                },
                "platform": {
                    "description": "Target OS/families that can be operated against",
                    "platforms": "posix",
                    "support": "N/A"
                }
            },
            "author": [
                "Ansible Core Team",
                "Michael DeHaan"
            ],
            "collection": "ansible.builtin",
            "description": [
                "A trivial test module, this module always returns C(pong) on successful contact. It does not make sense in playbooks, but it is useful from C(/usr/bin/ansible) to verify the ability to login and that a usable Python is configured.",
                "This is NOT ICMP ping, this is just a trivial test module that requires Python on the remote-node.",
                "For Windows targets, use the M(ansible.windows.win_ping) module instead.",
                "For Network targets, use the M(ansible.netcommon.net_ping) module instead."
            ],
            "filename": "/usr/lib/python3/dist-packages/ansible/modules/ping.py",
            "has_action": false,
            "module": "ping",
            "options": {
                "data": {
                    "default": "pong",
                    "description": [
                        "Data to return for the C(ping) return value.",
                        "If this parameter is set to C(crash), the module will cause an exception."
                    ],
                    "type": "str"
                }
            },
            "seealso": [
                {
                    "module": "ansible.netcommon.net_ping"
                },
                {
                    "module": "ansible.windows.win_ping"
                }
            ],
            "short_description": "Try to connect to host, verify a usable python and return C(pong) on success",
            "version_added": "historical",
            "version_added_collection": "ansible.builtin"
        },
        "examples": "\n# Test we can logon to 'webservers' and execute python with json lib.\n# ansible webservers -m ping\n\n- name: Example from an Ansible Playbook\n  ansible.builtin.ping:\n\n- name: Induce an exception to see what happens\n  ansible.builtin.ping:\n    data: crash\n",
        "metadata": null,
        "return": {
            "ping": {
                "description": "Value provided with the data parameter.",
                "returned": "success",
                "sample": "pong",
                "type": "str"
            }
        }
    }
}
[root@worker232 ~]#
三.ansible-console工具使用指南
1.ansible-console交互式执行命令
	1.远程主机清单环境准备
[root@worker232 ~]# cat /etc/ansible/hosts
[rook]
ceph141 ansible_ssh_hosts=10.0.0.141
ceph142 ansible_ssh_hosts=10.0.0.142
ceph143 ansible_ssh_hosts=10.0.0.143

[rook:vars]
ansible_ssh_password=yinzhengjie


[k8s]
master231 ansible_ssh_hosts=10.0.0.231
worker232 ansible_ssh_hosts=10.0.0.232
worker233 ansible_ssh_hosts=10.0.0.233
worker234 ansible_ssh_hosts=10.0.0.234
worker235 ansible_ssh_hosts=10.0.0.235
[root@worker232 ~]#


	2.进入到交互式命令行
[root@worker232 ~]# ansible-console
Welcome to the ansible console. Type help or ? to list commands.

root@all (8)[f:5]$ ?  # 使用?或者help均能查看当前终端支持的子命令

Documented commands (type help <topic>):
========================================
EOF             dpkg_selections  include_vars   setup
add_host        exit             iptables       shell
apt             expect           known_hosts    slurp
apt_key         fail             lineinfile     stat
apt_repository  fetch            list           subversion
assemble        file             meta           systemd
assert          find             package        sysvinit
async_status    forks            package_facts  tempfile
async_wrapper   gather_facts     pause          template
become          get_url          ping           timeout
become_method   getent           pip            unarchive
become_user     git              raw            uri
blockinfile     group            reboot         user
cd              group_by         remote_user    validate_argument_spec
check           help             replace        verbosity
command         hostname         rpm_key        wait_for
copy            import_playbook  script         wait_for_connection
cron            import_role      serial         yum
debconf         import_tasks     service        yum_repository
debug           include          service_facts
diff            include_role     set_fact
dnf             include_tasks    set_stats

root@all (8)[f:5]$
root@all (8)[f:5]$ help

Documented commands (type help <topic>):
========================================
EOF             dpkg_selections  include_vars   setup
add_host        exit             iptables       shell
apt             expect           known_hosts    slurp
apt_key         fail             lineinfile     stat
apt_repository  fetch            list           subversion
assemble        file             meta           systemd
assert          find             package        sysvinit
async_status    forks            package_facts  tempfile
async_wrapper   gather_facts     pause          template
become          get_url          ping           timeout
become_method   getent           pip            unarchive
become_user     git              raw            uri
blockinfile     group            reboot         user
cd              group_by         remote_user    validate_argument_spec
check           help             replace        verbosity
command         hostname         rpm_key        wait_for
copy            import_playbook  script         wait_for_connection
cron            import_role      serial         yum
debconf         import_tasks     service        yum_repository
debug           include          service_facts
diff            include_role     set_fact
dnf             include_tasks    set_stats

root@all (8)[f:5]$


温馨提示:
	关于"root@all (8)[f:5]$ "命令提示符说明如下:
		root表示当前用户。
		all表示所有组。
		8表示当前的主机数量。
		5表示当前的并发管理的机器数量。
2.help查看子命令帮助信息
root@all (8)[f:5]$ help list
List the hosts in the current group
root@all (8)[f:5]$
root@all (8)[f:5]$
root@all (8)[f:5]$ help group
Add or remove groups
Parameters:
  name Name of the group to manage.
  gid Optional I(GID) to set for the group.
  state Whether the group should be present or not on the remote host.
  system If I(yes), indicates that the group created is a system group.
  local Forces the use of "local" command alternatives on platforms that implement it.
  non_unique This option allows to change the group ID to a non-unique value. Requires C(gid).
root@all (8)[f:5]$
root@all (8)[f:5]$ help cd

            Change active host/group. You can use hosts patterns as well eg.:
            cd webservers
            cd webservers:dbservers
            cd webservers:!phoenix
            cd webservers:&staging
            cd webservers:dbservers:&staging:!phoenix

root@all (8)[f:5]$
3.list列出当前管理的主机列表
[root@worker232 ~]# ansible-console
Welcome to the ansible console. Type help or ? to list commands.

root@all (8)[f:5]$ list  # 列出当前管理的主机列表
ceph141
ceph142
ceph143
master231
worker232
worker233
worker234
worker235
root@all (8)[f:5]$
4.cd切换到指定分组
root@all (8)[f:5]$ cd rook # 使用cd切换到指定的主机组
root@rook (3)[f:5]$
root@rook (3)[f:5]$ list  # 查看当前主机组的主机列表
ceph141
ceph142
ceph143
root@rook (3)[f:5]$
root@rook (3)[f:5]$ cd k8s
root@k8s (5)[f:5]$
root@k8s (5)[f:5]$ list
master231
worker232
worker233
worker234
worker235
root@k8s (5)[f:5]$
root@k8s (5)[f:5]$ cd all
root@all (8)[f:5]$
root@all (8)[f:5]$ list
ceph141
ceph142
ceph143
master231
worker232
worker233
worker234
worker235
root@all (8)[f:5]$
5.使用ping模块检测主机是否存活
root@all (8)[f:5]$ ping
ceph141 | FAILED! => {
    "msg": "to use the 'ssh' connection type with passwords or pkcs11_provider, you must install the sshpass program"
}
ceph142 | FAILED! => {
    "msg": "to use the 'ssh' connection type with passwords or pkcs11_provider, you must install the sshpass program"
}
ceph143 | FAILED! => {
    "msg": "to use the 'ssh' connection type with passwords or pkcs11_provider, you must install the sshpass program"
}
master231 | UNREACHABLE! => {
    "changed": false,
    "msg": "Failed to connect to the host via ssh: ssh: Could not resolve hostname master231: Temporary failure in name resolution",
    "unreachable": true
}
worker233 | UNREACHABLE! => {
    "changed": false,
    "msg": "Failed to connect to the host via ssh: ssh: Could not resolve hostname worker233: Temporary failure in name resolution",
    "unreachable": true
}
...
四.ansible工具的命令行常用选项
1.ansible工具用来执行单条命令
[root@worker232 ~]# ansible --help
usage: ansible [-h] [--version] [-v] [-b] [--become-method BECOME_METHOD] [--become-user BECOME_USER] [-K | --become-password-file BECOME_PASSWORD_FILE]
               [-i INVENTORY] [--list-hosts] [-l SUBSET] [-P POLL_INTERVAL] [-B SECONDS] [-o] [-t TREE] [--private-key PRIVATE_KEY_FILE]
               [-u REMOTE_USER] [-c CONNECTION] [-T TIMEOUT] [--ssh-common-args SSH_COMMON_ARGS] [--sftp-extra-args SFTP_EXTRA_ARGS]
               [--scp-extra-args SCP_EXTRA_ARGS] [--ssh-extra-args SSH_EXTRA_ARGS] [-k | --connection-password-file CONNECTION_PASSWORD_FILE] [-C]
               [--syntax-check] [-D] [-e EXTRA_VARS] [--vault-id VAULT_IDS] [--ask-vault-password | --vault-password-file VAULT_PASSWORD_FILES]
               [-f FORKS] [-M MODULE_PATH] [--playbook-dir BASEDIR] [--task-timeout TASK_TIMEOUT] [-a MODULE_ARGS] [-m MODULE_NAME]
               pattern

Define and run a single task 'playbook' against a set of hosts

positional arguments:
  pattern               host pattern

options:
  --ask-vault-password, --ask-vault-pass
                        ask for vault password
  --become-password-file BECOME_PASSWORD_FILE, --become-pass-file BECOME_PASSWORD_FILE
                        Become password file
  --connection-password-file CONNECTION_PASSWORD_FILE, --conn-pass-file CONNECTION_PASSWORD_FILE
                        Connection password file
  --list-hosts          outputs a list of matching hosts; does not execute anything else
  --playbook-dir BASEDIR
                        Since this tool does not use playbooks, use this as a substitute playbook directory.This sets the relative path for many
                        features including roles/ group_vars/ etc.
  --syntax-check        perform a syntax check on the playbook, but do not execute it
  --task-timeout TASK_TIMEOUT
                        set task timeout limit in seconds, must be positive integer.
  --vault-id VAULT_IDS  the vault identity to use
  --vault-password-file VAULT_PASSWORD_FILES, --vault-pass-file VAULT_PASSWORD_FILES
                        vault password file
  --version             show program's version number, config file location, configured module search path, module location, executable location and
                        exit
  -B SECONDS, --background SECONDS
                        run asynchronously, failing after X seconds (default=N/A)
  -C, --check           don't make any changes; instead, try to predict some of the changes that may occur
  -D, --diff            when changing (small) files and templates, show the differences in those files; works great with --check
  -K, --ask-become-pass
                        ask for privilege escalation password
  -M MODULE_PATH, --module-path MODULE_PATH
                        prepend colon-separated path(s) to module library (default=~/.ansible/plugins/modules:/usr/share/ansible/plugins/modules)
  -P POLL_INTERVAL, --poll POLL_INTERVAL
                        set the poll interval if using -B (default=15)
  -a MODULE_ARGS, --args MODULE_ARGS
                        The action's options in space separated k=v format: -a 'opt1=val1 opt2=val2'
  -e EXTRA_VARS, --extra-vars EXTRA_VARS
                        set additional variables as key=value or YAML/JSON, if filename prepend with @
  -f FORKS, --forks FORKS
                        specify number of parallel processes to use (default=5)
  -h, --help            show this help message and exit
  -i INVENTORY, --inventory INVENTORY, --inventory-file INVENTORY
                        specify inventory host path or comma separated host list. --inventory-file is deprecated
  -k, --ask-pass        ask for connection password
  -l SUBSET, --limit SUBSET
                        further limit selected hosts to an additional pattern
  -m MODULE_NAME, --module-name MODULE_NAME
                        Name of the action to execute (default=command)
  -o, --one-line        condense output
  -t TREE, --tree TREE  log output to this directory
  -v, --verbose         verbose mode (-vvv for more, -vvvv to enable connection debugging)

Privilege Escalation Options:
  control how and which user you become as on target hosts

  --become-method BECOME_METHOD
                        privilege escalation method to use (default=sudo), use `ansible-doc -t become -l` to list valid choices.
  --become-user BECOME_USER
                        run operations as this user (default=root)
  -b, --become          run operations with become (does not imply password prompting)

Connection Options:
  control as whom and how to connect to hosts

  --private-key PRIVATE_KEY_FILE, --key-file PRIVATE_KEY_FILE
                        use this file to authenticate the connection
  --scp-extra-args SCP_EXTRA_ARGS
                        specify extra arguments to pass to scp only (e.g. -l)
  --sftp-extra-args SFTP_EXTRA_ARGS
                        specify extra arguments to pass to sftp only (e.g. -f, -l)
  --ssh-common-args SSH_COMMON_ARGS
                        specify common arguments to pass to sftp/scp/ssh (e.g. ProxyCommand)
  --ssh-extra-args SSH_EXTRA_ARGS
                        specify extra arguments to pass to ssh only (e.g. -R)
  -T TIMEOUT, --timeout TIMEOUT
                        override the connection timeout in seconds (default=10)
  -c CONNECTION, --connection CONNECTION
                        connection type to use (default=smart)
  -u REMOTE_USER, --user REMOTE_USER
                        connect as this user (default=None)

Some actions do not make sense in Ad-Hoc (include, meta, etc)
[root@worker232 ~]#
2.查看主机
	1.查看所有主机列表
[root@worker232 ~]# ansible all --list
  hosts (8):
    ceph141
    ceph142
    ceph143
    master231
    worker232
    worker233
    worker234
    worker235
[root@worker232 ~]#
[root@worker232 ~]# ansible all --list-hosts
  hosts (8):
    ceph141
    ceph142
    ceph143
    master231
    worker232
    worker233
    worker234
    worker235
[root@worker232 ~]#


	2.查看指定组主机列表
[root@worker232 ~]# ansible rook --list-hosts
  hosts (3):
    ceph141
    ceph142
    ceph143
[root@worker232 ~]#
[root@worker232 ~]# ansible k8s --list-hosts
  hosts (5):
    master231
    worker232
    worker233
    worker234
    worker235
[root@worker232 ~]#
3.自动添加主机到信任列表
	1.准备主机列表清单
[root@worker232 ~]# echo 10.0.0.231 > /etc/ansible/hosts
[root@worker232 ~]#
[root@worker232 ~]# ansible all --list
  hosts (1):
    10.0.0.231
[root@worker232 ~]#


	2.删除本地ssh的known_hosts文件
[root@worker232 ~]# rm -rf .ssh/*
[root@worker232 ~]#
[root@worker232 ~]# ll .ssh/  # 删除本地的主机配置后,下次ssh登录需要手动输入"yes"进行交互
total 8
drwx------ 2 root root 4096 Jan  5 22:35 ./
drwx------ 9 root root 4096 Jan  5 22:33 ../
[root@worker232 ~]#


	3.安装sshpass模块
[root@worker232 ~]# apt -y install sshpass


	4.关闭host_key_checking功能
[root@worker232 ~]# ansible --version | grep "config file"
  config file = /etc/ansible/ansible.cfg
[root@worker232 ~]#
[root@worker232 ~]# sed -ri 's#;(host_key_checking=)True#\1False#g' /etc/ansible/ansible.cfg
[root@worker232 ~]#


	5.自动添加主机到信任列表
[root@worker232 ~]# ansible 10.0.0.231 -m ping -k  # -k表示使用密码登录。
SSH password:   # 输入密码后,直接能响应了,并不需要输入"yes"
10.0.0.231 | SUCCESS => {
    "ansible_facts": {
        "discovered_interpreter_python": "/usr/bin/python3"
    },
    "changed": false,
    "ping": "pong"
}
[root@worker232 ~]#
[root@worker232 ~]# ll .ssh/  # 再次查看,发现果真出现了known_hosts文件哟~
total 12
drwx------ 2 root root 4096 Jan  5 22:35 ./
drwx------ 9 root root 4096 Jan  5 22:33 ../
-rw-r--r-- 1 root root  142 Jan  5 22:35 known_hosts
[root@worker232 ~]#
4.基于socket文件缓存登录
	1.如果首次登录后,会产生在cp目录下产生一个socket文件
[root@worker232 ~]# tree .ansible
.ansible
├── cp
│   └── 28d7f5dded
└── tmp

2 directories, 1 file
[root@worker232 ~]#
[root@worker232 ~]# file .ansible/cp/28d7f5dded
.ansible/cp/28d7f5dded: socket
[root@worker232 ~]#
[root@worker232 ~]# ansible 10.0.0.231 -m ping  # 当socket套接字在的话就不需要主机即可登录。
10.0.0.231 | SUCCESS => {
    "ansible_facts": {
        "discovered_interpreter_python": "/usr/bin/python3"
    },
    "changed": false,
    "ping": "pong"
}
[root@worker232 ~]#


	2.一分钟后socket套接字文件会自动删除,删除后就无法登录
[root@worker232 ~]# tree .ansible
.ansible
├── cp
└── tmp

2 directories, 0 files
[root@worker232 ~]#
[root@worker232 ~]# ansible 10.0.0.231 -m ping
10.0.0.231 | UNREACHABLE! => {
    "changed": false,
    "msg": "Failed to connect to the host via ssh: root@10.0.0.231: Permission denied (publickey,password).",
    "unreachable": true
}
[root@worker232 ~]#
5.指定主机和用户
	1.检查被监控主机是否存在用户
[root@master231 ~]# id yinzhengjie
uid=1000(yinzhengjie) gid=1000(yinzhengjie) groups=1000(yinzhengjie),4(adm),24(cdrom),27(sudo),30(dip),46(plugdev),110(lxd)
[root@master231 ~]#

	2.使用-u选项指定用户登录
[root@worker232 ~]# ansible 10.0.0.231 -m ping -k -u yinzhengjie
SSH password:
10.0.0.231 | SUCCESS => {
    "ansible_facts": {
        "discovered_interpreter_python": "/usr/bin/python3"
    },
    "changed": false,
    "ping": "pong"
}
[root@worker232 ~]#
6.使用command模块
	1.使用command模块执行的参数使用-a选项
[root@worker232 ~]# ansible 10.0.0.231  -k -u yinzhengjie -m command -a 'ls -l /home'
SSH password:
10.0.0.231 | CHANGED | rc=0 >>
total 4
drwxr-x--- 6 yinzhengjie yinzhengjie 4096 Jan  5 22:47 yinzhengjie
[root@worker232 ~]#


	2.其中"-m command"可以省略不写
[root@worker232 ~]# ansible 10.0.0.231  -k -u yinzhengjie -a 'ls -l /home'
SSH password:
10.0.0.231 | CHANGED | rc=0 >>
total 4
drwxr-x--- 6 yinzhengjie yinzhengjie 4096 Jan  5 22:47 yinzhengjie
[root@worker232 ~]#
7.并发控制
	1.主机环境准备
[root@worker232 ~]# cat /etc/ansible/hosts
[k8s]
10.0.0.231
10.0.0.233
[root@worker232 ~]#
[root@worker232 ~]# ansible k8s --list
  hosts (2):
    10.0.0.231
    10.0.0.233
[root@worker232 ~]#


	2.并发数为1,使用-f选项指定并发数量
[root@worker232 ~]# time ansible k8s -a 'sleep 5' -f1 -k
SSH password:
10.0.0.231 | CHANGED | rc=0 >>

10.0.0.233 | CHANGED | rc=0 >>


real	0m12.170s
user	0m1.216s
sys	0m0.128s
[root@worker232 ~]#


	2.并发数为2
[root@worker232 ~]# time ansible k8s -a 'sleep 5' -f2 -k
SSH password:
10.0.0.233 | CHANGED | rc=0 >>

10.0.0.231 | CHANGED | rc=0 >>


real	0m7.313s
user	0m1.168s
sys	0m0.158s
[root@worker232 ~]#
8.分组密码验证
	1.编写远程主机变量
[root@worker232 ~]# cat /etc/ansible/hosts
[k8s]
10.0.0.231
10.0.0.233

[k8s:vars]
ansible_ssh_password=yinzhengjie
ansible_ssh_user=root
[root@worker232 ~]#


	2.测试验证
[root@worker232 ~]# rm -rf .ansible  # 清楚本地缓存
[root@worker232 ~]#
[root@worker232 ~]# ansible k8s -a 'ls -l /home'
10.0.0.233 | CHANGED | rc=0 >>
total 4
drwxr-x--- 5 yinzhengjie yinzhengjie 4096 Aug 22 16:13 yinzhengjie
10.0.0.231 | CHANGED | rc=0 >>
total 8
drwxrwxrwx 4 jasonyin2020 jasonyin2020 4096 Jan  5 23:25 jasonyin2020
drwxr-x--- 6 yinzhengjie  yinzhengjie  4096 Jan  5 22:47 yinzhengjie
[root@worker232 ~]#
9.以sudo身份执行[存在问题]
	1.修改模板主机的sudoers的配置文件
[root@master231 ~]# useradd -m -s /bin/bash jasonyin2020
[root@master231 ~]#

[root@master231 ~]# grep jasonyin2020 /etc/sudoers
jasonyin2020 ALL=(root) NOPASSWD: ALL
[root@master231 ~]#


	2.sudo测试失败
[root@worker232 ~]# ansible 10.0.0.231  -a "sudo id" -u jsonyin2020 -k
SSH password:
五.ansible工具的host-pattern规则
1.查看集群的所有主机
	1.编写主机的资源清单
[root@worker232 ~]# cat /etc/ansible/hosts
[k8s]
10.0.0.23[1:3]

[ceph]
ceph14[1:3]
[root@worker232 ~]#


	2.查看所有主机
[root@worker232 ~]# ansible all --list
  hosts (6):
    10.0.0.231
    10.0.0.232
    10.0.0.233
    ceph141
    ceph142
    ceph143
[root@worker232 ~]#

	3.查看指定组的主机
[root@worker232 ~]# ansible k8s --list
  hosts (3):
    10.0.0.231
    10.0.0.232
    10.0.0.233
[root@worker232 ~]#
[root@worker232 ~]# ansible ceph --list
  hosts (3):
    ceph141
    ceph142
    ceph143
[root@worker232 ~]#


	4.直接指定主机【这些主机前提是在/etc/ansible/hosts文件中能匹配哟~】
[root@worker232 ~]# ansible "ceph141 ceph143" --list
  hosts (2):
    ceph141
    ceph143
[root@worker232 ~]#
2.主机通配符
	1.用通配符表示所有主机
[root@worker232 ~]# ansible "*" --list
  hosts (6):
    10.0.0.231
    10.0.0.232
    10.0.0.233
    ceph141
    ceph142
    ceph143
[root@worker232 ~]#


	2.指定开头
[root@worker232 ~]# ansible "ceph*" --list
  hosts (3):
    ceph141
    ceph142
    ceph143
[root@worker232 ~]#


	3.指定结尾
[root@worker232 ~]# ansible "*3" --list
  hosts (2):
    10.0.0.233
    ceph143
[root@worker232 ~]#


	4.指定开头和结尾
[root@worker232 ~]# ansible "c*1" --list
  hosts (1):
    ceph141
[root@worker232 ~]#
3.逻辑与或
	1.准备主机清单
[root@worker232 ~]# cat /etc/ansible/hosts
[k8s]
10.0.0.231
10.0.0.232
10.0.0.235

[ceph]
10.0.0.231
10.0.0.143
10.0.0.235

[prometheus]
10.0.0.231
10.0.0.143
10.0.0.232
[root@worker232 ~]#


	2.逻辑"与"
[root@worker232 ~]# ansible "k8s:&ceph" --list
  hosts (2):
    10.0.0.231
    10.0.0.235
[root@worker232 ~]#
[root@worker232 ~]# ansible "k8s:&prometheus" --list
  hosts (2):
    10.0.0.231
    10.0.0.232
[root@worker232 ~]#
[root@worker232 ~]# ansible "ceph:&prometheus" --list
  hosts (2):
    10.0.0.231
    10.0.0.143
[root@worker232 ~]#
[root@worker232 ~]# ansible "k8s:&ceph:&prometheus" --list
  hosts (1):
    10.0.0.231
[root@worker232 ~]#


	3.逻辑"或"(可以使用":"表示,当然如果不写的话,默认就是或的关系)
[root@worker232 ~]# ansible "k8s:ceph" --list
  hosts (4):
    10.0.0.231
    10.0.0.232
    10.0.0.235
    10.0.0.143
[root@worker232 ~]#
[root@worker232 ~]# ansible "k8s ceph" --list
  hosts (4):
    10.0.0.231
    10.0.0.232
    10.0.0.235
    10.0.0.143
[root@worker232 ~]#


	4.逻辑"非"
[root@worker232 ~]# ansible 'k8s:!ceph' --list
  hosts (1):
    10.0.0.232
[root@worker232 ~]#
[root@worker232 ~]# ansible 'k8s:!prometheus' --list
  hosts (1):
    10.0.0.235
[root@worker232 ~]#
[root@worker232 ~]# ansible 'ceph:!prometheus' --list
  hosts (1):
    10.0.0.235
[root@worker232 ~]#


	5.综合表达式
[root@worker232 ~]# ansible 'k8s:ceph:&prometheus:!k8s' --list
  hosts (1):
    10.0.0.143
[root@worker232 ~]#
[root@worker232 ~]# ansible 'k8s:ceph:&prometheus:!ceph' --list
  hosts (1):
    10.0.0.232
[root@worker232 ~]#
4.正则表达式
	1.准备数据
[root@worker232 ~]# cat /etc/ansible/hosts
[k8s]
kubernetes.io
prometheus.io
etcd.io
yinzhengjie.[x:z].com
[root@worker232 ~]#
[root@worker232 ~]# ansible all --list
  hosts (6):
    kubernetes.io
    prometheus.io
    etcd.io
    yinzhengjie.x.com
    yinzhengjie.y.com
    yinzhengjie.z.com
[root@worker232 ~]#


	2.以"yin"开头
[root@worker232 ~]# ansible "~yin" --list
  hosts (3):
    yinzhengjie.x.com
    yinzhengjie.y.com
    yinzhengjie.z.com
[root@worker232 ~]#


	3.以"io"结尾
[root@worker232 ~]# ansible "~.*io" --list
  hosts (3):
    kubernetes.io
    prometheus.io
    etcd.io
[root@worker232 ~]#
六.ansible工具执行结果状态说明
绿色:
	执行成功,此次执行远程主机没有写行为发生,比如修改文件,删除文件,新增文件等。

黄色:
	执行成功,有发生变化。

红色:
	执行失败。
1.绿色案例
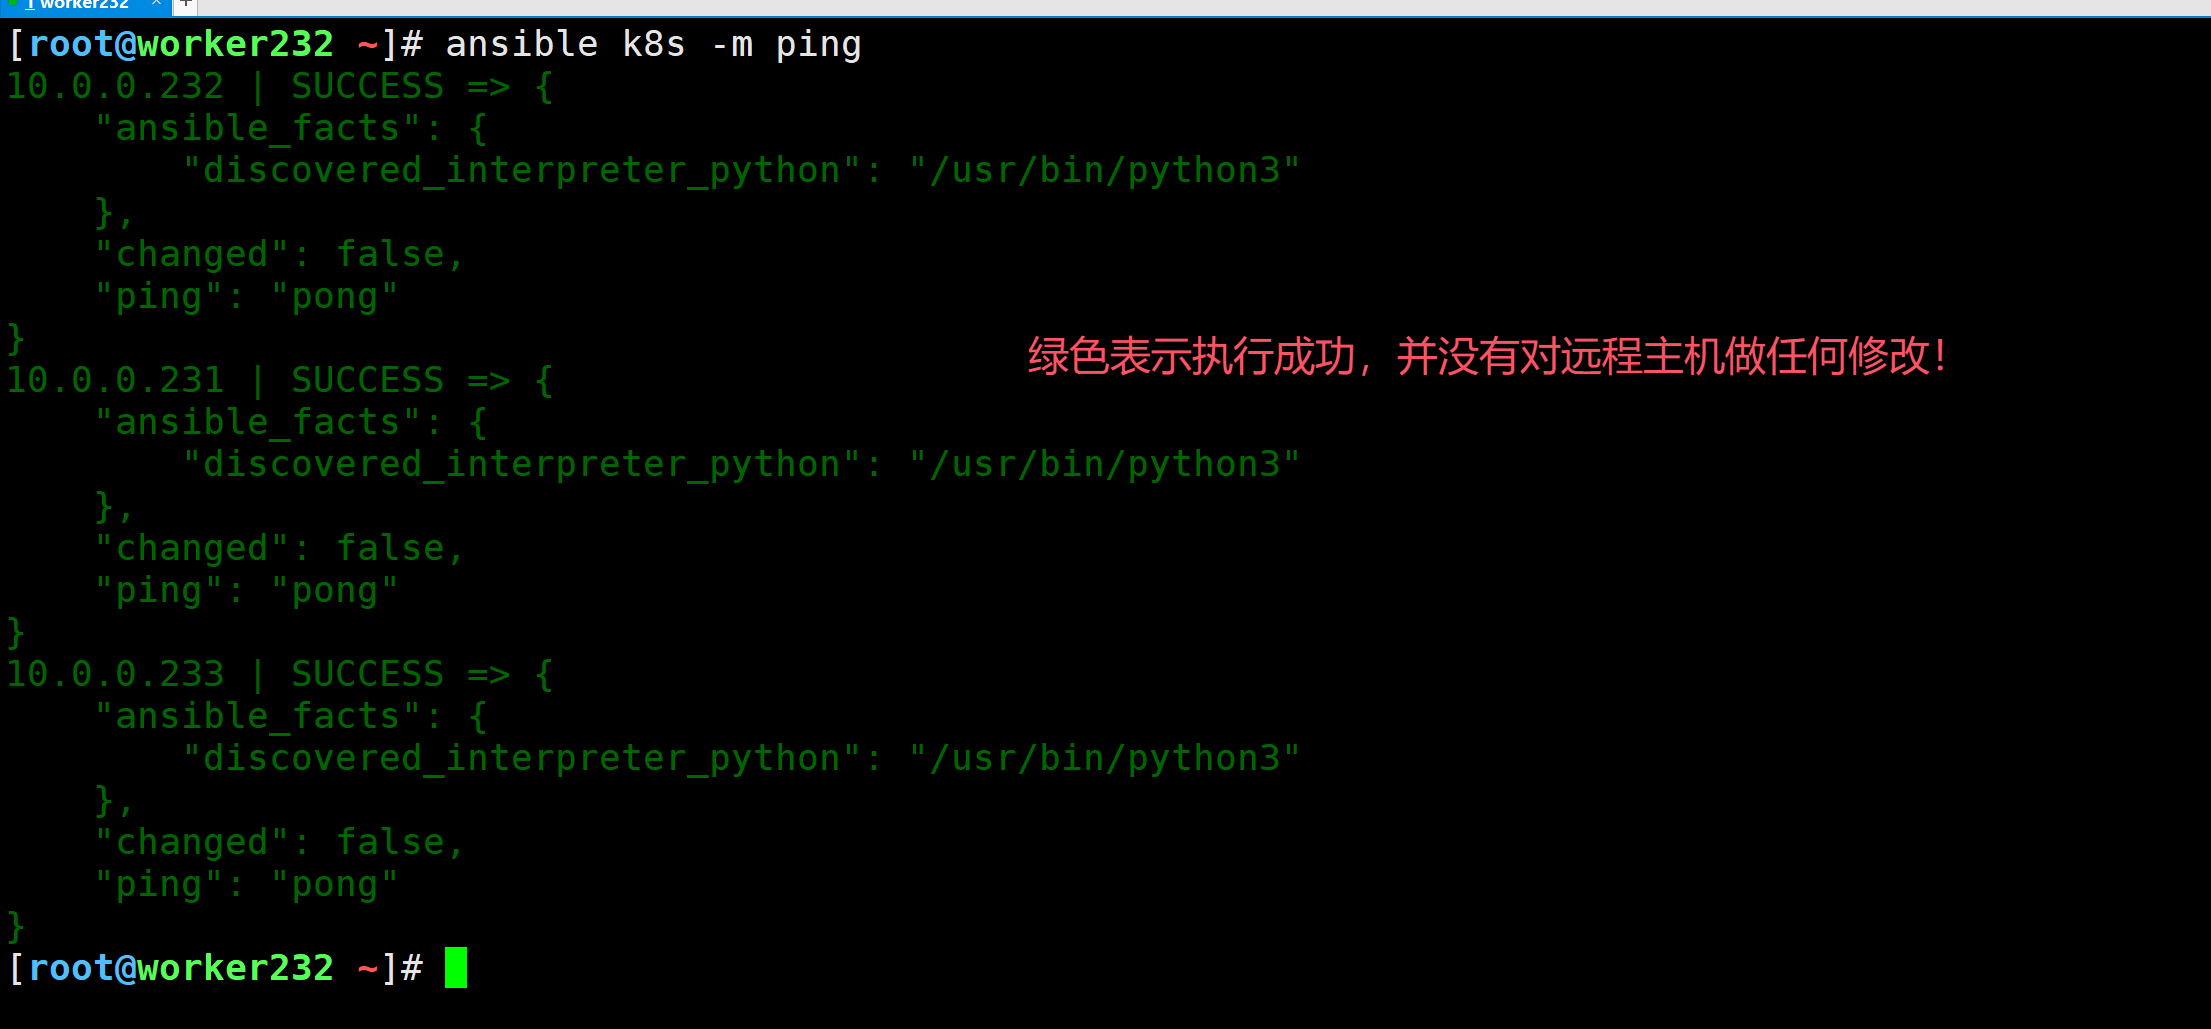
如上图所示,输出的结果为绿色。

[root@worker232 ~]# cat /etc/ansible/hosts
[k8s]
10.0.0.23[1:3]

[k8s:vars]
ansible_ssh_password=yinzhengjie
ansible_ssh_user=root
[root@worker232 ~]#
[root@worker232 ~]# ansible k8s -m ping
10.0.0.232 | SUCCESS => {
    "ansible_facts": {
        "discovered_interpreter_python": "/usr/bin/python3"
    },
    "changed": false,
    "ping": "pong"
}
10.0.0.231 | SUCCESS => {
    "ansible_facts": {
        "discovered_interpreter_python": "/usr/bin/python3"
    },
    "changed": false,
    "ping": "pong"
}
10.0.0.233 | SUCCESS => {
    "ansible_facts": {
        "discovered_interpreter_python": "/usr/bin/python3"
    },
    "changed": false,
    "ping": "pong"
}
[root@worker232 ~]#
2.黄色案例

如上图所示,输出结果为黄色。


[root@worker232 ~]# ansible k8s -m command -a 'id'
10.0.0.232 | CHANGED | rc=0 >>
uid=0(root) gid=0(root) groups=0(root)
10.0.0.231 | CHANGED | rc=0 >>
uid=0(root) gid=0(root) groups=0(root)
10.0.0.233 | CHANGED | rc=0 >>
uid=0(root) gid=0(root) groups=0(root)
[root@worker232 ~]#
[root@worker232 ~]#
[root@worker232 ~]# ansible k8s -m command -a 'mkdir -pv yinzhengjie-ansible/k8s'
10.0.0.232 | CHANGED | rc=0 >>
mkdir: created directory 'yinzhengjie-ansible'
mkdir: created directory 'yinzhengjie-ansible/k8s'
10.0.0.231 | CHANGED | rc=0 >>
mkdir: created directory 'yinzhengjie-ansible'
mkdir: created directory 'yinzhengjie-ansible/k8s'
10.0.0.233 | CHANGED | rc=0 >>
mkdir: created directory 'yinzhengjie-ansible'
mkdir: created directory 'yinzhengjie-ansible/k8s'
[root@worker232 ~]#
3.红色案例

如上图所示,输出结果为红色。


[root@worker232 ~]# ansible k8s -m command -a 'ceph -s'
10.0.0.232 | FAILED | rc=2 >>
[Errno 2] No such file or directory: b'ceph'
10.0.0.231 | FAILED | rc=2 >>
[Errno 2] No such file or directory: b'ceph'
10.0.0.233 | FAILED | rc=2 >>
[Errno 2] No such file or directory: b'ceph'
[root@worker232 ~]#
七.可能会遇到的错误
1.Could not match supplied host pattern, ignoring: ...
报错信息:
[root@worker232 ~]# ansible 10.0.0.231 -m ping
[WARNING]: provided hosts list is empty, only localhost is available. Note that the implicit localhost does not match 'all'
[WARNING]: Could not match supplied host pattern, ignoring: 10.0.0.231
[root@worker232 ~]#


问题分析:
	指定的主机模式在远程主机列表中未定义。

解决方案:
	在"/etc/ansible/hosts"中添加"10.0.0.231"主机列表。
2.Using a SSH password instead of a key is not possible because Host Key ...
报错信息:
[root@worker232 ~]# ansible 10.0.0.231 -m ping -k
SSH password:
10.0.0.231 | FAILED! => {
    "msg": "Using a SSH password instead of a key is not possible because Host Key checking is enabled and sshpass does not support this.  Please add this host's fingerprint to your known_hosts file to manage this host."
}
[root@worker232 ~]#


问题分析:
	ansible未关闭"host_key_checking"选项。

解决方案:
	将"host_key_checking"的值改为False即可。
	至于配置文件请在ansible具体的配置文件参考版本信息输出的"config file"信息即可。

[root@worker232 ~]# ansible --version
ansible [core 2.12.0]
  config file = /etc/ansible/ansible.cfg
  configured module search path = ['/root/.ansible/plugins/modules', '/usr/share/ansible/plugins/modules']
  ansible python module location = /usr/lib/python3/dist-packages/ansible
  ansible collection location = /root/.ansible/collections:/usr/share/ansible/collections
  executable location = /usr/bin/ansible
  python version = 3.10.12 (main, Nov  6 2024, 20:22:13) [GCC 11.4.0]
  jinja version = 3.0.3
  libyaml = True
[root@worker232 ~]#
本文来自博客园,作者:尹正杰,转载请注明原文链接:https://www.cnblogs.com/yinzhengjie/p/18669692,个人微信: "JasonYin2020"(添加时请备注来源及意图备注,有偿付费)
当你的才华还撑不起你的野心的时候,你就应该静下心来学习。当你的能力还驾驭不了你的目标的时候,你就应该沉下心来历练。问问自己,想要怎样的人生。

 浙公网安备 33010602011771号